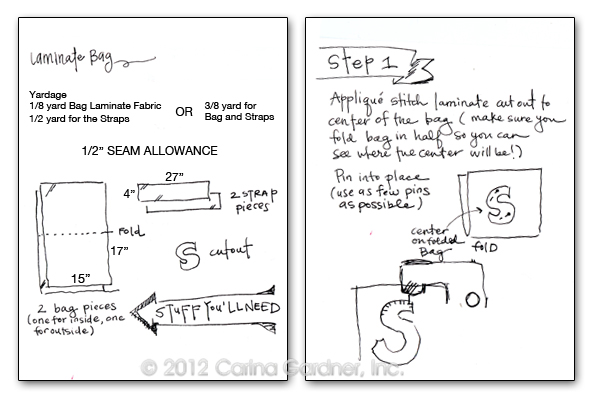
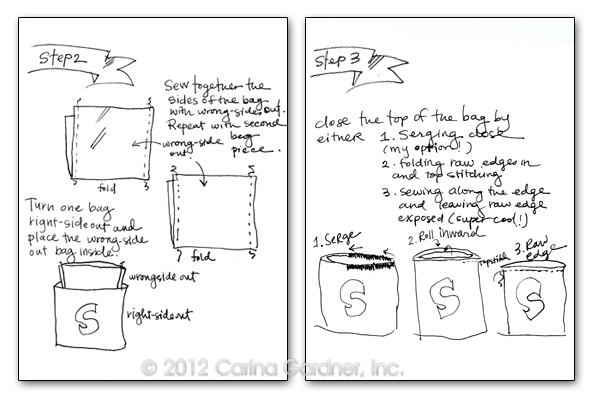
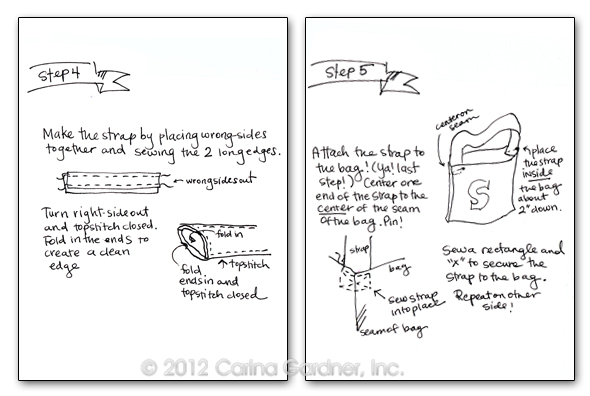
 I’ve been meaning to post this tutorial for a month now. My kids took a neighborhood art class and the night before I had the hair-brained scheme that they both needed new art bags. After making them, I sketched up the steps for anyone else who is interested in experimenting with these said “hair-brained” schemes.
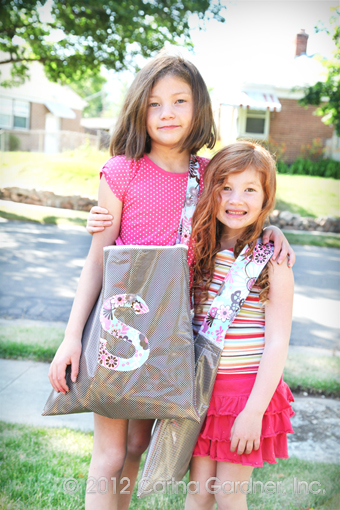
I’ve sketched up a similar tutorial for my girls’ ballet bag, but this time the bags are substantially larger, made of laminates, and have a single strap. I used the Dainty Blossoms™ laminates (shown in the photos).
Working with laminates was not as hard as I originally anticipated. I like to use Lila Tuller’s oil method for running laminates through my sewing machine. It works like a charm!
A few notes about the sketches for this tutorial:
* They are by no means comprehensive:). That means that I give you sizes, and you can customize as you wish.
* Yardage for the bag does NOT include the “cutout” (in my example I show an ‘S’). Either use a scrap of contrasting laminate or skip altogether (see more notes on this below).
* You may want to adjust the strap’s length for the intended use of the bag. My strap is meant to comfortably fit across the chest.
* I don’t use fusible material for the letters/cutout. I simply carefully laid the letters on the front of the bags and 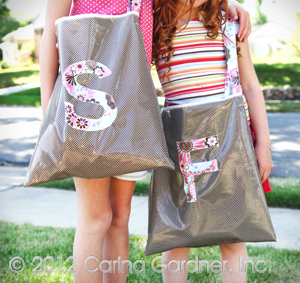 appliqué stitched the letters directly to the front. It was absolutely an experiment in progress since I had never used laminates like this before. Amazingly, it worked (but was not easy!)
After a month of use, turns out these bags are pretty strong and can take a beating. I attribute it to the laminates, which helped my wipe away all the paint my kid’s left undone in the bag. Perfect art bag.
Hope you also get a chance to experiment!
—Carina
