Happy Holidays
Wishing you the most wonderful holiday season and with hopes and wishes for a beautiful 2012! Thank you for being a part of our lives!
XOXO—Carina, Josh, Siri, and Felicity
These are few projects just for fun!
Wishing you the most wonderful holiday season and with hopes and wishes for a beautiful 2012! Thank you for being a part of our lives!
XOXO—Carina, Josh, Siri, and Felicity
 fauk tail /fok-teyl/ noun 1. a faux-mock-cocktail party;
2. a festive event where non-alcoholic beverages and appetizers are served to adult friends as they mix-&-mingle in their christmas best; 3. involves dressing up in your favorite faux-mock-cocktail clothing for general hob-nobbing and chit chat; 4. a cocktail that does not require taxi service at the end of the night.
And yes, I threw my made-up-name party this last weekend. Good friends, sugary drinks, and lots of food…it makes a girl happy! We tried to invite folks that we have been friends with in different walks of life—friends from Minnesota who had also relocated to Utah, roommates from our undergraduate days at BYU, and people we work with. It was a wonderful group and it made me pretty happy to see friends that I haven’t seen for over 5 years!
It was a great way to kick off the holidays and I find myself wanting to throw another one!
If you want to throw a non-alcoholic but adult-like event, here are my biased rules for getting it done—1. Don’t have your cabinets laquered a day before the party (your house will be very cold from airing it out); 2. Buy all your food and flowers from Costco (It’s one trip and all the appetizers are easy to make); 3. Spend most of your time shopping for cute glasses (the part I enjoyed the most!); 4. Designate someone to take pictures (what you are seeing here is about all I got!); and 5. Once the first couple walks in, let it all go (as in I hadn’t finished cleaning my daughters’ bedroom and I knew people were going to walk through it. I got over it.).
__________________________________________________________________________
Want to throw your own fauktail party? Here are my recipes…but be warned, I made these up and the quantities are simply estimates of how I made them. They are all super (may I add dooper?) delicious. Feel free to add or subtract from these faux-mock-cocktails. Most make about 3/4ths of a pitcher (about 4-6 glasses depending on the size of the glass).
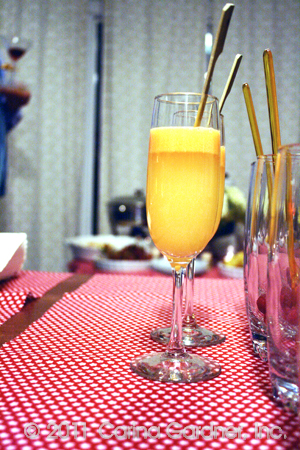 TROPICAL FIZZ (inspired by Planter’s Punch)
2 1/2 cups orange juice
2 1/2 cups sprite (or ginger ale)
1 1/2 cups pineapple juice
2 cups of orange sherbet (you can also substitute pineapple sherbet)
1/2 cup of sweetened lime juice
garnish with 2-3 cubes of fresh pineapple on a skewer
Blend all the ingredients together and garnish with the pineapple skewer.
__________________________________________________________________________
 TOMMY COLLINS SLUSHIE (inspired by Tom Collins)
1 package of slightly melted Edy’s Lemonade Fruit Bars (Use all 6 Popsicles in the box)
4 cups of Minute Maid Lemonade
2 1/2 cups of Ginger Ale
1/2 cup of Wildberry Martini Mixer
Raspberries (dropped at the bottom of the glass)
Blend all the ingredients together. Drop a few raspberries at the bottom of a glass. Pour in the blended drinks.
__________________________________________________________________________
3 cups of Ginger Ale
1/4 to 1/2 cup of Sweetened Lime Juice
Granny Apple wedge
Stir together the ingredients and garnish with a Granny Apple wedge on a martini glass.
__________________________________________________________________________
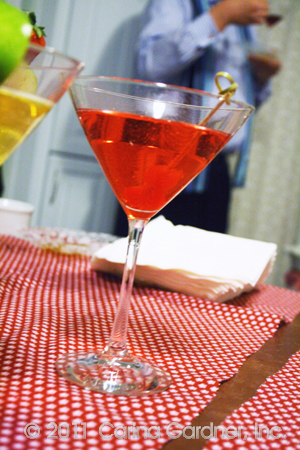 CARINA’S SHIRLY TEMPLE (obviously, my take on this recipe..because I didn’t feel like mixing sprite and gingerale:)
4 to 5 cups of sprite
1/2 cup of Maraschino cherry syrup
2 Maraschino cherries on a pick or 1 Maraschino cherry with it’s stem dropped in the bottom.
__________________________________________________________________________
My fifth drink was just a number of different bubblies from Costco and the supermarket that was garnished simply with a strawberry on the rim of a wine glass. That gave guests another option and freed me up to make more of the other drinks.
At the end of the day, “fancying up” a fauktail is all about the garnish or some salt/sugar to the rim of a party glass. Messing around with recipes just made it alot more fun for this hostess.
Hope you get to make a fauxtail for yourself soon!
Cheers! Carina
Fauktail Party Recipes Read More »
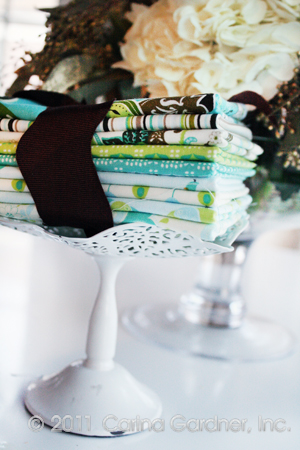 Monday morning after a long weekend of fun (tomorrow I’ll post about it). But for now, I wanted to help you win some more fabric and a lovely frame from Sweet Water Frames.
On the giveaway table today is a full fat quarter set of Pinfeathers Peacock Blue fabrics (9 fabrics in all) and Sweet Water Frame’s 3×3 Rasley Ornament in Green apple (shown below). All you have to do is leave a comment on this thread to be entered to win BOTH of these.
I believe I have talked about Sweetwater Frames here before. Last week I finally ordered our family pictures for the custom 24″ x 36″ frame I purchased from them. It looks amazing over my antique piano (See my frame below). I purchased the Powell in antique white, but I’m so in love with the black frames, I can see myself coming back for more!
___________________________________________________________
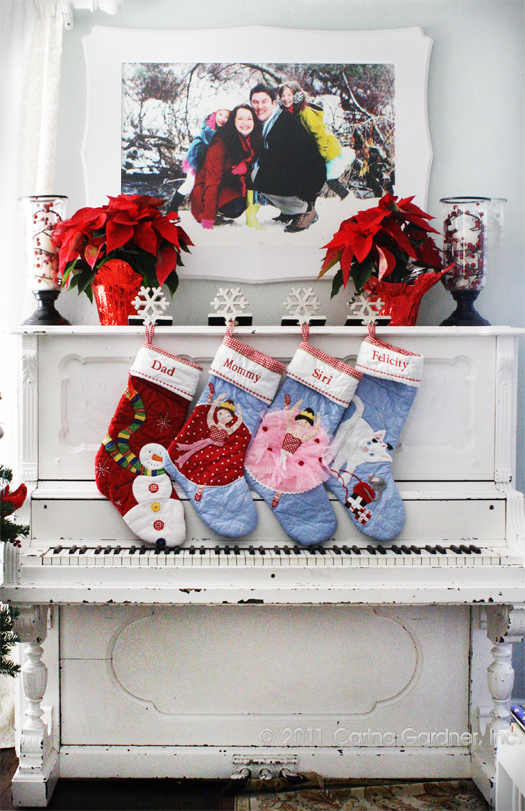 That green apple is ADORABLE isn’t it? And my frame isn’t bad either:). Btw, because I know you are going to ask, the family portrait was taken by my lovely assistant Susan.
So leave a comment to get the green frame and some Pinfeathers!
XOXO-Carina
PS. This giveaway ends on Sunday, December 18th!
Pinfeathers Fabric and Sweetwater Frames Giveaway Read More »
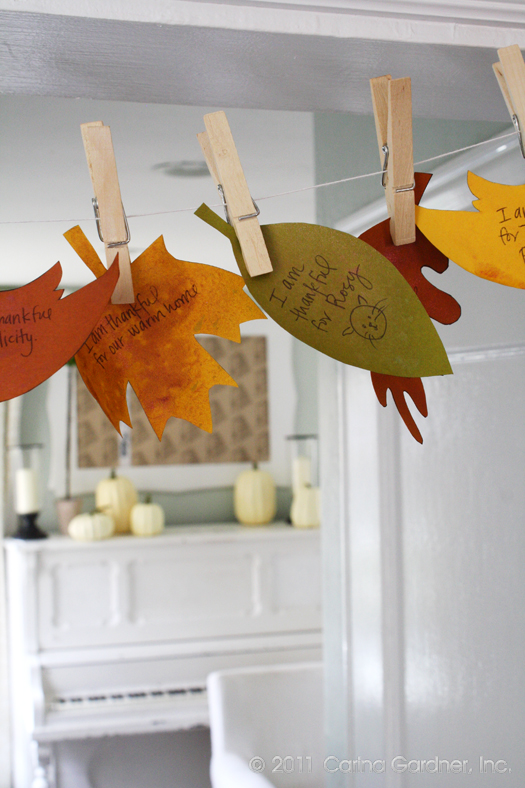 Last year, we did a thankful tree on Thanksgiving day. This year, the girls have a jar of leaves that they can write or draw on whenever they want to add to this banner in our kitchen.
I’m hoping it’s a great way for them to see what their parents are grateful for and encourages them to remember to be thankful too.
This is the simplest banner to make, and it changes as you add more leaves or birds! I hope ours is squished to the brim when the month is over.
I threw on a little glitter mist because it was lying around (so it’s completely optional). I liked the Forever Red Perfect Pearls Mist for the brown and orange leaves and the Tattered Angels Glitter Mist in Sweet Clover for the olive green leaves.
If you aren’t into the Glitter Mist, just let your little ones scribble away to add their “thanks.” Get bigger kids to help you cut out the leaves (or sit in front of your favorite show as you cut them out).
Hang the banner in a place that you’ll see often (ours is in the doorway between our living room and kitchen) so that you’ll see it often and remember to add to it.
I’m hoping ours is an opportunity to really remember what this month is about (rather than a jump start on Christmas). If it’s successful, we may just change up the colors for Christmasand use it place holder for “good deeds done” during December to encourage friendship and giving.
Here’s the full tutorial plus pattern for you to download! Hope you have fun and are able to give thanks at the same time!
________________________________________________
Giving Thanks-Free Thankful Banner Download Read More »
It’s November, and I’ve told myself that this year the holidays are going to be a little different. Instead of the rush, rush, rush, I’m hoping to really live in the present this holiday season and remember to be grateful for what I have. I’ve cleared out my schedule of any “hard” deadlines and while I certainly will be working, I hope to work at a more relaxed pace.
So maybe it’s a change in attitude about the holidays?
Either way, I have been thinking alot about being grateful and generously giving. And as always, my thoughts have turned to this blog and how I can share with you—make your life a little more pleasant or a little more beautiful.
…and that’s when I decided that I wanted to spend the next couple of months sharing with you more craft ideas and more “stuff” on this blog.
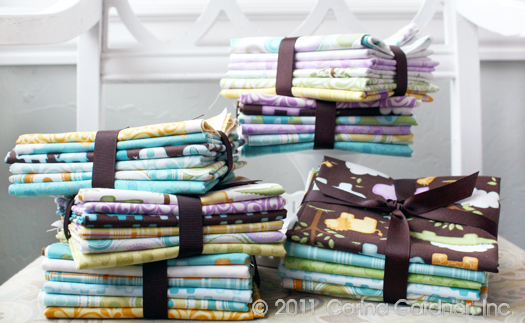
So there you have it—it’s officially the season of “giving” here on my blog. And to kick it off, I have 6 fat quarter packs of Baby Safari that I am giving away! Four packs (there are 6 fabrics in a pack) will be given away to comments on this blog post and two packs will be given away on the Facebook thread that links this post. Tell me what you are doing this holiday season. Maybe it’s a tradition or something new. Maybe it’s a scrumptious holiday recipe or the time you plan on cuddling with grandbabies. Whatever it is, share it! Winners will be announced on Sunday evening on both the blog and facebook page.
More fat quarter packs to come, announcements of new sewing patterns, more holiday craft tutorials, and lots of eye candy!
Hoping you also find a lot of joy this holiday season! -Carina
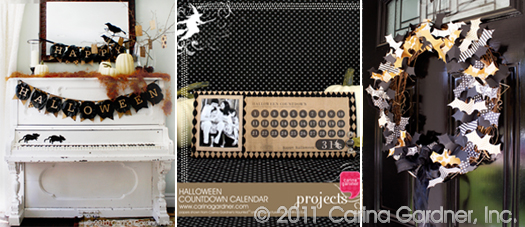
While we are working on a lot of NEW Halloween Crafts for the season, check these great project we did over the last couple of years with Haunted™ and Spider’s Web.
A Lot’o Halloween Crafts Read More »
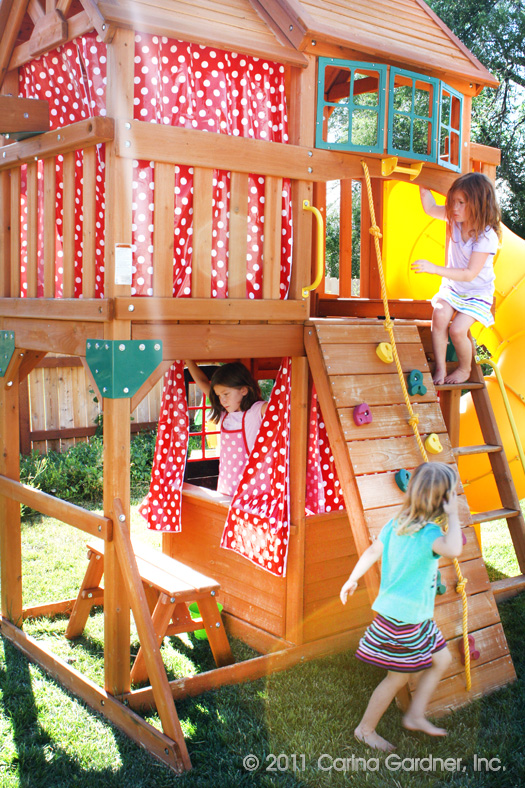 We got a Costco playset in April, which has kept my kids outside most of the summer. I had this idea that I was going to make it more of a “clubhouse” by making curtains for it.
Fast forward to yesterday (aka 4 months later). I picked up Amanda’s red polka dot laminate at Riley Blake’s warehouse. I was so excited that I stayed up late into the night to pound grommets into the curtains (much harder than I anticipated). I’m hoping the laminate holds up okay outside. I’ll probably pull the curtains down before winter and bring them inside for a good washing.
I might have given in and decided it was time to just buy a drill (instead of borrowing the neighbor’s) to install the curtain rods. Maybe I was tired of digging in someone else’s garage. Or maybe I decided that a girl just needs a drill of her own. The three of us headed to Home Depot this afternoon to get some hardware for installing the Tacksam Curtain rod sets from Ikea ($3.99 a rod).
_________________________________________________________________
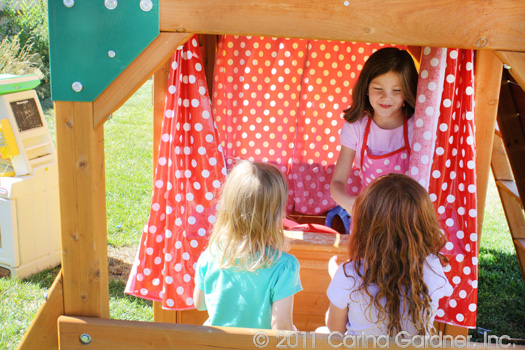
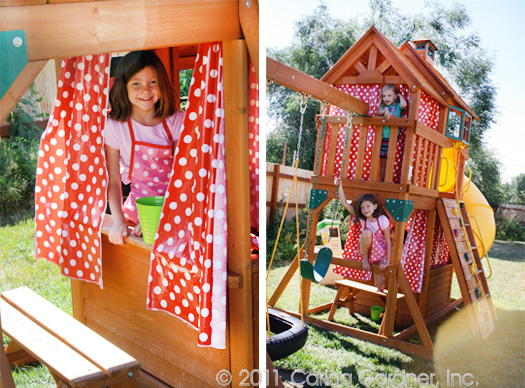
Now Siri can sell in her “shop” better than ever. Although she has informed me that they will still be making potions down there (but now they can close the curtains so that the non-witches will not steal the recipes).
Playhouse to Clubhouse Read More »
 Just dropping in for a second to report our very, merry Valentine’s Day. Seriously, my kids made out like bandits…I swear it could have been Halloween! Both were happily going through their candy /valentine cards after school today. I think Flissa tried every sucker and opened all of the Fun Dip a child could eat in a year.
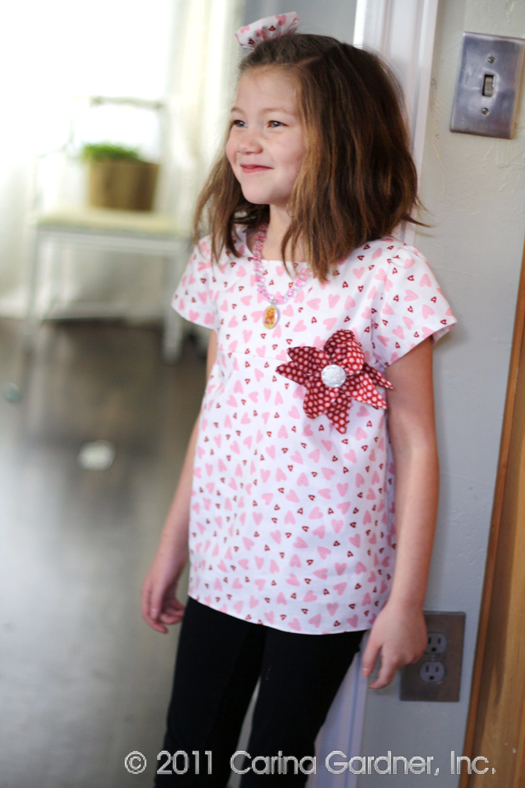
Siri made her Valentine’s Day box with Aunt Baily this year and used my Love Nest glitter paper and fabric, beads, ribbon, and silk flowers. I was a pretty proud mama. She was also excited to wear her ” Valentine’s Day shirt” from Love Nest. She was pretty cute modeling it for me. Ya, ya, I know. Proud mama again.
Tomorrow I’m heading into Siri’s first grade class to help the kids make a quilt to donate for their class project for their Arts Night Fundraiser. I’ll tell you how it goes…
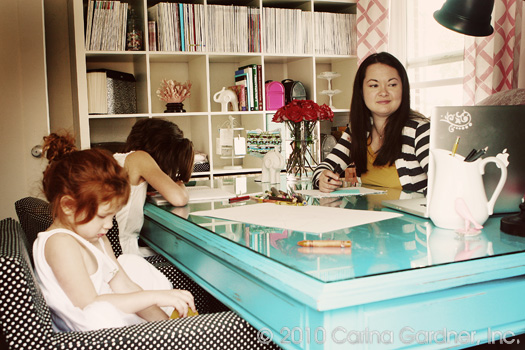
This photo didn’t make it into the Dec- Jan newsletter, but I was looking through my hard drive to see what photos I had wisely put on it before my computer crashed a couple of weeks ago. Thankfully, I’m really only missing 6 months of photos. Unfortunately, (you know what I’m going to say scrappers!) I lost 6 months of photos. Ah well.
 Enough of that sad tale, I dropped into my blog to say I haven’t forgotten about you…I’ve just got so many lovely things happening that are very secret right now and I have to keep myself from spilling! Some things you already know: an Illustrator class coming out in a month (images of the projects should be up in a couple of weeks), Love Nest™ has been slowly arriving at my house waiting to be quilted (4 bolts and counting!), and a new quilt freshly drawn up (I’ll have it up for download during the month of January-think flags!). Oh, and so many other wonderful things…
In the meantime, I am trying to get into the Christmas spirit (give me a couple more days when all the present shopping is completely finished), drink a little hot chocolate, and cuddle with my girls in front the “The Grinch.” Just hoping I can keep from becoming one myself this year.
Happy Holidays! Carina
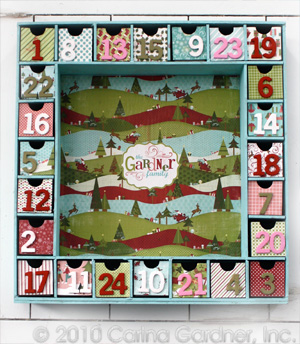
(Advent calendar made from Santa’s Sleigh digital kits).
 It’s not even Thanksgiving… and my house and studio are buzzing with all sorts of Christmas fun. We are getting ready for our 4th quarter newsletter, which should be out sometime next week. We might even have a wicked little goodie for you…so be sure and sign up so that you can get access to the newsletter the moment it goes out.
Want to see what kind of fun you are missing out on? Check out our first issue (3rd quarter) here.
Also wanted to be sure and mention One Dollar Wednesday and Hybrid Project Friday at my digital scrapbooking shop. To be totally fair with everyone, you’ll notice that I release only new products on One Dollar Wednesday and New Release Monday. That way, if you buy it on Monday, you won’t suddenly see it on One Dollar Wednesday (ya, that would suck).
 There is a 6-12 month lag period on all my products ever hitting a $1 day (and many will never hit the $1 day). So to help you all out, I’ve instituted 25% off on all my new releases on Mondays for the rest of, well, forever. You’ll see this start in January (you’ll want to check out the site-wide sale in December at Jessica Sprague).
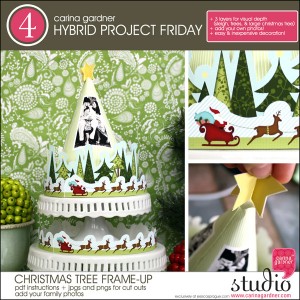
As for my new releases in December, can we say Christmas please? I have a new line (featured in this week’s Hybrid Project 4), Santa’s Sleigh that will hit next week.
Now, to buckle down and finish a few projects before Thanksgiving weekend…
XOXO-Carina
It’s Beginning to Feel Alot Like Christmas Read More »
Lots of little pumpkins at my house for this little place card that I plan on making for my little family’s Thanksgiving. He’s perfectly pumpkin-ie, isn’t he? He also goes up for sale as Hybrid Project 3: Turkey Placecard at Jessica Sprague for just $1 on Friday. He’s perfectly good way to add a little “gobble” to your Thanksgiving table!
And if you haven’t had a chance, make sure you check on my digital store on Mondays (new releases) and Wednesdays ($1 day!). Today you can grab an 18 paper pack and my lovely Border set from Daisy Jane for just $1. It’s a great deal that comes around only once on my products so be sure and check it out!
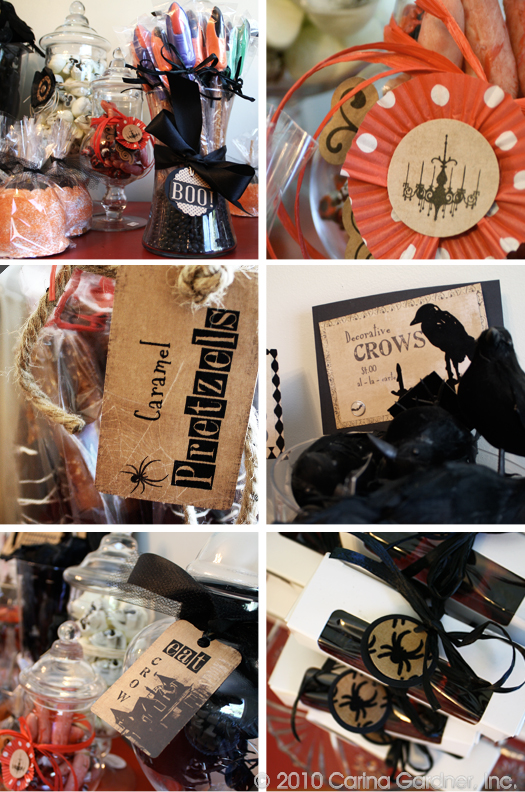
My neighbor Tausha does these incredible gift shows and she used my Haunted™ Paper Collection when putting together her goodies. It’s so cute, and I was totally inspired. If you are in Salt Lake, you can check out her booth at the Jenny Gochnur Autumn Art Show (At the Holladay City Building at 4580 S 2300 E), which starts tonight and goes until Friday (I believe 6pm-9pm Wed, 9am-9pm Thurs, and 9am-5pm Fri). Check out Tausha’s cute booth if you get a chance!
Haunted Paper in Action Read More »
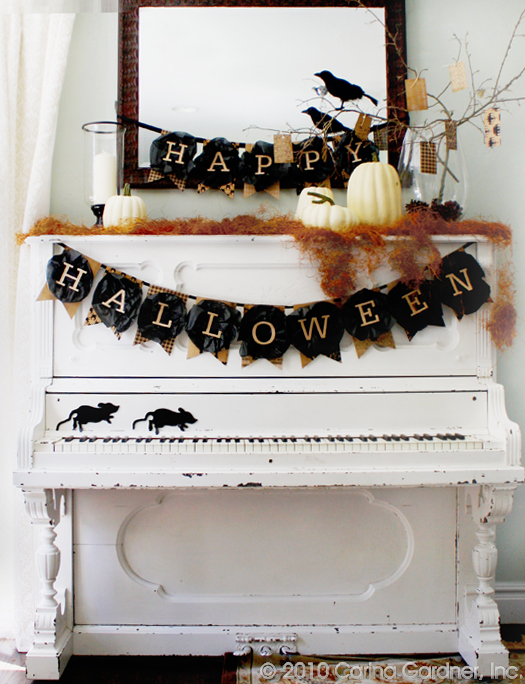 There have been spooky things happening at my house recently: Crows cawing, moss creeping, and mice scurrying along the old piano. It’s just enough to make you want to shout, “Happy Halloween!”
The spookiness has been so much fun that I made this banner using the Haunted™ Line. The instructions and pattern are below for you to download.
Another sweet creepy but easy Halloween project is just to tie pieces of Haunted™ paper with twine to dried branches. It’s cheap, easy, and chic all at once. Who knew Halloween could be chic?
Be sure and download the Halloween Banner tutorial below (all you will need is one pack of Haunted™, hot glue, black tissue paper, black ribbon, and black construction paper…it’s a whole lot of black:). I also have Illustrator files for those of you with a cutting machine. See below to download.
So what will I be working on next? My daughters have decided to be Sailor Moon (yes both of them) and I will be recreating a pair of red, white and blue outfits (hmmm, sounds patriotic). Let’s hope (for my sake) they don’t change their minds.
Illustrator File Downloads:
Halloween Flag Illustrator File
Halloween Pattern 1 Illustrator File
Halloween Pattern 2 Illustrator File
Download the Instructions:
You can also paste this link into your Internet Browser: https://carinagardner.com/2010/09/10/how-to-make-a-halloween-banner-free-download/
How To Make a Halloween Banner-Free Download Read More »
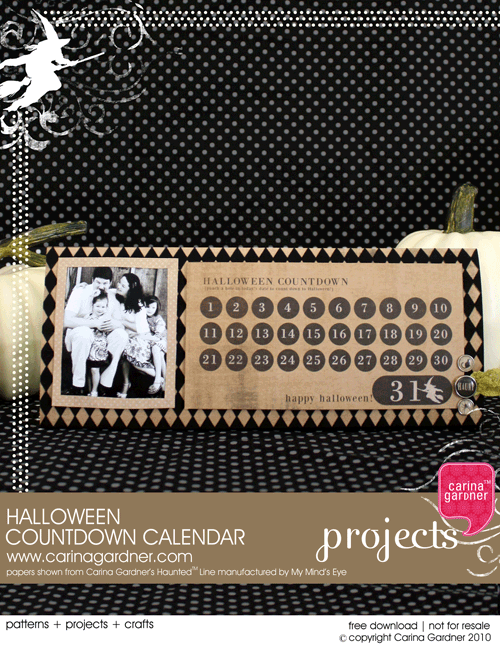 It may seem a bit early, but Halloween has come to my house this last week. I’ve been happily crafting with my Haunted™ Paper Line. Lots of white pumpkins and scarecrows are visiting my living room (Photos coming soon!).
Here’s a fun project that you really need to do (and can easily do) in advanced. You will specifically need the Haunted™ Line because the reason it is so simple is because the journaling page in this line has this Halloween Countdown already to go! (simply cut it out!)
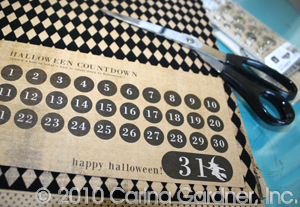 Once this fun little calendar is finished, all you’ll need to do is let your kids stamp a fun shape (The Haunted™ Acylic Stamps will be what we are using. I’m thinking we will be using white ink and that creepy, crawly spider.) or just draw a mark on each day as you countdown to a very spooky Halloween! It will be a fun way to start October 1st!
I have the tutorial for you to download below (seriously, this is a 20 minute project at best and the hardest part is making sure you have a photo of your family to add!) and you can certainly expect some more haunted crafting happening ’round here this week. Those cute, um, I mean spooky crows just love getting photographed!
How to Make a Halloween Countdown Calendar-Free Download Read More »
I think wreaths are one of those things that are really easy to make especially when you can’t find exactly the kind of wreath you want (In my case, an all green summer wreath). Of course, I think the materials are pretty expensive (which is what keeps me from making all of my wreaths), but if you can find a fab sale, then making a wreath is easy (and did I mention fun?). I found such a sale and stocked up with some summer and fall stuff to make a couple of wreaths.
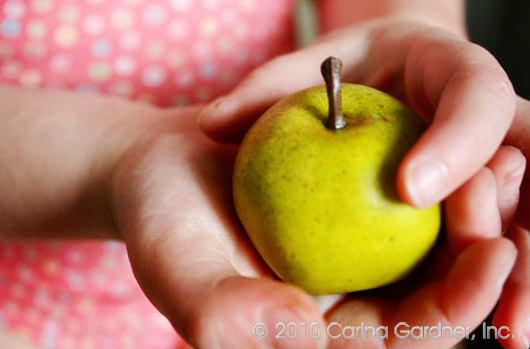
I like to keep it pretty simple. My summer wreath is made of four types of stems but they are all varying shades of green (so I can’t screw up). Then, I just layer them.
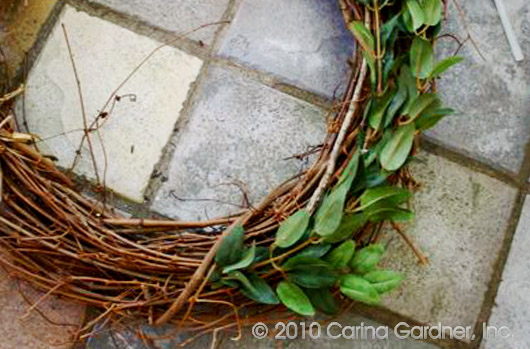
I just put a little hot glue on the bottom of the stem as I push it into the wreath. Sometimes I put a little hot glue on top, but not always because I want some of the branches to fall out to give it volume.
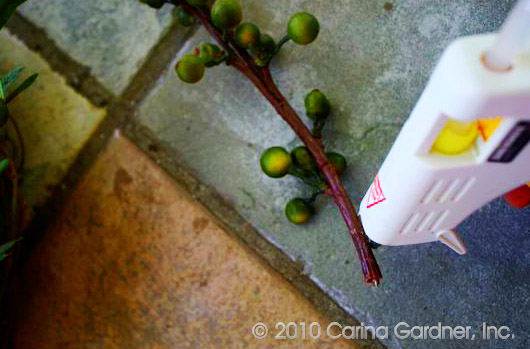
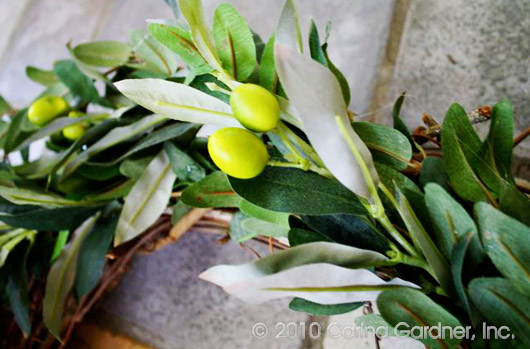
The layers for this summer wreath are 1)boxwood leaves, 2) lime green olive branches, 3) green berries, and 4) mini green apples. Group the green apples together (2 or 3 together).
This wreath took me less than an hour (how do I know? Because I dropped Siri off at dance and finished it before I picked her up again).
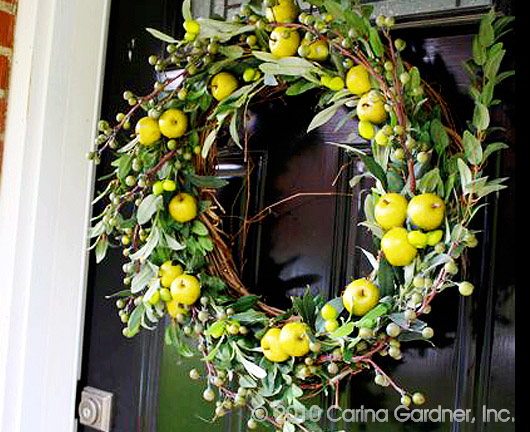
And there you go! An fun and custom wreath for your door!
BTW, if you haven’t taken a look at the sidebar, you’ll notice I now have a new “grab it” button! Please really take it and share it!
Speaking of sharing, if you have any great wreath ideas, please leave your comments here with links to wreaths you’ve made!!! I love hearing what you have to say and seeing what you are making too!
How to Make an Easy Summer Wreath Read More »
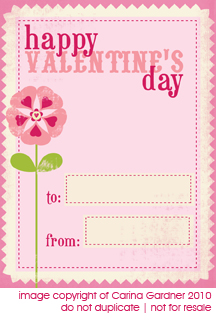 I’m a sucker for Valentine’s Day. And while we are still three weeks away, I’ve got some great little projects put together for this very pink holiday. If you haven’t picked it up yet, the Love Nest glitter book is available at Hobby Lobby, and I’ll be doing a few projects with those papers and my new Affectionate papers at Design House Digital.
First up, getting my daughter’s Valentine’s Day Cards together. And you can download them too! These sweet little cards ar 3″ x 4″ and I’ve even already assembled them onto a 8.5″ x 11″ sizes paper for you. So all you have to do is print! I’ve made the boxes “chubby” for my kindergartner’s fat letters. We’ll cut them out and let her write on them in advanced.
You can also check out my Valentine’s Day Kiddie cards from 2009 (also a free download!) if you want lots of different cards (and birdies:). Those cards are also set up on a 8.5″ x 11″ paper so all you have to do is cut! Easy-peasy!
Valentine’s Day Card for Kids-Free Download Read More »
Just wanted to give you a quick peek at the new Valentine’s Day line at DHD! It will 30% off tomorrow only. There are 5 packs and one mega pack. I’m just dreaming up all the neat hbrid projects I plan on doing with these papers and accessories (can anyone say Valentine’s Day Cards?).
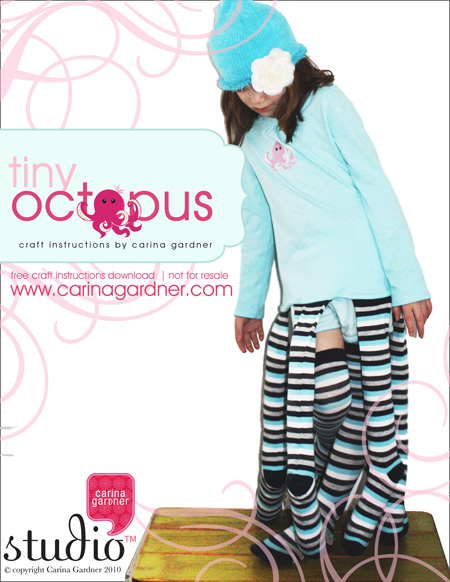 Yes, my daughter wanted me to make her an octopus costume for her birthday. So how could I refuse? I kept it simple by buying a t-shirt (with the gems already on it) and women’s long socks. Add some filling, a t-shirt transfer kit and my sewing machine and I was set. The only problem? Once I made one for my oldest daughter, I had to make a second one for my youngest daughter. Thankfully, it’s project that can be done in a couple of hours.
Here’s the basic idea. Take a t-shirt and iron-on one of my adorable octopus stickers. Or skip this step entirely. Then stuff 6 women’s socks with filling and sew them to the ends of the t-shirt. Grab a beanie hat (add a flower for fun) and put on a pair of shorts and a final pair of socks (so there are 8 legs in all). Instant octopus!
Want the full instructions and photos? Just download this pdf with my instructions for creating this easy craft project!
Craft Project-How to Make an Easy Octopus Costume Read More »

Creating great projects from digital products is easy! For example, my daughter’s birthday party was last week and we did an underwater theme. So my gifts to all the little guests were mermaid shirts with matching hair color for each girl. My daughter wanted to be an octopus, so I simply ironed-on an octopus illustration I made onto the simple costume I created for her (to see how to make the octopus costume, please visit the octopus costume post).

So here’s how I created this cute little gift idea.
 1. I bought a package of Dark T-shirt transfers and a few t-shirts in blue and dark pink. I picked them all up at Target but many places would have these goods.
2. Choose an illustration from your favorite digital kit…stickers work best because they are png (no background). I used my Tiny Mermaid line for this project.
3. Print your illustration onto your Transfer Sheet (follow the instructions from the back of tha package.). I just used my inkjet printer at home and bought inkjet transfers. If you want to maximize space, create a 8.5″ x 11″ document in Photoshop and place several stickers to cut out.
4. Cut out your printed transfer VERY CAREFULLY. Because it is on a dark T-shirt, you will want to cut out all the white and get as close to the edge of your design. For example, on the octopus sticker, I had to cut out a couple of the legs seperately because they were seperate from the body and I didn’t want white to show up between the legs.
4. Follow you transfer paper instructions to iron on the design to the t-shirt. For mine, I laid down a pillow case on a hard surface and laid a sheet of paper (provided by the iron-on packet I bought) down over the t-shirt and ironed for 1-2 minutes.
And that’s it! I great project that my children adore and made Siri’s party special.
Easy T-shirt Project-How to go from Digital Product to Iron-On Read More »
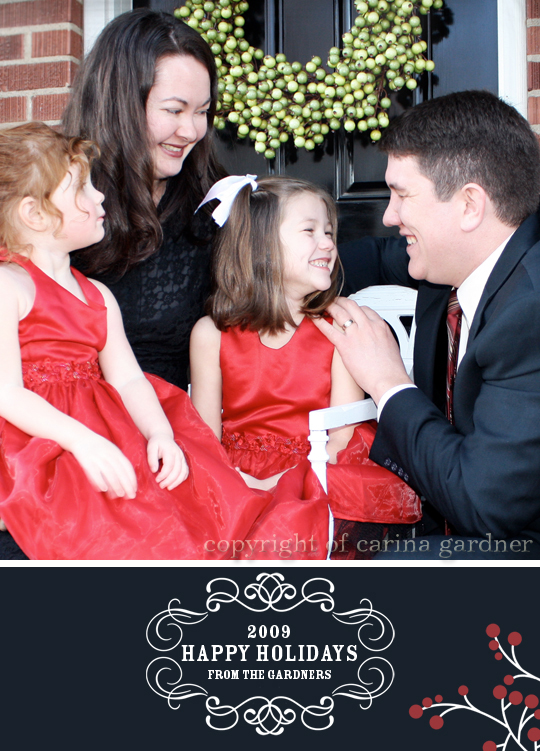
I hope you have a wonderful Christmas/Holiday weekend! I just barely (gulp!) got my Christmas Cards mailed (as shown here:)) and have had some time to reflect on what a wonderful and exciting year it has been for my family. I have been talking to my girl Jen today and I am just amazed at how excited I feel everyday for the things happening in my life. There are too many things to name, but certainly one of those things is going to Design House Digital with Jen. She has officially announced herself as a designer and as the brain behind the site today (go check it out!). We have more designer announcements to come and I’m just happy to be a part of such a spectacular crew.
I’m also getting more and more excited for 2010! I have so many things in the works right now for fabric, online classes, and more! Everyday is so exciting for me. Thank you for keeping in touch and I hope that in this holiday season you are also happy, healthy, and of good cheer!
Merry Christmas!
A Merry Christmas To You From Me Read More »
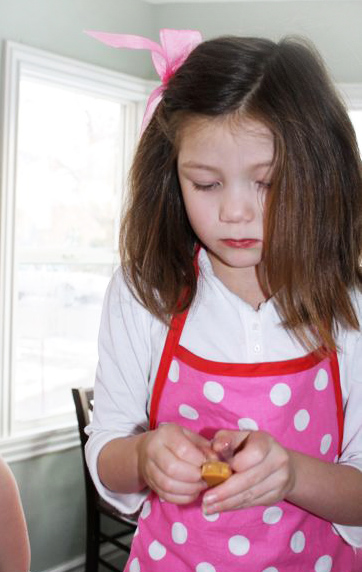
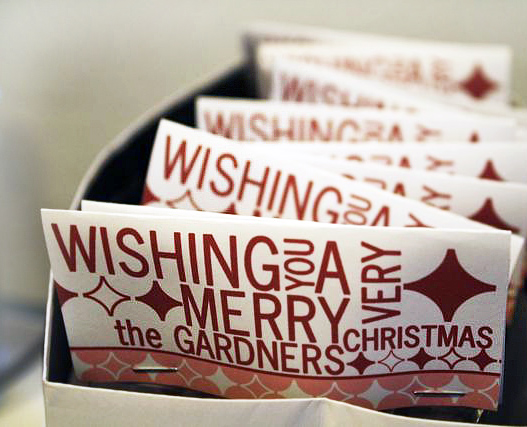 I just finished up my neighbor gifts—easy-to-make chocolate dipped pretzel rods. The girls helped me and we managed to make quite the mess. All you need to do to make this gift is melt carmel candies, dip pretzel rods in the “goop,” let them cool, and then dip them in chocolate. We also dipped ours in sprinkles and crushed Oreos for the fun of it. Tonight we will be delivering them.
 To make them even more special, I bought cellophane bags that were 4 inch x 9 inch and stapled on this bag topper. I like them because they are generic enough that you could shrink them down as place cards or anything else that had to do with Christmas.
Instructions:
1. Download the 8.5 x 11 jpg (below) of the neighbor gift tag. The size is 4 inches x 4.25 inchs.
2.Personalize by adding your family name (we added the GARDNERS) with a san serif font like Arial or Helvetica (I am using Abell Condensed) OR leave the area blank and move on to step 3. To personalize, you will need to use some kind of editing software like Photoshop or Photoshop Elements.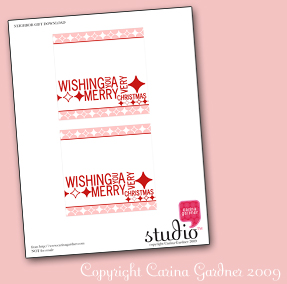
3. Print to fit cellaphane bag or shrink for other use.
4. Add a hand written message to the back or sign your family’s name to the front.
5. Fold in half (so the dimensions are 2 inches x 4.25 inchs and staple to the top of your bags.
6. Deliver holiday cheer!
Happy Holidays! Download the NEIGHBOR GIFT TAG here!
Neighbor Gift Tags-Free Download Read More »
 Thank you to everyone for the positive response to the Illustrator class! I’m excited for you guys to all get your hands on it!
I’ve had a design marathon this week trying to get together some Christmas lines. I also found out that two new fabric lines are in the the works (yes, and I know you haven’t even seen Coquette yet). A line called Soiree and another called Love Nest. The artwork from Love Nest will all come from the Glitter Book currently sold at Hobby Lobby. So you have a mini preview by just flipping open one of those books.
In the midst of of all this , the girls and I made gingerbread houses today. Nothing like the good-ole-store-bought gingerbread kits for me….what, you expect me to make it by hand? Hey, I’m not superwoman! So, we had a wonderful time messing up the kitchen and leaving most of it for Josh to clean up.
Okay, done with the blog break and getting back to it!
I promised a Christmas goodie and here it is! An advent calendar that you simply clip to a line. Add treats to the cones so your little ones can take one out everyday. This is a LARGE download because all of the 8.5 inch x 11 inch files are PRINT READY (300 dpi).
All you need to do is print (I printed from my home printer) and cut out. Tape each piece into a cone shape and hang on a line by clipping with a laundry clip. I hung 4 strings in one of our front room windows and clipped 6 cones (and seven on the last one) across the string.
I’ve also included a Santa that you can stick in the cones to show your kids what day it is.
We’re getting in the Christmas spirit at our house: We’ve got our tree up and we are heading for the Heber Creeper (AKA The Polar Express) tomorrow for my birthday. I think the kids will love it (which means I will love it…there is nothing quite like the excitement of children at Christmas). Go ahead and download this goodie and it’s okay if you get it up a few days late…your kids will still love it!

Christmas Calendar Cones—Free Download Read More »
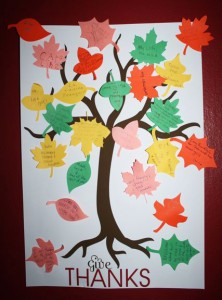 We’ve had a very Happy Turkey Day! With so much to be thankful for, I think it was one of the best Thanksgivings yet. We had our turkey feast at my mother-in-law’s. Two of my sisters joined us, which was wonderful! And with two healthy little girls and a loving husband, my cup runneth over. Siri also managed to (finally) pull out her extremely loose tooth. This means our first visit from the tooth fairy.
I hope your Thanksgiving was equally as wonderful. Holidays are always a hard but happy time for me. I can’t wait to get up the tree (as Thanksgiving is the acknowledgment of the official start of Christmas music and letter writing at my house). I can’t wait to make my neighbors’ gifts (I’m excited to really officially make gifts this year now that we have permanent neighbors). I’m excited for the ornaments, the decorating, and all of the fun events the season brings (bring it on Holiday Parties!). Anyway, hope you had a Happy Thanksgiving!
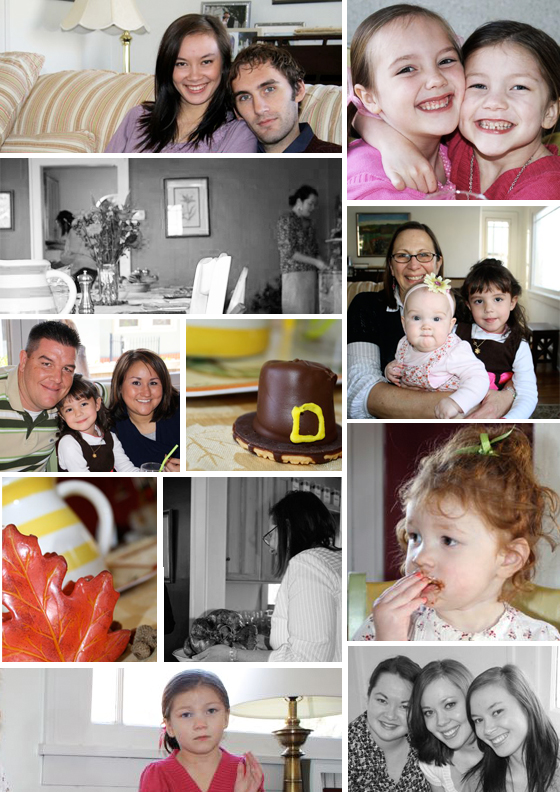
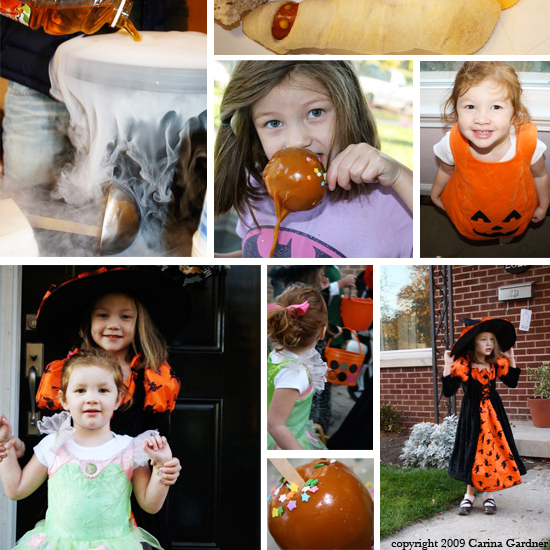
Just thought I’d share a little photo montage of our family’s halloween with you! Tinkerbell and the Fab Witch had a wonderful halloween and I hope you did too!
Sharing a Bit of Halloween with You Read More »
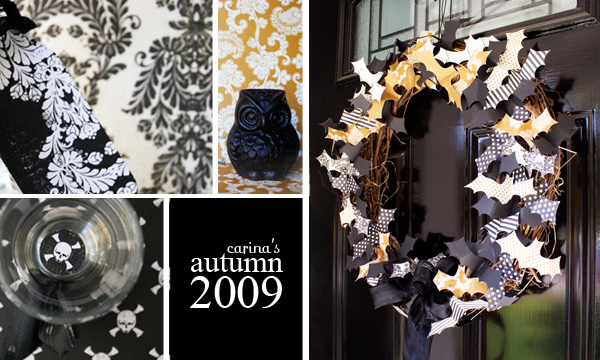
Just dropping in for a sec to wish you a Happy Boo Day! It’s few days early, but my Halloween starts tomorrow with a Halloween luncheon with my girls, Siri’s first Kindergarten Halloween Parade, and of course, trick-or-treating on the 31st. Plus, if you haven’t checked out my studio site recently, I’ve done a couple of updates! If you need a peek at some of the Love Nest papers, go here. I’ve had people tell me they were able to find the paper pad at Hobby Lobby and a couple of people tell me that it was already sold out! So be sure and drop by there if you want to snag it! Happy Haunting!
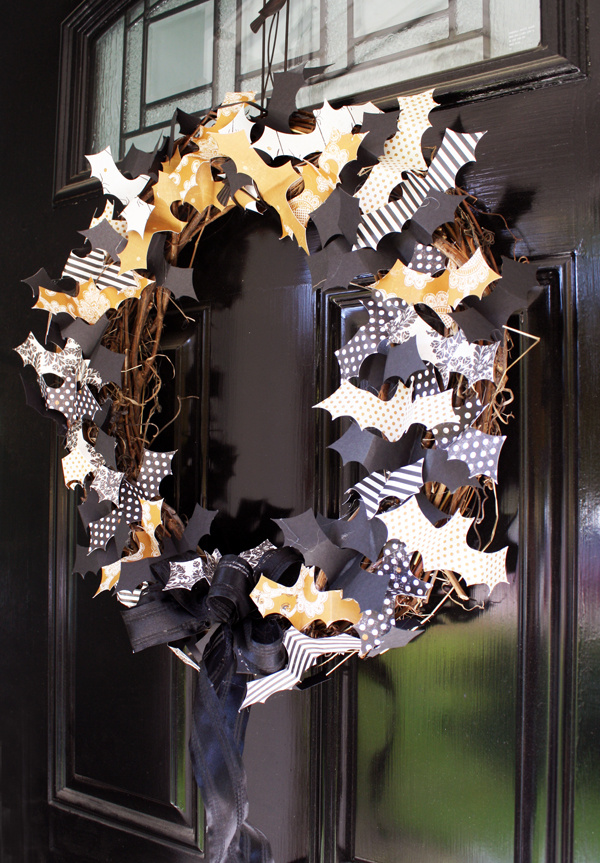
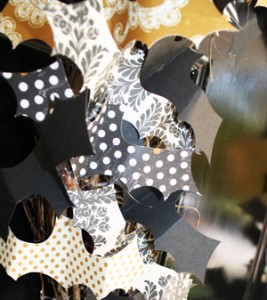 Halloween is just a week away and I finally have finished my Spider’s Web Bat Wreath. I used my paper version (produced by My Mind’s Eye), but you can also pick it up digitally. I picked up this wreath from Michaels. These twig wreaths are relatively inexpensive ($4, I believe). I then had my silhouette machine cut out these bats for me. I few hot glue gun sticks later, and I was in business!
My kids are going to be a witch and a pumpkin this year (if I can convince her). We are in a new neighborhood, and I excited for the kids to trick-or-treat in this super kid-friendly street.
Hope you have a happy halloween!!!!!
Spider’s Web Papers – Batty Wreath Read More »
I’m back from a bit of a hiatus from my blog. I’ve had a number of things barking at me these last couple of weeks and I’ve devoted myself to being a little more careful about what I choose to spend my time doing. I actually was sitting in on a seminar a few weeks ago that asked us to rate the top 5 things in our lives (things we like to do, wanted to spend more of our time on, etc.). We were then asked to take that list and compare it to what we ACTUALLY do with our day. This simple task is an eye opener. I found myself acknowledging that I didn’t want to spend my life living the way I was now (so busy and stressed out) and not doing the things that I LOVE. Life’s too short right? My number one thing I wanted to do more of was spend a little more quality time with my little family—especially my girls. They’ve always been my number one priority, but I decided to MAKE sure that if I am doing something other than being with them, that it is completely worth it (that’s one way to justify not getting around to the laundry, heehee). Other top things for me? Designing, of course. I am COMPLETELY passionate about it. Surprisingly enough, cooking came up high on my list too. I completely forget how much I enjoy cooking as I spend more nights quickly try to get dinner together at night without a thought to how fun the process is. So you may see a bit more cooking on this site as I flex my creative muscles and make myself spend more time on things I love doing!
What are your top 5 things? What do you care about the most? I really believe that we have the ability to DESIGN our lives…which is a task in and of itself. How would you design your life if you could? I have some ideas about how I am changing my life to be a little less busy and more dynamic and engaging! I am always seeking after beauty in my life and that is one of the things I hope to bring to anyone who reads this blog. I hope that creativity is an integral part of your life too.
Which brings me to what I originally planned on posting about today: Easter inspiration. This is such a wonderful holiday—for decorations, family, and reflection. Hopefully, you get a chance this week to think about your life and what you need and don’t need in it! And while you are pondering these very big questions, lol, here is some eye candy to make you happy and feel inspired for this holiday!
This is Bossy Feltworks etsy shop. What a little darling chicky, huh?
This one’s from SoMommySew. These birdies and colors are divine?
This one is from madepersonal and is so charming.
If you want something to tandalize your eyes and your tummy, you should read this post over from the kitchn. It’a an assortment of very pretty little cookies you can find at different locations. These are too sweet and are true eye candy:
Those ladybugs are KILLING me…and little umbrellas? So sweet! Hope this all makes you as happy as it does me! More holiday stuff all this week…because, well, how can I help it? Happy Easter, Passover, or whatever you choose to celebrate this season. The main thing is that you celebrate!
[ad]
Easter Inspiration Read More »
We made these edible easter nests that Siri is obsessed with it. I guarantee they’ll be a hit with your kids too! Plus they are easy!
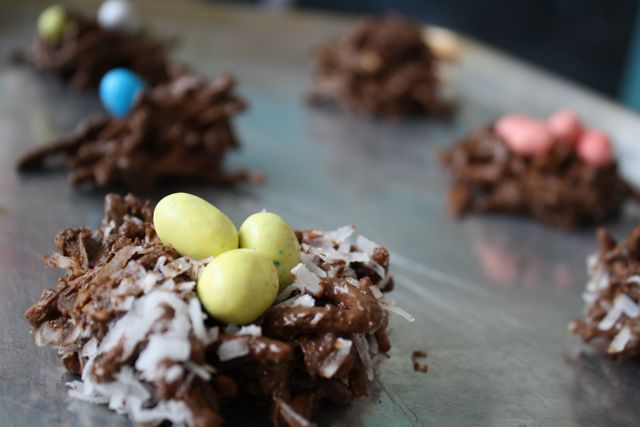
Add a peep birdie for extra sweetness!
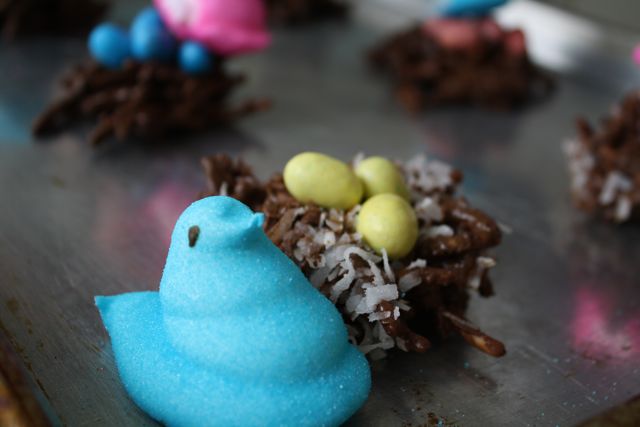
All you need is:
Chow Mein Crunch Noodles
Chocolate Chips (We like milk—it’s naughtier)
Shredded Sweetened Coconut (optional…I like it, the kids don’t)
jelly bean eggs or whopper eggs
Peeps chicks
Heat up a pan and melt the chocolate chips. Add the chow mein noodles and mix gently. I usually heap half into spoonfuls on a plate or tray and then mix the coconut in for the rest. Let your kids add the eggs and peeps. Easy Peasy!
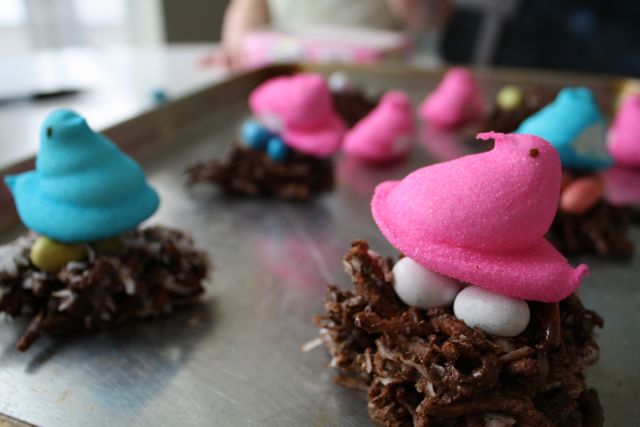
[ad]
Easter Birdie Nests—Kid Edible Project Read More »
Easter is fast approaching and I haven’t even begun to think about Easter projects for me girls. Our favorite is the peeps chicks in chocolate nests with jelly been eggs. Siri was just asking to do those the other day.
You should also check out the Easter Projects on Martha Stewart’s website. Look how cute these spring chicks are!
There’s also a slew of Easter decoration pictures. I am more motivated to get a few things together this week!
If you doing anything fun for Easter, post here!
[ad]
I posted my valentine freebie from card nirvana earlier, and we actually used them today for Siri’s preschool class! I printed them out back and front, Siri wrote in all her schoolmates names. We then attached the heart lollipops to the cards by punching a little hole in the corner. Fast and sweet…just the way it should be!
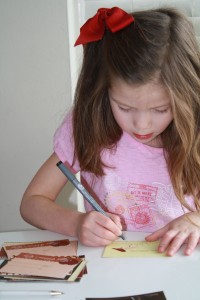
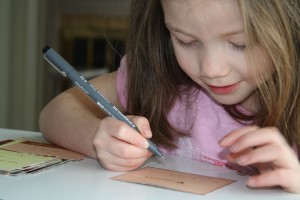
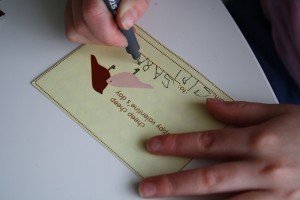
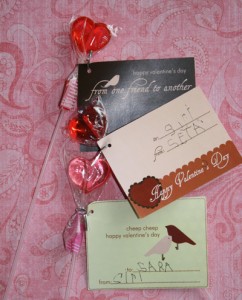
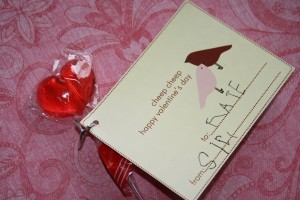
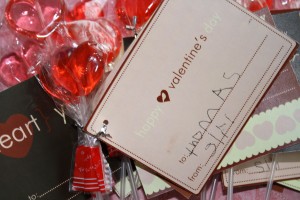
A note about the chocolate cards—we used a white gel pen to write on them! You can write on them with black ink, but it’s a little hard to read.
Want to grab these free cards? Grab them here from Card Nirvana, my digital invitation store!
**The Card Nirvana download is no longer available! You can now download them directly from this link:
https://carinagardner.com/valentineskiddiecard.zip
[ad]
Valentine Gifts for Preschoolers Read More »
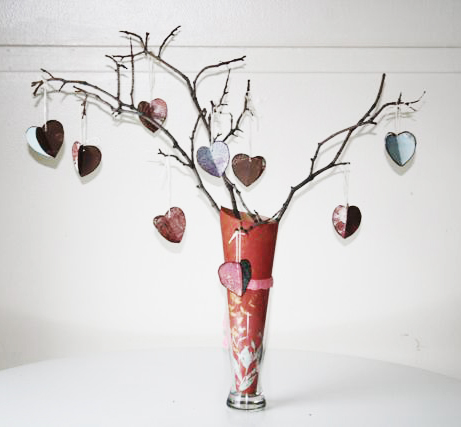
As Valentine’s day is approaching, I decided to be festive and actually do a project. You know, one where I am not on the computer. Ya, that doesn’t happen a lot. lol. If you want to make this heart tree, it’s SO easy and really inexpensive. Use any paper you like…my paper is the Bohemia line from My Minds Eye. I made 9 little “heart trios” as I call them, but you can make any number you like. So here’s the project: I took branches from outside and placed them in a vase. I used a piece of scrapbook paper, rolled it, and stuffed it in the vase. Then I put on these little heart trios. Here’s how to make them:
First, download my heart freebie here. Print is out as your template. Then you are going to want to cute out hearts from 3 different types of papers. I actually folded my heart template in half and folded the scrapbook paper too so my hearts were symmetrical. Then you want to glue stick three of the hearts together so they look like so:
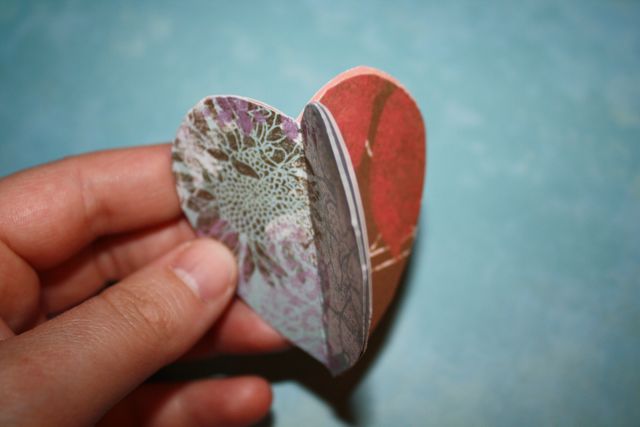
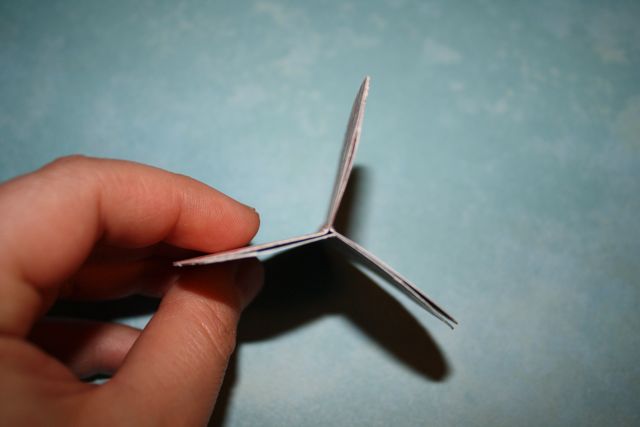
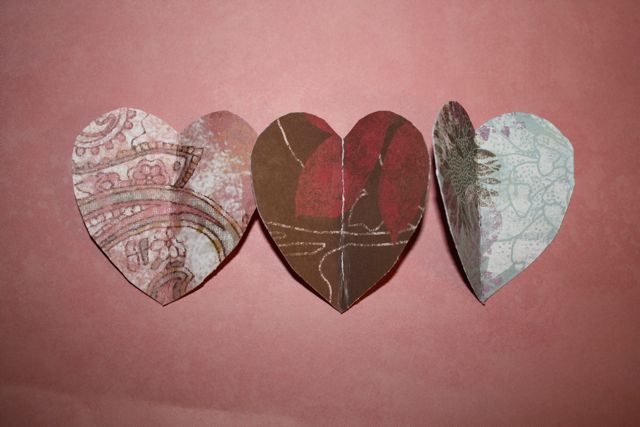
I then punched a little hole in each of these with a “baby” hole puncher. and hung then on string. I think ribbon would be cute too, but at the moment I don’t have ribbon thin enough for this project. So string it was!
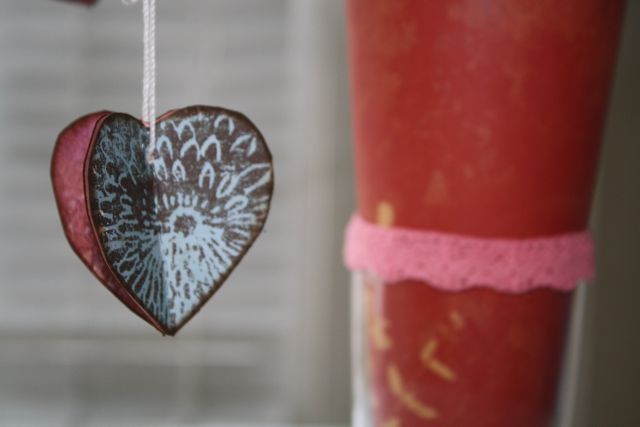
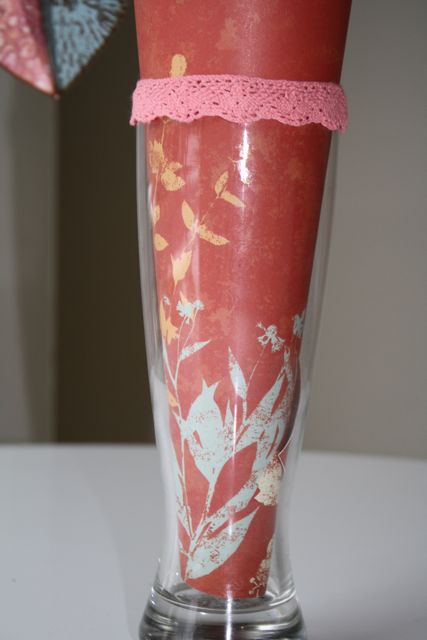
I did tie a little crochet lace around the top of the vase. I love how graphic this paper is because it feels so organic. I’d also suggest painting the branches white. I didn’t because I like the natural feeling of the branches, but I think that it could be a cute alternative.
Here’s my Kitchen 123 Recipe card I made to file away this project (See the recipe card post).
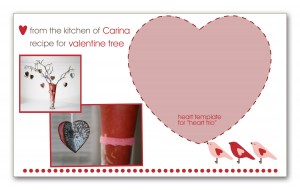
Grab the heart template freebie at my 4shared link: Heart Freebie Template
[ad]
Kitchen 123: Valentine Project and Heart Freebie Read More »
My kitchen recipes has been a sore spot for, well, forever. I usually keep everything in a plastic bag or pushed into the cook books I love the most. Not exactly contusive for say, actually, FINDING a recipe. And I really do have tons of free floating recipes…things I have ripped out of magazines, recipes friends have written on napkins for me, my grandmother-in-law’s pie crust recipe. They are just floating around the house…not the least bit usable until I think of one and dig it out.
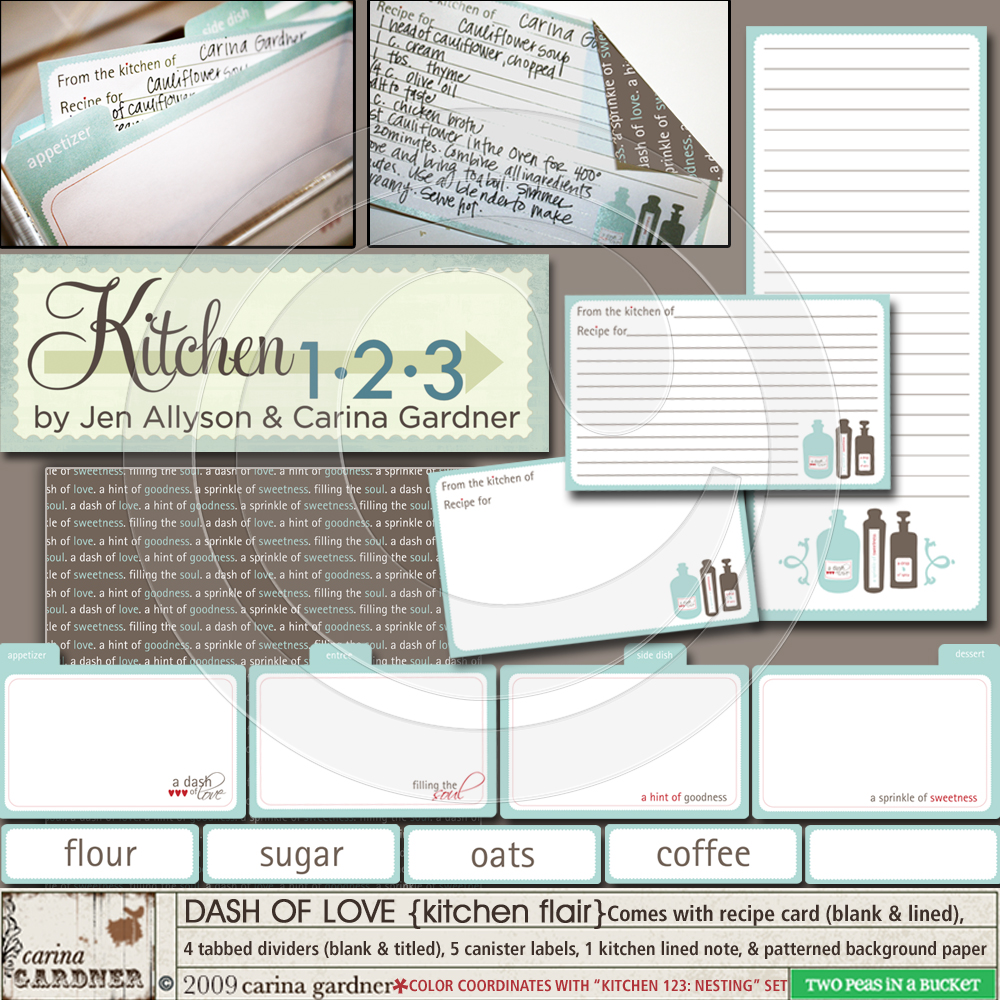
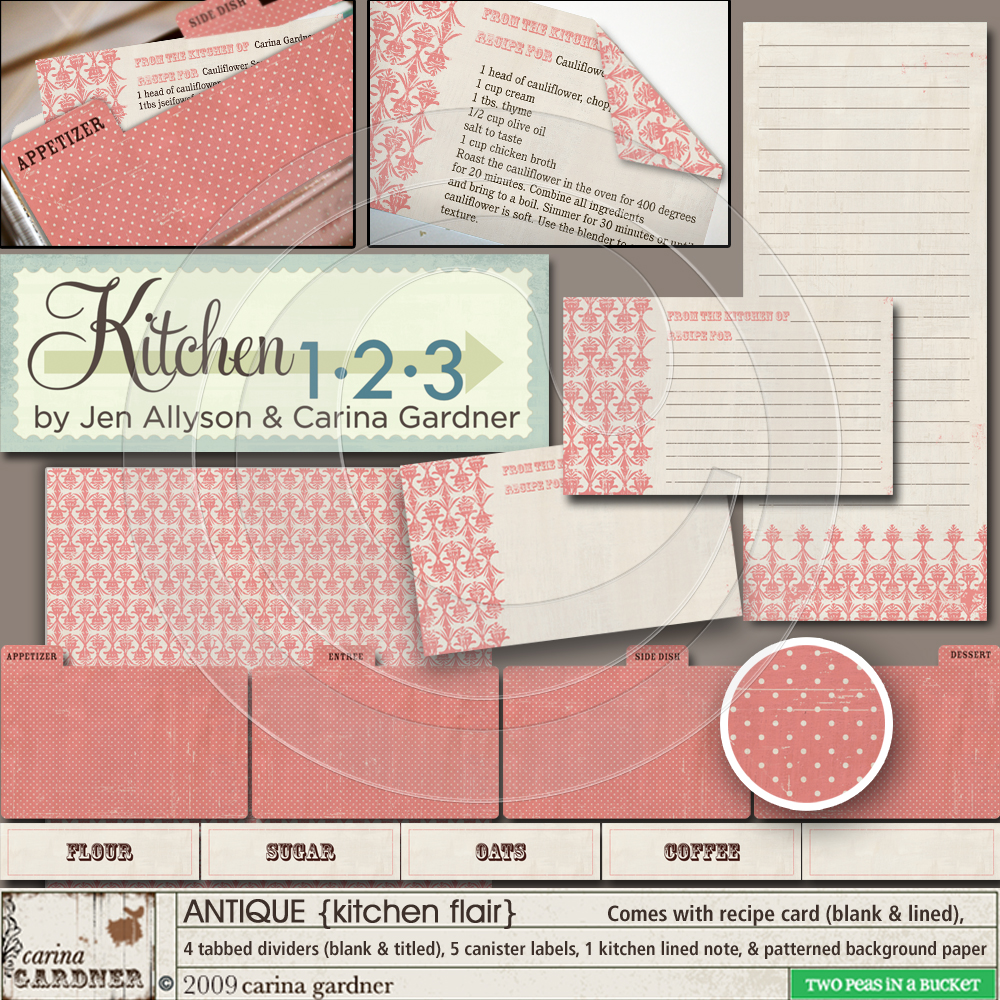
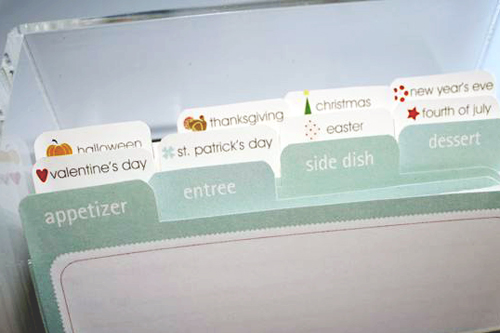
So almost more for me than anyone else, I created a line with Jen Allyson at 2Peas that will be released on Tuesday (Feb 10) called Kitchen 123. It is a recipe organization system. I created 2 different types of tab systems and a holiday tab set that I plan on using for more than just kitchen recipes, but for projects too. I’ll post my valentine’s day project so you can see! But for now, here’s how I used the recipe cards:
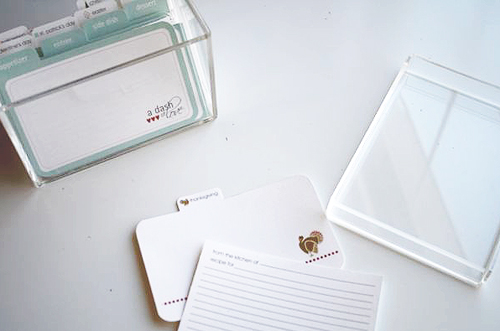
First, you need to find a good “box.” I know if I do this, then it will make it special. I think it would be cool to make the box a project itself. If you do this, post a link in the comments to you photo or blog post on it! I decided to go with something really clean that would show off the design. I got this box from the Container Store. These were MADE to put something pretty in!
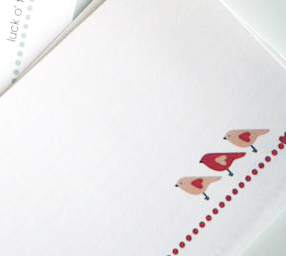
Here are my previews of the recipe sets I did along with the photos I took of the box I put together for me. I’m sure as I add cards to it that it will change and grow. But the best part? I plan to keep most of the cards digitally so if one gets oil or water on it, no problem! Just re-print! I did print extra cards with lines though so I could have one handy to write up a recipe. I don’t know how many times I’ve had someone over (or I’ve been over someone else house) and I asked for the recipe. They it would get written on a piece of paper and, inevitably, end up in my plastic sack!
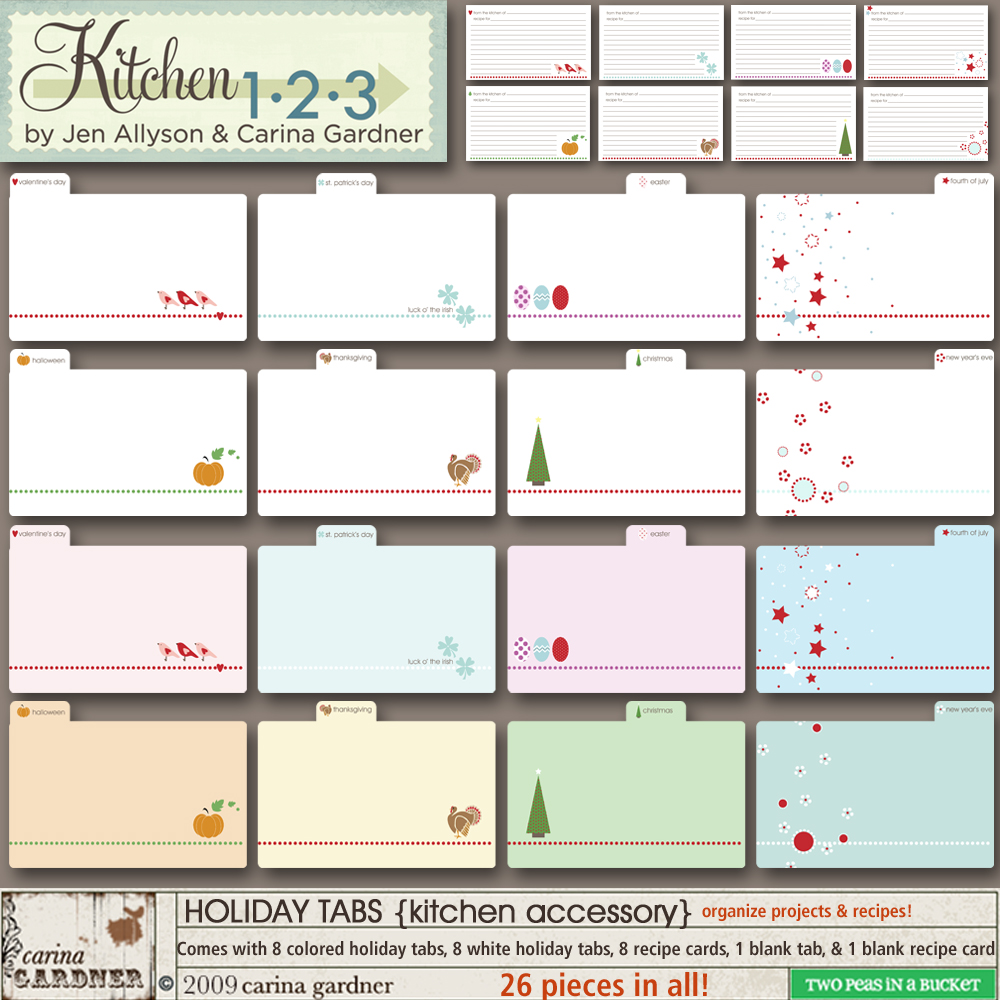
The last one it my favorite! I plan on using it for projects AND recipes! I’m totally making a post on 2peas to get people to give me their holiday projects and recipes!
Kitchen 1 2 3: New recipe card sets coming to 2Peas…See How I Used Them Read More »
Jen and I both got up our Valentine Freebies at Card Nirvana! I think you’ll like these cards! Jen put up this fun striped valentine’s day card and I have up some mini 3 in.x 4 in. cards that I made for my daughter’s preschool friends. I probably will attach them to heart lollipops or some other treat (I’ll post it when I do them), but for now, we thought anybody who wanted to use them for Valentine’s Day could grab them in advance! The Valentine Stripe card is for photoshop users and the small cards (Valentine Kiddie Cards) are set in a pdf. You can just print as is (there’s a cute heart wallpaper to print on the back of the cards) or use the Card Nirvana pdf to TYPE IN YOUR INFO. It’s SO easy.
This is what the files look like that you get:
Happy Heart Day! Have fun with the freebies! If you use them at all post the link here so we can see what you did with them! You can download from 4shared just one card. I’d recommend just going straight to Card Nirvana to pick all the freebies up at once though:).
**The Card Nirvana download is no longer available! You can now download them directly from this link:
https://carinagardner.com/studio/freedownloads/valentineskiddiecard.jpg
[ad]
Valentine Day Card Freebies! Read More »
I was just over at Decor8 and you should check out the giveaway Holly has going on! It’s for people who may have aspirations to open a creative business. Go check it out!
It’s Tuesday, so my lazy days collection is premiering at 2Peas in a Bucket! I LOVE, LOVE, LOVE being at 2Peas! The community is VERY cool and the designers are awesome!
If you get a chance, you should check out Sande Krieger’s blog…I’m always sneaking a peek at her stuff! It’s very fun and creative.
Amazingly enough, I am ahead of the game this year and I have already printed my Christmas cards. Remember my Costco post? So I ran 75 cards at Costco. I’ll give you the pros and cons. Pros: Wow! The turnaround time is AMAZING! I was expecting a couple of days…try an hour. Yes, I know it is called one hour photo, but at Christmas time I have seen it take them a LONG time to get cards to people. Another pro is that the size and photo itself are SO cool! And cheap ($15 for 50 plus the envelopes!). The cons…I was disapointed in the quality of the stock they print it on…it’s pretty flimsy as most Christmas greeting cards out there are. I love really nice thick stock for my cards. The flimsiness is probably made worse by how large the card is. Because many of you will be getting my Christmas card, I will just post some photographs from the shoot that my sister SuiKim took. I’ll post the actually Christmas card maybe a bit later.
Decor8 Giveaway & Christmas Photoshoot Read More »