
Craft Tutorial Favorite: Halloween Edition
Create a Fun Family Halloween Costume with Your Cricut or Silhouette Machine
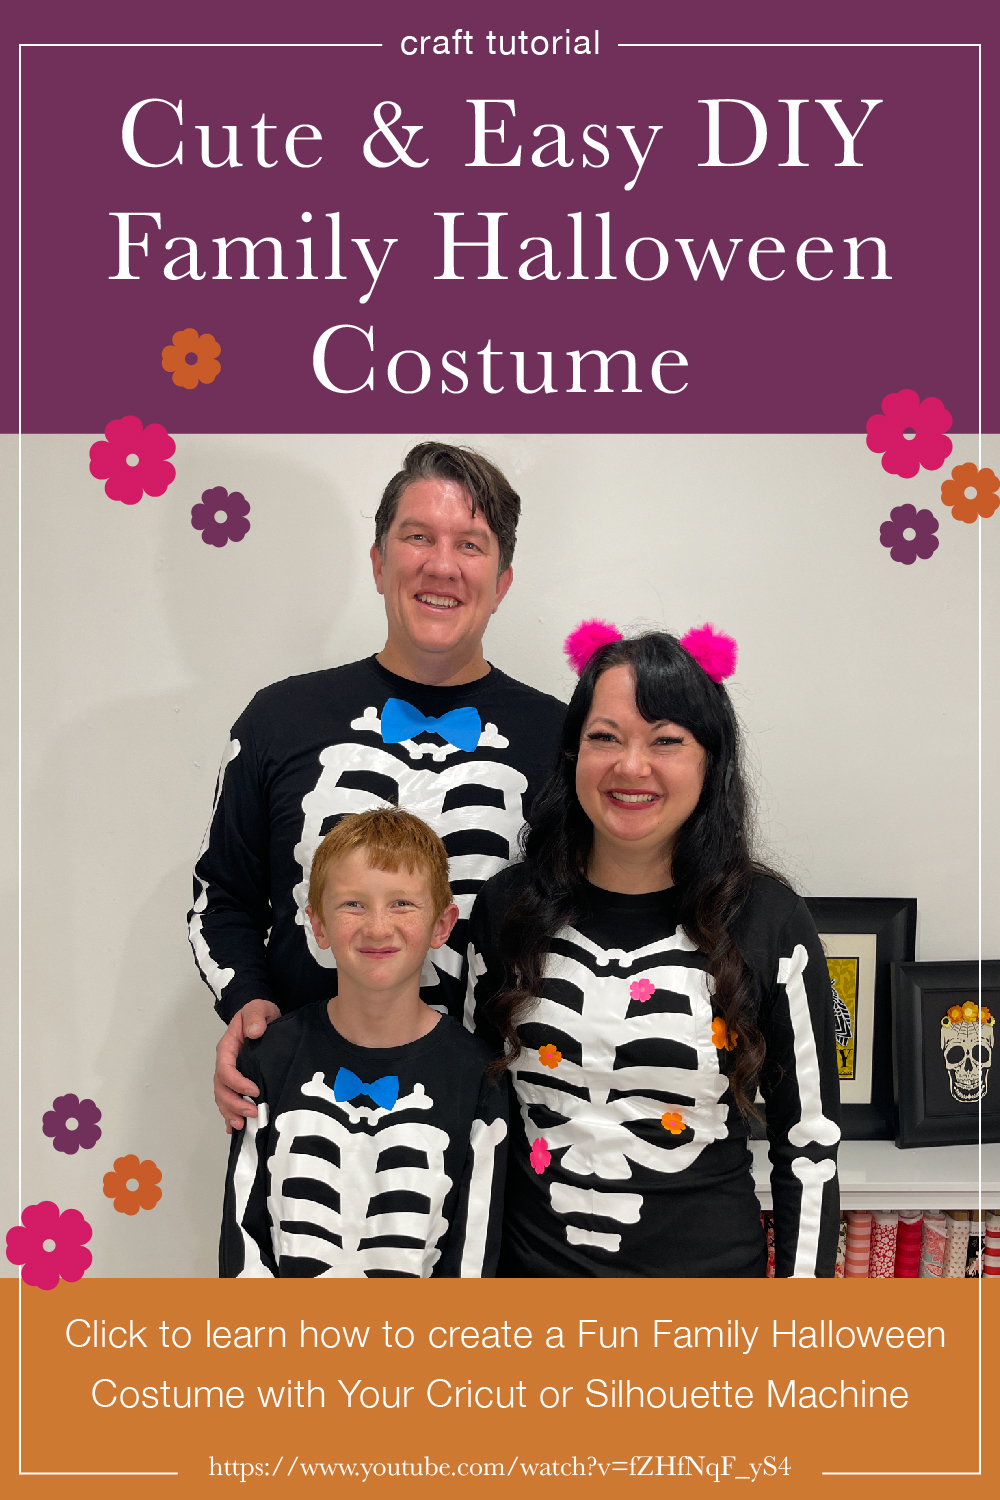
Get ready to create a memorable Halloween costume for the entire family with this fun and easy project! Using your Cricut or Silhouette machine, you can design personalized skeleton costumes that are sure to be a hit. Here’s what you need and how to get started.
What You Need:
– Silhouette or Cricut Machine
– Heat-Transfer Vinyl (White)
– Heat-Transfer Vinyl (Assorted Colors)
– Household Iron
– Skeleton Family zip file (provided)
– Blank Black Shirts
– Hook Weeding Tool
Step-by-Step Guide
- Prepare Your Materials:
Ensure you have all the materials listed above. The Skeleton Family zip file will be essential as it contains the designs you’ll cut out.
- Download and Upload Designs:
Download the Skeleton Family zip file to your computer. Unzip the file and upload the skeleton designs to your Cricut or Silhouette software.
- Cut Out Skeleton Bones:
Load the white heat-transfer vinyl into your cutting machine. Select the skeleton bone designs and cut them out. Be sure to size them appropriately for each family member’s shirt.
- Add Fun Accents:
Use the assorted colors of heat-transfer vinyl to cut out fun accents like flowers, bowties, and other personalized touches. This adds a unique twist to each costume and allows each family member to have a personalized skeleton.
- Weed the Designs:
Using the hook weeding tool, carefully weed out the excess vinyl from your cut designs. This step is crucial to ensure that only the design elements you want are transferred onto the shirts.
- Arrange the Designs on Shirts:
Lay out the black shirts and position the skeleton bones and accents on them. Make sure everything is arranged exactly how you want it before proceeding to the next step.
- Transfer the Designs:
Preheat your household iron to the cotton setting (or follow the heat settings recommended by your vinyl manufacturer). Place a piece of parchment paper or a thin cloth over the vinyl design on the shirt to protect it. Press the iron firmly onto the design, holding it in place for about 25-30 seconds. Make sure to apply even pressure and heat across the entire design to ensure it adheres properly.
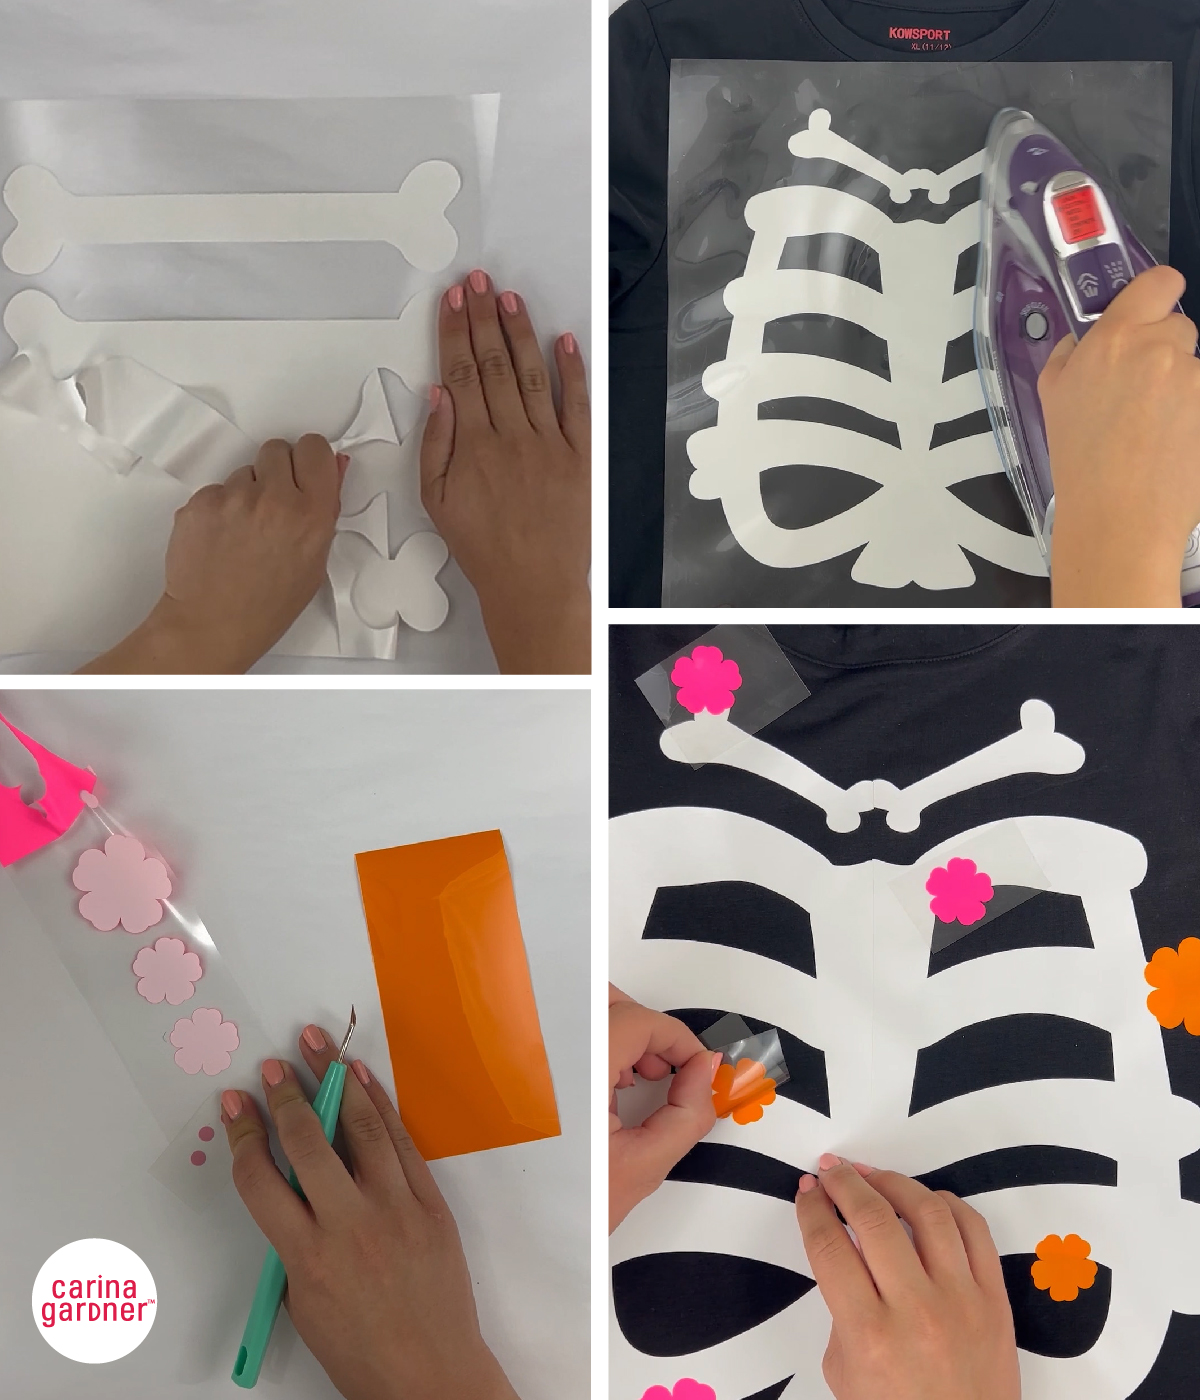
- Cool and Peel:
Allow the vinyl to cool for a few seconds, then carefully peel away the clear backing. If any part of the design lifts, reapply the iron and heat it again.
After creating your custom skeleton costumes, you’ll be ready for a Halloween to remember. Don’t forget to take pictures of your family in their unique outfits and share them on social media. Tag us @carinagarder so we can see and share your amazing work!
Tips for Success
– Test a small piece of viny
l on a scrap piece of fabric to ensure your iron settings are correct.
– If you’re new to using heat-transfer vinyl, practice with simpler designs before attempting more complex ones.
– Get the whole family involved in the design process for a fun crafting experience!
Creating these skeleton costumes is a fantastic way to bond with your family while making something truly special. Happy crafting and have a spooky, fun-filled Halloween!
Craft Tutorial Favorite: Halloween Edition Read More »


 What to Expect:

 I have a couple of new free kits that I am giving away to everyone. I love digital scrapbooking, and I haven’t had a lot of time to work on layouts recently! Making these new kits did a world of good for me as I “shabbied” paper to my heart’s content.
 You can download this kit for free at my upcoming Designer Sale at


 I haven’t had a giveaway for a while so here’s one that only lasts a day! It starts NOW and ends Thursday morning at 9am Mountain Standard Time. It’s from my popular Design 365 Color Kit Series (yum, yum!) and is normally $9.99 in the store (but will be 30% off this Thursday only). I’m giving away Design 365 Color Kit #2 (see to the right) to someone who makes a comment on this post on their favorite fabric from my
 So just make a comment in this thread and I’ll do a happy random dance to tell you all the winner on Thursday morning.
 I promised a Christmas goodie and here it is! An advent calendar that you simply clip to a line. Add treats to the cones so your little ones can take one out everyday. This is a LARGE download because all of the 8.5 inch x 11 inch files are PRINT READY (300 dpi).


 My tray on the desk keeps me “organized”. Well, sort of, I just dump things in it. It makes the desk less cluttered. It also holds my ugly hard drive (hidden under my Arts & Crafts book!).


 I love the rubons because they are so simple and really take all the work out of this project.


