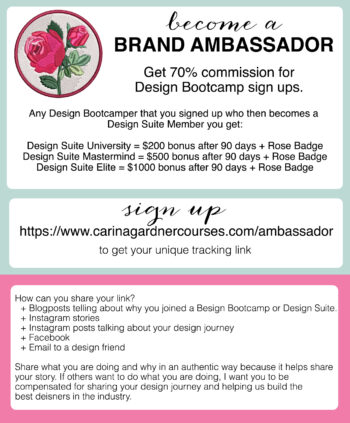
Are you interested in becoming a brand ambassador for Carina Gardner? We are super excited to announce that we have started our brand ambassador program!
What’s a Brand Ambassador?
Our Brand Ambassador is a program that allows anyone to have an affiliate link to share with others to join our Design Bootcamps! You earn a 70% commission for each person that signs up for a Design Bootcamp using your unique link.
If a Design Bootcamp participant then signs up for Design Suite, we give our Brand Ambassadors the following:
Design Suite University: A $200 bonus after 90 days and the Rose Badge
Design Suite Mastermind: A $500 bonus after 90 days and the Rose Badge
Design Suite Elite: A $1000 bonus after 90 days and the Rose Badge
Authenticity really speaks to people, so we recommend sharing your experience in Design Bootcamp. Be open about your design journey, why you got started, and how the bootcamp or Design Suite program has benefited you.
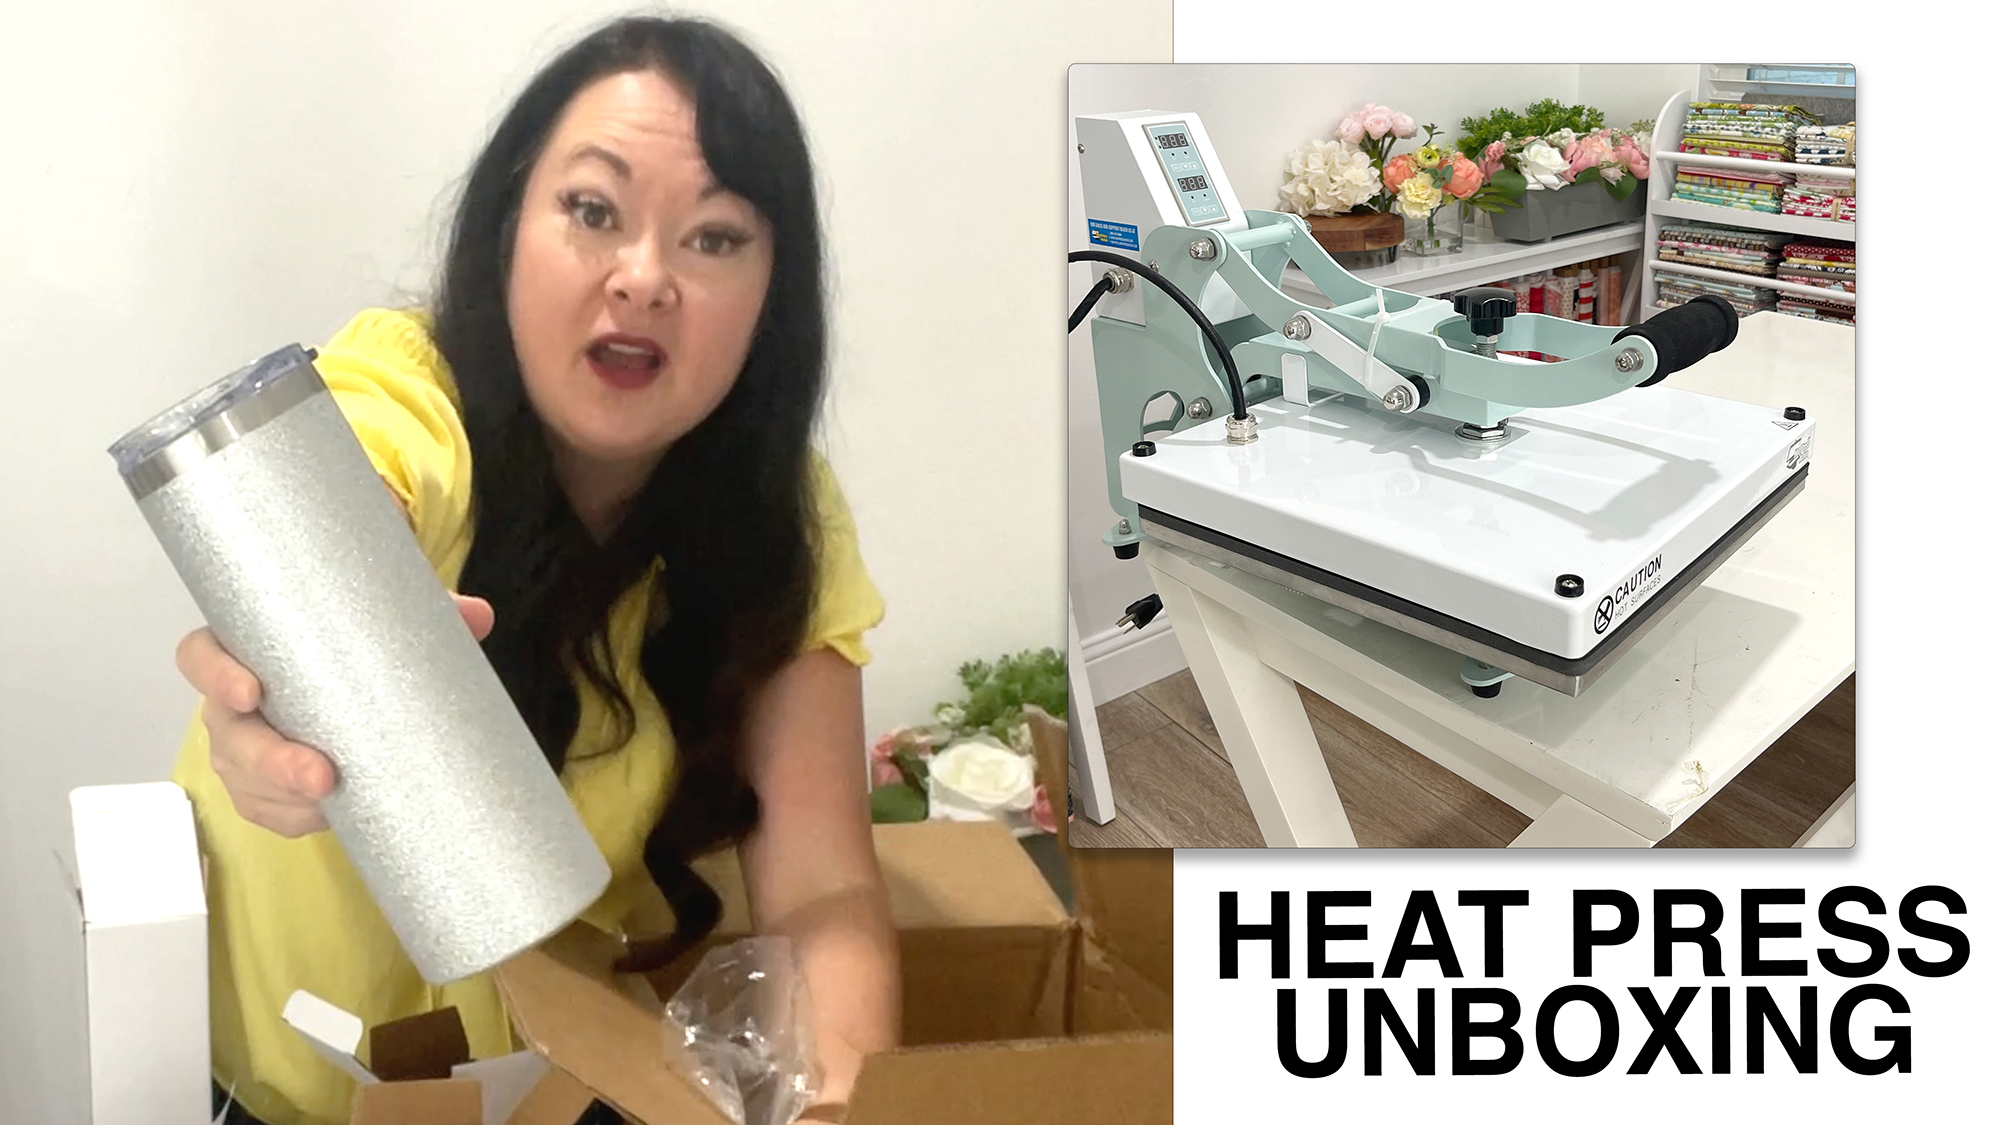
Today I am unboxing at HeatPressNation CraftPro 15″ x 15″ Crafting Transfer Machine in Mint, HPN Signature Series 2-in-1 Automated Sublimation Mug and Tumbler Press, and accessories!
HPN Signature Series 2-in-1 Automated Sublimation Mug and Tumbler Press
HeatPressNation CraftPro 15″ x 15″ Crafting Transfer Machine
SubliCraft by HeatPressNation 16 oz. Stainless Steel Sublimation Skinny Tumbler
SubliCraft by HeatPressNation 16 oz. Stainless Steel Sublimation Skinny Tumbler
SubliCraft by HeatPressNation 20 oz. Stainless Steel Sublimation Skinny Tumbler with Straw – Glitter Silver
SubliCraft by HeatPressNation 20 oz. Stainless Steel Sublimation Skinny Tumbler with Straw – Glitter White
Pro Grade Non-Stick Parchment Paper for Apparel – 15″ Roll
Heat Tape for Sublimation Mugs and Tiles
Twincore Tape Dispenser
I have some great craft videos coming up with sublimation that I’m so excited to share! I’m making some fun things for friends, Halloween, and Christmas!
XOXO,
Carina
Some links on this site may be affiliate links. If you purchase a product using the link I may receive a small commission. I will only link to products I support and/or use personally. All opinions are truthful and my own.
The “R” word always makes people stressed out. And technically, with two quarters in an economic turn, we ARE in a recession.
Instead of worrying about what the economy looks like or the price of gas, I focus on what I can control and what skills will keep me relevant.
Over the last 14 year of owning my business, I have seen many ups and downs. Through it all this one little skill – DESIGN – has gotten me through it.
That is why I believe that being an excellent designer is a way to be recession proof and bring stability to your finances.
When the pandemic started in 2020, I wondered if my design business would come out okay. I remember writing a list of things I could do to supplement my income if earnings fell. Great design skills (and the ones I teach in Design Suite) can help me in ALL realms of design…not just paper and fabric as I am known for.
That’s why it’s not a leap to see one of my designers take a corporate job in design even if they are trained to become a surface pattern designer (and yeah, I have had this happen).
In fact, in Design Suite I created a Freelance Design Course so my designers have the skills and knowledge to pivot when needed and also be recession proof.
I can’t explain just how important becoming a designer has been to be creative and financially secure.
If you have wanted to create additional design skills, learn how to earn money, and you need a first step, enroll in one my Design Bootcamps to learn strategies I used to get started.
To learn more about why I believe that design is recession proof, listen to episode 168 on our podcast here:
Today I’m unboxing the new award system for Design Suite! We also just got a new case of our signature Design Suite Tote!
If you haven’t heard of my Design Suite program before, it’s the only design mastermind that teaches members how to make money as they learn how to design. It’s a year-long program with 17 courses (WHAT!) and weekly meetings to give our members one of a kind experience.
You’ll notice on that page that there is no way to actually purchase Design Suite. That’s because we only open it up in Design Bootcamps.
I like to make sure that my Design Suite members understand what I teach and how we make money. We do that by having anyone interested go through a Design Bootcamp. In Design Botocamp, I teach our core principles, signature framework, and how to build residual income. I like to be realistic about the challenges and why the market isn’t as saturated as you think.
I often get asked if going back to college is the best way to become a designer.
If a design degree is what you are seeking, I will always encourage people to get one if they would like it. However, if you are more interested in working as a designer, there are certainly ways to bypass the college process.
In fact, this is precisely why I created Design Suite program.
So, let’s quickly talk about the college programs. If you have been to a typical four year college, the first two years are usually dedicated to prerequisite courses like math and english. The last two years are generally focused on the degree specific courses. When I taught design at the University of Minnesota, course work included foundational classes, packaging design, typography, color theory, and more.
Part of the reason we teach a wide variety of theoretical design classes at a university is to make sure students are getting a well-rounded education. If you are someone who wants that, a university degree is a great solution for you.
If you are more interested in digging in and designing now, then learning via online courses and programs is the best way to move forward. Many designers who want a more niched route are looking at becoming Cricut designers, surface pattern designers, sticker or printable designers, or another niche market.
So, do you need a design degree to become a designer? No. You do, however, need the right tools and knowledge. There are many online programs and courses that can help get you there.
Are you interested in maybe something in between University coursework but, at the same time, learning to design now to make money? My Design Suite was built to be the middleground between University level course work (niched down to teach practical tips) and business (learn to design for shops and making money while in the one year program). You can learn more in a Design Bootcamp! In these bootcamps, we provide some useful tips and discuss the Design Suite program in greater detail.
If you want to learn more about how to become a surface pattern designer without going back to college, listen to the Podcast Episode 167 here:
If you’re familiar with my blog or podcast, you have heard me mention Design Suite. Here’s a little more info on my signature design program.
I only open up the Design Suite program in Design Bootcamps. It is set up this way because it is incredibly important for designers to understand the strategies involved, best practices for selling designs, and what holes are missing in their design businesses.
As designers, it is easy to get excited about the creative work. This is the “design” part of a “design business.” What is often missing is the “business” part.
This is why many designers never make any money.
One of the goals of Design Bootcamp is to start the education process of becoming a design business that understands what it takes to make money.
Design Bootcampers who understand the principles I teach and are ready to invest in creating a design business are invited into Design Suite.
So what happens in the Design Suite Mastermind? This one year membership includes 17 courses that are specifically meant for surface pattern designers and crafters. It also includes weekly meetings and community for support that actually moved your design business forward.
Some of the types of meetings you will experience in the program are Mentor Meetings, coaching sessions, peer led discussions, and guest expert meetings. We also meet quarterly in Virtual Conferences to stay up-to-date with trends and software changes.
What’s New in August 2022?
We are so excited to announce that we’ll be releasing a Design Suite Handbook in August 2022 for all Design Suite Mastermind members. This physical handbook will include things like roadmaps, cheat sheets for the courses, trackers, and worksheets.
We are also thrilled to be starting an awards system in August! These awards help celebrate all of the wins that are required to build a thriving design business.
More on Design Suite
To hear more about Design Suite, and the upcoming changes, check out the Podcast Episode 166 here:
Setting it up was SO easy! Sometimes I get nervous about putting in ink cartridges but this was a snap!
I know most of you like to use my SVG files (aka Silhouette and Cricut cutting files) so this new machine is going to be fun to play with! Sublimation uses a heating element to fuse png or jpg files all at once. I’m used to layering everything with my heat transfer and vinyl projects with my cutting machine!
I will for sure be playing with my print and cut SVG files with this sublimation machine!
Other things to note, Sawgrass has an amazing onboarding phone call that is FREE when you purchase a printer. Go to https://www.sawgrassink.com/ to set up the call.
The call was so helpful because they walked me through the paper, ink, and getting everything right on my computer to print! Whoopee!
So what am I going to use this sublimation printer for? I think I’m going to start with some tumblers and then make some t-shirts! I’ll make sure and document my process via video!
Twenty years ago while I was in the academic system, portfolios were a necessary part of getting design gigs. I still believe a great portfolio can be a job catalyst for designers just out of school. If you are a freelancer in my program, I will also encourage a portfolio. However, if you are getting into surface pattern design or a crafting specialty, I don’t recommend a portfolio.
The topic of creating a portfolio has come up in my Design Suite Program on numerous occasions, which is why I want to address this today.
When you’re in a specific field like surface pattern design, the best way to show your work is to be SELLING your work. Your portfolio IS the shop you are designing and selling in.
Experience as a designer is far more important than a portfolio. That’s because you will be learning from that shop which of your art is being sold. The main point of a portfolio is to get you a corporate design job or get you that freelance gig. If you are in a shop, you are past needing a portfolio.
Do you love this kind of design information? If so, come check out one of my Design Bootcamps!
To hear more about why you don’t need a portfolio, check out the full podcast episode here:
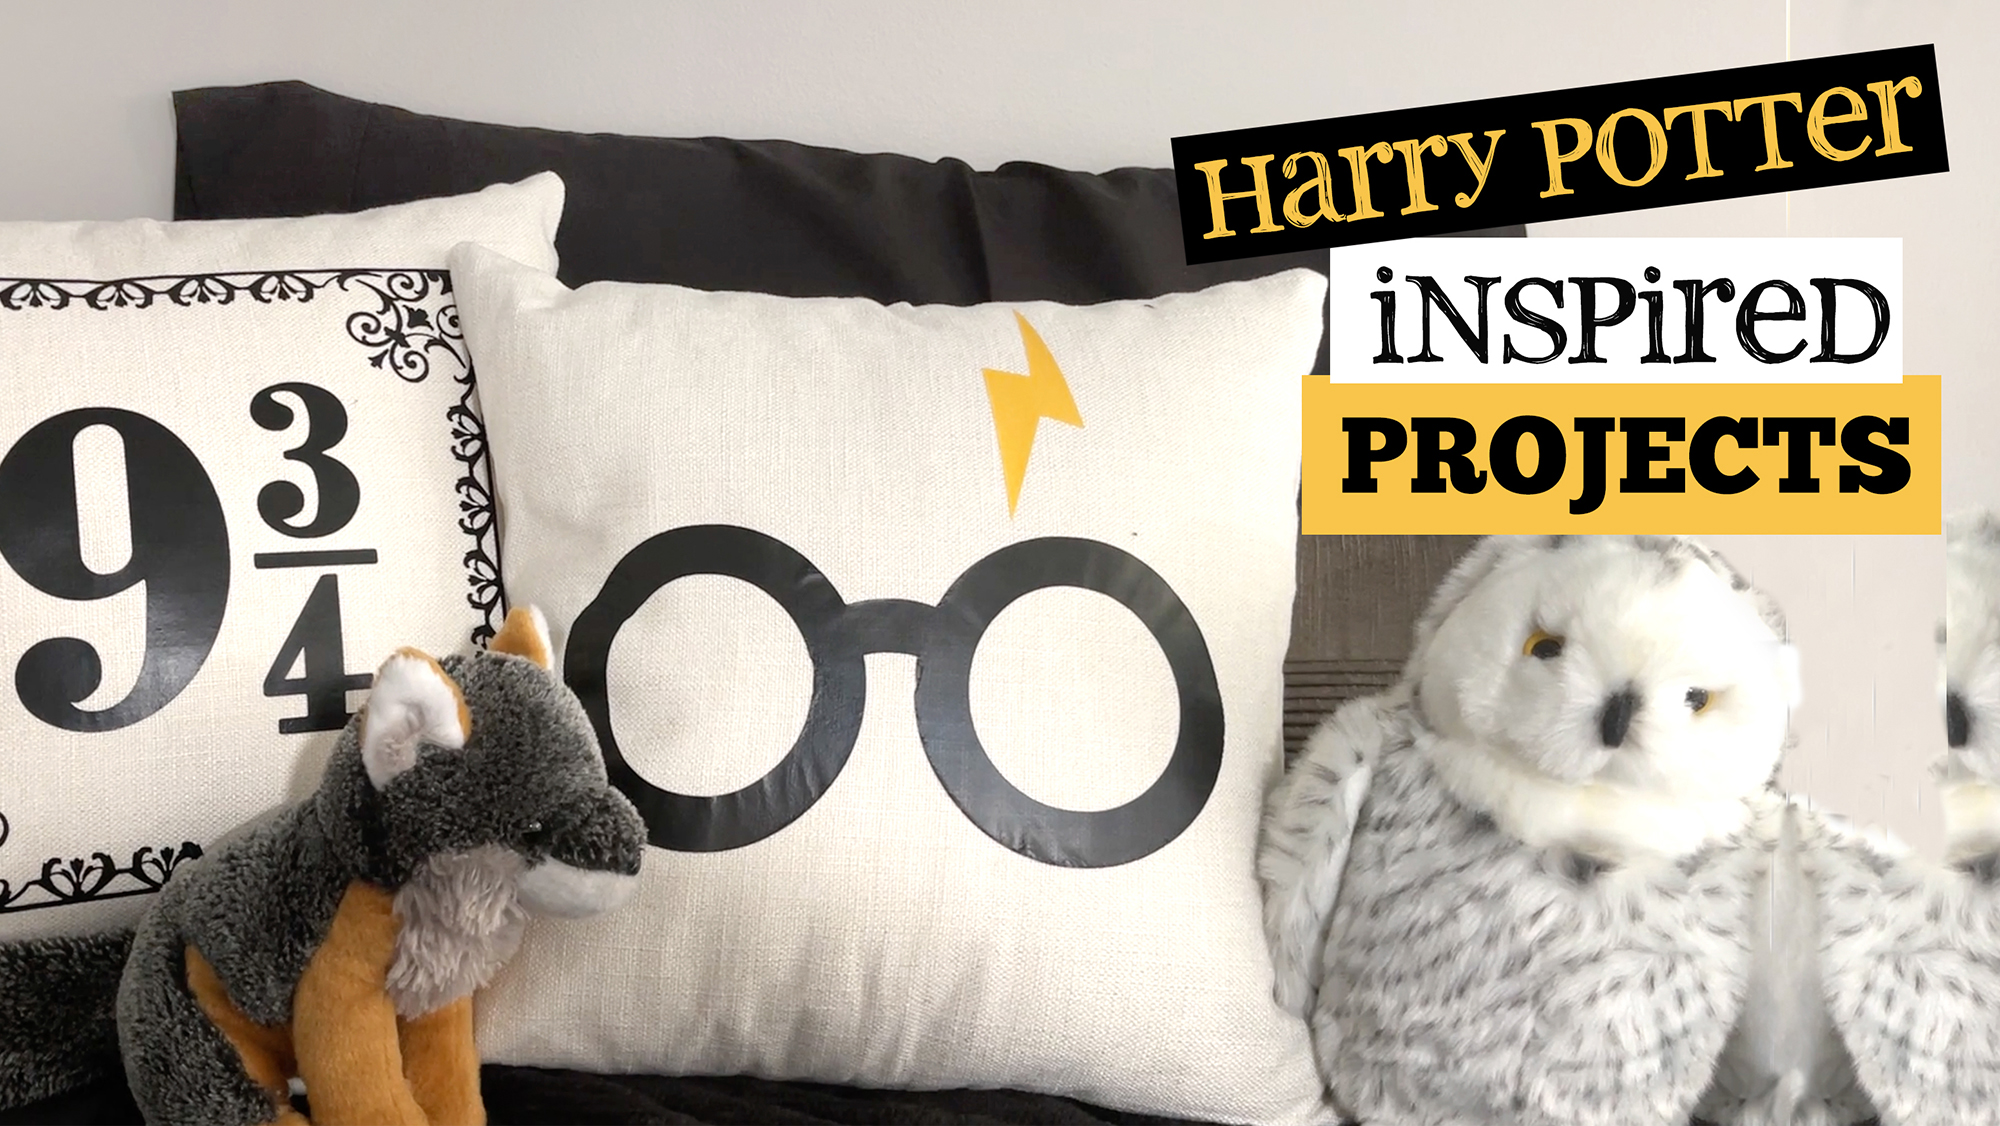
Have you joined our Cricut and Silhouette bundle membership? $4.99 for our gorgeous set of files all inspired by Harry Potter for Witch and Wizard month.
Join the app to get access to this month’s download. Past bundles available at carinagardner.com for $9.99
When I started surface pattern design 15 years ago, one of the things I wanted was a contract to work with a company. Options were limited, and I think that I was blissfully ignorant of how complicated this road was going to be.
Today, there are many ways that surface pattern designers can make money. Designers no longer need to rely on manufacturers alone to create income. Online marketplaces now provide ways to sell digital products and freelance work. The income is more stable and flexible than ever before!
There has never been a better time or more transparency about the process of becoming a designer as now. If you’ve been thinking about getting into surface pattern design, I want to challenge you to start learning the software, building networks, and learning where you can sell your designs.
It’s hard to predict the future. Many designers who took time off, wish they could go back and do something different. I want to emphasize that focusing on the NOW will propel you forward. This is exactly how I run my design business, and how I recommend you run yours.
While doing this, I look for lessons I’ve learned from the past to determine the opportunities in the future. It’s vital to be hopeful and positive to get those creative juices flowing!
The little steps you take add up. Perseverance and consistency are important attributes of successful designers. Oh, and this crazy little thing called adaptability. It’s an ever changing world and the faster you can pivot your designs, the better your financial future will be.
Many people dream of creating a surface pattern design business or businesses in the craft field like sublimation, Cricut or Silhouette files, Glowforge files, or printables. As my own design business has flourished over the last 14 years, I have turned part of my focus to helping other designers get started in this field.
Today I want to focus on surface pattern design since this was one of my early goals when I was a new designer.
Many of the things that I’m going to cover today are also in my New Designer Checklist. You can get this free download by going to my Instagram and following me at @carinagardner. If you comment “CHECKLIST” on the most recent post, I’ll send you a PDF link in your DMs.
This checklist contains six practical points to help you get started. Today I’m going to talk to you about three of those.
The Top Three Things You Need to Start Your Surface Pattern Design Business
Tools
1. Tools are everything. In Stephen Covey’s “Seven Habits of Highly Effective People” he says to “sharpen your saw.” Abraham Lincoln said, “If I only had an hour to chop down a tree, I would spend the first 45 minutes sharpening my axe.” Both Abraham Lincoln and Stephen Covey understand that tools save you time and money. A sharpened saw or axe will make the work go quicker.
I’ve been known to tell people to hold off on joining my Design Suite program until they have purchased the right tools.
One example of something I do not skimp on is computer memory. I will pay extra to put more memory into my laptop because I know it will save me hundreds of hours of time because the computer will go faster.
Software
2. I’m a huge advocate of the Adobe software. I have been using the software for over 20 years and it is the gold standard. While there are a lot of new programs out there, none will help you create your final production pieces. Do the hard work and learn Adobe Illustrator and Photoshop and it will serve you well as a professional designer.
Other tools like Procreate can be used in conjunction with the Adobe Software (many of our courses reference Procreate and many of our Design Suite members use it). However, we have to finalize all design work in Photoshop or Illustrator before sending it on to it’s final destination.
I get a lot of resistance to this because many people really emphasize that the other programs are so much cheaper. Have you heard the saying, “you get what you pay for”? This is certainly the case with design software.
A Plan
3. Finally, you need a plan for selling your designs. I talk about this in my Design Bootcamp because it is such a vital piece of making money as a designer. This was one lesson I personally learned.
I find that many people go into design with the mentality that they are just going to make what they like. Creating a plan for who you are designing for will make your design work stronger and help you build for the final production stages.
Do you know where to start now? Are you ready to learn more?
It’s time for an Easter project round up. Happy springtime and “hoppy” Easter season! Today we’re going to take a look back at some of the fun projects that I’ve done over the past couple of years! These fun items to add a touch of Easter to any decorations or displays that you’re putting up to celebrate.
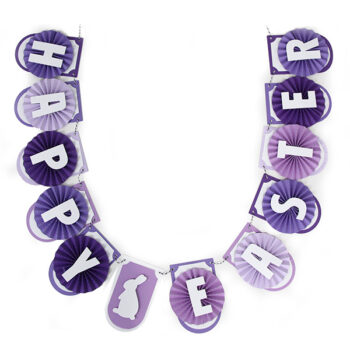
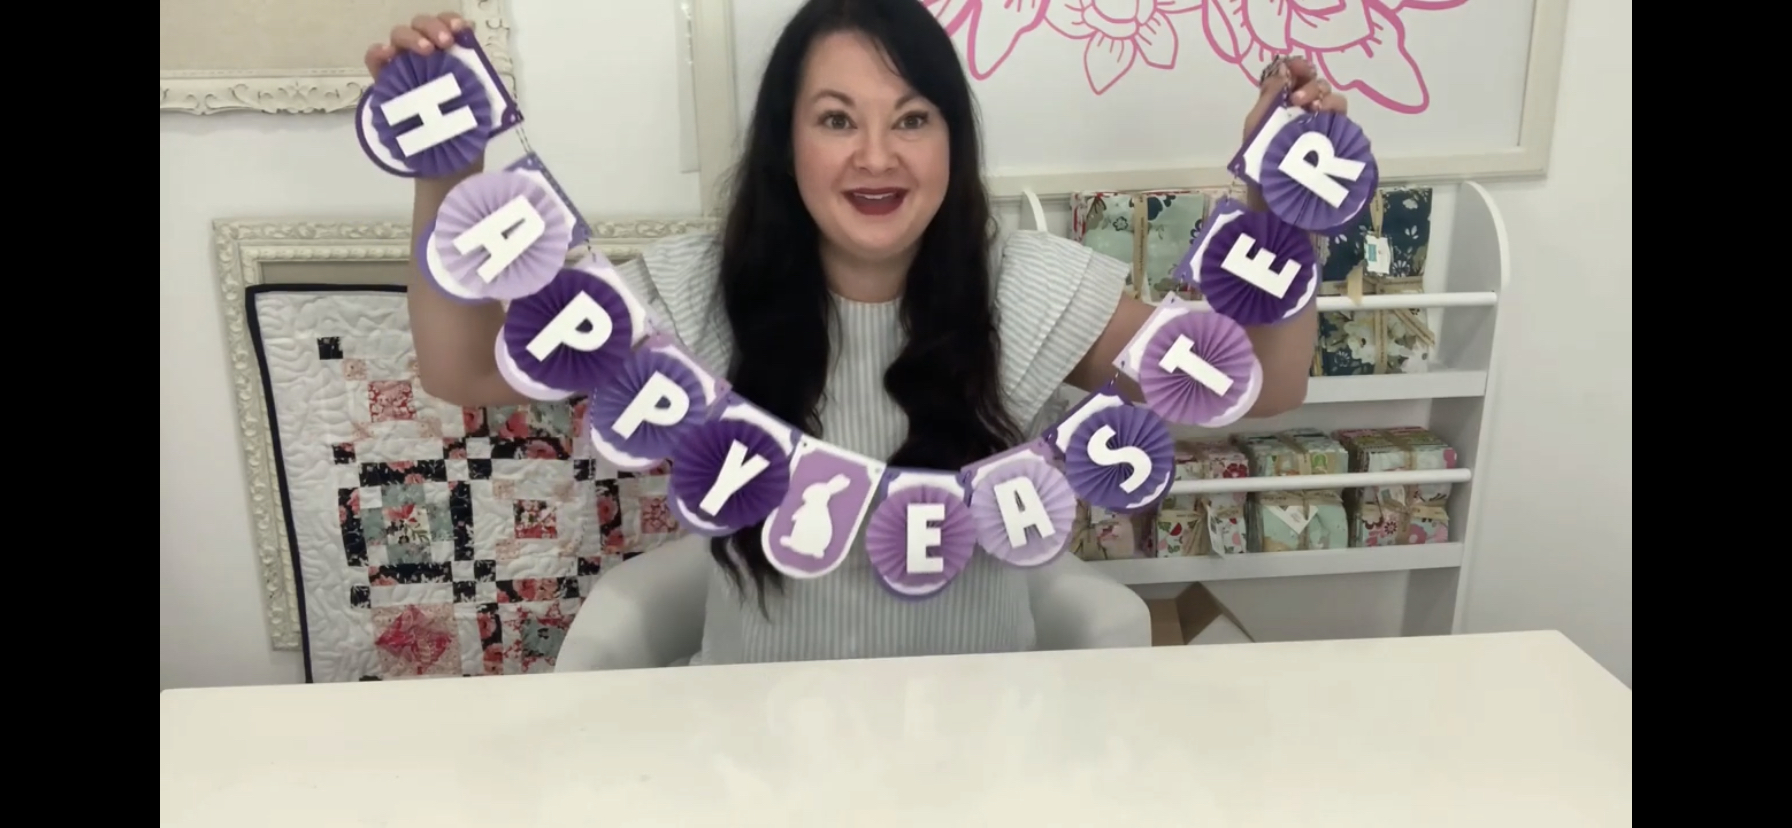
Happy Easter Banner
First up is this decorative Layered Easter Banner! Whether you hang it along a wall or in an archway, what better way is there to say “Happy Easter” than this banner? Its accordion cuts, fun textures, and optimistic messaging make it beam with “Spring is here, so let’s celebrate!”
Such a fun way to set the stage for a beautiful Easter display!
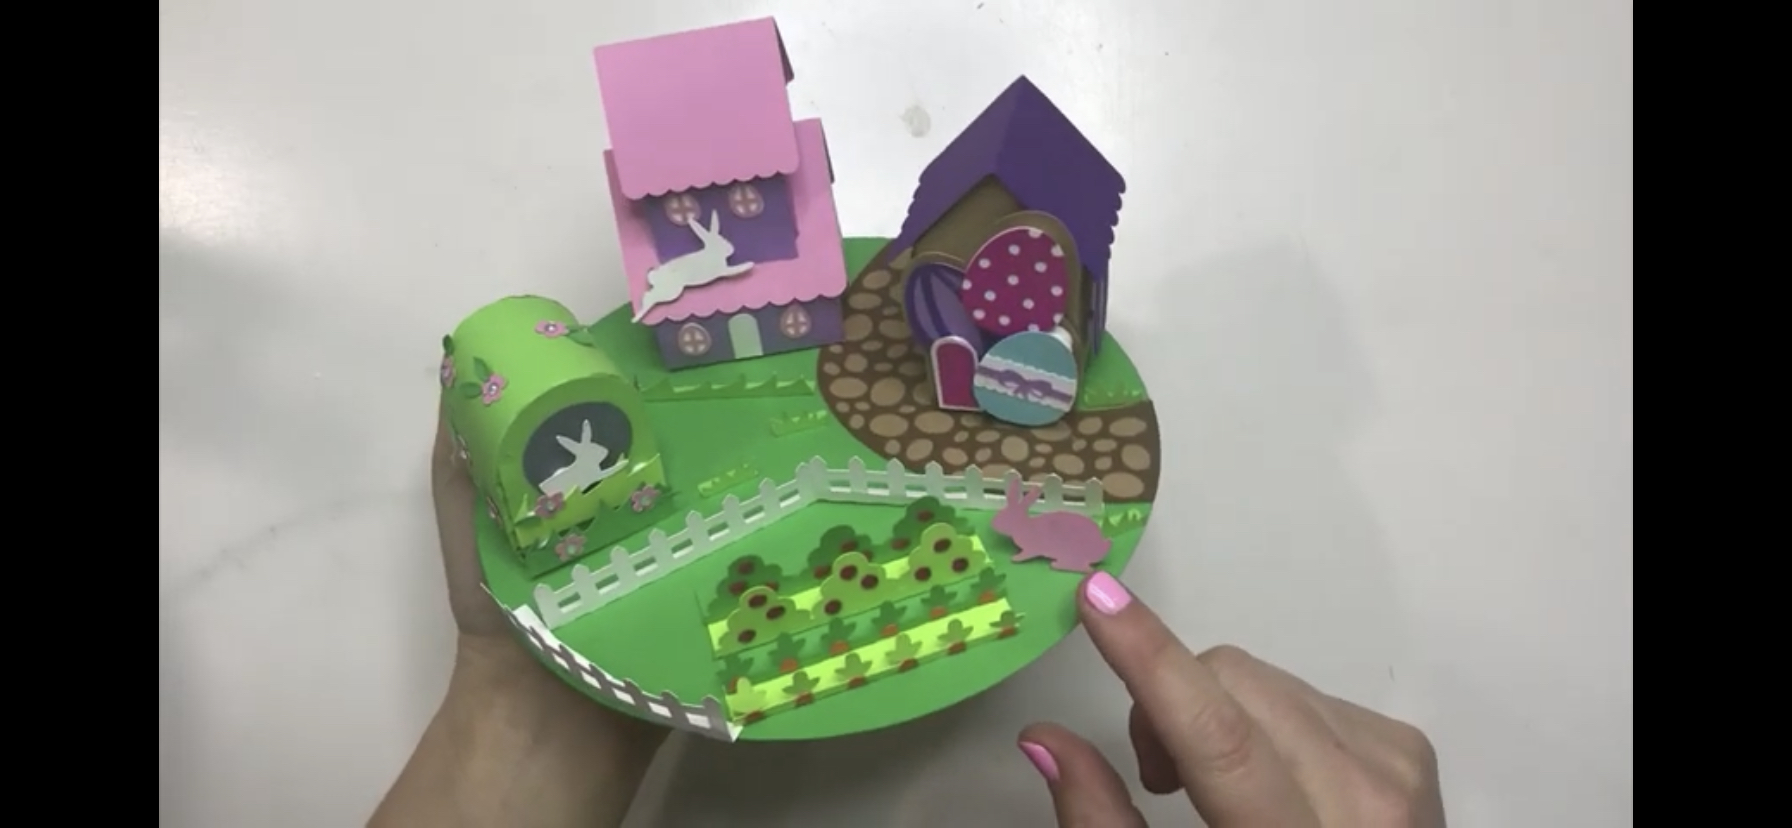
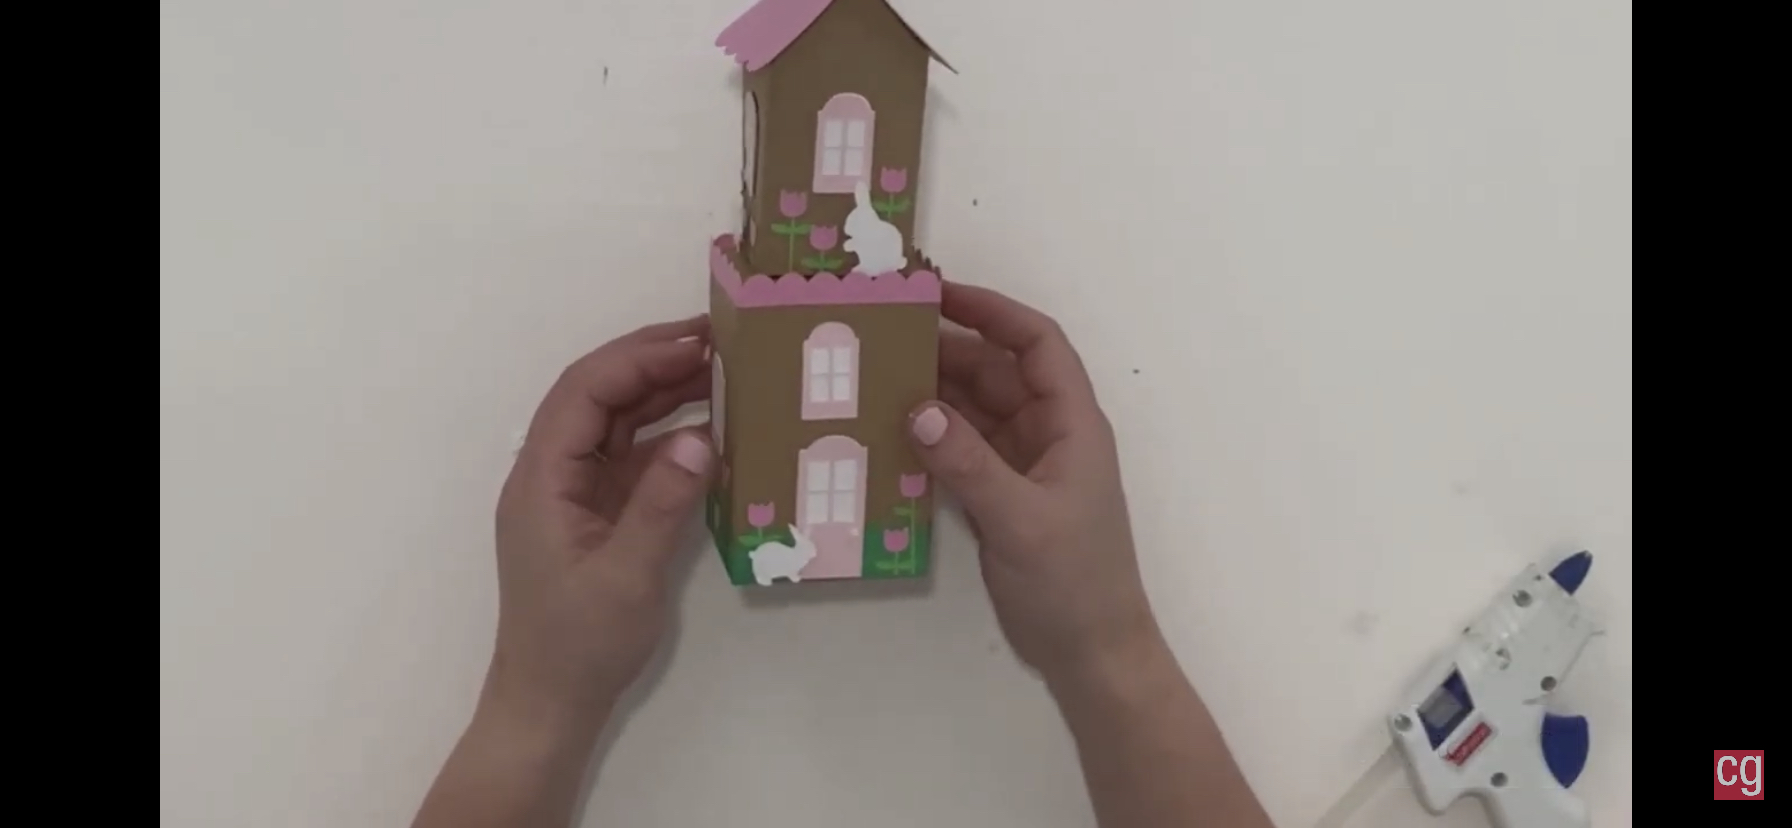
Next up in our Easter project round up, we have two pieces that you can display together or display separately. The Mini Tabletop Easter Village is perfect for putting on a cake plate. It can also serve as a centerpiece and will add decorative flair to any Easter display. Give little bunnies adorable places to live! Choose from the two houses or bunny den that lovingly overlook the cute easter garden in this colorful vignette.
The little village brings joy to any room as a standalone or it can be paired with my Best Bunny House to build a little Easter Bunny metropolis (well, the beginnings of one, at least!). Combined with the Village or on its own, the Bunny House combines cute flowers, adorable bunnies, and a double-decker design to add a flourish of Easter fun to any room or table top. The darling spring garden that surrounds the house makes this a fun and colorful way to celebrate springtime and the Easter season.
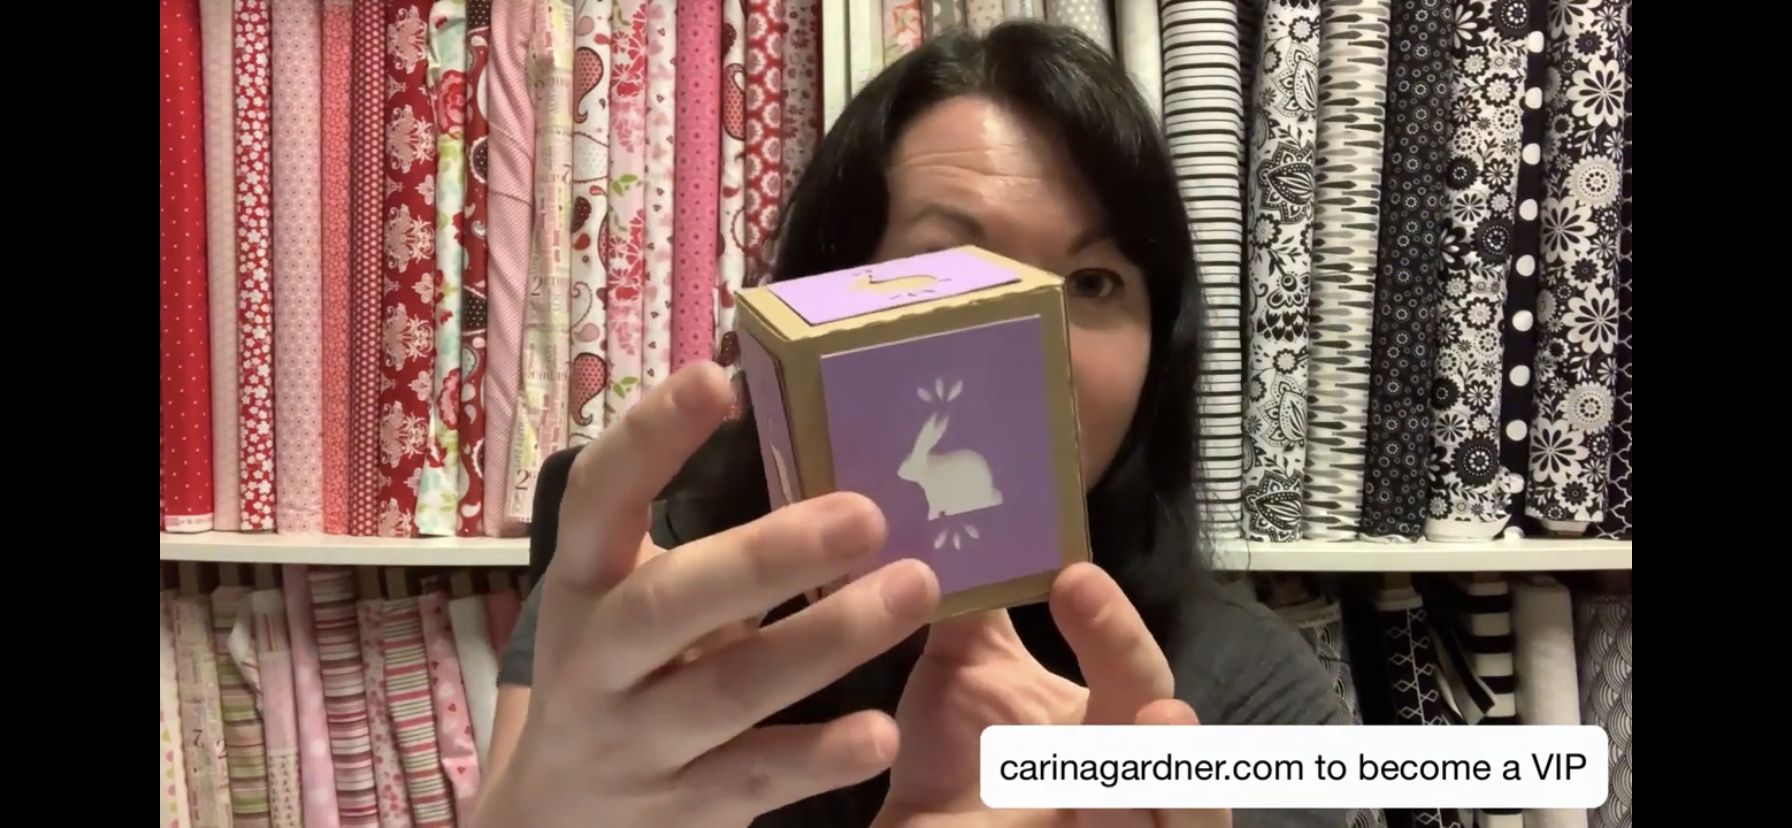
Last up, we have an adorable little project that can be used in a number of ways!
The Flat Folding Bunny Box is the perfect way to package party favors or to wrap up a little Easter present you’d like to give someone! Stacking several of these boxes in different colors is also a cute way to create a stackable Easter display to add a touch of pastel panache to a room for the holiday.
I hope you’ve had as much fun revisiting the Easter project roundup as I have! If you’d like to join my VIP group so that you can get designs like these as freebies in your inbox every week, go here: http://eepurl.com/dN2RcY. I regularly RESEND files to be sure to sign up so that you’re getting all my free tutorials!
Like getting freebies? To join my VIP group for free, go here: http://eepurl.com/dN2RcY. I regularly RESEND files so be sure to sign up so that you are getting all my free tutorials!
Want to learn more? To join my VIP group for free, go here: http://eepurl.com/dN2RcY. I regularly RESEND files so be sure to sign up so that you are getting all my free tutorials!
Like getting my patterns and freebies? To join my VIP group for free, go here: http://eepurl.com/dN2RcY. I regularly RESEND files so be sure to sign up so that you are getting all my free tutorials!
Like getting freebies? To join my VIP group for free, go here: http://eepurl.com/dN2RcY. I regularly RESEND files so be sure to sign up so that you are getting all my free tutorials!
Like getting freebies? To join my VIP group for free, go here: http://eepurl.com/dN2RcY. I regularly RESEND files so be sure to sign up so that you are getting all my free tutorials!
Like getting freebies? To join my VIP group for free, go here: http://eepurl.com/dN2RcY. I regularly RESEND files so be sure to sign up so that you are getting all my free tutorials!
Like getting freebies? To join my VIP group for free, go here: http://eepurl.com/dN2RcY. I regularly RESEND files so be sure to sign up so that you are getting all my free tutorials!
I send out links to my new tutorials and free pdfs to my Courses VIP Group! To join my VIP group for free, go here: http://eepurl.com/dN2RcY. I regularly RESEND files so be sure to sign up so that you are getting all my free tutorials!
Want to join my new Design Bootcamp? For only $17 start learning how to design and what you need to do to make money!
I send out links to my new tutorials and free pdfs to my Courses VIP Group! To join my VIP group for free, go here: http://eepurl.com/dN2RcY. I regularly RESEND files so be sure to sign up so that you are getting all my free tutorials!
Today is also the day I sent out a FREE SVG my VIP Silhouette Group. To join my VIP group for free, go here: http://eepurl.com/dN2RcY. I regularly RESEND files so be sure to sign up so that you are getting all my free tutorials!
I sent the free pdf for this project to the Fabric VIP Group! To join my VIP group for free, go here: http://eepurl.com/dN2RcY. I regularly RESEND files so be sure to sign up so that you are getting all my free tutorials!
I rarely post my personal projects but since I moved into a new house 9 months ago I started posting to my instastories some of my renovations. I decided I better start documenting them on my blog as well. Partially for myself and for anyone else considering these types of projects.
First off, I’m just an amateur having a good time making changes to my house. I’m not afraid of a little work. That being said, I definitely underestimated what it would take to paint my house.
If you have painted brick before, comment below. You can also see all my in process videos on my instagram feeds (in particular at @carinagardnerdesigns).
Here’s a little video I put together that will help you see what I did on weekend one. Josh helped me do a lot of the top of the house (I’m scared of heights), but I did get up there to hand paint a few areas.
Here is a before picture of my house.
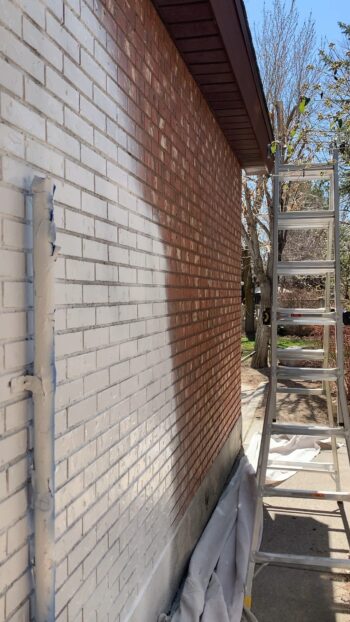
The brick needed washing and cleaning. It wasn’t too hard with a pressure washer. However, the stucco had old iyy stuck to it and it was a beast to work with. I spent 8 hours cleaning the back of my house from a ladder. I couldn’t reach the ivy on the back side of the house. I”ll be using a boom lift on week 2 to get to that.
I love the look of ivy, but now that I have had to clean it off, I won’t let it grow on this house!
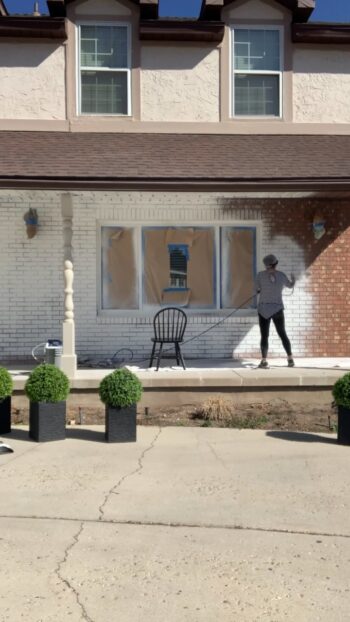
The brick needed primer first, which I put on after 2 prep days. I bought my sprayer from Home Depot (This is NOT a sponsored post, BTW). I ended up with Magnum 5X, which was about $350. I highly recommend this for brick. I originally thought I was going to just roll it (ya, that wasn’t going to work).
As for paint color, I was trying to decide between alabaster, white dove, and swiss coffee. I went with swiss coffee because of my dark brown roof. Jury’s still out on whether I chose the right white. I thought I wanted it warm but I’m not sure that I love the way it looks at all points in the day. If you are looking for a truer white, I would recommend white dove. If you like this creamier look, check out swiss coffee.
I ended up painting about 2-3 coats of the swiss coffee on the front of the house and most of the bottom of the house.
I decided a few months ago on a blue on my front door. I simply taped paint chips on the door and looked at it at different points in the day.
Feel free to comment below whether you have painted stucco and brick before!
I’ll post before and after pictures in a week when I finish the house!
Here are some of the things I have left to do:
Columns Redone
Paint the backdoor
Prep and clean up of the back side of the house
Paint the top of the house
Clean up of the eaves and rain gutters
So that was a quick look at week 1. Hope you enjoyed this!
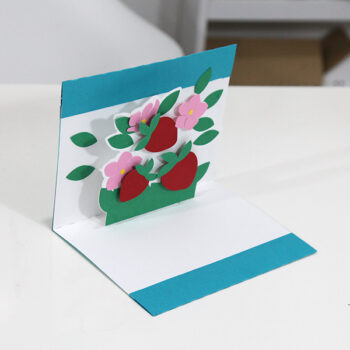
I recommend going to that post to see the video! There are LOTS of these Pop Up cards hitting my shop so enjoy! See the ones coming out this week in this post!
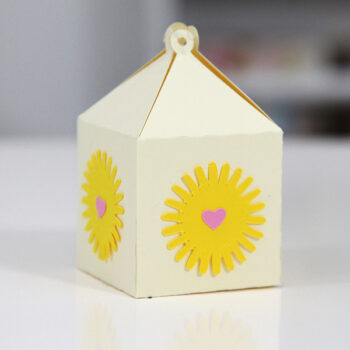
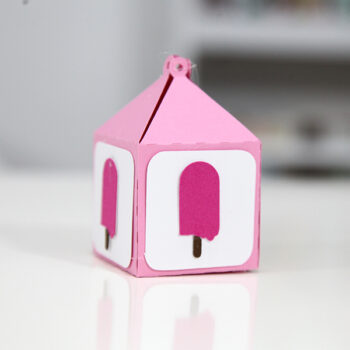
Favor Boxes
These are simple and the best way to see them get put together is to visit my instagram feed at @carinagardnerpapercrafts.
If you are nervous about putting these together, here are some simple instructions:
Fold on all the score lines.
Use stick glue or hot glue to layer the images on the side before gluing the box together.
Use the tabs to glue together the side of the box.
Use twine or ribbon to keep the top together to hang this or put a bow!
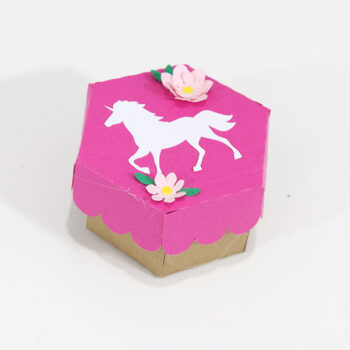
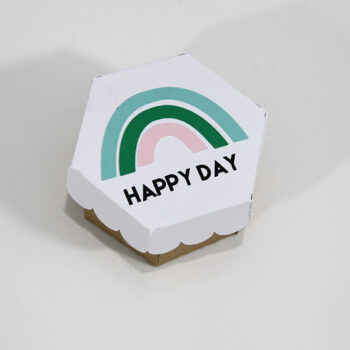
Hexagon Boxes
I LOVE hexagon boxes with lids. They make great party favors.
These are simple and the best way to see them get put together is to visit my instagram feed at @carinagardnerpapercrafts.
If you are nervous about putting these together, here are some simple instructions:
Fold on all the score lines.
Use stick glue or hot glue to layer the images on the lid before gluing the tabs.
Use the tabs to glue together the side of the box. Then glue all the tabs on the lid!
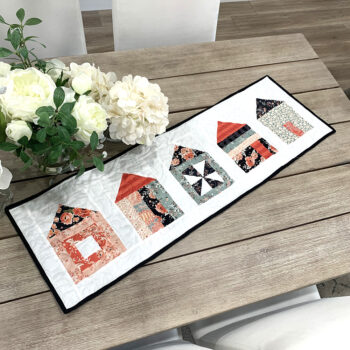
This has been such an enjoyable week making this table runner with you! I hope you enjoyed it to! I wanted there to be an easy place for you to access all the videos so I made this blogpost for you. If you scroll down you will find measurements for all the pieces. For the full pattern, please subscribe to my Fabric VIP group. I regularly resend out pattern and I’ll add this one into the rotation!
Measurements for this 6 in. X 9 in. Block
Roof – (cut 1) 3.5 in. x 6.5 in.
White Roof Sides – (cut 2) 4 in. X 4 in.
Top House – (cut 1) 3.5 in. X 6.5 in.
Sides – (cut 2) 2.75 in. X 3.5 in.
Door – (cut 1) 2 in. X 3.5 in.
Measurements for this 6 in. X 9 in. Block
Roof – (cut 1) 3.5 in. x 6.5 in.
White Roof Sides – (cut 2) 4 in. X 4 in.
Strips – (cut 4) 2 in. X 6.5 in.
Measurements for this 6 in. X 9 in. Block
Roof – (cut 1) 3.5 in. x 6.5 in.
White Roof Sides – (cut 2) 4 in. X 4 in.
Strips – (cut 3) 1.5 in. X 6.5 in.
Side A – (cut 1) 4.25 in. X 3.5 in.
Side B – (cut 1) 1.5 in. X 3.5 in.
Door – (cut 1) 2 in. X 3.5 in.
Measurements for this 6 in. X 9 in. Block
Roof – (cut 1) 3.5 in. x 6.5 in.
White Roof Sides – (cut 2) 4 in. X 4 in.
Middle Square – (cut 1) 2.5 in x 2.5 in.
Top and Bottom Inner Strips – (cut 2) 1.5 in. X 2.5 in.
Side Inner Strips – (cut 2) 1.5 in. X 4.5 in.
Top and Bottom Outer Strips- (cut 2) 1.5 in. X 4.5 in.
Side Outer Strips- (cut 2) 1.5 in. X 6.5 in.
Measurements for this 6 in. X 9 in. Block
Roof – (cut 1) 3.5 in. x 6.5 in.
White Roof Sides – (cut 2) 4 in. X 4 in.
Middle Squares – (cut 2 white and 2 fabric) 3.5 in x 3.5 in.
Trim Your Pinwheel to 4.5 in.
Side Strips – (cut 2) 1.5 in. X 4.5 in.
Top and Bottom Strips – (cut 2) 1.5 in. X 6.5 in.
Measurements
Sashing – (cut 4) 2.5 in. x 9.5 in.
White Borders – (cut 3) 2.5 in. x WOF
Binding – (cut 3) 2.5 in. X WOF
I sent the free pdf for this project to the Fabric VIP Group! To join my VIP group for free, go here: http://eepurl.com/dN2RcY. I regularly RESEND files so be sure to sign up so that you are getting all my free tutorials!
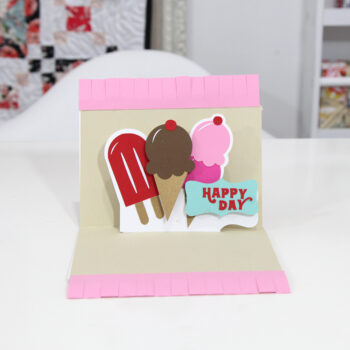
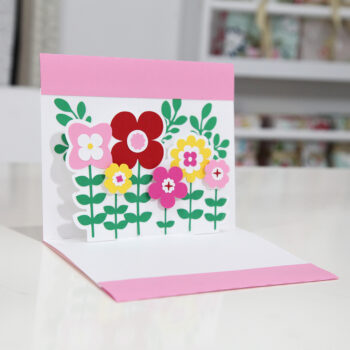
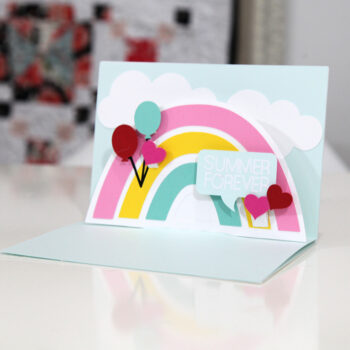
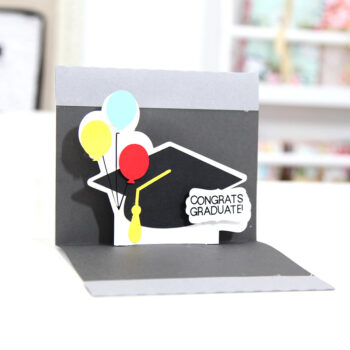
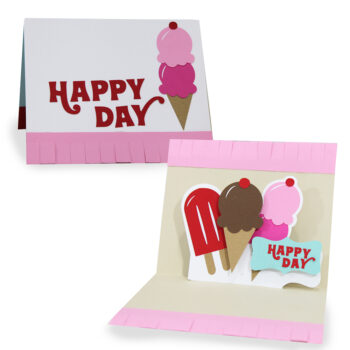
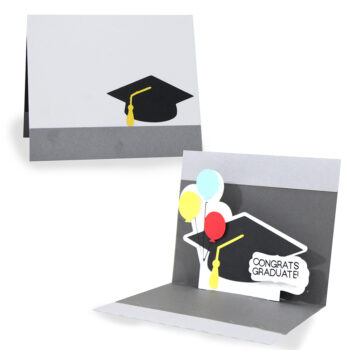
These pop ups are SO fun to make and give. They fold completely flat. Most of the designs are 5 in. x 6 in. (with the fringe). Some are 4 in. x 6 in.
Tuesdays I send out a FREE SVG my VIP Silhouette Group. To join my VIP group for free, go here: http://eepurl.com/dN2RcY. I regularly RESEND files so be sure to sign up so that you are getting all my free tutorials!

 Are you interested in becoming a brand ambassador for Carina Gardner? We are super excited to announce that we have started our brand ambassador program!
 The “R” word always makes people stressed out. And technically, with two quarters in an economic turn, we ARE in a recession.
 If you have wanted to create additional design skills, learn how to earn money, and you need a first step, enroll in one my
  Today I’m unboxing the new award system for Design Suite! We also just got a new case of our signature Design Suite Tote!
 I often get asked if going back to college is the best way to become a designer.
 Are you interested in maybe something in between University coursework but, at the same time, learning to design now to make money? My Design Suite was built to be the middleground between University level course work (niched down to teach practical tips) and business (learn to design for shops and making money while in the one year program). You can learn more in a
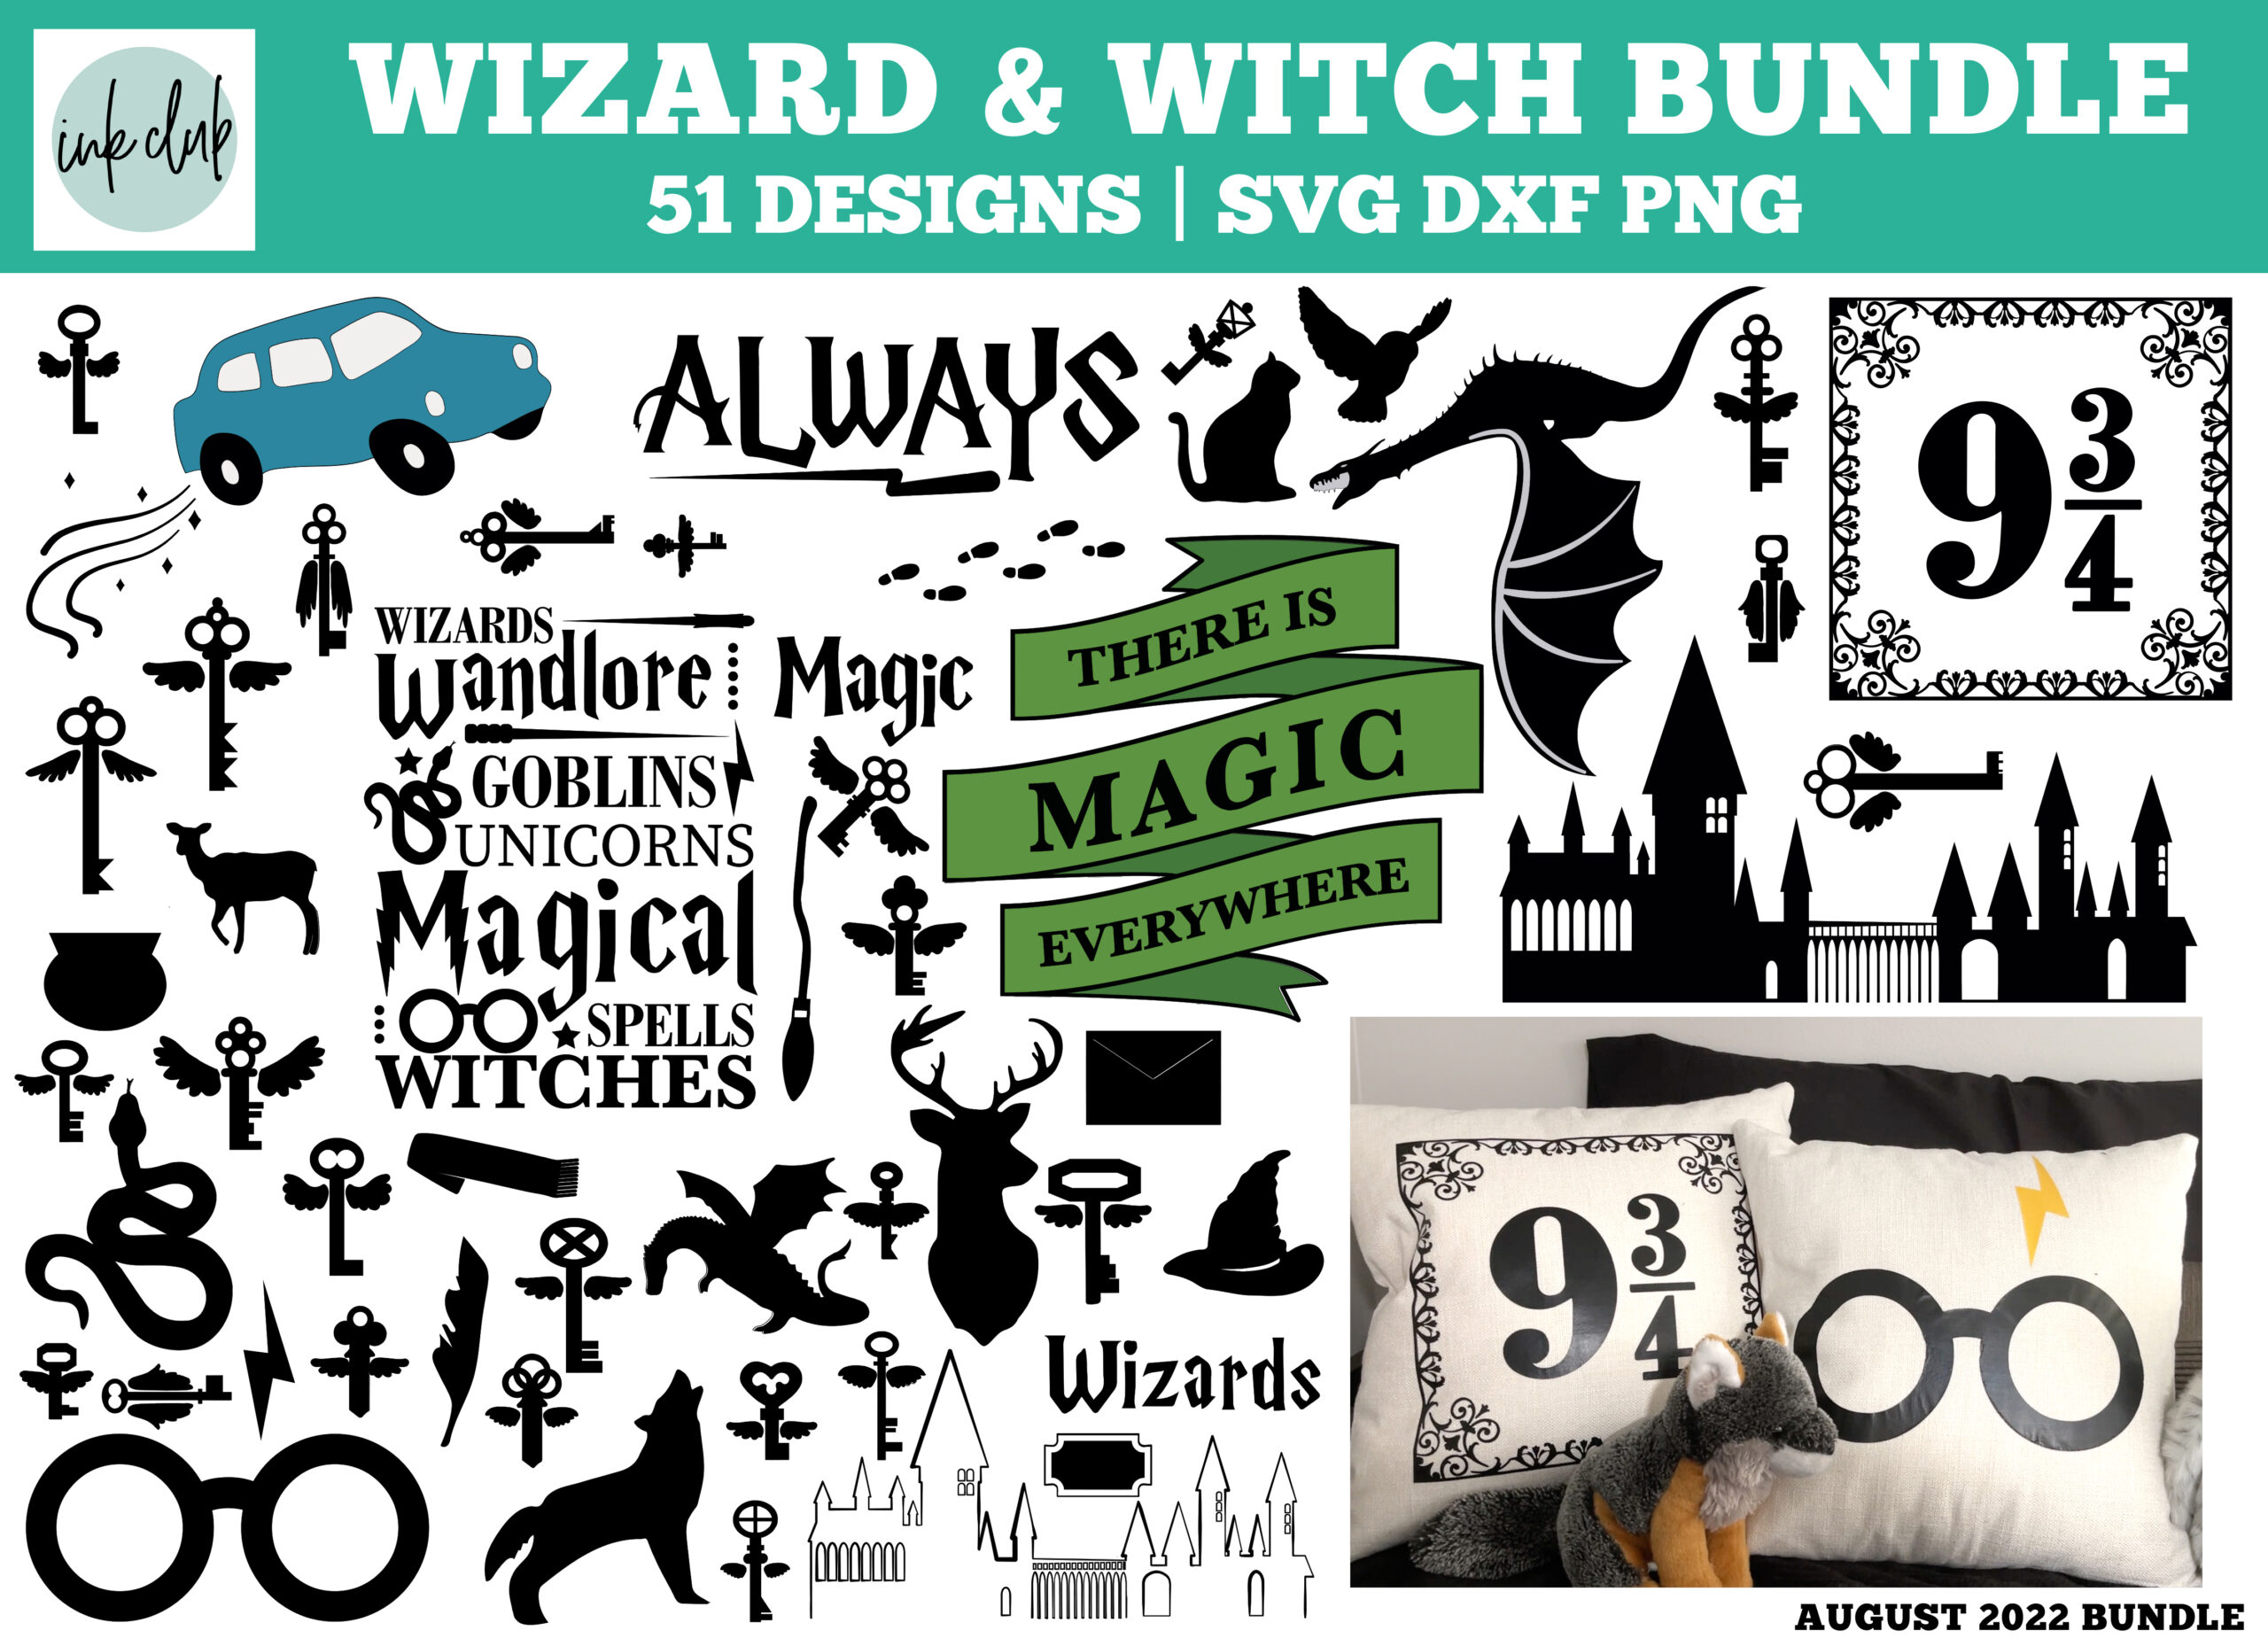
 So what happens in the
 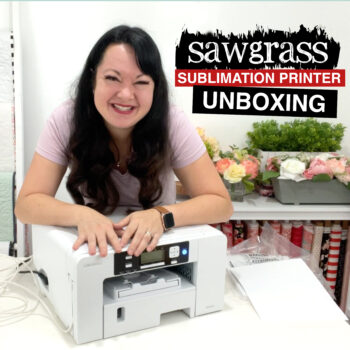 Today I am unboxing at
 Twenty years ago while I was in the academic system, portfolios were a necessary part of getting design gigs. I still believe a great portfolio can be a job catalyst for designers just out of school. If you are a freelancer in my program, I will also encourage a portfolio. However, if you are getting into surface pattern design or a crafting specialty, I don’t recommend a portfolio.
 When I started surface pattern design 15 years ago, one of the things I wanted was a contract to work with a company. Options were limited, and I think that I was blissfully ignorant of how complicated this road was going to be.
 Many people dream of creating a surface pattern design business or businesses in the craft field like sublimation, Cricut or Silhouette files, Glowforge files, or printables. As my own design business has flourished over the last 14 years, I have turned part of my focus to helping other designers get started in this field.

 I’m excited to show you what’s new in my shop! This new video is part of this week’s new releases. You can visit my new products here:
 Need some Free or Low Cost Ways to learn more about design?
 I’m excited to show you what’s new in my shop! This new video is part of this week’s new releases. You can visit my new products here:
 Want to learn more? To join my VIP group for free, go here:
  I’m excited to show you what’s new in my shop! This new video is part of this week’s new releases. You can visit my new products here:
 Let sew together! Here is today’s project!
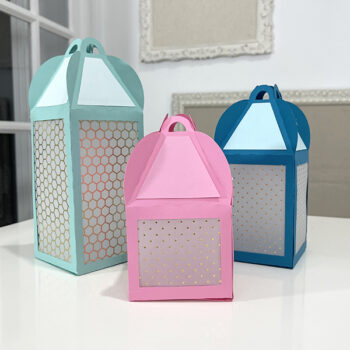 I’m excited to show you what’s new in my shop! This new video is part of this week’s new releases. You can visit my new products here:
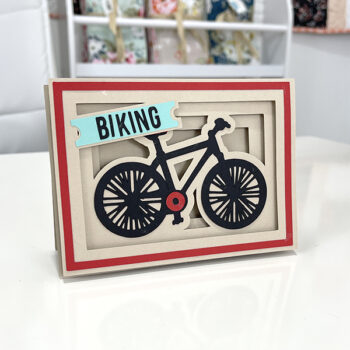 I’m excited to show you what’s new in my shop! This new video is part of this week’s new releases. You can visit my new products here: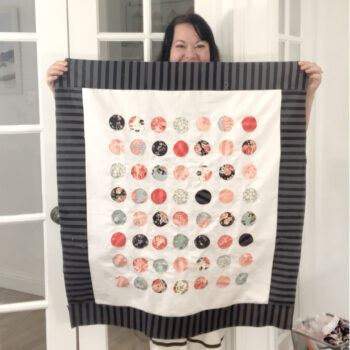
 I’m excited to show you what’s new in my shop! This new video is part of this week’s new releases. You can visit my new products here:
 Are you a smart designer or learning to be one? Here’s a little listen on what I think on this!
 If you want a free course, I have one for you here:
  I’m excited to show you what’s new in my shop! This new video is part of this week’s new releases. You can visit my new products here:
 I sent the free pdf for this project to the Fabric VIP Group! To join my VIP group for free, go here:
 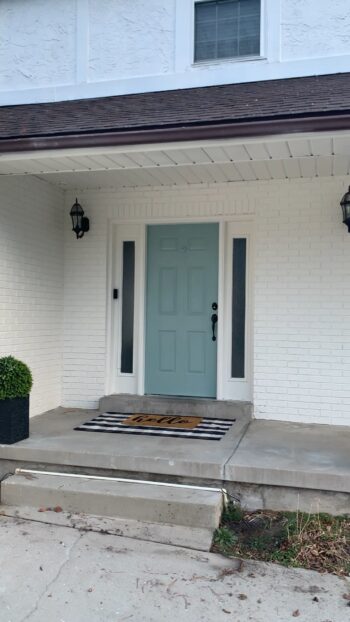 I rarely post my personal projects but since I moved into a new house 9 months ago I started posting to my instastories some of my renovations. I decided I better start documenting them on my blog as well. Partially for myself and for anyone else considering these types of projects.
 Here is a before picture of my house.
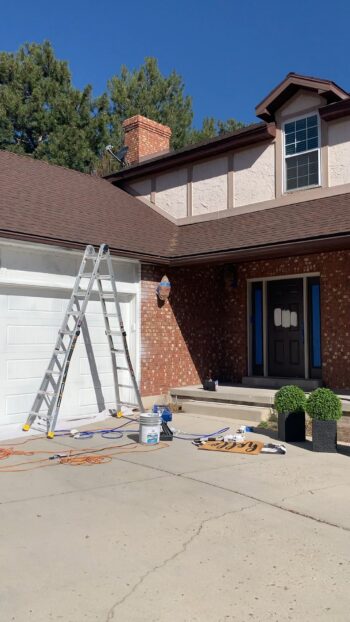 As for paint color, I was trying to decide between alabaster, white dove, and swiss coffee. I went with swiss coffee because of my dark brown roof. Jury’s still out on whether I chose the right white. I thought I wanted it warm but I’m not sure that I love the way it looks at all points in the day. If you are looking for a truer white, I would recommend white dove. If you like this creamier look, check out swiss coffee.
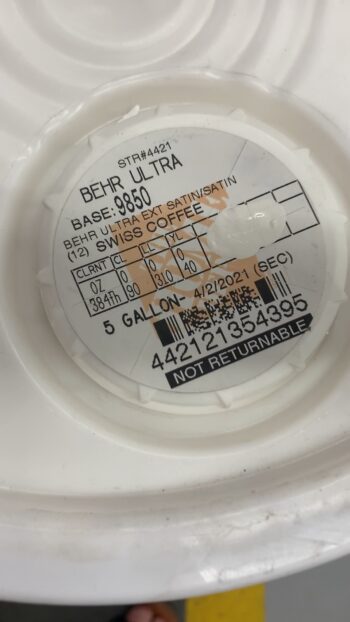
 Pick up the free pdf at carinagardner.com or join my VIP group for free
 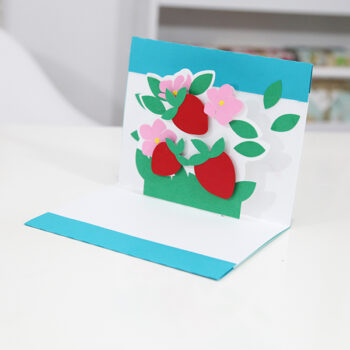 I have a lot of different releases this week! Here are links for all the videos and instructions for these new 3D projects!
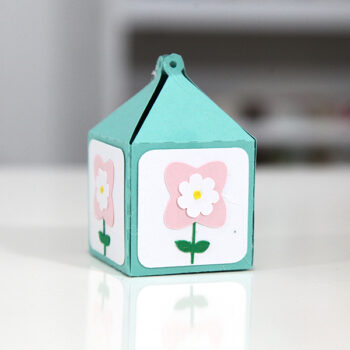 Favor Boxes
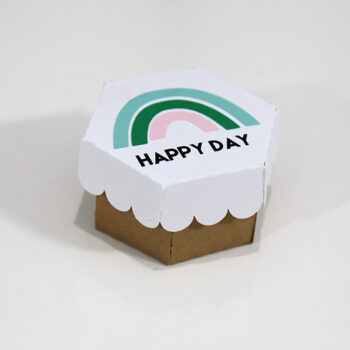 If you are nervous about putting these together, here are some simple instructions:
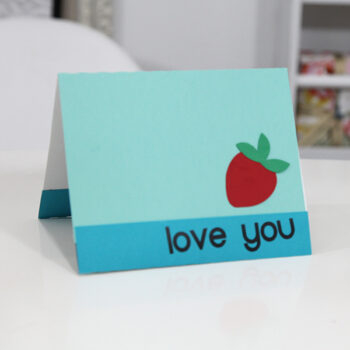
 I wanted there to be an easy place for you to access all the videos so I made this blogpost for you. If you scroll down you will find measurements for all the pieces. For the full pattern, please subscribe to my Fabric VIP group. I regularly resend out pattern and I’ll add this one into the rotation!
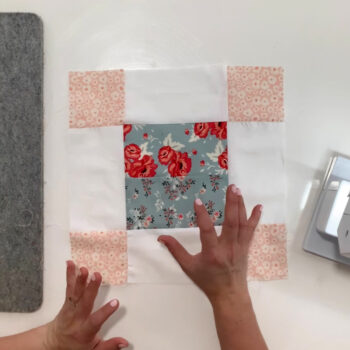 I sent the free pdf for this project to the Fabric VIP Group! To join my VIP group for free, go here:
 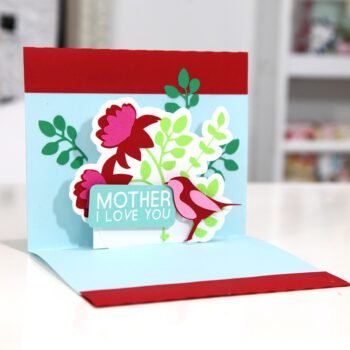 I’m excited to show you what’s new in my shop! This new video is part of this week’s new releases. You can visit my new products here: