Hi guys! The last month I have been making a Strawberry and Leaf Quilt. Guess what? It’s done! Well, almost. I’m going to machine quilt it and bind it this weekend. Here’s my Live Video on putting it together. I’ve also linked the blocks as well below!
Want to get PDFs for all my projects? You have to become one of my Fabric VIPS! It’s free and you can join here:JOIN VIP.
This video on putting it together was done during my Fabric Live Video (Live video times below).
The best part is you can download it anytime of the year and use it by quarter. So maybe you decide you hate your current planner and want to try this one? Build just a Quarter 2 Planner (that’s what I did for myself).
This video explaining it was done during my Silhouette Live Video (Live video times below).
I started a new series that I have been thinking of doing for some time now! It’s called Ultimate Paper and every month I’m creating a project using my die cutting machine to create something really wonderful, really big, or really unique. This project took me a full week to design and cut. The project is available here: https://carinagardnershop.myshopify.com/collections/ultimate-paper
My Live series continues and today I put together a Leaf Quilt Block, which works with the Strawberry Block we put together last week! Want to catch me live or follow the series?
Hi guys! I have been playing a bit with live videos on my instagram and facebook page and have decided to commit to doing them starting January 2020! I will also repost these lives to my youtube channel. Here’s where you can find my lives:
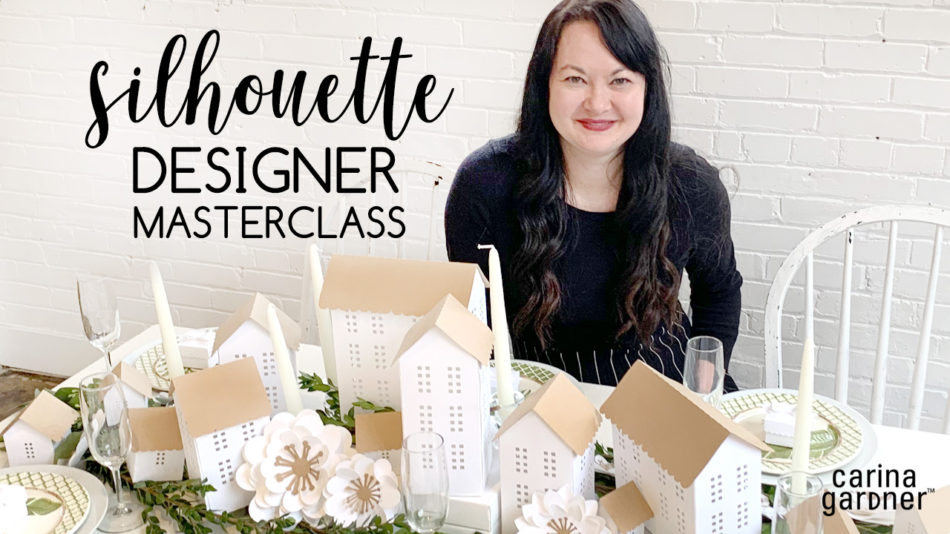
I’m so excited about this new class where I’ll be spilling my secrets as a Silhouette Designer! Registration is NOW open and will be open until December 17th! This would make a great Christmas present to yourself or someone who has been dreaming of putting their designs into paper form! Visit the Silhouette Designer Master Class page to watch a video on what we will be doing and checking out ALL THE FUN things going on in this class!
You may have noticed a refreshing change to my website. First of all, all new pictures and a cleaner designer. Second, I have added COURSES! I’m so excited about the new platform I am using for my courses!
I have a free class available (which I plan on always making available) called Introduction to Illustrator. It will help you see how the backend is set up and how easy it is to access courses. Go try it for free here.
Hi guys! This is an older design that I didn’t have a tutorial for and decided to revisit! Plus, I gave this file away for Thankful Week to my Silhouette VIP Group for free. And of course I want to make sure that you know how to make it! I’m probably going to send this file out one more time to the group during my 12 days of christmas so, be sure and join so you can get this file and so many others!
Hi guys! This is an older design that I didn’t have a tutorial for and decided to revisit! Plus, I gave this file away for Thankful Week (going on this week!) to my Silhouette VIP Group for free. And of course I want to make sure that they know how to make it! So here it is!
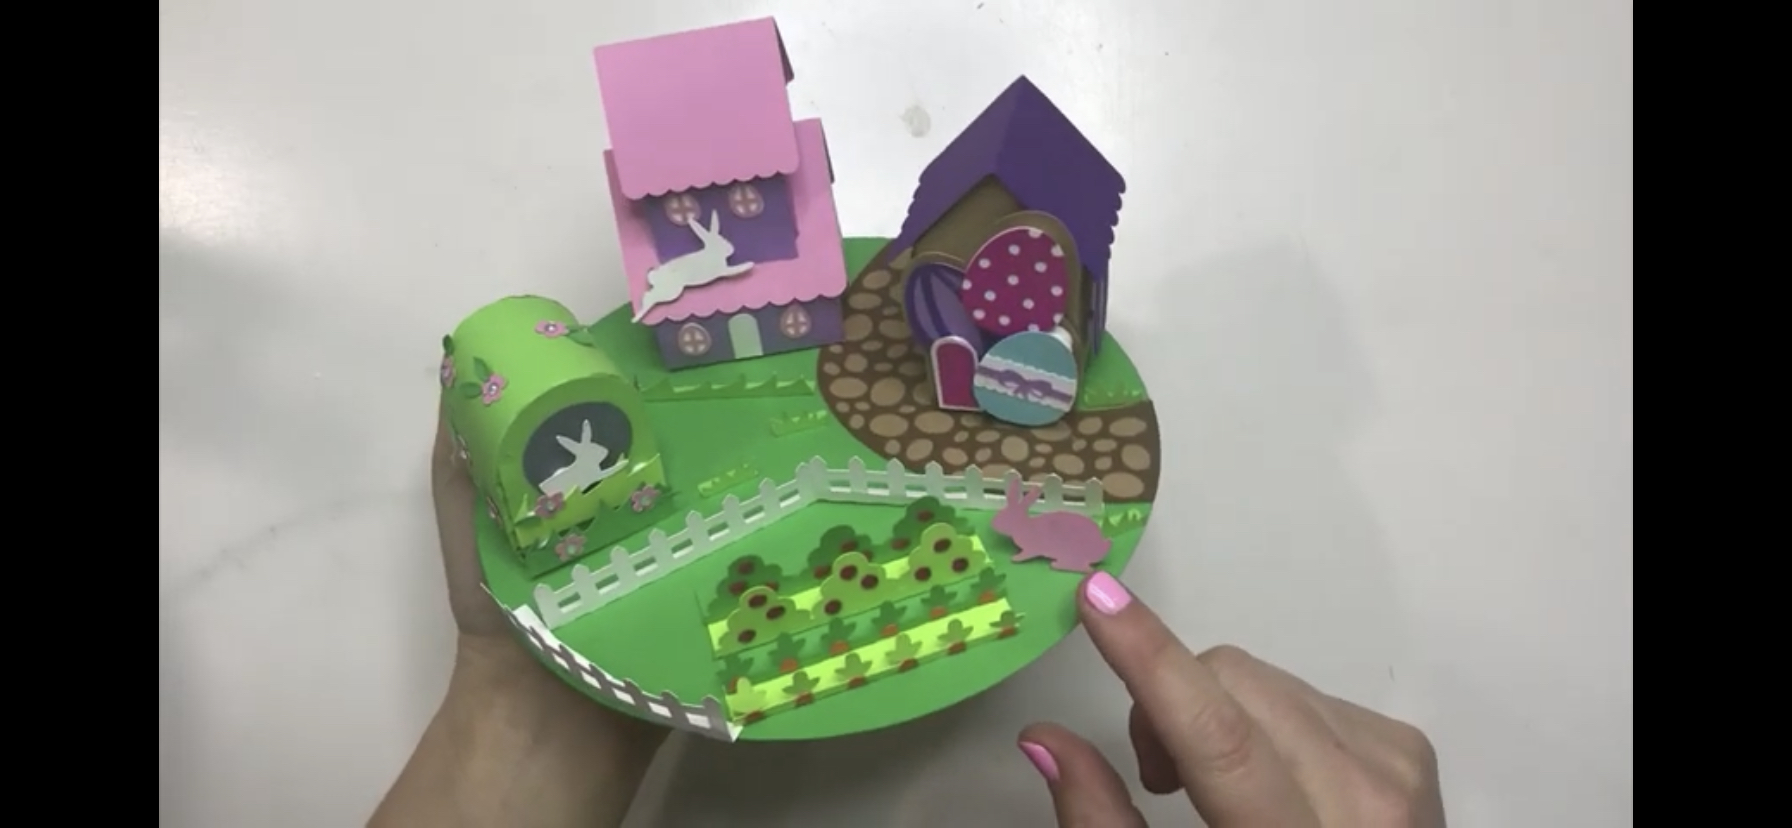
Today’s tutorial on my YouTube channel walks us through how to make my Mini Table Top Easter Village!
The Mini Easter Village is perfect for putting on a cake plate or as a centerpiece to decorate for the holiday. It adds decorative flair to any Easter display. First, you can give little bunnies adorable places to live. Then, choose from two houses or a bunny den that lovingly overlook the cute Easter garden in this colorful vignette.
Next, which bunny will live in the house decorated with Easter eggs? And which bunny will get the double-decker house with the round windows? Which will dwell in the little domed den that matches perfectly with the nature around it?
But, oh no! The bunnies will surely eat the garden! Finally, adding the picket fence is the perfect finishing touch to keep the leafy greens safe! But will it be enough?
Hi everyone! Today I’m excited to announce that a new quilting conference will be happening in March! I’ll be teaching a my perfect hexagon quilt! I hope you get to join me! The entire conference is only $75 PLUS if you use my DISCOUNT CODE CARINAGARDNER you will get $20 OFF!
Read below to find out more! Hope to see you there!
XOXO- Carina
Today we are excited to announce that tickets sales for Mod Bee are now open!
Mod Bee is 3 day, online conference full of interactive quilting classes taught by some of the internet’s favorite quilters.
This year Mod Bee will be held March 14th, 15th, and 16th (With classes running every 2 hours from 9am-7pm)
When you register for Mod Bee you receive:
*Access to a private Facebook group where 6 classes will be taught each day during the conference (Making that a total 18 classes!)
*12 PDF Patterns sent to you via email prior to the conference beginning so that you can be prepared to sew along with the classes of your choice
*Automatic entry to win daily prizes during the conference
*Continued access to the videos that will remain posted throughout the remainder of the year.
*Ticket price for this 3 day event is $75
The Mod Bee is a modern twist on an old fashioned quilting bee…a chance to gather together quilters from across the country into one location to learn, visit, be inspired and enjoy the love of quilting. And, we hope you will join us.
The team of teachers gathered together this year include:
Bev from Flamingo Toes
Amanda from A Crafty Fox
Mathew Boudreaux from Mister Domestic
Kate from See Kate Sew
Cindy Cloward from Riley Blake Designs
Elizabeth from Simple Simon and Company
Lindsay from Lindsay Sews
Melissa from The Polka Dot Chair
Amy from Ameroonie Designs
liZ from Simple Simon and Company
Becky from Patchwork PosseCarina Gardner
Caroline from Sew Can She
Mandy from Sugar Bee Crafts
It is going to be three days worth of quilting awesomeness that you can take part in without ever having to leave the comfort of your own home!
Register HERE
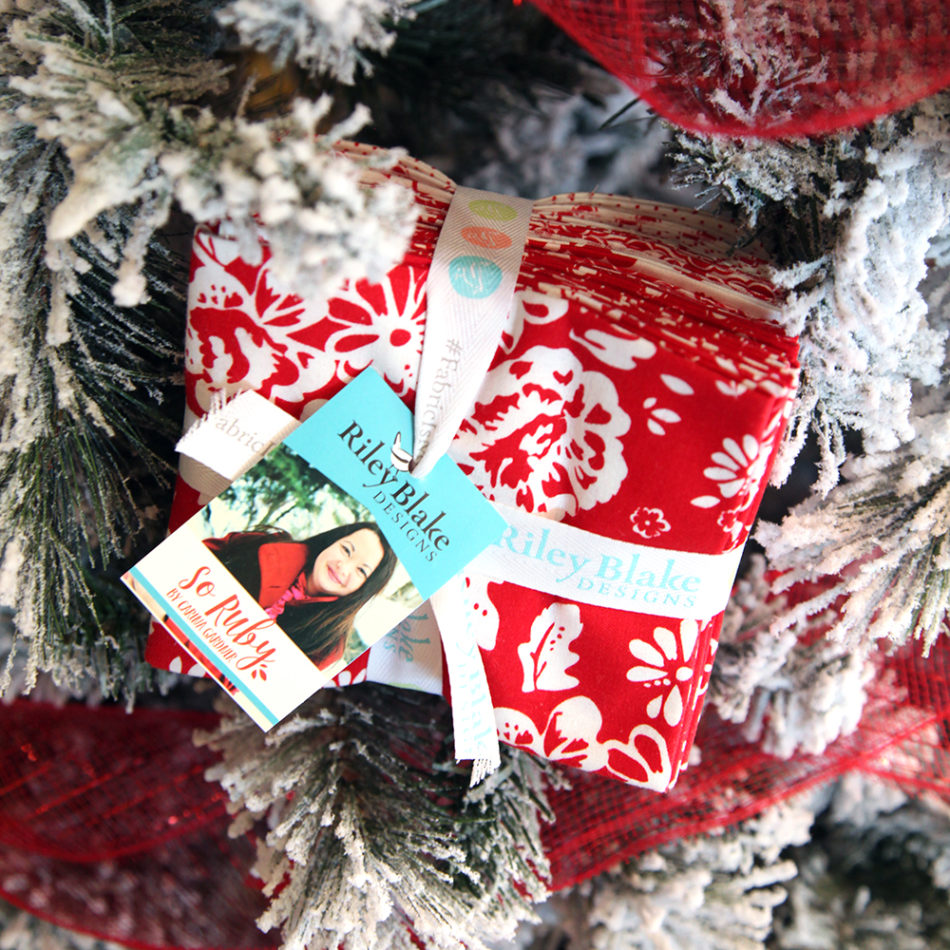
I have a new tutorial up on my youtube channel for a Valentine Heart Quilt Block Tutorial! I’m using my most recent collection So Ruby manufactured by Riley Blake Designs.
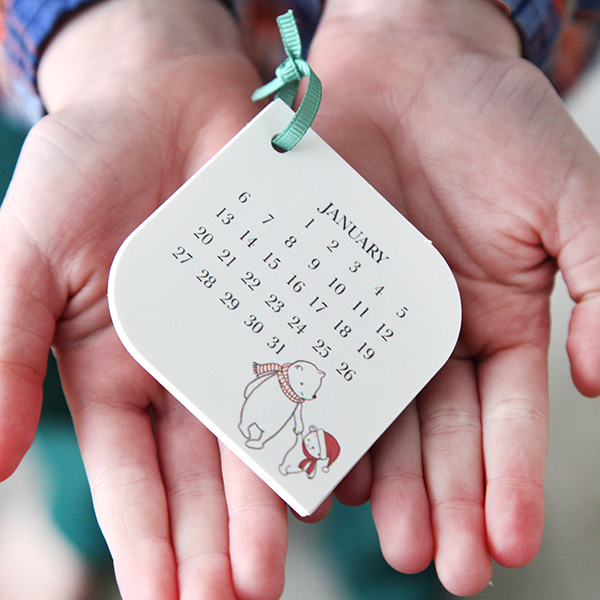
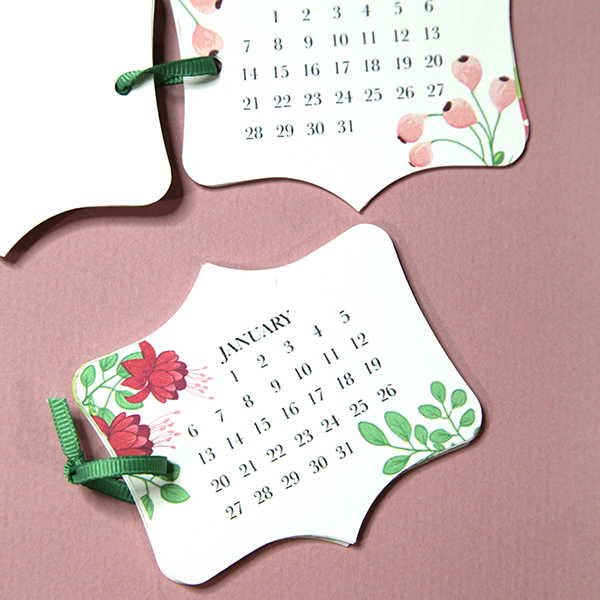
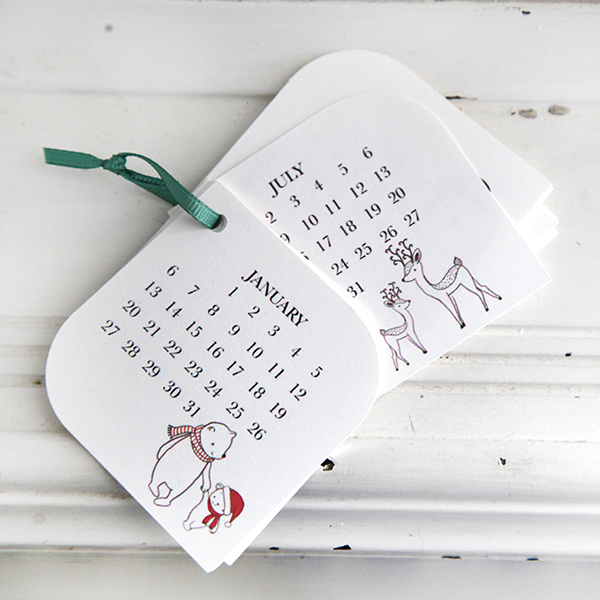
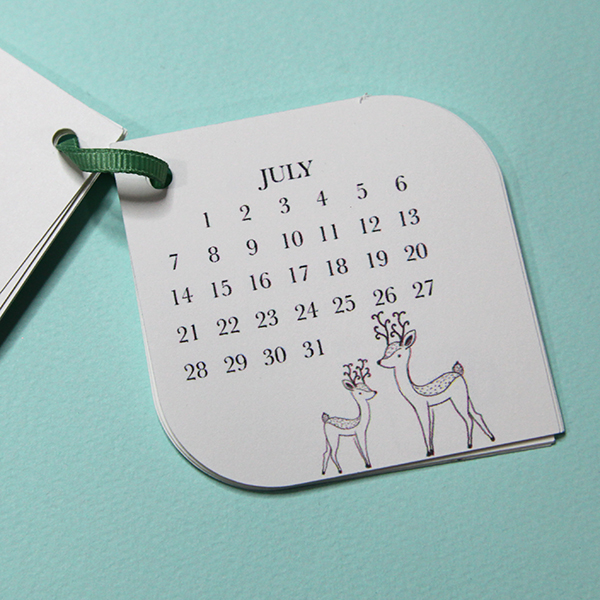
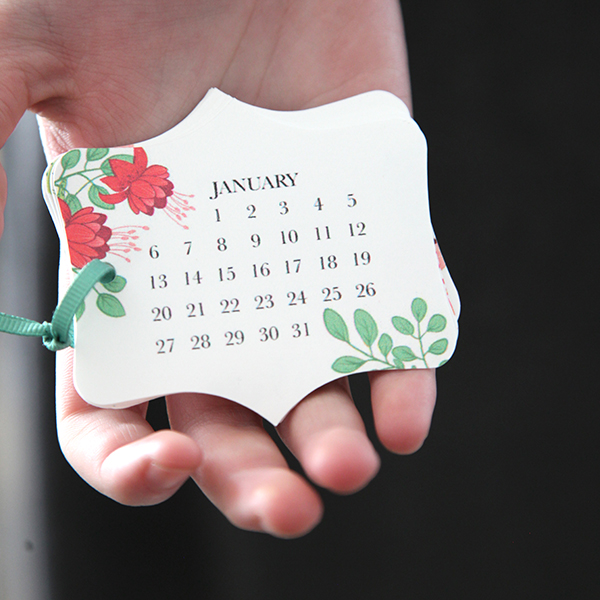
These cute little calendars are new in my Silhouette shop. These are little printables and make the cutest gift!
There are four set of printables for these. The Floral Set has a bleed so that if you registration is slightly off, they will still cut out cute!
I’m using these with my kids for tracking goals.
Hope you have a chance to make these! Be sure to check out my youtube channel for new paper project tutorials! I just posted a new one yesterday for my new Multi Fold Insert Cards!
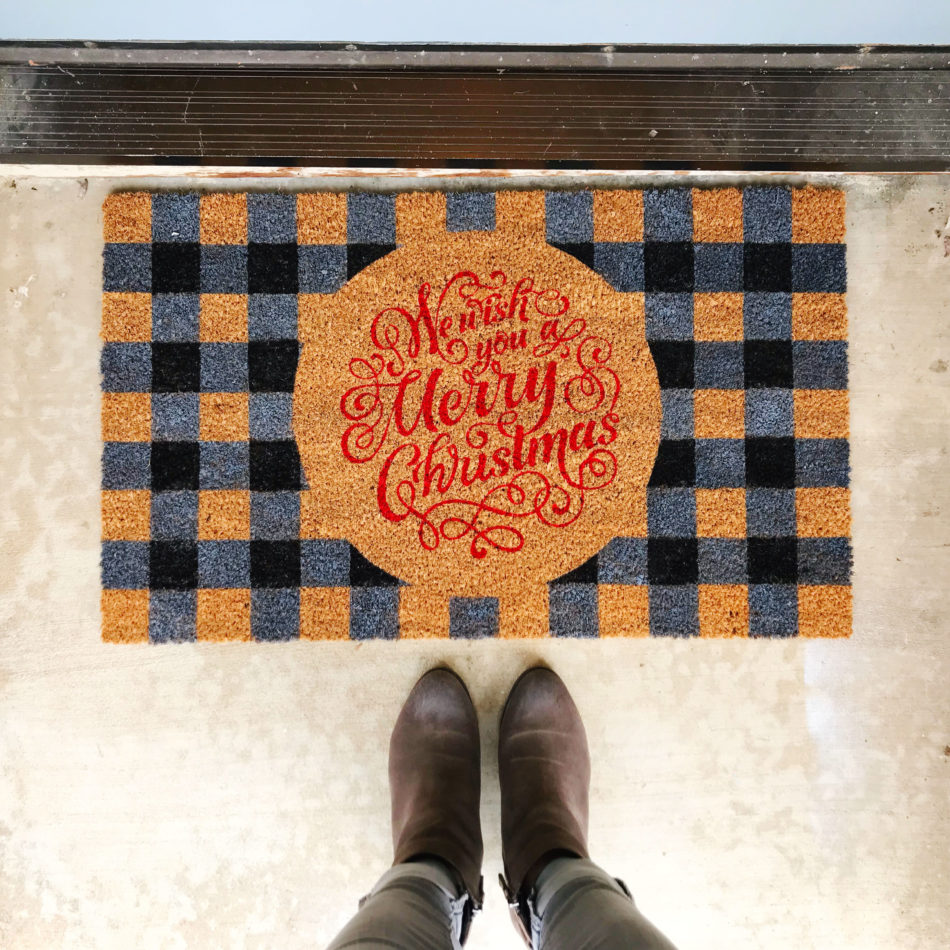
Christmas decorating is in full force at my house and while it’s easy to decorate the inside of the house, I knew I need to add some holiday flair outside. The front door is a great opportunity and space to welcome guests into our home so I made a customized holiday door mat to wish them a Merry Christmas!
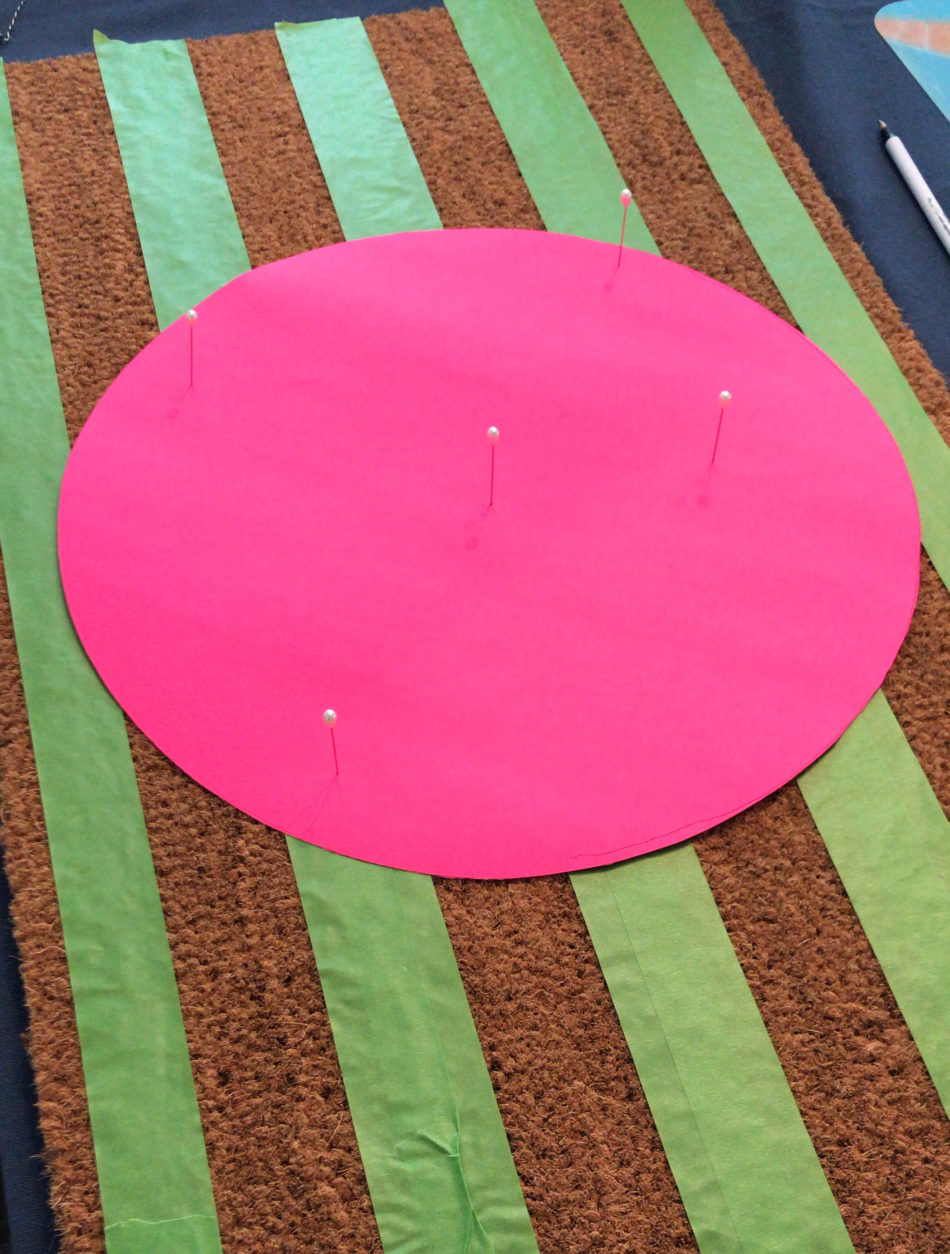
The core doormat comes blank and was purchased from Target. To create the buffalo plaid pattern, I used painter’s tape to section off 2” strips horizontally and vertically. Next, I cut out a large round circle and secured it to the middle of the doormat with pins.
The stripe painting process took a while because the horizonal stripes had to dry before I could tape down and paint the vertical stripes. It’s important to use outdoor acrylic paint versus regular acrylic paint as it is waterproof and to remove the painter’s tape while the paint is drying. Also, I highly recommend using a round bristle paint brush and painting in an up and down dabbing motion so that the paint goes straight down into the mat versus side to side that could lead to bleeding under the painter’s tape.
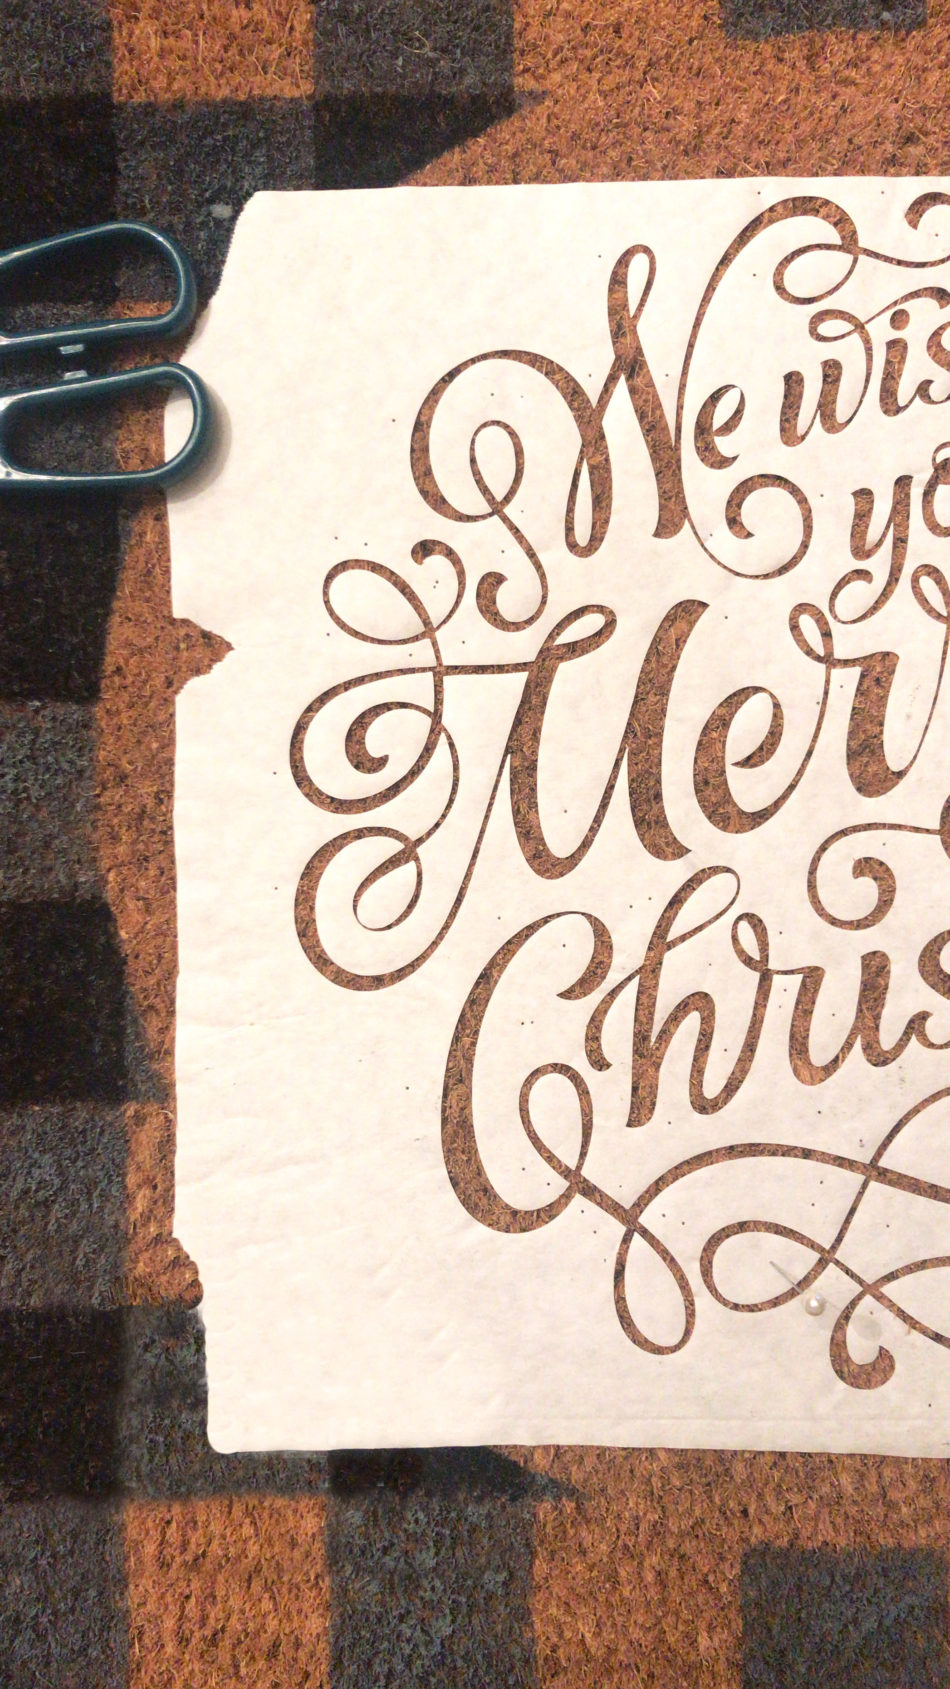
Next, I used my Silhouette Cameo and my 12in x 24in cutting mat to cut out the “We Wish You a Merry Christmas” design using freezer paper. Securing the cut out to the doormat was the longest part of this project since there are tons of flourishes and inner loose pieces. Patience is key here! I again used the pins to help lay out the design and once I liked how it looked, I gently ironed the design onto the doormat. The shiny side of the freezer paper adheres to the doormat when ironed.
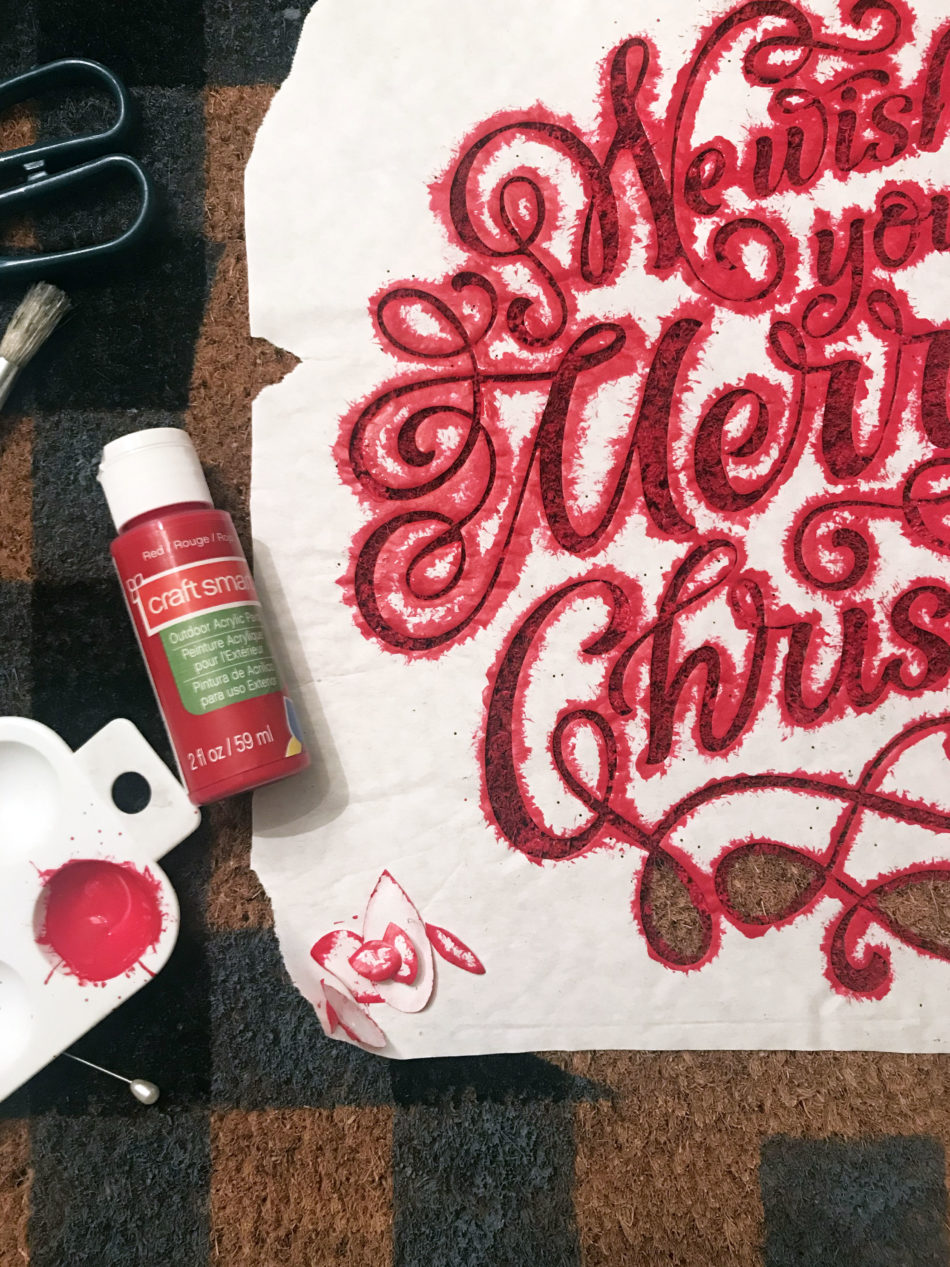
The last step was to use red acrylic paint and a smaller round bristle paint brush for the stencil. After a couple coats, I peeled off the freezer paper stencil and my festive door mat was done!
Hello from Southern California! I’m Christine, the gal behind Studio Xtine, where I share fun project tutorials, free printables, and a tiny glimpse of my favorite things like donuts, tacos, and more donuts. Ingrained in me is a deep desire and joy to create, which is why I love my Silhouette machines! When I’m not crafting, you can find me, my hubby, and my two munchkins hiking, devouring poke bowls, and strapping on a GoPro for our adventures.
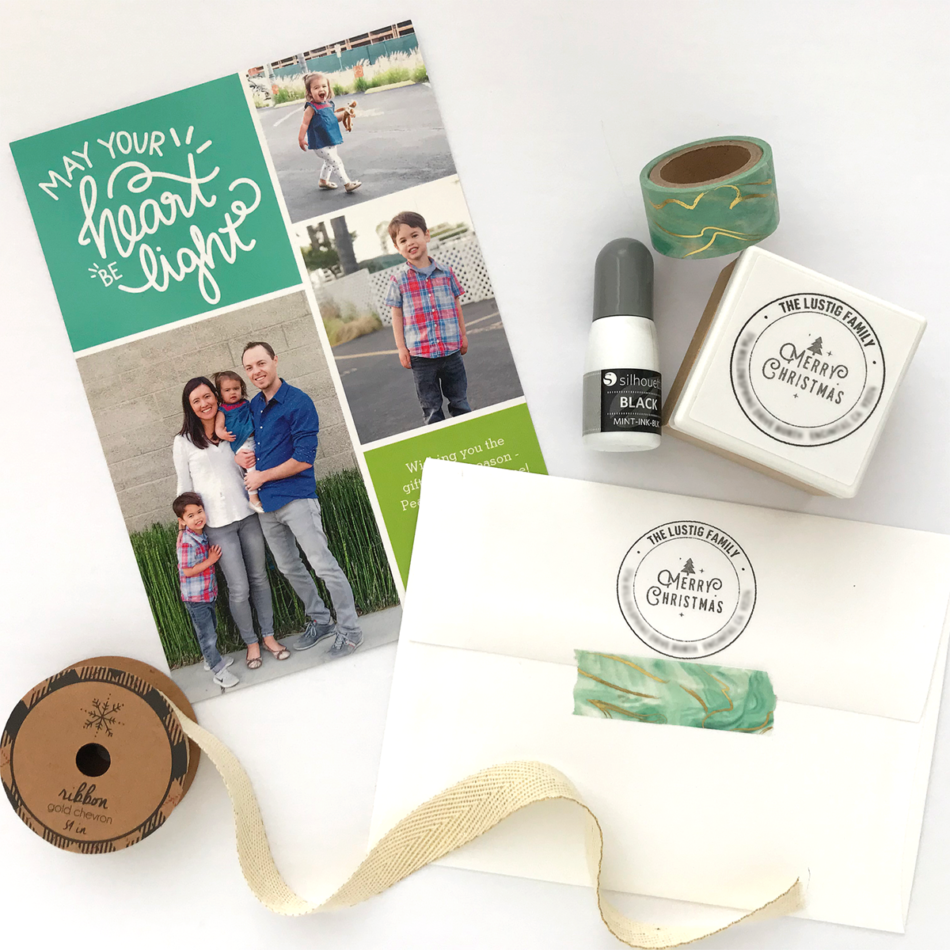
It’s that time of year again when I prepare sending Christmas photo cards to loved ones. This year, I have created a custom Christmas-themed address stamp with my Silhouette Mint custom stamp maker. The Silhouette Mint offers a variety of sizes and I find the 45mm x 45mm stamp size is the perfect size for round-shaped address stamps.
For my stamp, I used the letter “H” dingbat from Carina Gardner’s CG Christmas Quotes Dingbats collection and made it the focal piece. Next, I added my family name and address and nestled them within two concentric circles. I was able to create this design pretty easily all within the Mint Studio software. Many of the functions in Mint Studio is similar to Silhouette Studio’s such as making text curve.
The one thing to note is that a Mint stamp is different from standard rubber stamps. Mint stamps use special ink that is absorbed into the stamp material. After applying ink onto the stamp, let it sit for about 10 minutes. On scratch paper, stamp out excess ink until your stamp design becomes clear and clean.
You could even take this project up a notch by using different Mint inks. For example, I could use green ink for the Merry Christmas design in the middle and use black ink for the rest of the design. Again, there are a lot of possibilities for this project! Do you have the Silhouette Mint custom stamp maker? What do you make with it?
Hello from Southern California! I’m Christine, the gal behind Studio Xtine, where I share fun project tutorials, free printables, and a tiny glimpse of my favorite things like donuts, tacos, and more donuts. Ingrained in me is a deep desire and joy to create, which is why I love my Silhouette machines! When I’m not crafting, you can find me, my hubby, and my two munchkins hiking, devouring poke bowls, and strapping on a GoPro for our adventures.
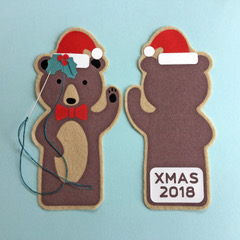
I love making Christmas decorations that can be used year after year, adding to our collection of family heirloom decor. These finger puppet files are intended to be made from paper, but with the simple addition of an offset, and omission of the finger holes, each cute creature can be cut from felt and flock heat transfer vinyl to make lasting tree ornaments. The fox, bear and racoon have been decorated with Christmas accessories taken from the dingbat file shown (letters e,x and z) and cut from fuzzy textured heat transfer. Once the decorations have been fused and the figures padded with a little wadding, they have been sewn by hand to make them perfect for decorating our holiday tree.
There is the opportunity for adding personalisation too. I’ve added ‘Xmas’ and the year to these in the Silent Hight font, but I’ll be adding the names of the junior family members for our family set.
All the cut files used are by Carina Garner and Mini Lou from the Silhouette Design Store:
Christmas Animals Ornaments– intend to double them up, add offset, remove the holes, cut from felt and add accessories.
My name is Janet Packer, a passionate papercrafter from Aberdeen, Scotland. My background is in education and technical instruction and I love to share crafting techniques, new products, and design sources. My craft blog, Crafting Quine, is brimming with ideas for card making, paper craft and home decor, many using the Silhouette Cameo. You’ll find hints and tips galore, as well as step-by-step project instructions, and crafting inspiration with a thrifty bias. For updates and pretty crafting pics follow me on Instagram.
HI everyone! Thank you to everyone who participated in the So Ruby Christmas Quilt Along on my instagram feed. I have the entire week’s worth of 1 minute tutorials bundled up into a single youtube video for you.
Due to the popularity of the quilt along. I will be doing block tutorials (maybe not full quilts) all the time on my feed. Be sure to check the feed often for these!
Today we are starting our So Ruby Quilt Along at @carinagardner!
Videos are being posted everyday on instagram and at the end of week I will have a consolidated video on youtube. If you haven’t bought your supplies yet, here is that information:
You will need the following supplies: + A fat quarter pack of So Ruby Fabric + 1/8 yard of light interfacing + 1 1/3 yards of white fabric (Note: technically you can use the WHITE patterned pieces in fat quarter pack for this if you want a more patchwork look!) + about 1 1/2 yards backing
Tag your posts #carinaquiltalong so I can see what you are up to!
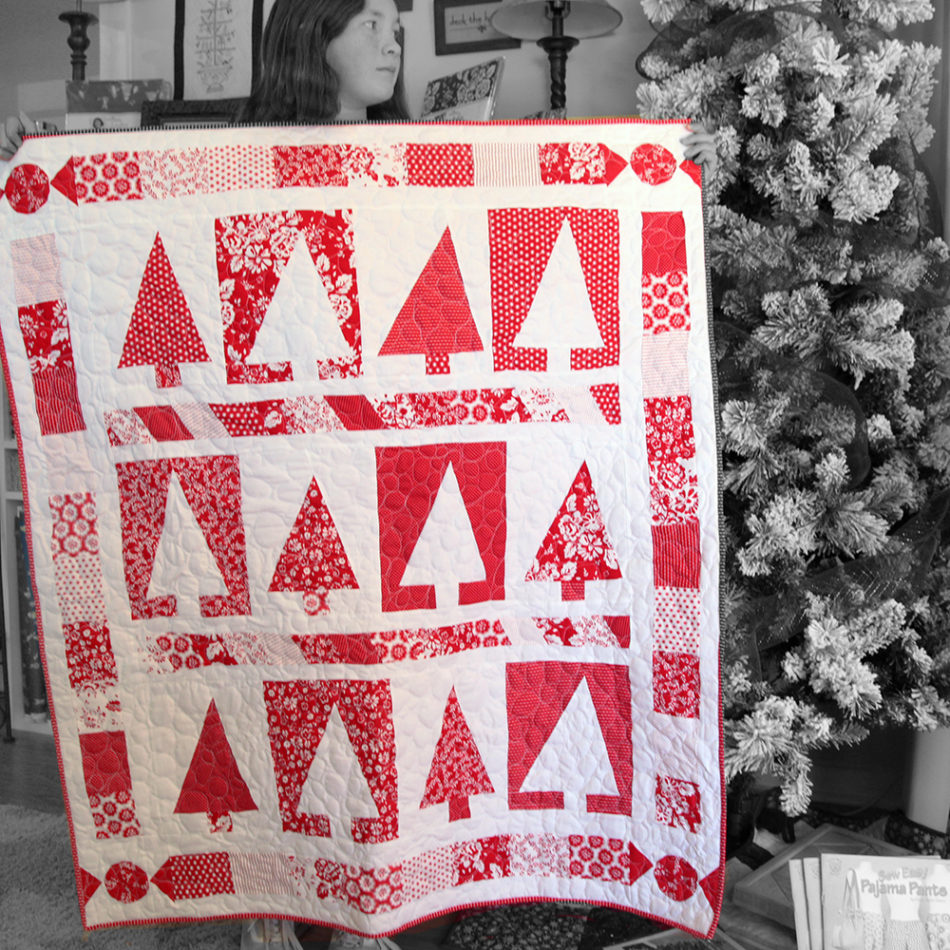
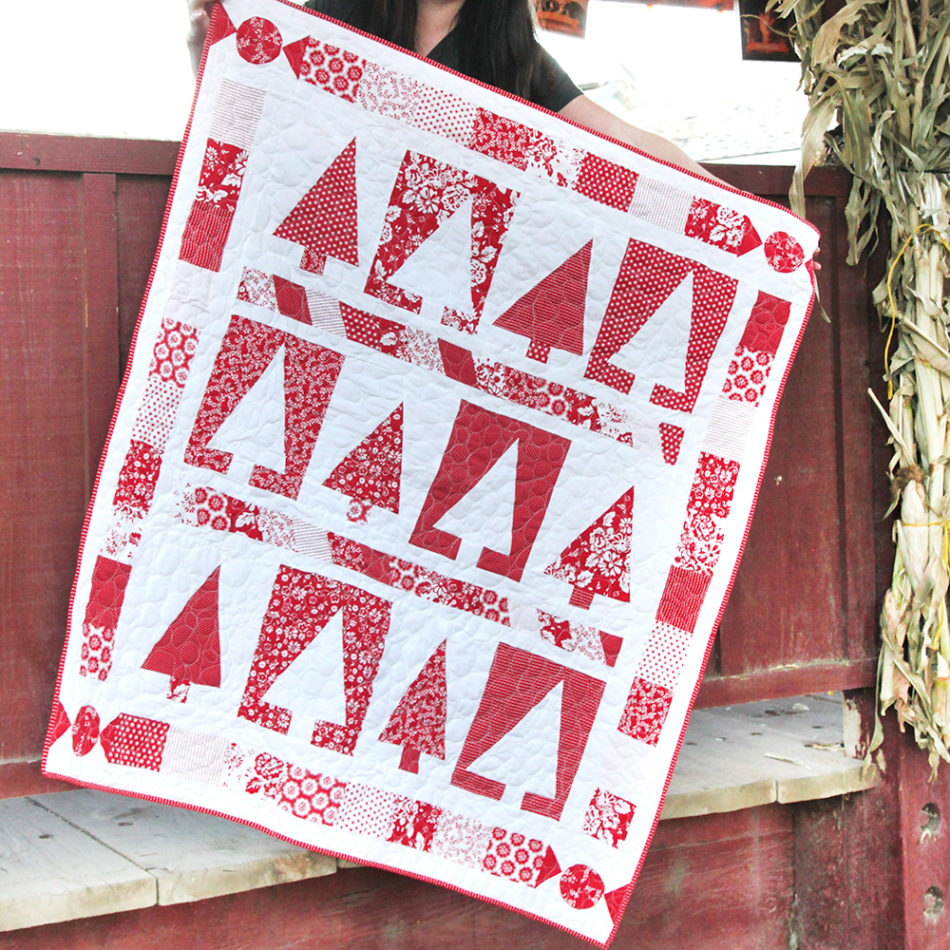
The final quilt is about 44 in. x 55 in. If you plan on machine quilting it yourself you will need crib sized batting.
Here’s the plan this week!
CUT THE FOLLOWING:
Monday, November 12th: Tree Quilt Block
(Total of 12 Tree Blocks)
+ six red (mix and match the fabrics) 10 in. x 10 in. squares
+ six red (matching the fabrics above) 2 in. x 10 in. rectangles
+ six white 10 in. x 10 in. squares
+ six white 2 in. x 10 in. rectangles
+ six red (mix and match the fabrics) 2 in. x 2 in. squares (trunk)
+ six white 2 in. x 2 in. squares (trunk)
Tuesday, November 13th: Candy Cane Stripe
(Total of 2 Candy Cane Stripes)
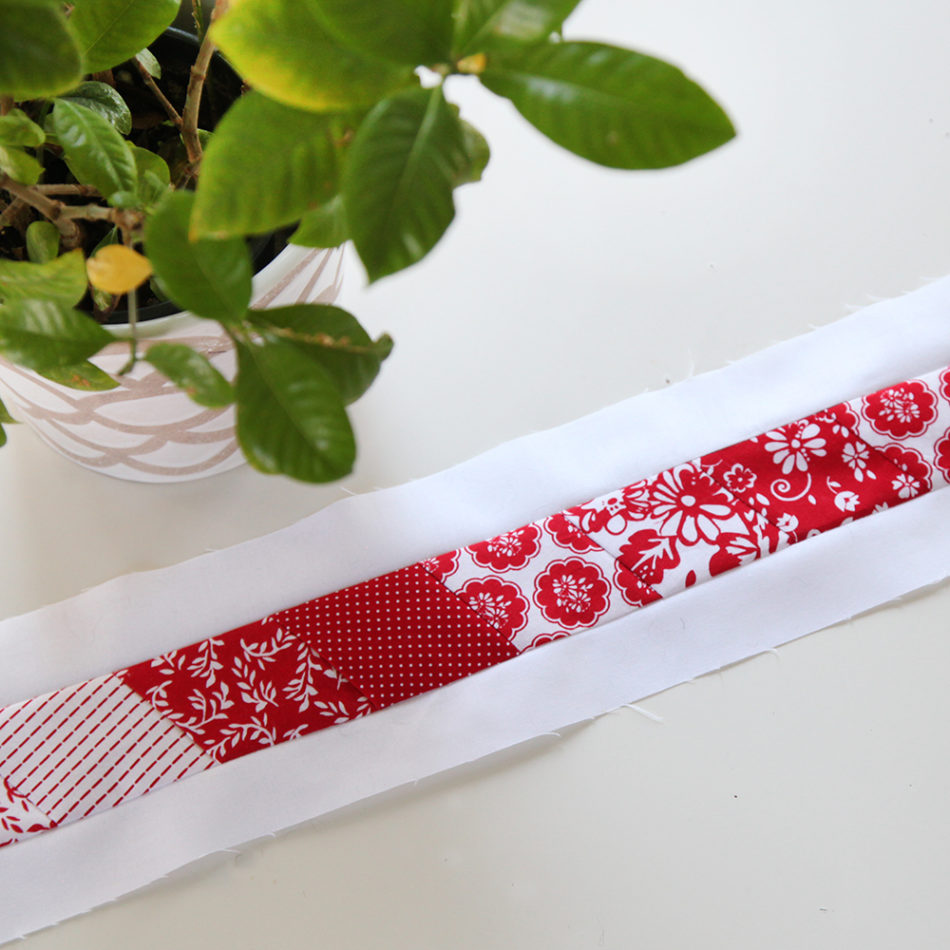
+ thirty red (mix and match) 2.5 in. x 4.5 in. rectangles
+ four 1.5 in. x WOF white rectangles
Wednesday, November 14th: Peppermint Quilt Block
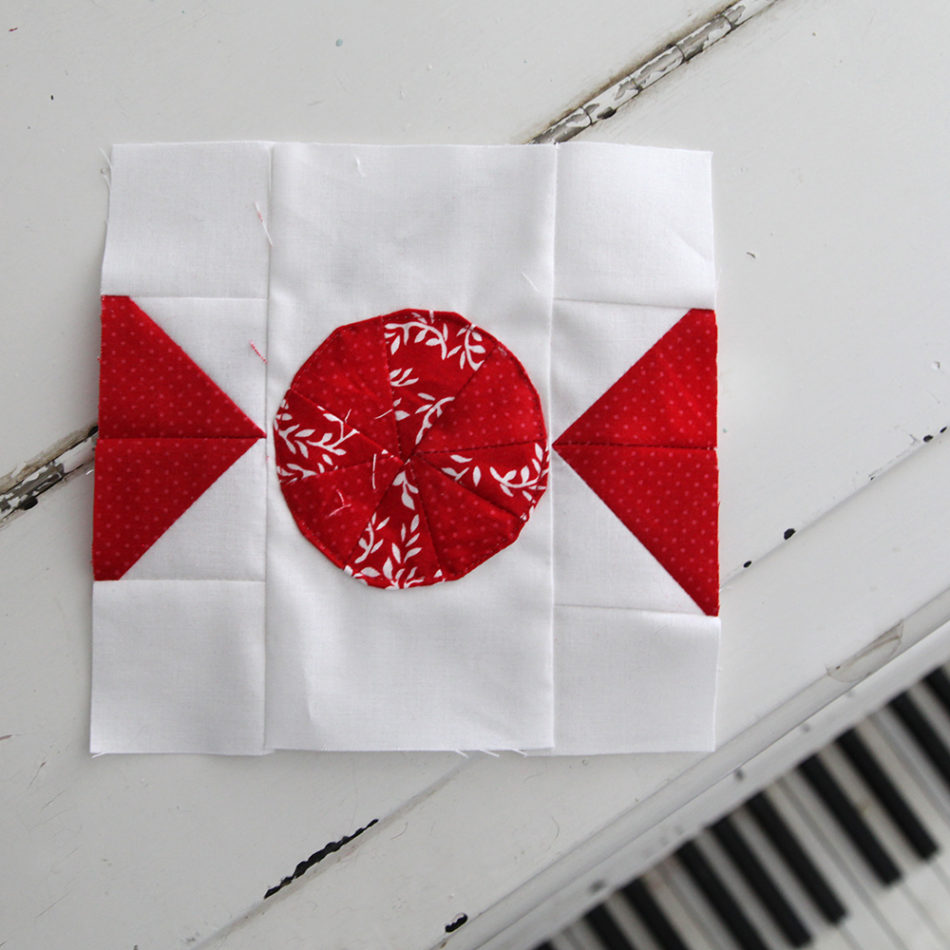
(Total of 4 Peppermint Blocks)
NOTE: This is an intermediate to advanced block.If you are a beginner, you can skip this block and simply cut out four 6.5 in squares in red fabrics!
+ sixteen red color A 3 in. x 3 in. squares
+ eight red color B 3 in. x 3 in. squares
+ eight white 3 in. x 3 in. squares
+ four white 3.5 in. x 6.5 in. rectangles
+ sixteen white 2 in. x 2 in. squares
+ four 4 in. x 4 in. pieces of fusible interfacing (1 used the single sided fusible featherweight)
+ one 3 inch circle template (available for download below)
Thursday, November 15th: Patchwork Borders
(Total of 2 Short Borders and 2 Long Borders)
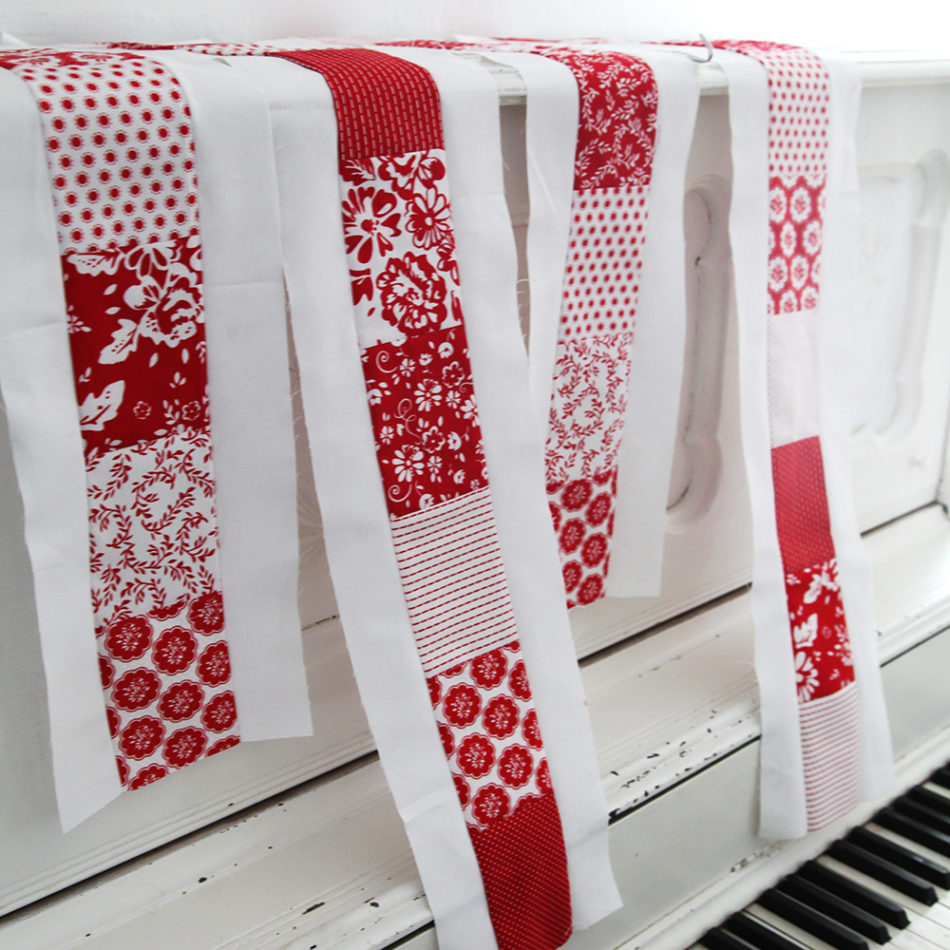
+ thirty-six red/white So Ruby fabrics cut into 3.5 in. x 4.5 in. rectangles
+ eight 2 in. x WOF white fabric
Sew together ten 3.5 in x 4.5 in rectangles for one long border. Repeat for 2 long borders. Sew together eight 3.5 in x 4.5 in rectangles for a short border. Repeat to get two short borders. Watch the video for the full instructions.
Friday, November 16th: Putting it all together!
+ Backing – You will need about 1 1/2 yards for the back fabric
+ Batting – You will need batting that is crib sized.
+ Binding – I’m not going over this, but you can patch together binding from your fat quarter pack OR purchase a single fabric. You will need about 1/2 yard if you use the WOF for your binding.
🌿FINAL PIECES
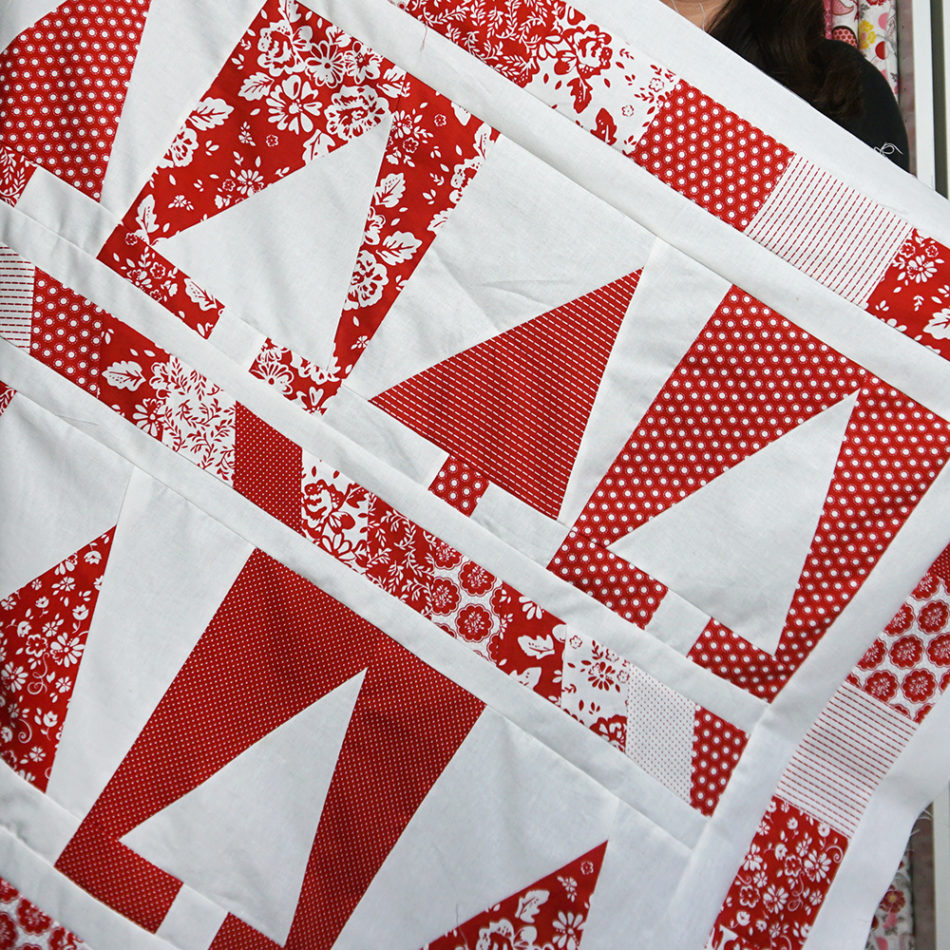
12 tree blocks
2 candy cane stripes
4 peppermint blocks
2 short borders
2 long borders
🌿INSTRUCTIONS
1. Stitch together three rows of four tree blocks
2. Place the two candy cane stripes BETWEEN the three rows of tree blocks to create the center.
3. Sew the LONG border on either side of the quilt.
4. Sew the peppermint blocks to either side of the short border pieces.
4. Sew the short border pieces (now with a peppermint block on either side) to the quilt.
Note: Binding can be a patchwork of your fat quarters or you can purchase about 1/2 yard for the binding.
All the videos will be hosted on instagram @carinagardner. Of course you can watch via your computer by simply clicking on the @carinagardner link. There are several videos everyday so make sure you watch them in the correct order! (You will see each video noted as Part 1 of 2, ect.).
Here is the template you will need to download (It is just a 3 inch circle…if you have a way to measure this at home, you don’t need to download this one!)
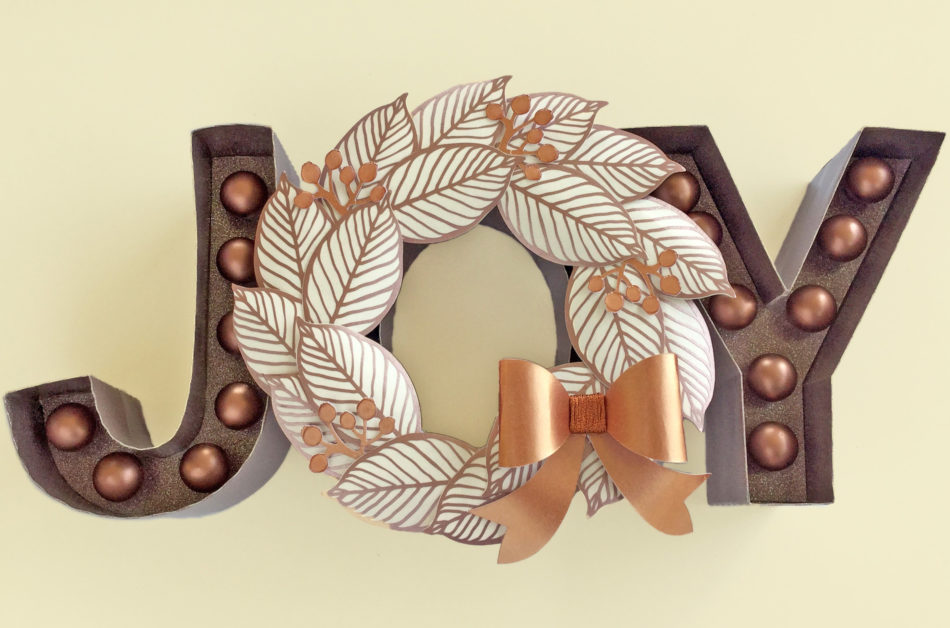
I love, love, LOVE making my own Christmas decorations. This joy marquee letter project makes the perfect holiday centrepiece – I shall be giving it pride of place in my entryway this year!
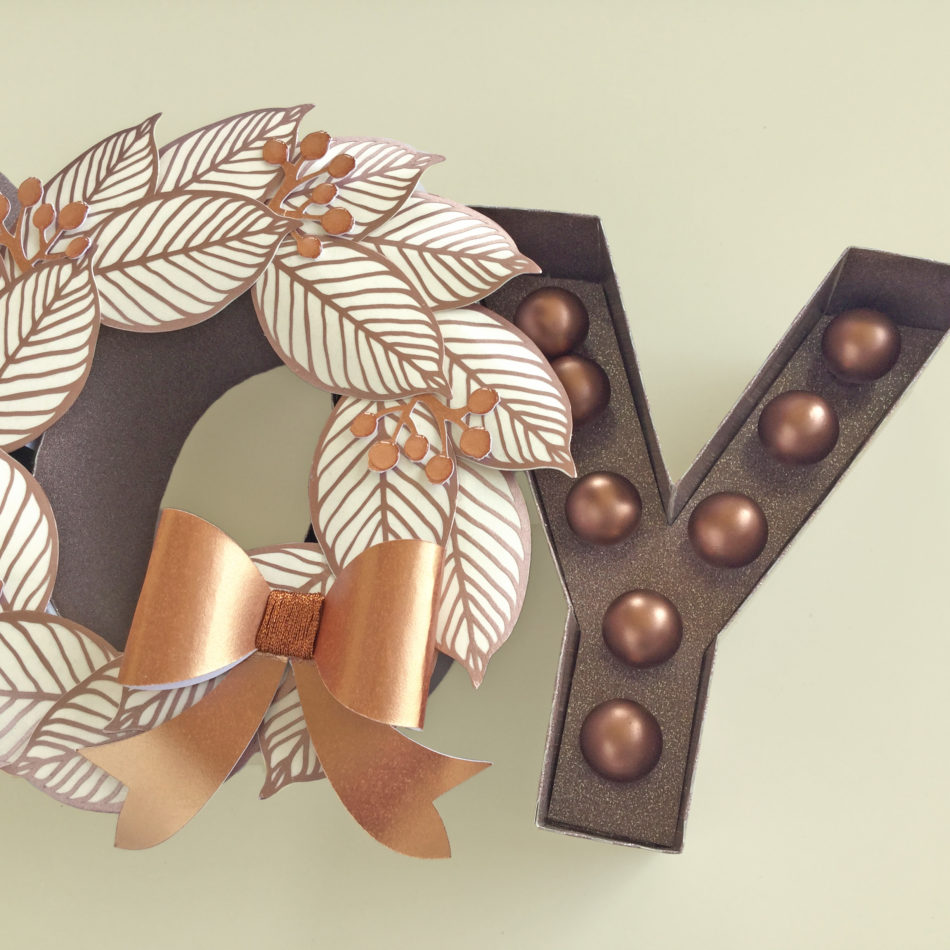
The marquee letters are made from paper and cardstock. I like to make these letters with thick cardstock for the center parts, and a thinner, more flexible paper for the outer part; here I’ve used glitter wallpaper! The wreath has been reduced in size from the original and the delicate cuts on the leaves are cut from metallic vinyl – great for fine details. The bow and berries are cut from metallic cardstock with metallic embroidery thread wrapped around the bow knot to give additional texture. The berries are made more rounded using some clear dimensional glaze. The faux light bulbs are actually glass tree bauble decorations, spray painted with metallic spray paint. They fit perfectly in the holes provided for fairy lights, but the holes could be reduced or enlarged if the base of the bulbs used differ in size. The letters are joined together with some wedges of card. Mine are made with cardstock scraps from around the letter centres and are hidden by the wreath’s leaves. The entire piece is light enough to be wall mounted with temporary hook and loop hangers.
All the cut files used are by Carina Garner and Mini Lou and are available from the Silhouette Design Store:
My name is Janet Packer, a passionate papercrafter from Aberdeen, Scotland. My background is in education and technical instruction and I love to share crafting techniques, new products, and design sources. My craft blog, Crafting Quine, is brimming with ideas for card making, paper craft and home decor, many using the Silhouette Cameo. You’ll find hints and tips galore, as well as step-by-step project instructions, and crafting inspiration with a thrifty bias. For updates and pretty crafting pics follow me on Instagram.
Please note that you need to watch the entire video (and or skip to the end) because I have several tips and tricks for ALL of the ornaments throughout but especially at the end!
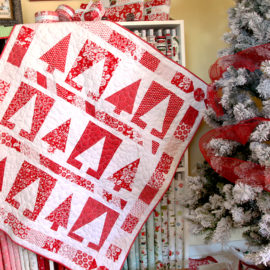
Hi everyone! To kick off my new line So Ruby, I am hosting a quilt along on instagram! I’ll have 5 days worth of videos starting on November 12th-16th at @carinagardner. And the quilt you will be making is the one shown here!
You will need the following supplies: + A fat quarter pack of So Ruby Fabric + 1/8 yard of light interfacing + 1 1/3 yards of white fabric (Note: technically you can use the WHITE patterned pieces in fat quarter pack for this if you want a more patchwork look!) + about 1 1/2 yards backing
We will be making this entire quilt that week, and I really hope this is a fun way to kick off the holiday season! AS you get your supplies or start cutting, tag your posts #carinaquiltalong so I can see what you are up to!
Alright, I know some of you are eager beavers so I have the full set of cutting instructions for you right here! You can get everything cut and ready to go for that week OR you can simply wait until that week and cut as we make the blocks…your choice!
CUT THE FOLLOWING:
Monday, November 12th: Tree Quilt Block
(Total of 12 Tree Blocks)
+ six red (mix and match the fabrics) 10 in. x 10 in. squares
+ six red (matching the fabrics above) 2 in. x 10 in. rectangles
+ six white 10 in. x 10 in. squares
+ six white 2 in. x 10 in. rectangles
+ six red (mix and match the fabrics) 2 in. x 2 in. squares (trunk)
+ six white 2 in. x 2 in. squares (trunk)
Tuesday, November 13th: Candy Cane Stripe
(Total of 2 Candy Cane Stripes)
+ thirty red (mix and match) 2.5 in. x 4.5 in. rectangles
+ four 1.5 in. x WOF white rectangles
Wednesday, November 14th: Peppermint Quilt Block
(Total of 4 Peppermint Blocks)
NOTE: This is an intermediate to advanced block.If you are a beginner, you can skip this block and simply cut out four 6.5 in squares in red fabrics!
+ sixteen red color A 3 in. x 3 in. squares
+ eight red color B 3 in. x 3 in. squares
+ eight white 3 in. x 3 in. squares
+ four white 3.5 in. x 6.5 in. rectangles
+ sixteen white 2 in. x 2 in. squares
+ four 4 in. x 4 in. pieces of fusible interfacing (I used the single sided fusible featherweight)
+ one 3 inch circle template (available for download below)
Thursday, November 15th: Patchwork Borders
(Total of 2 Short Borders and 2 Long Borders)
+ thirty-six red/white So Ruby fabrics cut into 3.5 in. x 4.5 in. rectangles
+ eight 2 in. x WOF white fabric
Friday, November 16th: Putting it all together!
+ Binding – I’m not going over this, but you can patch together binding from your fat quarter pack OR purchase a single fabric. You will need about 1/2 yard if you use the WOF for your binding.
All the videos will be hosted on instagram @carinagardner. Of course you can watch via your computer by simply clicking on this link. There are several videos everyday so make sure you watch them in the correct order! (You will see each video noted as Part 1 of 2, ect.).
The final quilt is about 44 in. x 50 in. If you plan on machine quilting it yourself you will need crib sized batting.
Here is the template you will need to download (It is just a 3 inch circle…if you have a way to measure this at home, you don’t need to download this one!)
This July I got together with my 11 roommates from college for our 20th reunion! We visited Alcatraz, biked the Golden Gate Bridge, and more! Check it out below! You can subscribe to the channel here to never miss a video: SUBSCRIBE.
November Block of the Month is up! Th is the final video this year and shows you how to put together all the block pieces including dimensions for borders!
Download all the quilt instructions from my shop for here:
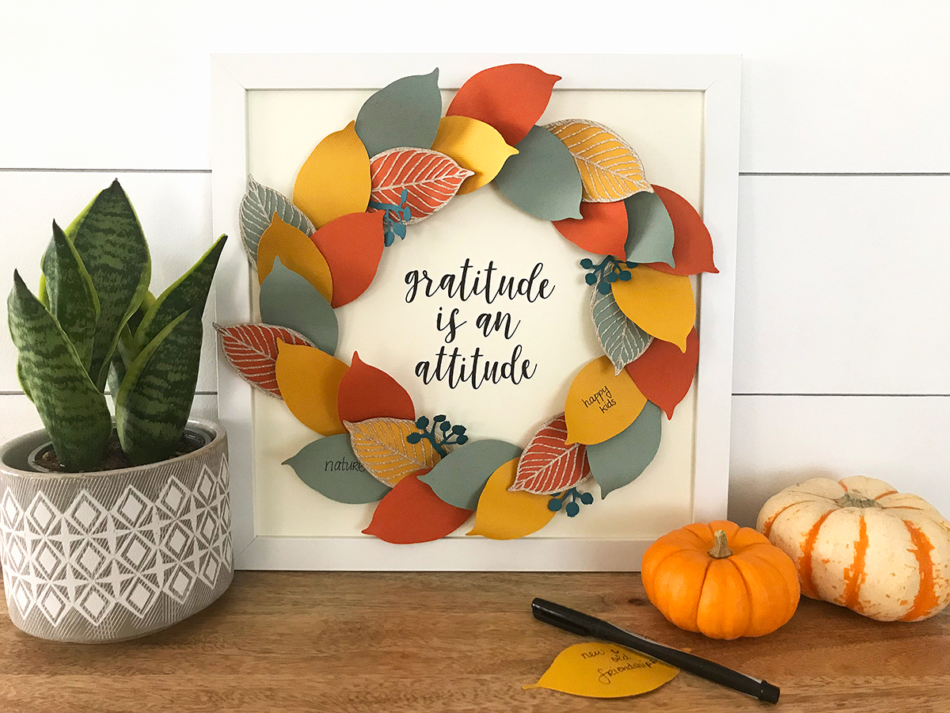
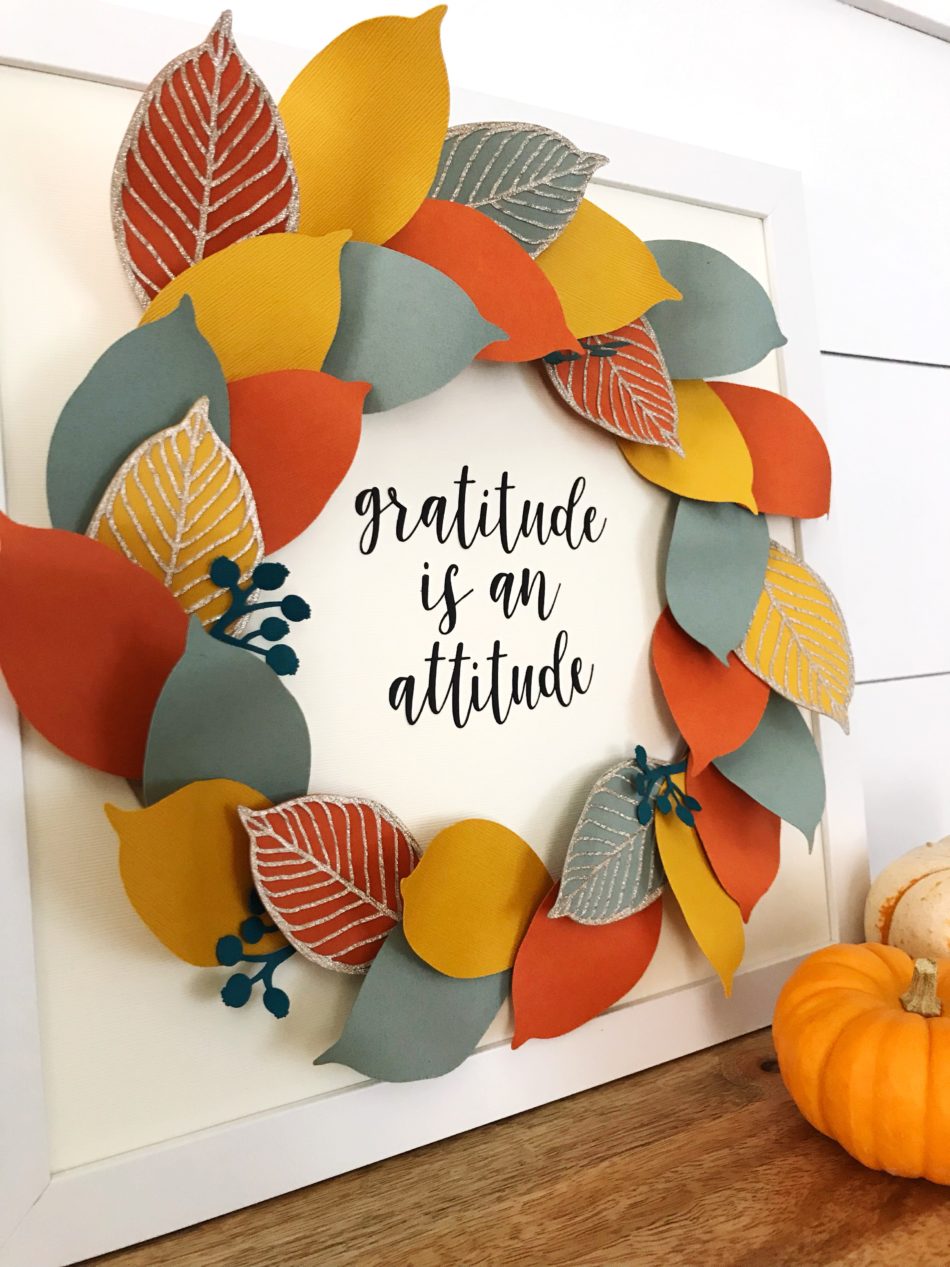
Creating beautiful papercrafts is always fun but to take it up a notch and make it interactive and a part of my family’s daily life…THAT is #craftyparentgoals! Thankful trees are popular around this time of year as we reflect on the year and count our blessings. This project takes the same concept of writing on leaves but assembles them into a stunning wreath.
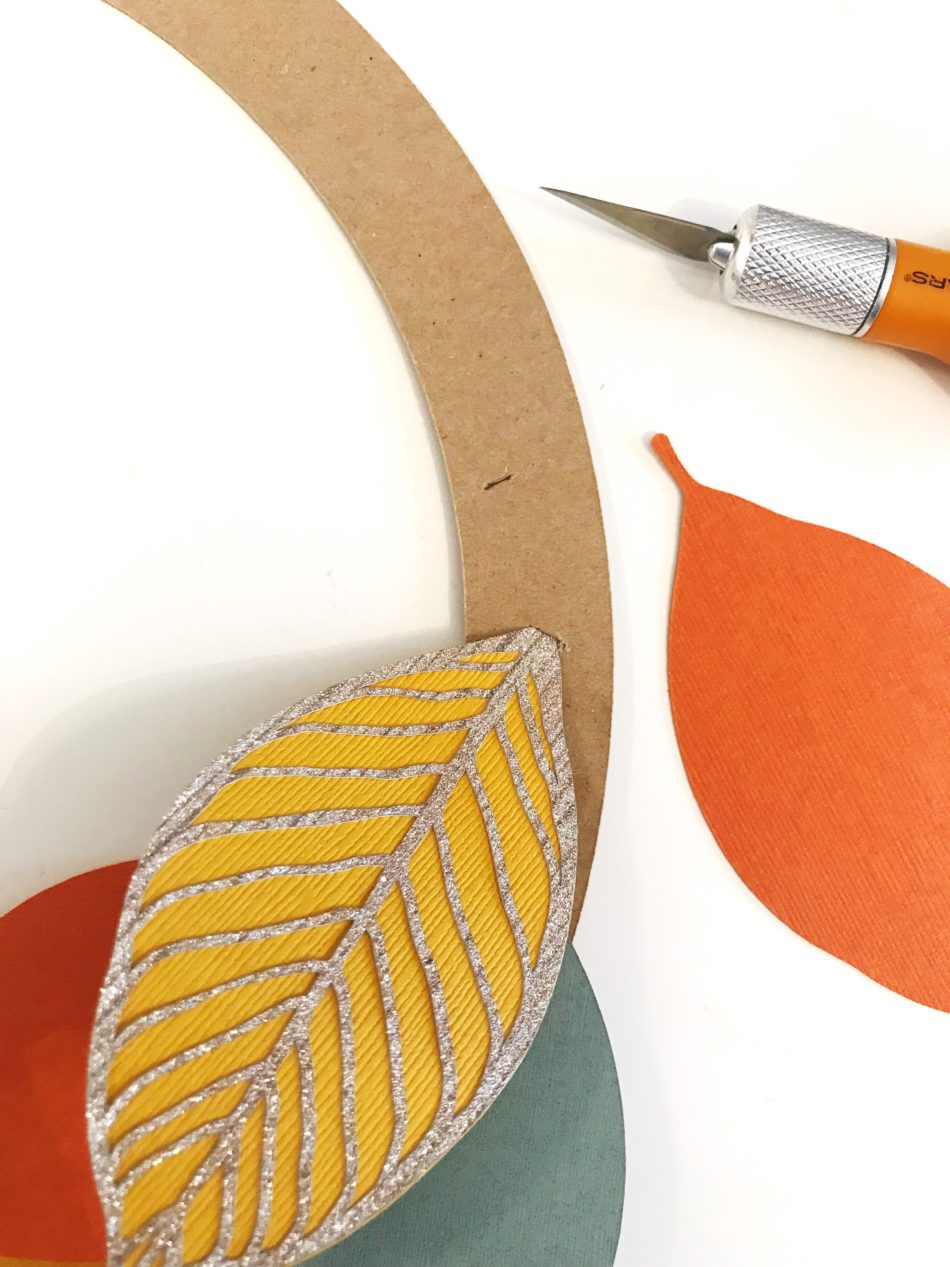
For the leaf cutouts, I used three different colored cardstock in fall colors. I decided to use a glitter cardstock for the lace-like leaf cutout to give the wreath some visual interest and sparkle. As for the base circular piece, I used chipboard because it is a stiffer material that can hold the weight of the leaves when they are attached to it.
I created a natural look with the leaves by giving it some dimension. I did this by bending the leaves gently with my fingers or curling the leaves with a pencil until the desired look is achieved.
With an Xacto knife, I cut a small slit on the circular chipboard base that was wide enough for the leaf stem to slip in. I arbitrarily cut slits wherever I felt the next leaves should go and continued around the chipboard base piece.
I found the perfect phrase in CG Thankful Dingbats, cut it out using black cardstock, and glued it onto an ivory-colored cardstock that was already inserted into a 12in x 12in frame. Note: a scrapbooking glue with a fine tip works best for thin cutouts.
Lastly, with strong scrapbooking adhesive applied to the back of the circular chipboard, I pressed it firmly onto the framed cardstock. And all that is left to do is jotting down things we are grateful for and remembering that gratitude is an attitude!
Hello from Southern California! I’m Christine, the gal behind Studio Xtine, where I share fun project tutorials, free printables, and a tiny glimpse of my favorite things like donuts, tacos, and more donuts. Ingrained in me is a deep desire and joy to create, which is why I love my Silhouette machines! When I’m not crafting, you can find me, my hubby, and my two munchkins hiking, devouring poke bowls, and strapping on a GoPro for our adventures.
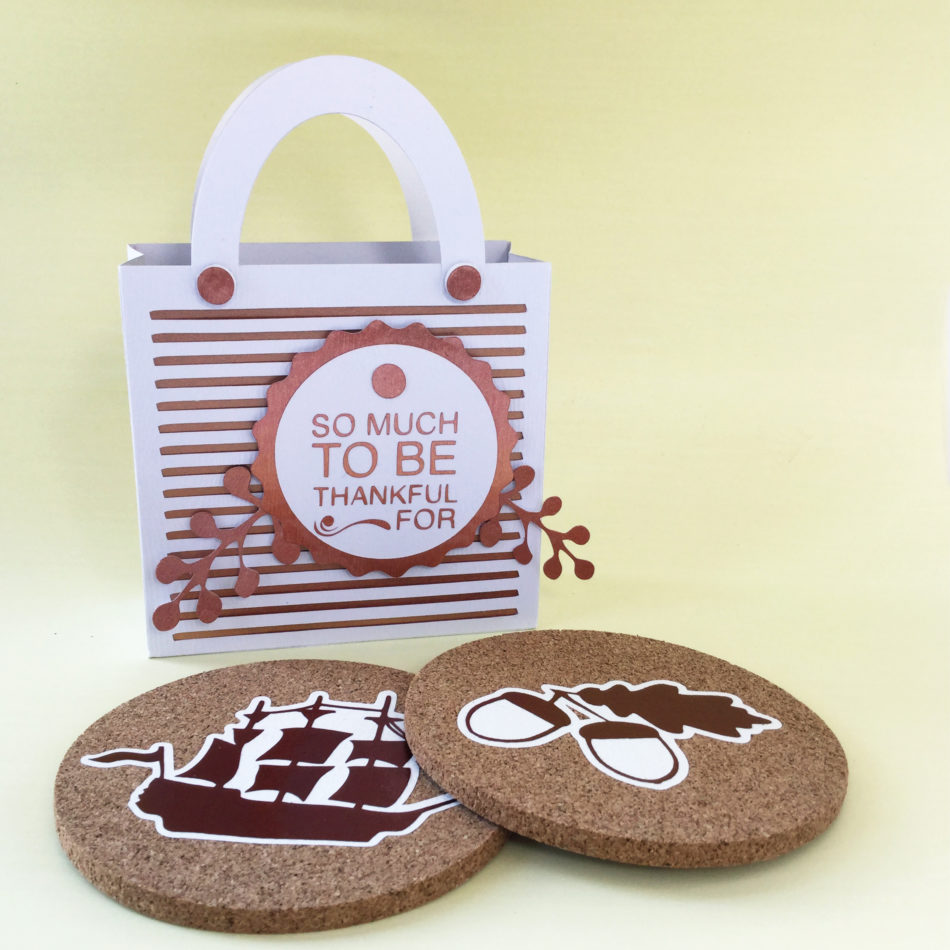
It is great to be able to make useful homemade gifts and to present them in lovely gift packaging. This Thanksgiving gift of practical cork drink mats in a cute presentation bag makes a perfect family or hostess gift.
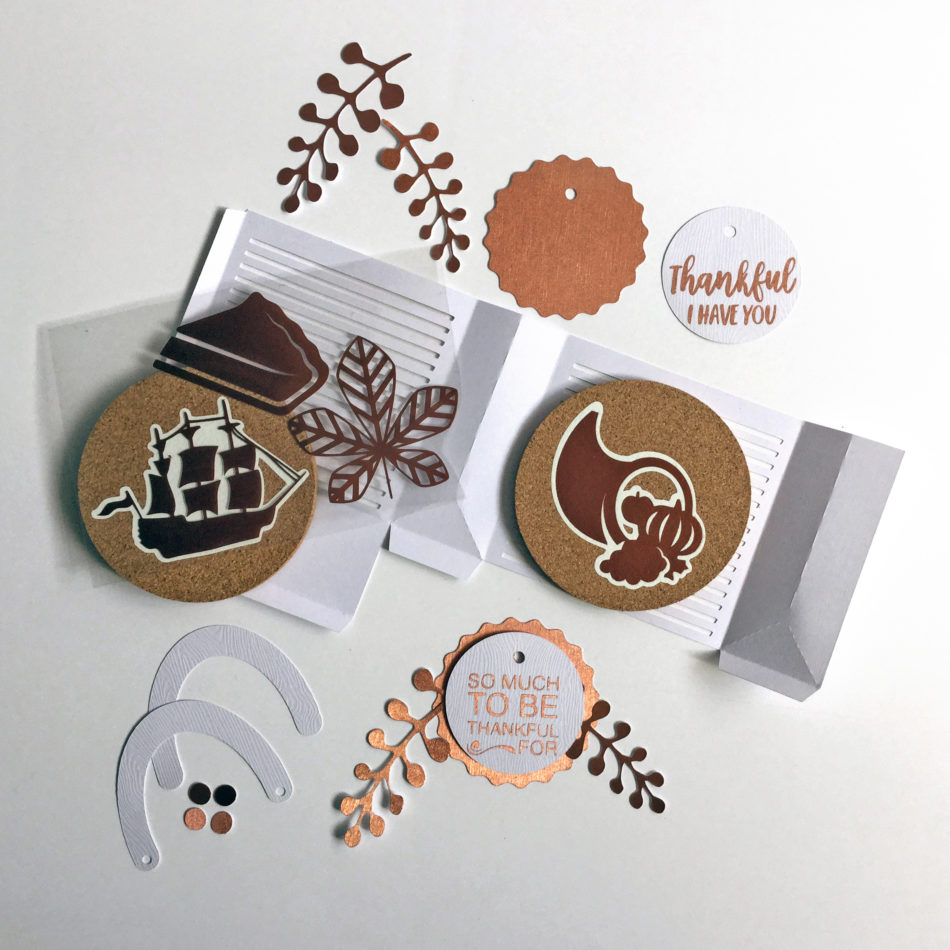
The cork mats are decorated with heat transfer materials in warm metallic copper, set off against smooth white vinyl offset outlines. All the shapes come from a selection of designs from two sets of Dingbat fonts. The striped gift bag is a lovely way of gifting them, being cut from wood textured white cardstock with copper cardstock and metallic vinyl accents (I highly recommend cutting tiny details, such as wording and flourishes, in adhesive sign vinyl). The foiled decorative accents come from a further set of dingbats. It’s such fun to be able to mix and match the tags, sentiments, and leafy sprig designs – there are so many variations to choose from in the dingbat fonts .
All the cut files used are by Carina Garner and Mini Lou from the Silhouette Design Store:
My name is Janet Packer, a passionate papercrafter from Aberdeen, Scotland. My background is in education and technical instruction and I love to share crafting techniques, new products, and design sources. My craft blog, Crafting Quine, is brimming with ideas for card making, paper craft and home decor, many using the Silhouette Cameo. You’ll find hints and tips galore, as well as step-by-step project instructions, and crafting inspiration with a thrifty bias. For updates and pretty crafting pics follow me on Instagram.
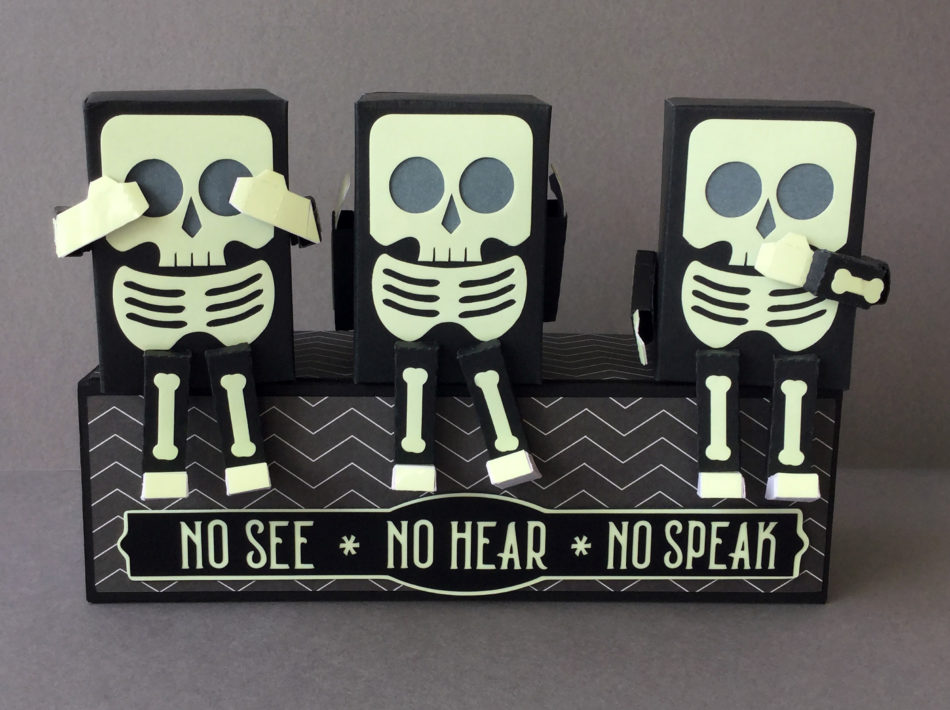
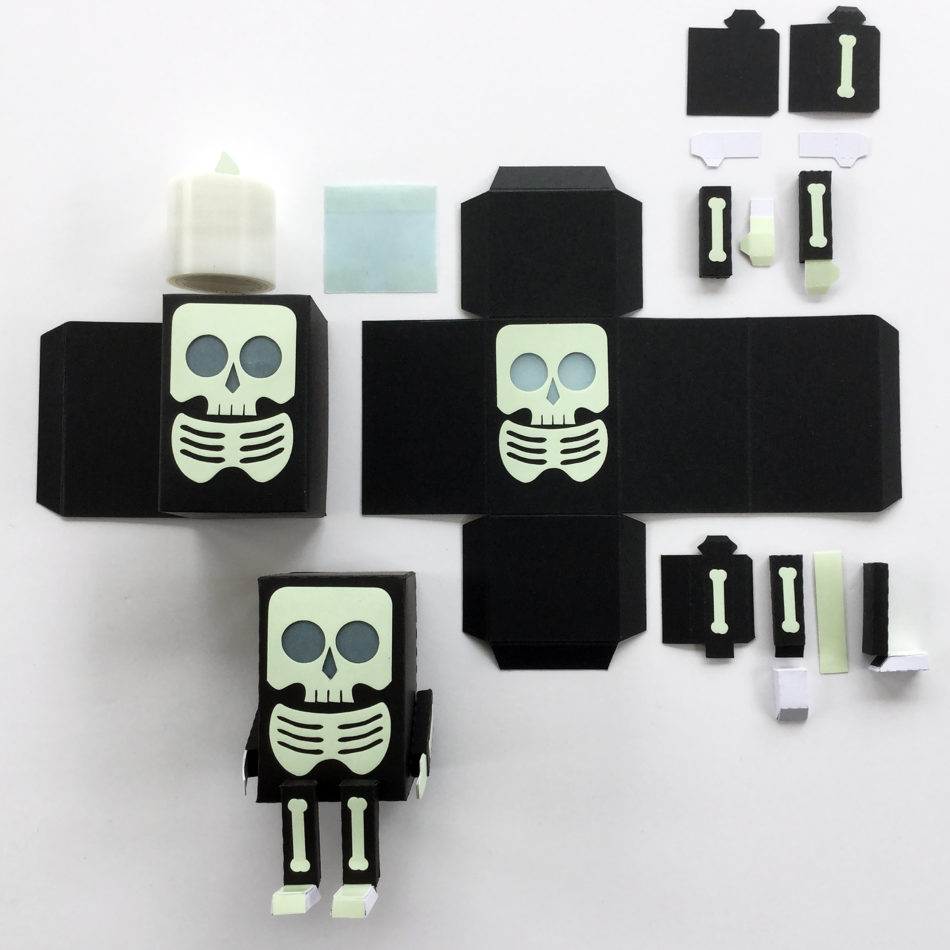
I LOVE halloween, and it is the perfect opportunity to use our cutting machines to make the most fun and unique items to decorate our homes! This mini skeleton shelf sitter is such a cute halloween make, and by adding the bones cut from glow-in-the-dark paper, a square of vellum behind the eyes, and popping a LED tea light inside, it becomes a little spooky too!
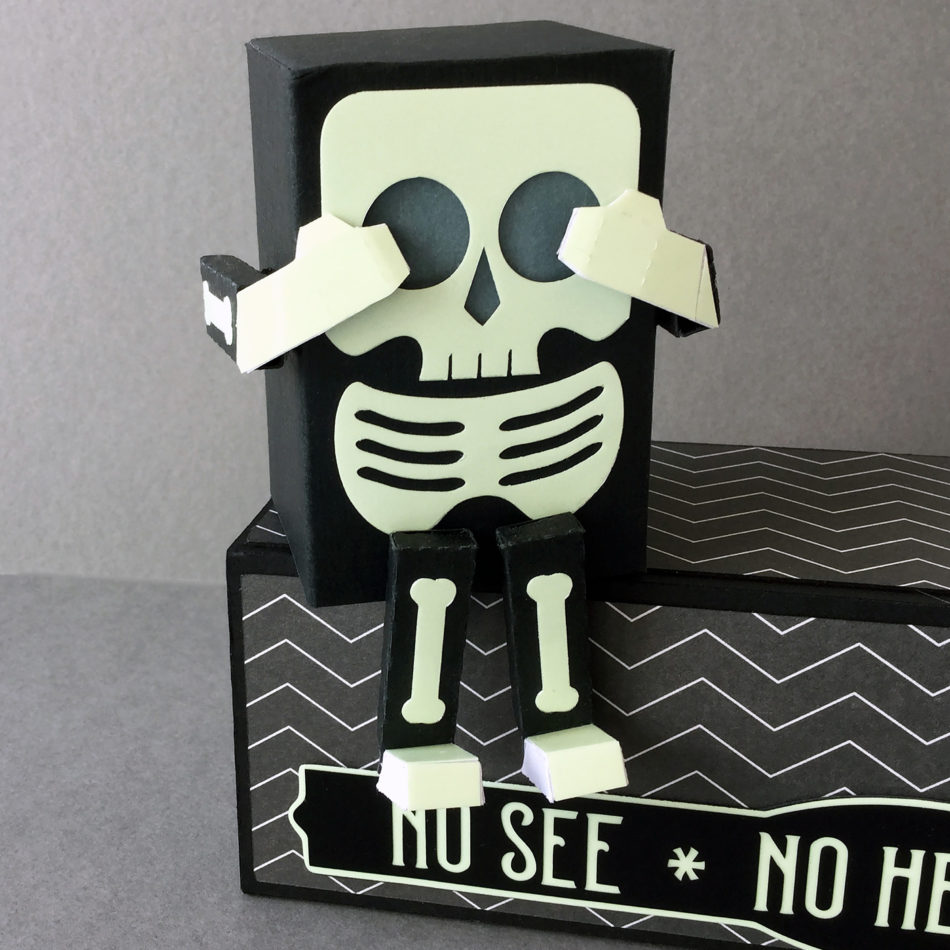
As I was putting the first one together I had the idea that three skeletons in a row could become a take on the three wise monkeys; the three wise skellies! Just a little manipulation to the placement and construction of the hands and arms and the were transformed into ‘see no evil’, ‘hear no evil’, and ‘speak no evil’ skeletons! To achieve the different arm configurations, I simply cut a few extra pieces and played around with them until I like the positioning.
Originally designed to sit directly on a shelf, I mounted them onto a single box. It is an enlarged version of one of the I Love America boxes, stretched until it was big enough for the skeletons to sit comfortably side by side. I then added a sign in black vinyl layered on glow-in-the-dark-paper in the lovely CG Posh font, and a stretched label from the CG Pretty Shapes Dingbat set.
The finished group can sit anywhere in the house: shelf, mantle, or just about any piece of furniture. For an even more fun idea, the boxes could be mounted directly to the wall with removable picture fixings. I think they look best after dark. What do you think?
All the cut files used are by Carina Garner and Mini Lou from the Silhouette Design Store:
My name is Janet Packer, a passionate papercrafter from Aberdeen, Scotland. My background is in education and technical instruction and I love to share crafting techniques, new products, and design sources. My craft blog, Crafting Quine, is brimming with ideas for card making, paper craft and home decor, many using the Silhouette Cameo. You’ll find hints and tips galore, as well as step-by-step project instructions, and crafting inspiration with a thrifty bias. For updates and pretty crafting pics follow me on Instagram.
Hi there my fellow crafters!! My name is Nicole, known better as “teachdanz” in the craft world, and I am here today with a Halloween inspired project for you.
To create my Halloween treat boxes I used the following files from Carina Garnder –
I started off by opening up the Snowflake Favor Bag in my silhouette design studio. I ungrouped everything and then resized the bag to 11.5 inches in height keeping the sizing “locked” so that the image increased proportionately in size. I resized the layers for the sides of the bag too. After I cut out the bag and the layers I glued those together and got to work on the candy corn swirl flourish. I sized the flourish to fit the sides of my bag and then did an offset. Since I used a striped paper for my bag I wanted to make sure the candy corn flourish stood out and didn’t get lost in the busy background. I used foam adhesive to pop my candy corn images up to give a bit of dimension to the bag.
I designed these to be given as a Halloween treat but they could easily be redone in fall colors to make it more of a “fall/Thanksgiving” themed treat bag. I really like this treat bag and the versatility of it!!
Thanks so much for stopping by today!! I hope I have inspired you today!
Find all of Nicole’s amazing projects at the links below!
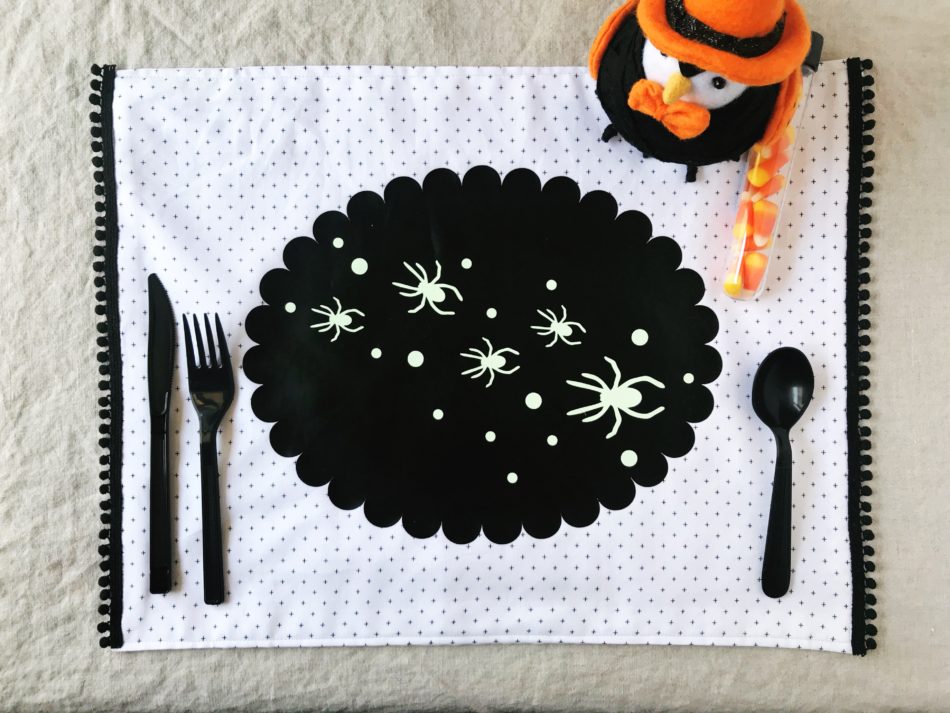
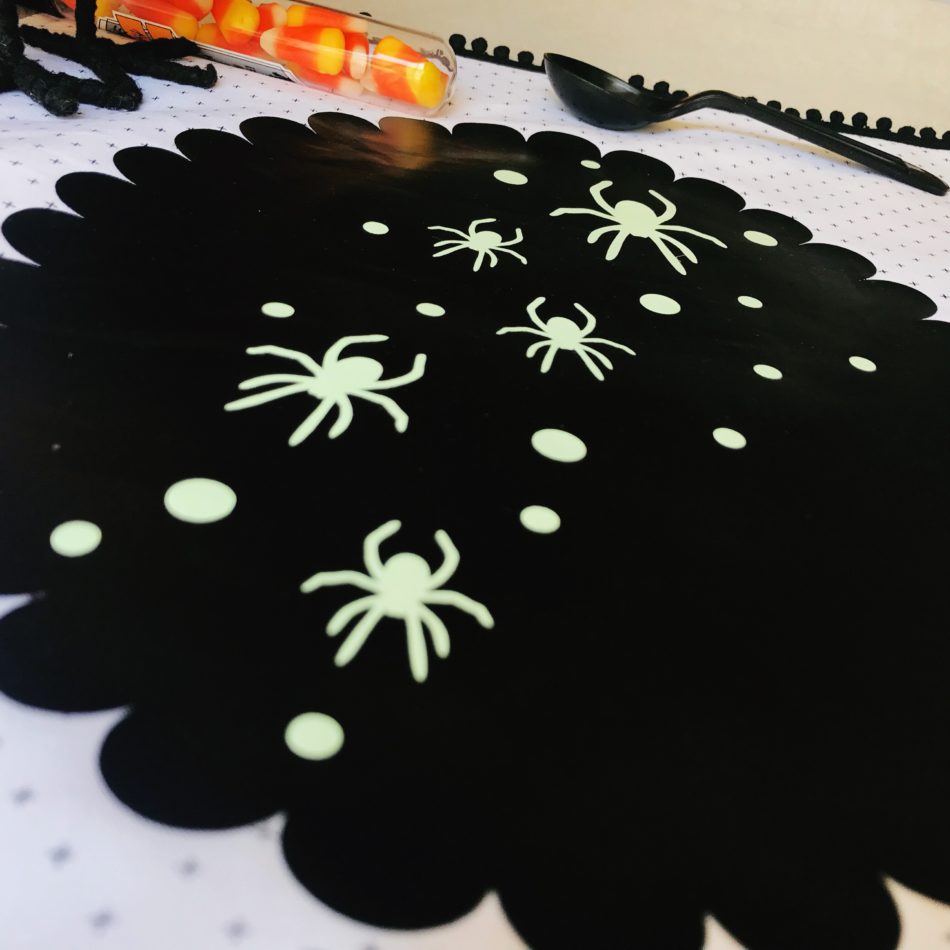
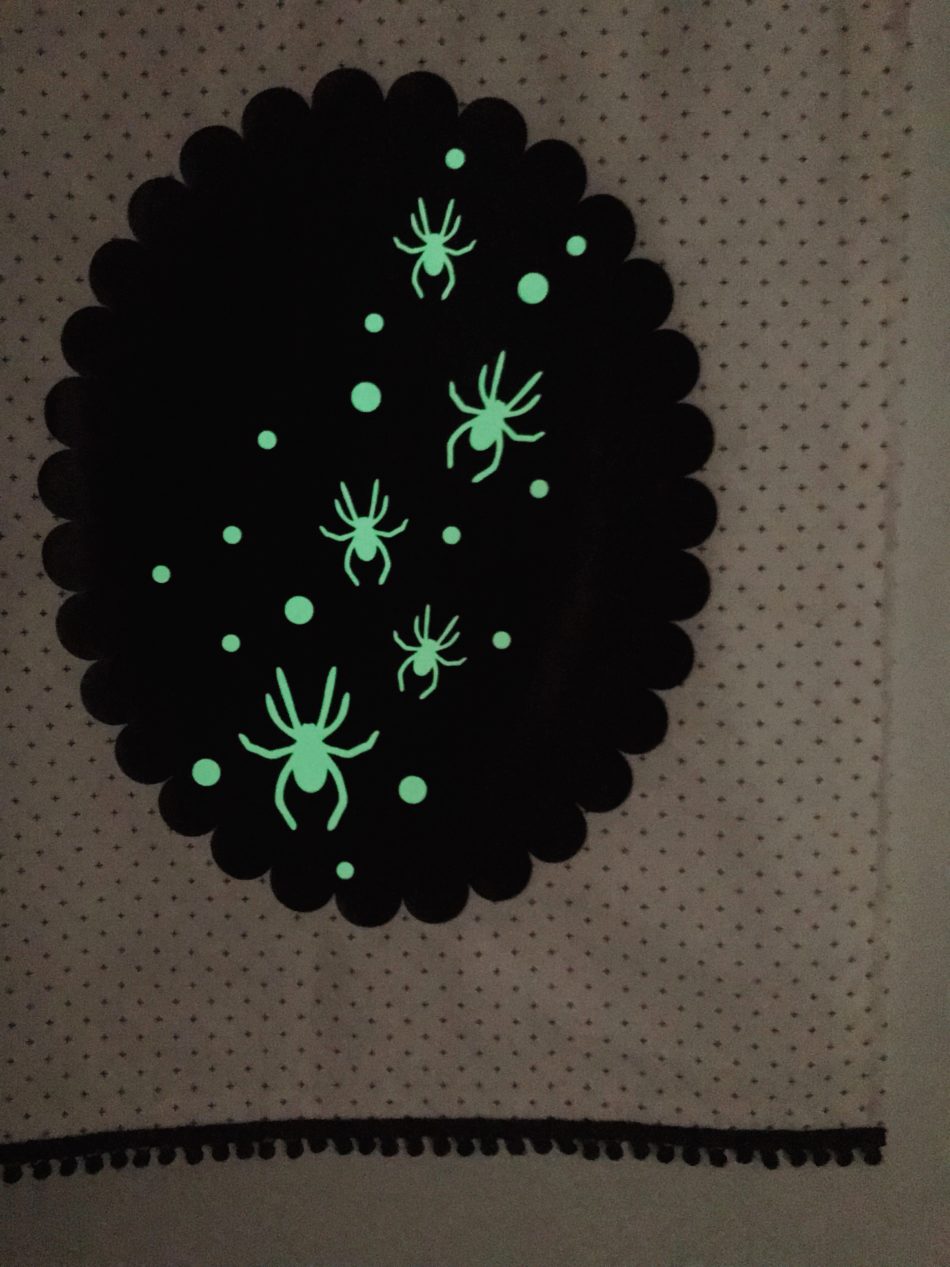
As soon as summer ends, I get right into fall decorating mode because Halloween is my favorite holiday of the year! First on my decorating to-do is our dining room tablescape and I’m so thrilled how well this DIY placemat project turned out!
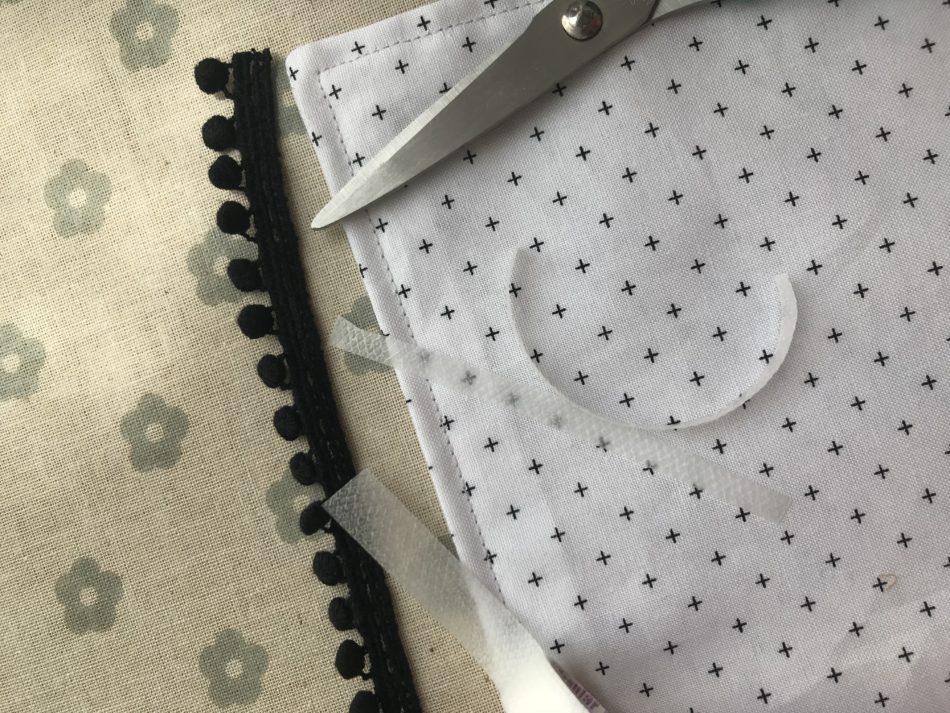
Now I’ll just need to make a whole set! Making the fabric placemat was the hardest part but that’s because I am a sewing newbie. My favorite part of this project was adding glow-in-the-dark heat transfer vinyl for the dots and spiders! Anything glow-in-the-dark screams Halloween, right?
Hello from Southern California! I’m Christine, the gal behind Studio Xtine, where I share fun project tutorials, free printables, and a tiny glimpse of my favorite things like donuts, tacos, and more donuts. Ingrained in me is a deep desire and joy to create, which is why I love my Silhouette machines! When I’m not crafting, you can find me, my hubby, and my two munchkins hiking, devouring poke bowls, and strapping on a GoPro for our adventures.
The kids and I spent a day at Universal Studios this summer. It was the first time for Charlie (my 5 year old) and the second time for the Felicity, Siri, and myself. Here are our top 5 things that we loved at Universal Studios this year! Make sure and watch through the end to see how lucky Felicity is!
My third video is up and it’s a quick little trip I took with Josh to Chicago just a few weeks ago! It was a quick trip but we packed in all the essentials for this trip including hitting the Frank Lloyd Wright house, Radiohead concert, a boat tour, Navy Pier, and of course, FOOD! (We ate A LOT on this trip lol)





 \
\
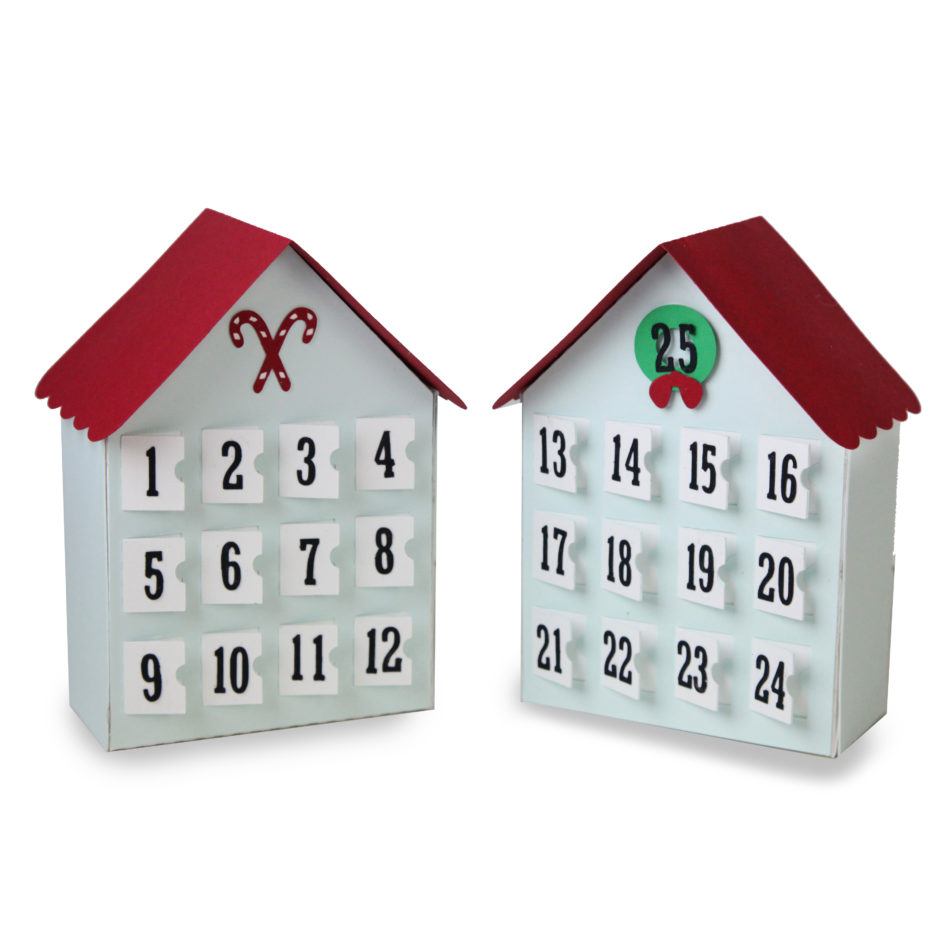
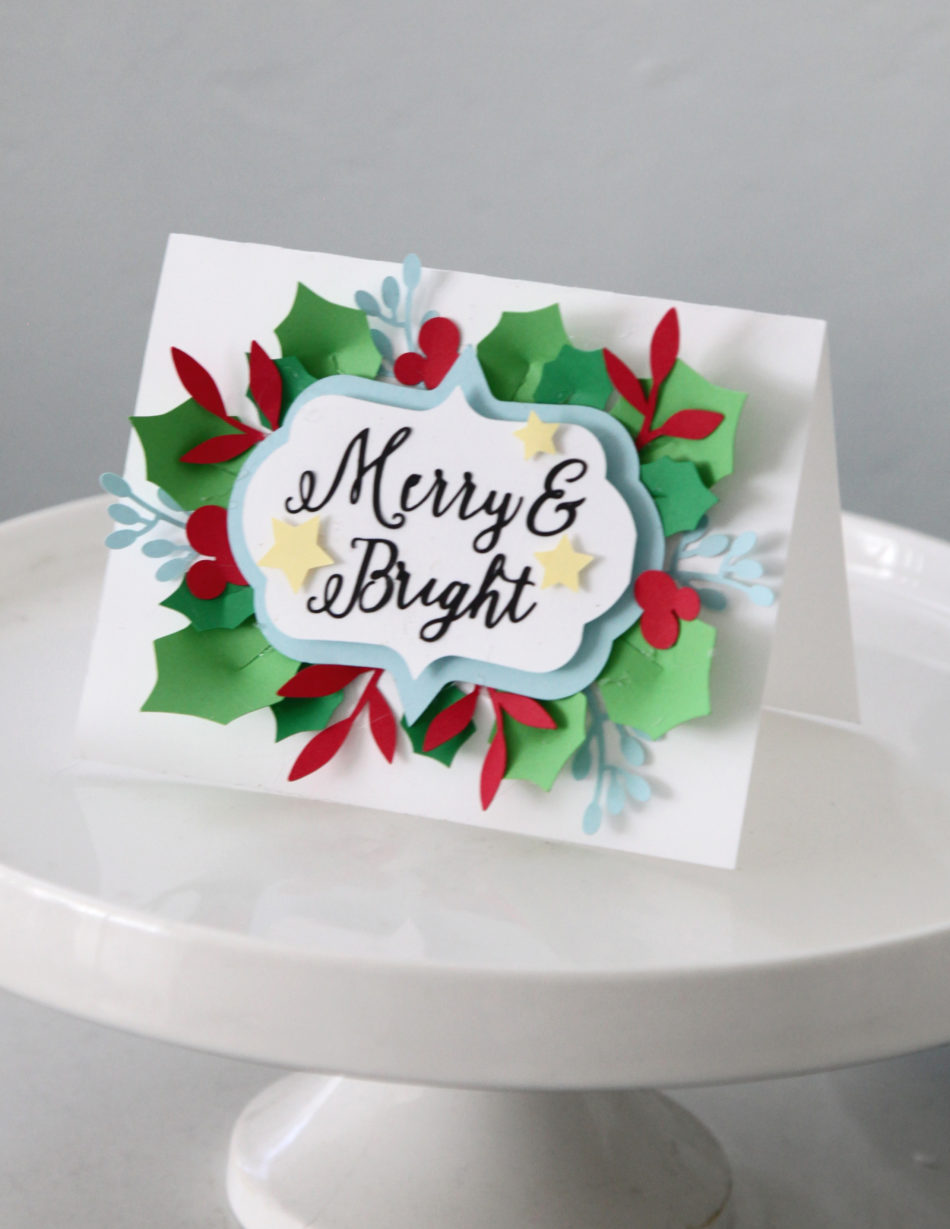
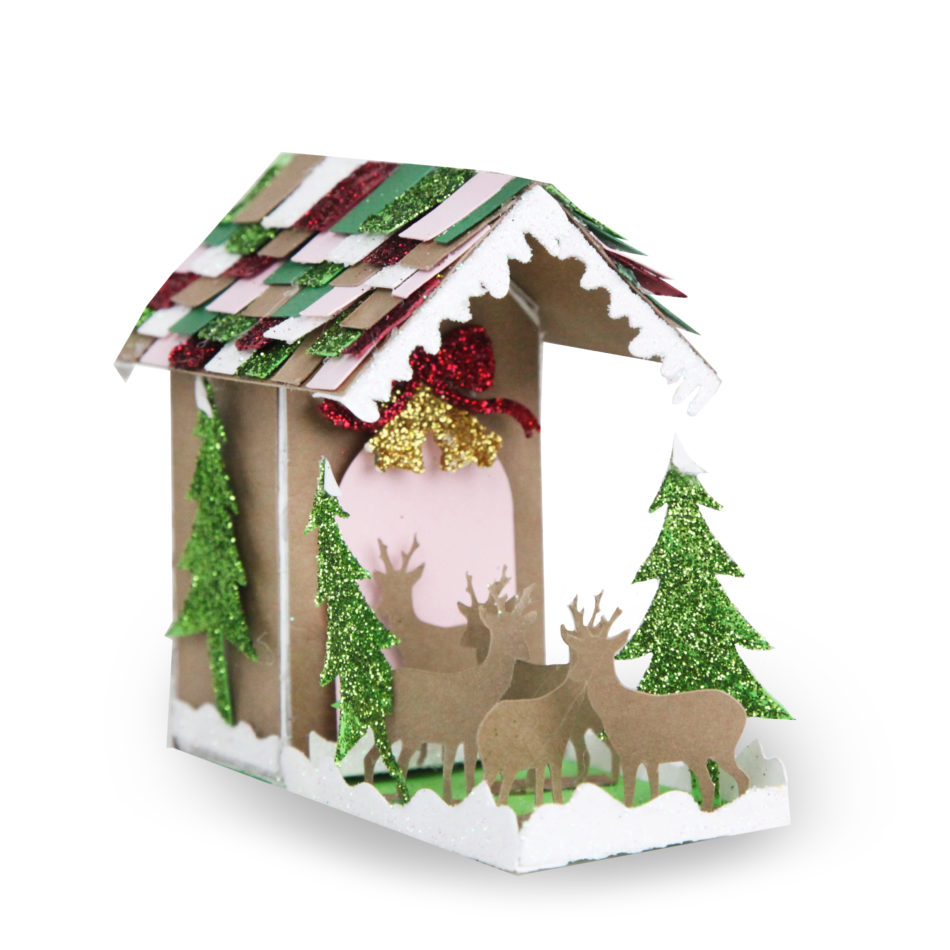
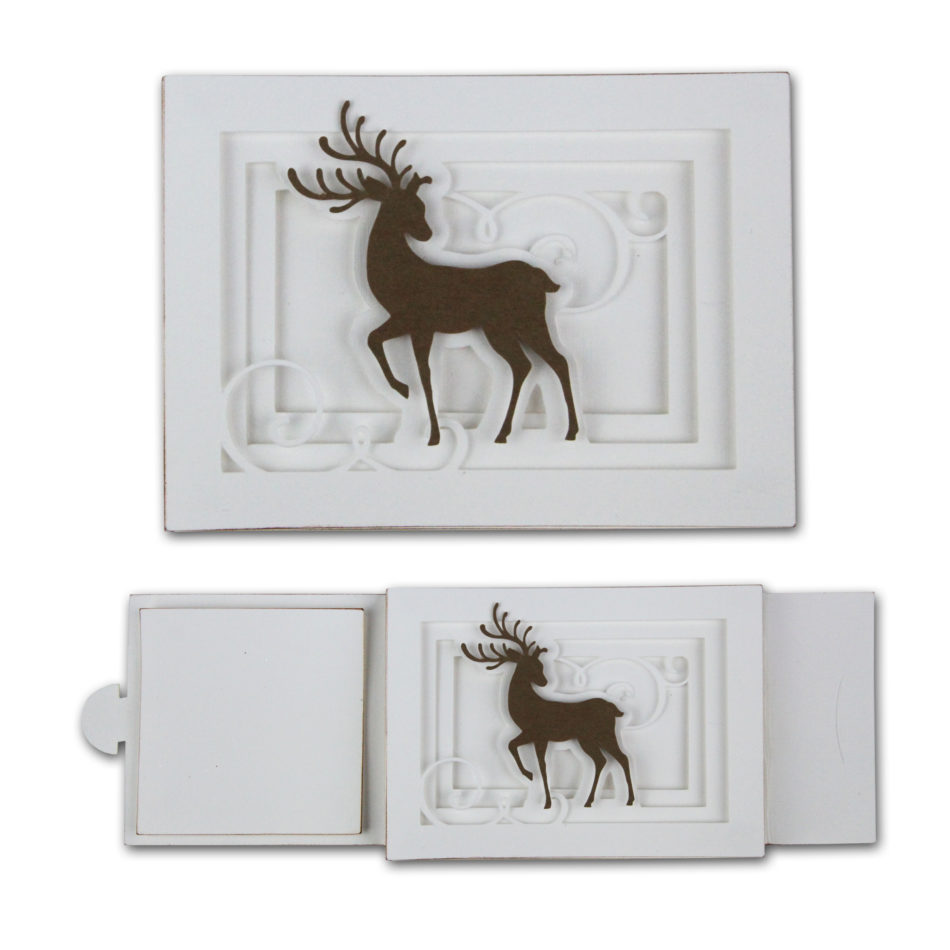


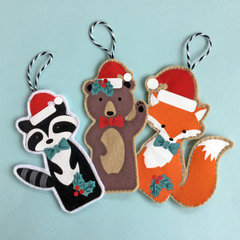 I love making Christmas decorations that can be used year after year, adding to our collection of family heirloom decor. These finger puppet files are intended to be made from paper, but with the simple addition of an offset, and omission of the finger holes, each cute creature can be cut from felt and flock heat transfer vinyl to make lasting tree ornaments. The fox, bear and racoon have been decorated with Christmas accessories taken from the dingbat file shown (letters e,x and z) and cut from fuzzy textured heat transfer. Once the decorations have been fused and the figures padded with a little wadding, they have been sewn by hand to make them perfect for decorating our holiday tree.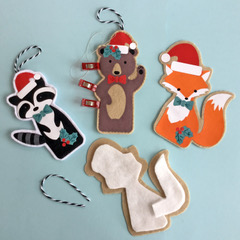


 Today we are starting our So Ruby Quilt Along at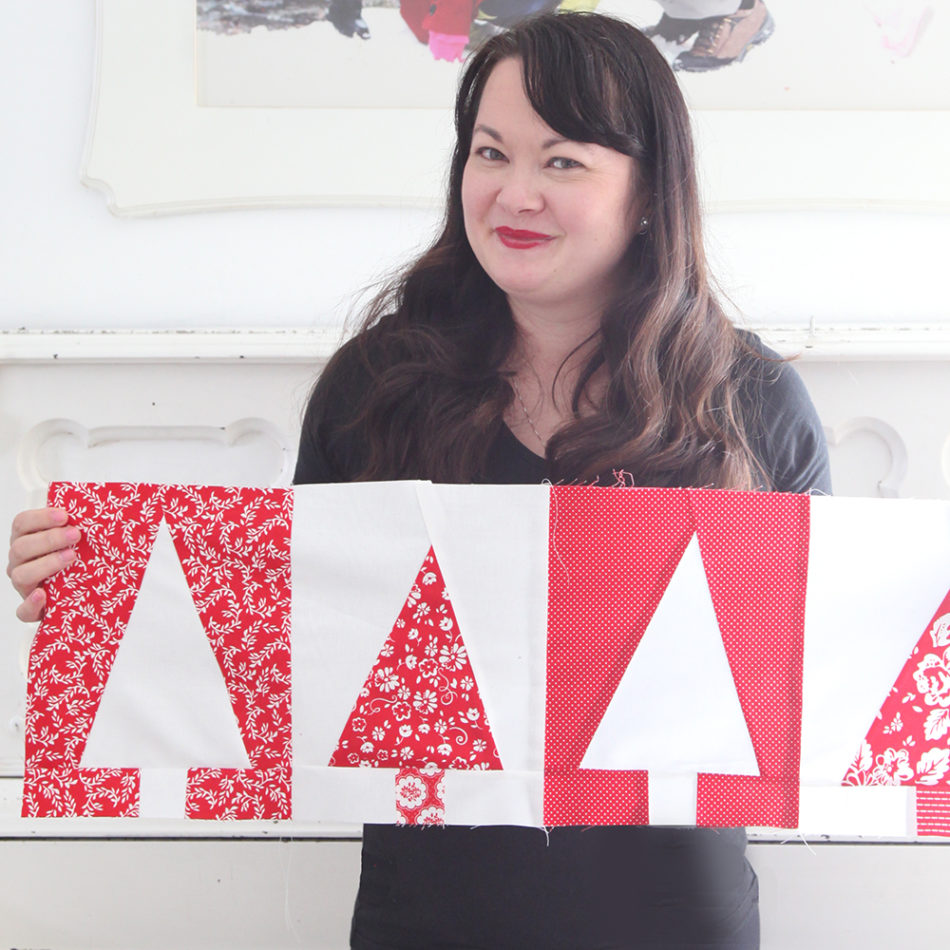



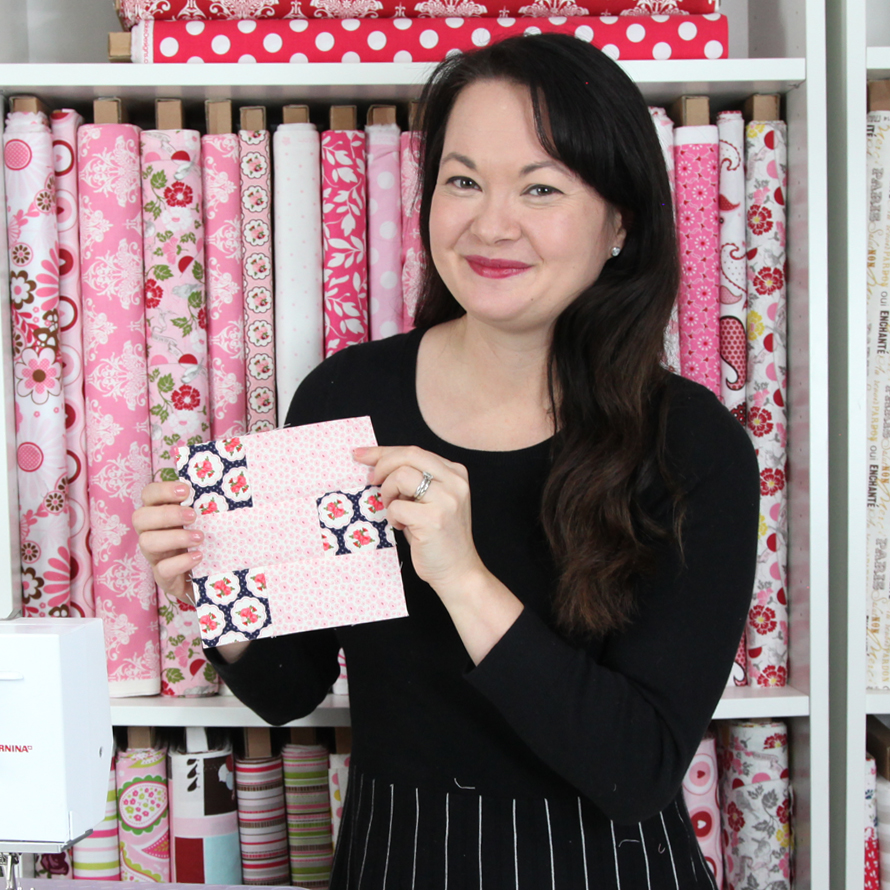
 August Block of the Month is up!