Creating beautiful papercrafts is always fun but to take it up a notch and make it interactive and a part of my family’s daily life…THAT is #craftyparentgoals! Thankful trees are popular around this time of year as we reflect on the year and count our blessings. This project takes the same concept of writing on leaves but assembles them into a stunning wreath.
For the leaf cutouts, I used three different colored cardstock in fall colors. I decided to use a glitter cardstock for the lace-like leaf cutout to give the wreath some visual interest and sparkle. As for the base circular piece, I used chipboard because it is a stiffer material that can hold the weight of the leaves when they are attached to it.
I created a natural look with the leaves by giving it some dimension. I did this by bending the leaves gently with my fingers or curling the leaves with a pencil until the desired look is achieved.
With an Xacto knife, I cut a small slit on the circular chipboard base that was wide enough for the leaf stem to slip in. I arbitrarily cut slits wherever I felt the next leaves should go and continued around the chipboard base piece.
I found the perfect phrase in CG Thankful Dingbats, cut it out using black cardstock, and glued it onto an ivory-colored cardstock that was already inserted into a 12in x 12in frame. Note: a scrapbooking glue with a fine tip works best for thin cutouts.
Lastly, with strong scrapbooking adhesive applied to the back of the circular chipboard, I pressed it firmly onto the framed cardstock. And all that is left to do is jotting down things we are grateful for and remembering that gratitude is an attitude!
Hello from Southern California! I’m Christine, the gal behind Studio Xtine, where I share fun project tutorials, free printables, and a tiny glimpse of my favorite things like donuts, tacos, and more donuts. Ingrained in me is a deep desire and joy to create, which is why I love my Silhouette machines! When I’m not crafting, you can find me, my hubby, and my two munchkins hiking, devouring poke bowls, and strapping on a GoPro for our adventures.
This week my Silhouette release continues with 2.25 in. x 3.25 in. cards. I’m really loving this size! This week the cards are “layered.” I cover a lot of different themes—wedding, baby, spring to name a few. These Layered Cards are the same size as my Accordion Shadow Box Cards that were released last week. Because of this, I also have envelopes that match up to these cards.
I also have two videos below that will help you make these cards and envelopes. Please subscribe to the youtube channel if you are interested in these tutorials. Many times I am putting up these videos the week before the products are released so you can see what is coming out (your very own sneak peek!)
If you get one of each (layered card or accordion card + an envelope), you will find that it’s a very nice tight fit. Don’t use pop dots because the card will not fit. I may have an envelope come out that allows for a thicker card (tell me on instagram @carinagardnerpapercrafts if you want something like that!).
This week I am releasing these cool Accordion Shadow Box Cards! They fold flat and are so sweet. Cards are sized to 2.25 in. x 3.25 in. and can be cut on a portrait or cameo. There are 4 folds with layers of goodness! See how I put it together in the video below OR check out my quick instructions below. These are in my Silhouette Shop: https://www.silhouettedesignstore.com/artists/252689
Happy Crafting!
Carina
PS Make sure and subscribe to my youtube channel because this it the first of many videos that I am doing in this new format! I’m hopeful that you will be able to see clearly what I am doing!
Instructions
Cut out all the pieces in the file.
Fold the main card piece into an accordion shape.
3. Glue all the extra pieces into place using the preview photo as your guide. For items like flowers or butterflies, finger press to give dimension. Be sure to use the folded accordion card to decided where pieces should go so you do not mistakenly add pieces to the wrong side of the card.
There are lots of reasons that spring is a favorite time of year for most of us. Whether it’s the sunshine, bulbs in bloom, or the chirping of birds back from their winter hideouts; spring is a time of renewal. For me, I feel re-energized to make again. Here are some of the reasons spring is the best time to get your Silhouette machine out to CREATE!
1. Holiday crafts
Sure, you love making stuff for Christmas, but what about St. Patrick’s Day, Easter, Mother’s Day, and Graduation? These are some of my favorite holidays to make cards and projects for! (Animal Explosion Basket – Easter Bunny Design ID 122681)
2. Flowers
I don’t have to tell you that there are SO many good flower projects in the Silhouette Shop…because there always are! Party it up with some great floral projects! (3D Gold Fringed Petal Flower Design ID 109882)
3. Spring Cleaning
You would think this would be a reason NOT to be making stuff, but the truth is once your spring-cleaning is done, there is nothing like sitting down to your craft table to make. That’s right, creating in a clean space is pure happiness. And once you have cleaned, declutters, and dejunked your house, isn’t it the perfect time to make something to fill it back up again (wink)!
Spring is officially the best time to get organized. There are so many great FUNCTIONAL (not just pretty) projects to get your photos, knick-knacks, and office supplies organized.
This week is the last one I’ll be releasing Valentine’s so I’m going out with a bang! I also decided to double dip. These pencil cards are not only my final Valentine’s release but are also Felicity’s class gifts. She’s going to write on each of them, and I’m sure we’ll add a few quotes like “I’m write for you.”
TIP 1: When you are putting these together, I recommend putting your pencil through the slits FIRST and then gluing your pieces into place (see photo below).
There are several designs were two or more papers have slits that match up. Use the slits as your guides. Place the pencil through the slits first and then pull open the edges of the top paper to glue it into place.
TIP 2: I LOVE pop dots with these designs! And glitter. And stamping ink on the edges. I kept them all simple on purpose. So you can jazz them up or use them as a kid activity.
TIP 3: Add a printable. Simply use whatever word processing software you use and write up a cute phrase in a cute font. Print, cut and attach to these Valentine’s cards!
And in case you missed it (haha), I’ve been releasing Valentine’s for the last month. In fact, we have been releasing Valentine’s for both CGInc. and MiniLou for the past several weeks. You can check both shops here:
These adorable box card were released in my Silhouette shop this week! They are so fun to give and receive. You can write an note on them or give them with a present. They fold flat and fit in an A2 envelope so you can mail them easily. They’re pretty simple to put together, and so fun to give! Below is the tutorial for how to put them together.
There are several designs hitting the store for these so be sure to always search MiniLou and box cards!
Instructions for putting together Foldable Box Cards
1. Cut out all SVGs provided in the file. Glue on all the accessories to the box as indicated in the photo.
2. Then, to make the core body of the box, fold the box together, and glue the tab on the inside and fold the flaps down.
3. Next, Take the inserts and fold them into a “Z” shape. Fold one tab backwards and one tab forward.
4. To attach the inserts, use a glue stick for the tabs and place it in the box without sticking the tabs to the sides. When you are gluing the tabs, make sure to keep it in the “Z” shape, so each tab has glue on the opposite sides of each other.
5. When you have the insert where you want it, fold the box flat so the tabs attach. Make sure the top and bottom line up as you do this.
6. Next, glue the second tab on the same way.
7. Add any embellishments, and you’ve got an adorable card to put in the mail!
So after weeks of my production assistant and designer telling me it was TIME, I finally gave in and we are hosting bundles of SVG files on our site! This is a bit of a leap of faith on my part. I’m so hopeful that you will like what we have done and those of you with different types of machines (other than a Silhouette) have access to my designs!
So here is the deal: Each of our file sets include an svg file that works with most softwares & the Silhouette Designer Software AND it includes a studio file for the free Silhouette Software. In our descriptions, we have linked instructions, our private facebook groups, and added video tutorials so you can watch instructions DIRECTLY in the instructions. How cool is that?
Everyday, the team is uploading new bundles to the site so that you have access to all of my SVGS as well as MiniLou’s SVGs. Now all your cutting and crafting is easier than ever! Go check it out!
These darling Shadow Box Scenes pop together and then can be pulled apart and stored flat. For me, that makes for the perfect piece of Christmas decor! There are five scenes in all for you to enjoy the holidays!
1. Cut out the svg files. The sides, roof, and frames I cut out in kraft paper, the shepherd, background, and the main part of the sheep in black, and the frame, angel, and sheep fur in white.
2. Begin with the frames. Pop dot and attach the angel, shepherd, sheep, and white frame in their appropriate places. Once you have all the figures in place, you can start putting the nativity together.
3. Now, put the background and two side pieces together by slipping the tabs on the short ends of the sides into the slits of the background.
4. The frames attach similarly. Put the tabs on the ends of the frames into the slits in the side piece. Do this for all of the frames. Remember, the frames go in a certain order for it to have the shadowbox effect. The frame with the thickest bottom goes in the back and the thinnest goes in the front.
It will look like this when all of the frames are in.
5. For the roof, start with one side and put the tabs of the side piece into the slits of the roof. Do this for the other side. Make sure the side of the roof with the rounded edges goes in the front.
You’re done with your Nativity! I hope you have a chance to make the entire collection!
2. Begin with two pieces of the binding and fold along the dotted lines, then glue them together by overlapping the short sides.
3. Turn it over, and glue the wider folds together so the back looks flat and the front has tabs sticking out.
4. Take your pages and fold all of the creases inwards. (The picture below shows the binding on backwards. All those little glued together pieces will become the pages for the album).
5. Now to add the pages! Glue along the long edge of each page and attach the long edge to the back of one of the folds in the binding. This will create a double-sided/double thick page.
6. Glue the top side of the edge of the long page, as well as the bottom tab and fold the page over. This should create an envelope with an open top. Add a page to each one of the binding pieces.
7. Add the cover by gluing the left side of the cover to the bottom side of the flap. This makes the inside look clean and the binding flap will be covered with the binding cover later.
8. Glue the binding cover by matching up the crease of the binding cover with the square of the book. Glue the front, binding, and back side separately.
9. For the tabs, glue each number onto an oval (or whatever shape you have). Note: one of the albums (bracket) does not use this step.
10. Glue half of the ovals onto each tab, leaving space to slide the tabs into the slits and for the ovals to go on top of the page. There are 13 tabs, so each tab will have two numbers (one and two will be on one tab, three and four another etc.)
11. Slide the tabs into the appropriate slit on each page. Leave the oval out and glue the other half of the oval onto the outside of the page. Glue odd numbers to the front and even numbers on the back of each tab.
12. For the frames, take each frame and place pot dots on the back.
13. Place the frame in the center of the page and make sure the pop dots are firmly in place.
14. Glue the leaves to the berries and attach to the corner of the frame.
15. Place pictures and memories on each page to fill your 25 days of December Album!
I’ve been working on this Christmas Village for weeks now. Every time one of the little houses got put together, I couldn’t help but smile! Everything about this little village makes me so happy.
There are quite a few pieces, and they all can be purchased from Silhouette. Each building is very intricate and there are a lot of parts. I have a quick video on some of the harder pieces so you can see how they go together (see above).
As for displaying this village, there are soooo many options. I have two I’d like to suggest here for you. The first is a display made completely from foam core. I have a free svg file for you to make a template of the one I made and some instructions on how to put it together below. (The photo below is the display I created with foam core. You can make this too!)
The second way I would display it is on a mantle or coffee table. I love mine on top of our white piano. The best part is at night when we put electric tealights underneath and the entire thing lights up (picture of this below!).
If you place your village on a mantel, depending on the number of pieces you build, I suggest using cake plates and cups turned upside down to give dimension and layer to your village. Cover these with ‘snow’ you can purchase from your local craft store to hide these layers. Instant snow drift!
The two photos below is of the Christmas Village on top of my piano (about the size of the mantel). I love it up there! Every piece is so unique and darling. My family is really going to enjoy it this holiday season!
There are so many great pieces in this village. They will be release over the next two weeks (so keep an eye out for them!). The picture below is of the Santa’s Workshop, General Store, Gingerbread House, Trees, and Deer.
Picture below highlights the Clock Tower, Chapel, and Gingerbread House.
The train comes in two files—a Train Station with tracks and a curved 3D Train.
Happy little penguins anyone?
Check out the Snow Cottage, Elf Houses (with curved roof!) and the Chapel.
Turn off the lights and watch them glow! Instant Christmas Magic!
Download the zip. You will need 5-6 pieces of 20 inch x 30 inch foam core in white. You will also need a hot glue gun, a small package of ‘snow’, and x-acto knife.
There are four layers to this display. The zip contains 4 documents that may look a bit jumbled (everything needed to fit on a 12 x 12 template for Cricut users). All you need to do is pull all the pieces apart and cut each of them out. Then layout your template like I have below:
3. After cutting out your pieces you will lay the template onto each layer. Layer 1 you will use the template to cut away two edges of the display. Layer 2 you will need to add a width of 8.5 inches to add the depth. Layers 3 and 4 you can cut out as is.
4. Use an x-acto knife to cut these out. Don’t worry about making it perfect! Your snow will cover your mistakes!
5. Once the layers are cut out, you will want to create dimension by cut out several 2 inch strips the full length of the 30 inches on the extra foam core you have. Slice lightly into one side of the strips so that you can bend them to the shapes of your layers. Start with layer 2. Start at the side front and hot glue the 2 inch strip along the curve. Don’t worry about mistakes or gaps! Your snow will cover all of this! Once you have glued the strip along the edge of layer 2 you will glue it down to layer 1. Continue with all the layers using the diagram below to help determine how to place everything.
6. Once everything is glued together, simply layer snow on the display. I glued a little bit to the board to help everything stay in place. To glue the trees, deer, and penguins to the display, I moved the snow to the side and glued these pieces directly onto the foam core. Then I moved the snow back into place.
I hope you have fun making this display and the entire Christmas Village!
I love some dead branches in a vase as halloween decor. These little ornaments are the perfect accessory for those branches! They’d also be cute strung in front of a window or as a banner.
Every one of these ornaments are made a little differently. I’ve chosen to show you how to put together the hardest one. Most are simply layered with hexagons and shapes. Feel free to mix and match all of the ornaments in this collection!
1. Cut out the svg files. The main body of the ornament I cut out in a deep gray and the interior is a matte black with white spider webs and red spider.
2. Next take the hexagon sides and fold the flap that is connected to the long rectangle piece back onto itself and glue down. Repeat on the other side.
3. Fold all hex flaps away from each other so that they create a flat surface that you are going to glue your rectangle piece to. There are fold marks where each side of the hexagon’s flaps should be glued to your long rectangle. Repeat all the way around until you end with 2 open slits at the top
4. Slip the ornament hangers from the hexagon through those two open slits and glue together.
5. Take your flat hexagon accent pieces and pop dot them on each side of your ornament.
6. Lay the spider web over the top of your ornament with the long webs aligning with the corners of your hexagon. Bend them over the edges to give you a good idea where to glue. Neatly tuck your folded spider web string to the inside of the corner to the hexagon and glue together. Repeat all the way around and the other side.
7. Once your finished pop dot your spider to the web and you’re done!
It’s my favorite time of year! That’s probably why I get so excited for all of these Halloween projects. This post is for a tutorial on the Light Up Halloween Crates. You can purchase them from both the Silhouette and Digiplayground shops. (Links to the crates will become available as they go live).
These are incredibly simple to put together. I’m planning on putting in the windows at the house and as centerpieces on my coffee table. You can place an electric tea light in the center (I love the black ones!) for a but of ambiance!
1. Cut out the svg files, cut two of each side piece, four total. Ink the edges of your crate to create some dimension.
2. Glue accent pieces to the inside of the crate side pieces.
2. Once you have glued on all the accent pieces onto the sides, take the bottom flat geometric piece and slip the pointed edge through the slot at the bottom, just below the ghost.
3. Next, grab the opposite side piece and slip the tabs through the slots provided in your first piece. Again, insert bottom pointed edge just below ghost and repeat this step all the way around.
I’m so excited about my Alphabet Photo Album series that can be purchased from Silhouette. There are so any ways to use this album. Tutorial below along with a few ideas for using this album!
IDEAS AND INSPIRATION
1. Cut a single photo into one letter. Simply lay a large photo behind the letter and trim the photo.
2. Use multiple letters together to create a name (like C-H-A-R-L-I-E) and only put photos of that person in it.
3. Choose a theme like S-U-M-M-E-R and capture favorite moments from the season.
4. Add journaling and/or capture a specific photo shoot or time of year.
5. Create an alphabet album highlighting each letter. For example, an apple orchard experience with your children all captured in the letter ‘A’ or a swim party in the letter ‘S’.
6. Do a single letter album to highlight a holiday. For example, ‘C’ for Christmas—
7. Or highlight the holiday by spelling out the holiday like E-A-S-T-E-R.
There are so many great ways to use this album for a gift or keepsake. Here’s how you put it together.
TUTORIAL
1. Cut out SVG files. You will have two pieces—a front overlay and a back piece with holes for attaching it to other album pieces. (PS All the Alphabet Photo Album pieces go together).
2. Use tape or a glue stick to adhere the photograph to the back of a framed window. I used scotch tape, but you may use whatever adhesive you would like to make your picture stay in place.
3.Finally, simply place the letter on back piece to create a simple collage of fun photos.
This week I made a bunch of these darling little vellum topped boxes. They make the cutest favor boxes and gift items. You can purchase them from the Silhouette Shop here.
All the boxes that work with this tutorial (and links!) are down at the bottom of this post.
1. Cut out on Silhouette files. The main body of the box is shown in kraft paper. I used plain velum to go underneath the circle cut out on top, and a patterned blue paper for the accent panels.
2. Fold scored lines on the box. This creates a visual image of where your accent panels should be placed.
3. Glue vellum or transparent paper to the INSIDE of your folds into the opening on the top to create a “peek-a-boo” window.
4. Glue accent papers into place using adhesive. I used a glue gun to put it together quickly. A glue stick or glue dots would also work great.
5. Finally, put glue on the flaps and attach the sides of the box to finish the box.
And that’s it! It’s the best little party, wedding, or birthday favor box or treat box!
Today I released several new silhouette designs in my shop. Here are the instructions for the Accordion Number Album. I love this album because you can mix and match it so many ways and it makes an amazing gift. It is fairly simple to put together.
1. Cut out all the pieces in the file. You will want to cut out three of the folded pieces with the glue flap and one of the cover. If you want to place a “color” (in my case white) behind the number, use scrap pieces of paper and simply place behind the bracket numbers.
2. Glue the number brackets to each of the “pages.” Glue a plain bracket to the front cover. Each page will hold two numbers (1 + 2, 3 + 4, 5 + 6). If you plan on putting a photo between numbers, cut out six of the template instead and only place one number on each page.
3. Fold at all the crease lines of the cover and pages.
4. Place glue on the flaps of each of the pages and attach the pages to each other so that the numbers are in order.
5. Finally glue the flap attached to the number “1” page to the cover.The flap will fit perfecting in the center of the cover.
And that’s it! Add photos or journaling for a simple and elegant album!
Every Christmas I try to tell myself that THIS year it’s going to be more about family, love, and giving. But like all the rest of you, I find myself completely caught up with the busyness that consumes my time during the month of December. December happens to be a crazy time for designers ON TOP OF the usual craziness that happens during the holidays. For me, work revolves around CHA, new releases for first quarter, and the Atlanta GiftShow (for MiniLou). Despite all of this, I’m going to try (once again) to slow down during the month of December. And with you as my witness (See! I’m holding myself accountable to you!), I’ve decided to get on top of things THIS month to make December a little more cherry and bright.
First off, I already ordered my Christmas Cards (I think a sigh of relief escaped as I wrote that). They arrive December 2nd, and I plan on getting all my labels done this coming week. Yes, it is a relief to already have them printed, and no, I am NEVER this early. Second, I’m going to get all my holiday shopping done in November. Yes, you heard me. And no, I don’t have a plan for this yet. Any tips would be helpful!!! (Leave comments below.) And FINALLY, I went ahead and designed myself an entire 25 Days of December Album (that you can purchase in my silhouette shop), that I have already cut out and put together.
I have never done an album like this before, but have ALWAYS wanted to. I designed all of the albums and accessories to be super easy to cut out and use.
This year, I’m doing the 5 x 7 Album, but I also have available the 5 x5 Album and the 5 x 7 Horizontal Album. The 5 x 7’s are meant to fit a 4 x 6 photo per day. The 5 x5 Album is meant for instagram photos and fits a 4 x 4 photo beautifully (I love to use Persnickety Prints for my 4 x 4 photos).
Each album also comes with some different accessories. I plan on using the extra pocket pieces and fun shapes to add journaling and some of our holiday photos (and to stash my Christmas Card).
So if you are making this album, it’s pretty easy to put together, but here are a few hints to help you out:
1. You will need to cut 5 of each tabbed piece. That will give you 25 pages—one for each day. Cut one or two of the cover piece (no tab). I only cut one and used a pocket accessory for my back page.
2. Add as many accessory pages as you like. You can see in mine that I elected to put a few in the front and back of the album. Because I’m making this a “stress-free, expectation-free” album, I didn’t want to throw in pages that I then felt obligated to fill. However, I do think it would be pretty to throw in an extra shape or pocket page between each tab so that it goes to a specific day.
3. If you are looking to have this album “pre-made” in time for Christmas or you are making it for someone else, I recommend only adding “scraps” to the left-side of the page and leaving the tabbed side for the photo. (Like the second photo at the very top.)
4. Have fun or go simple with your paper choices. On mye tabbed sheets I elected to use kraft paper just because it was easy. I cut each tabbed sheet on an 8.5 inch x 11 inch piece of paper (one fits per sheet). I inked the edges a little bit to give it some dimension. (FYI, I use my newest Carta Bella collection Christmas Time for this book).
3. Glue is good. A stapler is better. ESPECIALLY on the pocket pages. The folds are pretty self-explanatory on the pocket pages. Once you fold them all in, I like to take a stapler to it. It adds some “scrappiness” to the album and helps secure the pocket in place. I’ve also used hot glue and a glue stick. They work great as well. Note: For the Mini Pockets, you may want to add a couple of extra staples right to the MIDDLE of the page to separate out the two pockets.
4. Use ribbon, twine, or O-rings to keep it together. If your album gets REALLY thick, you may want to consider O-rings (you can usually find these at an office supply shop). I wanted to keep my album “unprecious” and added different little bits of ribbon and twine. I want the kids to feel like they can handle and play with this album all through the season and beyond. Which brings me to my next point…
5. Have a plan. Especially when it comes to the photo part. Are you going to print at home or send out your photos? Are you going to print daily or weekly? Are you going to journal (or will it stress you out?). My plan this year is to print everyday at the end of the day. So I have a pack of 4 x 6 photo papers ready for December. As for journaling, this year the album is the “family” album. That means, I plan on having the kids write things they are thankful for or are doing for Christmas. Josh and I will add notes too. If you are doing a personal, reflective album, yours will be so different from mine.
And that’s it! I hope you have fun making your book and you get to spend some time really showing off how wonderful the holiday season really is! If you are on instagram, you can follow me at @carinagardner. Make sure and hashtag #25dod (25 Days of December) so that we can all share in your journey in December!
After a month and a half of travel, I’m finally back home in Salt Lake. I’m glad to be back home although there hasn’t been much time for a break. Lots of things have happened over the last month. Other than finishing press checks in China, going to a wedding in Tennessee, heading to St. George to enjoy the Tuacahn, and accompanying Siri at harp camp in Logan, some of my new paper and fabric lines have been released.
Over at Carta Bella, check out my newest collections Boy Oh Boy and Spooky as well as Alisha Gordon’s Moment’s & Memories. If you are going to the Summer show, be sure and check them out!
I’m also thrilled to announce my newest fabric line is on pre-sale to quilt shops! For a sneak peek at Primrose Garden, click on this link over at Riley Blake. Scroll down to the bottom to catch a glimpse of my first 18 inch doll panel! I’m so excited for this addition to this fabric line! More pretties on this line coming soon.
At my silhouette shop, I’ve been stocking with a lot of great basics that I have been interested in using for myself. Tons of swirls, overlays, gift bags, and cards to name a few.
And of course, I’ve been working on MiniLou. I’ve been planning out our tradeshows and trying to get everything “just so” for our upcoming fall release and the introduction of our spring release. It’s been a work-in-progress and I’m so proud of what we have accomplished so far. So many more exciting things to come!
As far as getting back on track, I’ve been working on some new home decor items for Deseret Book which should be out this fall/winter. I’ve also been working hard on our end of year releases for Carta Bella. Oh, and I’m hoping to have available two new design classes in the shop later this week.
Thankfully, this summer has not been all work-work, and I’ve been able to enjoy time alone with both of my girls on their respective trips as well as getting in a couple of vacas as a family. But summer is slipping by so very fast…I’m going to squeeze in as much fun as I possibly can!
Happy Summer!
Carina
(PS. Photo is from my Little Bitties Bookmarks for MiniLou).
Carina is off on her adventure to China to do press checks on the products for her new company Mini Lou
You can follow her adventures on her Instagram (carinagardner). In the meantime I am taking over the blog while she is away so let’s have some fun!!
Today kicks off our HUGE 30% off diecut sale in the shop. The shop is fully stocked with wonderful goodies. Make sure to hit the NEW DIECUTS section where we have all of Carina’s most current releases from her Silhouette Store.
We are so excited to have Deborah from Craftin Chaos working with us now on our Design Team! In honor of the big sale Deborah has worked up some fabulous eye candy to get you inspired for the diecut sale!
Here is Deborah to tell you more about her projects:
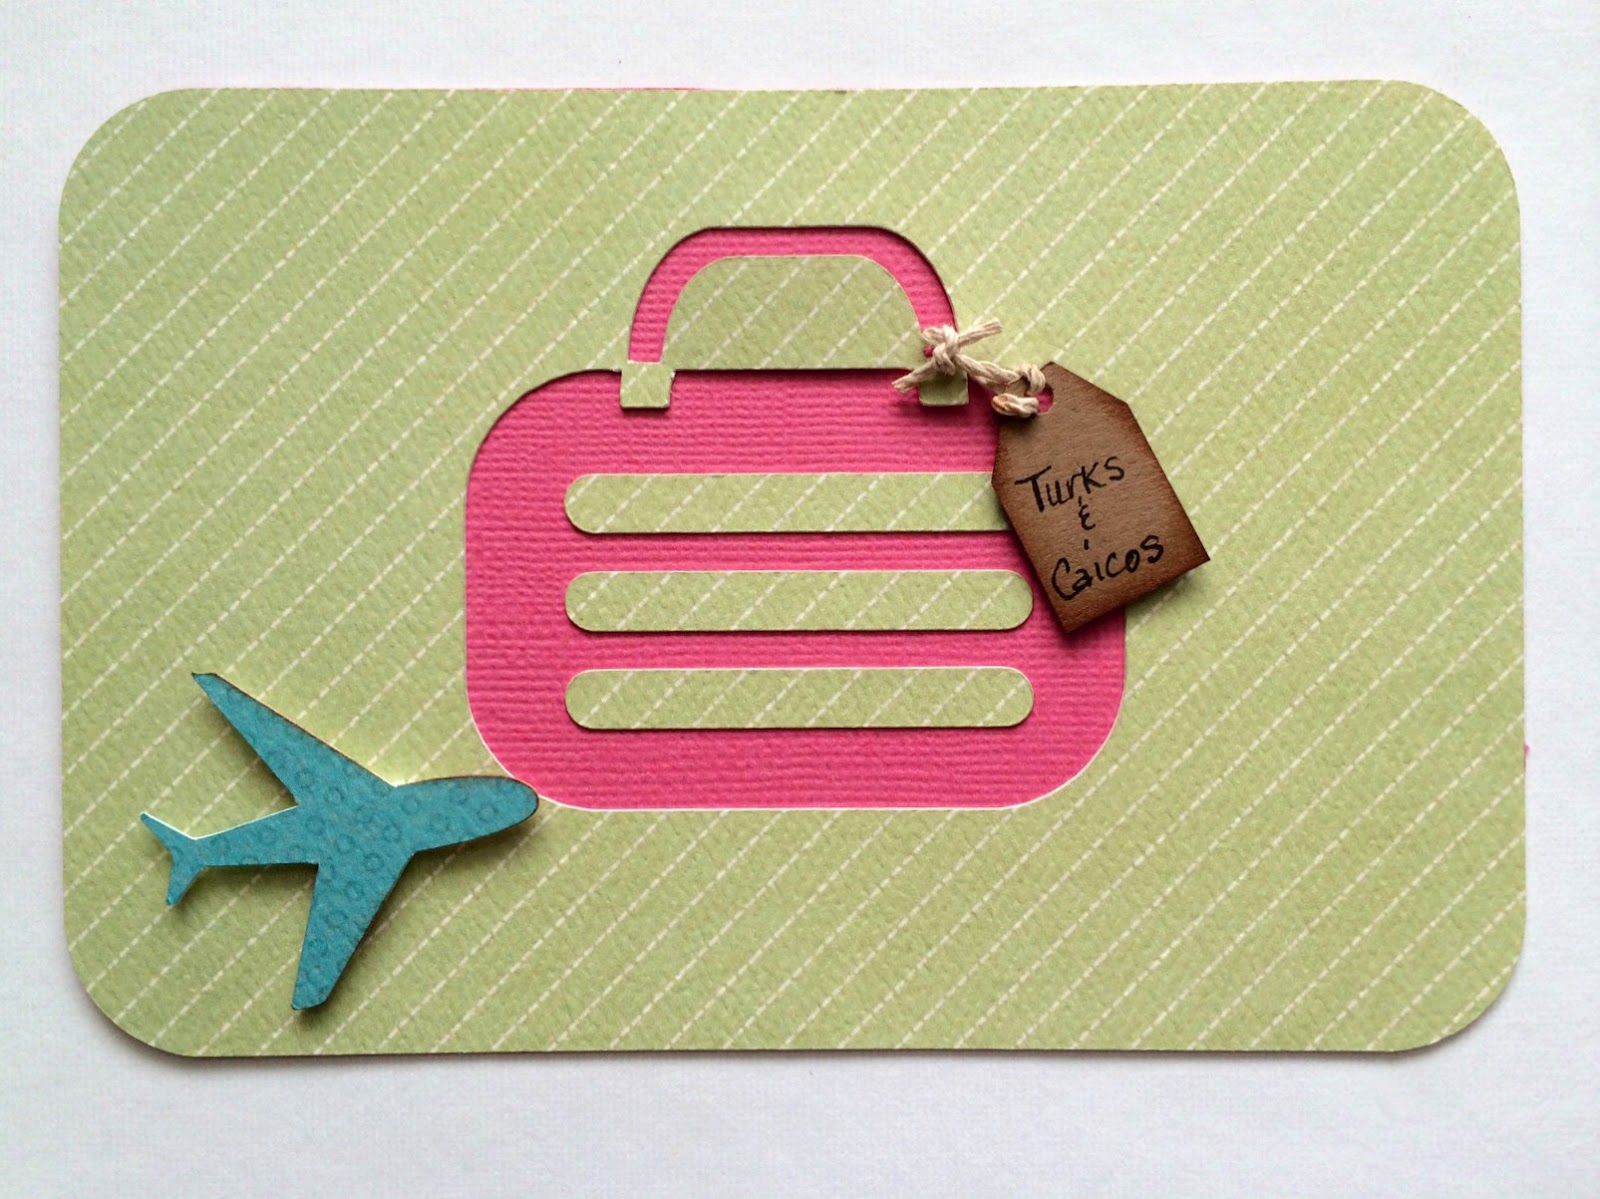
This first project was super quick to do. If you have a busy schedule…and who doesn’t, these albums are perfect for capturing the moments you spent with family and friends without devoting the time it takes to create a scrapbook album layout. I love that you can get so many configurations from the pockets giving you so many options.
I used the We R Memory Keepers pockets for mine. The cards are Carina’s My Life 4X6 Travel Card Diecutsand I am loving Carina’s Garden Picks Set of 5 Diecuts very versatile as you will see two ways I used them. And you know I made some custom buttons! I used the die cuts from the cards to create a print and cut for the buttons in my silhouette studio
Can you tell where I want to be from my luggage tag?
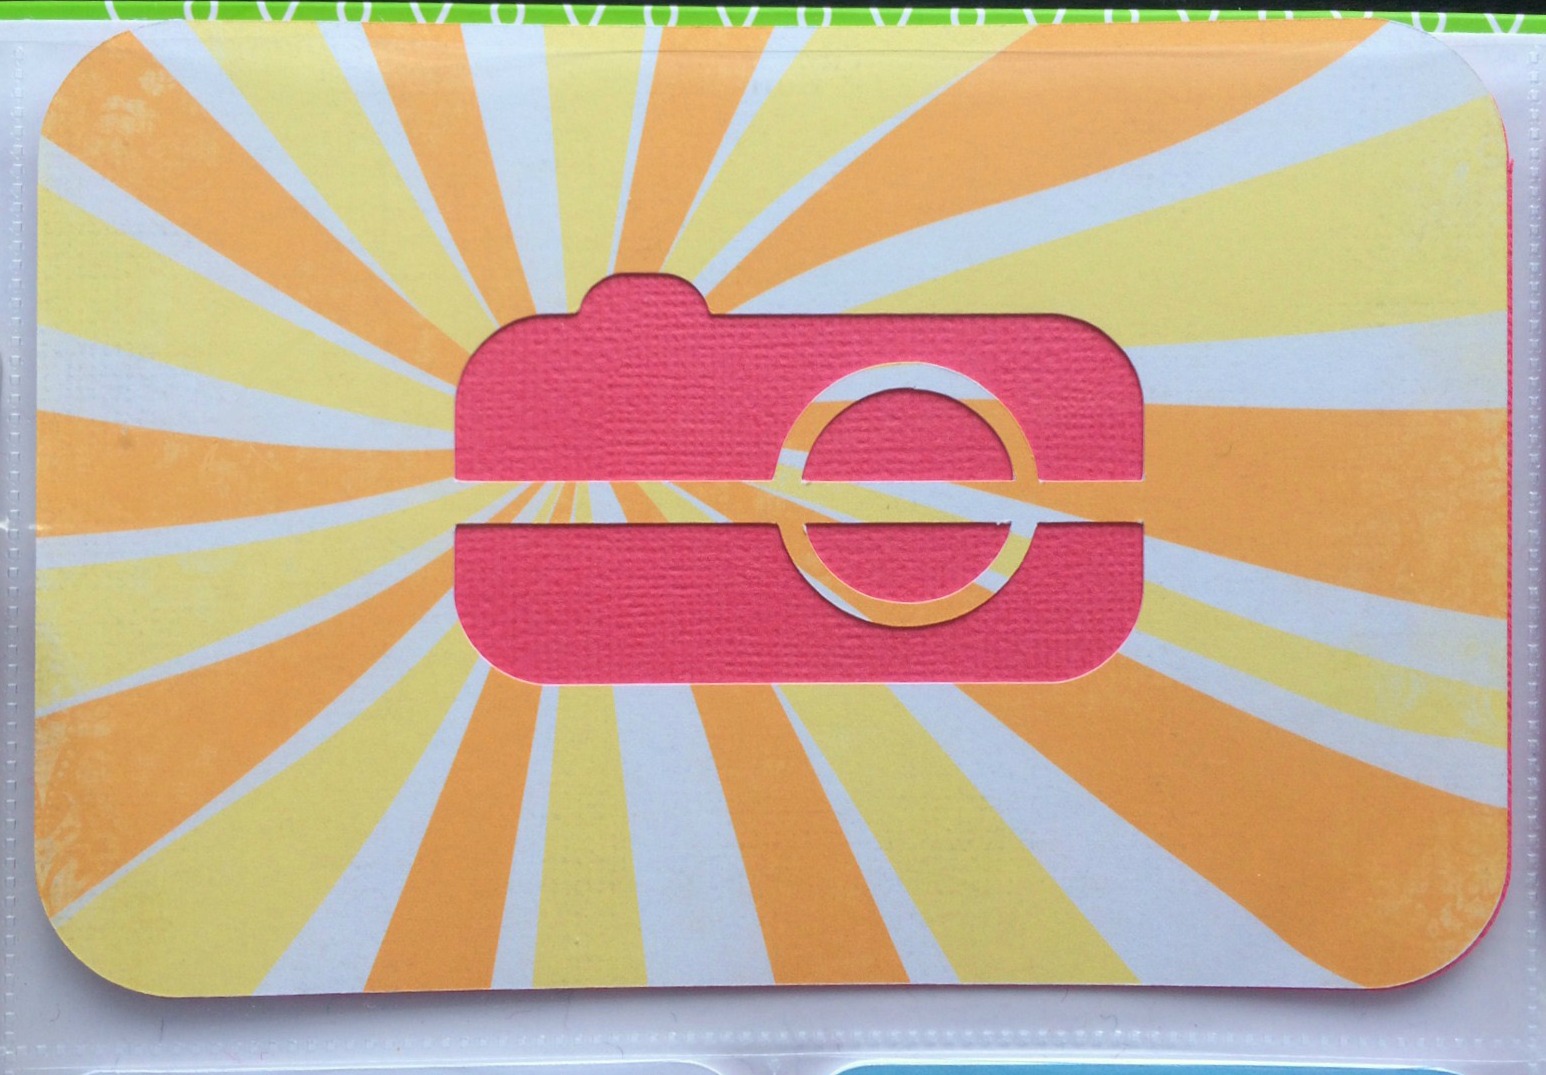
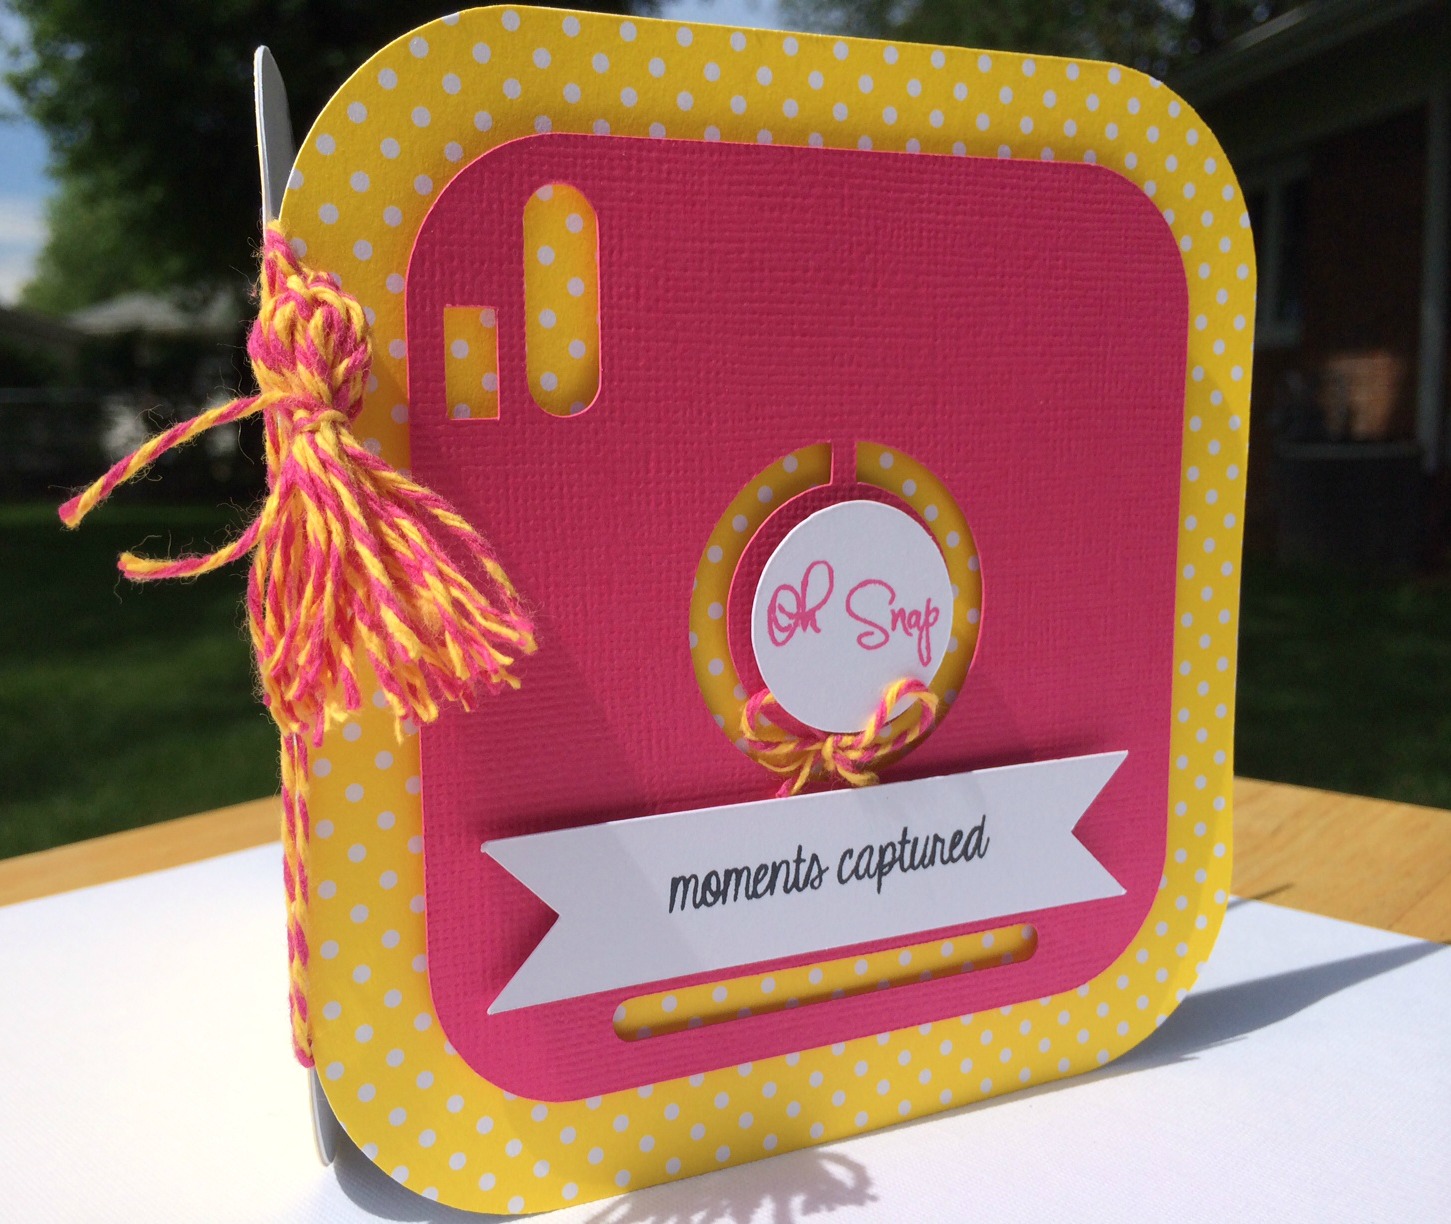
This project is one of my favorites. I just love anything with cameras on them or camera related. Instagram is something I just started using recently and I am hooked! I wanted this to be very bold and I love these two colors together. That pop of fuchsia on the front against the bright yellow is just my favorite. I used the Instant Photo Camera Album I added the Flag Shape 17 Diecut for the sentiment. I cut a smaller circle for the center to add a fun sentiment to the album.
A nice feature is the slots the file cuts for you to just pop in a cute photo for perfect placement. I added more sentiments to give a little more love to it.
Thanks to Deborah for those awesome projects! We will be featuring more of her creations over the weeks to inspire you.
The glamper tour has ended. The extra weekends off has given me time to finish up a few projects. Today I managed to push out one of my 2015 fabric lines and tape a new mini class. I can hear my inner voice pushing me right now. I suspect because of the upcoming trip to China to do press checks for my new company.
That’s right. You heard me. I’ve been letting out little hints about it on instagram and the facebook page with no official announcement. You’ll have to wait for June 1st for that.
Two of my girlfriends were very spontaneous and decided to tag along. We’ll be in Vancouver, Hong Kong, Dongguan City, and Beijing. All planned out in the little travel books (left) that I made for us. I’ve been filling mine out with packing lists, places I want to see, and more. Books were made from my Travel Stories collection.
For the best possible front seat on all the action, follow my instagram feed @carinagardner. I’ll be posting all my doings from the trip and @miniloukids will be posting all the giveaways and peeks at all our new creative kids products.
For now, I’m kicked into high gear to finish out the last few remaining items that need to be taken care of. You’ll notice my extra emphasis on instax photos in my silhouette store these last couple of weeks. That’s because I’m planning on using my instax alot on this upcoming trip, and I’m going to need all those accessories I have been making.
Other things that I should make note of: 1. My Boy Oh Boy Paper Collection for Carta Bella ships June 1st! 2.Little Ark is now available in stores. 3. Full reveal of my October fabric line Primrose Garden should be available this summer. It comes with (*gasp*) an 18 inch doll panel!!!! 4. The 30% Fabric Sale will be ending on May 31st. So will the mega discounted price on my newly released Digital Design class.
More soon,
Carina
PS The photo to the left is of my three children with Josh up in Bell’s Canyon. I couldn’t resist posting.
I hope you have a wonderful Thanksgiving! My little family will be having an intimate family Thanksgiving today and go to my in-laws tomorrow. My turkey went into a homemade brine yesterday for a 24 hour bath. Usually I like to use the William and Sonoma Turkey Brine but I never got around to picking it up so this year so I improvised. Fingers crossed my salt-allspice-brownsugar-peppercorn-sage-thyme mixture works!
In our family we don’t have any set Thanksgiving traditions unless you count getting a tree the day after Thanksgiving. This year we invited the cousins over for a glamper movie night so the grownups could play games. I also made these little turkey take out boxes for Siri and Felicity to give to their cousins.
Hope you have a spectacular Turkey Day! Are you doing anything special or sticking to your family traditions this year?
I’m back from a lovely sisters trip in St Louis (see my instagram feed) and happy to be home. The last two months I have been on the road a lot, and I’m ready to start thinking about the holidays. I spent the day decluttering my house in anticipation of holiday decorations. I’m planning on getting out my Thankful Leaves (feel free to download it for free too!) and letting my family take advantage of November to remember why things are so good in our lives.
With the holidays in mind, I’ve been trying to create digital scrapbooking and diecutting projects that will help me celebrate creatively. If you have been checking out my new Silhouette shop you’ll see that I have introduced several fabric projects, Thanksgiving goodies, and new this week are my Essentials Album Collection!
My lovely assistant Susan (queue the Wheel of Fortune music) created a fun Halloween album that spotlights her kids costumes using the Carina’s Essentials Album 4×6 Vertical Bracket. She placed a picture on the cover of her kids in their costumes. On individual pages she added a picture of each child with some journaling.
Susan also placed pictures from her Halloween dinner into the album. She added the menu and guest list on the cards then tucked them in the pocket.
I’m loving these new Essential Albums. Make sure you check out the video (Episode 9) on the CGTV channel so you can see how to put them together.
Here are some of the other products I came out with over the last couple of weeks:
Hoping to get to some great projects this season! I should be revealing new Deseret Book collections soon and have you checked out my new line for Carta Bella Homemade with Love? It’s perfect for the holidays.
I’ve been working hard to get out some new diecuts at the shop at Silhouette America! That is between binding quilts, checking fabric strike-offs, and working on the glamper.
As always my diecuts are .99 cents and you can save 25% on all of my Halloween shapes through October 31st!
Yes, yes, I will post this week’s new items soon (if you want a sneaky peeky go here). If you sew and have a silhouette, I think you will be excited about what I have up!
Tomorrow I’m headed to Quilt Market, and I’ve been meaning to announce my new sewing patterns, but of course I haven’t gotten around to it. That and all the great stuff coming out from me at Deseret Book. Soon, very soon…
I love costumes that are homemade and quick to put together. You may remember Siri’s favorite Octopus Costume that was made from socks and a t-shirt. For Halloween this year, my kids chose costumes with stuff we already had around the house and in the dress up clothing. Felicity will be a little Chinese girl, and Siri asked to be Medusa. Other than making a snake tiara for Siri, it’s going to be an easy year for costumes at our house!
Charlie is going to wear this little skeleton bones outfit that I made using my Silhouette machine. You can get my new Skeleton Bones diecut for this in the Silhoutte Shop for 99 cents! Not a bad price for a costume if I do say so myself.
I have tips for working with this diecut on my extremely-oh-so-very official silhouette page here: https://carinagardner.com/silhouette/. Susan and I are hoping to tape a video for that page sometime next week to teach you a few awesome things about your machine! Be on the lookout for that!
And if you are looking for more from me, this week we also released the following diecuts (for 99 cents as always!)
That’s right! My big news this week is you can now find my diecutting files at silhouetteamerica.com. How cool is that?
This week was the first week we placed files on the silhouette site. You’ll see this darling halloween scalloped bag, fabric flowers, the my life album set, and more! Yesterday I put together a myriad of new projects for the shop that will come out next week! More fabric stuff and great paper shapes. And some monster surprises for Halloween.
Speaking of Halloween, I thought I would point you in the direction of some happy Halloween fun.
Have I mentioned that there are digital diecutting files in the shop? Oh ya, I don’t think I have.
When I opened the shop last March, we were so busy trying to figure out how to run a retail shop (not an easy endeavor!), that I didn’t have time to actually design many diecutting files.
That’s officially changed. We have been uploading lots of great new files in the shop and you can get your hands on some free diecuts. We change these out pretty often so grab them when you can!
We also implemented a brand new category called NEW DIECUTS. We should be releasing new diecuts every Tuesday so be sure and check that category for the brand-spankin’ new goodies!
The diecuts come as a zip download and is available immediately (free diecuts can take up to 24 hours to show up in your inbox). It includes several files including svg, ai, jpg, dxf, png, and pdf. Yep, we’ve got you covered for whatever machine you are using. Don’t have a machine? That’s why we put in a jpg and png. Simply cut it out.
Probably my favorite product right now are the MY LIFE folder inserts.I plan on cutting some out for my kid’s school folders. I’m also going to play around with making them smaller (they are sized for 8.5 x 11 folder—be sure to use the svg file to keep your size from shrinking). I think they would make a darling album!
I’m actually working on next weeks digital die cutting files right after this blogpost. What are some diecuts you’d like to see?


 If you get one of each (layered card or accordion card + an envelope), you will find that it’s a very nice tight fit. Don’t use pop dots because the card will not fit. I may have an envelope come out that allows for a thicker card (tell me on


 This week is the last one I’ll be releasing Valentine’s so I’m going out with a bang! I also decided to double dip. These pencil cards are not only my final Valentine’s release but are also Felicity’s class gifts. She’s going to write on each of them, and I’m sure we’ll add a few quotes like “I’m write for you.”


 The second way I would display it is on a mantle or coffee table. I love mine on top of our white piano. The best part is at night when we put electric tealights underneath and the entire thing lights up (picture of this below!).


 The
The  For now, I’m kicked into high gear to finish out the last few remaining items that need to be taken care of. You’ll notice my extra emphasis on


