Scrapbooking

Paper Cutout Bunny House for Easter – Best Bunny House Tutorial

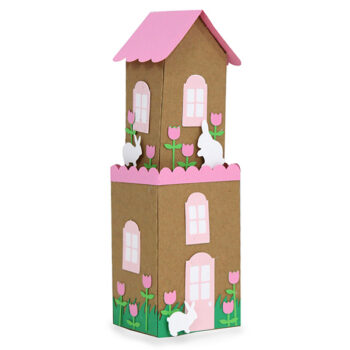
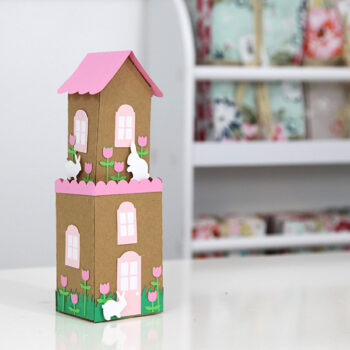
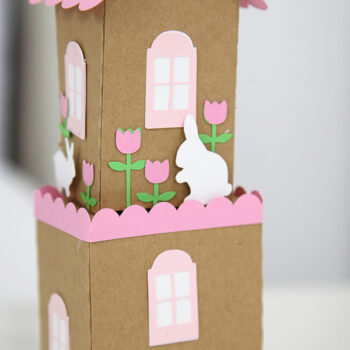
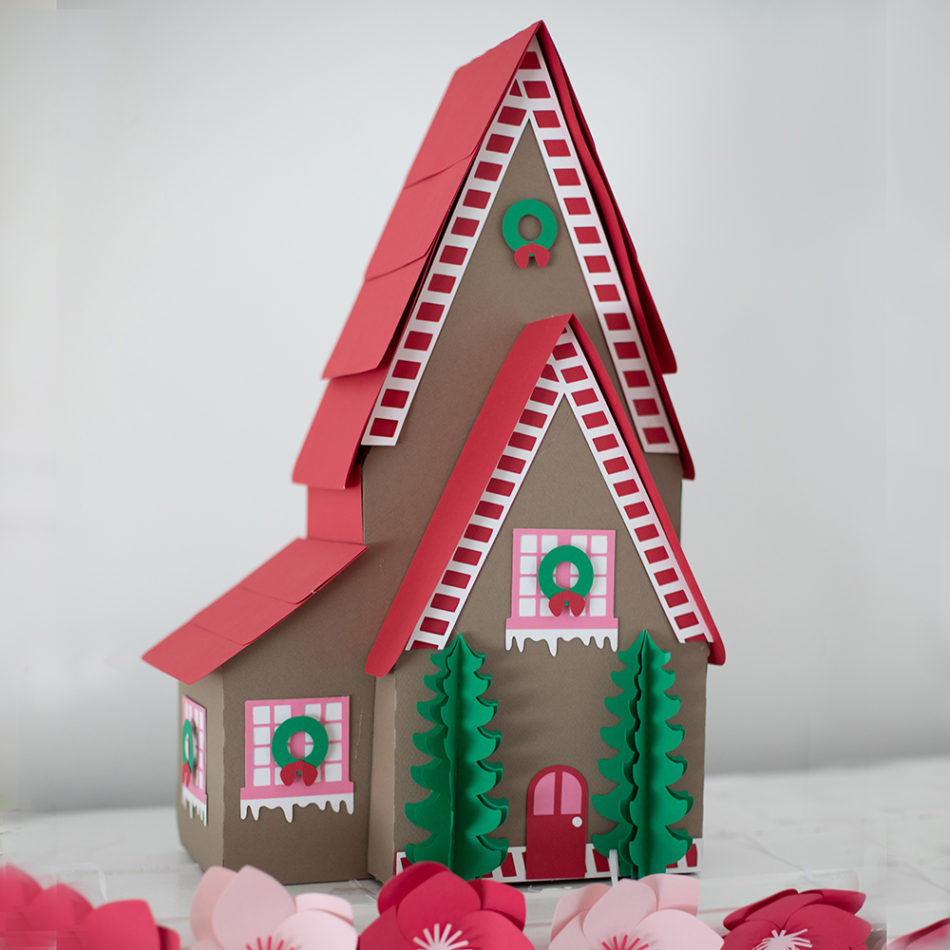
In today’s blog, I show you how to make my Best Bunny House, an adorable paper cutout bunny house for Easter, using your Silhouette machine.

This Bunny House combines cute flowers, adorable bunnies, and a double-decker design to add a flourish of Easter fun to any room or table top. The darling spring garden that surrounds the house makes this a fun and colorful way to celebrate springtime. So, whether you put it on a shelf, on a table, or in an entryway, this little house will fill all the little bunnies in your life with joy.

In this tutorial, you will learn and practice:

  •  how to use score lines and folds to create more advanced Silhouette structures
  • how to use glue lines to hide mistakes that happen along the way
  • how to use a clever bottom cutout so that you can illuminate your design with a tealight
  • when you should use hot glue and when you should use a glue stick

You can find my new products in the Silhouette store here: https://www.silhouettedesignstore.com/view-artist/252689 

You can find the Best Bunny House here: https://www.silhouettedesignstore.com/designs/D-347131

Check out even more Easter projects here: Easter Project Round Up

To join my VIP group for free, go here: http://eepurl.com/dN2RcY. I regularly RESEND files to be sure to sign up so that you’re getting all my free tutorials!

Silhouette Design Store JOANN Stores

Paper Cutout Bunny House for Easter – Best Bunny House Tutorial Read More »

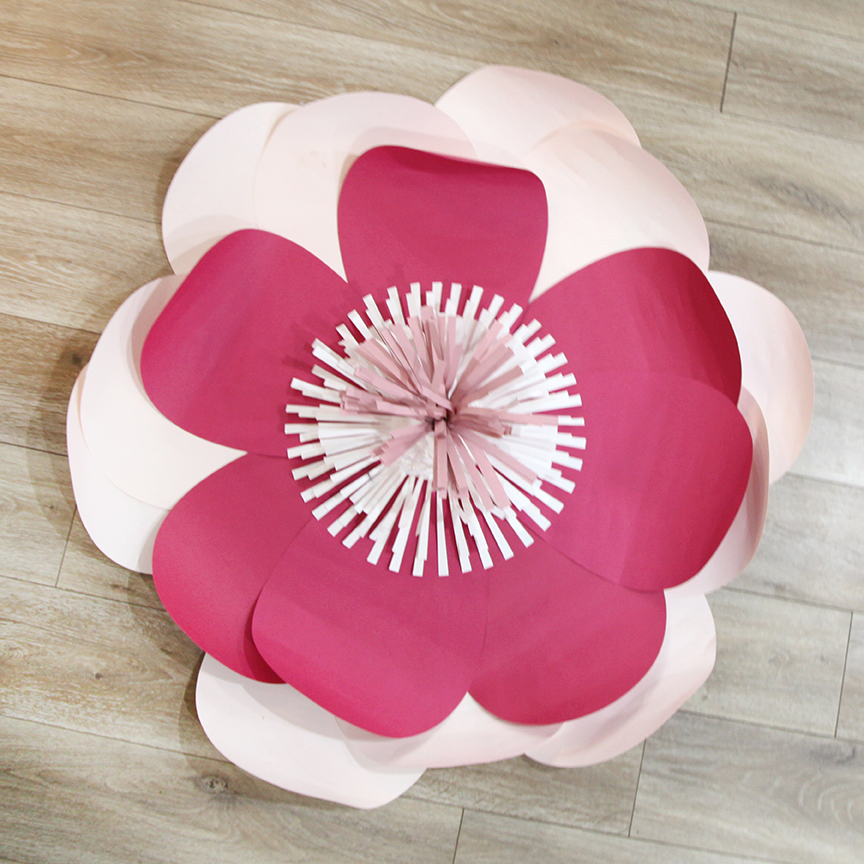
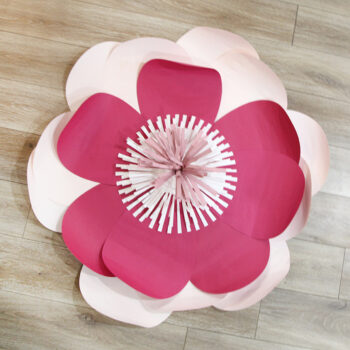
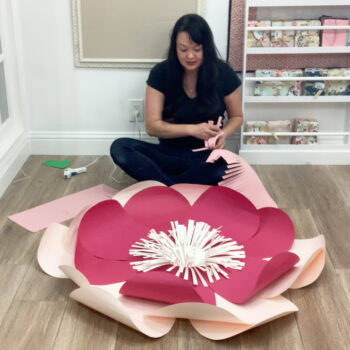
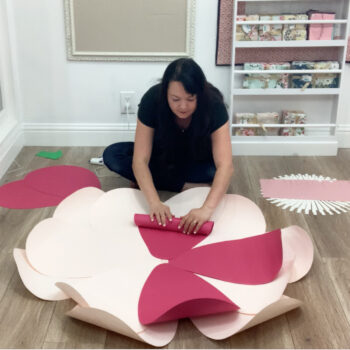
Stunning Big 3D Flower Tutorial made with Your Silhouette Pro

I’m excited to show you what’s new in my shop! This new video is part of this week’s new releases. You can visit my new products here:
https://www.silhouettedesignstore.com/view-artist/252689

Tuesday is the day I sent out a FREE SVG my VIP Silhouette Group. To join my VIP group for free, go here: http://eepurl.com/dN2RcY. I regularly RESEND files so be sure to sign up so that you are getting all my free tutorials!

TUTORIAL/LIVE VIDEO SCHEDULE

Tuesdays Silhouette Projects 10am MST
instagram @carinagardnerpapercrafts
facebook https://www.facebook.com/carina.gardner.designs/

Tuesdays MiniLou 10:30am MST
instagram @miniloukids
facebook https://www.facebook.com/miniloukids/

Wednesdays Learn to Design Videos
Youtube only

Thursdays Fabric Projects 10am MST
instagram @carinagardner
facebook https://www.facebook.com/carina.gardner.designs/

Silhouette Design Store JOANN Stores

Stunning Big 3D Flower Tutorial made with Your Silhouette Pro Read More »

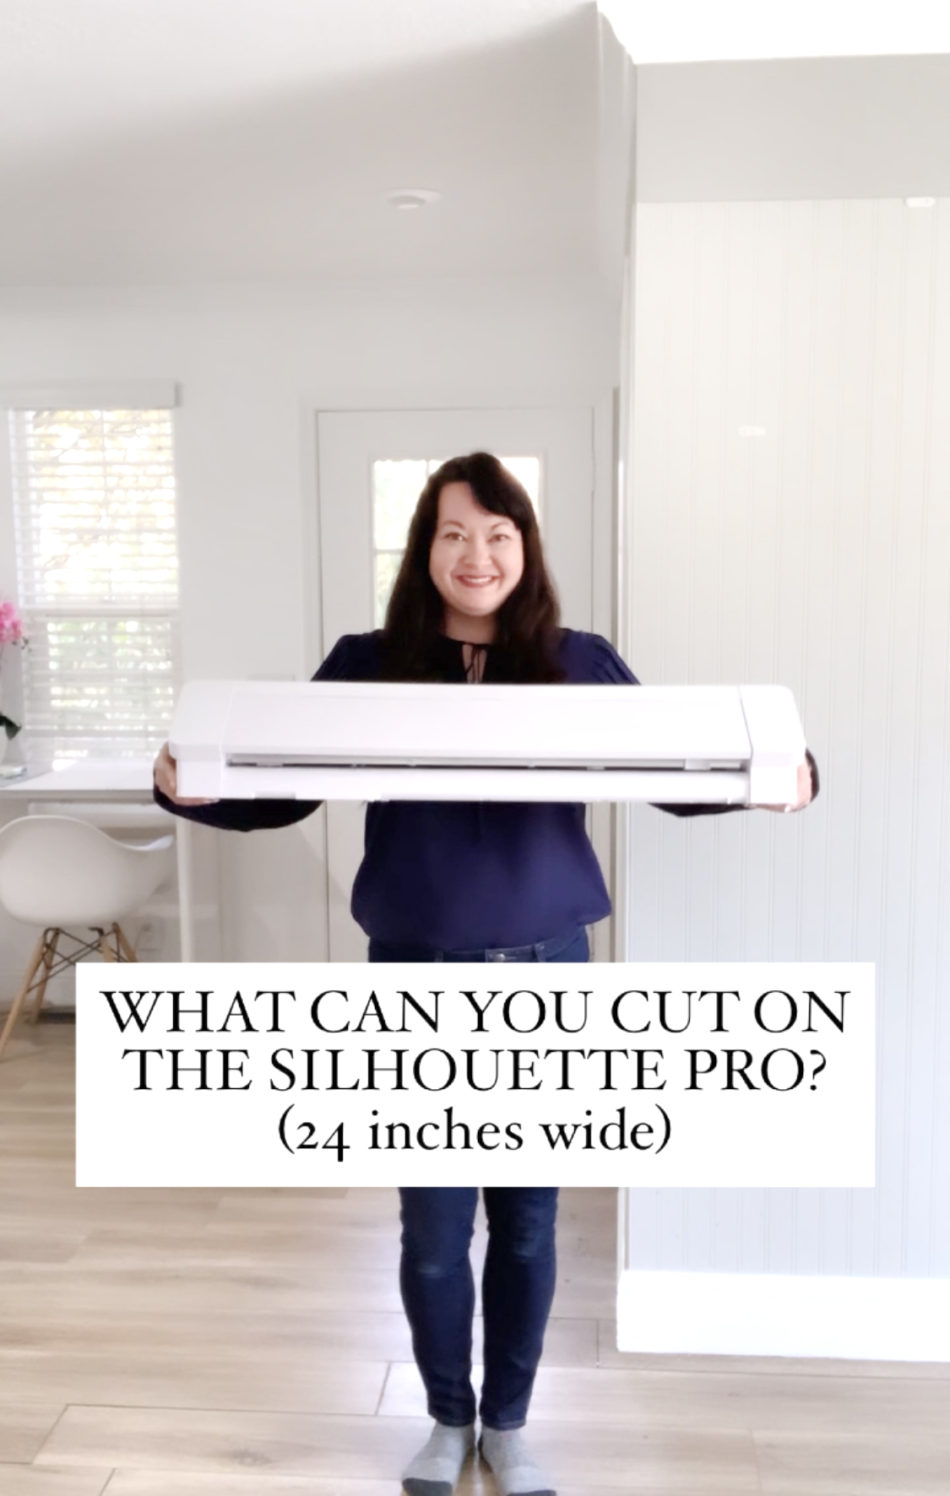
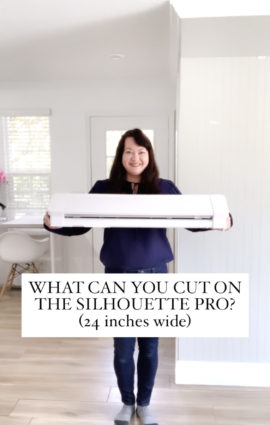
Looking for Big Paper for the Silhouette Pro? Here’s What You Need to Know!

Finding 24 inch paper, vinyl, and heat transfer for the Silhouette Pro isn’t easy. So many of you have been asking me on instagram where I am buying paper. I even made a Reel on it (I have posted it here via my YouTube Channel. This will give you a 15 second glimpse at some of your options, but if you are serious Silhouette user like me, I thought a blogpost with links would help you most.

(By the way, the link in this post are NOT affiliate links. It’s just where I was able to find this size paper! You can see more of what I’m up to with my machine and get free files by joining my Silhouette VIP group here: http://eepurl.com/dN2RcY

PSST: If you scroll to the bottom you can see all the papers in a 15 second video!

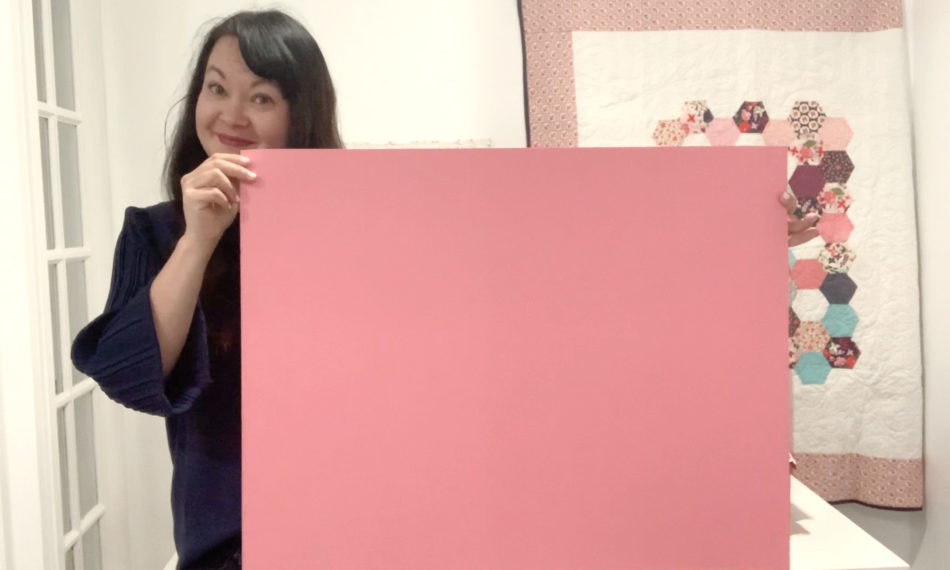
Poster Board 22 in. x 28 in.

I found poster board at Michaels . It is slightly smaller than the 24 inch mat but I love  how thick it is! You may need to do 2 passes on your Silhouette Machine because of the thickness. Awesome for making structures.

Pro: Cheap! ($1-$2 per poster) | Con: Very few colors.

Canson Textured Paper 19.5 in. x 25.5 in. 

These papers I purchased at Dick Blick. These are the papers I like using the most because of all the colors! Great of structures. Not as stable as poster board but better because you have more color options. you only need one pass on your Silhouette Pro for these.

Pro: Lots of colors, Medium price point ($3-$4 per paper) | Con: Cost can start to add up.

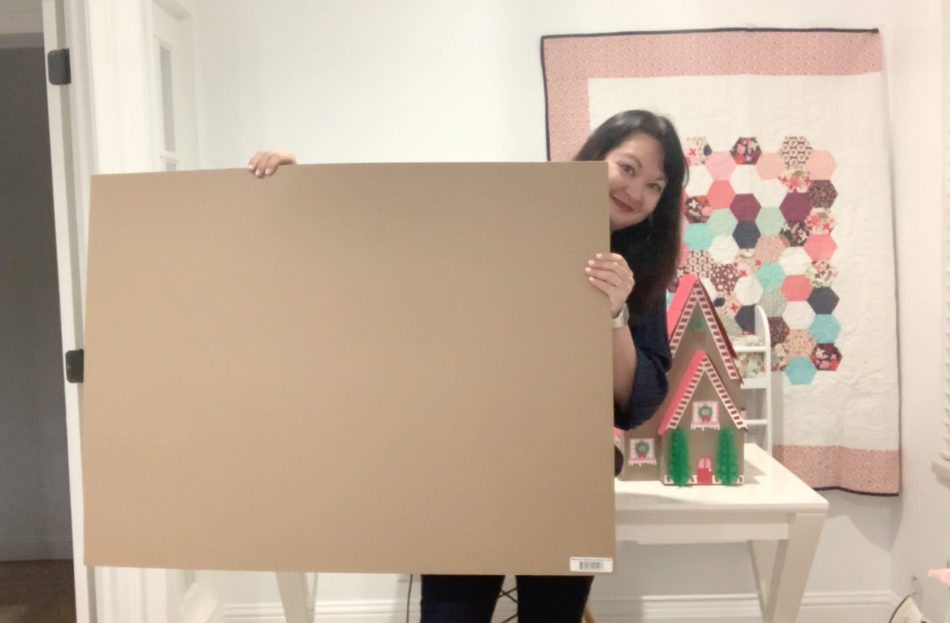
Chipboard 30 in. x 40 in.

I bought my chipboard from Dick Blick. Comes in multiple sizes and one color (brown). Great for really largee projects. You may need a kraft blade for this a couple of passed on your Pro!

Pro: Thick! | Con: 1 color and expensive

Matte Board 25 in. x 35.5in.

Also purchased from Dick Blick. Comes in a few colors like black and white. It is also thick but not as thick as Chipboard. Great for structures. I would do 2 passes on my Silhouette Pro for this stuff!

Pro: Thick, a few more colors | Con: Not many colors and expensive

Specialty Paper 20 in. x 27 in.

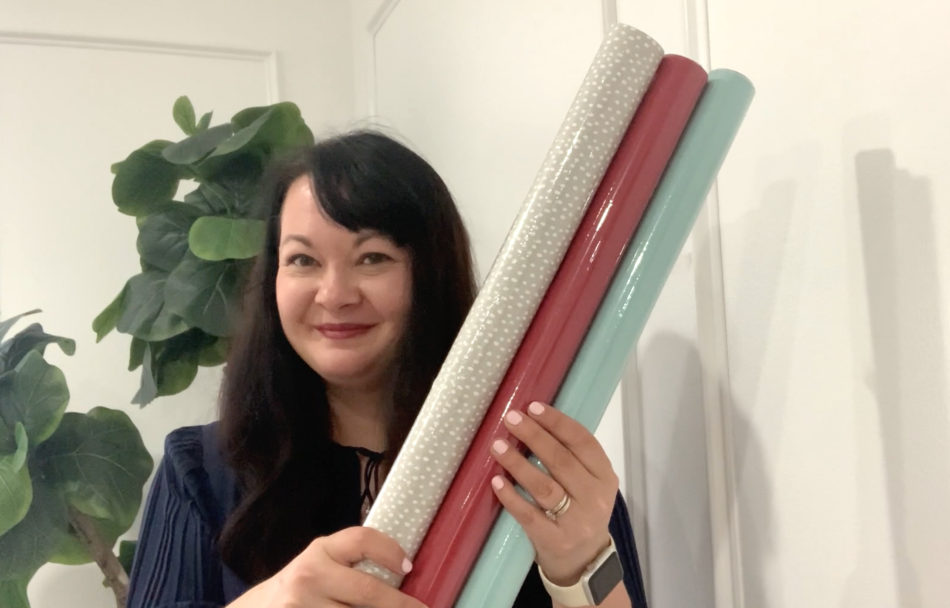
The best place for patterned paper is Paper Source. These are pretty expensive ($4-$12!) but are awesome for really beautiful projects! Medium weight requiring only one pass with your machine. Paper source also sells rolls of paper and colors online that I didn’t find in store (see picture below). Check out all their papers on their website.

Pro: Beautiful, options | Con: Expensive, may have to wait for an order online.

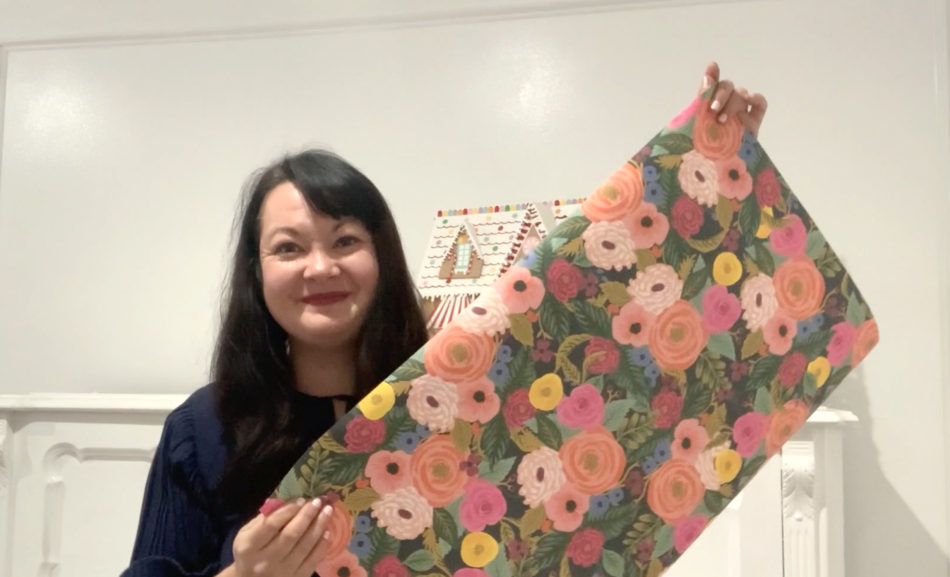
Wrapping Paper (multiple sizes but usually 30 inches wide)

Wrapping paper is an absolutely great product for flat projects! It is thin so you will need to b careful getting it on and off the mat! P.S. In the picture I am holding wrapping paper and 2 of the flat colored rolls I got from Paper Source!

Pro: cheap, easy to find | Con: only good for some projects.

Newsprint 24 in. x 36 in.

This is thin material and won’t be good for most projects, but you never know, right? I keep it on hand to test shapes!

Pro: Cheap, Easy to find | Con: Thin, only good for some projects.

Vinyl 24 in. x 10 feet (or more)

Great vinyl can be found on Amazon and really all over online. The brand that pops up the most is Oracal. It comes in multiple yards and it SO awesome! Do a google search and you can compare prices!

Pro: available in 24 inches, multiple colors | Con: Must buy online

Heat Transfer Vinyl 20 in. x 5 feet (or more)

The brand I find the most in Heat Transfer is Siser Easy Weed. I would it in 20 inches but I have heard it also comes in 24 inches (if you find this, please link in the comments!).  Here’s were I found the 20 inch: https://www.heattransferwarehouse.com/siser-easyweed-20-inch/

Pro: available in 20 inches, multiple colors | Con: Must buy online, unable to find 24 inches.

And for the fun of it, here is the original 15 second video I mad for this blogpost!

Silhouette Design Store JOANN Stores

Looking for Big Paper for the Silhouette Pro? Here’s What You Need to Know! Read More »

The Silhouette Pro Projects

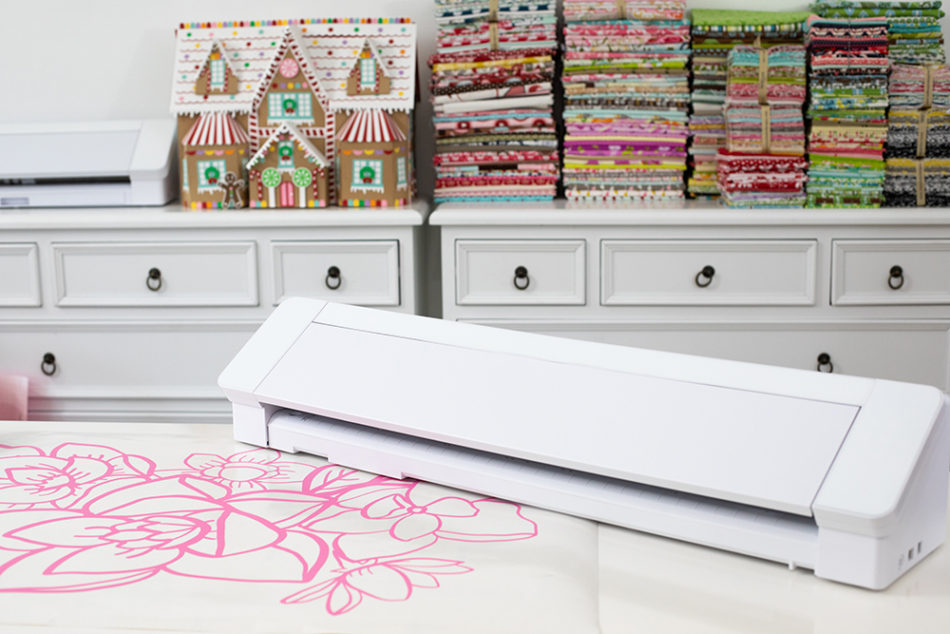
I have a couple of other projects for the Pro that are currently free in the shop and I wanted to make sure and share! I am so in love with the projects you can do with this machine. Before, I would try and cut my vinyl crazy to make it work but now…Voila! I can cut everything in one go!

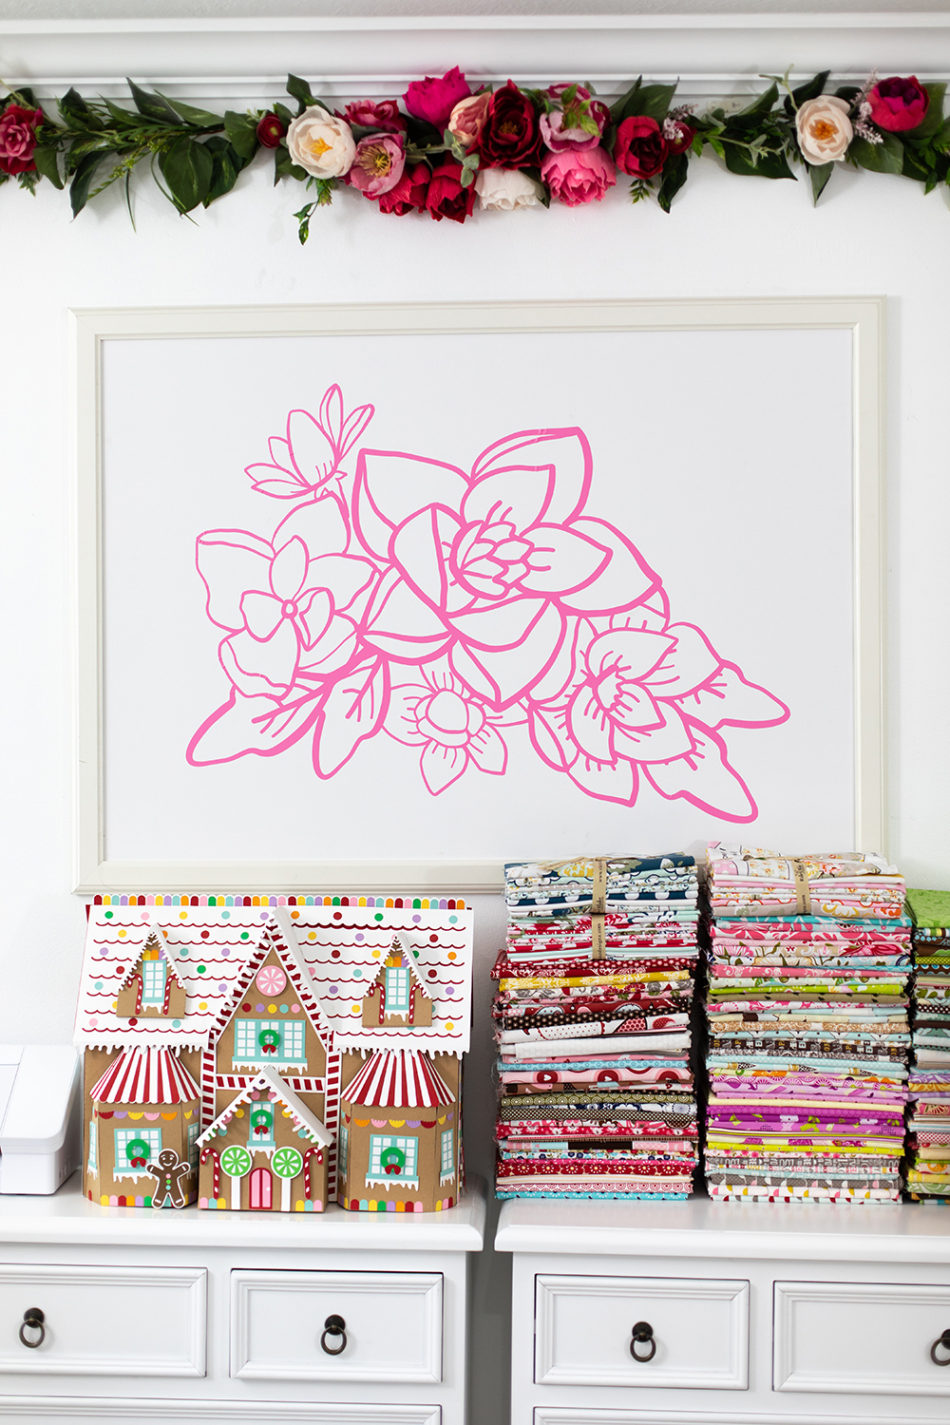
This big floral is hanging over my desk in my studio and I originally tried cutting it on the Cameo. Cutting it on the pro was one seamless project!

You can find it in my Silhouette Shop. It will be free for a short time with the launch of the Pro.

https://www.silhouettedesignstore.com/view-artist/252689

If you are looking for my VIP group for free, go here: http://eepurl.com/dN2RcY. I regularly RESEND files so be sure to sign up so that you are getting all my free tutorials and I’m sure this one will me in the mix!


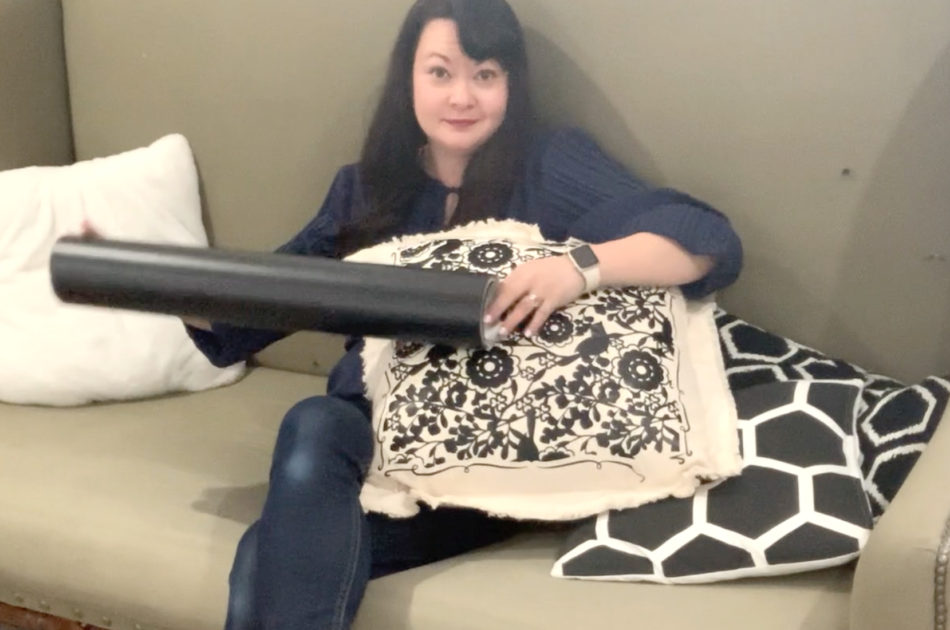
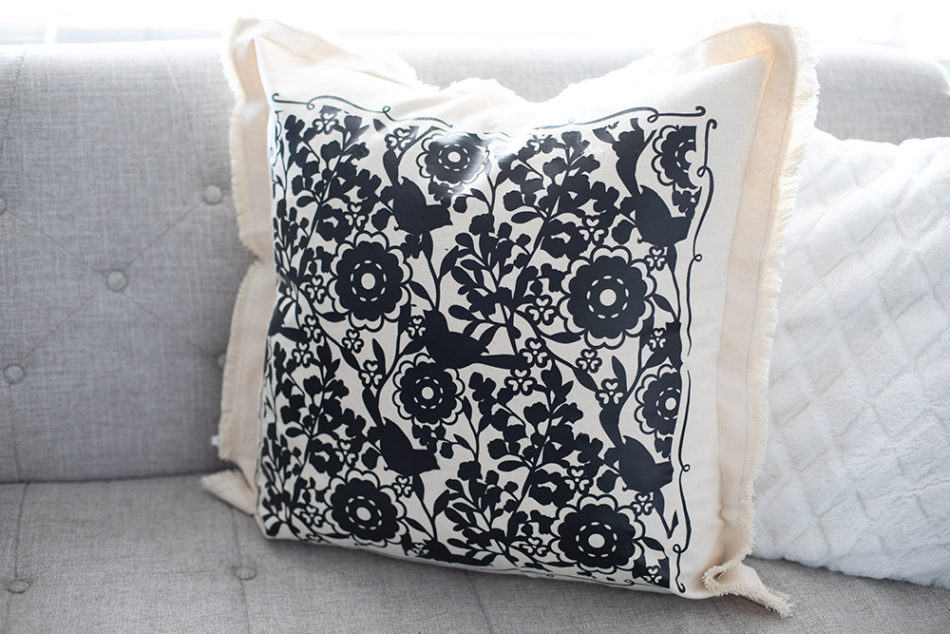
The second project that I tried was a heat transfer projects. Look how amazing a single cut and how big this pillow is (The pillow is over 24 inches big). This design can also be found in my shop.


I have a few stories on finding paper for the PLUS (I was looking for 14-15 inch paper) and now I will be on the search for you on 24 inch papers. I’ll make sure and do a post on it soon. In the meantime you can check out my highlights on my instagram feed @carinagardnerpapercrafts because there are several stories on my search for paper.

TUTORIAL/LIVE VIDEO SCHEDULE

Tuesdays Silhouette Projects 10am MST
instagram @carinagardnerpapercrafts
facebook https://www.facebook.com/carina.gardner.designs/

Tuesdays MiniLou 10:30am MST
instagram @miniloukids
facebook https://www.facebook.com/miniloukids/

Wednesdays Learn to Design Videos
Youtube only

Thursdays Fabric Projects 10am MST
instagram @carinagardner
facebook https://www.facebook.com/carina.gardner.designs/

Silhouette Design Store JOANN Stores

The Silhouette Pro Projects Read More »

Big Christmas House Tutorial and HUGE Silhouette Announcement!

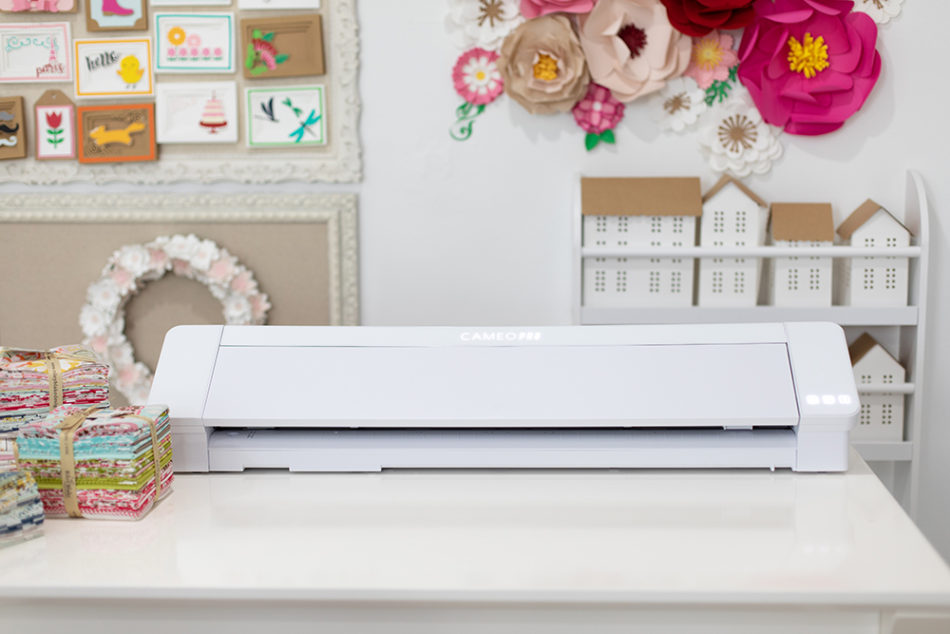
I AM SO EXCITED to announce a new product that launched today at Silhouette. If you have been dreaming of making everything BIGGER, then look no further than the new Silhouette Pro!

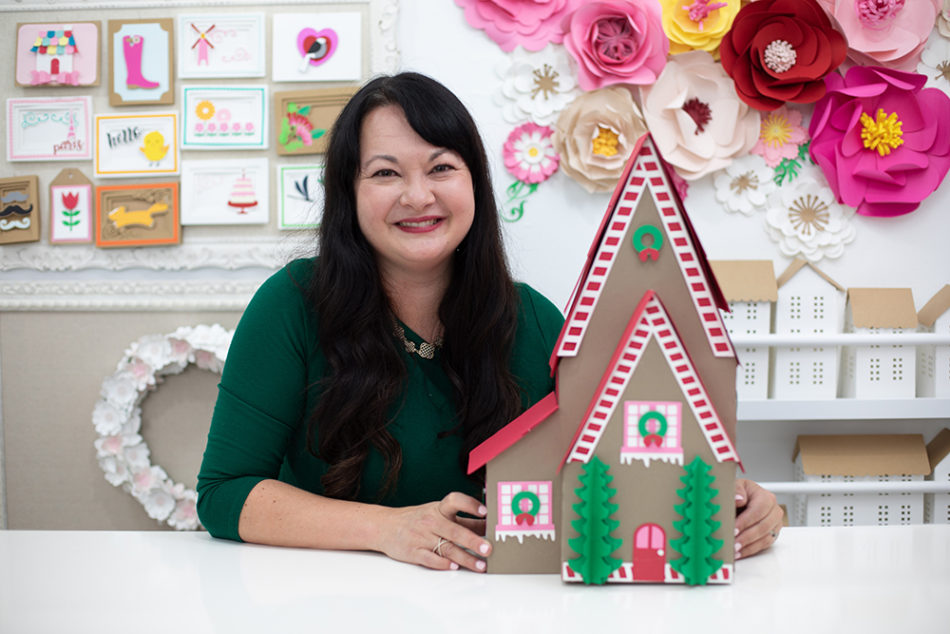
It cuts 24 inch long projects! And I’m thrilled to announce that for a short time, my Big Christmas House will be available for free in my Silhouette Shop. Now of course, you do not need the Pro to make this project. You can absolutely size down for your Cameo or Plus.

This new video is part of this week’s new releases. You can visit my new products and FREE products here:
https://www.silhouettedesignstore.com/view-artist/252689

If you are looking for more freebies, I  will be sending out  more FREE SVGS my VIP Silhouette Group. To join my VIP group for free, go here: http://eepurl.com/dN2RcY. I regularly RESEND files so be sure to sign up so that you are getting all my free tutorials!

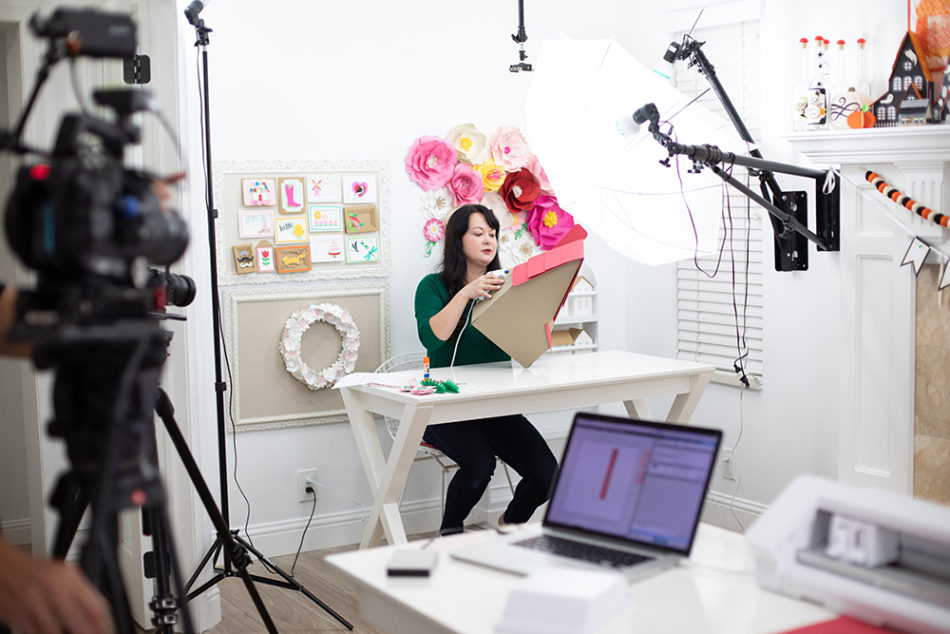
If you want a little behind the scenes, Silhouette visited me at my house to film all the tutorials for the new Pro.

They should be releasing more info on the Pro in the coming weeks and you will see me doing projects for them and for you! I’m SO thrilled about cutting REALLY BIG vinyl and heat transfer projects. If you have a business using the Silhouette Machine, the Pro is going to be a game changer for you!

As for designs, you basically can take any design and size it up for the Pro. I’m really excited to try building some of my Ultimate projects so I can see just how big I can build things!

The Pro will be available in the Silhouette Store and some craft stores. I hope you get your hands on one! I’ll be doing so many projects on my instagram feed so check out new projects there!

XOXO, Carina

TUTORIAL/LIVE VIDEO SCHEDULE

Tuesdays Silhouette Projects 10am MST
instagram @carinagardnerpapercrafts
facebook https://www.facebook.com/carina.gardner.designs/

Tuesdays MiniLou 10:30am MST
instagram @miniloukids
facebook https://www.facebook.com/miniloukids/

Wednesdays Learn to Design Videos
Youtube only

Thursdays Fabric Projects 10am MST
instagram @carinagardner
facebook https://www.facebook.com/carina.gardner.designs/

Silhouette Design Store JOANN Stores

Big Christmas House Tutorial and HUGE Silhouette Announcement! Read More »

How to get the Most Out of Your Mats!

Today I’m featuring a video that will help you save money!

Of course, I also sent my VIPs a freebie today! To join my VIP group for free, go here: http://eepurl.com/dN2RcY. I regularly RESEND files so be sure to sign up so that you are getting all my free tutorials!

TUTORIAL/LIVE VIDEO SCHEDULE

Tuesdays Silhouette Projects 10am MST
instagram @carinagardnerpapercrafts
facebook https://www.facebook.com/carina.gardner.designs/

Tuesdays MiniLou 10:30am MST
instagram @miniloukids
facebook https://www.facebook.com/miniloukids/

Wednesdays Learn to Design Videos
Youtube only

Thursdays Fabric Projects 10am MST
instagram @carinagardner
facebook https://www.facebook.com/carina.gardner.designs/

Silhouette Design Store JOANN Stores

How to get the Most Out of Your Mats! Read More »

Colorful Scrapbooking Layout Tutorial made with Your Silhouette Machine

I sent this little freebie to the Silhouette VIP Group! To join my VIP group for free, go here: http://eepurl.com/dN2RcY. I regularly RESEND files so be sure to sign up so that you are getting all my free tutorials!


TUTORIAL/LIVE VIDEO SCHEDULE

Tuesdays Silhouette Projects 10am MST
instagram @carinagardnerpapercrafts
facebook https://www.facebook.com/carina.gardner.designs/

Tuesdays MiniLou 10:30am MST
instagram @miniloukids
facebook https://www.facebook.com/miniloukids/

Wednesdays Learn to Design Videos
Youtube only

Thursdays Fabric Projects 10am MST
instagram @carinagardner
facebook https://www.facebook.com/carina.gardner.designs/

Silhouette Design Store JOANN Stores

Colorful Scrapbooking Layout Tutorial made with Your Silhouette Machine Read More »

Little Boy Dinosaur Shadow Box Card Tutorial made with Your Silhouette Machine

I sent this little freebie to the Silhouette VIP Group! To join my VIP group for free, go here: http://eepurl.com/dN2RcY. I regularly RESEND files so be sure to sign up so that you are getting all my free tutorials!

TUTORIAL/LIVE VIDEO SCHEDULE

Tuesdays Silhouette Projects 10am MST
instagram @carinagardnerpapercrafts
facebook https://www.facebook.com/carina.gardner.designs/

Tuesdays MiniLou 10:30am MST
instagram @miniloukids
facebook https://www.facebook.com/miniloukids/

Wednesdays Learn to Design Videos
Youtube only

Thursdays Fabric Projects 10am MST
instagram @carinagardner
facebook https://www.facebook.com/carina.gardner.designs/

Silhouette Design Store JOANN Stores

Little Boy Dinosaur Shadow Box Card Tutorial made with Your Silhouette Machine Read More »

Baby Truck Scrapbooking Layout Tutorial made with Your Silhouette Machine

I sent this little freebie to the Silhouette VIP Group! To join my VIP group for free, go here: http://eepurl.com/dN2RcY. I regularly RESEND files so be sure to sign up so that you are getting all my free tutorials!

TUTORIAL/LIVE VIDEO SCHEDULE

Tuesdays Silhouette Projects 10am MST

instagram @carinagardnerpapercrafts

facebook https://www.facebook.com/carina.gardner.designs/

Tuesdays MiniLou 10:30am MST

instagram @miniloukids

facebook https://www.facebook.com/miniloukids/

Wednesdays Learn to Design Videos

Youtube only

Thursdays Fabric Projects 10am MST

instagram @carinagardner

facebook https://www.facebook.com/carina.gardner.designs/

Silhouette Design Store JOANN Stores

Baby Truck Scrapbooking Layout Tutorial made with Your Silhouette Machine Read More »

Marquee Letter K Tutorial made with Your Silhouette Machine

I sent this little freebie to the Silhouette VIP Group! To join my VIP group for free, go here: http://eepurl.com/dN2RcY. I regularly RESEND files so be sure to sign up so that you are getting all my free tutorials!

TUTORIAL/LIVE VIDEO SCHEDULE

Tuesdays Silhouette Projects 10am MST
instagram @carinagardnerpapercrafts
facebook https://www.facebook.com/carina.gardner.designs/

Tuesdays MiniLou 10:30am MST
instagram @miniloukids
facebook https://www.facebook.com/miniloukids/

Wednesdays Learn to Design Videos
Youtube only

Thursdays Fabric Projects 10am MST
instagram @carinagardner
facebook https://www.facebook.com/carina.gardner.designs/

Silhouette Design Store JOANN Stores

Marquee Letter K Tutorial made with Your Silhouette Machine Read More »

Flat Folding Bunny Box Tutorial made with Your Silhouette Machine

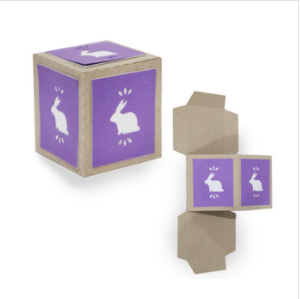
Flat Folding Bunny Box

In today’s blog post, I show you how to put together an adorable little Flat Folding Bunny Box, which originally went out as a freebie to my Silhouette VIP group. This little box is the perfect way to package party favors or to wrap up a little Easter present you’d like to give someone! Maybe the Easter Bunny could use this box to deliver a special Easter treat. Stacking several of these boxes in different colors is also a cute way to create a stackable Easter display to add a touch of pastel panache to a room for the holiday.

I hope you have as much fun making this flat folding bunny box I had designing it! If you’d like to get freebies like this in your email every week then be sure to sign up as a VIP at the link below!

You can find my new products in the Silhouette store here:

https://www.silhouettedesignstore.com/view-artist/252689 


You can find the Best Bunny House here:

https://www.silhouettedesignstore.com/designs/D-190402 


To join my VIP group for free, go here:

http://eepurl.com/dN2RcY.  I regularly RESEND files to be sure to sign up so that you’re getting all my free tutorials! 

Check out even more Easter projects here: Easter Project Round Up

Silhouette Design Store JOANN Stores

Flat Folding Bunny Box Tutorial made with Your Silhouette Machine Read More »

How to Make Candy Corn Halloween Treat Bags

Hi there my fellow crafters!!   My name is Nicole, known better as “teachdanz” in the craft world, and I am here today with a Halloween inspired project for you.


To create my Halloween treat boxes I used the following files from Carina Garnder –
I started off by opening up the Snowflake Favor Bag in my silhouette design studio.  I ungrouped everything and then resized the bag to 11.5 inches in height keeping the sizing “locked” so that the image increased proportionately in size.  I resized the layers for the sides of the bag too.  After I cut out the bag and the layers I glued those together and got to work on the candy corn swirl flourish.  I sized the flourish to fit the sides of my bag and then did an offset.  Since I used a striped paper for my bag I wanted to make sure the candy corn flourish stood out and didn’t get lost in the busy background.  I used foam adhesive to pop my candy corn images up to give a bit of dimension to the bag.


I designed these to be given as a Halloween treat but they could easily be redone in fall colors to make it more of a “fall/Thanksgiving” themed treat bag.  I really like this treat bag and the versatility of it!!


Thanks so much for stopping by today!!  I hope I have inspired you today!

Find all of Nicole’s amazing projects at the links below!

Instagram – @teachdanz
Facebook – teachdanz


Silhouette Design Store JOANN Stores

How to Make Candy Corn Halloween Treat Bags Read More »

Instructions for Christmas Silhouette Projects from Merry Christmas eBook

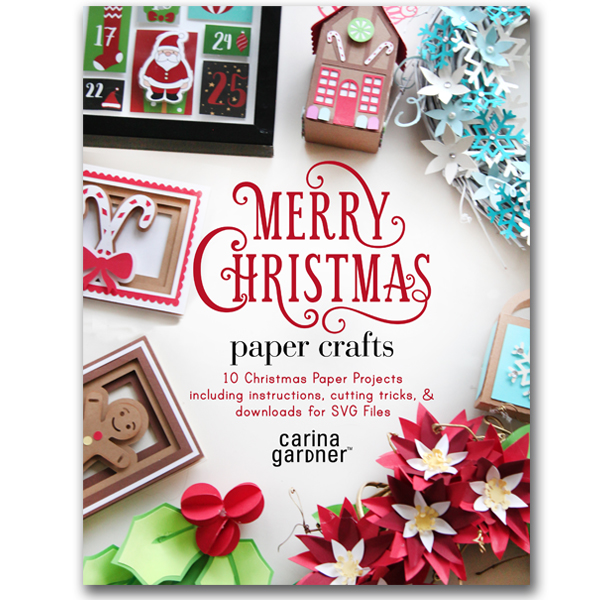
I’m excited to announce the release of my newest eBook Merry Christmas Paper Crafts! This book includes 10 christmas and winter related projects for the crafters with a digital die cutting machine. Every set of instructions included detailed photos and instructions on how to put each project together!

It is available in my store for $9.99 and available in the Silhouette store for $12.99. If you purchase it from my store, you will receive a PDF book and SVG downloads for your machine to all the projects. If you purchase if from the Silhouette store, you get the PDF book and Studio files that will go directly into your silhouette software! Pretty cool, right? Be sure to watch for discounts on BOTH of these books!

I am also offering the projects INDIVIDUALLY in the Silhouette store with my normal releases. These will be priced from .99 to $2.99. Sufficient to say, if you buy the book, you will definitely be getting a deal! 

If you bought an individual item, I have limited instructions below for each of the projects. They should help you put together the projects with ease. Enjoy!

CHRISTMAS HOUSE ORNAMENT

MATERIALS | Pop dots + Hot glue & glue gun or/and glue stick + Ribbon or string to hang the ornament + Papers – assortment of browns, green, white, red, blue, and purple

STEP 1 Begin by cutting out all the pieces in your studio or svg file from your software. Note: The main house piece is best cut on a 12″ x 12″ paper, however, the entire project can be sized down to fit on 8.5″ x 11″ paper by selecting all the pieces and holding the SHIFT key while making smaller.
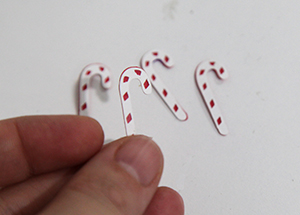
STEP 2 Glue together the white candy cane pieces to the top of the red candy cane pieces. Make sure you have half facing right and half facing left. Next, glue the peppermint tops to the round circles.

STEP 3 Next, fold all the score lines of the main house piece. On the INSIDE of the house, glue the white rectangle and house pieces to the main house.
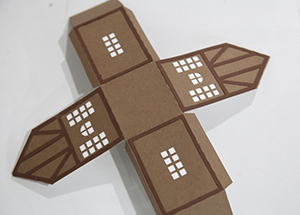
STEP 4 Next glue the dark brown “cottage cut outs” to the outside of the house. Add the red windows and doors. Match the windows and doors up to the holes already cut out of the house.

STEP 5 Place a pop dot on the back of each gumdrop. Add the gumdrops along the bottom sections of the house. Place a pop dot on the back of the peppermints. Place the peppermints to the top area of the house. Glue the candy canes to the house where ever you would like.
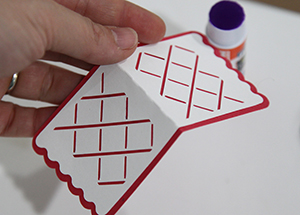
STEP 6 Next, layer the white roof piece above the red roof piece. Glue together.
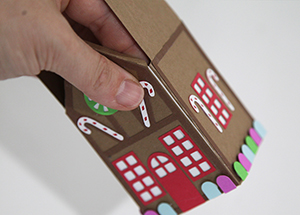
STEP 7 Put together the house by gluing the tabs to the sides of the house. Place glue on the tabs of the roof. Glue into place. There may be a hole in the top. This will be covered by the red and white roof piece. Hot glue the entire roof area of the house. Place the red and white roof on it.
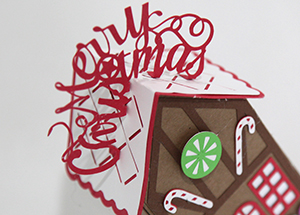
STEP 8 Then fold back the tabs of the “Merry Christmas” sign. Glue the “Merry Christmas” sign into place on the top of the roof using the tabs.
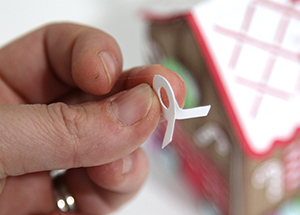
STEP 9 Glue together the circles of the two round tabs. Fold out the bottom tabs. Glue this piece to the CENTER of the roof. Place one tab on one side of the roof and the other tab on the opposite side of the roof. Glue into place. Finally, add a ribbon or string to hang.

MERRY & BRIGHT CARD

MATERIALS | Pop dots + Hot glue & glue gun or/and glue stick + Papers – assortment of blue, green, white, red, yellow, and black
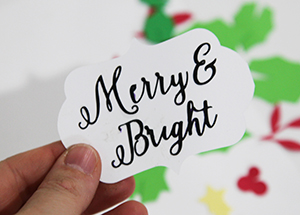
STEP 1 Begin by cutting out all the pieces in your studio or svg file from your software. Glue the phrase “Merry & Bright” to the white cut out.
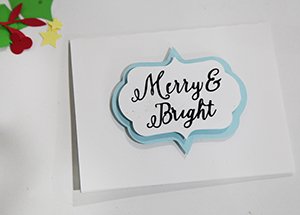
STEP 2 Next, place pop dots on the back. Place on the center of the blue bracket shape. Then, put pop dots on the back of the blue bracket. Place the pieces in the front center of the folded white card.
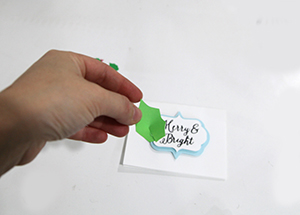
STEP 3 Make the leaves 3D by placing a little glue on the center of each leaf. Then pull the center opening together in the leaf. Hold until the glue has dried. The finished leaf will curve in.

STEP 4 Place all leaves under the blue bracket shape. Glue into place. Fill in the blue and red filler pieces.
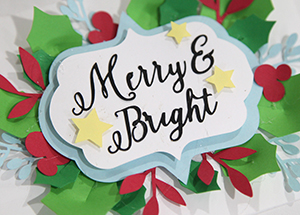
STEP 5 Finally, add the three yellow stars to the center bracket. Use pop dots to make them stand out.

SANTA SLEIGH CENTERPIECE

MATERIALS | Hot glue & glue gun or/and glue stick + Papers – assortment of black, yellow, green, and red

STEP 1 Begin by cutting out all the pieces in your studio or svg file from your software. Note: The long pieces are best cut on 12″ x 12″ paper, however, the entire project can be sized down to fit on 8.5″ x 11″ paper by selecting all the pieces and holding the SHIFT key while making smaller. You can also simply cut a little extra of the long piece and glue them together.
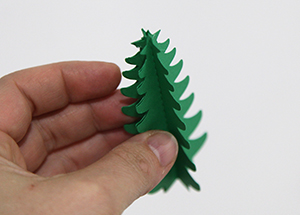
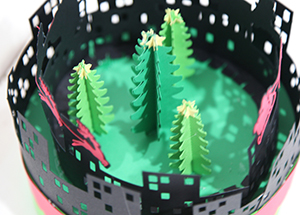
STEP 2 Create the evergreen trees by folding on the scores lines. Glue together two pieces on one side of the tree. Continue to add pieces to create a 3D tree. Glue a total of five pieces per tree. Finish off the tree by gluing the first and fifth piece together. Glue a star to the center of each evergreen tree on every side.
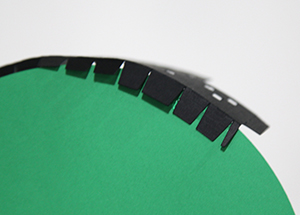
STEP 3 Next fold down the tabs of the black cityscape pieces. Glue the tabs down to the underside of the circle. Glue all the way around until the cityscape ends. Repeat with the second cityscape by gluing a small piece of the sides of the cityscapes together. Then finish gluing the tabs under the circle.
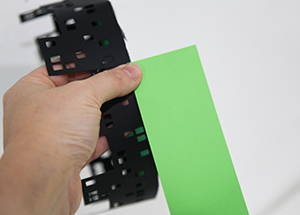
STEP 4 Glue together the two light green pieces. Glue the light green piece to the bottom 1/8th of the cityscape. Follow along the edge until it is completely glued into place. Finish by gluing the ends of the light green pieces together.
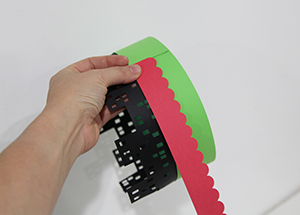
STEP 5 Add the red scallop to the top of the light green piece. Glue all the way around to create a pretty border for the city.
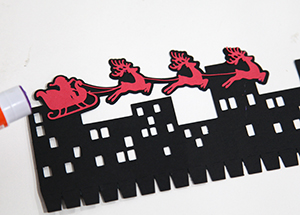
STEP 6 Next glue the santa sleigh to the two black cityscapes that are left. Glue the tabs about 1/4th to 1/3rd inch from the outside edge of the circle. Repeat with the other piece until the inside cityscape with Santa is complete.
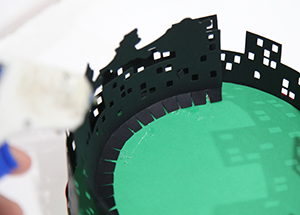
STEP 21 Finally, glue the largest tree to the center of the circle. Add the remaining trees to the center of the circle.
POINSETTIA WREATH

MATERIALS | 10 to 12 inch wreath + Hot glue & glue gun or/and glue stick + Gold spray paint + Papers – assortment of yellows, white, red, and green

STEP 1 Begin by cutting out all the pieces in your studio or svg file from your software. Spray paint your wreath gold. Let dry.
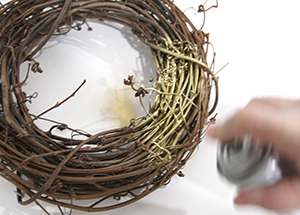
STEP 2 Next, finger press all your flower pieces. Glue together two of the large red pieces. Make sure the petals do not overlap. Glue a smaller dark red piece to the center of the red flower pieces. Next, glue a white flower piece to the center of the red pieces.
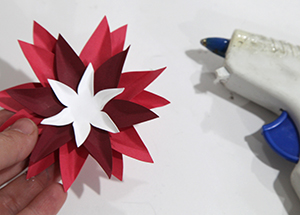
STEP 3 Next, place a yellow center to the middle of the poinsettia. Add a second yellow center to the flower to finish it.
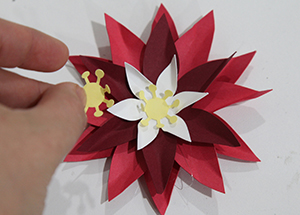
STEP 4 Finger press all the leaves. Glue the flowers to the wreath. Finger press the flowers together to make a tight arrangement. Add green leaves around the edges.
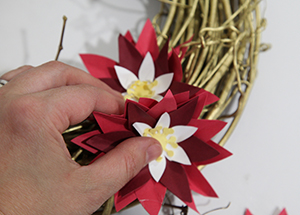
STEP 5 Finish by placing all the flowers and leaves on the wreath.

HANGING MISTLETOE

MATERIALS | Hot glue & glue gun or/and glue stick + Ribbon or string + Papers – assortment of greens and red

STEP 1 Begin by cutting out all the pieces in your studio or svg file from your software.
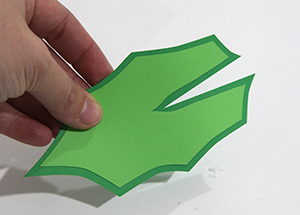
STEP 2 Glue together the darkest leaf color (largest leaf) to the matching medium green leaf. Repeat for the second leaf. Next, glue together the medium leaf color (smaller leaf) to the matching light green leaf. Repeat for the second and third leaves. Next, place a dot of glue on the end of the leaf center and glue together so that the center portion is connected. Repeat with all the leaves.
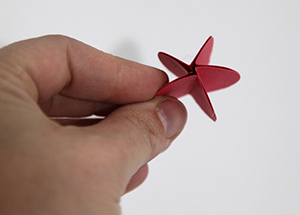
STEP 3 Next, build the berries. There are five berries to create a single 3D berry. Fold the berry in half along the score line. Then glue together one side of the berry to another berry. Repeat this until there are five berries connected. Finally, glue the first berry to the fifth berry to finish. Repeat with all three berries.
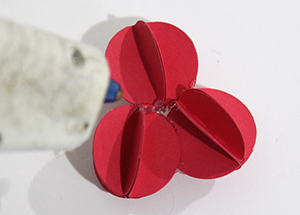
STEP 4 Place the berries in a triangle as shown. Glue together the first two triangles. Hold them together as the glue dries. Glue the third berry to complete the trio. Hold together to secure into place. Add some glue to the center of the berries.
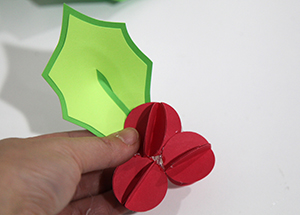
STEP 5 Next glue together a leaf to the berries. Continue gluing leaves to create a bundle of leaves with the berries at the bottom. Hold the leaves in place to make sure the group is glued securely. Finish adding leaves to the set (or only use 3 leaves if you would like).
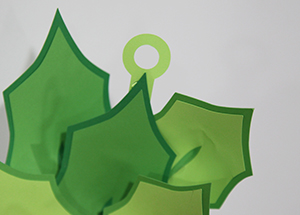
STEP 6 Place the hanging tab to the top center leaf. Glue into place. Place ribbon through the hanging tab to finish.

SNOWFLAKE WREATH

MATERIALS | 10 to 12 inch wreath + Hot glue & glue gun or/and glue stick + White spray paint + Papers – assortment of blues, whites, and creams + Gems and pearls
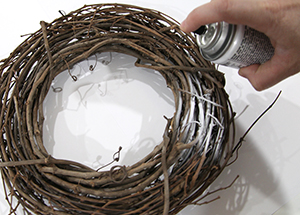
STEP 1 Begin by cutting out all the pieces in your studio or svg file from your software. Spray paint your wreath white. Let dry.
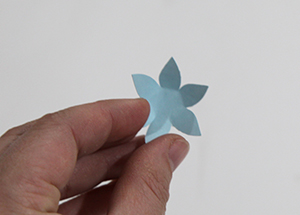
STEP 2 Next, finger press all your flower pieces. I use an all-over pattern for my wreath but you can keep all your objects to one side (like the poinsettia wreath). Begin by gluing a large snowflake to the wreath. Leave big snowflakes all alone or layer them with flower pieces or smaller snowflakes. Add a small accessory like a pearl or gem to the center.
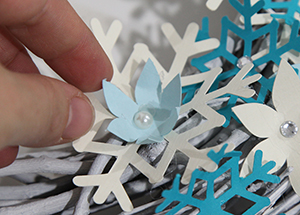
STEP 3 Finish covering the entire wreath mixing the snowflakes and flowers. Add the swirls to the wreath to finish.
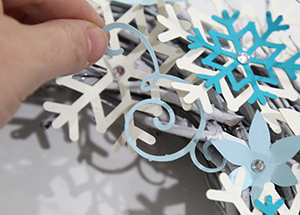
 

ADVENT CALENDAR

MATERIALS | Pop dots + Hot glue & glue gun or/and glue stick + STRONG Magnets + Printout of calendar and santa + A 12 in. x 12 in. shadow box frame + Optional – Laminator

STEP 1 Print all of your pieces (Santa and advent calendar) either on your printer or local printer.
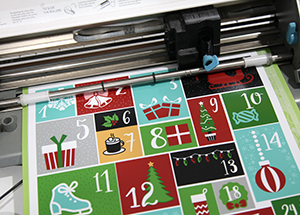
STEP 2 Cut out all the advent calendar in your studio or svg file from your software. If you are using a shadow box, pull out the multiple layers. You will be placing your calendar on the layer closest to the glass front. If you do not have multiple layers, just make sure your final artwork will be as close to the front as possible.
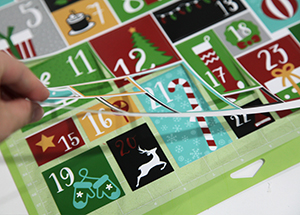
STEP 3 Take off all the pieces from your cutting mat. On your number pieces, place pop dots and hot glue a magnet to the back side of the number. Use a 12 in. x 12 in. piece of paper as your background. Then place the “negative” or “throwaway” piece on TOP of the white background paper to use as your guide on placing all the pieces. Place the “number 1” box into the first spot using the template as your guide.
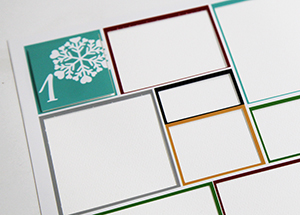
STEP 4 Repeat with every number piece. Make sure all of your magnets are the same side up (all +’s or all -’s). Once all the numbers are glued down, pull off the template carefully. The finished advent calendar will be 3D and easy to place in the shadow box frame. Place the advent calendar in the frame and close.
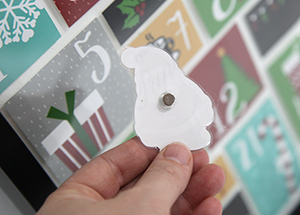
STEP 5 Finally, cut out the santa. To line this up, use a test piece of paper to cut out the Santa shape. Then without moving the paper from the mat, pull the cut out area away and place the printed Santa behind the mat. Pull away the test piece of paper and cut out the Santa printout. Optional: Laminating your Santa will give it more durability. If you don’t have or want to laminate your santa, skip this step and simply glue a magnet to the back and you are done! Optional: If you laminate your Santa, trim away the excess lamination paper.

STEP 6 Hot glue a magnet to the back of the Santa.


Silhouette Design Store JOANN Stores

Instructions for Christmas Silhouette Projects from Merry Christmas eBook Read More »

Round up of 5 Springtime Silhouette Cameo Cuttables!

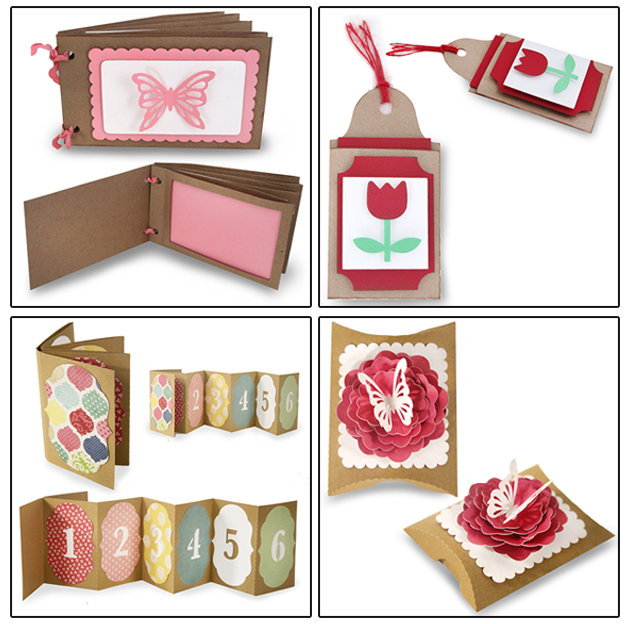
Sometimes I forget to tell you about projects I’m doing or have loved that are amazing! So here’s a ROUND UP of some favorite SPRINGTIME projects that you can get from my Silhouette Shop.

1. ​​Accordion Number Album Design ID #75919 https://www.silhouettedesignstore.com/view-shape/75919

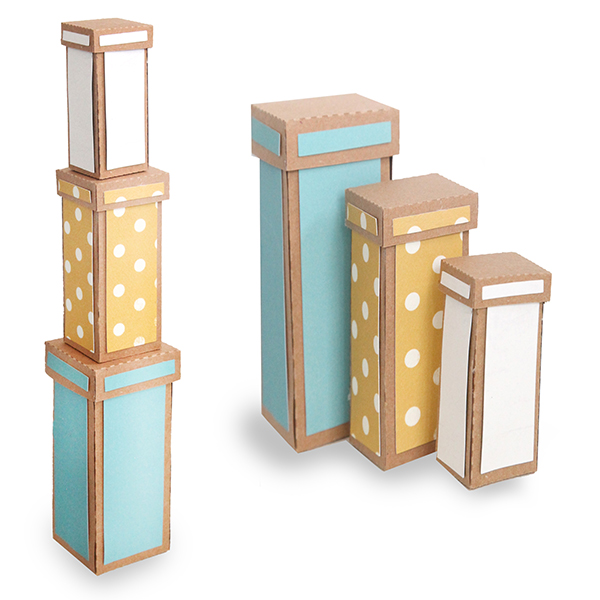
2. 3 Stacked Skinny Square Boxes Design ID #76544 https://www.silhouettedesignstore.com/view-shape/76544

3. Butterfly Perched on a Flower Pillowbox Design ID #76289 https://www.silhouettedesignstore.com/view-shape/76289

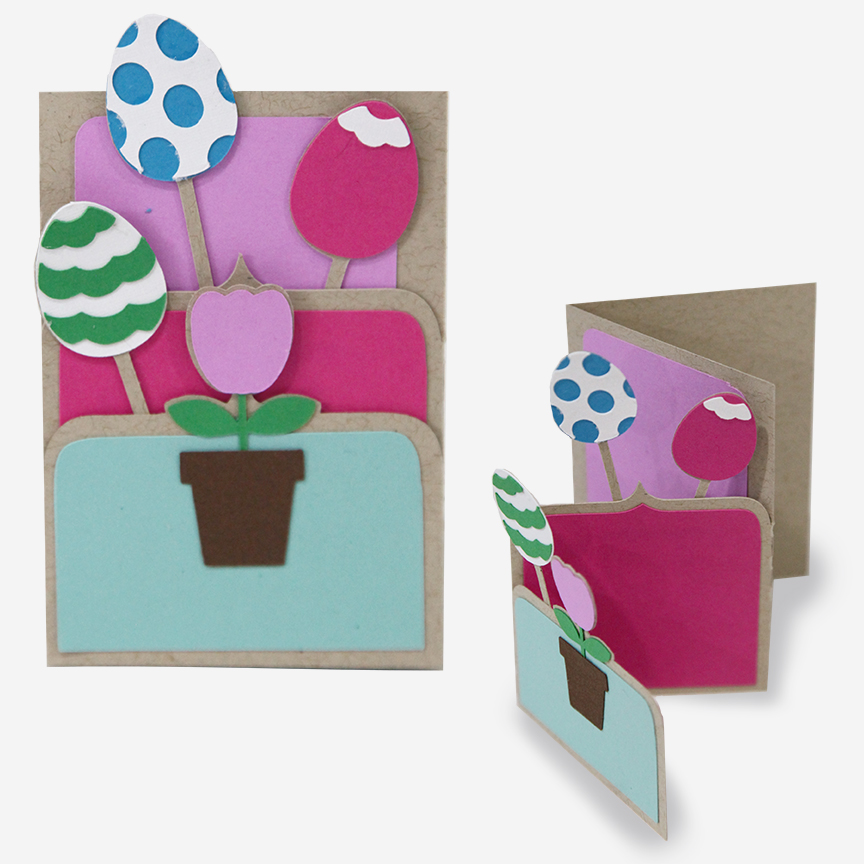
4. Layered tulip gift card Tag Design ID #77394 https://www.silhouettedesignstore.com/view-shape/77394

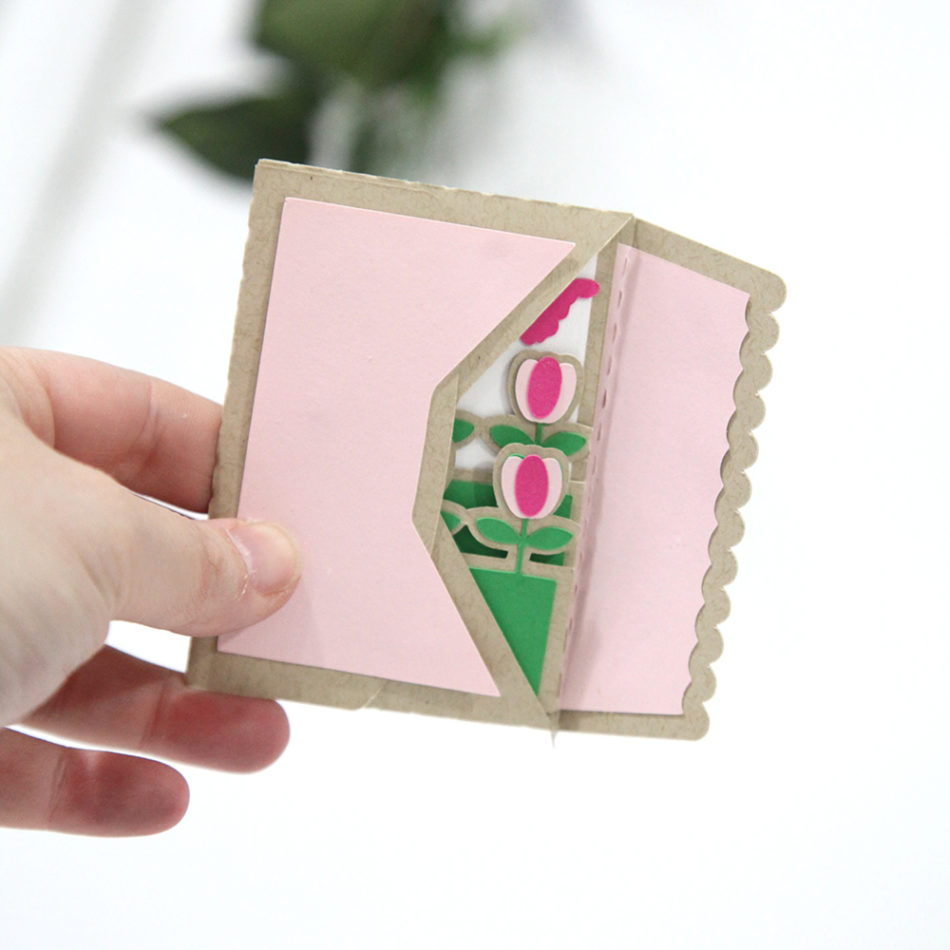
5. 4 x6 Window Photo Pocket Album Design ID #77713 https://www.silhouettedesignstore.com/view-shape/77713


​Hope you have some fun with these! I also have a fun bonus for you! Use coupon code SPRINGTIME30 for 30% off diecuts from my shop through May 1st!

XOXO- Carina


Silhouette Design Store JOANN Stores

Round up of 5 Springtime Silhouette Cameo Cuttables! Read More »

2.25 in. x 3.25 in. Layered Cards and Envelopes on Silhouette

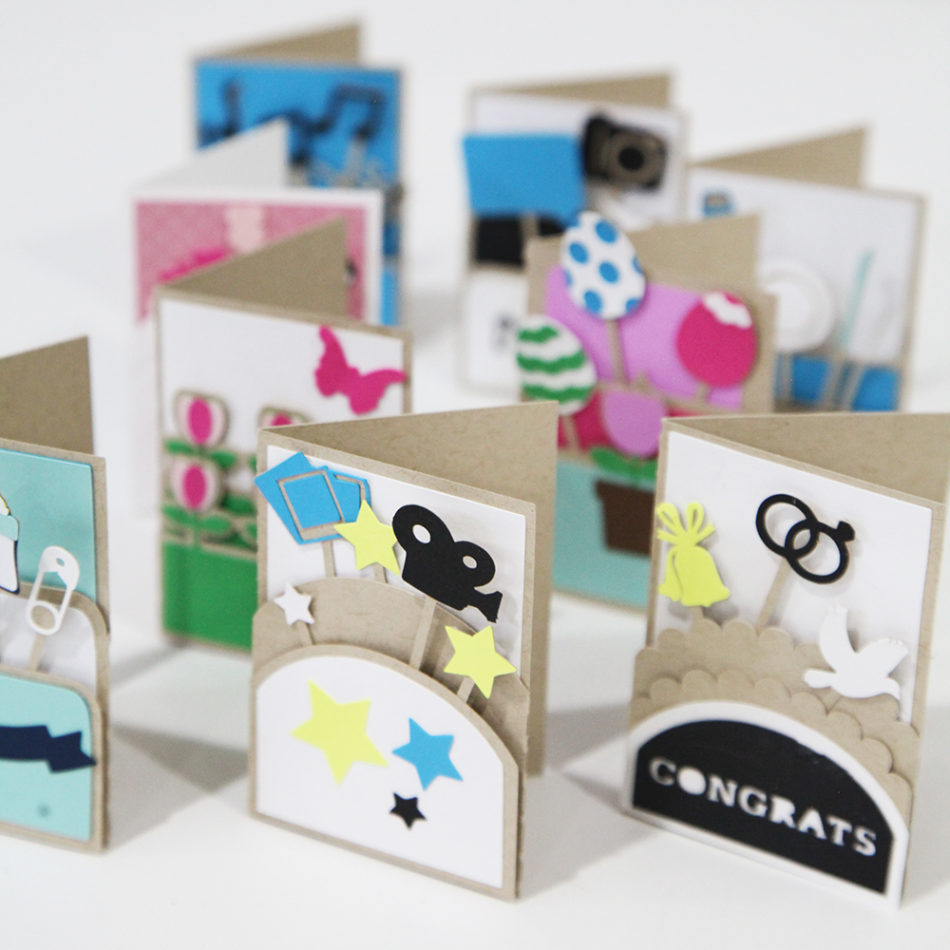
This week my Silhouette release continues with 2.25 in. x 3.25 in. cards. I’m really loving this size! This week the cards are “layered.” I cover a lot of different themes—wedding, baby, spring to name a few.  These Layered Cards are the same size as my Accordion Shadow Box Cards that were released last week. Because of this, I also have envelopes that match up to these cards.

I also have two videos below that will help you make these cards and envelopes. Please subscribe to the youtube channel if you are interested in these tutorials. Many times I am putting up these videos the week before the products are released so you can see what is coming out (your very own sneak peek!)


If you get one of each (layered card or accordion card + an envelope), you will find that it’s a very nice tight fit. Don’t use pop dots because the card will not fit. I may have an envelope come out that allows for a thicker card (tell me on instagram @carinagardnerpapercrafts if you want something like that!).
Happy Crafting!

Carina


Silhouette Design Store JOANN Stores

2.25 in. x 3.25 in. Layered Cards and Envelopes on Silhouette Read More »

Kids Pencil Valentine Cards

IMG_7052_1web
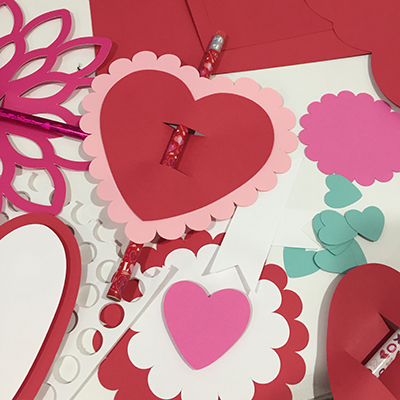
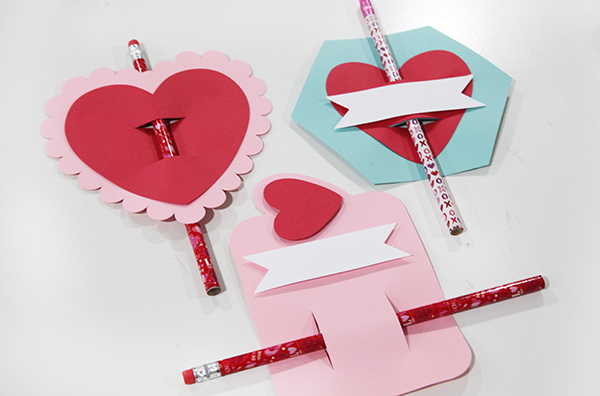
IMG_8715_webThis week is the last one I’ll be releasing Valentine’s so I’m going out with a bang!  I also decided to double dip. These pencil cards are not only my final Valentine’s release but are also Felicity’s class gifts. She’s going to write on each of them, and I’m sure we’ll add a few quotes like “I’m write for you.”
You can find them in my Silhouette shop here.

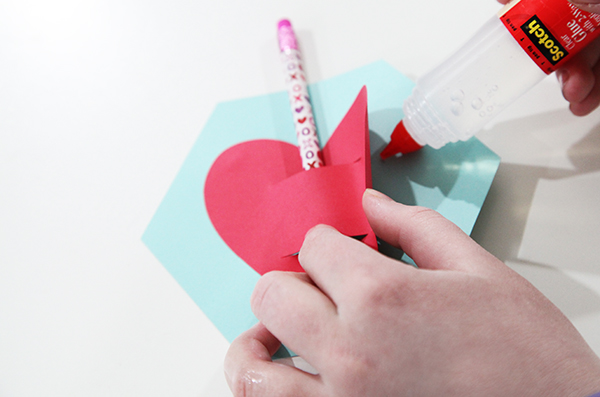
TIP 1: When you are putting these together, I recommend putting your pencil through the slits FIRST and then gluing your pieces into place (see photo below).

There are several designs were two or more papers have slits that match up. Use the slits as your guides. Place the pencil through the slits first and then pull open the edges of the top paper to glue it into place.

TIP 2: I LOVE pop dots with these designs! And glitter. And stamping ink on the edges. I kept them all simple on purpose. So you can jazz them up or use them as a kid activity.

TIP 3: Add a printable. Simply use whatever word processing software you use and write up a cute phrase in a cute font. Print, cut and attach to these Valentine’s cards!

IMG_6996_1web

And in case you missed it (haha), I’ve been releasing Valentine’s for the last month. In fact, we have been releasing Valentine’s for both CGInc. and MiniLou for the past several weeks. You can check both shops here:

Carina Gardner Silhouette Shop

MiniLou Silhouette Shop

IMG_7059_1web

Happy crafting!
Carina


Silhouette Design Store JOANN Stores

Kids Pencil Valentine Cards Read More »

Santa’s Glitter Village SVG Tutorial for Silhouette

img_5692_edited_web

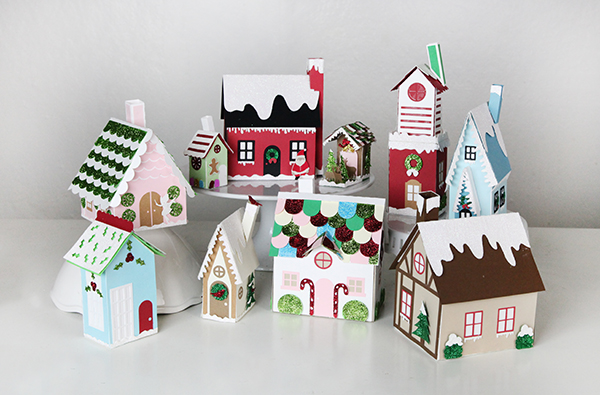
I’m SO excited about the new village I designed this year for Christmas! It’s called Santa’s Glitter Village and you can download all of it from my Silhouette shop! You can add it to any pieces you have from my original Christmas Village or build these separately! There is even a cool download showing you how I made the snowy centerpiece the either village is made on. You can use that for this village too!

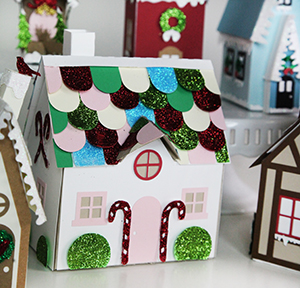
img_5710_1webThis year it is all about GLITTER! I have a great tutorial for you on how you can put together below. I do NOT have individual tutorials on these houses because many of them are made THE SAME. The tutorial I have below is for the Sugar Plum Fairy’s House and most of the buildings are built in this way. There are also extra instructions below for pieces I thought you might like a little extra help with. So scroll on down to see if there is something there that will help you!
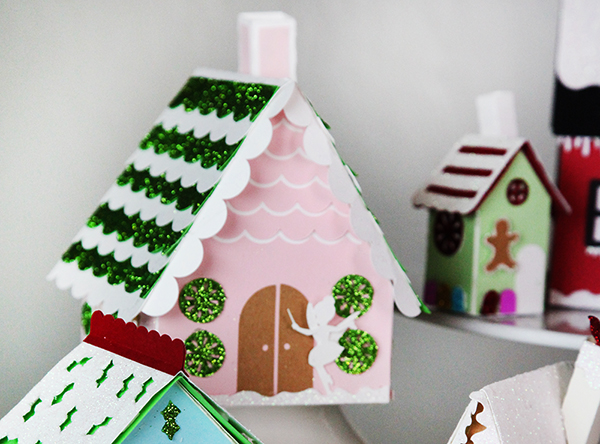
This year, the Santa Glitter Village includes: Santa’s Cottage, Candy Cane Place, a Chapel, Elf Dwelling, Reindeer Stables, Santa’s Tower, Snow Bird House, Sugar Plum Fairy’s House, Tiny Mistletoe House, and the Winter House. Many of these come with openings at the bottom for an electric tea light (or two). The smaller houses do not because a tea light would not fit:).

You can find ALL my tutorials on my main Silhouette landing page here: https://carinagardner.com/silhouette/. I noticed that when I went back to look at previous projects in the Silhouette store, that some of the links are broken. That landing page is your end all for ALL of my tutorials. You can also watch many tutorials I have filmed on my YOUTUBE channel.

I hope you have a wonderful time building Santa’s Glitter Village! Every piece is unique and sweet! I think I’m placing mine on my piano this year.

Happy crafting!

XOXO-Carina

img_5700_1web


Supplies

-Glitter (we used fine glitter, but you could use more course glitter)

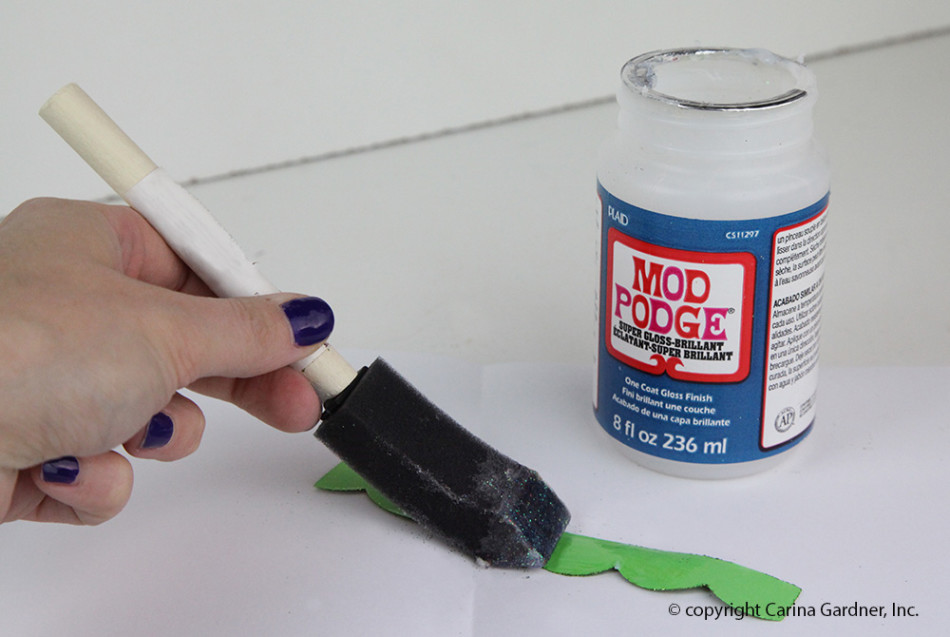
-Mod Podge (we used gloss, but you could use any kind)

-foam brush

-1 piece of copy paper

-SVG card cutouts

Instructions

Note:  These instructions work for all of the houses in Santa’s Glitter Village.  At the end of the tutorial there are instructions on how to put a few of the more intricate pieces together.

1.  Cut out all SVGs provided in the file.

2.  Before putting the house together, decide which pieces you want to glitter.  I did mine on the green scallop pieces of roof, peppermint swirls, and snow.

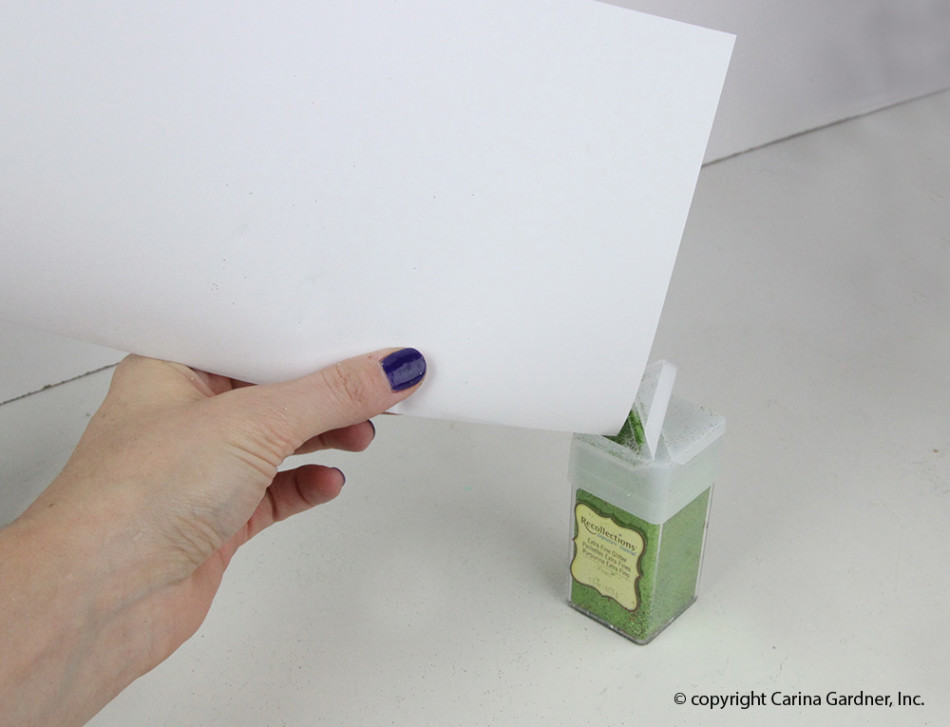
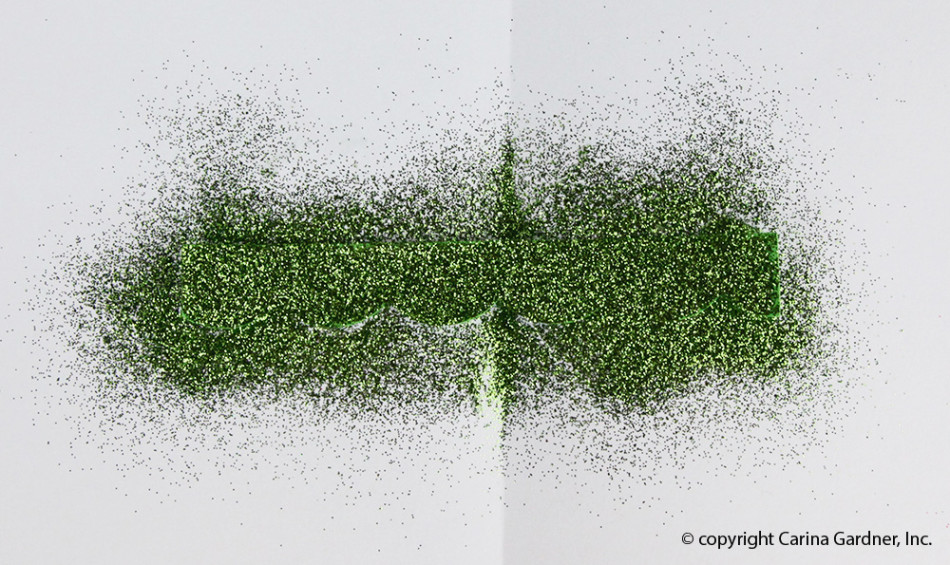
3.  Once you have all of the glitter pieces and supplies, take a piece of copy paper and fold it in half (this makes it easier to put the extra glitter back in the jar later).  This paper will be your working surface to catch the extra glitter and Mod Podge.

4.  Next, take your foam brush and dip it in Mod Podge.  Cover any area you want glittered with a thin layer of Mod Podge.  Put the copy paper underneath to contain any Mod Podge and glitter that goes over the edge.

img_5560_web-copy

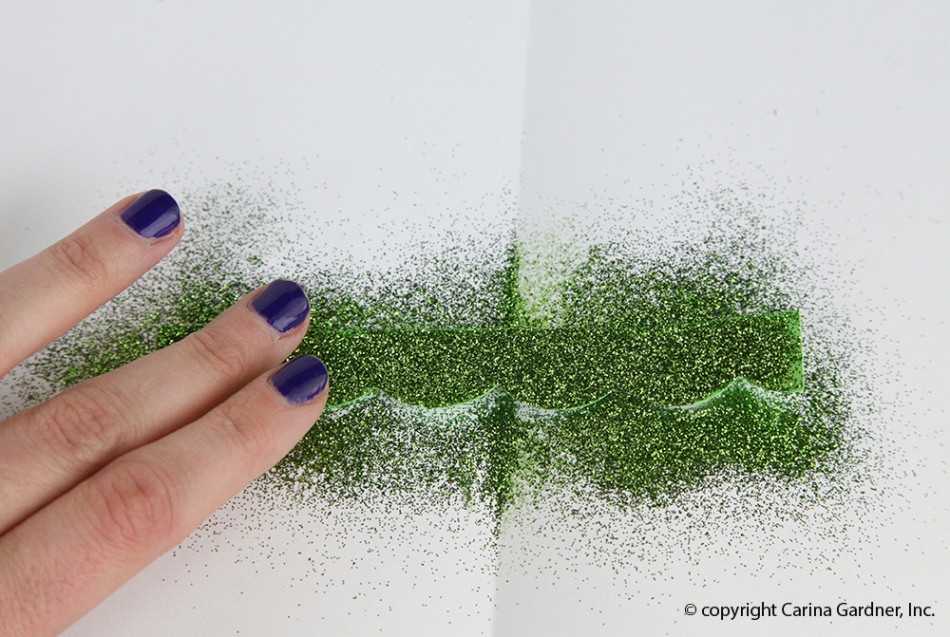
5. After the whole piece is covered in Mod Podge, take the glitter and sprinkle it over the area the Mod Podge covers.  Be very generous with the glitter so it covers everything.  Remember, you will be able to put the extra back in the container so make sure everything is covered well.

img_5564_web

6. To make sure the glitter to stays in place better, use your finger to tap the glitter lightly.  This make sure more glitter adheres to the Mod Podge.img_5569_web

7.  Wait for the Mod Podge to dry a few minutes, and tap off the excess glitter.

Tip:  If you are worried about the glitter transferring too much, you can put another layer of Mod Podge on top.  If you use gloss Mod Podge, the glitter wont lose it’s sparkle.

8.  Once you’re done with the glitter, fold the copy paper with the glitter on the inside and pour the excess back into the container.img_5573_web

9.  You’re done with the glitter, now onto how to put together the rest of the house!

10.  To put the house together, first, take the facades and glue all of the embellishments to them.

11.  Next, glue the facades to the side and front pieces.

12.  Then, glue the tabs of the back and side pieces to the tabs of the bottom.  It should form a “T” shape.

img_5576_web

13.  To make the house 3D, hot glue the tab on the side of the front piece to the side piece.  Do this for all of the tabs until you have a house shape.

img_5578_web img_5580_web

14.  After the house is done, gather your roof pieces.  Hot glue the scallop pieces to the roof piece.  Make sure you overlap each scallop piece and switch off between colors as you glue.  It’s best to estimate your spacing before your start glueing so the scallop pieces cover the roof evenly.img_5586_web

14.  Next, add the long scallop piece to the side of the roof by glueing it on the underside of the roof.

img_5590_web img_5591_web

15.  Then add the roof by glueing one side, making sure it’s centered and the top creased is lined up.

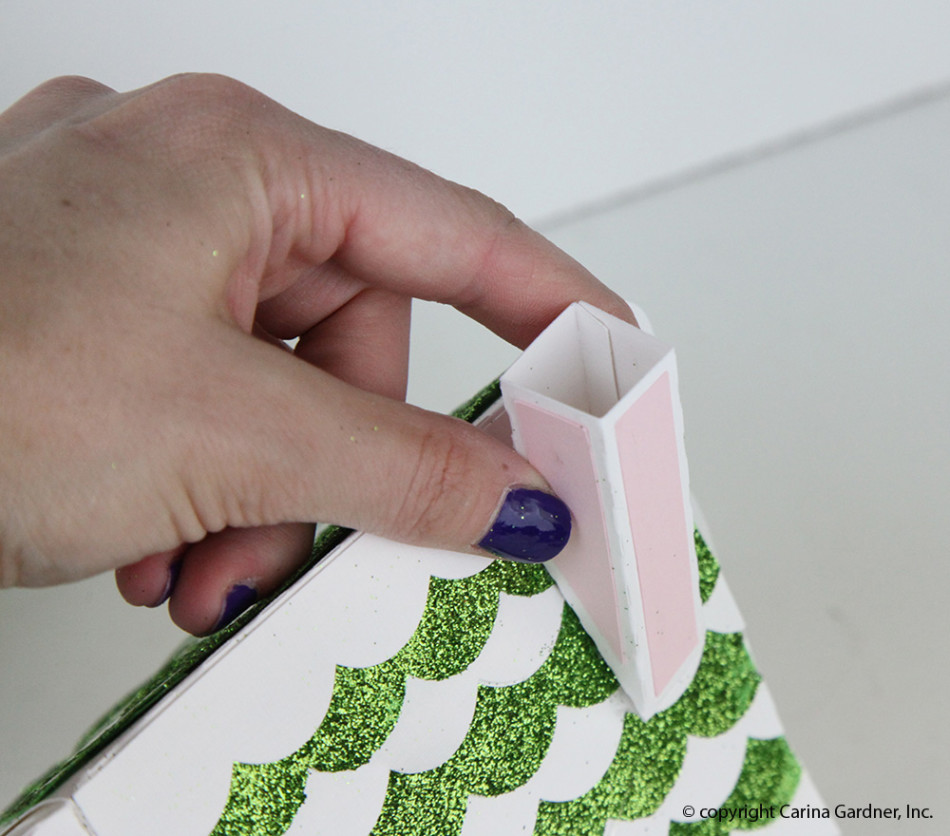
16.  The last thing to add is the chimney!  Take the chimney piece and fold it into a box shape.  Then, glue the tabs on the angled side to the roof.img_5596_web img_5597_web

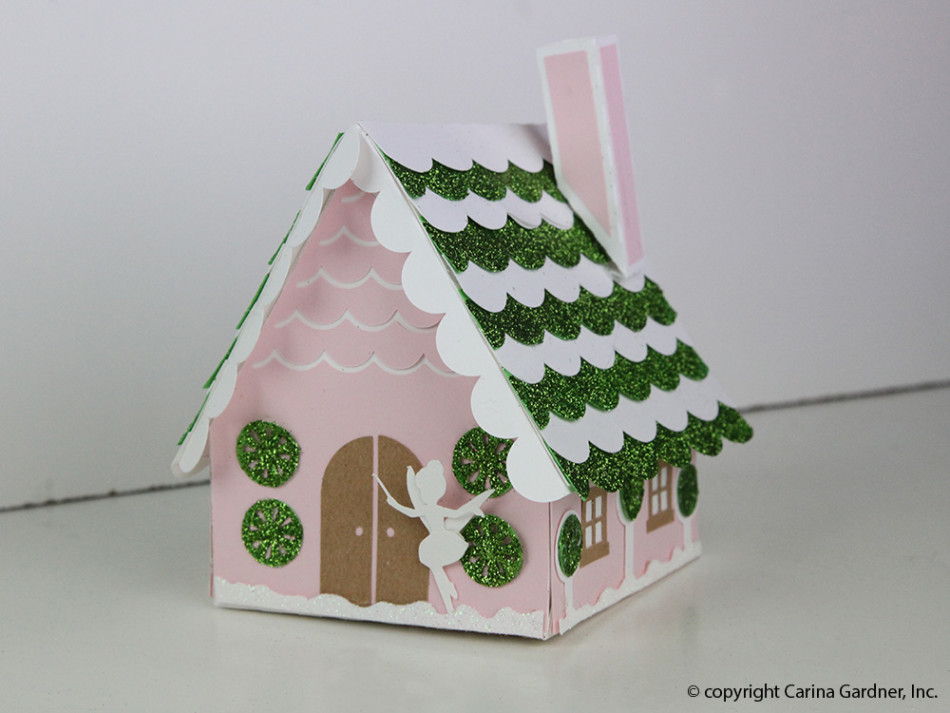
Now you have the most adorable Fairy House for your Glitter Christmas Village!

img_5606_web

Here’s a few more instructions on some of the parts that are specific to each piece.

img_5649_1web

Chimney on Santa’s Cottage:

  1.  Start by folding all of the score lines.
  2.  Next, glue the tab on the long side and glue it so it makes a box.
  3.  Then, Glue the tabs on the open part to the house.

img_5627_1web

Front Door piece on Chapel:

  1. Start by adding all of the embellishments to the facade.
  2. Then, glue the facade to the front/back piece.
  3. Next, take the long bottom piece and glue the tabs to the front/back piece.
  4. Add the roof/snow like you would for the other houses.
  5. To finish, glue the front door piece to the front of the chapel.

img_5669_1_web

Reindeer Stables:

  1. Start by assembling the house.
  2. Then, take the green piece and glue it to the bottom of the house.  The green piece will cover the entire bottom of the house and then extends into a yard.
  3. Next, glue the reindeer and tree tabs to the yard area.

Silhouette Design Store JOANN Stores

Santa’s Glitter Village SVG Tutorial for Silhouette Read More »

Guest Post from Kelly of Finding Time to Create: Her Adorable Halloween Village

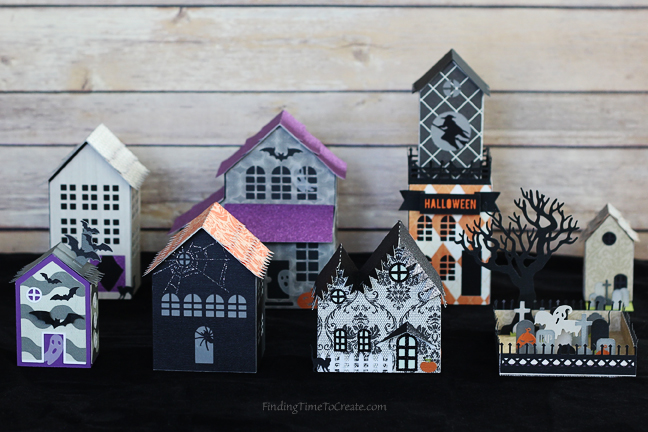
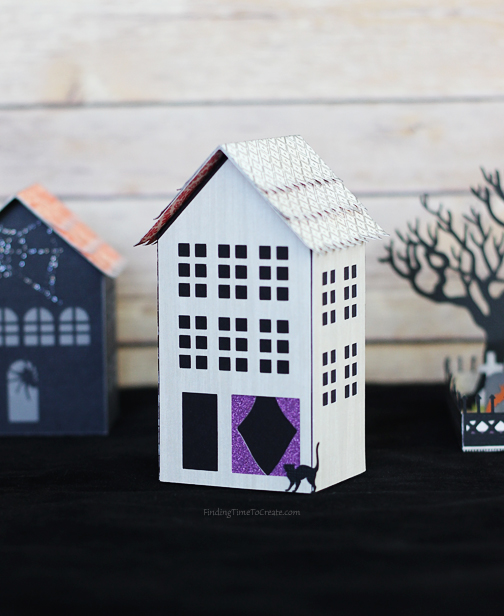
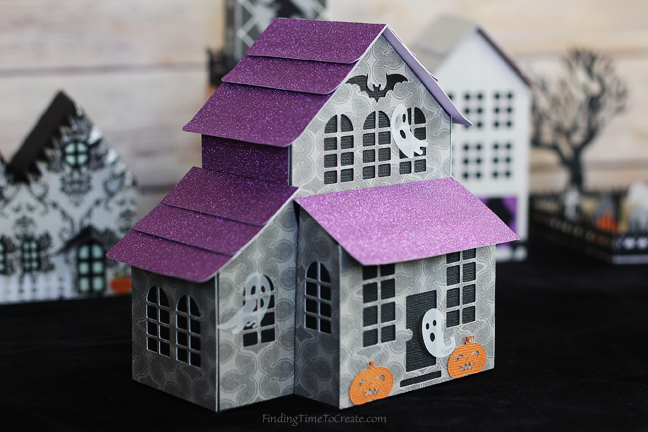
Hello! Kelly here from Finding Time To Create. I absolutely love making paper crafts with my Silhouette CAMEO, so I jumped at the chance to use Carina’s fun Halloween designs this season.

I used designs both from this year’s tiny Halloween village set, and from last year’s Halloween haunted village set. It was fun to mix and match the two sets.

halloween-village-finding-time-to-create

[photo: Halloween Village – Finding Time To Create]

I wanted these to catch your attention in the dark, so I made a couple of the houses with materials that would really pop when it’s dark.

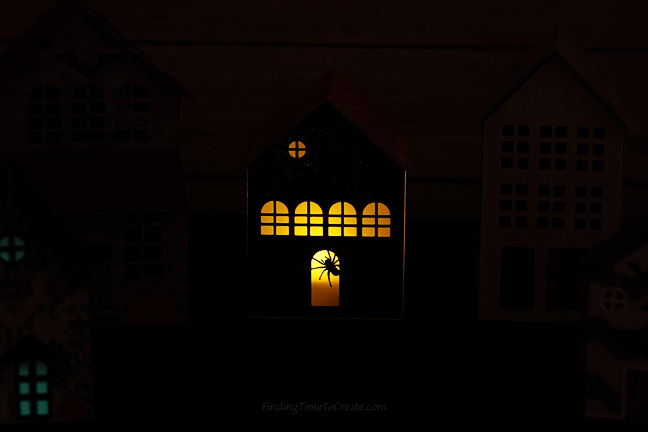
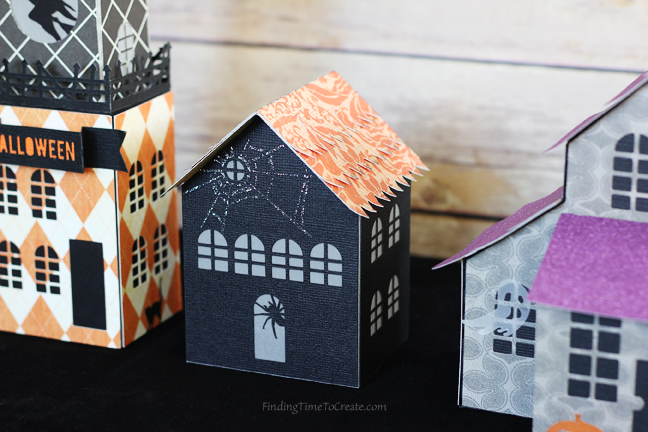
I used vellum as my base for the spider house, which has an opening in the bottom for a battery-operated tea light. That spider on the door looks pretty creepy, don’t you think?

spider-house-night-finding-time-to-create

[photo: Spider house night – Finding Time To Create]

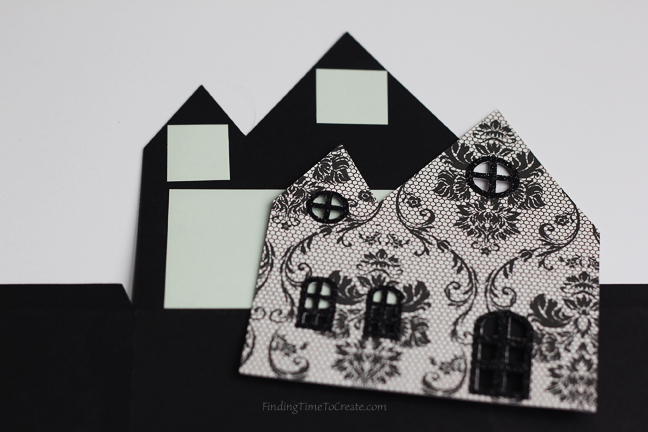
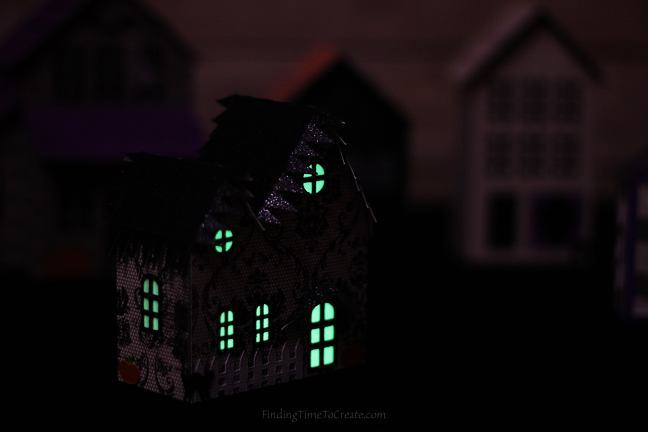
On the tiny village haunted house, I backed the windows with glow-in-the-dark sticker paper. It really makes those windows pop! (This house was my kids’ favorite.)

glow-in-the-dark-sticker-paper-and-glitter-heat-transfer-accents-finding-time-to-create

[photo: Glow in the dark sticker paper and glitter heat transfer accents – Finding Time To Create]

tiny-village-haunted-house-night-finding-time-to-create

[photo: Tiny village haunted house – night – Finding Time To Create]

Glitter makes every paper craft better, so I also used glitter paper for some of the rooftops, and glitter heat transfer for the spider web and some window frames.

spider-house-day-finding-time-to-create

[photo: Spider house day – Finding Time To Create]

You may also notice I cut all the ghosts from vellum, and added a few cats from the cat house throughout the set.

This was such a fun project to make! Thanks for letting me share it with you!
More pictures:

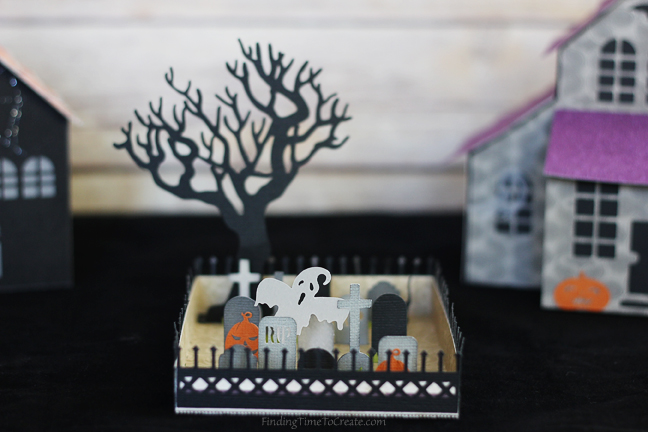
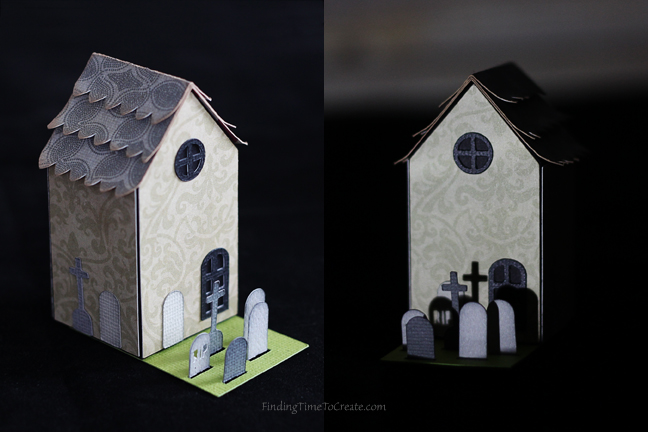
Halloween haunted village – Spooky cemetery and Tiny Halloween village – Haunted tree

cemetery-finding-time-to-create

[photo: Cemetery – Finding Time To Create]

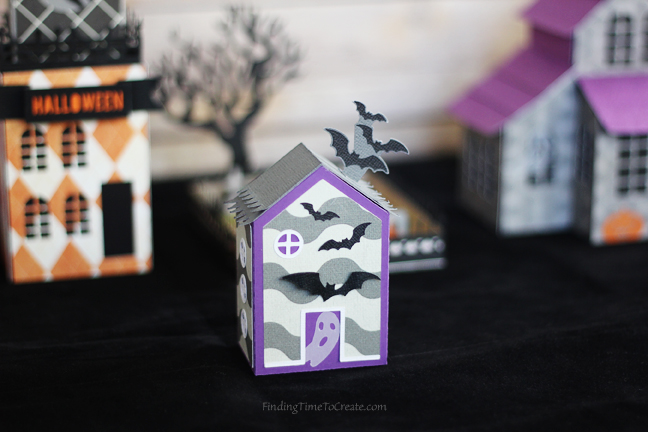
Bitty bat house

bitty-bat-house-finding-time-to-create

[photo: Bitty bat house – Finding Time To Create]

Halloween haunted village – Cat house

cat-house-finding-time-to-create

[photo: Cat house – Finding Time To Create]

Halloween haunted village – Ghost mansion

haunted-mansion-finding-time-to-create

[photo: Haunted mansion – Finding Time To Create]

Tiny Halloween village – Lil graveyard

lil-graveyard-day-and-night-finding-time-to-create


A huge thank you to Kelly for being on my blog and showing us how she put together her Halloween village! It turned out beautiful!
XOXO-Carina

Silhouette Design Store JOANN Stores

Guest Post from Kelly of Finding Time to Create: Her Adorable Halloween Village Read More »

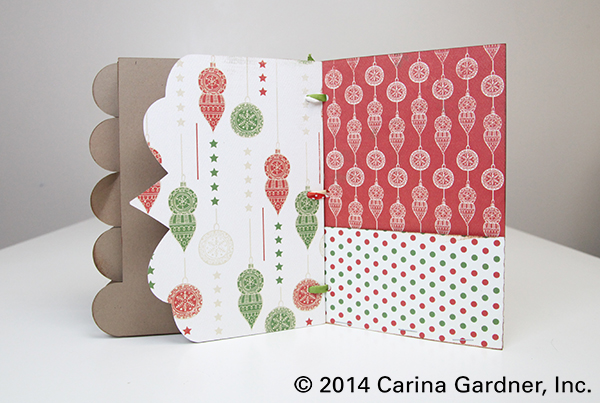
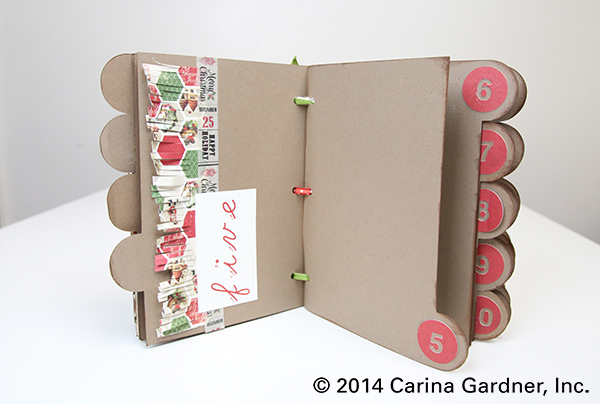
31 Days of Halloween Album Tutorial for Silhouette

Halloween is almost here!  I made some fun 31 days of Halloween albums to document everything going on in October.  Each album comes with the cover and details, three binding pieces, pages (one with score marks and one without depending on how flexible you want your album to be), a mat for photos, and a piece the size of a photo (to use for journaling).  You can also get the numbers and layouts if you want to accessorize your album!

img_4362_in_web

If you want to put pictures in the albums, here is some info on the measurements:
-The skull and cross bone and bat albums are 5 x 8 and fit a horizontal 4 x 6 photo.
-The black cat album is 6 x 6 and fits a square 4 x 4 photo or a 4 in. x 5 in. photo.
-The pumpkin and spider albums are 6 x 7 and fit a vertical 4 x 6 photo.


Here’s the tutorial on how to put these albums together:

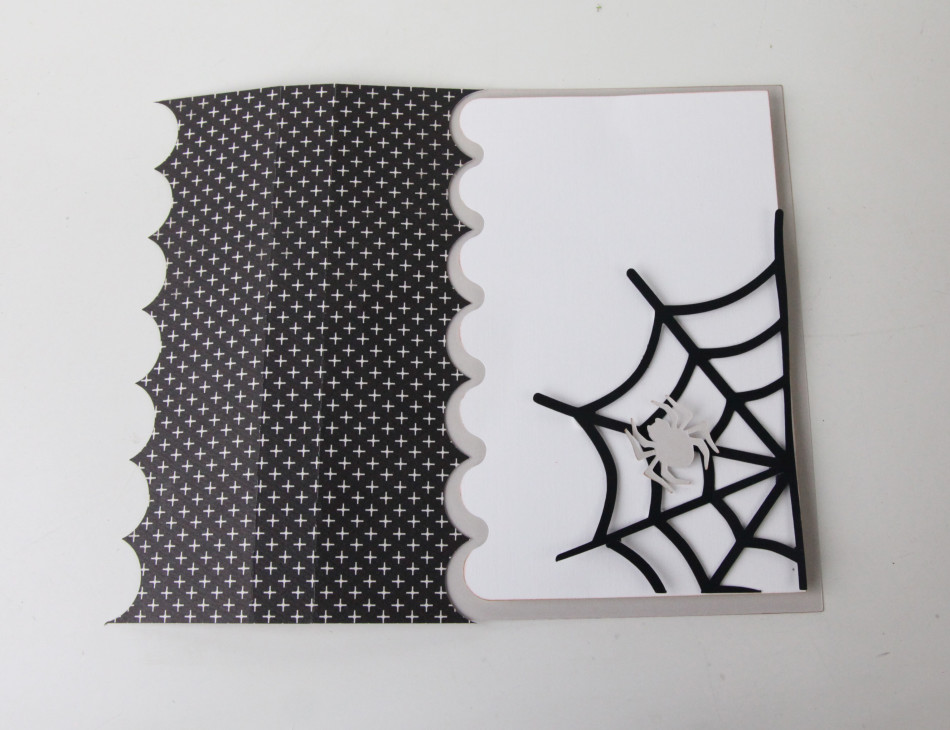
  1. Cut out all SVGS.  We used some fun scrapbook paper for the binding to add some Halloween flare.
  2. Put together the details on the cover.  You can use pop dots to give it some fun dimension.
  3. Next, take the cover and glue it to the binding piece.  The edge of the cover should go to the score line.  img_4326_web
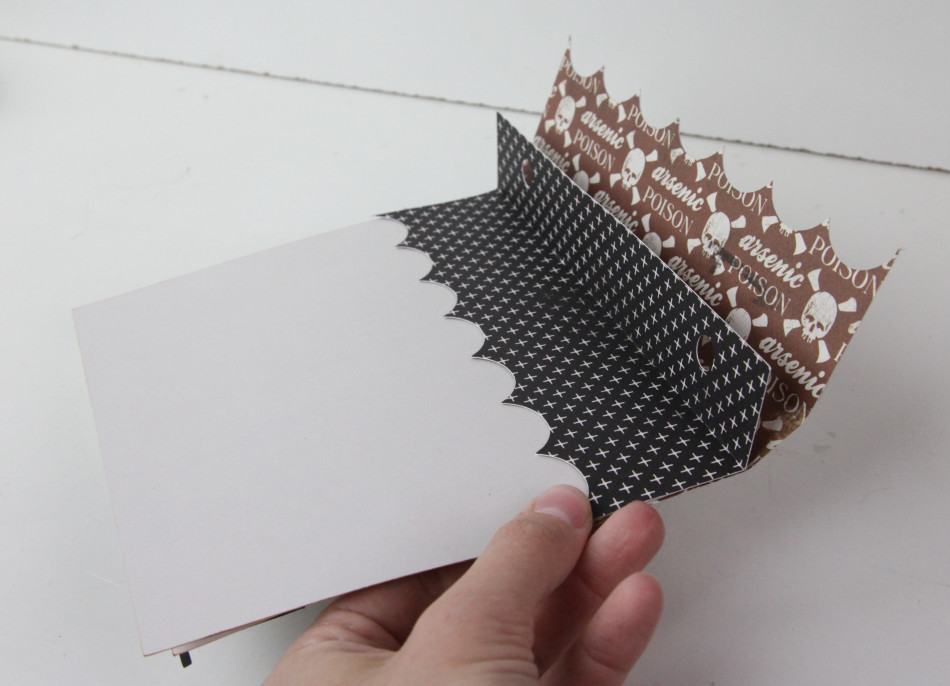
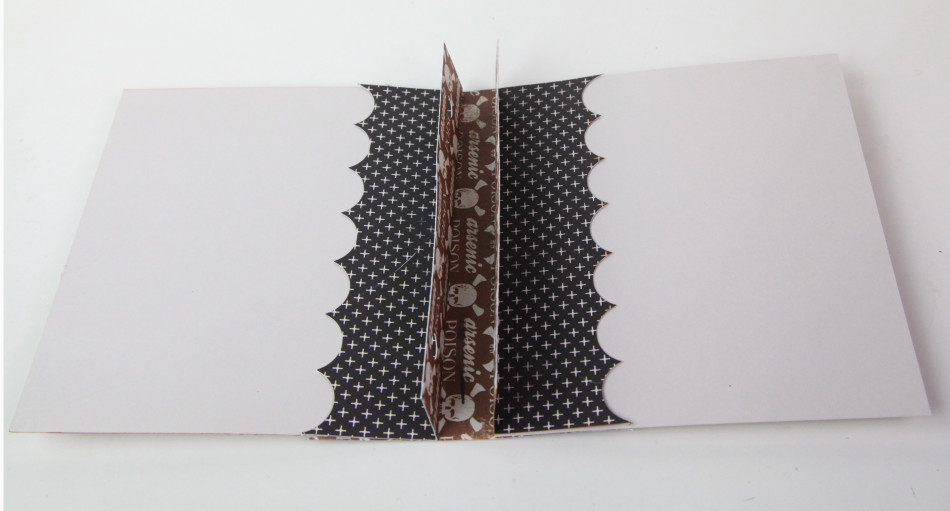
  4. Next, glue the scalloped half of the inside binding piece to the back side of the cover.  The score lines should match.  Leave the side with the page holes free so you can use it to attach the pages later.    img_4330_web
  5. Do Steps 3 and 4 again for the back cover.img_4332_web
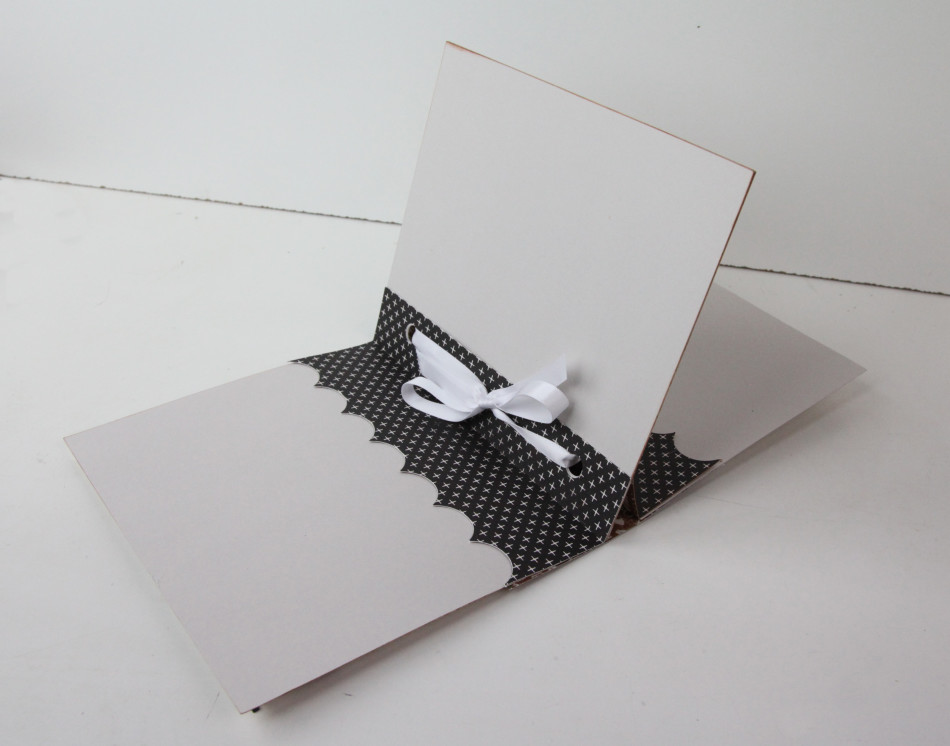
  6. Now that you have the cover done, take the pages and align the holes together.  Use a ribbon to secure them into the holes.  img_4333_web

That’s all there is to these adorable Halloween albums!  Now you can add your pictures and memories for the 31 days of Halloween!

Happy Crafting!

img_4337_web


Silhouette Design Store JOANN Stores

31 Days of Halloween Album Tutorial for Silhouette Read More »

Shadow Box Sliding Card

I’m still recovering from Quilt Market and I’m hoping to have photos up by Thursday! We had a great show and I can’t wait to tell you all about it. For now, I’ve added my shadow box to the Mini Episodes! We have been making so many gorgeous little videos of the new Carina Gardner and MiniLou products coming out in our Bundle Shop and in the Silhouette shops. You’ll see them premier on instagram so check it all out there!

XOXO-Carina

Silhouette Design Store JOANN Stores

Shadow Box Sliding Card Read More »

Last Minute Projects for Mother’s Day

IMG_4595_instagram_webIt might FEEL too late to throw something together for Mother’s Day but it really isn’t. Sometimes I think we get caught up in putting together something REALLY fabulous or REALLY intricate and while that is great once in a while, I think it’s just as appreciated to put together a simple card or pillow box (with a gift card in it for extra ease!).

This year is one of the first years I’ll be with my mom ON Mother’s Day (she’s flying in!). And she KNOWS it’s a busy time of year for me and there is a good chance I’m not going to have time to shop for that incredibly thoughtful gift (she’s also incredibly easy going about gifts).

Because of this, I’m going to be giving her a stack of fabric (something she will definitely use) and maybe something sweet to send home with her. And time. I’m going to really try and spend some time with her.

I know what types of things, I want from my kids…hugs, kisses, maybe a chance to put up my feet instead of cleaning the kitchen (let’s be honest, I wish for that everyday). But mostly I want time. It goes quickly, doesn’t it?

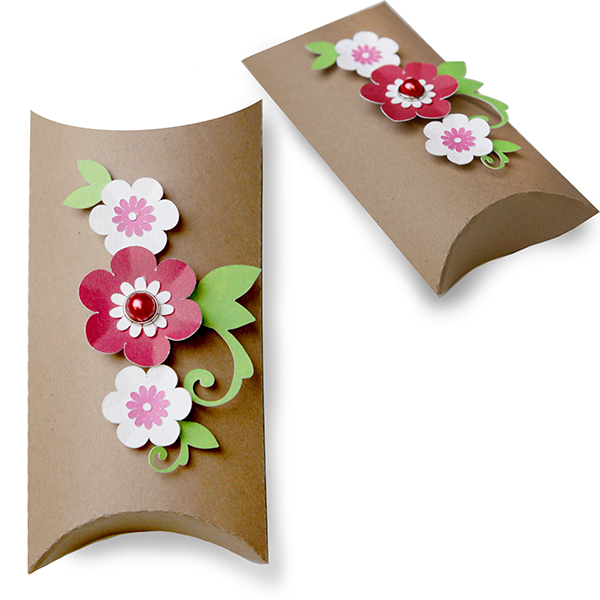
floralpillowbox

I love a little pillowbox with a giftcard in it. Thoughtful but easy.

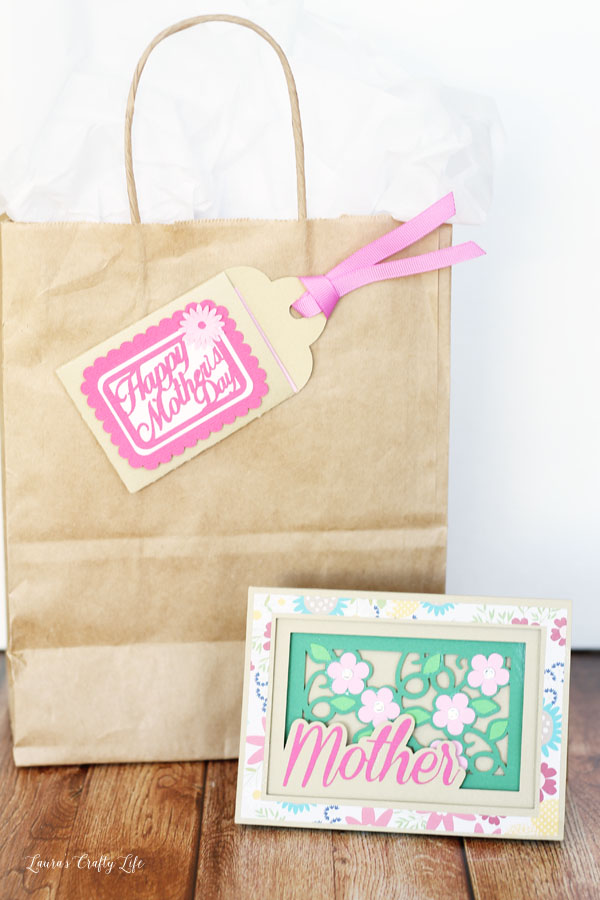
Mothers-Day-Card-and-Gift-TagI also have a Mother’s Day bundle in our SVG shop (for all types of cutting machines) that makes me pretty happy! Laura from LaurasCraftyLife made the sweetest gift and tutorial for Cricut users on how to put these projects together. Check it out if you have a chance! The shadow box card takes a moment to put together but everything else requires a couple of cuts and then you are off to the races!

Hope you are prepping for a fabulous Mother’s Day!

XOXO-Carina

Silhouette Design Store JOANN Stores

Last Minute Projects for Mother’s Day Read More »

Nativity Tutorial for Silhouette and Digiplayground

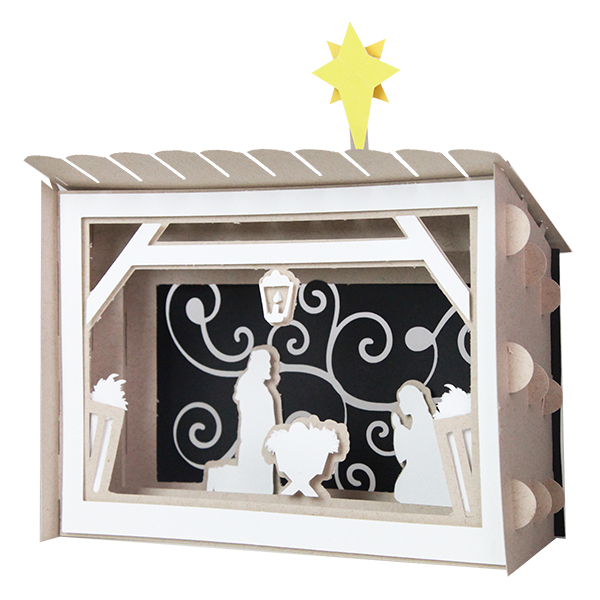
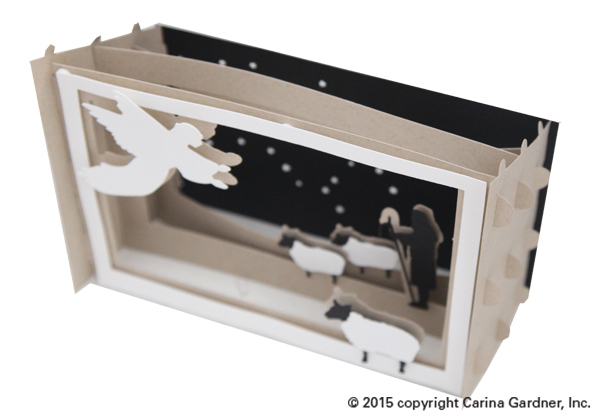
DS-C-W-CG-Nativity shadow boxDIGIThese darling Shadow Box Scenes pop together and then can be pulled apart and stored flat. For me, that makes for the perfect piece of Christmas decor! There are five scenes in all for you to enjoy the holidays!

Here are the links to my Silhouette shop and DigiPlayground shop so you can pick up one of these albums!

Here’s how to put this together:

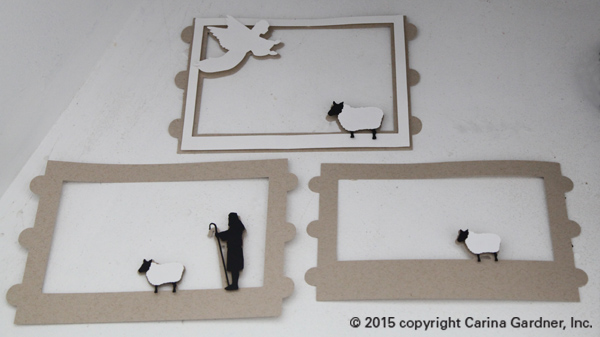
1. Cut out the svg files.  The sides, roof, and frames I cut out in kraft paper, the shepherd, background, and the main part of the sheep in black, and the frame, angel, and sheep fur in white.

2. Begin with the frames.  Pop dot and attach the angel, shepherd, sheep, and white frame in their appropriate places.  Once you have all the figures in place, you can start putting the nativity together.

IMG_1837_web

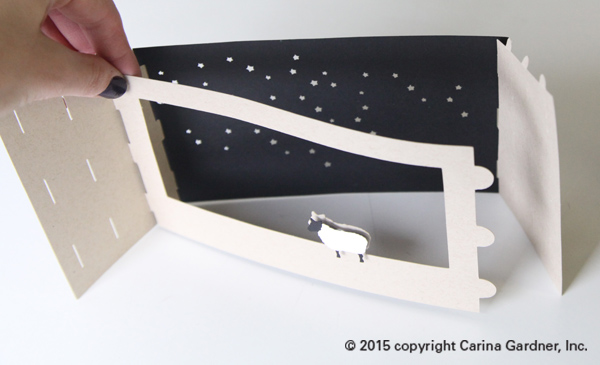
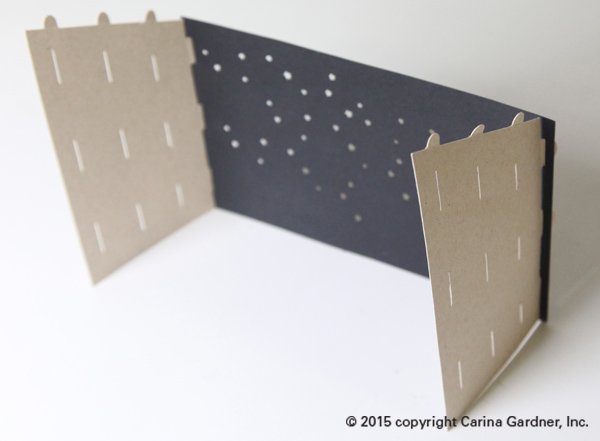
3. Now, put the background and two side pieces together by slipping the tabs on the short ends of the sides into the slits of the background.

IMG_1827_web

4. The frames attach similarly.  Put the tabs on the ends of the frames into the slits in the side piece.  Do this for all of the frames.  Remember, the frames go in a certain order for it to have the shadowbox effect.  The frame with the thickest bottom goes in the back and the thinnest goes in the front.

IMG_1828_web

It will look like this when all of the frames are in.

IMG_1841_web

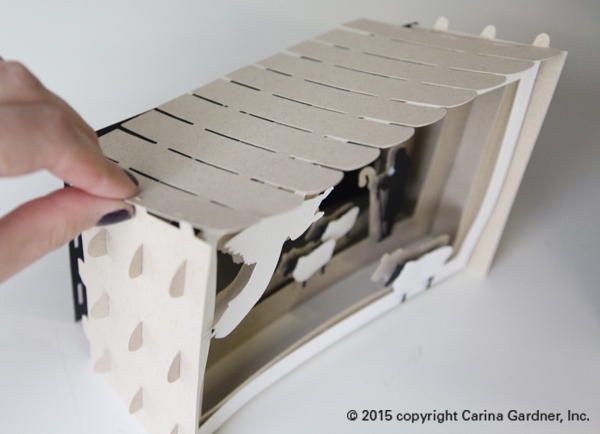
5. For the roof, start with one side and put the tabs of the side piece into the slits of the roof.  Do this for the other side.  Make sure the side of the roof with the rounded edges goes in the front.

IMG_1831_web

You’re done with your Nativity! I hope you have a chance to make the entire collection!

Carina

Silhouette Design Store JOANN Stores

Nativity Tutorial for Silhouette and Digiplayground Read More »

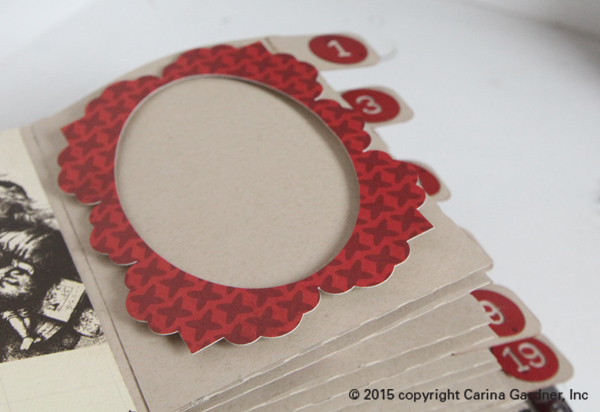
Tutorial for 25 Days of December French Fold Album for Silhouette and DigiPlayground

carinagardner_november182015_2_web

My 25 Days of December French Fold albums have finally hit the shops! It’s just in time to make one before December 1st hits and you start taking photos.

These are a little different than my 25 Days of December from last year because these feature a french fold and hidden binding.

Here are the links to my Silhouette shop and DigiPlayground shop so you can pick up one of these albums!

Here’s how to put this together:

1. Cut out the svg files.  The main body of the book I cut out in kraft paper and the cover and frames are my Have a Merry Christmas papers for Cartabella.

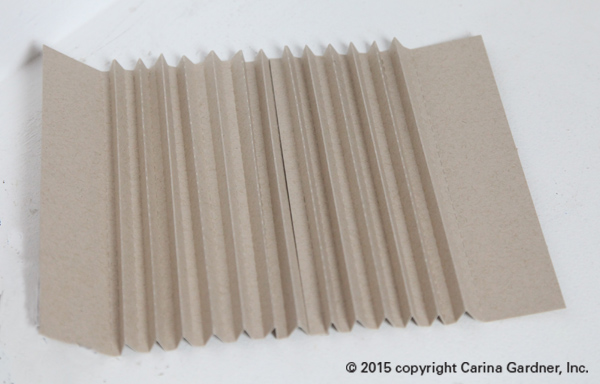
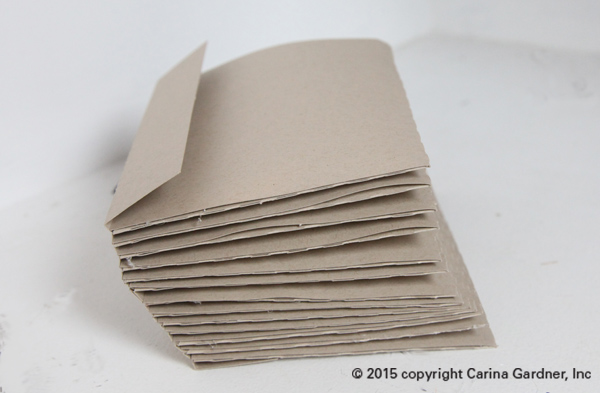
2. Begin with two pieces of the binding and fold along the dotted lines, then glue them together by overlapping the short sides.

IMG_1028_web

3. Turn it over, and glue the wider folds together so the back looks flat and the front has tabs sticking out.

4. Take your pages and fold all of the creases inwards. (The picture below shows the binding on backwards. All those little glued together pieces will become the pages for the album).

IMG_1030_web

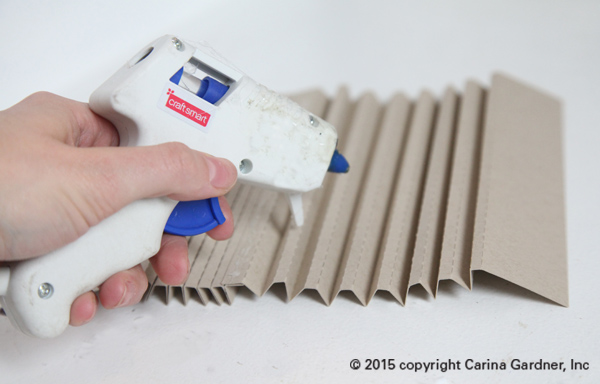
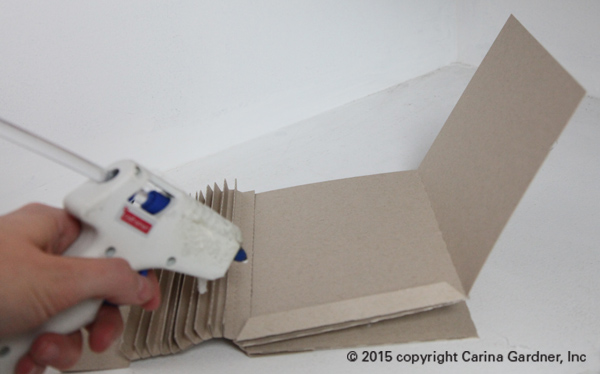
5. Now to add the pages! Glue along the long edge of each page and attach the long edge to the back of one of the folds in the binding. This will create a double-sided/double thick page.

6. Glue the top side of the edge of the long page, as well as the bottom tab and fold the page over.  This should create an envelope with an open top.  Add a page to each one of the binding pieces.


IMG_1038_web


IMG_1041_web

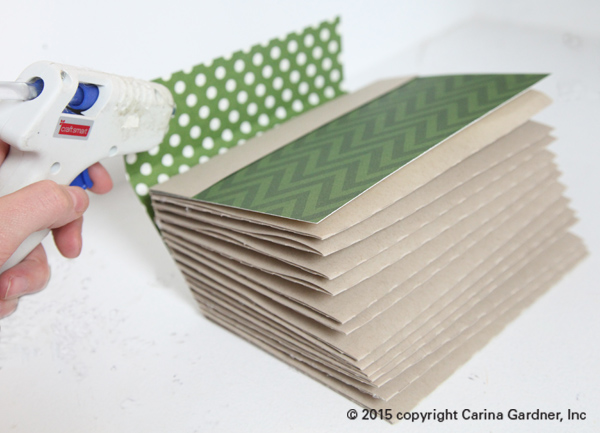
7.  Add the cover by gluing the left side of the cover to the bottom side of the flap.  This makes the inside look clean and the binding flap will be covered with the binding cover later.

8. Glue the binding cover by matching up the crease of the binding cover with the square of the book.  Glue the front, binding, and back side separately.

IMG_1043_web

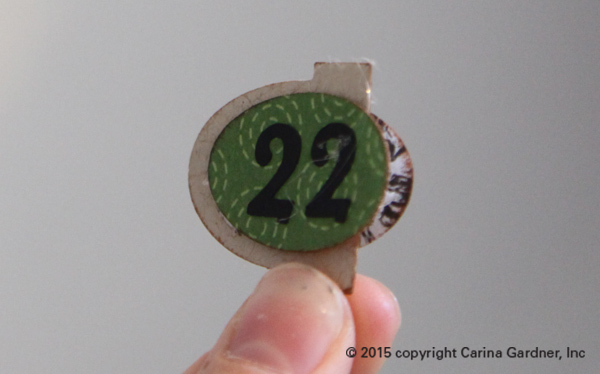
9. For the tabs,  glue each number onto an oval (or whatever shape you have). Note: one of the albums (bracket) does not use this step.

10.  Glue half of the ovals onto each tab, leaving space to slide the tabs into the slits and for the ovals to go on top of the page.  There are 13 tabs, so each tab will have two numbers (one and two will be on one tab, three and four another etc.)

IMG_1277_web

11.  Slide the tabs into the appropriate slit on each page.  Leave the oval out and glue the other half of the oval onto the outside of the page. Glue odd numbers to the front and even numbers on the back of each tab.

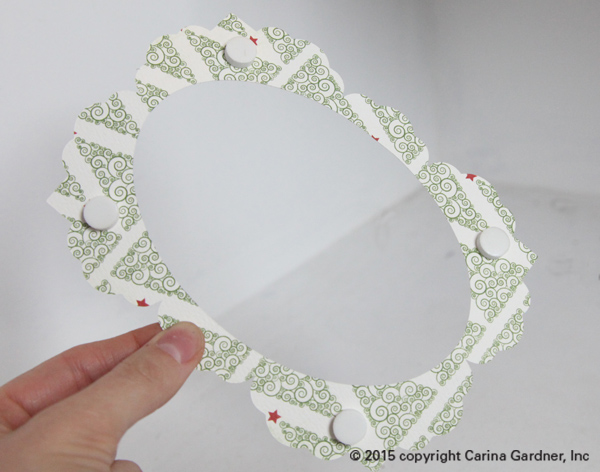
12. For the frames, take each frame and place pot dots on the back.

IMG_1056_web

13. Place the frame in the center of the page and make sure the pop dots are firmly in place.

IMG_1057_web

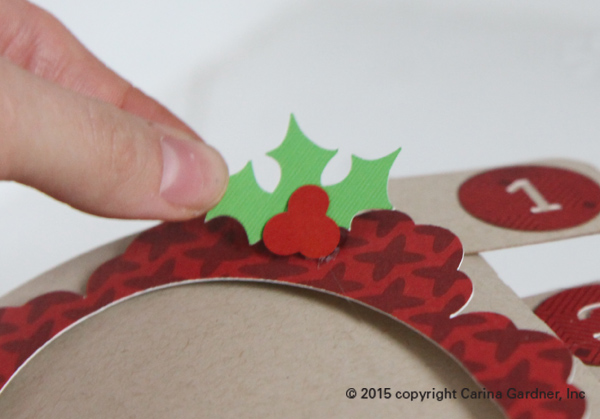
14. Glue the leaves to the berries and attach to the corner of the frame.

IMG_1058_web

15.  Place pictures and memories on each page to fill your 25 days of December Album!

Happy crafting!

Carina


Silhouette Design Store JOANN Stores

Tutorial for 25 Days of December French Fold Album for Silhouette and DigiPlayground Read More »

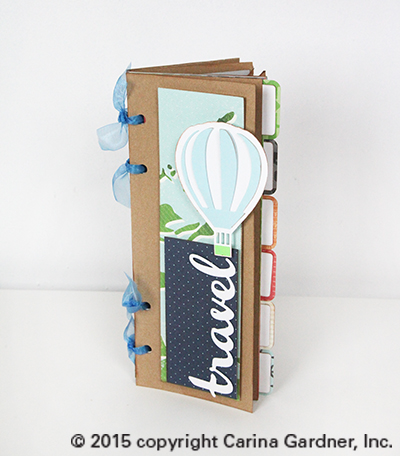
Travel Stories Album for Silhouette

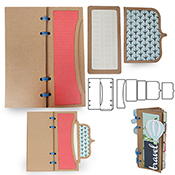
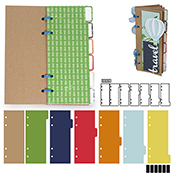
Watch the Travel Stories Album video for an introduction into my Carta Bella Paper line and how to put together the album using SVG files from my Silhouette Shop! The final size of this album is about 5.5 inches x 11 inches (with a few things pocking out like tabs and pages).

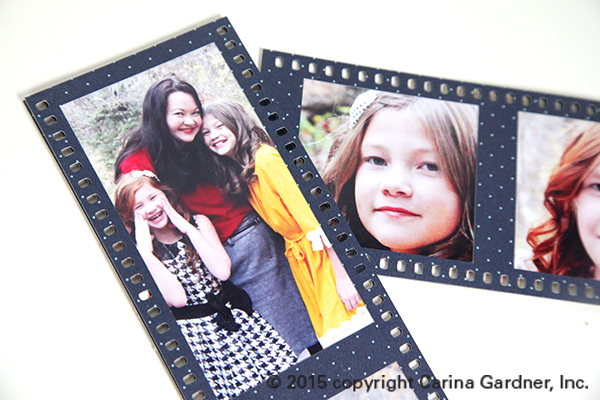
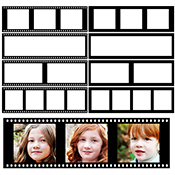
I am so excited about this album especially because I love some of the little add ons. In particular, I adore the filmstrips that go in this collection and plan on using them not just for the album but for lots of other projects.

IMG_5760_1_web

IMG_5764_1_webI hope you get a chance to play about with this paper line and/or the silhouette files! I also hope you have a GREAT excuse to make an album (aka, an amazing summer adventure perhaps?).
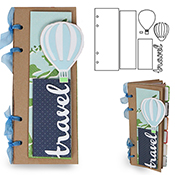
Happy Crafting!

Carina

____________________________________________________________________________

TravelStoriesDeepPocketAlbum   TravelStoriesHalfPocketwithLayeredBracketNotes TravelStoriesHotAirBalloonLayoutAlbum TravelStoriesPhotoFilmStrips TravelStoriesSidePocketAlbum TravelStoriesTabbedAlbum

Silhouette Design Store JOANN Stores

Travel Stories Album for Silhouette Read More »

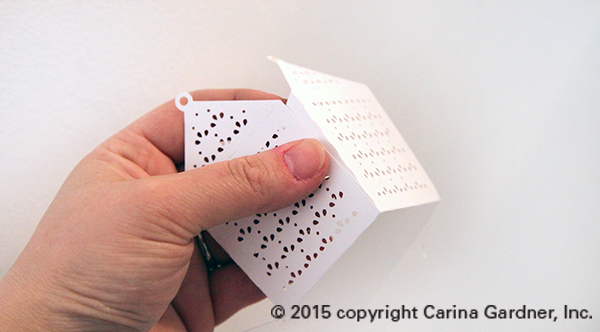
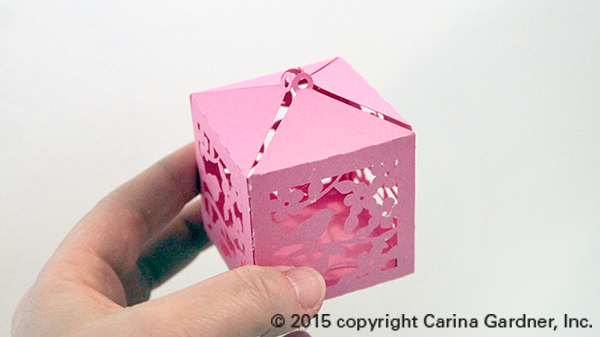
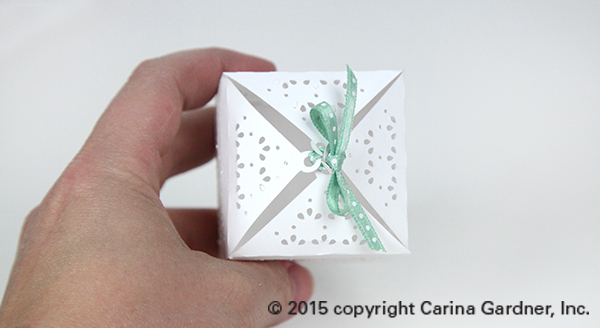
3D Intricate Cutout Boxes for Silhouette

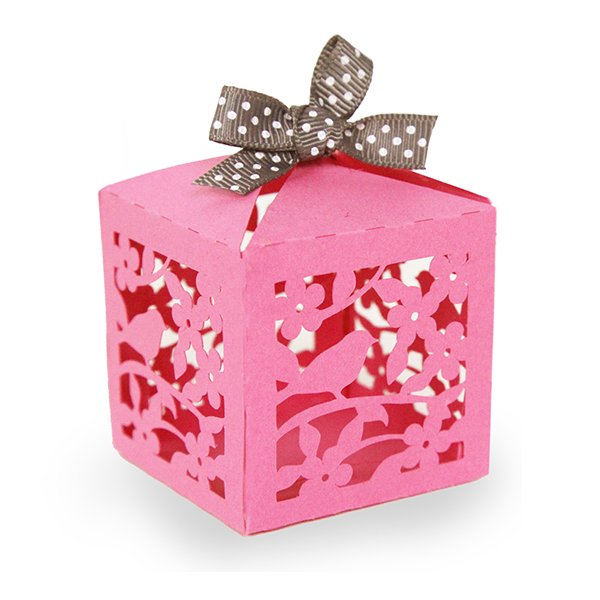
3dlatticebirdboxThese little intricately cut out boxes are one of my favorite projects right now! I can imagine them hanging in some overhead branches for a party or as little electric candle holders on a table. Any way you decide to use these, you will love the effect!

Here is the quick tutorial (and tips) for putting these intricate cutout boxes together.

1. Cut out the silhouette file.  The main body of the box is about 2 inches deep, wide and tall. It fits on an 8.5 inch x 11 inch paper.

2. Fold all the score lines and glue all the flaps to create the main body of the box.

IMG_5768_1_web

3. Fold up all the “circle” pieces at the top of the box. For dimension, you can finger press the triangle piece at the top to give it some curvature. You can also create a straight box by folding all the triangle pieces flat and putting a ribbon through all the pieces at once. However, if you want the box to have dimension, “sew” the ribbon through each of the holes individually. Hint, fold UP the circles at the top. There will be slight gaps between the triangles once the ribbon is tied on.

IMG_5770_1_web

IMG_5785_1_web

Other notes: This box can be scaled larger or smaller. Cut at a slower speed on your machine for to catch all the fine details. A sticker mat will also help the cutting process on these!

Hope you have fun making these!
Carina
(for all my silhouette designs, visit my silhouette store at http://www.silhouettedesignstore.com/?page=view-artist&artist_id=252689).

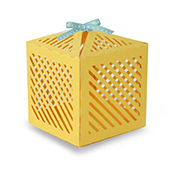
3dlatticebirdbox3dlacybox 3dmotherbox

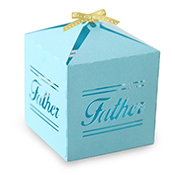
3dbutterflybox 3ddecorativebox 3dfatherbox 3dstripesbox

Silhouette Design Store JOANN Stores

3D Intricate Cutout Boxes for Silhouette Read More »

Words of Love Banner and Video

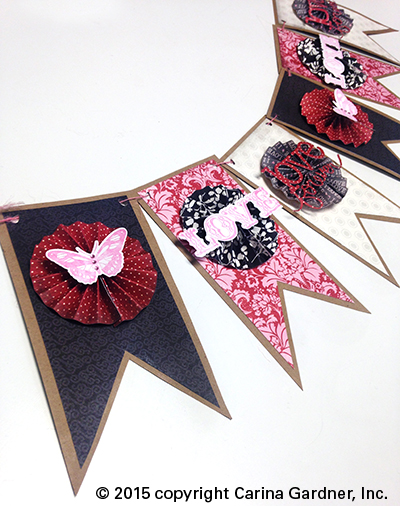
carinagardner_wordsoflovebannerIt’s been since before Christmas since I posted. The first of the year is always so crazy. This year I was headed to Atlanta for my new company MiniLou. It was my first year of missing CHA in long time.

Soooo, to introduce my first line to come out this year, I put together a little video. Words of Love is my Valentine’s line and it should be hitting your local scrapbooking store this month. It’s a classic red and black line with a bit of pink and gray.

I hope you enjoy the video! I am having issues with my video uploading to YouTube blurry so I am working on getting an HD version of this video up soon.

If you want the free download banner template, you can download it here:

BANNER TEMPLATE FREE DOWNLOAD

Silhouette Design Store JOANN Stores

Words of Love Banner and Video Read More »

Open When Envelopes—Last Minute Meaningful Homemade Gifts

IMG_3661_1_webLast week I came out with a brand new series of envelopes called OPEN WHEN. It’s a wonderful meaningful gift, and I am making a set of envelopes with box for Josh for Christmas. If you want to see the instructions and everything in the series, go here: https://carinagardner.com/silhouette/carinas-open-when-series/. If you want to look at the current printables for this series, go here: http://www.carinagardnershop.com/index.php?option=com_virtuemart&page=shop.browse&category_id=56&Itemid=2

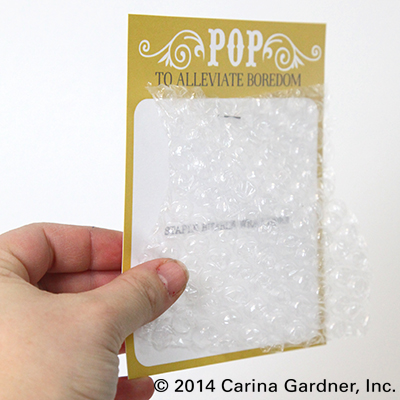
(Photo to the left is one of the printables from the Open When: You Are Bored. You just staple onto the card a piece of bubble wrap.)

This post is just to show you a few examples of what I am doing (although to be honest, I’m not done yet). I love that you can make a set of envelopes for someone and put A LOT into the envelope or just a note. Really, the most important part (in my opinion) is the hand written note. Every single one of the envelopes I’m making for Josh includes a note and a photo. I also included some of the printables, a treat, and anything else I think will be fun for him to open.

IMG_3653_1_webYou’ll notice that I have included label printables in the shop. That’s because I know that not all of you have a diecutting machine. To be honest, the labels are a lot easier (and quicker) to use if you are throwing together this project (last minute, right?). The labels can be put on any A2 sized envelope and you can just fill them. It’s the perfect last minute solution!

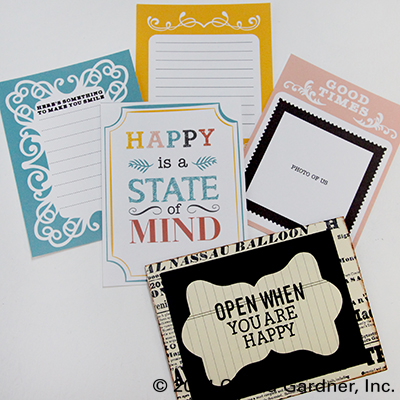
(Photo to the right is from the Open When: You Are Happy printable set. The svg file from for the envelope can be found here.)

The Open When projects I’ve seen usually are given in sets of 10. But I think you should be able to include as little or as many envelopes as you want. You could even coordinate them and give more envelopes out during the year (for example, Christmas 5 envelopes, Valentine’s 5 envelopes, and your anniversary 5 envelopes).

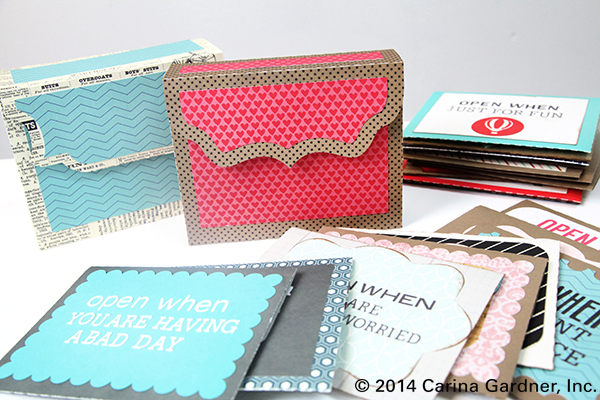
For Josh, I selected 10 envelopes and am using my basic 10 envelope box. I love the prompts in the printables I’m hoping they will help me think of things that are special to just the two of us (and by the way, each of the descriptions in the printables have suggestions for other things you can put in your envelope).

IMG_3517_1_web

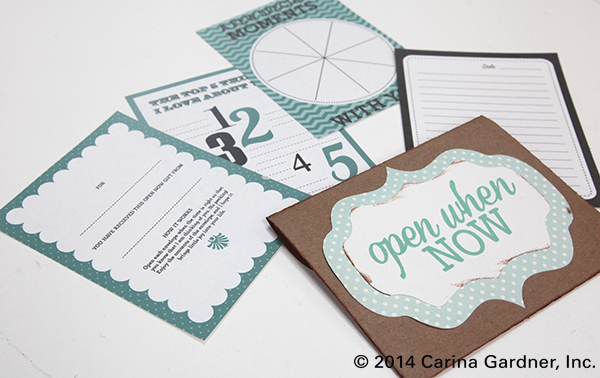
Every “Open Now” gift should have an “Open Now” Envelope. Truthfully, I designed the printables (shown below) so that I could use all of the cards in any of the envelopes. It’s sort of “basic pack.” I’m planning on throwing some funny photos of the two of us from 2014 into this envelope—kind of as a way to celebrate the year. The “pie chart” card I’m going to write all of the things we did in 2014.

IMG_3667_1_web

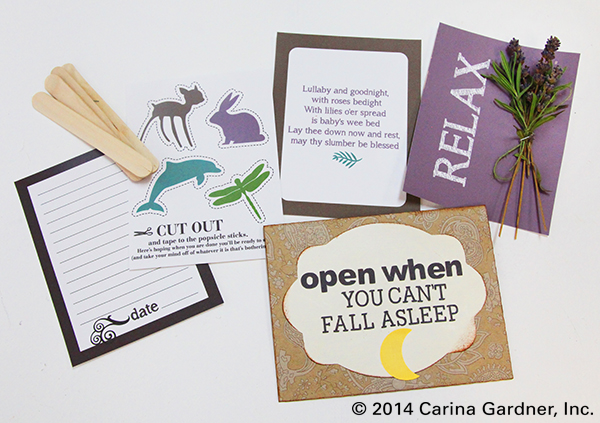
I’m so in love with my printable set for “Open When: You Can’t Fall Asleep.” One card allows you to staple a piece of dried lavendar to it (or any other scent you want). The silly cutouts are more of a joke then something the person has to do, but I like adding the popcycle sticks in the envelope just in case they do end up cutting out the animals.

IMG_3649_1_web

The “Open When: You Want to Reminisce” is going to be the most fun to put together for Josh. I’m using all the printables as prompts but spending most of my time gathering up photos and things that we did together for the last 14 years.

IMG_3641_web

You’ll notice that I’m slowly adding printables to the shop as I make them for myself. If you decide to do this project (for Christmas, a birthday, Valentine’s, and Anniversary, or whenever!), make sure and check my Silhouette instruction page because it has updated links to all the envelopes, boxes, and printables that go to this collection to see what is new!

IMG_3521_1_web

Hope you are being creative and having a great time doing it this holiday season! Merry Christmas and Happy New Year!
Carina


Silhouette Design Store JOANN Stores

Open When Envelopes—Last Minute Meaningful Homemade Gifts Read More »

25 Days of December Silhouette Album

IMG_2934_1_webEvery Christmas I try to tell myself that THIS year it’s going to be more about family, love, and giving. But like all the rest of you, I find myself completely caught up with the busyness that consumes my time during the month of December.  December happens to be a crazy time for designers ON TOP OF the usual craziness that happens during the holidays. For me, work revolves around CHA, new releases for first quarter, and the Atlanta GiftShow (for MiniLou). Despite all of this, I’m going to try (once again) to slow down during the month of December. And with you as my witness (See! I’m holding myself accountable to you!), I’ve decided to get on top of things THIS month to make December a little more cherry and bright.

IMG_2943_1_web

First off, I already ordered my Christmas Cards (I think a sigh of relief escaped as I wrote that). They arrive December 2nd, and I plan on getting all my labels done this coming week. Yes, it is a relief to already have them printed, and no, I am NEVER this early. Second, I’m going to get all my holiday shopping done in November. Yes, you heard me. And no, I don’t have a plan for this yet. Any tips would be helpful!!! (Leave comments below.) And FINALLY, I went ahead and designed myself an entire 25 Days of December Album (that you can purchase in my silhouette shop), that I have already cut out and put together.

25daysofdecember2

IMG_2939_1_webI have never done an album like this before, but have ALWAYS wanted to. I designed all of the albums and accessories to be super easy to cut out and use.

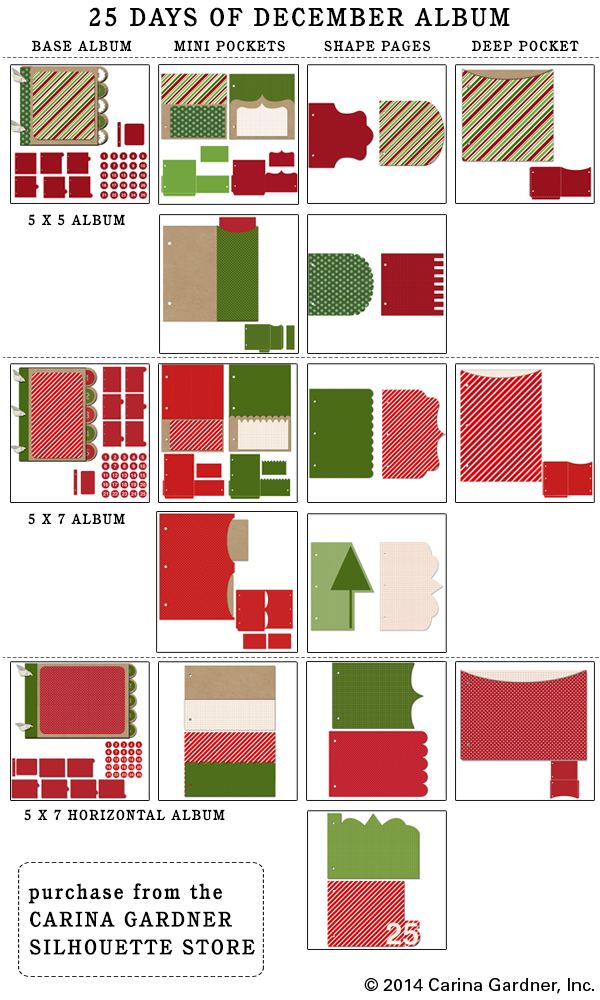
This year, I’m doing the 5 x 7 Album, but I also have available the 5 x5 Album and the 5 x 7 Horizontal Album. The 5 x 7’s are meant to fit a 4 x 6 photo per day. The 5 x5 Album is meant for instagram photos and fits a 4 x 4 photo beautifully (I love to use Persnickety Prints for my 4 x 4 photos).

Each album also comes with some different accessories. I plan on using the extra pocket pieces and fun shapes to add journaling and some of our holiday photos (and to stash my Christmas Card).

So if you are making this album, it’s pretty easy to put together, but here are a few hints to help you out:

25daysofdecember1

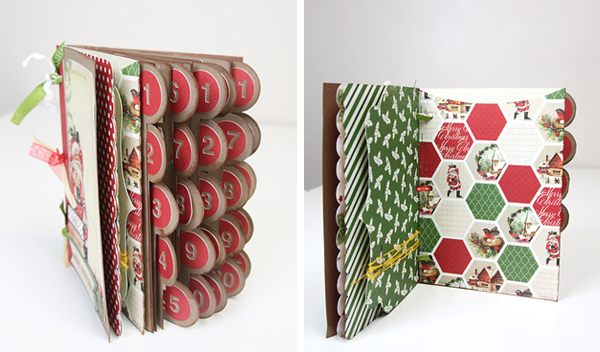
1. You will need to cut 5 of each tabbed piece. That will give you 25 pages—one for each day. Cut one or two of the cover piece (no tab). I only cut one and used a pocket accessory for my back page.

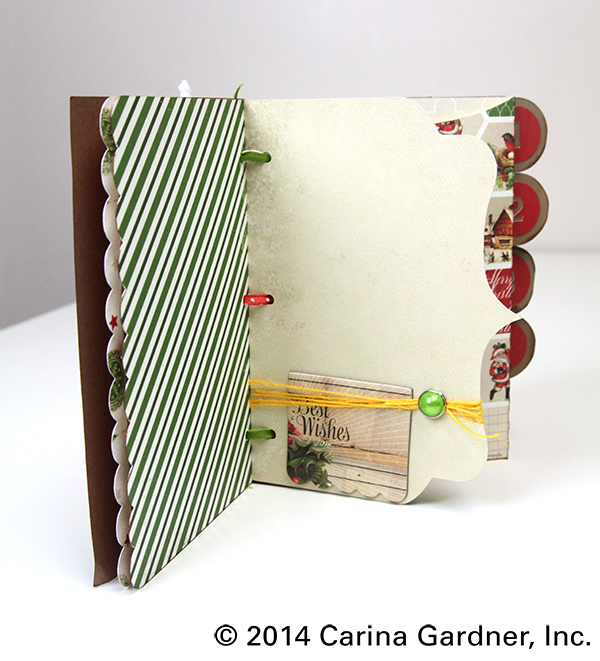
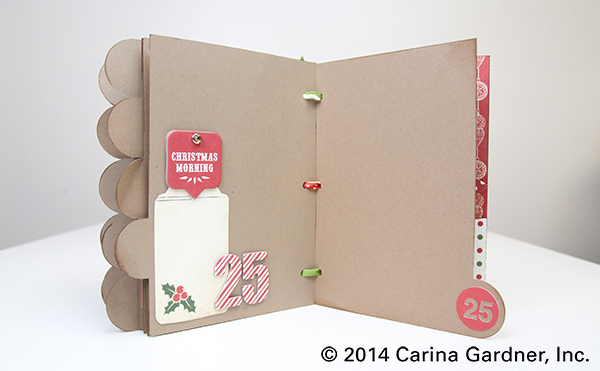
2. Add as many accessory pages as you like. You can see in mine that I elected to put a few in the front and back of the album. Because I’m making this a “stress-free, expectation-free” album, I didn’t want to throw in pages that I then felt obligated to fill. However, I do think it would be pretty to throw in an extra shape or pocket page between each tab so that it goes to a specific day.

3. If you are looking to have this album “pre-made” in time for Christmas or you are making it for someone else, I recommend only adding “scraps” to the left-side of the page and leaving the tabbed side for the photo. (Like the second photo at the very top.)

4. Have fun or go simple with your paper choices. On mye tabbed sheets I elected to use kraft paper just because it was easy. I cut each tabbed sheet on an 8.5 inch x 11 inch piece of paper (one fits per sheet). I inked the edges a little bit to give it some dimension. (FYI, I use my newest Carta Bella collection Christmas Time for this book).

3. Glue is good. A stapler is better. ESPECIALLY on the pocket pages. The folds are pretty self-explanatory on the pocket pages. Once you fold them all in, I like to take a stapler to it. It adds some “scrappiness” to the album and helps secure the pocket in place. I’ve also used hot glue and a glue stick. They work great as well. Note: For the Mini Pockets, you may want to add a couple of extra staples right to the MIDDLE of the page to separate out the two pockets.

4. Use ribbon, twine, or O-rings to keep it together. If your album gets REALLY thick, you may want to consider O-rings (you can usually find these at an office supply shop). I wanted to keep my album “unprecious” and added different little bits of ribbon and twine. I want the kids to feel like they can handle and play with this album all through the season and beyond. Which brings me to my next point…

5. Have a plan. Especially when it comes to the photo part. Are you going to print at home or send out your photos? Are you going to print daily or weekly? Are you going to journal (or will it stress you out?). My plan this year is to print everyday at the end of the day. So I have a pack of 4 x 6 photo papers ready for December. As for journaling, this year the album is the “family” album. That means, I plan on having the kids write things they are thankful for or are doing for Christmas. Josh and I will add notes too. If you are doing a personal, reflective album, yours will be so different from mine.

IMG_2948_1_web IMG_2949_1_web

And that’s it! I hope you have fun making your book and you get to spend some time really showing off how wonderful the holiday season really is! If you are on instagram, you can follow me at @carinagardner. Make sure and hashtag #25dod (25 Days of December) so that we can all share in your journey in December!

Happy scrapping!
Carina

IMG_2953_1_web


Silhouette Design Store JOANN Stores

25 Days of December Silhouette Album Read More »

Silhouette Files at CarinaGardnerShop.com

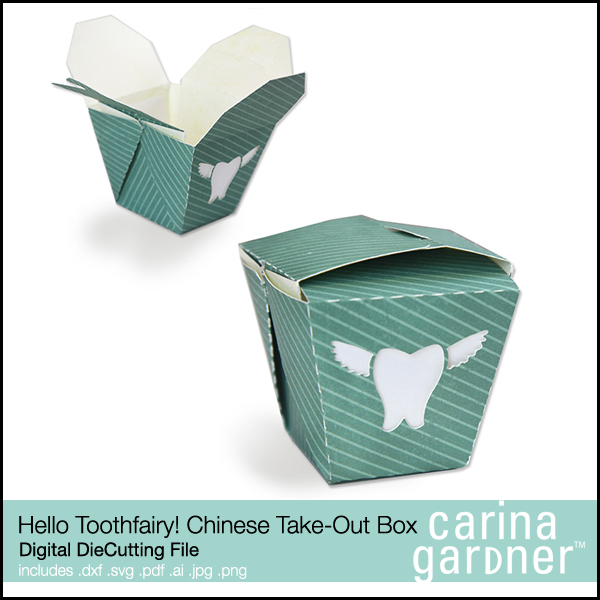
Hello_Toothfairy_51fed4f2d6c03Have I mentioned that there are digital diecutting files in the shop? Oh ya, I don’t think I have.

When I opened the shop last March, we were so busy trying to figure out how to run a retail shop (not an easy endeavor!), that I didn’t have time to actually design many diecutting files.

That’s officially changed. We have been uploading lots of great new files in the shop and you can get your hands on some free diecuts. We change these out pretty often so grab them when you can!

We also implemented a brand new category called NEW DIECUTS. We should be releasing new diecuts every Tuesday so be sure and check that category for the brand-spankin’ new goodies!

The diecuts come as a zip download and is available immediately (free diecuts can take up to 24 hours to show up in your inbox). It includes several files including svg, ai, jpg, dxf, png, and pdf. Yep, we’ve got you covered for whatever machine you are using. Don’t have a machine? That’s why we put in a jpg and png. Simply cut it out.

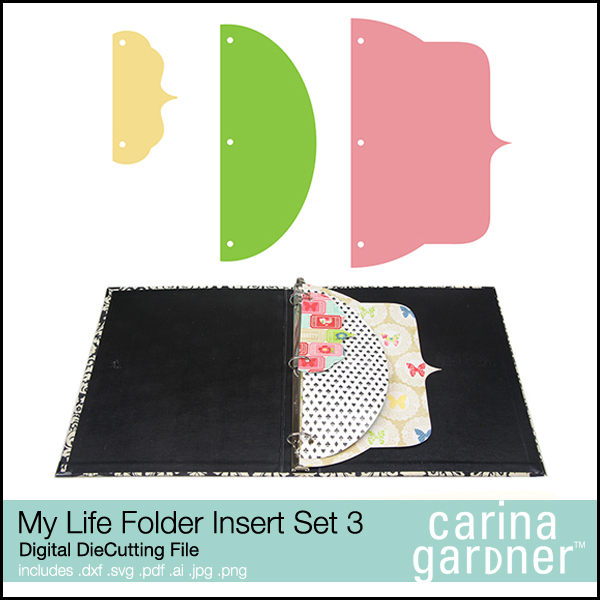
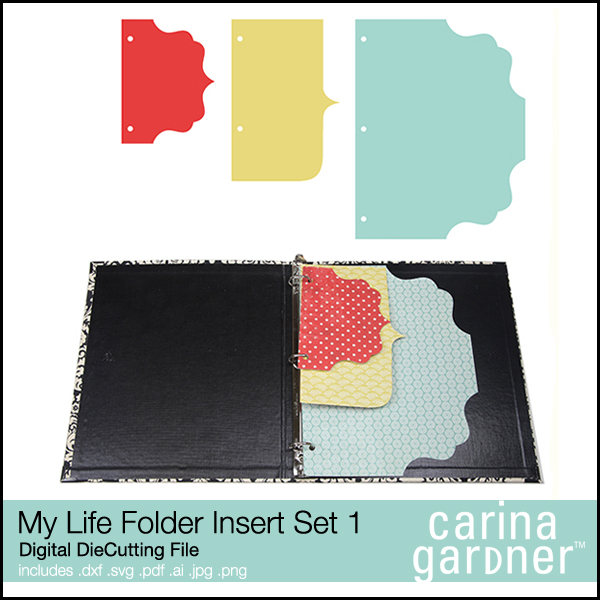
My_Life_Folder_I_51fed65f122bc My_Life_Folder_I_51fed614df601 My_Life_Folder_I_51fed63896e1d Probably my favorite product right now are the MY LIFE folder inserts.I plan on cutting some out for my kid’s school folders. I’m also going to play around with making them smaller (they are sized for 8.5 x 11 folder—be sure to use the svg file to keep your size from shrinking). I think they would make a darling album!

I’m actually working on next weeks digital die cutting files right after this blogpost. What are some diecuts you’d like to see?

Happy Crafting!

Carina


Silhouette Design Store JOANN Stores

Silhouette Files at CarinaGardnerShop.com Read More »

Well Played!

Screen Shot 2013-05-18 at 9.51.40 PMWhile I’ve been at Quilt Market, my new line Well Played was announced at Carta Bella! I”m so excited for this scrapbook line! It’s modern and upbeat! It’s game board inspired but has enough great patterns in it for everyday use. I plan on using it for all my kid layouts. Hoping to get a chance to play with it this week.

This line ships in June. Check out the whole line (and the awesome sticker sheet) here.

XOXO,

Carina

Silhouette Design Store JOANN Stores

Well Played! Read More »

Instagram Giveaway & Facebook Giveaway

There is so much awesomeness happening at Carta Bella these days. So to kick off the awesomeness, I am giving about 3 kits each of True Friends and Well Traveled on Instagram. To enter, just follow @carinagardner on your Instagram feed and add a comment to the “Instagram Giveaway” photo. Invite a friend and you may both win. How cool is that?

Winners will be announced on Friday, Feb 8th!

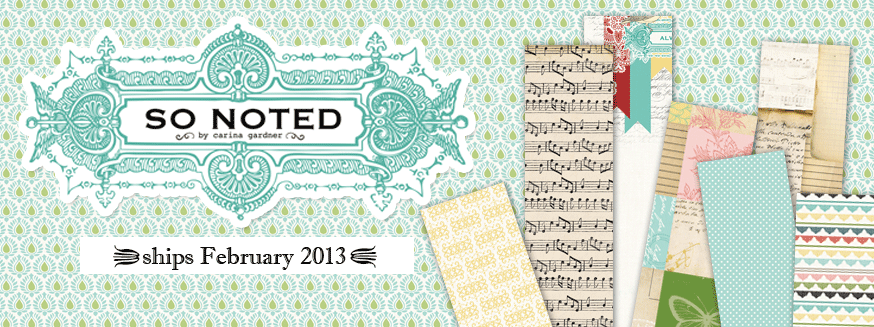
For a little added fun, I’m also going to give away 3 So Noted Kits! To enter into this drawing, you need to leave a comment on my facebook page .  Tell me which is your favorite paper from the line! Winners will also be announced on Feb 10th for this giveaway. How fun is that?

Silhouette Design Store JOANN Stores

Instagram Giveaway & Facebook Giveaway Read More »

Back from Winter CHA

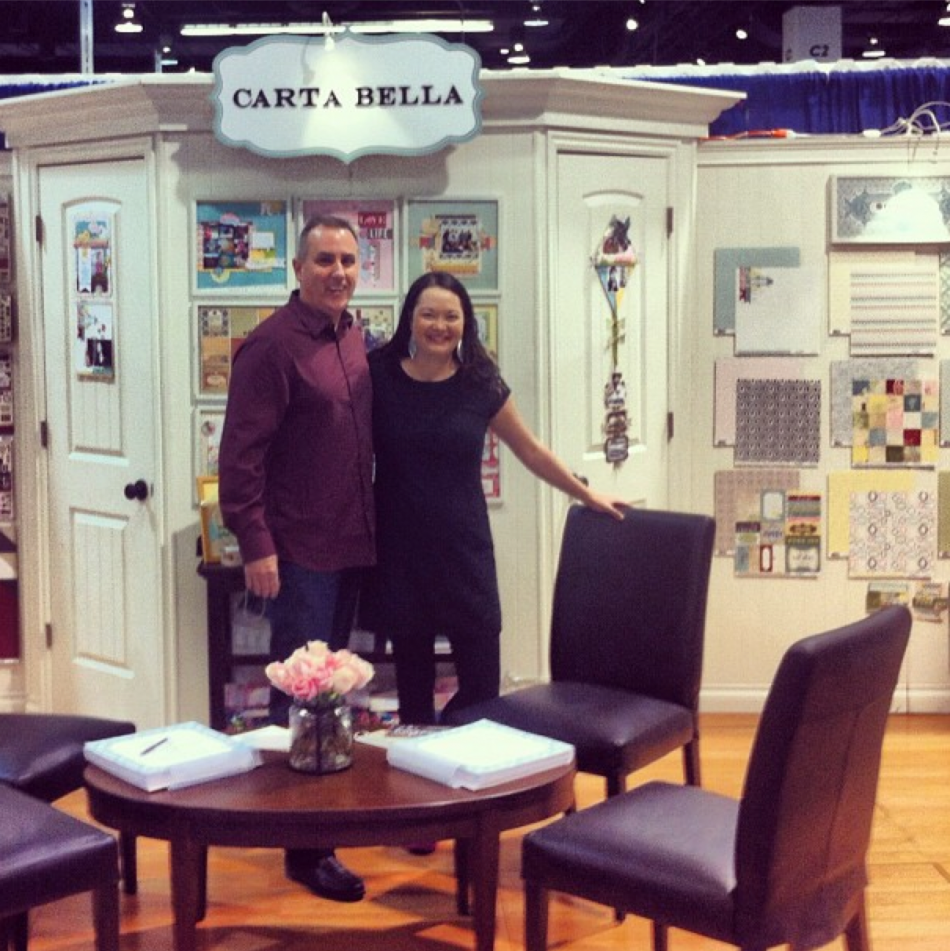
I’m back from Winter CHA in Anaheim and a sweet family trip to Disneyland. I’m trying to wrap my head around all the things that are about to happen this coming month. You should check out this link for a peek of things to come.

But back to the things that are NOW. You’ll want to check out Carta Bella’s new releases, namely True Friends, Well Traveled, So Noted, and Cool Summer. I’m so ecstatic about our spring line up. And if you are one of the lucky ones to have Devoted, I’d horde it if I where you. We’re nearly out and not reprinting it. I didn’t even see it in RL (that would be Real Life) until CHA because I had my head buried in my computer keyboard for 2 months.

Now, I’m home, snuggling my baby, hanging out with my girls, and excited for all the new good, stuff to come. 2013 is going to be wonderful.

More on just how wonderful later.

Carina

PS That is Mr. Lindsay Moore himself in the photo above…if you where wondering who I was hanging out with.

Silhouette Design Store JOANN Stores

Back from Winter CHA Read More »

Smashball 2012—Utah Edition

Yes, I have been terrible about posting, but, it is because I have been working like a maniac to get ready for Winter CHA. And I can’t even show you want I’m working on. Boo. Or the other cool stuff I am working on. Double Boo. Well, all in good time. In the meantime go check out Devoted and True Friends, which have both recently been released by Carta Bella and designed by yours truly.

In the midst of the Carta Bella madness, I took a break and went to (and sponsored) Becki Crosby’s Smashball (you know her as the genius behind Whippy Cake). Susan, aka the fab assistant, so graciously came along with me for a night of scrapping and gabbing. I pulled the camera out so rarely throughout the night that I fear that you will be better served by instagram (@carinagardner). Don’t have an instagram account? Check out the feed on my sidebar.

Here’s what I did catch:

Table disaster or creative chaos?

This just makes me laugh. Susan is to my left and Becki to my right. I shouldn’t post it but I.can’t.help.myself.

The cute gal who won one of my giveaways (3 sewing patterns and 3 yards of Songbird fabric) and a pictures of Becki’s AMAZING swag bags. There might have been a little something in there from me…

This girl has so much energy.

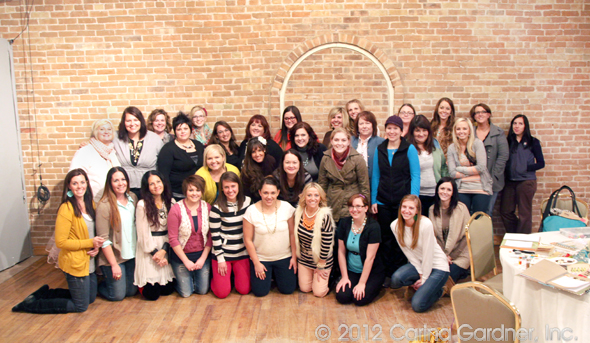
Quite the group

It was fun to meet new smashers and reunite with old acquaintances (I had lunch with Rhonna Farrer four years previously when I started at Two Peas…it was SO fun to see her again!).

Thanks ladies for the fun night and for pulling me away from my computer!

Carina

Silhouette Design Store JOANN Stores

Smashball 2012—Utah Edition Read More »

Episode 4 All Hallow’s Eve Decor Video

I know it’s only August, but this Halloween video is meant to get you excited about the approaching season. I love fall and adore Halloween. With school starting next week (eek!), fall is just around the corner. I know there’s a lot of sentimentality about new beginnings and freshly sharpened pencils when school starts, but I actually feel that fresh starts CAN happen in the fall. I probably feel it more so this year than others since baby boy will be coming to us the day after school begins (7 days and counting!).

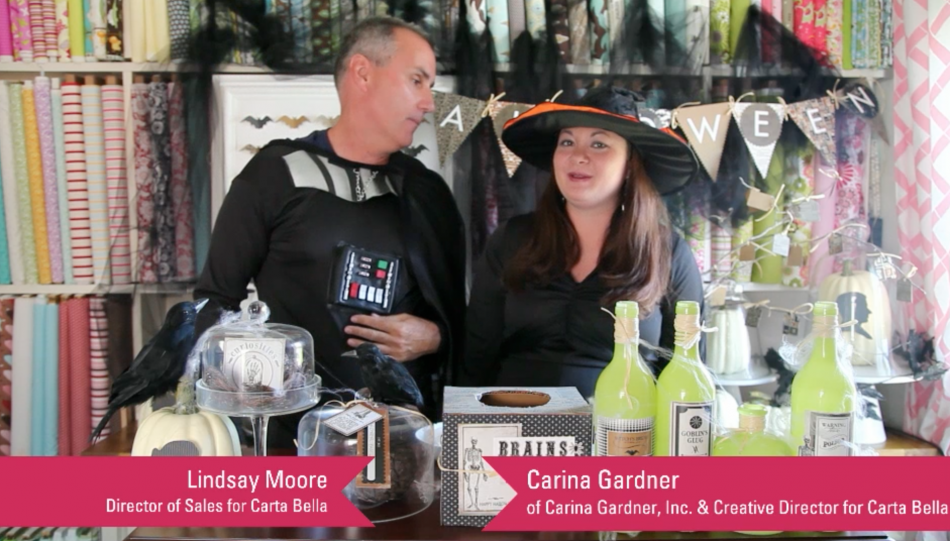
Lindsay Moore, Sales Director for Carta Bella joins me in my studio to introduce the All Hallow’s Eve line. We show you how easy it is to make home decor crafts from this line (Most of it is either just “cut out” and display or “stick” and display!)

We obviously have a good time, and you’ll definitely want to enter to win our Hot-Off-The-Press Giveaway.

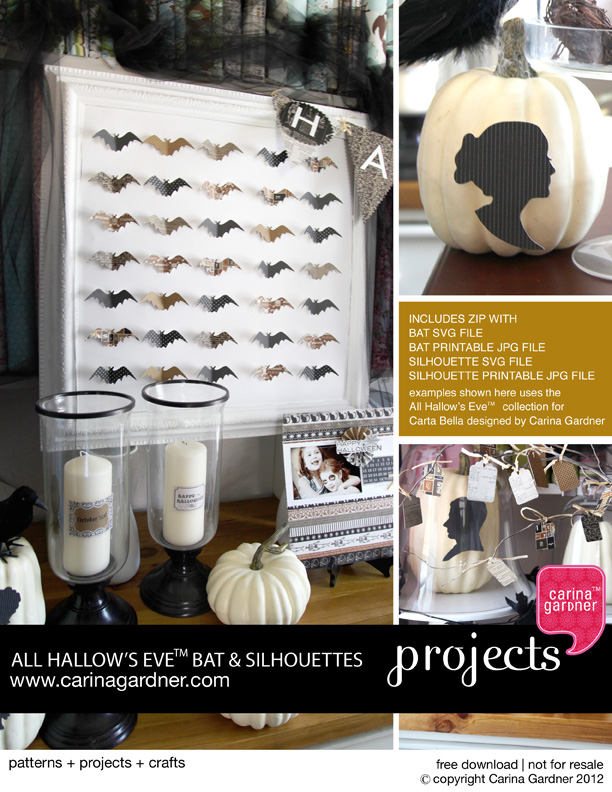
As promised, I also have silhouette files and jpgs of the silhouettes and bats I mention in the video. Download them here: All Hallow’s Eve Projects.

If you are looking for the Bat Wreath I mention in the video, you can find it here: Bat Wreath Post

And finally, here is the video of Lindsay and me dressed up and having a good time:

Silhouette Design Store JOANN Stores

Episode 4 All Hallow’s Eve Decor Video Read More »

Summer CHA Tradeshow Booth Video (Episode 3)

I wasn’t sure if it was going to work, but I tried to create a video of us putting up the tradeshow booth. Before I had ever participated in having a booth, I always wondered what the process was. Sooooo…here’s a time lapsed video of the two days we put together the Carta Bella booth. It’s two days squished into 3 minutes. It’s so fun, and I hope you enjoy my commentary!

Enjoy! Carina

Silhouette Design Store JOANN Stores

Summer CHA Tradeshow Booth Video (Episode 3) Read More »

Summer CHA 2012 Review

Hello! I’m back from Summer CHA in Chicago and I’ve spent the last 24 hours downloading a heck-of-a-lotta videos and photos! You can see more photos (if you don’t think you’ll get enough here) on the Carta Bella blog.

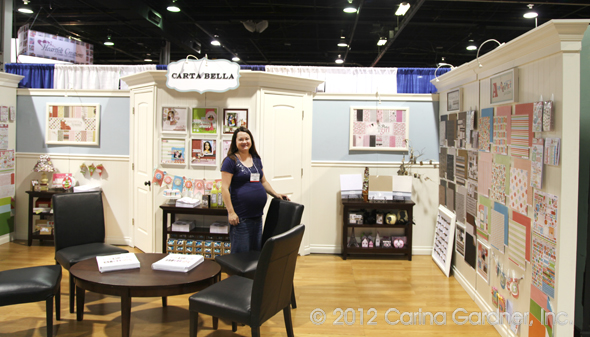
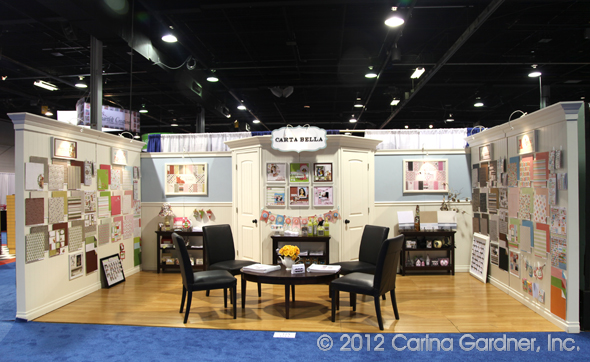
Many of you will recognize the booth as my Quilt Market booth. It was fun to see it filled with paper this time around. It’s also fun to compare that baby belly after two months of baking (only a month left!).

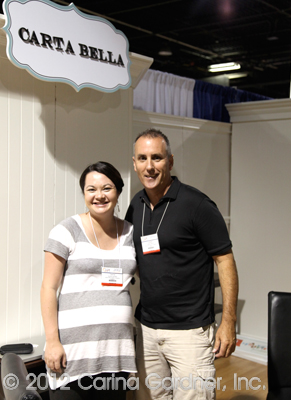
Here Lindsay and I pose on Day 1 of set up. I hardly had to lift a box because everyone was so concerned (I think they just didn’t want to deliver a baby).

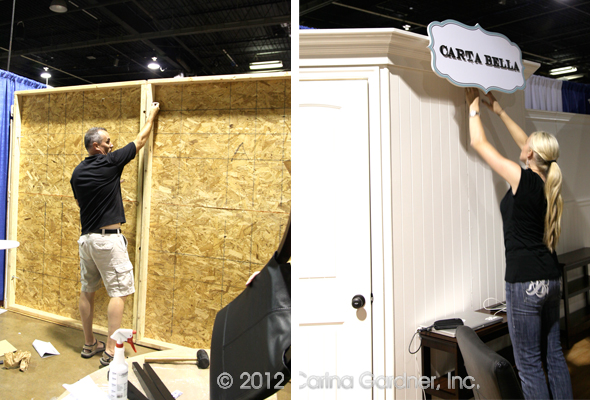
Set up was also fun because it was a Carta Bella and Echo Park team effort. It was nice to have that many hands putting together the two booths. Check out Andrea (CHA Coordinator for Echo Park and Carta Bella) putting up the Carta Bella sign (below) and Lindsay bolting together the walls.


____________________________________________________________

There were a lot of darling projects in the booth! This advent calendar was made by Deena Rutter who also designed Merry & Bright for Carta Bella (ships September 2012).

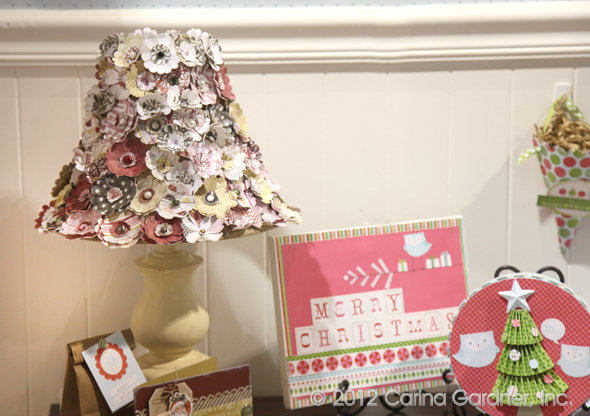
I made this Beautiful Moments lamp below. I HIGHLY recommend having a silhouette machine for this project. It turned out darling but took a lot of time to put together.

Samantha Walker put together this fabulous display of silhouette pieces using her Paris Girl Collection.

So many darling cards made by the design team!

Here are my All Hallow’s Eve bottles that you will see in the upcoming Halloween video Lindsay and I do. It should be posted sometime next week. Any guesses on what we dress up as?

I made this banner using the Alphabet Junction Collection by Melanie Ritchie.

Here’s Miss Melanie herself with her first collection! Love the Vanna White pose!

Me and my belly.

Shimelle (from 2Peas in a Bucket), with Melanie and myself. Too bad we aren’t having fun.

Here’s dinner with Lori Whitlock (designer for Echo Park) and Andrea (CHA Coordinator for EP and CB). Matt (THE sticker guy and serious foodie) chose this awesome place. The food was A.M.A.Z.I.N.G. If you go to Chicago, it’s worth getting the beef tenderloin (and all the desserts) http://www.carnivalechicago.com/.

Look at the amazing light fixture! (Which also accounts for the bad photo lighting).

Well, there it is! A few photos from CHA and a little of what we were up to. I’ll admit, I was happy to get back home to my own bed. I’m at the most uncomfortable stage of this pregnancy, and it was nice to snuggle into bed last night. Josh and my girls are in Sun Valley at the Bar Convention (therefore making it possible to get all my blogging in before they come home). They should be showing up tonight so I will have my little darlings to snuggle.

Be back in a second with our tradeshow booth video!

—Carina


Silhouette Design Store JOANN Stores

Summer CHA 2012 Review Read More »

Carina Gardner TV Channel—Episode 2 Paris Girl

I just finished editing Episode 2 for the new CG TV Channel. Today’s episode features guest Lindsay Moore, who is the Director of Sales at Carta Bella Paper. I hope you’ll check out because we show off the Paris Girl Collection for Carta Bella Paper Company and making this darling card (see left).

Watching this video, you’ll see why I love working with Lindsay. He keeps me on my toes and has me laughing through the entire thing (and BTW, So You Think You Can Dance IS better than America Idol…just saying, Lindsay).

We also continue our Hot-Off-The-Press Giveaway. Check it out and see what you have to do to be entered!

As promised, here are the dimensions of the card for your scrapbooking pleasure!

* Main Envelope—5 inch x 12 inch (fold)
* Contrasting Paper—4 inch x 5 inch
* Insert—4 inch x 5 1/2 inch
* Ribbon—3 inches of a satin or grosgrain

Enjoy! —Carina

Silhouette Design Store JOANN Stores

Carina Gardner TV Channel—Episode 2 Paris Girl Read More »

New Lines

Today I have been getting production files ready, getting ready for CHA, and a lot of other general fun stuff for Carta Bella. I also announced two new lines for Carta Bella. Go check out my blogpost for that reveal here.

In the midst of getting the new lines ready, I managed to take the girls to the park for a couple of hours. They have been asking since April to play in the creek (it was too cold then and I wouldn’t let them dip their toes in). So today was an indulgence.

To be honest, my only goal this summer is to get out for a couple of hours a day so that the girls and I can relish in our last summer of freedom (ironic because of my current working schedule). Either way, it’s our last summer of “big girls only” and I want them (and me) to really cherish it.

The girls playing in the creek today reminded me of growing up in Tennessee. It seemed like we used to play in creeks a lot and explore the woods behind our backyard. Oh, and catch fireflies at night. I tried to explain that to the girls the other night, and they asked when they would get to catch fireflies. I had to explain to them that we didn’t have fireflies to catch in Utah. It made me a little sad.

It also reminded me to lug my camera around a lot more this summer. First because I need to make sure the girls have photos of what we did this summer. And second, because I have an awful lot of scrapbooking papers to use up!

So here’s to fireflies and rambling! Hope you are enjoying your summer too!

Carina

Silhouette Design Store JOANN Stores

New Lines Read More »

Beautiful Moments Ships

Beautiful Moments™ shipped this week! Ironically, I haven’t even had a chance to let it sink in because I have already moved on to the next 5 lines. Today, I’m sqwanching (is that word?) paper and tying up twine to take photos of the Halloween line. And I took photos and made layouts for our July release earlier this week.

You are in for some eye candy!

Click on the image to the side here and you can see our Beautiful Moments™ Catalog. More of these catalogs to come…

I’d recommend following my instagram (just follow carinagardner) to see what “secret” projects I’m up to in the day to day. You may even get a sneak peek at what I’m working on at this very moment.

Now back to hot gluing…

Carina


Silhouette Design Store JOANN Stores

Beautiful Moments Ships Read More »

Carina Gardner TV Channel—Free Download and Giveaway

I’m excited to introduce to you a series of videos straight from my studio! Introducing CG TV! I originally got the idea for doing the videos because I wanted to show tutorials on my sewing patterns. The idea eventually was expanded to include all the things I do here in the studio—paper, fabric, digital, hybrid, classes, sewing patterns, as well as projects, interviews, giveaways, and introduction into new designs.

So here it is—Episode 1! I’m excited that my first video introduces the Beautiful Moments™ Collection for Carta Bella Paper. You get a sneak peek into my studio where I film the videos and get to see me grow around the middle every month to boot!

As a kick off to the new videos, there is an awesome new giveaway in this video—so be sure to check it out! The winner will be announced on the Carta Bella Facebook Page on Monday, June 4, 2012.

As promised, here is the free download of the album bracket and flowers I show in the video. I’ve included the following in this zip:

ALBUM BRACKET  AI FILE
ALBUM BRACKET DXF FILE (FOR SILHOUETTE CAMEO)
ALBUM BRACKET JPG FILE
BASIC FLOWER PATTERN AI FILE
BASIC FLOWER PATTERN DXF FILE (FOR SILHOUETTE CAMEO)
BASIC FLOWER PATTERN  JPG FILE

Sadly, this project download DOES NOT include instructions for making the album shown here. It simply includes all the fun templates for you to create an album like this one.

Enjoy!

Carina

Silhouette Design Store JOANN Stores

Carina Gardner TV Channel—Free Download and Giveaway Read More »

Surprise, Surprise!

You’ve been waiting, and I will not disappoint!  I have TWO announcements for you today. I’m going to let you in on my family news first—and that is we are expecting baby number 3!

After a five and a half year gap, we have decided to head back into diapers, teething, and night feedings. (It has been long enough that I have forgotten how little sleep I will get and have created a blissful illusion that I will be happily snuggling a baby in my very tidy house 24 hours a day). To top off our joy, we also found out that squirt #3 is a boy! Guess I’ll be making more boy lines, huh?

My pregnancy secret better explains this or even this, don’t you think? You guys are lucky that I skipped posting on bagel week (yes, I ate bagels every day for every meal.)

Baby boy is due at the end of August. This is my first summer baby so if you want to give me some advice for staying cool, I will gladly take it!

To throw a whammy into all this new-found baby fun, today is the announcement of a brand-new company—Carta Bella. Some of you sneaky folks have managed to find out all about this scrapbooking company before we have even had a chance to announce it!

This has been a big undertaking, and I’m so excited for you to be a part of this new venture! Our sister company Echo Park made the transition from “conceptual” to “actual” a wonderful process. Getting to work with the EP team has made the process a pleasure. Second of all, I get to work with the brilliant Lindsay Moore, who is the Director of Sales at Carta Bella (Seriously, have you met Lindsay? He’s fab!). And as if I wasn’t having enough fun, I am the Creative Director over a fabulous team of designers many of who you know already.

So what’s so special about the Carta Bella brand? Other than the amazing crew, the awesome talent, and all the hard work everyone has already put in? All of our papers are TEXTURED! I can’t tell you how beautiful this makes the lines. (I wanted to add 4 exclamation marks there, but restrained myself.) I can’t help but run my fingers over the samples at my house every time I pass them. And you’ll love all the great stuff we are doing with alphabets and elements. Get ready for some serious scrapping!

Our very first collection is Beautiful Moments™, which I designed specifically for the launch (check out that little cutie in the layout! I think I know her…). I know there may be a way to win it through the facebook page although I’m not sure when (details to come!). I also happen to know there is a SERIOUS week of prizes coming up soon to those who are part of the facebook page. Don’t miss out on it!

+ Want to check out more on Carta Bella? Visit the new website here: http://www.cartabellapaper.com.

+ You can check out the first blog post here as Lindsay and I introduce the company.

How’s that for some big news? Lots of paper loving coming your way!

Yours truly,

A happy, fat pregnant lady

PS. If you don’t subscribe to my facebook page, I made the announcement that we are having some troubles with the email feeds. This meant completely starting over with a new feed. Please re-subscribe in the top-right hand corner of the blog by adding your email or you will no longer receive the blog emails. Thanks!


Silhouette Design Store JOANN Stores

Surprise, Surprise! Read More »

Paper and Digital Designer Workshop Review February 2012

This last weekend was the Paper and Digital Designer Workshop. I obviously wasn’t thinking straight when I scheduled it the weekend after CHA. Despite the back-to-back scheduling, we had a fabulous time and it went off without a hitch.

Truthfully, it doesn’t matter how many classes I have taught, I always get a little nervous about getting in front of a group. Thankfully, the group dealt with all the Illustrator techniques I, ahem, made them participate in relatively well!

I was so impressed with the doodling, papers, textures, techniques, and elements that these ladies came out with during this workshop. (I was equally amazed at the amount of food I managed to eat during the two days.) The group was a wide range from beginners to industry designers. You’ll recognize some faces and names from this group (and might I suggest some up-and-coming designers?). Though I was the teacher, I learned so much from them as they shared their tips and tricks.
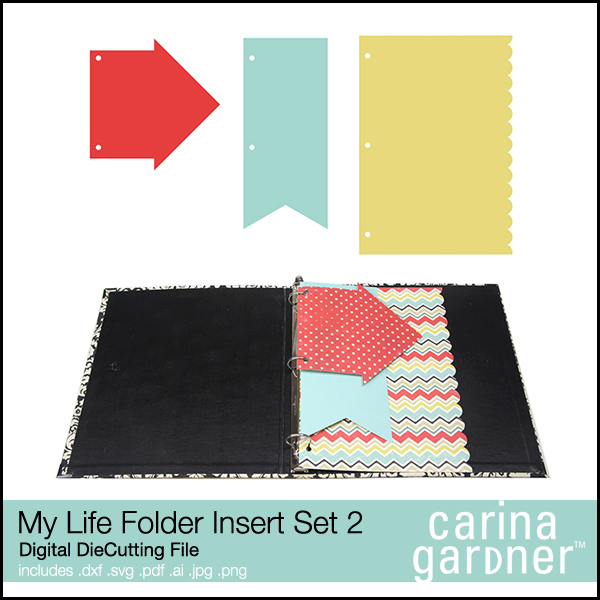
A huge thank you to Riley Blake who donated fabric to the swag bags. We had a number of Riley Blake designers in attendance, which made the event that much more fun! I also need to thank Susan Haglund for taking all of these pictures over the two days of the workshop.

Lots of thinking, thinking, thinking (picture below). Mostly of how we could all get Diet Coke IVs inserted. Since Roxanne came up with the idea, I’m expecting a patent from her soon. You’ve gotta love Samantha Walker’s monster computer screen (she was banished to the back row)!

A few of the ladies posing in one of the Little America Hotel Rooms.

The picture above looks pretty serious. That’s the only reason I included it.

I know that all these pictures give the illusion that we had our heads stuck in our computers the whole time. However, there was a lot of unruly behavior from the blonds at the back of the room (aka mischief-makers assistant Susan Haglund and Heidi Swapp). It seemed like every time I left the room to do a portfolio review with someone, those two had everyone in an uproar.

Other surprises? That Samantha Walker can tell a great embarrassing story on command.

We had lots of locals (Deena Rutter was in-and-out since her boys were battling it out for the hockey state championships.) as well participants from as far away as Canada (Thank you for the maple syrup, Melanie Ritchie!). Meg Stocks, a mentor at JS.com, came all the way from Atlanta (I do love my southern girls!).

I was also thankful that Pam Meeks and Rachel McPeek (do you like how their last names almost rhyme?) made it in right before the Colorado snowstorm hit. I was also grateful that it didn’t make it’s way up to Utah! Kathy Sierra-Fernandez came from Washington and became our resident Illustrator expert (we all learned a thing or two on how she magically builds patterns!). Roxanne Bergener of Close to My Heart cracked us up with her wit and  dazzled us with her industry experience.

The picture above is of Audrey Hanks (traveled from Wendover) and Christine Chodil(traveled from Chicago). It was fun to chat with both since they came from your non-typical designer backgrounds (Christine’s degree is in Musical Theater and Audrey has a MA in Mathematics).

Heidi Swapp gives her two cents on our typography exercise. We will certainly take her two cents along with any other change she has on her.

And who knows what I am explaining here? Obviously something to do with the itsy bitsy spider.

Don’t let the cool appearance of this one fool you (Kasey, Casey, Kasie, Casee…who knows how to spell her name?). She’ll slice you with her witty comments. And putting her next to Heidi wasn’t our smartest move.
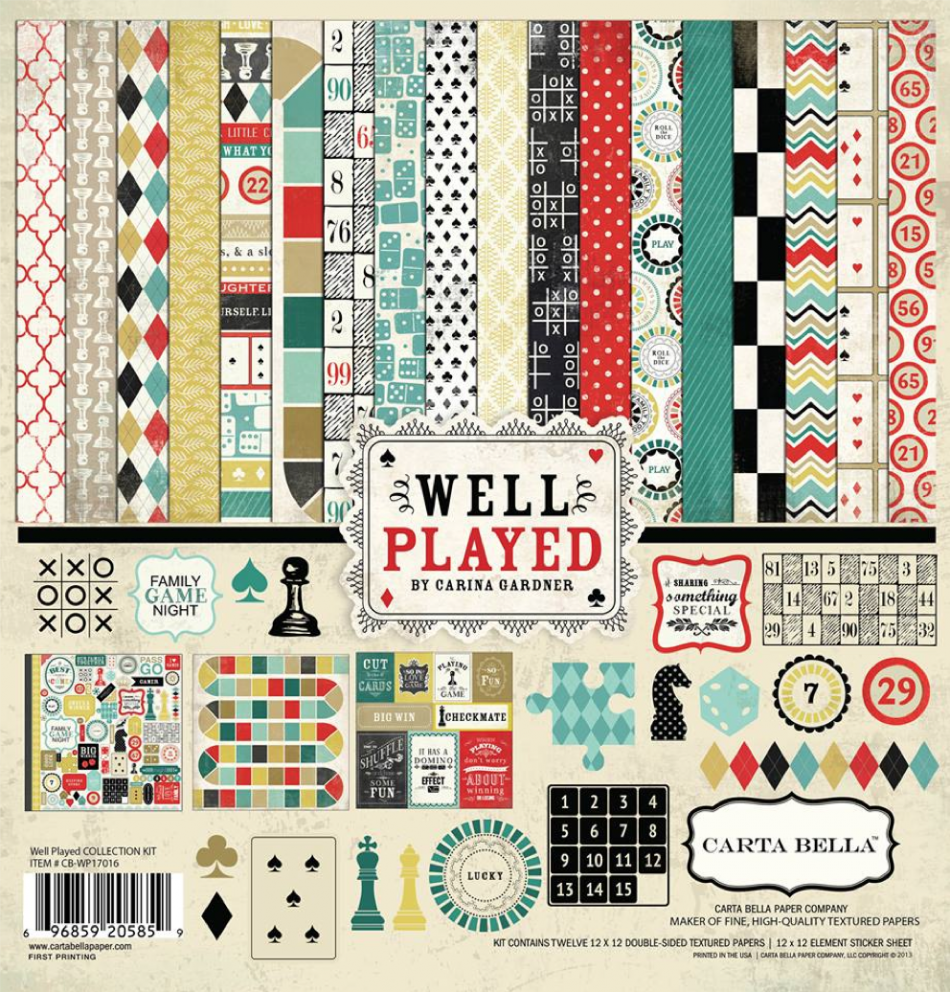
You gotta love the work of Lori Whitlock. I just felt lucky that she came!

For our final dinner, we let a few guys crash our girl party. I’m pretty sure that I’m saying something extremely important here (photo below). Thank goodness for that pretty damask pattern behind me.
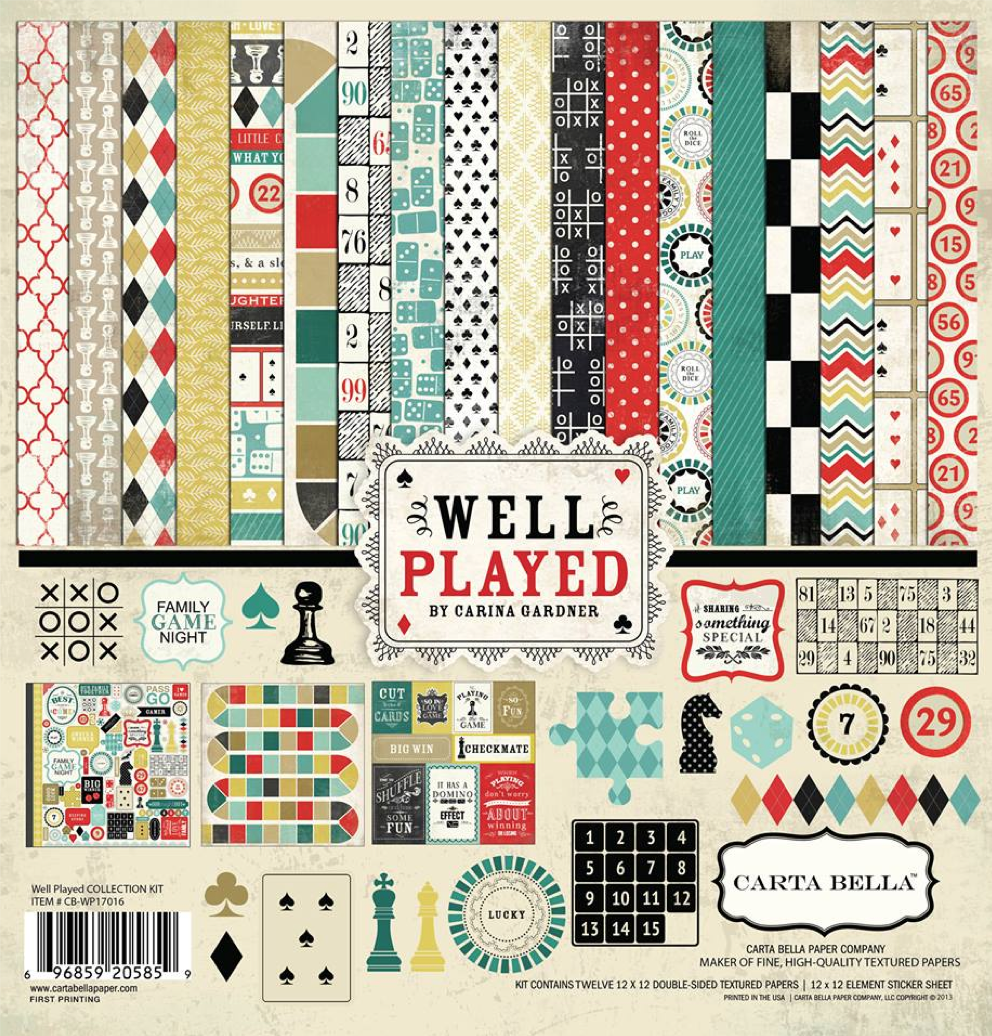
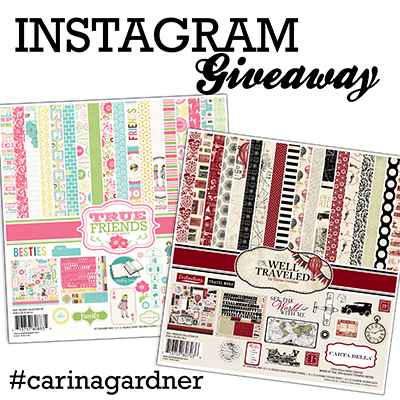
First off, there was no possible way to shrink down the picture of this slice of cake (scroll down, it’s hard to miss). Secondly, I thought it best for you to see the size of it in relation to Susan’s head.

Yes, we ate like that for many meals the entire two days. And yes, I was sick afterwards.

Lori Whitlock’s husband Doug, Eric Swapp of JessicaSprague.com, and Jody Hunt of Echo Park overseeing our picture-taking.

In review—we ate a lot, designed a bit, had a number of “aha” moments (even me!), and had a pretty fantastic time.

Cheers to girl-design-time,

Carina

Silhouette Design Store JOANN Stores

Paper and Digital Designer Workshop Review February 2012 Read More »