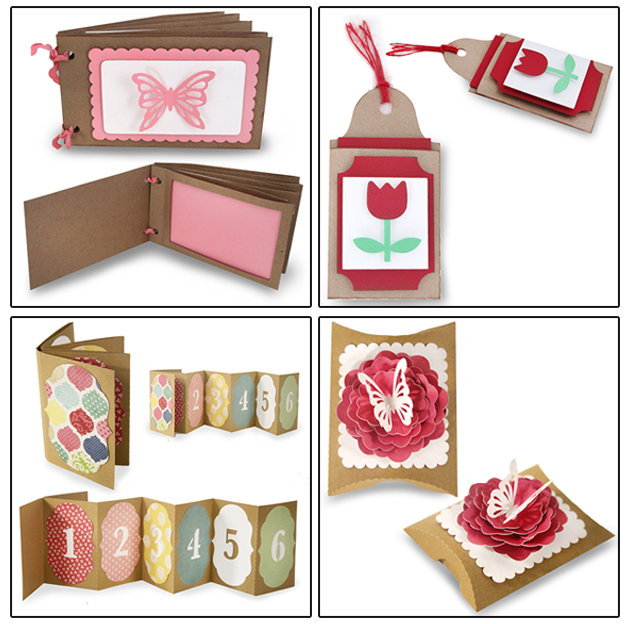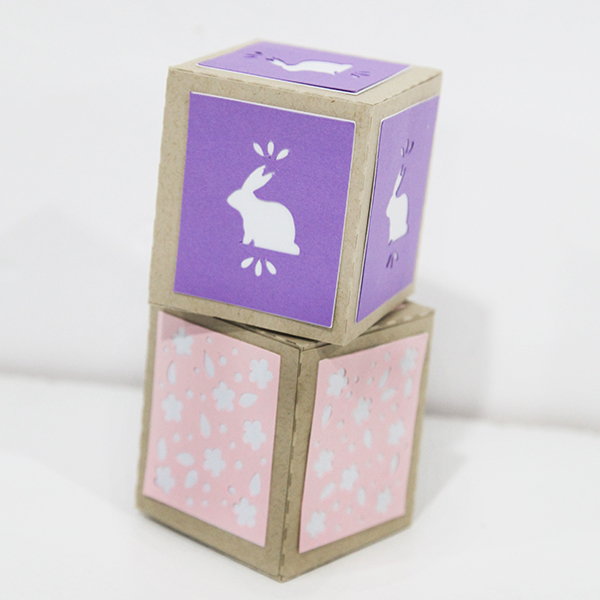
Accordion Shadow Box Card Tutorial for Silhouette

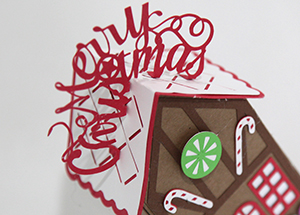
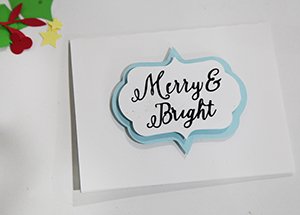
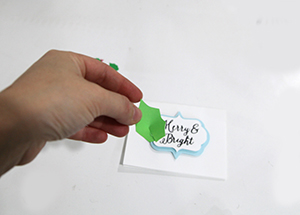
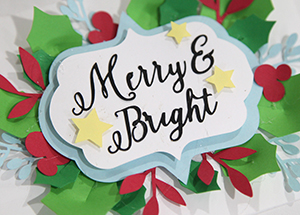
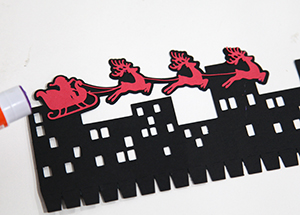
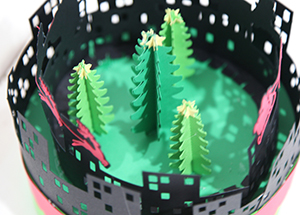
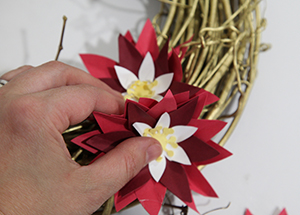
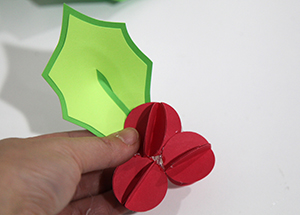
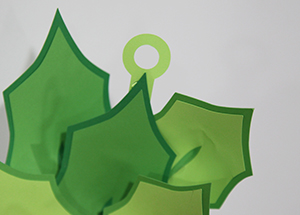
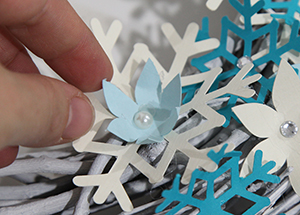
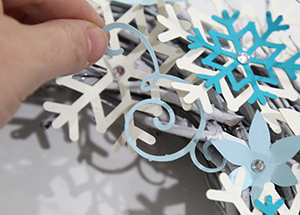
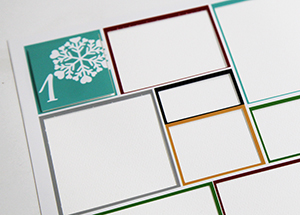
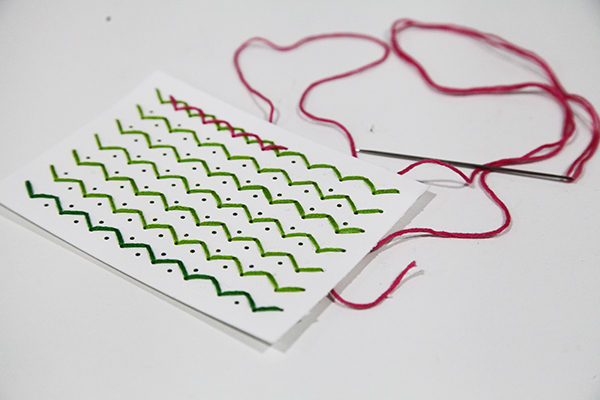
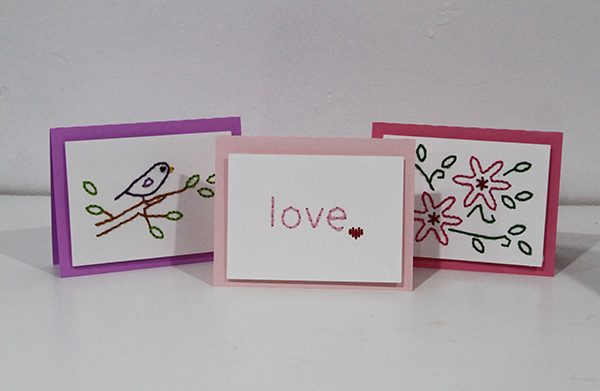
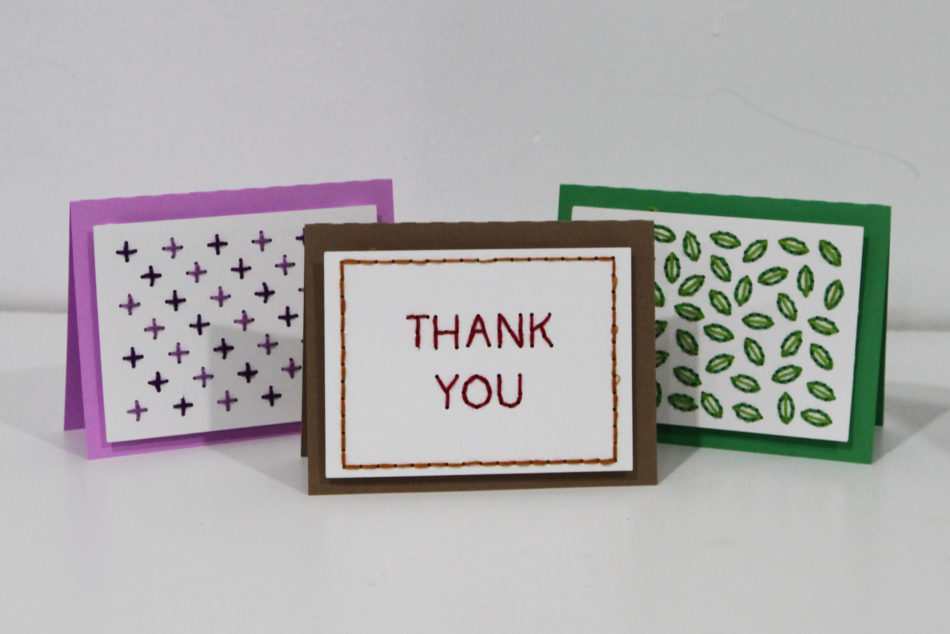
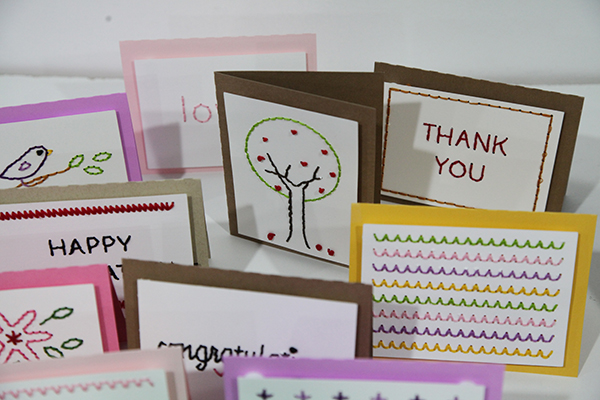
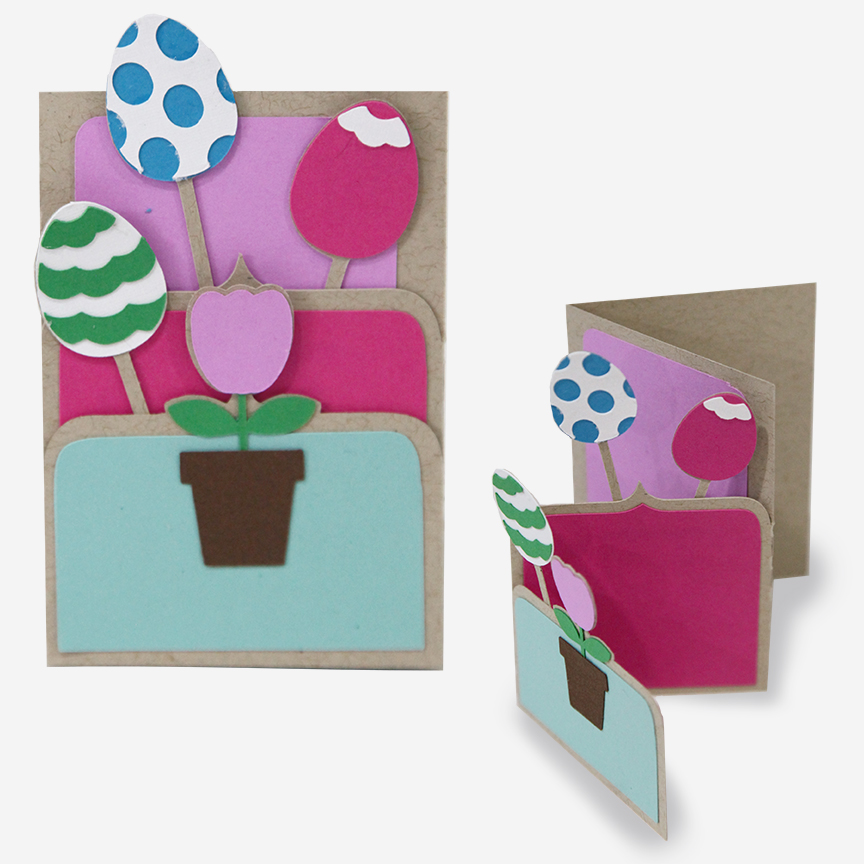
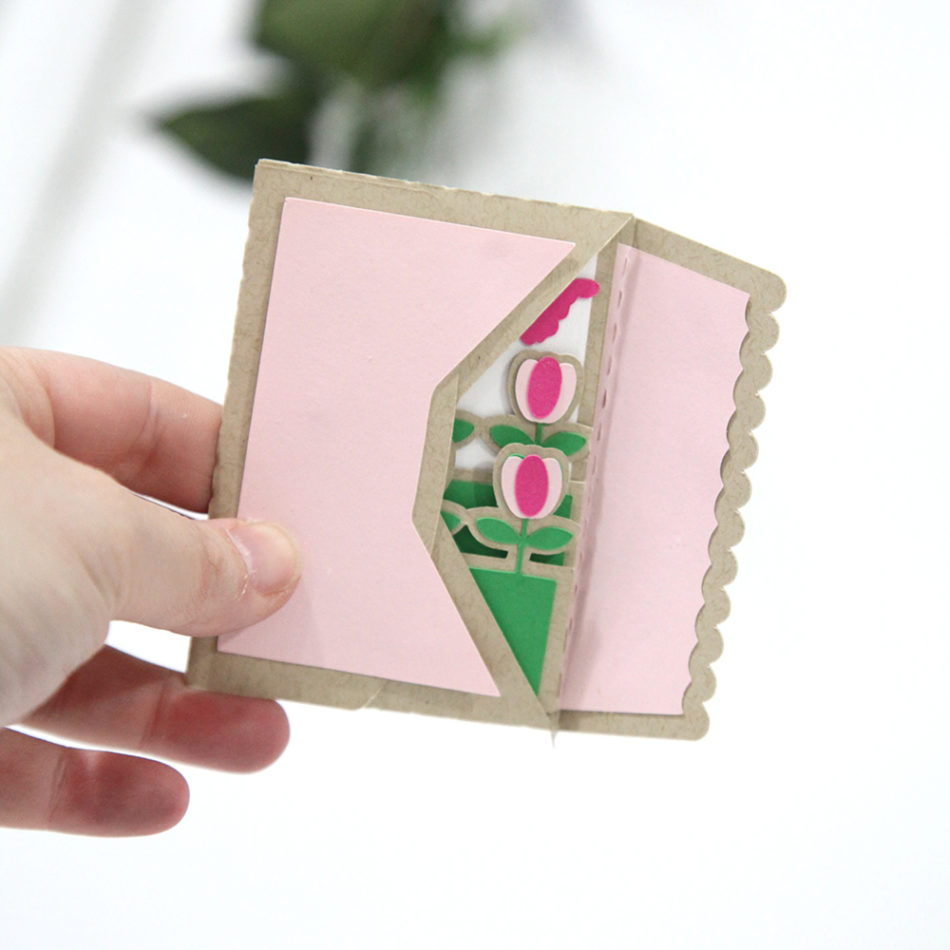
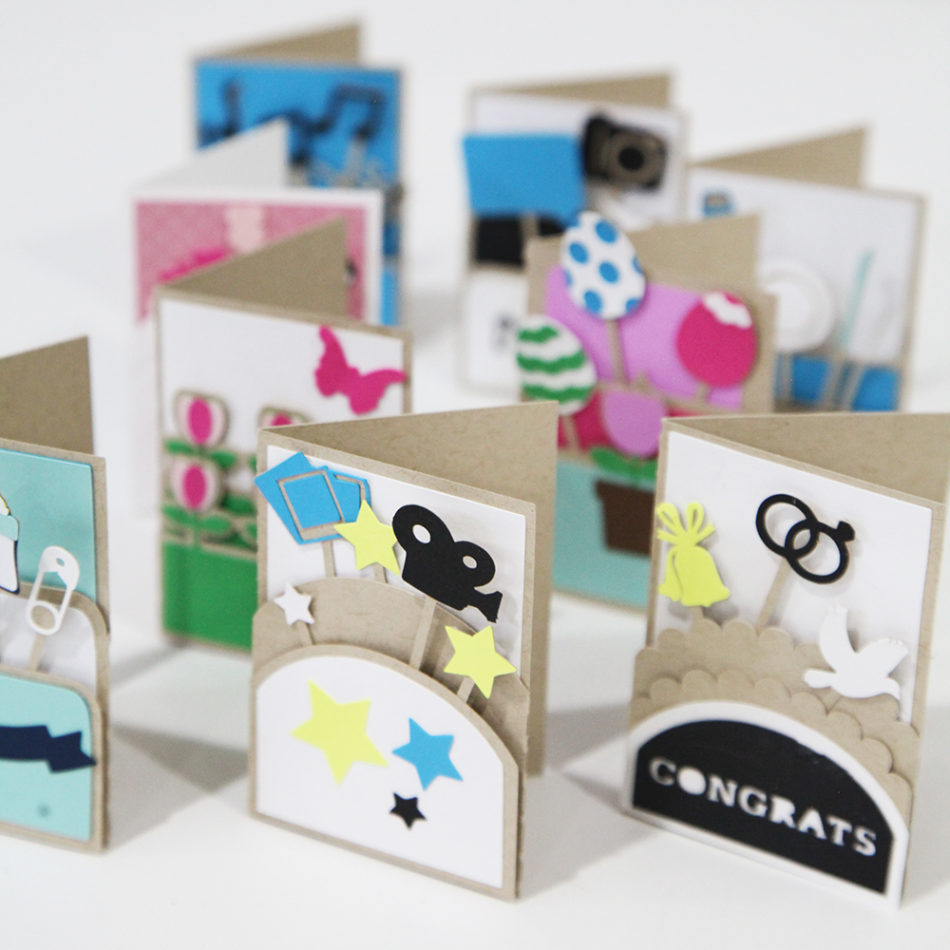
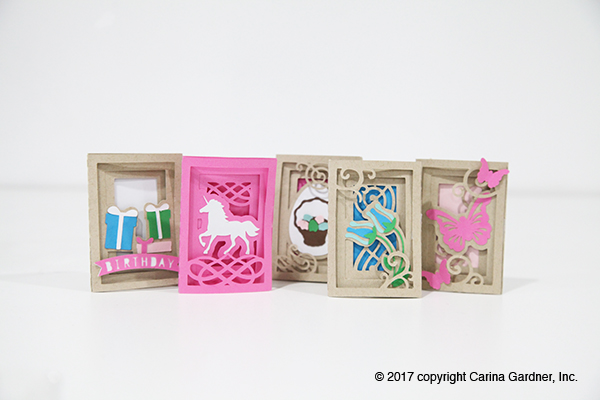
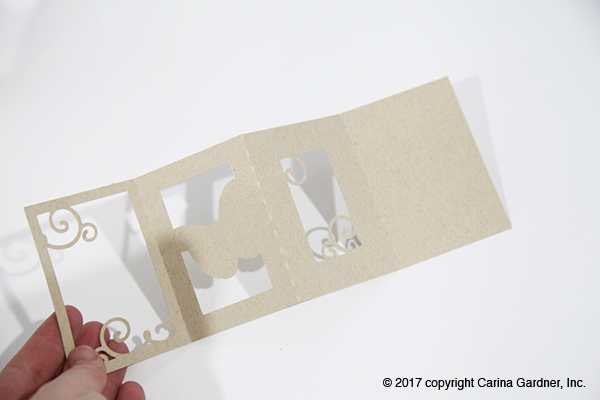
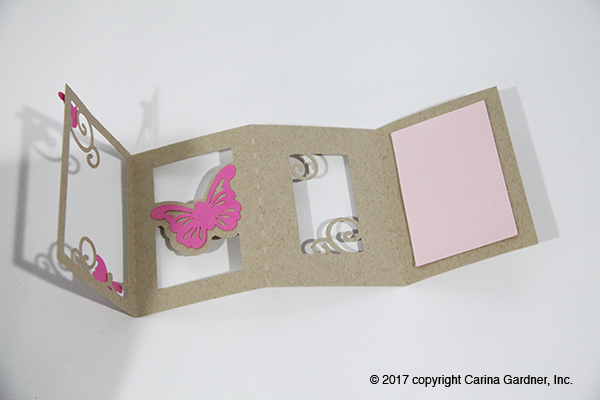
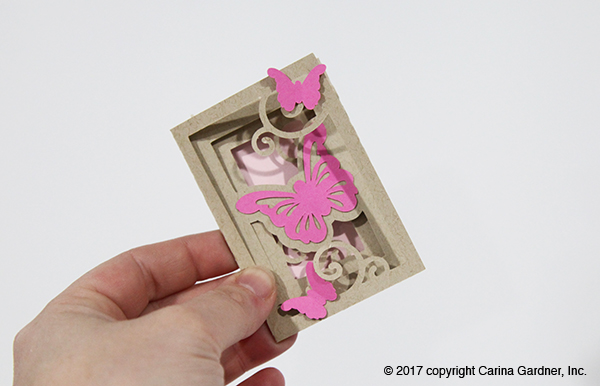
This week I am releasing these cool Accordion Shadow Box Cards! They fold flat and are so sweet. Cards are sized to 2.25 in. x 3.25 in. and can be cut on a portrait or cameo. There are 4 folds with layers of goodness! See how I put it together in the video below OR check out my quick instructions below. These are in my Silhouette Shop: https://www.silhouettedesignstore.com/artists/252689

***EDIT: Some of the Design IDS for this line is Design ID #187756, Design ID #187753,  Design ID #187750, Design ID #187747, Design ID #187744, Design ID #187741, Design ID #187735, Design ID #187729, Design ID #187726, and Design ID #187717.

Happy Crafting!
Carina
PS Make sure and subscribe to my youtube channel because this it the first of many videos that I am doing in this new format! I’m hopeful that you will be able to see clearly what I am doing!

Instructions

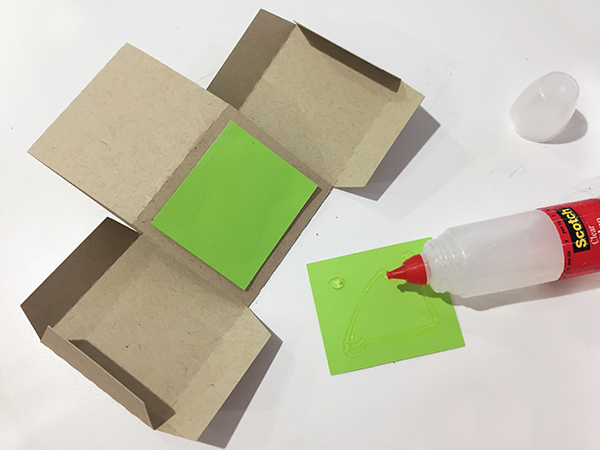
  1. Cut out all the pieces in the file.
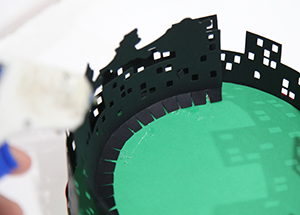
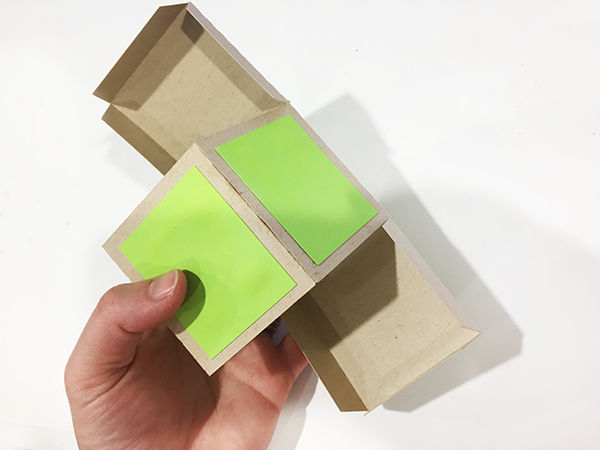
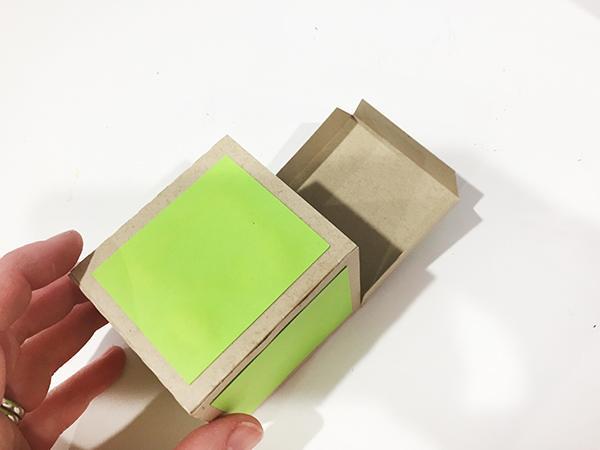
  2. Fold the main card piece into an accordion shape.

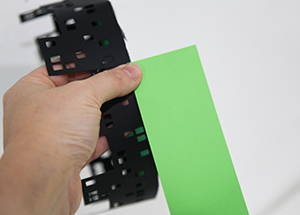
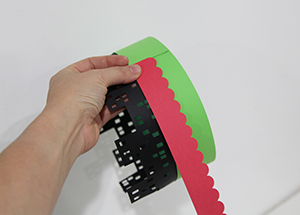
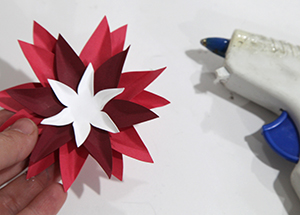
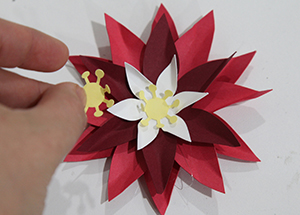
3. Glue all the extra pieces into place using the preview photo as your guide. For items like flowers or butterflies, finger press to give dimension. Be sure to use the folded accordion card to decided where pieces should go so you do not mistakenly add pieces to the wrong side of the card.

Silhouette Design Store JOANN Stores

Accordion Shadow Box Card Tutorial for Silhouette Read More »

5 Reasons Spring is the Best Time to Create

IMG_0022_1webThere are lots of reasons that spring is a favorite time of year for most of us. Whether it’s the sunshine, bulbs in bloom, or the chirping of birds back from their winter hideouts; spring is a time of renewal. For me, I feel re-energized to make again. Here are some of the reasons spring is the best time to get your Silhouette machine out to CREATE!

1. Holiday crafts

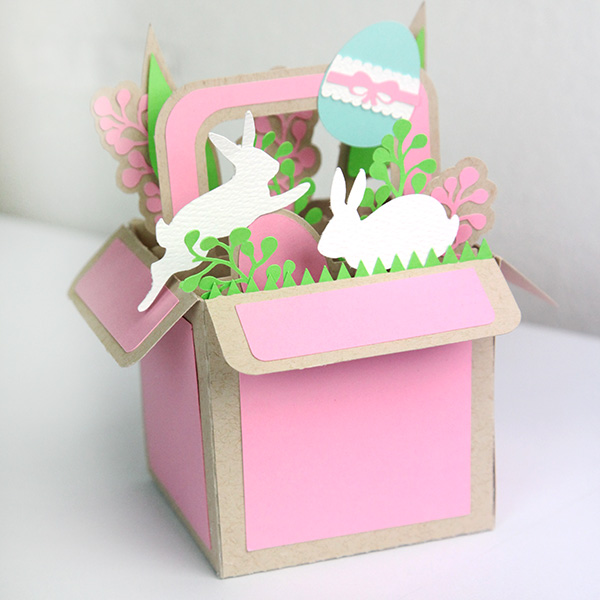
Sure, you love making stuff for Christmas, but what about St. Patrick’s Day, Easter, Mother’s Day, and Graduation? These are some of my favorite holidays to make cards and projects for! (Animal Explosion Basket – Easter Bunny Design ID 122681)

2. Flowers

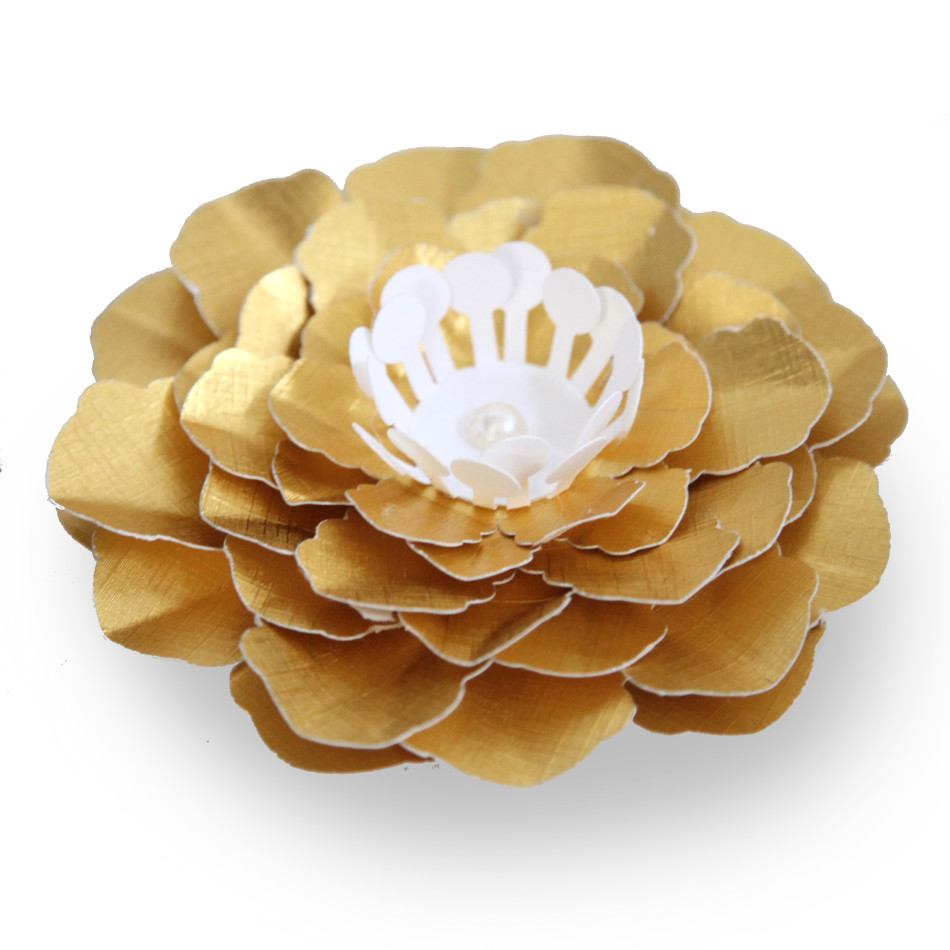
I don’t have to tell you that there are SO many good flower projects in the Silhouette Shop…because there always are! Party it up with some great floral projects! (3D Gold Fringed Petal Flower Design ID 109882)

goldcrimpededgeflower3. Spring Cleaning

You would think this would be a reason NOT to be making stuff, but the truth is once your spring-cleaning is done, there is nothing like sitting down to your craft table to make. That’s right, creating in a clean space is pure happiness. And once you have cleaned, declutters, and dejunked your house, isn’t it the perfect time to make something to fill it back up again (wink)!

4. Butterflies

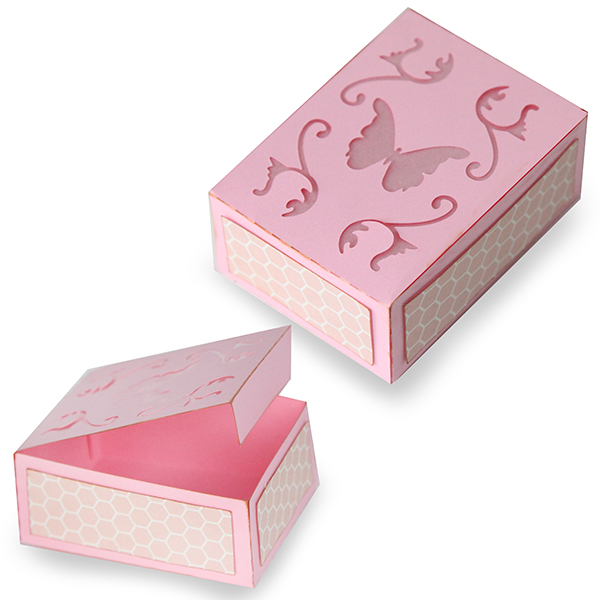
There’s never a time I like to pull out all the butterfly projects more than in the spring. Who’s with me? (Vellum Top Butterfly Box Design ID 79311)

vellumtopbutterflybox5. Organization

Spring is officially the best time to get organized. There are so many great FUNCTIONAL (not just pretty) projects to get your photos, knick-knacks, and office supplies organized.

Hope you are enjoying spring as much as I am!

XOXO-Carina

Silhouette Design Store JOANN Stores

5 Reasons Spring is the Best Time to Create Read More »

February & March Posy Garden Block of the Month

IMG_6939_1instagram

I think I managed to forget to do a post on Block of the Month for February so I’m doing double duty today!

I’m a bit late, but March block of the month is finally up! We had some technically difficulties over the last few days with the website so I’m so happy everything seems to be resolved with our hosting company.

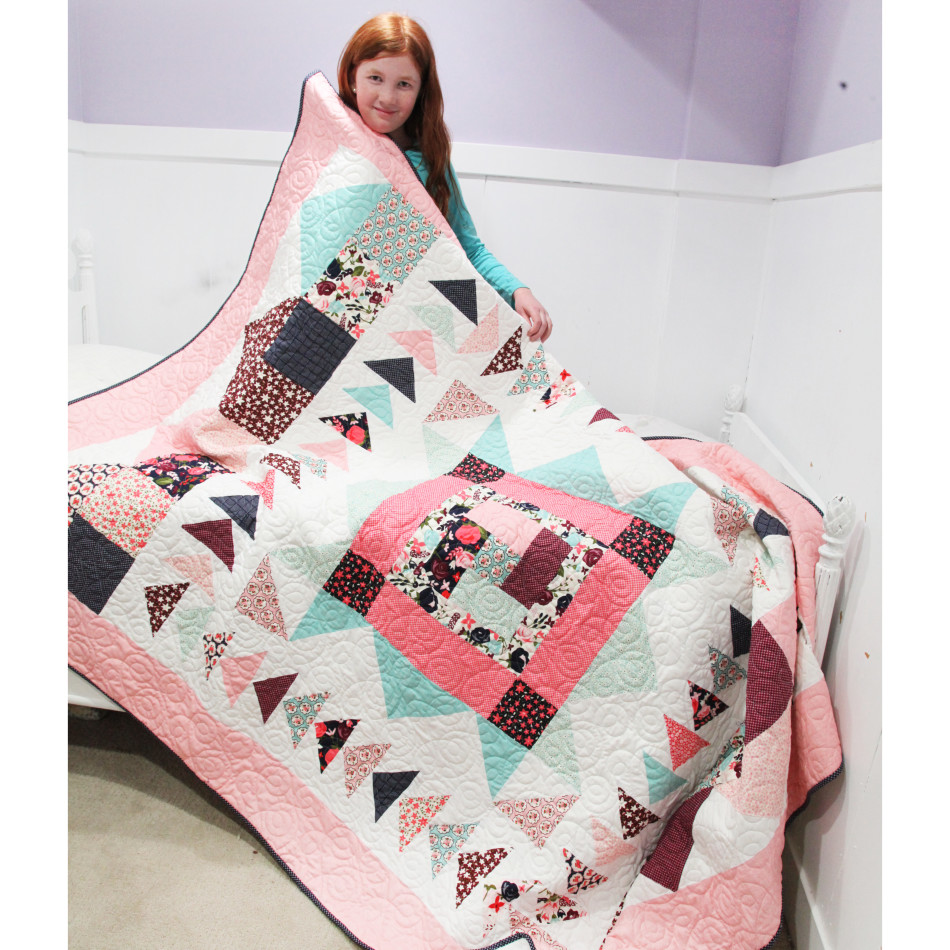
March’s video is a bit long but hopefully helps all of you beginners put together this video. If you can’t tell, I had fun making it (wink, wink). The downloads are all available in the shop for free (as per usual). I use Posy Garden fabric (with minky on the back for Felicity), but you can make it in any fabric you want. Felicity and I also tested a portion of the inside of this quilt with Primrose Garden (I’ll make sure to post a pic soon on Facebook).

Hope you have fun making it!!!!

XOXO- Carina

February 2017 BLOCK VIDEO

Grab the FEBRUARY DOWNLOAD here.

March 2017 BLOCK VIDEO

Grab the MARCH DOWNLOAD here.

Silhouette Design Store JOANN Stores

February & March Posy Garden Block of the Month Read More »

Carina Gardner & Where Women Cook Magazine Article Spring 2017

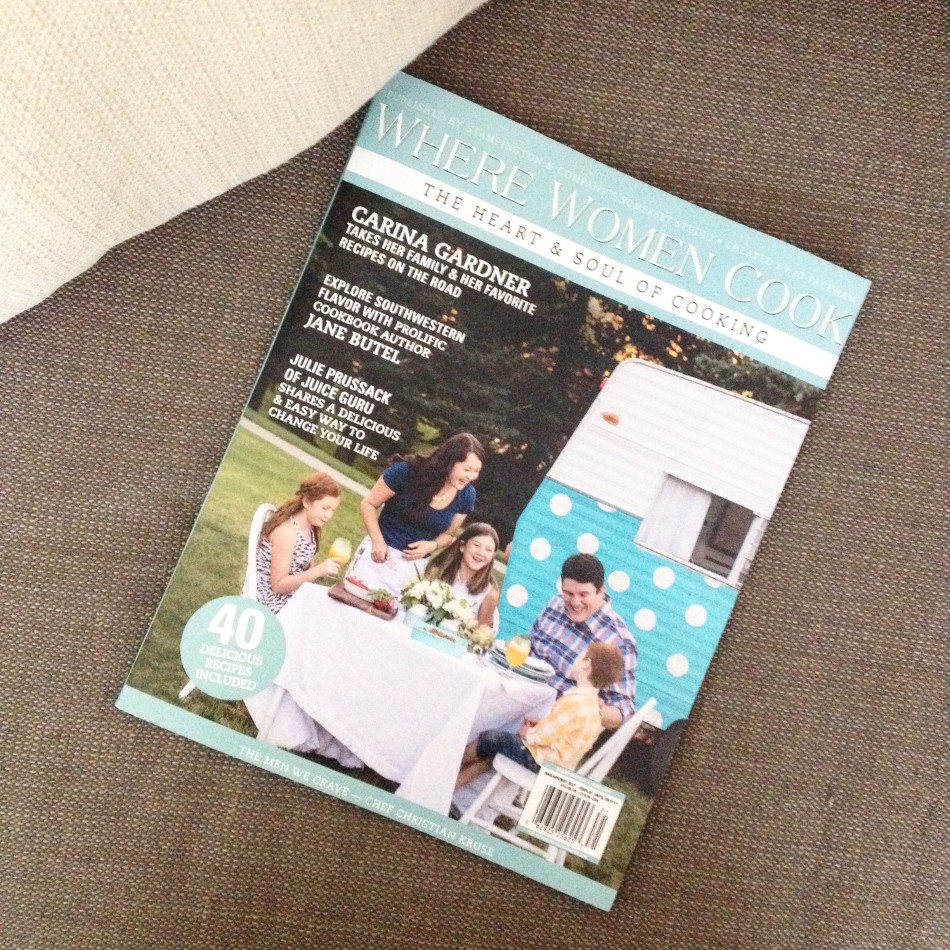
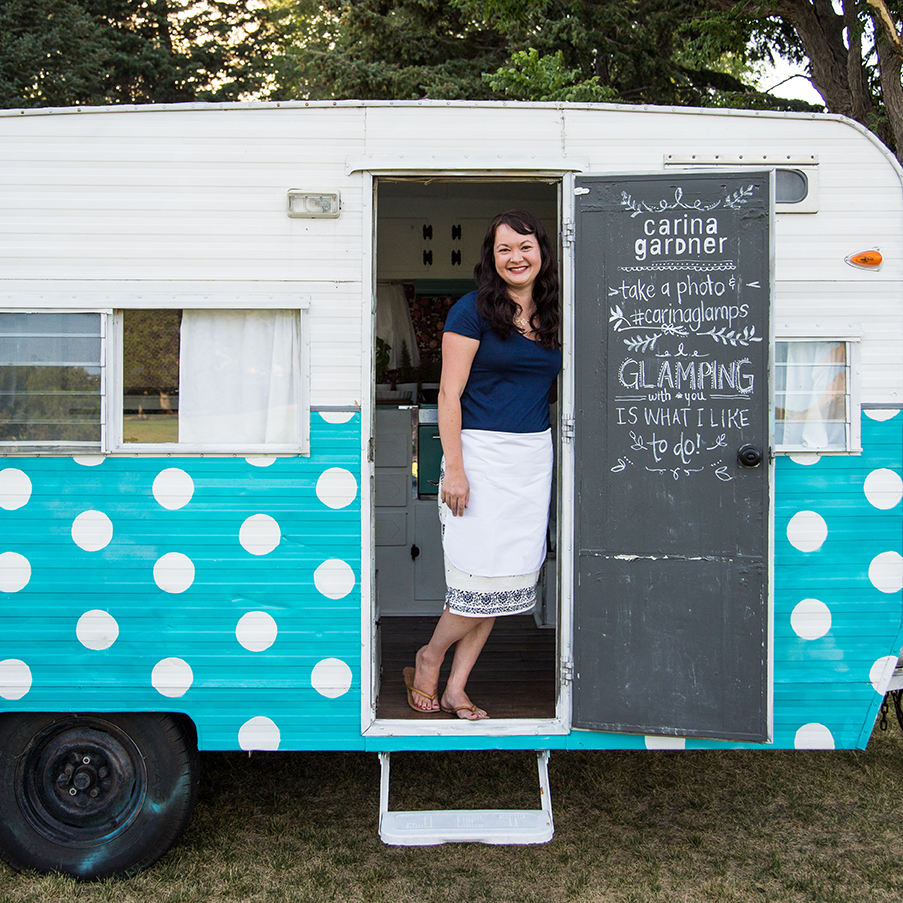
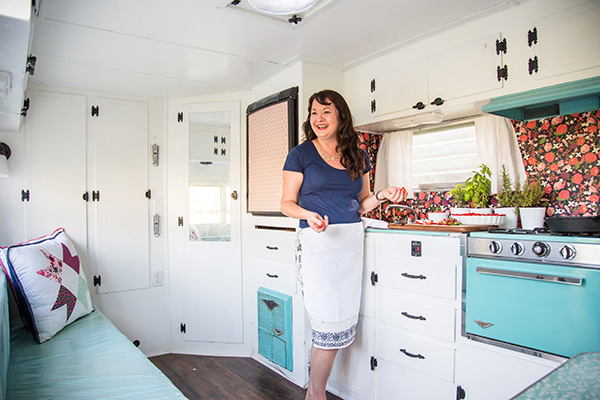
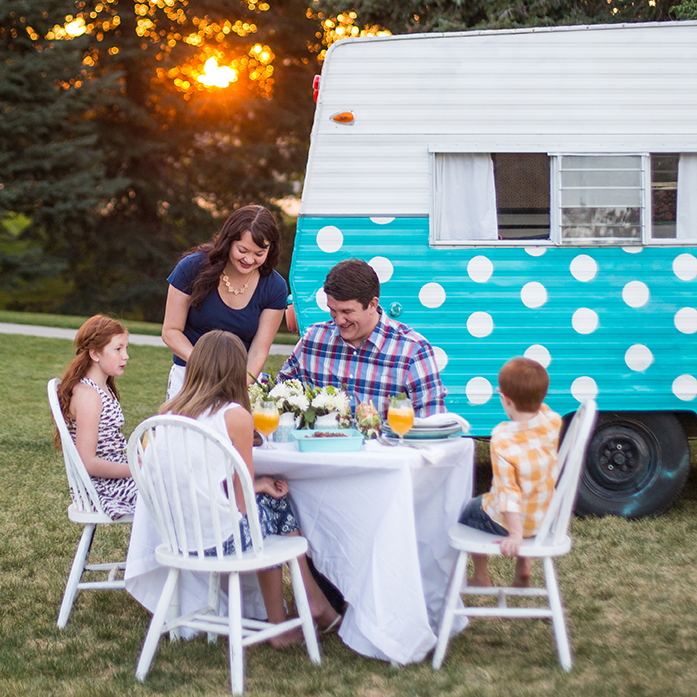
IMG_9256 2Last July, I prepared several recipes and met up with photographer Justin Hackworth and editor-in-chief of Where Women Cook Magazine Jo Packham to take photos in my 1968 Jet Airway.

It’s now March. When I received the copy of the magazine I was completely surprised to see my family on the front cover! Well, surprised is an understatement. Delighted and giddy describes it better! My mom was in town helping me sew my most recent book (Sweetly Stitched Quilts available in Kindle and PDF format), and she saw how excited I was. Actually, she might have seen me jump right out of my chair in my office, lol.

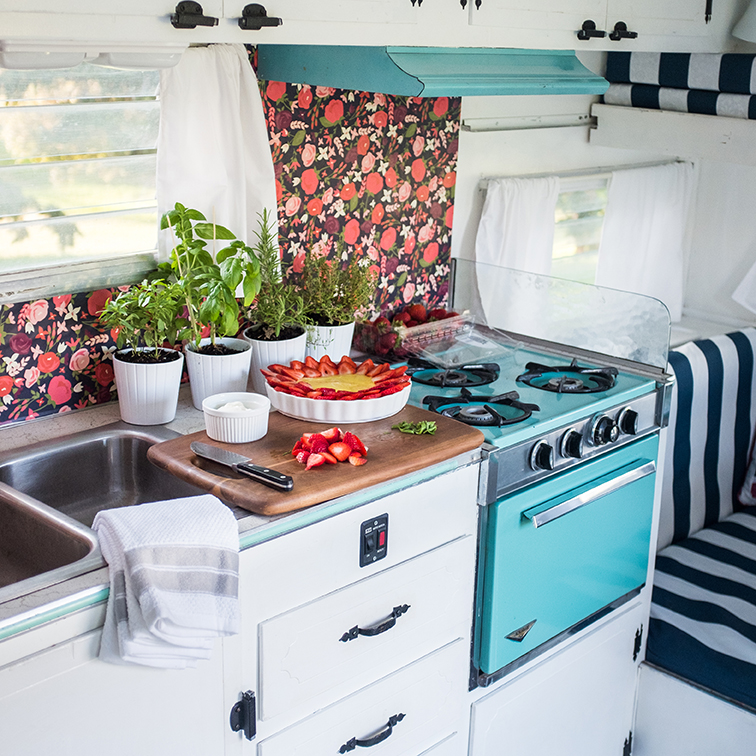
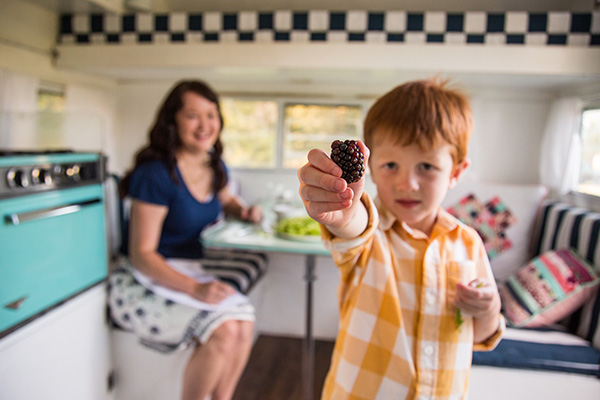
There are so many wonderful recipes in this issue! I’m excited to try them out. There are also some gorgeous photos. Because so many photos I loved from the shoot didn’t make it into the issue I thought I would share a few here. Also be sure to check out the hastag #carinaglamps on instagram for more glamper goodness.

If you want to see more of my glamper renovation, check it out here.

Utah wedding and portrait photography

Utah wedding and portrait photography
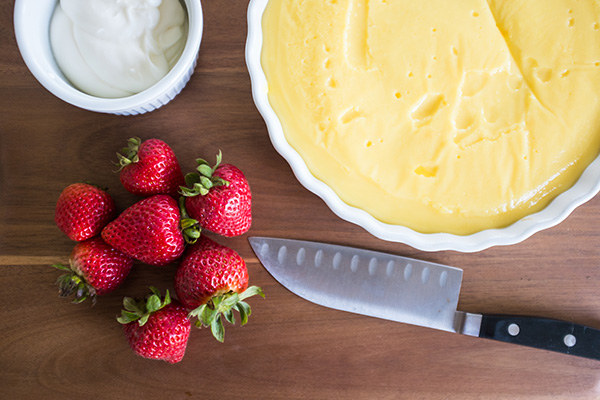
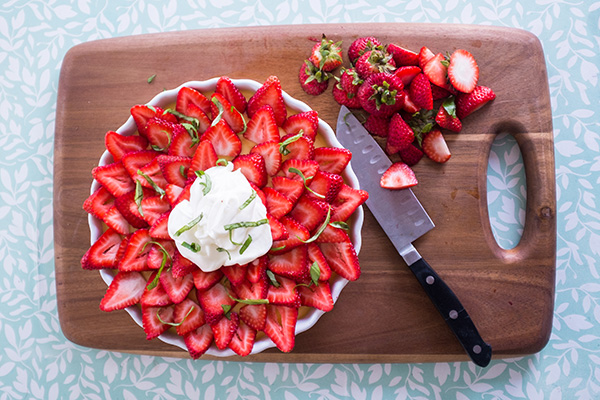
Strawberry Basil Pie…available in Where Women Cook Spring 2017 as well as my new book Sweetly Stitched Quilts. 


Utah wedding and portrait photography

Utah wedding and portrait photography

Utah wedding and portrait photography

wherewomencookmag_blogpost

This Peach Fizzy Drink didn’t make it into the magazine but is in my book.

Utah wedding and portrait photography
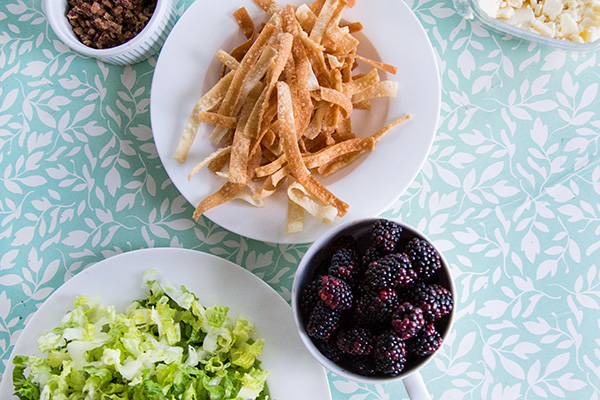
This is for my wonton blackberry salad.

Utah wedding and portrait photography

Get your issue of this magazine here or at your local craft or grocery store.

XOXO-Carina

Silhouette Design Store JOANN Stores

Carina Gardner & Where Women Cook Magazine Article Spring 2017 Read More »

Carina Gardner’s Best Little Album for Silhouette and SnapClickSuppy.com

IMG_7085_instagramwebThis week I’m leaving for long anticipated trip. It’s been a tough week with a lot of sickness and big news so the timing of this trip couldn’t be better. If you want to see what I am doing, I’ll be posting to all three of my feeds depending on where I am: @carinagardner @carinagardnerpapercrafts @miniloukids.

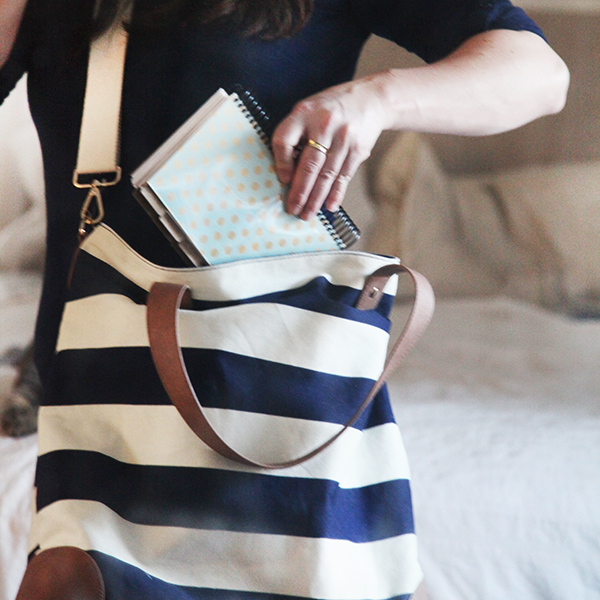
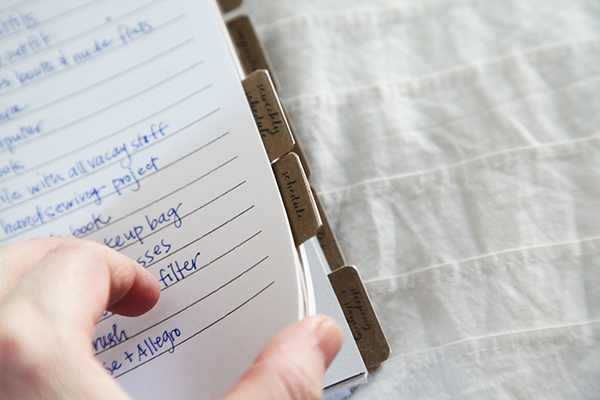
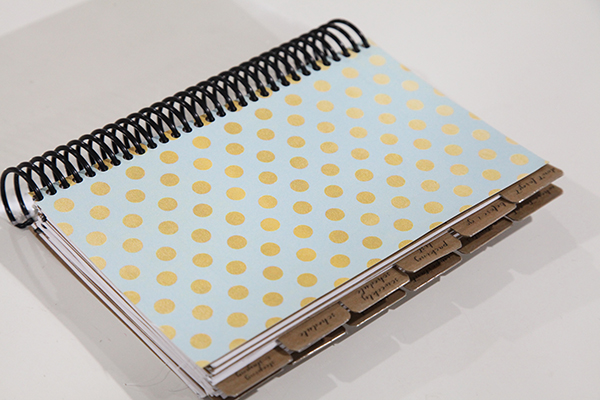
I always make myself a travel book for a trip like this ( think my Hong Kong trip for MiniLou) and this time wasn’t any different. This time, I wanted everything to be tabbed and easy to get to, so I used my Silhouette machine to cut out this book. I did however, get this SPIRAL BOUND instead of using the holes I made for my cutting files. Why? Because I like pre-made holes for regular album making. But for a trip, I think you need a sturdy spiral bound so you can really use the book. Printables are available on Silhouette OR you can also wait until I release them the first week in March for Digital Scrapbooking.

IMG_7102_1web

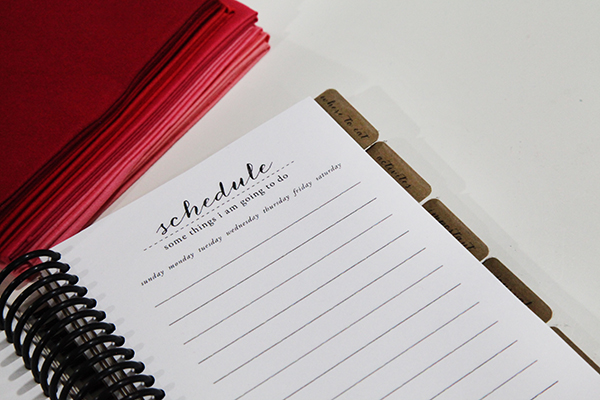
I call this the “Best Little Album” because I’ve gone out of my way to make it SO simple that it would work for your trip to Florida as well as a trip to Europe. You can pick and choose from the 12 printables that correlate with the 6 tab system (so you cut out 12 tabs in all). You can also pick from printable or cut-able covers I’ve provided as well as pockets and accessories. The point is that every piece should work seamlessly so you can mix and match to your hearts content. I know I did.

IMG_7106_1web

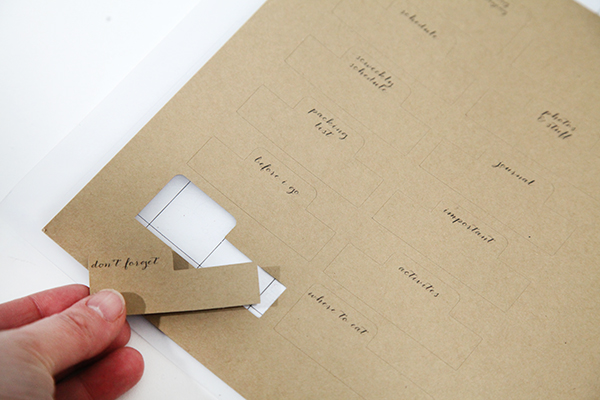
For the tabs, the printable is in a separate “tab” file so you can cut tabs out on mutli-colored paper. I’m sure I’ll do that in future travel books but for this one, I decided to go all kraft paper.

IMG_7065_1web

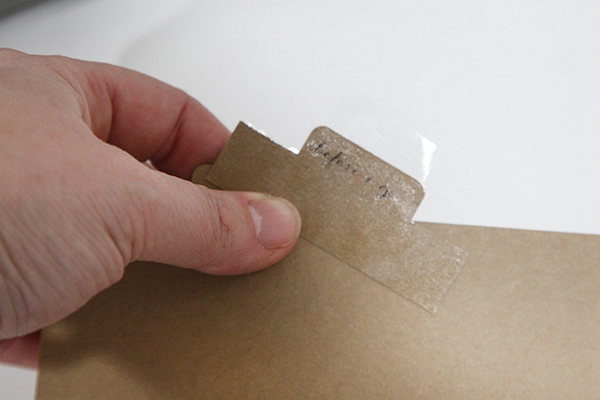
I also “laminated” the tabs with moving tape. Sturdiness is important! There’s nothing worse than having a tab break off midway through a trip or even later when your kids are handling them to look at it photos.

IMG_7066_1web

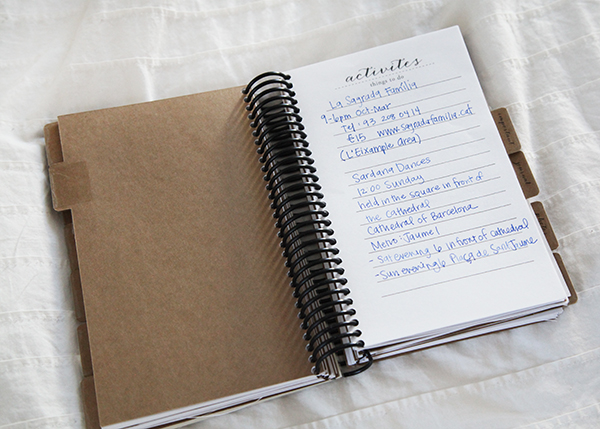
My travel albums are always dual purpose. They contain everything we are going to do, addresses, directions, places to eat, flight information, as well as a journal and a place for photos. That way I don’t have to come home from a trip and “scrapbook it.” It’s done. I staple in tickets to events, museums, and instax photos. I’ll come home and print a few and glue them into the remaining pages. Done and done.

IMG_7074_1web

IMG_7078_1web

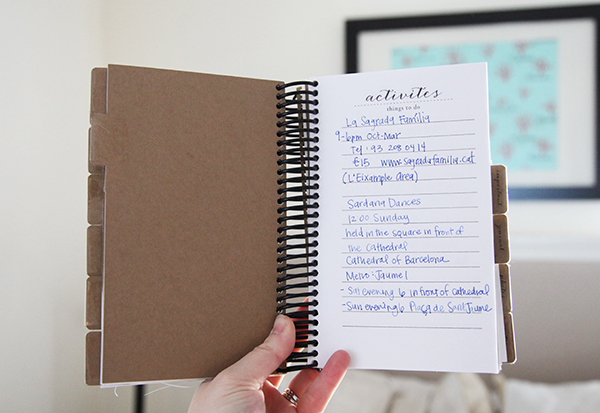
Maybe you can guess where I’m going from the activities I wrote here (wink, wink).

IMG_7097_1web


Search “BEST LITTLE ALBUM” under my Silhouette Artist name to find the entire collection of these! I promise you’ll use this one again and again!

XOXO, Carina


Silhouette Design Store JOANN Stores

Carina Gardner’s Best Little Album for Silhouette and SnapClickSuppy.com Read More »

Kids Pencil Valentine Cards

IMG_7052_1web
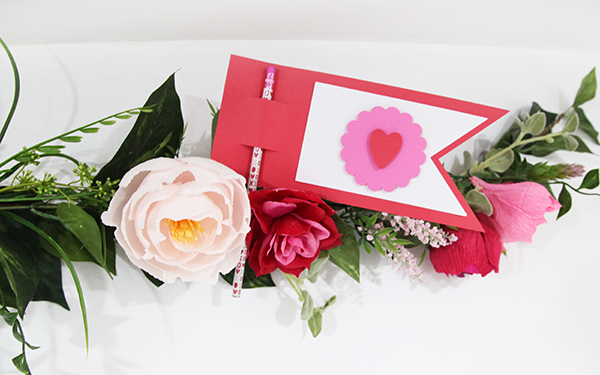
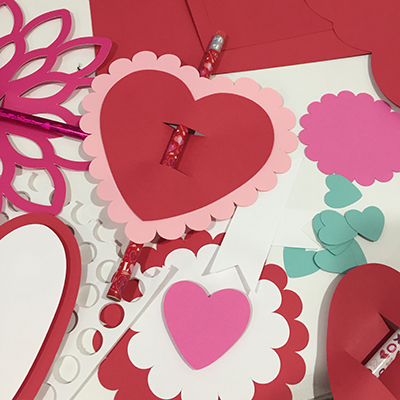
IMG_8715_webThis week is the last one I’ll be releasing Valentine’s so I’m going out with a bang!  I also decided to double dip. These pencil cards are not only my final Valentine’s release but are also Felicity’s class gifts. She’s going to write on each of them, and I’m sure we’ll add a few quotes like “I’m write for you.”
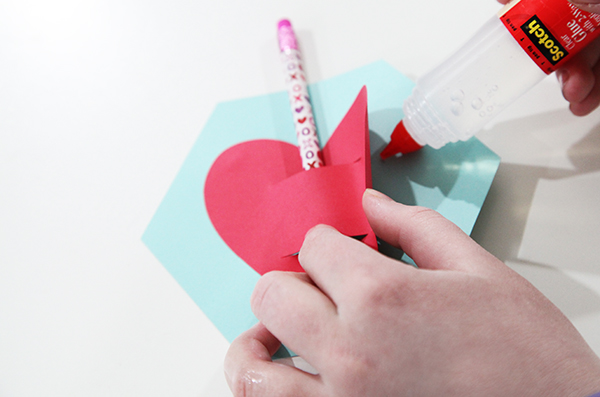
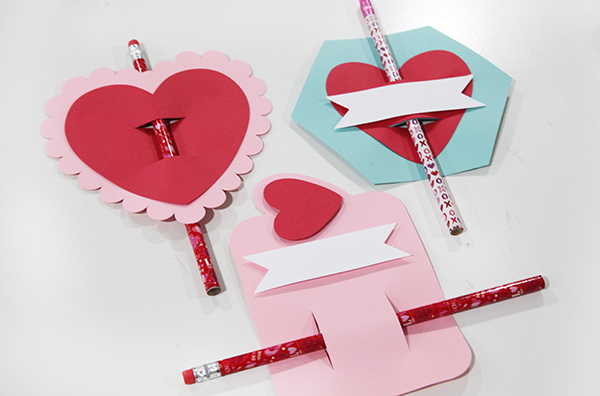
You can find them in my Silhouette shop here.

TIP 1: When you are putting these together, I recommend putting your pencil through the slits FIRST and then gluing your pieces into place (see photo below).

There are several designs were two or more papers have slits that match up. Use the slits as your guides. Place the pencil through the slits first and then pull open the edges of the top paper to glue it into place.

TIP 2: I LOVE pop dots with these designs! And glitter. And stamping ink on the edges. I kept them all simple on purpose. So you can jazz them up or use them as a kid activity.

TIP 3: Add a printable. Simply use whatever word processing software you use and write up a cute phrase in a cute font. Print, cut and attach to these Valentine’s cards!

IMG_6996_1web

And in case you missed it (haha), I’ve been releasing Valentine’s for the last month. In fact, we have been releasing Valentine’s for both CGInc. and MiniLou for the past several weeks. You can check both shops here:

Carina Gardner Silhouette Shop

MiniLou Silhouette Shop

IMG_7059_1web

Happy crafting!
Carina


Silhouette Design Store JOANN Stores

Kids Pencil Valentine Cards Read More »

Carina Gardner’s 2017 Block of the Month

I’m so excited to introduce the 2017 Block of the Month Quilt! I’ve posted the introduction to this year’s block of the month below along with the January video! As always, you will be able to access everything on my 2017 BLOCK OF THE MONTH PAGE. That page is updated monthly with all the videos and download links you need! Check out the quilt we will be making!

INTRODUCTION

MATERIALS
This is a scrappy quilt and you can make it from scraps OR purchase a fat quarter pack to cut your blocks. You can start with me in January or anywhere along the way. I am using my line Posy Garden for Riley Blake in this quilt. Download all the cutting and fabric requirements here:

https://carinagardner.com/store/?model_number=2017bomjanuary
INSTAGRAM
Want to become part of my instagram (@carinagardner) community? Sew with me every month and hashtag #carinagardner the photo of your monthly block so I can see what you are making!
January 2017 BLOCK VIDEO

Grab the JANUARY DOWNLOAD here.

Silhouette Design Store JOANN Stores

Carina Gardner’s 2017 Block of the Month Read More »

Six Carina Gardner Free Fabric Projects You Might Have Missed

I posted on instagram the other day a picture of Felicity watching my cut out fabric for my 2017 Block of the Month.  It reminded me that I wanted to put together a list of the SIX FREE FABRIC PROJECTS you might have missed.

freedownloads_carinagardner

  1. Double Ringed Pincushion Pattern (also known as the Donut Pattern!)
  2. Partridge Bird Pattern
  3. Pinfeathers Rosetta Wreath Pattern
  4. Dainty Blossoms Camera Strap Pattern
  5. Reversible Blouse & Dress Pattern
  6. Primrose Garden 18 inch Doll Quilt Pattern


Hope you get a chance to download all of these!

Happy Sewing!

XOXO- Carina

Silhouette Design Store JOANN Stores

Six Carina Gardner Free Fabric Projects You Might Have Missed Read More »

2017 Tutorial Tuesdays for 99 cents!

2017tutorialtuesday_jan3_carinagardner_iconI’m so excited to announce that this year I’m introducing a Tutorial Tuesday! Every Tuesday you will see a new 5-10 minute tutorial on one of my favorite programs (illustrator, indesign, photoshop, silhouette software), a sewing technique or some other crafty goodness.

Each tutorial will go up on Tuesdays for the introductory price of 99 cents! Isn’t that a steal of a deal? Wednesday they will go to their normal price of $2.99. So get it while it’s hot!

I’m excited for the very first tutorial, which is an Illustrator Tutorial (you know me, I can’t help teaching a little Illustrator!). I show you how to make a scalloped tag and I highlight the following things:

• The Ellipse Tool
• The Pattern Brush Tool
• Using the Fill and Stroke
• Changing colors
• Expanding Objects
• Trimming and Uniting Objects
• Arranging Objects (Front, Back, ect)
• Ungroup Objects

What you will need for this lesson:
• Illustrator CS3, CS4, CS5, CS6, or Cloud (A free month trial is available at Adobe)
• Internet access (video is streaming)

Every week will be a little different so make sure and check them all out as I release them! If you have never taken Illustrator before (or any of the other programs), it’s ALL GOOD! The tutorials are meant for every level to give you tips and tricks, get you comfortable with the software or technique, and help you in your own business, blog, or personal design endeavors.

This week only, the first tutorial will be 99 cents ALL WEEK. That’s right! Up until next week’s tutorial.

Happy learning!

Carina


Silhouette Design Store JOANN Stores

2017 Tutorial Tuesdays for 99 cents! Read More »

Interview on American Patchwork & Quilting Radio – Episode #320

american-patchwork-quilting-pocast-episode-320-carina-gardnerYesterday I was thrilled (aka nervous!) to be on American Patchwork & Quilting Radio with Pat Sloan. I didn’t get to hear the episode until late last night, but if you are the least bit interested in what I have to say about Barbie doll sewing, Posy Garden, how I got into fabric, and my glamper, go check it out here:

http://blog.patsloan.com/radio-shows/

Choose Episode 320:).

XOXO-Carina


Silhouette Design Store JOANN Stores

Interview on American Patchwork & Quilting Radio – Episode #320 Read More »

Santa’s Glitter Village SVG Tutorial for Silhouette

img_5692_edited_web

I’m SO excited about the new village I designed this year for Christmas! It’s called Santa’s Glitter Village and you can download all of it from my Silhouette shop! You can add it to any pieces you have from my original Christmas Village or build these separately! There is even a cool download showing you how I made the snowy centerpiece the either village is made on. You can use that for this village too!

img_5710_1webThis year it is all about GLITTER! I have a great tutorial for you on how you can put together below. I do NOT have individual tutorials on these houses because many of them are made THE SAME. The tutorial I have below is for the Sugar Plum Fairy’s House and most of the buildings are built in this way. There are also extra instructions below for pieces I thought you might like a little extra help with. So scroll on down to see if there is something there that will help you!

This year, the Santa Glitter Village includes: Santa’s Cottage, Candy Cane Place, a Chapel, Elf Dwelling, Reindeer Stables, Santa’s Tower, Snow Bird House, Sugar Plum Fairy’s House, Tiny Mistletoe House, and the Winter House. Many of these come with openings at the bottom for an electric tea light (or two). The smaller houses do not because a tea light would not fit:).

You can find ALL my tutorials on my main Silhouette landing page here: https://carinagardner.com/silhouette/. I noticed that when I went back to look at previous projects in the Silhouette store, that some of the links are broken. That landing page is your end all for ALL of my tutorials. You can also watch many tutorials I have filmed on my YOUTUBE channel.

I hope you have a wonderful time building Santa’s Glitter Village! Every piece is unique and sweet! I think I’m placing mine on my piano this year.

Happy crafting!

XOXO-Carina

img_5700_1web


Supplies

-Glitter (we used fine glitter, but you could use more course glitter)

-Mod Podge (we used gloss, but you could use any kind)

-foam brush

-1 piece of copy paper

-SVG card cutouts

Instructions

Note:  These instructions work for all of the houses in Santa’s Glitter Village.  At the end of the tutorial there are instructions on how to put a few of the more intricate pieces together.

1.  Cut out all SVGs provided in the file.

2.  Before putting the house together, decide which pieces you want to glitter.  I did mine on the green scallop pieces of roof, peppermint swirls, and snow.

3.  Once you have all of the glitter pieces and supplies, take a piece of copy paper and fold it in half (this makes it easier to put the extra glitter back in the jar later).  This paper will be your working surface to catch the extra glitter and Mod Podge.

4.  Next, take your foam brush and dip it in Mod Podge.  Cover any area you want glittered with a thin layer of Mod Podge.  Put the copy paper underneath to contain any Mod Podge and glitter that goes over the edge.

img_5560_web-copy

5. After the whole piece is covered in Mod Podge, take the glitter and sprinkle it over the area the Mod Podge covers.  Be very generous with the glitter so it covers everything.  Remember, you will be able to put the extra back in the container so make sure everything is covered well.

img_5564_web

6. To make sure the glitter to stays in place better, use your finger to tap the glitter lightly.  This make sure more glitter adheres to the Mod Podge.img_5569_web

7.  Wait for the Mod Podge to dry a few minutes, and tap off the excess glitter.

Tip:  If you are worried about the glitter transferring too much, you can put another layer of Mod Podge on top.  If you use gloss Mod Podge, the glitter wont lose it’s sparkle.

8.  Once you’re done with the glitter, fold the copy paper with the glitter on the inside and pour the excess back into the container.img_5573_web

9.  You’re done with the glitter, now onto how to put together the rest of the house!

10.  To put the house together, first, take the facades and glue all of the embellishments to them.

11.  Next, glue the facades to the side and front pieces.

12.  Then, glue the tabs of the back and side pieces to the tabs of the bottom.  It should form a “T” shape.

img_5576_web

13.  To make the house 3D, hot glue the tab on the side of the front piece to the side piece.  Do this for all of the tabs until you have a house shape.

img_5578_web img_5580_web

14.  After the house is done, gather your roof pieces.  Hot glue the scallop pieces to the roof piece.  Make sure you overlap each scallop piece and switch off between colors as you glue.  It’s best to estimate your spacing before your start glueing so the scallop pieces cover the roof evenly.img_5586_web

14.  Next, add the long scallop piece to the side of the roof by glueing it on the underside of the roof.

img_5590_web img_5591_web

15.  Then add the roof by glueing one side, making sure it’s centered and the top creased is lined up.

16.  The last thing to add is the chimney!  Take the chimney piece and fold it into a box shape.  Then, glue the tabs on the angled side to the roof.img_5596_web img_5597_web

Now you have the most adorable Fairy House for your Glitter Christmas Village!

img_5606_web

Here’s a few more instructions on some of the parts that are specific to each piece.

img_5649_1web

Chimney on Santa’s Cottage:

  1.  Start by folding all of the score lines.
  2.  Next, glue the tab on the long side and glue it so it makes a box.
  3.  Then, Glue the tabs on the open part to the house.

img_5627_1web

Front Door piece on Chapel:

  1. Start by adding all of the embellishments to the facade.
  2. Then, glue the facade to the front/back piece.
  3. Next, take the long bottom piece and glue the tabs to the front/back piece.
  4. Add the roof/snow like you would for the other houses.
  5. To finish, glue the front door piece to the front of the chapel.

img_5669_1_web

Reindeer Stables:

  1. Start by assembling the house.
  2. Then, take the green piece and glue it to the bottom of the house.  The green piece will cover the entire bottom of the house and then extends into a yard.
  3. Next, glue the reindeer and tree tabs to the yard area.

Silhouette Design Store JOANN Stores

Santa’s Glitter Village SVG Tutorial for Silhouette Read More »

Guest Post from Kelly of Finding Time to Create: Her Adorable Halloween Village

Hello! Kelly here from Finding Time To Create. I absolutely love making paper crafts with my Silhouette CAMEO, so I jumped at the chance to use Carina’s fun Halloween designs this season.

I used designs both from this year’s tiny Halloween village set, and from last year’s Halloween haunted village set. It was fun to mix and match the two sets.

halloween-village-finding-time-to-create

[photo: Halloween Village – Finding Time To Create]

I wanted these to catch your attention in the dark, so I made a couple of the houses with materials that would really pop when it’s dark.

I used vellum as my base for the spider house, which has an opening in the bottom for a battery-operated tea light. That spider on the door looks pretty creepy, don’t you think?

spider-house-night-finding-time-to-create

[photo: Spider house night – Finding Time To Create]

On the tiny village haunted house, I backed the windows with glow-in-the-dark sticker paper. It really makes those windows pop! (This house was my kids’ favorite.)

glow-in-the-dark-sticker-paper-and-glitter-heat-transfer-accents-finding-time-to-create

[photo: Glow in the dark sticker paper and glitter heat transfer accents – Finding Time To Create]

tiny-village-haunted-house-night-finding-time-to-create

[photo: Tiny village haunted house – night – Finding Time To Create]

Glitter makes every paper craft better, so I also used glitter paper for some of the rooftops, and glitter heat transfer for the spider web and some window frames.

spider-house-day-finding-time-to-create

[photo: Spider house day – Finding Time To Create]

You may also notice I cut all the ghosts from vellum, and added a few cats from the cat house throughout the set.

This was such a fun project to make! Thanks for letting me share it with you!

More pictures:

Halloween haunted village – Spooky cemetery and Tiny Halloween village – Haunted tree

cemetery-finding-time-to-create

[photo: Cemetery – Finding Time To Create]

Bitty bat house

bitty-bat-house-finding-time-to-create

[photo: Bitty bat house – Finding Time To Create]

Halloween haunted village – Cat house

cat-house-finding-time-to-create

[photo: Cat house – Finding Time To Create]

Halloween haunted village – Ghost mansion

haunted-mansion-finding-time-to-create

[photo: Haunted mansion – Finding Time To Create]

Tiny Halloween village – Lil graveyard

lil-graveyard-day-and-night-finding-time-to-create


A huge thank you to Kelly for being on my blog and showing us how she put together her Halloween village! It turned out beautiful!

XOXO-Carina

Silhouette Design Store JOANN Stores

Guest Post from Kelly of Finding Time to Create: Her Adorable Halloween Village Read More »

Box Card SVG Tutorial for Silhouette

img_4897_webThese adorable box card were released in my Silhouette shop this week!  They are so fun to give and receive.  You can write an note on them or give them with a present.  They fold flat and fit in an A2 envelope so you can mail them easily.  They’re pretty simple to put together, and so fun to give!  Below is the tutorial for how to put them together.

There are several designs hitting the store for these so be sure to always search MiniLou and box cards!

Instructions for putting together Foldable Box Cards

1. Cut out all SVGs provided in the file. Glue on all the accessories to the box as indicated in the photo.

img_4875_web

2. Then, to make the core body of the box, fold the box together, and glue the tab on the inside and fold the flaps down.

img_4878_web

3. Next, Take the inserts and fold them into a “Z” shape.  Fold one tab backwards and one tab forward.

img_4882_web

4.  To attach the inserts, use a glue stick for the tabs and place it in the box without sticking the tabs to the sides.  When you are gluing the tabs, make sure to keep it in the “Z” shape, so each tab has glue on the opposite sides of each other.

img_4885_webimg_4886_web

5.  When you have the insert where you want it, fold the box flat so the tabs attach.  Make sure the top and bottom line up as you do this.

img_4887_webimg_4889_web

6.  Next, glue the second tab on the same way.

img_4891_web

7.  Add any embellishments, and you’ve got an adorable card to put in the mail!img_4893_web

Happy Crafting!

Carina

img_4897_web

Silhouette Design Store JOANN Stores

Box Card SVG Tutorial for Silhouette Read More »

Halloween Boo Marquee Letters Tutorial

img_4593_web

This week I released these fun BOO marquee letters on Silhouette!  They take some time to put together, but are so worth it!  They are similar to my original marquee letters, but have more decorative element to make them fun for Halloween.  Click here if you want a tutorial on how to put the letter part together.  You can see how to put together the festive Halloween pieces below.  Happy crafting!

1.Cut out all SVGS.  We did the letters in black, and the other pieces in fun Halloween scrapbook paper.

2.  For instructions on putting the letter together, click here.

3.  Once your black letter piece is put together, pop dot the back of the flat letter piece and place it in the letter.

img_4408_web

4.  After the flat letter piece is placed in the letter.  Add the skinnier, flat letter pieces to the letter using pop dots.img_4418_web

5.  Once the letter part is done, add the fringe to the outside.  Before you start glueing, make sure you know where the fringe pieces fit.  Then hot glue down the center to attach it to the outside of the letter.  Make sure not to glue the fringe to the letter because you want to be able to bend it up.

6.  After all of the fringe pieces are glued down, bend the fringe pieces up.

img_4602_web

That’s all there is to making the BOO marquee letters!  Hope you have a much fun making Halloween decorations as I have!

Silhouette Design Store JOANN Stores

Halloween Boo Marquee Letters Tutorial Read More »

31 Days of Halloween Album Tutorial for Silhouette

Halloween is almost here!  I made some fun 31 days of Halloween albums to document everything going on in October.  Each album comes with the cover and details, three binding pieces, pages (one with score marks and one without depending on how flexible you want your album to be), a mat for photos, and a piece the size of a photo (to use for journaling).  You can also get the numbers and layouts if you want to accessorize your album!

img_4362_in_web

If you want to put pictures in the albums, here is some info on the measurements:
-The skull and cross bone and bat albums are 5 x 8 and fit a horizontal 4 x 6 photo.
-The black cat album is 6 x 6 and fits a square 4 x 4 photo or a 4 in. x 5 in. photo.
-The pumpkin and spider albums are 6 x 7 and fit a vertical 4 x 6 photo.


Here’s the tutorial on how to put these albums together:

  1. Cut out all SVGS.  We used some fun scrapbook paper for the binding to add some Halloween flare.
  2. Put together the details on the cover.  You can use pop dots to give it some fun dimension.
  3. Next, take the cover and glue it to the binding piece.  The edge of the cover should go to the score line.  img_4326_web
  4. Next, glue the scalloped half of the inside binding piece to the back side of the cover.  The score lines should match.  Leave the side with the page holes free so you can use it to attach the pages later.    img_4330_web
  5. Do Steps 3 and 4 again for the back cover.img_4332_web
  6. Now that you have the cover done, take the pages and align the holes together.  Use a ribbon to secure them into the holes.  img_4333_web

That’s all there is to these adorable Halloween albums!  Now you can add your pictures and memories for the 31 days of Halloween!

Happy Crafting!

img_4337_web


Silhouette Design Store JOANN Stores

31 Days of Halloween Album Tutorial for Silhouette Read More »

Tiny Halloween Village Tutorial for Silhouette

img_4151_instagram_webI know it’s early September but Halloween is around the corner and I know I’m gearing up for some serious decorating. I’m releasing a Tiny Halloween Village, this week on Silhouette. I think you will love it, especially if you did last year’s Halloween Village. Yes, All the pieces in the new set WORK WITH the Halloween village from last year! So mix and match!

This set (as the name suggests) is a little smaller. Why you ask? Because it all fits neatly on 8.5 in. x 11 in. paper! Yep! No sizing down for the Silhouette Portrait users! Hooray!

I have a new video with the tutorial of how to put together each of these new Tiny Halloween pieces here!

Silhouette Design Store JOANN Stores

Tiny Halloween Village Tutorial for Silhouette Read More »

3D Ice-Cream Treat SVG tutorials for Silhouette and Digital Diecutting

I love summer and all of the treats that come with it! These 3D Ice-cream treats are so cute and wonderful. There are a few different kinds of popsicles, an ice cream sandwich, and a cute candy favor box.  You can get them in my store and on Silhouette on Monday. Check out these tutorials for help in putting them together.

Silhouette Design Store JOANN Stores

3D Ice-Cream Treat SVG tutorials for Silhouette and Digital Diecutting Read More »

Posy Garden Blog Hop & PreSale of Simply Modern Patchwork Quilts

PosyGardenSewingProjects_2_stroke_smToday is the start of our wonderful BlogHop with Riley Blake Designs for my new collection Posy Garden! I can’t wait for you to see all the amazing goodness that is about to be unveiled over the next two weeks! It’s going to be awesome!

Along with that! My new (and first!) eBook called Simply Modern Patchwork Quilts goes on presale today! Eeek! I’m so excited! It will release on August 15th in the Kindle Store on Amazon. I’ll add links here as soon as the presale goes live! I know we are doing a HEFTY discount for the presale so keep your eyes open for it!

***NOTE: It’s on PRESALE NOW! Go to Amazon to purchase it here. The presale price is $4.99. which is 50% off the regular price of $9.99 through AUGUST 15th when it becomes available! That’s less than 50 cents per pattern! Make sure and grab it during the presale period!

There are also four contributing pattern designers to the book including Amy Webb, Amanda Neiderhauser, Christine Cook, and Angie Tackett! These ladies did a fabulous job and I can’t wait for you to see what they have done!

As for the Bloghop, here is the list you are going to want to visit everyday! Come back to this post to link over to these ladies blogs!

I’ll also be reposting their projects over the next two weeks on instagram if you want to follow over there.06_gardenpatchquilt

Okay, here’s the amazing line up!

Monday, August 1st: My Sewing Haven with Carla Peicheff

Tuesday, August 2nd Happy Little Cottage with Debbie Homick

Tuesday, August 2nd The Family Hearth with Bridgette McNay

Wednesday, August 3rd Fort Worth Fabric Studio with Lindsey Weight

Wednesday, August 3rd Happy Quilting Melissa with Melissa Corry

Thursday, August 4th Pretty By Hand with Kristyne Czepuryk

Thursday, August 4th Out of the Blue with Sondra Davison

Friday, August 5th Samelia’s Mom with Anorina Morris

Friday, August 5th Free Time Frolics with Adrienne Woods

Monday, August 8th Flamingo Toes with Bev McCullough

Monday, August 8th Silly Mama Quilts with Brooke Sellmann

Tuesday, August 9th Snickerdoodle Stew with Jessica Stewart

Tuesday, August 9th A Little Patchwork with Ange Hamilton

Wednesday, August 10th Ameroonie Designs with Amy Chappell

Thursday, August 11th One Little Pooh with Tina

Thursday, August 11th Jedi Craft Girl with Amanda Neiderhauser

Friday, August 12th Stitching Revival with Christine Cook

I’m so excited to see all their amazing projects! It’s going to keep myself from sewing all week!

Carina

Psst! If you are in Utah, make sure to come visit me at Elaine’s Quilt shop this weekend on August 6th! I’m teaching a free class in the morning and the Clean Star Quilt in the afternoon. My glamper will also be there to tour all day!


Silhouette Design Store JOANN Stores

Posy Garden Blog Hop & PreSale of Simply Modern Patchwork Quilts Read More »

Wedding Props and Tealight Candle holder SVGS for Silhouette and Digital Diecutting

It’s party and wedding season!  Both of my SVG releases are wedding or party related.  You can find them in my Silhouette Store here.  This week I have tealight candle holders that you can use for decoration or center pieces.  I used translucent binding cover that you can get at your local office supply store for the windows.  They’re super simple and easy to cut out and all you need is a battery powered tealight to put in it.  They look great by them selves or with other decorations for a center piece.

Untitled-15


I also released wedding props that you can use for a photo booth at a wedding or other party.  Aren’t the mustaches fun? These are also easy to cut out.  Just attach them to a wooden dowel with hot glue or tape and you’re ready to take pictures!

Untitled-2


Happy Crafting!

Silhouette Design Store JOANN Stores

Wedding Props and Tealight Candle holder SVGS for Silhouette and Digital Diecutting Read More »

Stacked Pillowbox and Flower Ball SVGS for Silhouette and Digital Diecutting and 40% off SVG this Weekend!

This is the first week we are releasing our SVG files in bundles here before they are released in the Silhouette Store!  That’s right, you can get them early!  This week’s releases are in the store right now.  We are also doing a 40% off SVG sale this weekend only.  Now through Sunday you can get 40% off all SVGS!  This week we released sets of Stacked Pillowboxes and Flower Spheres!

5 sided pillowbox

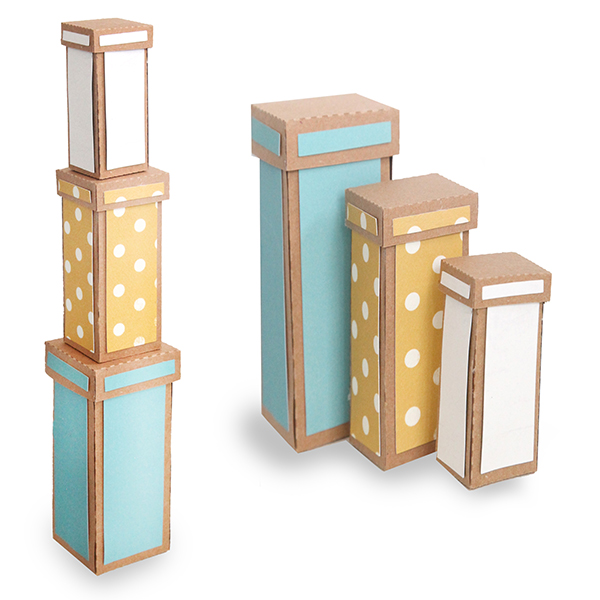
These Stacked Pillowboxes, found in my shop here and here, are perfect for small gifts or as favor boxes for your next party.  There’s a triangle, square, pentagon, and hexagon shape set.  They’re simple to cut out and put together!  You can also decorate them with your favorite scrapbook paper.  We tied our up with twine for a cute package set!  lilly Ball

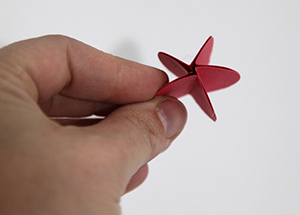
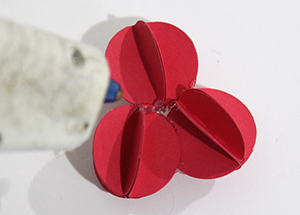
Flower Spheres are super versatile project that go together without any glue!  Each pieces has slits that slide together to create a sphere.  These flower balls are a fun decoration for a room or party.  We made ours with three different colors to give it a fun ombre vibe.  You could also use patterned paper or glue other decorations onto them.  Here are some short instructions to go with the video:

  1. Cut 12 of the shapes on your machine
  2. slip the pieces together using the slots on the sides of the shape.
  3. (Optional) add a string if you are interested in hanging your flower ball.


Silhouette Design Store JOANN Stores

Stacked Pillowbox and Flower Ball SVGS for Silhouette and Digital Diecutting and 40% off SVG this Weekend! Read More »

Join Carina Gardner August 6, 2016 at Elaine’s Quilt Block in Salt Lake City

IMG_3070_1_webThat’s right! I’m going to be at Elaine’s Quilt Block! Put Saturday, August 6, 2016 on your calendar because I am pulling in my glamper and teaching classes! Here’s what is happening!

When: SATURDAY, AUGUST 6, 2016
Where: ELAINE’S QUILT BLOCK
6970 S 3000 E
Salt Lake City, UT 84121
What: Classes, Glamper Walk Through, Kits, and Raffles!
Class Times: 10am-12pm Modern Granny Square Pillow or Mini Quilt (Shown below)
1pm-3pm Clean Star Quilt (shown in the pic to the left)

Here’s the deal on classes: There is a Posy Garden Kit you will need to buy from Elaine’s for each of the classes. There is a class cost that I believe will be $24.99. I will have raffles sponsored from Riley Blake and I will be making a grand prize for someone to win at the end of the day. Be sure to check Elaine’s Quilt Block for registration and more information on this!

Raffles will be happening throughout the day. I know there will be some cool things happening to enter into that (more on that on instagram!).

The glamper will be set up like we had it for Quilt Market.


IMG_3043_1_eq_web

I hope you will come join me because we are going to have a wonderful time! I’m so excited to launch Posy Garden.

See you at Elaine’s!
Carina


Silhouette Design Store JOANN Stores

Join Carina Gardner August 6, 2016 at Elaine’s Quilt Block in Salt Lake City Read More »

Fairy and Butterfly Bottles

I have been loving these Fairy Jars.  There’s something magical about them.  They might look a little intimidating to make, but trust me, they’re pretty simple.  All you need is transparent paper, which you can get it at your local office supply store.  The transparent paper makes up the jar part, and the rest is regular paper.  To put it together, all I used was hot glue.  Watch the video tutorial for more help on putting it together.  Happy crafting!


Silhouette Design Store JOANN Stores

Fairy and Butterfly Bottles Read More »

4th of July Stars & Sparklers Explosion box

I ADORE 4th of July! That is why I made a ton of 4th of July stuff for my Silhouette Shop and the Bundle shop this week (well, that and I promised my church I would provide the 4th of July centerpieces for the Holiday Breakfast). I have a bunch of new Mini Episodes for you to watch how I put these together. This one is the Star Explosion Box.
Enjoy!
Carina

Silhouette Design Store JOANN Stores

4th of July Stars & Sparklers Explosion box Read More »

Motion SVG Cards for Silhouette and Digital Diecutting Files

These motion card are put together like most folding cards the little piece that moves in the card is attached by using a 1/4” inch pop dot.

Instructions:

1. Cut all pieces and assemble all Parts that attach to the card.
2. Assemble the portion of the card that will move around.
3. place a 1/4” pop dot on to the back of the movable piece.
4. push the pop dot through the slot in the card.
5. Attach one of the circles to the back of the pop dot. (at this point your motion piece should be attached)
6. Take the second circle (the one with the dashed score line in it) and fold it in half. Now glue half of it to the circle on the back of the pop dot. (this gives it a little bit of a handle so its easer to make the motion piece move.)


Silhouette Design Store JOANN Stores

Motion SVG Cards for Silhouette and Digital Diecutting Files Read More »

Accordion Folded SVG Cards for Silhouette and Digital Diecutting Files

This cards are great and can be used for gifts as well as or little standup albums .

The steps to making these cards are:

  1. Cut out all the cards that you want to chain together
  2. Glue the elements onto the inner portion of the card
  3. After you have all the elements glued down. glue the borders onto the frame that goes along the out side
  4. Take the long tab and glue it the it to the next card in the chain and repeat until you have the desired amount chained
  5. Fold back and forth along the score lines
  6. Now take the tabs or tab on the inner card and glue it to the the next inner card.
  7. Make sure you pass through the frames (don’t try to go outside the frames)
  8. Now you can fold up your card and give it to someone, or you can put it on display.
  9. Note that if you are folding the card. It will only fold in one way. if it doesn’t seem to be folding together better tray folding the inner cards the same as the outer cards.
  10. Watch the videos so you can see how we put our cards together.


Silhouette Design Store JOANN Stores

Accordion Folded SVG Cards for Silhouette and Digital Diecutting Files Read More »

Offset Tool Tutorial in Illustrator

I LOVE the Off Set Tool in Illustrator. It’s fast and easy to use. Best of all, it has so many applications for use. I like it when I am creating dielines for stickers or diecuts. I also adore it for anything that needs a bleed. It works like a charm for nested objects. Take a look and hopefully it will be useful to you as well!

Mini Episode 3: Offset Tool in Illustrator

Silhouette Design Store JOANN Stores

Offset Tool Tutorial in Illustrator Read More »

2016 Quilt Market Recap in Salt Lake City

IMG_3728 I’m still decompressing a bit from market. In fact, when we finished and pulled the entire double booth down, I looked through my photos on my phone and realized that I had been so busy, I hardly took ANY pictures. WHHHAAAT? Whoops.

In the end, you’ll have to visit the hastag #carinaglamps on instagram to see all the going ons that happened in my booth over the course of the three glorious days at Quilt Market 2016 in Salt Lake City.

First off, a story. My glamper was suppose to go in before all the pipe and drape went up in the convention center.

Ya. They forgot about me. When I called the Tuesday before set up, they realized their mistake. So I pulled it in at 8am Wednesday before everyone else came to set up (important since we didn’t want to drive over anyone else and their booths). One of the dock workers pulled it into the Salt Palace for me since exhibitors were technically not allowed in yet. All good.

A bit later, a DIFFERENT dock worker came and asked me if I wanted the door facing out. I’m not sure what the expression on my face was, but I can tell you I was extremely puzzled and confused. I think I mumbled a, “Um, yes? I mean, I want people to actually go INTO it.” Apparently, they had pulled the glamper in BACKWARDS with the door facing the inside of the booth (as in, no one would be able to actually get into it). I believe I heard the dock worker mumble something along the lines of, “I told those idiots that.” as he ran in to the scene of the crime.

Needless to say, they fixed it. I’m not sure how well my booth would have gone over if no one was able to actually go into it to see all the pretty Posy Garden fabric (heehee!).

Because I didn’t leave my booth much, I only have highlights for you. Maybe the biggest highlight (for me) was that the booth won the Creativity Award. I was SO honored! I hadn’t thought about booth awards and I felt grateful to get one. (Photos below: Left—Creativity Booth Award; Right: Baby Coco visits the glamper)

quiltmarket1

(Photo below: Left—I spent a lot of time on the chalkboards for this booth; Right—First day of the show.)

quiltmarket2

Most of my double booth was taken up by the glamper (which is about 10′ Wide and 17′ in Length), but we also had a fun section of MiniLou at the front and a section in the back for patterns and block of the month. And that darling sign above (the white one with my logo on it) was made by my sister who has a darling etsy shop: https://www.etsy.com/shop/SKWoodDesigns. She also made the MiniLou one below. (Photos below: Left—this was taken by @emmalinebags; Right—MiniLou).

quiltmarket3

I wish I could take credit for all the wonderful sewing in the glamper, but I can’t. I had some fabulous sewers put together many of the projects in the booth. A big thank you to @stitchingrevival Christine Cook, @quiltstorymeg Megan, @mystitchstory Angie Tackett, @amylouwhosews Amy Webb, @farmwifejournal Cherilyn Dunn, @diaryofaquilter Amy Smart 20.2, @jedicraftgirl Amanda Neiderhauser and @happylittlecottage1 Debbie Homick. They made wonderful minis for the glamper.

(Photos below: Left—Amy Smart shows off her mini; Right—Flying Geese Pillow and Garden Patch Quilt I made using my Posy Garden fabric).

quiltmarket4

(Photos below: Amanda Niederhauser and her mini; Christine Cook and her mini).

quiltmarket5

Last but not least, my mom came into town and helped with my kids, sewing, and cleaning to get me ready for market. She sewed all the curtains, cushions, and gulp, the piping for all the pillows. Did I mention I HATE doing the piping. Ya, she saved me!

(Photos below: Left—Minilou was all the rage at market!; Right—My mom and me at the Chinese bash we threw after market.—That’s my I-am-happy-it-is-all-over-with smile-wink, wink.).

quiltmarket6

It was so fun to catch up with new and old friends. The photos below include Heather Spurlock who works at Elaine’s Quilt Shop (BTW the glamper will be there with classes in August! Stay tuned!) and Deanna Hartvigsen who used to be with Mormon Handicraft but has since retired. Deanna is a dear friend and recently has gone through several rounds of chemotherapy. I couldn’t have been more glad to see her!

quiltmarket7

The photo to the left is of MOST of the Riley Blake designers. A few of the designers were missing in this shot.

The other photo is of Josh and I dressed up for the Riley Blake 80’s party. Anybody want to guess at Josh’s movie reference?

quiltmarket8

Any that’s the wrap up! It’s always such a treat to be part of the Riley Blake team and I can’t wait for Posy Garden to hit a store near you! Hopefully, I’ll have the swatch book up for it soon!

XOXO, Carina

Silhouette Design Store JOANN Stores

2016 Quilt Market Recap in Salt Lake City Read More »

Shadow Box Sliding Card

I’m still recovering from Quilt Market and I’m hoping to have photos up by Thursday! We had a great show and I can’t wait to tell you all about it. For now, I’ve added my shadow box to the Mini Episodes! We have been making so many gorgeous little videos of the new Carina Gardner and MiniLou products coming out in our Bundle Shop and in the Silhouette shops. You’ll see them premier on instagram so check it all out there!

XOXO-Carina

Silhouette Design Store JOANN Stores

Shadow Box Sliding Card Read More »

Almost there! Quilt Market Starts tomorrow!

IMG_2081_1_1+webTomorrow is the kick off of Quilt Market. Earlier this week, Felicity and I were part of the runway show at Riley Blake’s Retail Fabric Extravaganza. I also did a drop for Riley Blake’s awesome Fabric is Fun 60 days of giveaways that has been going on.

On Wednesday my team and I installed the glamper into the Salt Palace and finished setting up the booth. (We are in Booth #2031 BTW! Come by if you are here). Today I have a Schoolhouse and I’ll be selling MiniLou at Sample Spree.

It’s been a tough few weeks finishing up our mid year launch of products for MiniLou and finishing everything I needed done before Quilt Market. There’s a lot more that goes into Quilt Market than just the sewing (although that takes up a lot of the time!). Organizing other quilters to make projects, ordering catalogs, designing new business cards, ordering flooring/lighting/walls, and getting babysitting are just a few of the things that were on my to-do list.

IMG_2139_instagramwebSpeaking of babysitting, my mom was in for the save. She showed up last Saturday and has helped me sew, watch kids, cook, and clean this whole week. Such a blessing! That kind of help is priceless and I owe you one, Mom!

Quilt Market Summary will be up sometime soon!

XOXO-Carina

(Photo above is my Perfect Hexagon Quilt Sewing Pattern in my Posy Garden fabric line available in quilt stores July 2016. Photo to the left was made by Megan Jimenez of @quiltstorymeg)


Silhouette Design Store JOANN Stores

Almost there! Quilt Market Starts tomorrow! Read More »

Mini Episodes on the CGTV Channel & Clipping Mask Tutorial

So I had a blog fail last week and didn’t write a bit. Getting myself on a schedule for this might be harder than I thought.  Today I wanted to introduce you to our new Mini Episodes on the CGTV Channel. They have their own page now (click on CGTV then Mini Episodes) and you’ll see all of the videos I have that are 1 minute or less. I have a new instagram (@carinagardnerpapercrafts) that sort of inspired me to make this new line of episodes. I have several small videos that didn’t have a place to live, including periscopes, quilt tops, tutorials, ect. On this new instagram feed I am trying to do several of my SVG tutorials in this method so you can see how I make them. Because I needed a place for these (and they didn’t fit into the regular CGTV Channel), we created the “mini episodes.” I’m still in the process of uploading some of the older mini episodes to this page so keep an eye out for that.

To kick things off, I have a new tutorial for you! I have a short little video showing you the power and simplicity of Clipping Masks in Photoshop. I hope you enjoy!

Mini Episode 2

XOXO, Carina

Silhouette Design Store JOANN Stores

Mini Episodes on the CGTV Channel & Clipping Mask Tutorial Read More »

Last Minute Projects for Mother’s Day

IMG_4595_instagram_webIt might FEEL too late to throw something together for Mother’s Day but it really isn’t. Sometimes I think we get caught up in putting together something REALLY fabulous or REALLY intricate and while that is great once in a while, I think it’s just as appreciated to put together a simple card or pillow box (with a gift card in it for extra ease!).

This year is one of the first years I’ll be with my mom ON Mother’s Day (she’s flying in!). And she KNOWS it’s a busy time of year for me and there is a good chance I’m not going to have time to shop for that incredibly thoughtful gift (she’s also incredibly easy going about gifts).

Because of this, I’m going to be giving her a stack of fabric (something she will definitely use) and maybe something sweet to send home with her. And time. I’m going to really try and spend some time with her.

I know what types of things, I want from my kids…hugs, kisses, maybe a chance to put up my feet instead of cleaning the kitchen (let’s be honest, I wish for that everyday). But mostly I want time. It goes quickly, doesn’t it?

floralpillowbox

I love a little pillowbox with a giftcard in it. Thoughtful but easy.

Mothers-Day-Card-and-Gift-TagI also have a Mother’s Day bundle in our SVG shop (for all types of cutting machines) that makes me pretty happy! Laura from LaurasCraftyLife made the sweetest gift and tutorial for Cricut users on how to put these projects together. Check it out if you have a chance! The shadow box card takes a moment to put together but everything else requires a couple of cuts and then you are off to the races!

Hope you are prepping for a fabulous Mother’s Day!

XOXO-Carina

Silhouette Design Store JOANN Stores

Last Minute Projects for Mother’s Day Read More »

Posy Garden Mini Quilts for the Glamper

2016-04-28 22.38.56_instagram_webThis little thing called Quilt Market has taken over my life. For the next two weeks, I will be cutting, sewing, tucking, and painting (yes, painting!) to get everything ready for Quilt Market.

For those of you who do not know what Quilt Market is, it is a tradeshow for retailers to purchase the new fabric lines coming out. It is twice a year and this spring, it happens to be in Salt Lake. If you are REALLY curious about what Quilt Market is like, you can check out the video I did of several booths in Portland 2013. Skip through to see the different booths (there are a lot!).

Anyway, I have some sneaky peeks of some of the mini quilts that have been arriving for the glamper.  Because this Quilt Market is in Salt Lake, I have the awesome opportunity to feature the glamper in my booth!

(The photo above is a mini made by Debbie of @HappyLittleCottage1).

2016-04-28 22.27.41_instagram_web

This darling little bike one is made by Cherilyn of @FarmWifeJournal. All the little hand stitching is SO sweet!

Most of these mini’s will be placed on the cabinets of the glamper for the show. We’ll also use them in a glamper stop we are doing at Elaine’s Quilt Shop a little later in the summer when my new fabric line Posy Garden is released (Right now we are using digital prints and strike offs!).

2016-04-28 22.27.31_instagram_web

This one was made by Amy of @AmyLouWhoSews….little twinkling stars! Love!

2016-04-28 22.39.31_instagram_web

The beauty above was made by Angie of @MyStitchStory. Love the little hand sewing of the stems of these flowers.

miniglamper

This little flower mini was made by Amanda of @JediCraftGirl. I love how well this one features all of the fabrics in the Posy Garden fabric collection!

posygarden_stitchingrevival

How about the sweetness (and awesome machine quilting?) done by Christine of @StitchingRevival.

I have a couple more that we haven’t photographed yet, so you’ll just have to wait on those. But what a fabulous sneak peek, right?

Happy Sewing!

Carina


Silhouette Design Store JOANN Stores

Posy Garden Mini Quilts for the Glamper Read More »

Perfect Hexagon Quilt

IMG_9844_1_instagram_webThis is one of those quilts that started MONTHS back…actually when I was in Dallas at a tradeshow for MiniLou. I accepted to teach at the Sew Simply Stitched Retreat and needed to come up with a couple of projects to teach. I love hexagon quilts, and I ADORE all of those gorgeous English Paper Pieced Hexis so naturally one of my projects turned into this Perfect Hexagon Quilt.

FINALLY, this April I released the pattern in my shop. Y-seams can be a little daunting so after teaching it at the retreat, I decided to make a video tutorial that went along with the pattern. This is the first pattern I have done this for—a private video that comes with the purchase of the pattern. Cool, huh?

I’m hoping people like it so that I can make more of these types of videos! (The video below I originally did for my instagram feed. It was so fun I decided to add it here! This is the Perfect Hexagon Quilt done in my new Posy Garden fabric that should arrive July 2016!)

IMG_9670_instagram_web

I’ve made two versions of this quilt now. I’m really excited about the one I made in my new line Posy Garden that I’ll be showcasing at Spring Quilt Market (that is in the video above).

The other quilt is done in Apricot and Persimmon. It’s been a really versatile fabric line and I’d loved everything I have made with it.

The photo to the left captures a look at what a lot of my afternoons look like. Kids doing homework while mom tries work out how to get the fabric to do what she wants:).

Want to learn more about the Hexi Pattern and video? Check it out below:

Now, I’m off to cello lessons tonight and ready for Friday to kick off the weekend! Lots of Posy Garden sewing for me these next couple of days! I’ll try to sneak in some fun pictures of the progress on the glamper next week!

XOXO-Carina

Silhouette Design Store JOANN Stores

Perfect Hexagon Quilt Read More »

Back to Blogging

IMG_1156_1_instagram_webHi guys! A week ago I attended SNAP (which was amazing, BTW) and I was so INSPIRED by all the gorgeous work everyone was doing, that I really sat down and tried to work out what I needed to be doing better. Blogging was a top priority on my list—along with fixing my email newsletter and a million other little things that you tend to let slip when you are busy running two companies and a family.

Because I know myself, I’ve decided to force myself to keep you up-to-date with blogposts twice a week on Tuesdays and Thursdays. Yes, it is not very spontaneous, but I’m finding if I don’t build a system to make it happen, it doesn’t. And I hope you guys will like hearing more about what we are doing at CGInc.

So here I am blogging.

Among my April-New-Year’s-Resolutions (since I have already stopped doing all the ones I made up in January, haha) is to also fix my email list (equally as deficient as the blogging). For those of you who were on my main list, you’ll note that we basically sent out a single monthly newsletter with EVERYTHING new from the month. It was fun and informative but A LOT of information at ONE go. And things ALWAYS got skipped over. It was simply too much stuff.

So the newsletter went on the chopping block.

NOW, if you join the newsletter, you can choose a group. This is so you can only get information on the hobbies you like most that I design for. I am send out a weekly newsletter for the sewing and svg/paper folks and a bi monthly newsletter for the class folks.  My first newsletters for this went out today! Hooray for getting organized!

This has been a long time coming. And what’s more, even if you belonged to the old newsletter list, you will need to resubscribe to these new lists. I sent out an email to everyone allowing them to add themselves to the new lists but if you didn’t get it, you can add yourself below.

You can choose your newsletter type here: GET THE NEWSLETTER & FREE DOWNLOAD.

OKay, so now you’ve heard my spiel on blogging and newsletters. Looking forward to seeing you more often!

Hugs- Carina

Silhouette Design Store JOANN Stores

Back to Blogging Read More »

CarinaGardner.com Now Has Diecutting File Bundles!

homebanner_32016_svg

So after weeks of my production assistant and designer telling me it was TIME, I finally gave in and we are hosting bundles of SVG files on our site! This is a bit of a leap of faith on my part. I’m so hopeful that you will like what we have done and those of you with different types of machines (other than a Silhouette) have access to my designs!

So here is the deal: Each of our file sets include an svg file that works with most softwares & the Silhouette Designer Software AND it includes a studio file for the free Silhouette Software. In our descriptions, we have linked instructions, our private facebook groups, and added video tutorials so you can watch instructions DIRECTLY in the instructions. How cool is that?

And the best part is that we are doing a 35% off sale THIS MONTH ONLY to kick everything up! Want to get even more off? Join our private facebook group who get their own coupon codes and our newsletter who also get separate coupon codes.

Everyday, the team is uploading new bundles to the site so that you have access to all of my SVGS as well as MiniLou’s SVGs. Now all your cutting and crafting is easier than ever! Go check it out!

XOXO-Carina

Silhouette Design Store JOANN Stores

CarinaGardner.com Now Has Diecutting File Bundles! Read More »