Sewing Summit’s Quilt Shop Hop today (which by the way was awesome!), I ran over to Brandon’s to check out the official renovation list. As per request from the Part 1 comments, here’s the abbreviated list I am having him work on. He gave me a invoice that separates out labor and cost of parts. I love that because it gives me a good idea of what I am really paying for. We are hoping the trailer will be done in a month, but I suspect it will be more like 6 weeks.
So far I am about $800 over budget but I know there are things I haven’t compensated for. Plus I haven’t calculated in any of MY costs for beautifying this baby (paint, fabric, light fixtures).
-Install new Fridge
-Remove and replace Water Heater (Atwood 6 Gallon Gas Water Heater)
-Replace fresh water tank (24 Gallon)
-Remove and install new toilet and fittings
-Install new water pump
-Install new battery (12 Volt Marine Deep Cycle Battery)
-Remove Rotten Floor including Bathroom Floor
-Install Inverter/Charger (Progressive Dynamics 45 AMPS)
-Install Propane Tank (2, 5 Gal tanks)
-Remove rotten material for fridge and rebuild
-Replace trailer cable,
-Repack hubs and bearing inspection
-Power check, shoe inspection, axle inspection
You can see these are not exactly little things. And it doesn’t include the possibility of replacing a ceiling panel, ceiling vent/fan, and putting in the flooring for me. I can’t imagine doing all of those things myself so I’m grateful to have Brandon. The last thing you want on happy-family-mini-vaca is for everything to breakdown.
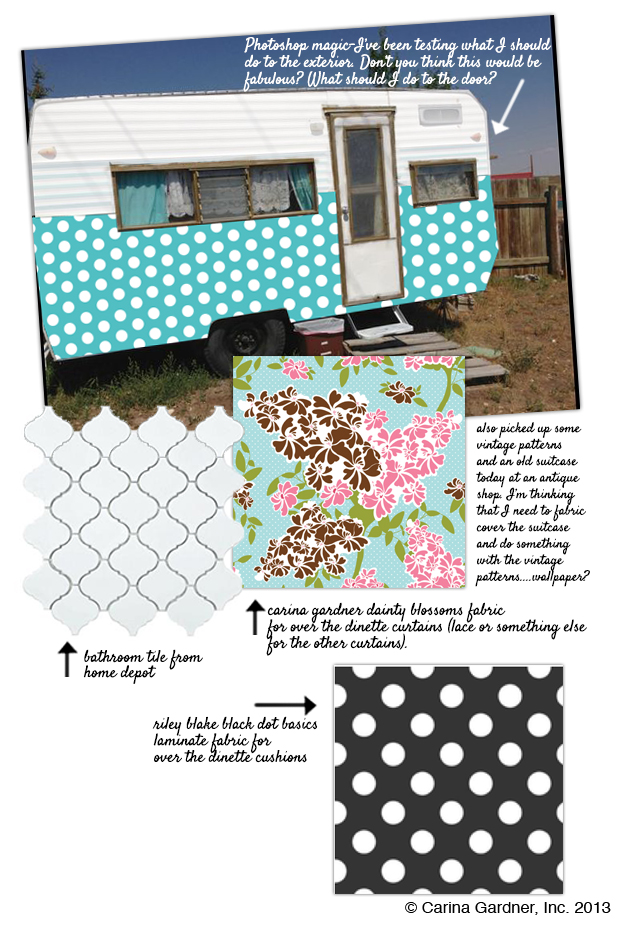
Above are some of the materials I’m considering for the interiors (because that’s the fun part). You like the photoshop magic? I tried a few different colors before I settled on this one. I’m going to have to see if I can find a color chip to match.
I also started a glamper pinterest board to keep me organized. If you have any inspiration(or have done a glamper yourself) please leave a comment with a link on this post! I would love to see!
Also, if you know anything about 12v, gas, and 120 v lighting fixtures, please send me links! I’m finding it difficult to find cute fixtures.
I also promised this information:
Brandon (who is repairing my camper) is at http://campereparadise.com/wp/. He is based in Salt Lake City and while the website doesn’t show alot, the trailers in his repair shop does. He has a few that are for sale as well.
Carina
Carina,
Looks wonderful! It’s going to be magic, nothing beats the thrill of camping in something you designed yourself. I can totally see and feel that. We have a trailer too, it’s a bit *cough* larger than yours, it’s 42 ft. 🙂 but we plan on full timing in it not just weekends, plus husband has an extra room in the back that is his office so he can work while on the road.
About the light fixtures. Our trailer(which has a patio attached to it) has horrible boring plastic light fixtures, she is 2 years old and I have been searching online for these 2 years for something cute or stylish. No luck so far. I have come to the occlusion that I am going to have to make my own. I have vague plans that involve ikea hacks, a Kickstarter project and a husband with an electrical engineering degree. 🙂 I have a super cute Kickstarter light coming my way. The Lumio – http://www.kickstarter.com/projects/lumio/lumio-one-lamp-multiple-forms-infinite-possibiliti and another project that I sponsored about a year ago produced the Loomi. This is actually kind of fun, you have to put it together yourself and thus make a unique fixture. You can paint it, decorate it the way you want to and most importantly, it is in production so ready for sale. Here is the link. http://www.kickstarter.com/projects/623521323/loomi-a-modular-light-of-paper
How I’m going to attach it is not quite clear yet, this is where the husband comes in handy, if I found a way I will let you know but I’m sure Brandon will know a way as well. As for the smaller lights I’m going to go over the Ikea hack website and see if I can find some inspiration there. Another thing that works very well with us are the paper rice ball lights that are battery powered. I can’t find the link at the moment but have it somewhere, will post it later. Those nice tiny battery holiday lights on a wire that you can fold however you want to make cute lights in a glass or tin bowl and even work on a timer. They come in different colors at QVC.
Am looking forward to the progress of your … Did you name her yet? You should! Ours is named Sidonia, after a Dutch/Belgium comic character, she is a larger female with enormous feet. So fitting. 🙂
My brother suggested I would possibly like this
website. He used to be totally right. This submit actually made my day.
You cann’t believe simply how so much time I had spent
for this information! Thank you!