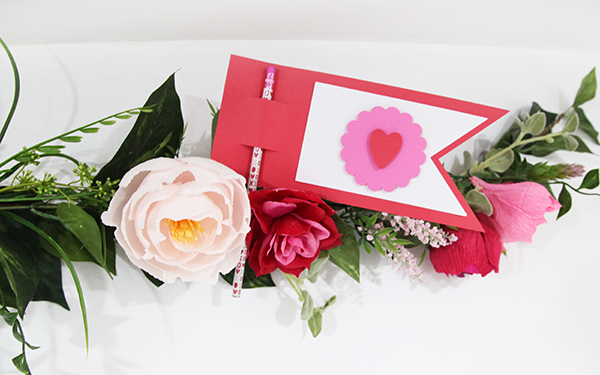
Kids Pencil Valentine Cards

IMG_7052_1web
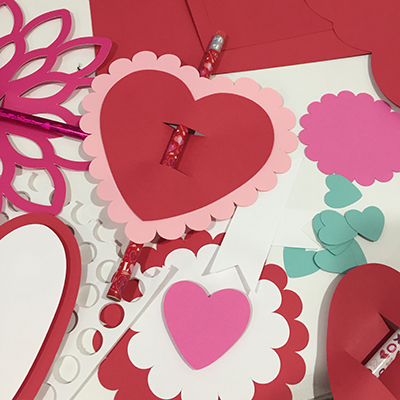
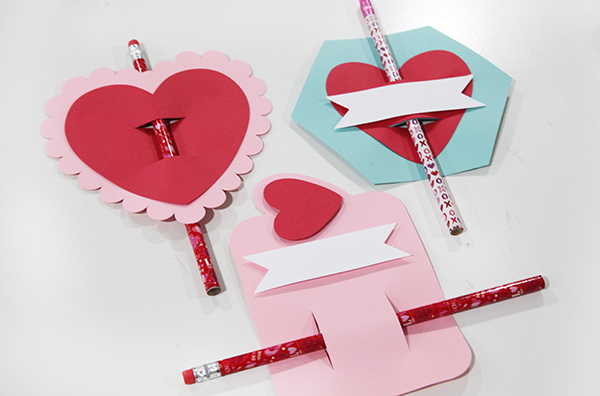
IMG_8715_webThis week is the last one I’ll be releasing Valentine’s so I’m going out with a bang!  I also decided to double dip. These pencil cards are not only my final Valentine’s release but are also Felicity’s class gifts. She’s going to write on each of them, and I’m sure we’ll add a few quotes like “I’m write for you.”

You can find them in my Silhouette shop here.

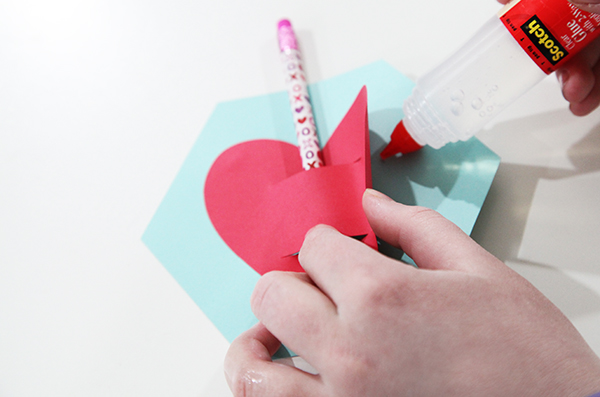
TIP 1: When you are putting these together, I recommend putting your pencil through the slits FIRST and then gluing your pieces into place (see photo below).

There are several designs were two or more papers have slits that match up. Use the slits as your guides. Place the pencil through the slits first and then pull open the edges of the top paper to glue it into place.

TIP 2: I LOVE pop dots with these designs! And glitter. And stamping ink on the edges. I kept them all simple on purpose. So you can jazz them up or use them as a kid activity.

TIP 3: Add a printable. Simply use whatever word processing software you use and write up a cute phrase in a cute font. Print, cut and attach to these Valentine’s cards!

IMG_6996_1web

And in case you missed it (haha), I’ve been releasing Valentine’s for the last month. In fact, we have been releasing Valentine’s for both CGInc. and MiniLou for the past several weeks. You can check both shops here:

Carina Gardner Silhouette Shop

MiniLou Silhouette Shop

IMG_7059_1web

Happy crafting!
Carina


Silhouette Design Store JOANN Stores

Digital Scrapbooking, St. George, and Stuff

IMG_5250_1_webI’m going to admit something right off the bat and that this is a procrastination post. I just looked at my list (a mile long) and really all I want to do is snuggle up in front of the TV and start a new show (like Call of the Midwife or Death Comes to Pemberley…anyone seen either of those?). There is a time and place for everything and tonight, well, tonight the work comes first.

Before you feel too sad for me, I just got back today from a short weekend getaway with my family in St. George. I loved seeing Charlie romp, climb, and dig in the slot canyon, the sand dunes, and the park. The girls swam and swam and swam (did I mention the water was cold?—oh to be young again).

While I was gone, I got some awesome photos from my amazing machine quilter Michelle Jensen (@mixiheart on instagram), and I’m so excited to share the pattern soon. It will be free along with an awesome collaboration with pattern jam (more on this to come).

Annndd, while I wish I could say I didn’t work at all while I was gone, I was happy to spend one night getting my digital scrapbooking done for this week. Two weeks ago I came out with a Spring Sunshine Paper Pack and this week I’ll have tags for them. I even managed to put together a couple of layouts. Making the layouts reminded me of all the things I needed while digi scrapping. I see a big collection in my future:).

Print

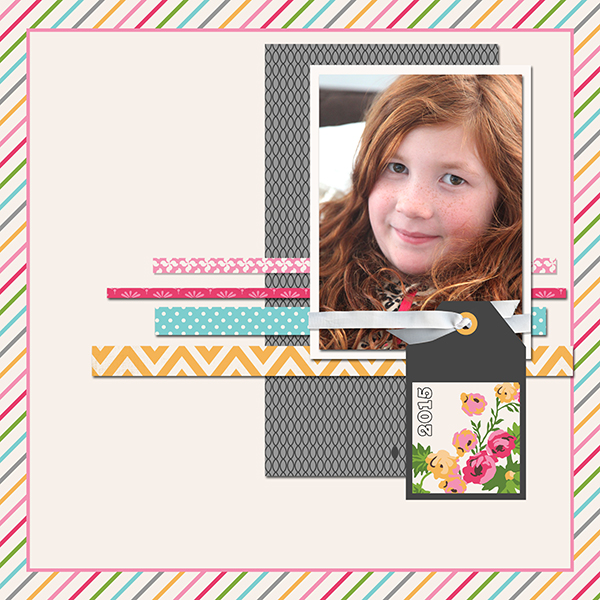
(Layout above: Papers and Tags from Spring Sunshine, Ribbon from Bella Bella 2 Thick Ribbons)

Print

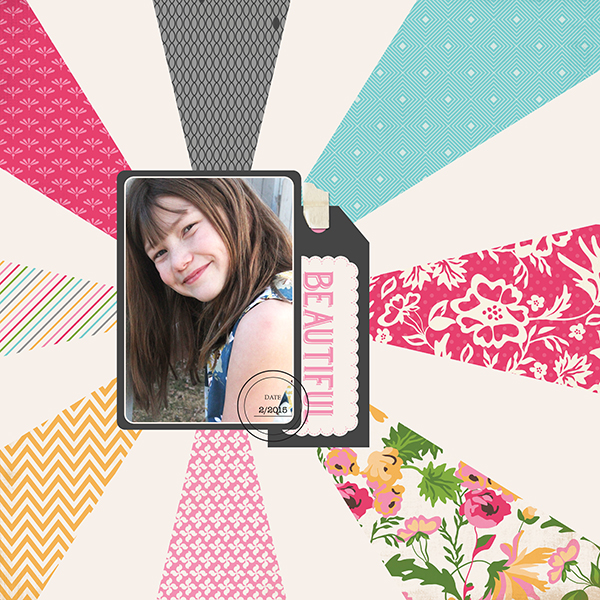
(Layout above: Papers and Tags from Spring Sunshine, Tape from Bella Bella 2, and Stamp from Journaling Stamps).

Hope you are having a fun spring break (or at least spring) as well. Back to the list.

Carina

Silhouette Design Store JOANN Stores

Family Ornament Silhouette Instructions

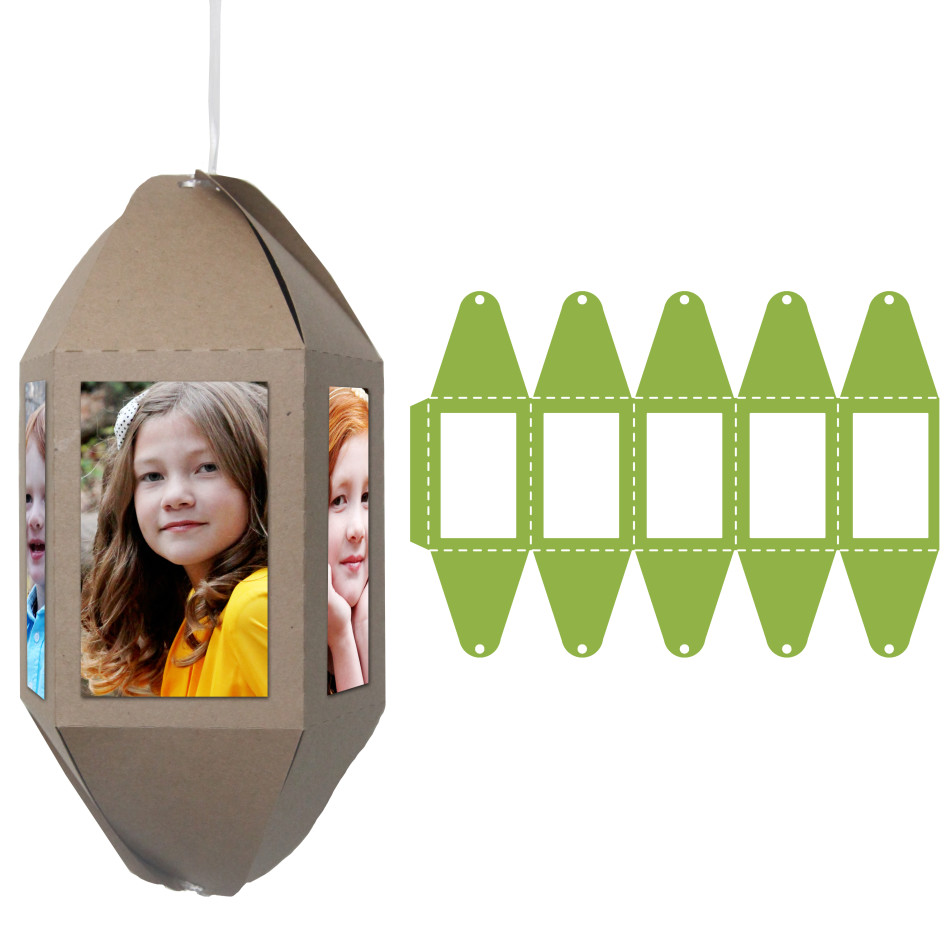
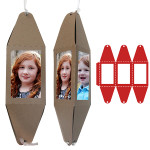
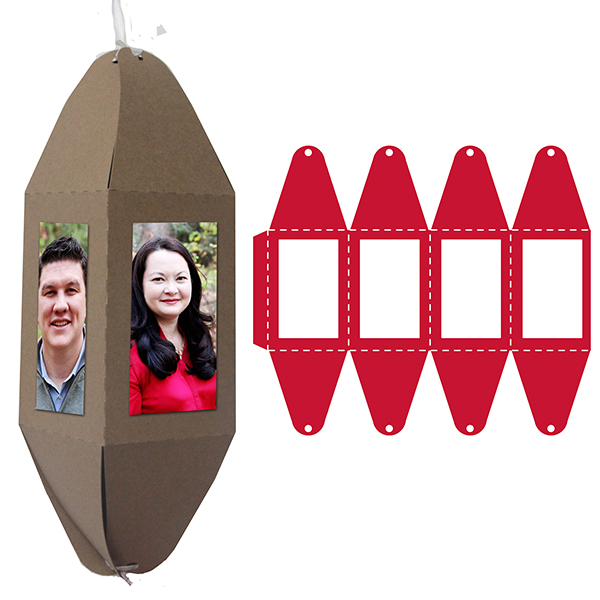
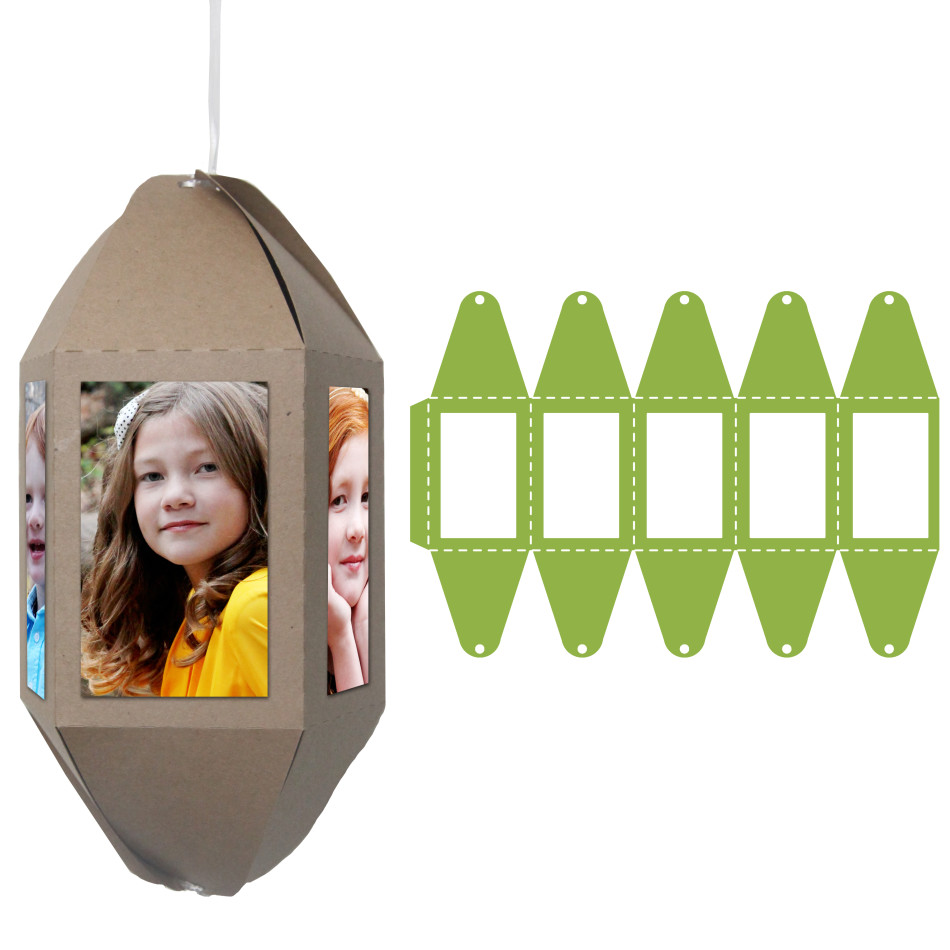
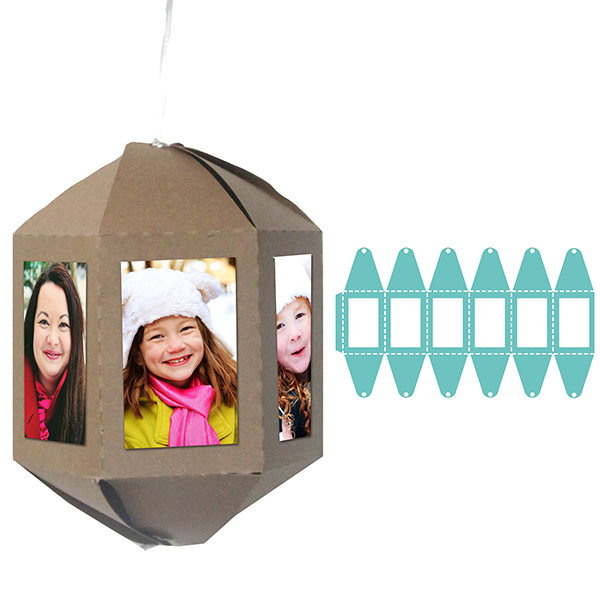
5photofamilyornamentToday I have a series of 3-D cut out ornaments coming out in my Silhouette Store. I love a great homemade gift, and these are perfect for that! They are so simple to put together and I love that you can customize the ornaments (or choose one) that fits your family size (The Photo Family Ornaments come in 3 sides, 4 sides, 5 sides, and 6 sides). Here are some of the instructions and helpful hints for putting together these ornaments.

Several Sided Photo Family Ornament Instructions
(Silhouette Store links: 3 Photo Family Ornament, 4 Photo Family Ornament, 5 Photo Family Ornament, 6 Photo Family Ornament)
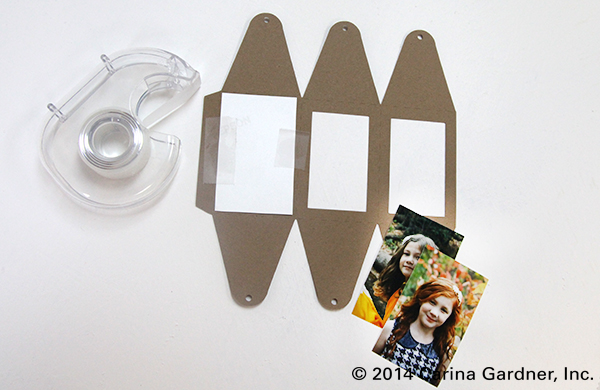
1. Cut out the shape and then print/cut photos that are a little bigger than the windows in the ornament. Tape photos to the wrong-side of the ornament windows.
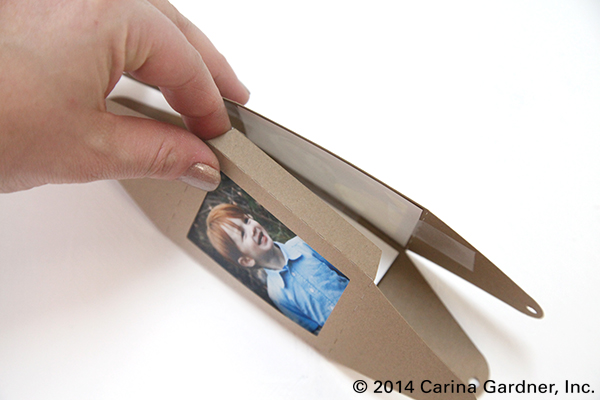
2. Crease/fold along all the dotted lines.
IMG_3419_1_web

3. Place glue on the tab and adhere it to the opposite side of the ornament.

IMG_3422_1_web
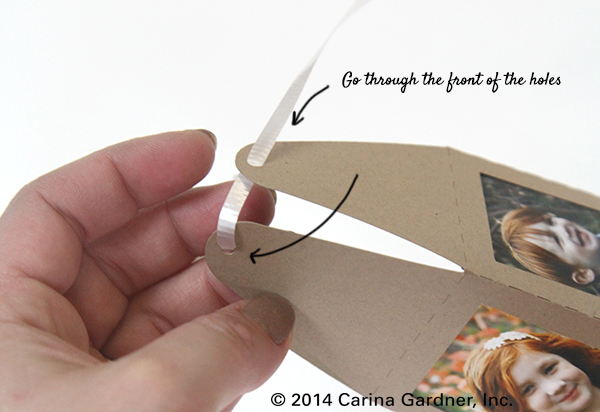
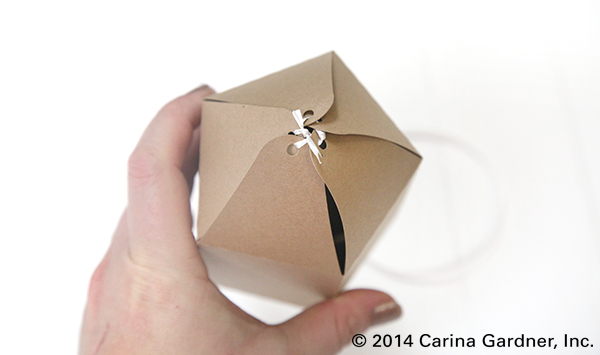
4. Use twine or ribbon to “sew” up the bottom and top of the ornaments. I like starting by placing the ribbon through the front hole of the ornament, then “whip stitching” by coming through the back of the hole and then placing the ribbon through the FRONT of the next flap/hole. Once you have gone through every hole with your twine, pull tight and tie a knot. You can leave one string long to hang the ornament or cut both strings short.

IMG_3424_1_web1 IMG_3430_1_web

3photofamilyornament 4photofamilyornament 5photofamilyornament 6photofamilyornament

Block Ornament Instructions
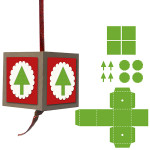
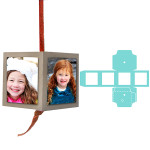
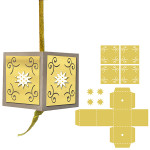
(Silhouette Store links: 4 Photo Block Family Ornament, Christmas Tree Block Ornament, Star Blog Ornament)
1. Cut out the shape and then print/cut photos that are a little bigger than the windows in the ornament. If you are making the photo ornament, tape photos to the wrong-side of the ornament windows. Add embellishments in layers to the ornament. (Pop dots are also a fun accessory.)
2. Crease/fold along all the dotted lines.
3. Place glue on the tab and adhere it to the opposite side of the ornament.
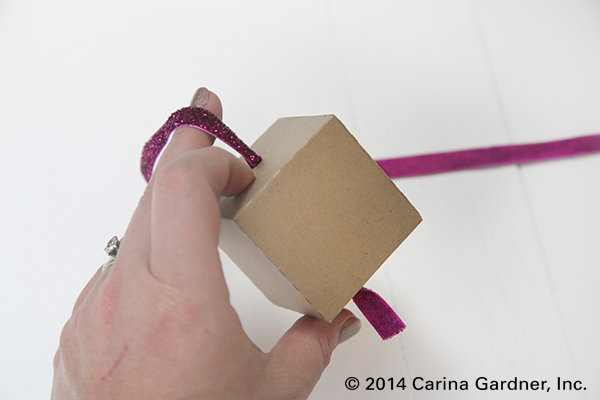
4. Place a piece of ribbon through the bottom and top of the box in the hols provided. Tie a knot at the bottom to keep the ribbon in place.

IMG_3433_1_web

christmastreeblockornament 4photoblockfamilyornament starblockornament

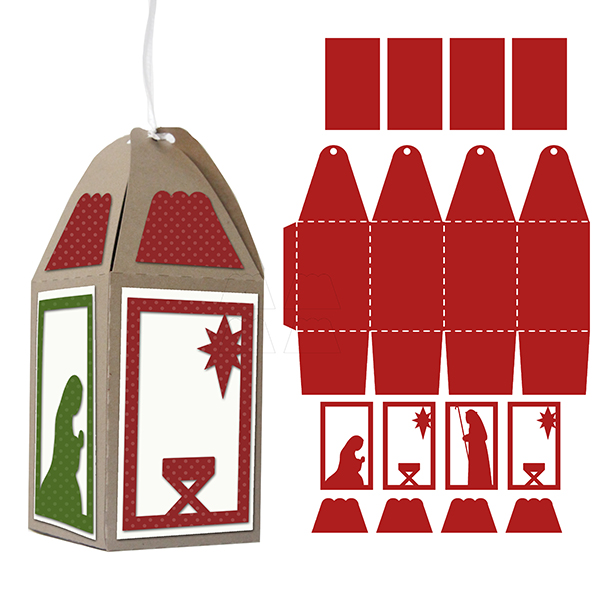
nativity4sidedornamentNativity Ornament Instructions
(Silhouette Store link: Nativity 4 Sided Ornament)
1. Cut out the shape and then print/cut photos that are a little bigger than the windows in the ornament.
2. Crease/fold along all the dotted lines.
3. Place glue on the tab and adhere it to the opposite side of the ornament.
4. Fold up the bottom of the ornament, placing glue on each flap to adhere the bottom of the box together.
5. Use twine or ribbon to “sew” up the top of the ornaments. I like starting by placing the ribbon through the front hole of the ornament, then “whip stitching” by coming through the back of the hole and then placing the ribbon through the FRONT of the next flap/hole (see photo above). Once you have gone through every hole with your twine, pull tight and tie a knot. Leave one string long to hang the ornament.

Silhouette Design Store JOANN Stores

Upcoming

carinagardner-hkThe glamper tour has ended. The extra weekends off has given me time to finish up a few projects. Today I managed to push out one of my 2015 fabric lines and tape a new mini class. I can hear my inner voice pushing me right now. I suspect because of the upcoming trip to China to do press checks for my new company.

That’s right. You heard me. I’ve been letting out little hints about it on instagram and the facebook page with no official announcement. You’ll have to wait for June 1st for that.

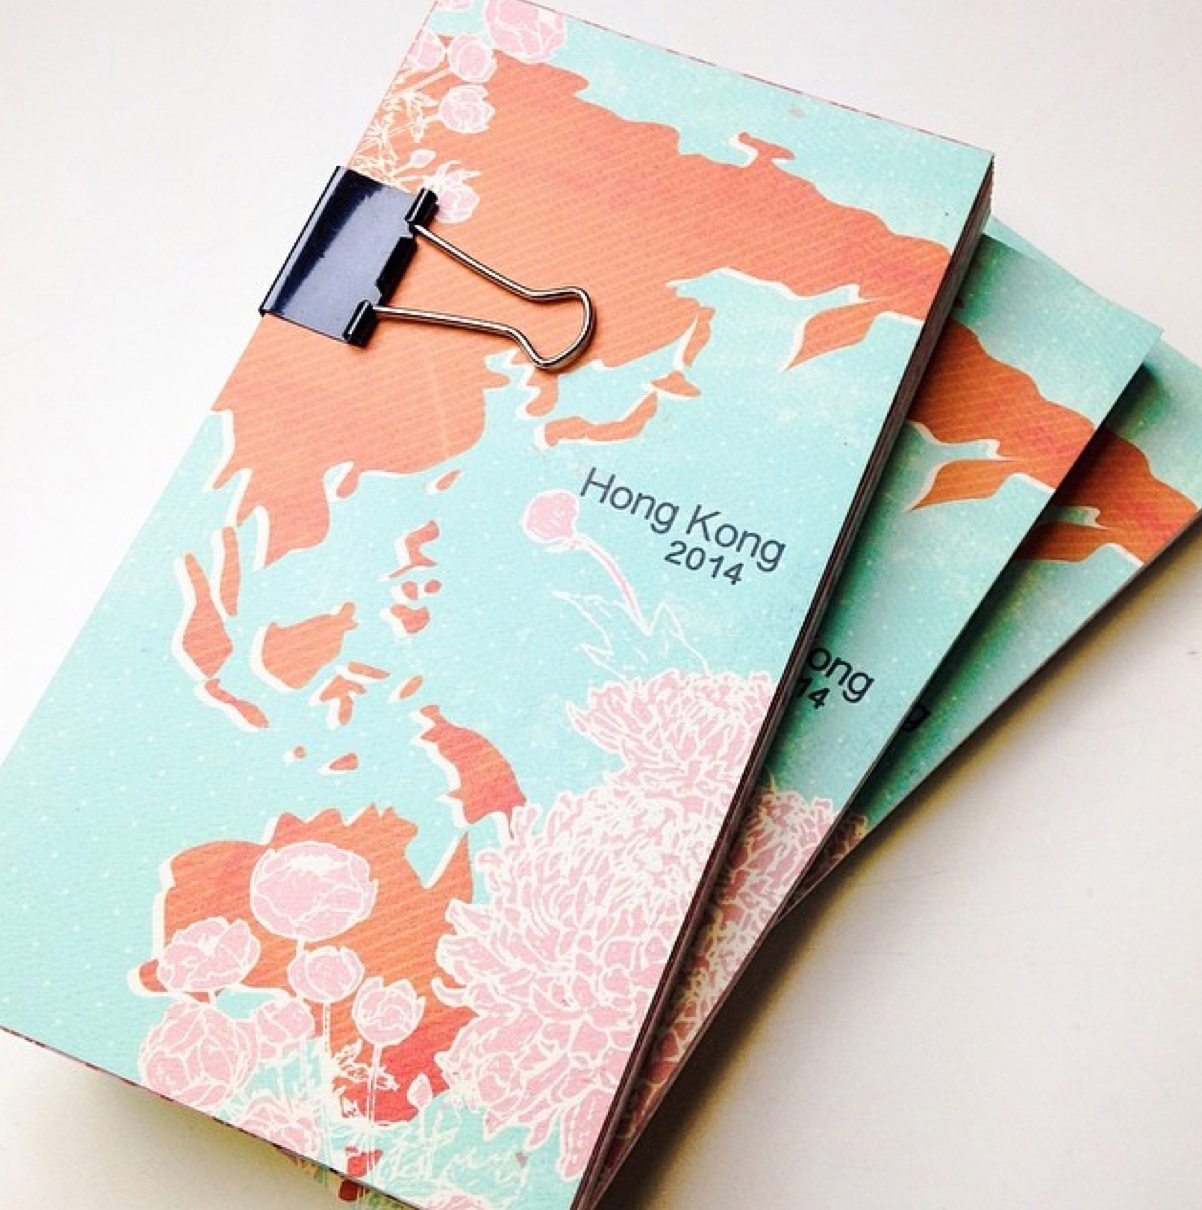
Two of my girlfriends were very spontaneous and decided to tag along. We’ll be in Vancouver, Hong Kong, Dongguan City, and Beijing. All planned out in the little travel books (left) that I made for us. I’ve been filling mine out with packing lists, places I want to see, and more. Books were made from my Travel Stories collection.

For the best possible front seat on all the action, follow my instagram feed @carinagardner. I’ll be posting all my doings from the trip and @miniloukids will be posting all the giveaways and peeks at all our new creative kids products.

carinagardner_kidsoutFor now, I’m kicked into high gear to finish out the last few remaining items that need to be taken care of. You’ll notice my extra emphasis on instax photos in my silhouette store these last couple of weeks. That’s because I’m planning on using my instax alot on this upcoming trip, and I’m going to need all those accessories I have been making.

Other things that I should make note of:
1. My Boy Oh Boy Paper Collection for Carta Bella ships June 1st!
2. Little Ark is now available in stores.
3. Full reveal of my October fabric line Primrose Garden should be available this summer. It comes with (*gasp*) an 18 inch doll panel!!!!
4. The 30% Fabric Sale will be ending on May 31st. So will the mega discounted price on my newly released Digital Design class.

More soon,

Carina

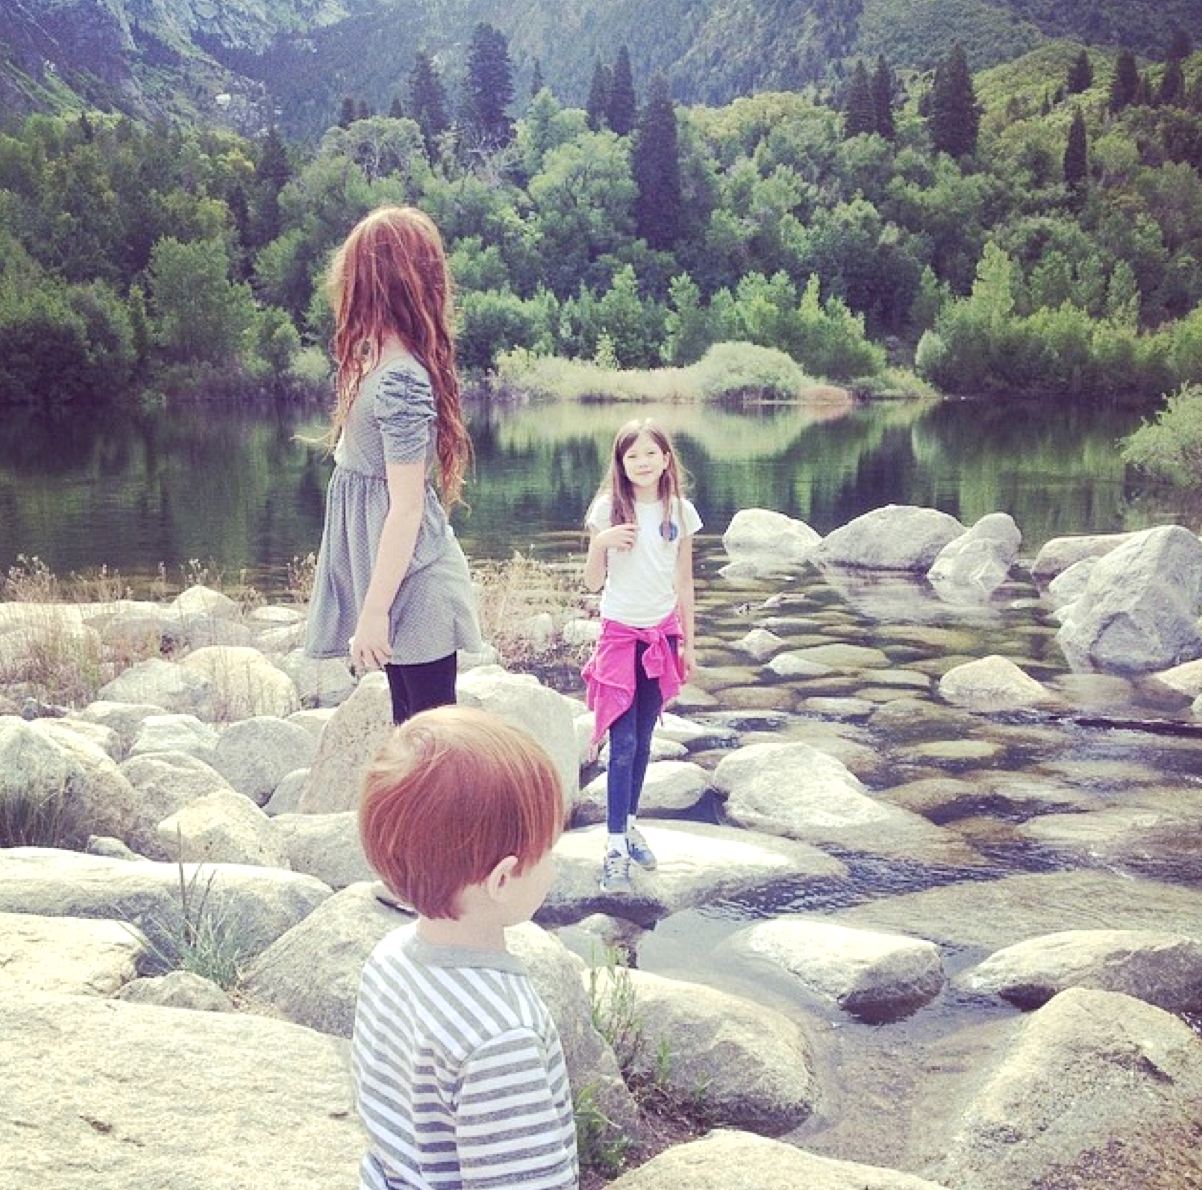
PS The photo to the left is of my three children with Josh up in Bell’s Canyon. I couldn’t resist posting.


Silhouette Design Store JOANN Stores

Glamper Recap on Quiltique

IMG_8229_webI’m a bit behind since I need to recap the last two glamper stops. This has been taking up a lot of my time recently. Feel free to “like” that page because I am going to have A LOT more on that later along with a number of giveaways and beautiful images come time to launch.

So here’s my photo recap of our Glamper Stop at Quiltique.

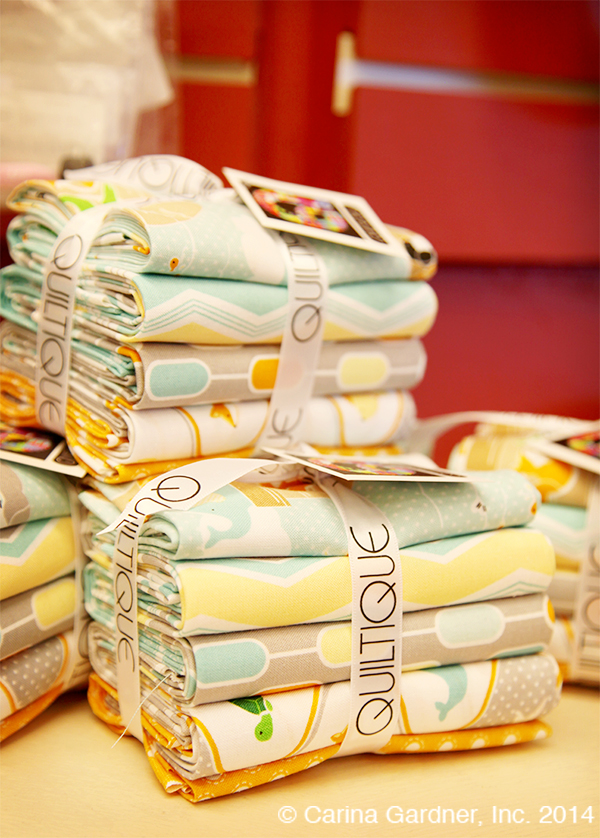
First off, Little Ark is in shops! (Yaaay!) Quiltique had these darling bundles available for sell. I also spotted some Evening Blooms pre-cuts in their shop. If you are in the Las Vegas area, Quiltique is a must-visit shop. I love the glass windows into the classroom and all the quilts hung above the shop. There were some darling displays and of course, an abundance of fabric.

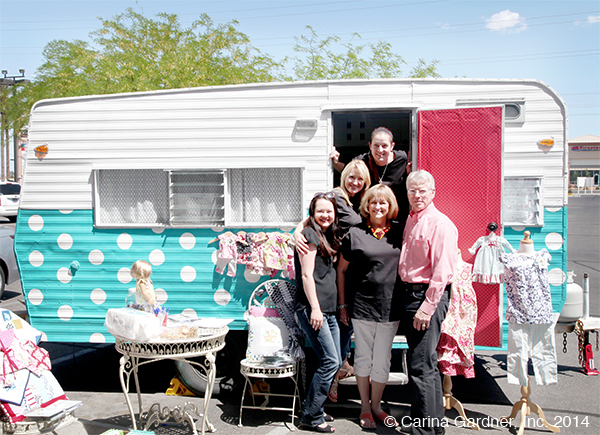
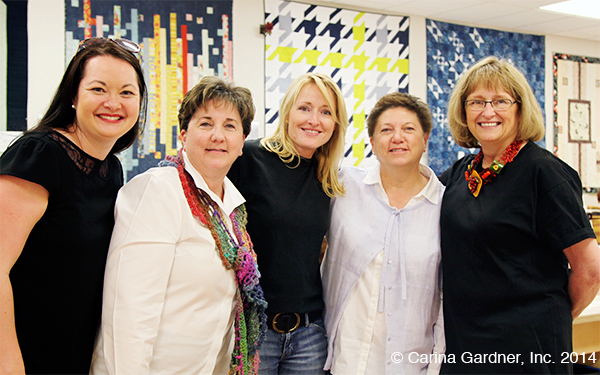
(photo below) Quiltique is a family-owned business. We happily all posed in front of the glamper in the Las Vegas heat!

___________________________________________________________________________________

IMG_8223_web

IMG_8227_web

The number one question I get from people who come to see the glamper is, “So do you use it?” The answer is always, “YES! Open a cupboard, and you’ll see all the food still in it from the last trip!” At this stop, this was even more true since I had to get up bright and early to clean the glamper. My family had been living in it for spring break as we traveled down to Nevada from SLC.

glamper_quiltique1

(photo below) Since it was Quiltique’s birthday weekend, I was excited to meet Me and My Sisters Designs (Moda Fabrics) who happen to be teaching in the shop the same day!

IMG_8236_web

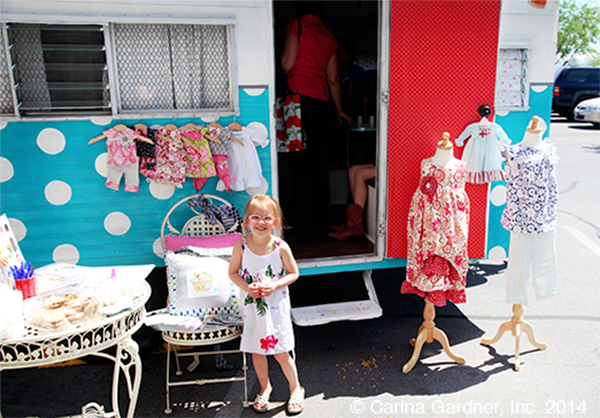
(photo below) This little cutie is one of my college roommate’s daughters who dropped by to see me!

IMG_8198_web

I had an amazing time at Quiltique and loved seeing their shop! Thank you to all of you who dropped by to see Lucy and me!

XOXO—Carina


Silhouette Design Store JOANN Stores

Glamper Tour Stop on April 19th at Quiltique in Nevada

GLAMPER_carinagardner_6_webYesterday my family trekked from Salt Lake City to St. George for spring break and for the Quiltique Glamper Stop! St. George is just a side trip to play in the red rock and go to the children’s museum (from which this post is being written).

Currently, my glamper doesn’t look as pristine as you see it in the photo to the right. One night in the glamper turns the small space into kids chaos. I keep telling myself that’s what it’s for!:) You’ll see it in the pristine condition when I see you on Saturday!

If you are on the Quiltique newsletter, then you already know that I am going to be there to help celebrate their 11th birthday! If you are in the Las Vegas/Henderson, Nevada area, this is an event not to be missed! On Friday, you can enter their Easter basket raffle to try a win for the $1100 Quiltique Shopping Spree! I know they are doing lots of other fabulous things so be sure to check their website at www.quiltique.com. And of course, if you come see me (wink, wink), we’ll have treats and a raffle that will happen every 30 minutes!

Here’s what you need to know:

Glamper Tour Stop 2 happens at:
Quiltique
213 N. Stephanie Street, Suite E
Henderson, NV 89074
Saturday, April 19, 2014
11am-2pm

Treats, raffles, and Lucy the Glamper!

Hope to see you all there! If can follow my week down to Las Vegas by following me on instagram @carinagardner.

Carina

PS, you can check out past glamper stops and the renovation of Lucy by going here: https://carinagardner.com/category/glamper-renovation/

Silhouette Design Store JOANN Stores

Flashback

A few years ago I did a photoshoot with Jessica from Hiya Papaya  (I think this was 41/2 years ago but I could be wrong). I ran into these photos again and thought I would share the flashback. It couldn’t be helped:).
6

As I was scanning through the photos I was laughing because I have an obvious obsession for vintage trailers. Back then I wanted an Airstream pretty badly. Let’s face it. I STILL want an Airstream pretty badly (who doesn’t?).

7

I was still learning about the industries that I am currently involved in: fabric, scrapbooking paper, digital….it was all still so fresh and new. My mini office in the picture above was in my bedroom. Now I have a warehouse and a home studio, and I feel as if they are brimming full! I feel pretty grateful looking back at all the opportunities that opened up to me.

4

The flashback was good since I have some really, really, really amazing things happening in 2014. Every year, everyday it’s a new adventure. I feel lucky and blessed for all of it.

Carina

(PS How is it February already?)

Silhouette Design Store JOANN Stores

Carina Gardner Exclusively for Deseret Book!

bracelets

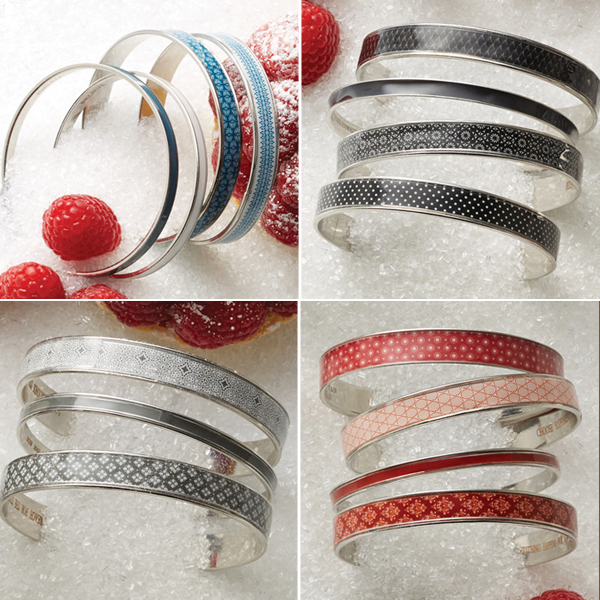
I’m so excited to announce my Winter Collections for Deseret Book! Just in time for Christmas, DB has stocked a collection of inspirational bangles that I have designed! The sets come in Navy, Red, Black, and Gray. They each have a different engraved inspiration on the inside. You can find them online here:

Navy
Stand As a Witness
Believe
So Lucky to Have a Friend Like You
Cherish Life’s Little Moments

Black
Be Your Own Kind of Beautiful
Faith Makes Things Possible
Believe in Yourself
Live. Laugh.Love

Gray
Love Surrounds You
Enjoy the Ride
Reach for the Stars

Red
Be Wise, Be Kind, Be True
Choose Happiness
Live a Happy Life
Everything Happens for a Reason
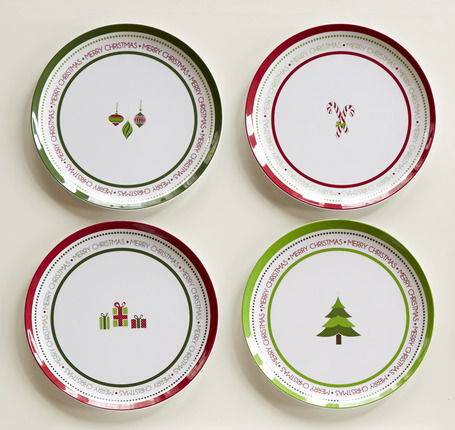
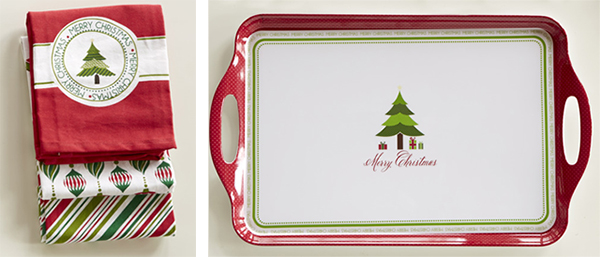
5112575_ChristmasPlates_detailAnd just in time for Christmas—New Christmas Dishware! I’m SO happy with how these turned out! Santa will certainly be getting his cookies on one of these beauties!

CG Dish Towels

CG Dessert Plates

CG Christmas Tray

___________________________________________________________________________________________

5112571_ChristmasTray_detail

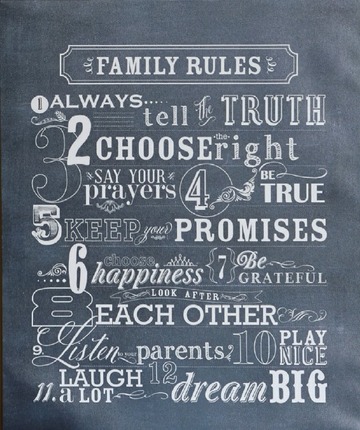
Family_Rules_Plaque_detailAnd last but not least, I have a new darling line of Canvas Art! Lots of good stuff going on here!

Family Rules

We All Have Our Best Guides

Our Family

There is Always Something to be Thankful For

All Things are Possible

Don’t Try Too Hard

(The ones without links I was unable to find on their site).

Hope you have a chance to walk into a store to see these! The packaging is hard to miss!:).

Carina


Silhouette Design Store JOANN Stores

Glamper/Camper Renovation Part 3

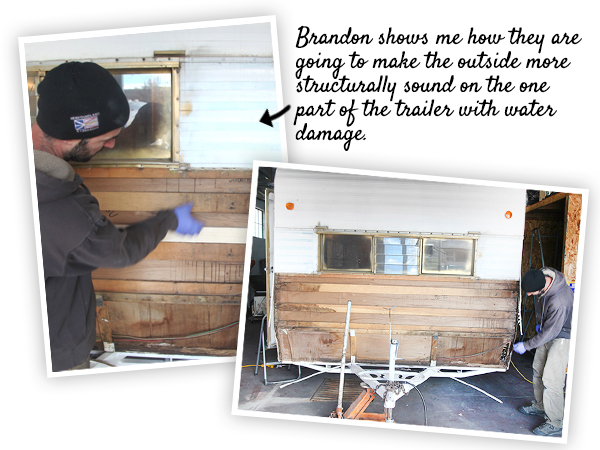
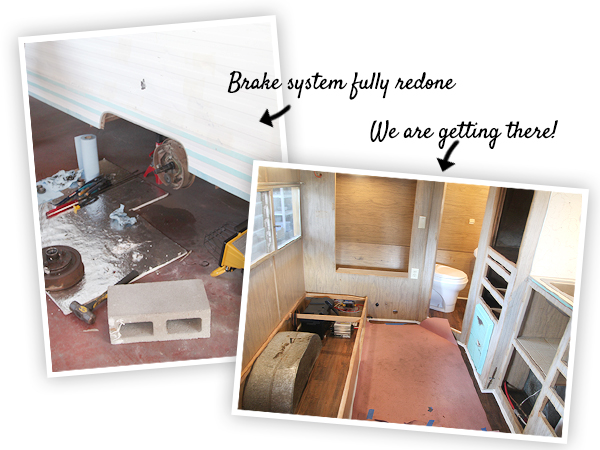
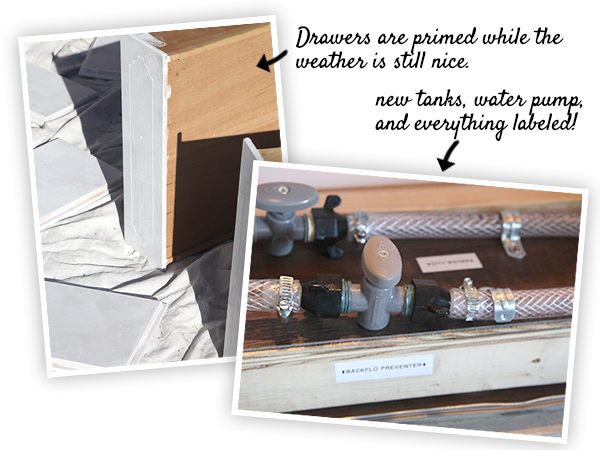
3_web_glamper_7It’s been a busy couple of weeks with the glamper. Brandon has been working on it nonstop with his team over at Camper Reparadise. The list of things he has taken care of goes on and on. All the electrical was wired, new tanks, brake work, new wood installed with flooring, new water tank and pump, and outside replacement lights to name a few. It’s been amazing to see it come together on my trips to drop off flooring and fixtures.

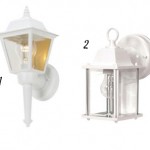
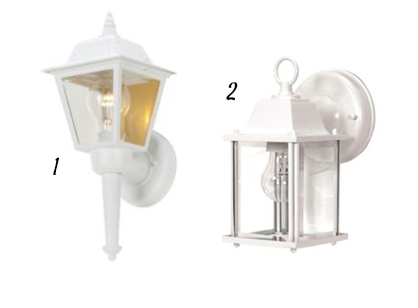
Speaking of lights, lighting has been my nightmare conundrum. I spent several days looking at lights. I finally decided on one from Home Depot (without the long bottom piece)  shown to the right (number 1). Turned out that the top part wouldn’t fit in some of the spaces.  Then I bought the second light shown to the right (also from Home Depot) and although they fit, we realized that the trailer was set up for lights that each had an individual switch. I was totally heartbroken (because I was in love with the second lights by this point) and in trouble! I looked for a few days and finally settled on a light that I will have to repaint. A facing-down light, white, small, and with a switch is pretty well impossible to find. I couldn’t find a link for the one I found at Home Depot (despite all the online searches I ended up with one I found there!), but I’ll show you it in the final photos.

These lights are for the 120 volt power. I still had to buy lights for the 12 volt battery. Once again, not a chance you will find something cute out there. Thankfully, these lights are sort of hidden so I bought some run-of the-mill lights from the State Trailer Supply in SLC.

3_web_glamper_2

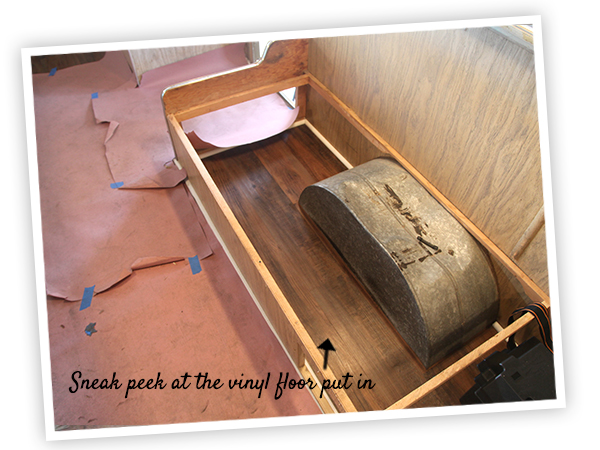
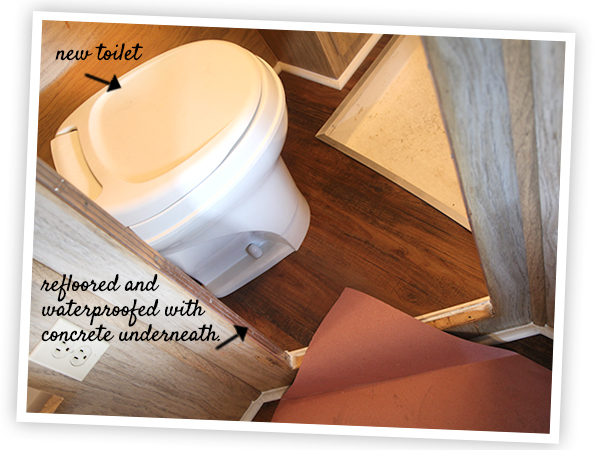
I also learned my lesson with flooring. I purchased regular laminate wood planks at first and then had to return them in favor of vinyl planks. Apparently, they are waterproof and necessary. I purchased mine from my local Lowes. I didn’t have time to special order (the flooring needed to go in before other parts of the trailer could be finished) and Home Depot didn’t have anything dark enough. Brandon suggested we put the flooring under all of the chairs and in the bathroom to keep everything waterproof. After seeing the water damage in the floor before, I was only to happy to have him put it in anywhere he could. He also put down a layer of concrete (I think?) in the bathroom to give it some extra durability.

3_web_glamper_5

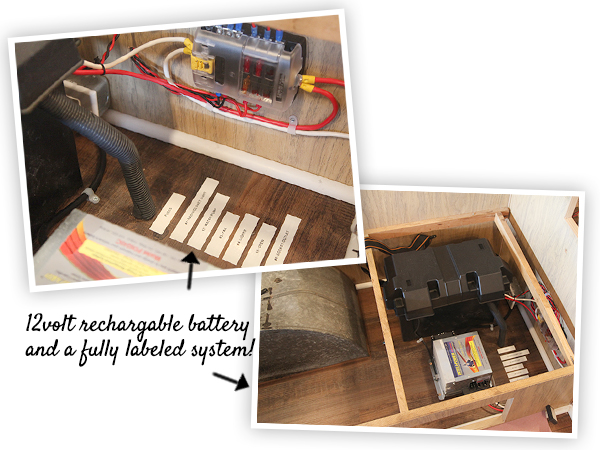
Even though it is such a little thing, I have to share one of my favorite surprises with the camper renovation. See the photo below? That’s of my 12 Volt Battery and everything it is hooked up to. And yes!!!! Those are LABELS next to it. Brandon put labels here and on the entire water system. I was like, seriously? I love it when someone takes pride in their work and really goes the extra mile. It makes you feel like every little thing they are doing is top quality.

3_web_glamper_4

The list of stuff that still has to be done is getting shorter although there is still plenty to do (note photo below. Eeek!).

3_web_glamper_1

3_web_glamper_3

This week, I started getting my part of the glamper/camper renovation underway. I cleaned and primed all the drawers and picked up laminates for the cushions. Brandon still has the trailer so I’m trying to do anything I can while he is still working on it. Here’s my to do list for the coming week:

+ Sew all the cushions
+ Sew all the curtains
+ Finish painting all the drawers
+ Make pillows
+ Choose and order wallpaper
+ Put trim on the built in mirror
+Buy a showerhead

And once I get it, I have to do the following:

+ Some of the windows need to be replaced
+ Prime and paint the interior
+ Wallpaper
+ Prime and paint the exterior
+ Add laminates to the kitchen counter tops and table
+ Tile the shower

3_web_glamper_6

Of course, there are lots of other things I need to do, that can wait (like make fabulous quilts and other such niceties), but those will have to wait.

I also wanted to pass on the information for Chad and John who I purchased the trailer from. They have a facebook page that shows the trailers they currently have. I loved working with them, and you shouldn’t be afraid to send them a message if you are interested in a trailer or airstream. They will LOOK for one for you and are super reasonably priced. Plus, the most invaluable part (for me) is they are willing to point you in the direction of people they have used, where to buy parts, ect. Since I was coming into this cold, having these guys walk me through what I needed to do was amazing.  John even went with me to the hardware store to buy the hitch to my vehicle. Ya, they are that nice.

Looking forward to the projects ahead!

Carina

PS: Here are the links to Glamper Part 1 and Glamper Part 2.

Silhouette Design Store JOANN Stores

Glamper/Camper Renovation Part 2

Sewing Summit’s Quilt Shop Hop today (which by the way was awesome!), I ran over to Brandon’s to check out the official renovation list. As per request from the Part 1 comments, here’s the abbreviated list I am having him work on. He gave me a invoice that separates out labor and cost of parts. I love that because it gives me a good idea of what I am really paying for. We are hoping the trailer will be done in a month, but I suspect it will be more like 6 weeks.

InteriorDesignBoard

So far I am about $800 over budget but I know there are things I haven’t compensated for. Plus I haven’t calculated in any of MY costs for beautifying this baby (paint, fabric, light fixtures).

-Install new Fridge
-Remove and replace Water Heater (Atwood 6 Gallon Gas Water Heater)
-Replace fresh water tank (24 Gallon)
-Remove and install new toilet and fittings
-Install new water pump
-Install new battery (12 Volt Marine Deep Cycle Battery)
-Remove Rotten Floor including Bathroom Floor
-Install Inverter/Charger (Progressive Dynamics 45 AMPS)
-Install Propane Tank (2, 5 Gal tanks)
-Remove rotten material for fridge and rebuild
-Replace trailer cable,
-Repack hubs and bearing inspection
-Power check, shoe inspection, axle inspection

You can see these are not exactly little things. And it doesn’t include the possibility of replacing a ceiling panel, ceiling vent/fan, and putting in the flooring for me. I can’t imagine doing all of those things myself so I’m grateful to have Brandon. The last thing you want on happy-family-mini-vaca is for everything to breakdown.

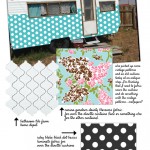
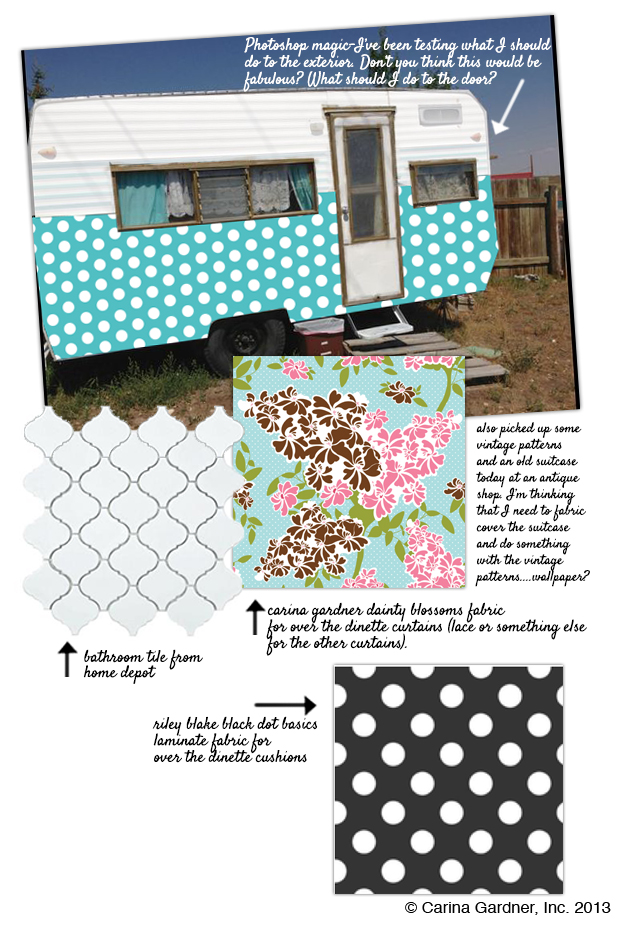
Above are some of the materials I’m considering for the interiors (because that’s the fun part). You like the photoshop magic? I tried a few different colors before I settled on this one. I’m going to have to see if I can find a color chip to match.

I also started a glamper pinterest board to keep me organized. If you have any inspiration(or have done a glamper yourself) please leave a comment with a link on this post! I would love to see!

Also, if you know anything about 12v, gas, and 120 v lighting fixtures, please send me links! I’m finding it difficult to find cute fixtures.

I also promised this information:

Brandon (who is repairing my camper) is at http://campereparadise.com/wp/. He is based in Salt Lake City and while the website doesn’t show alot, the trailers in his repair shop does. He has a few that are for sale as well.

Carina

Silhouette Design Store JOANN Stores

Glamper/Camper Renovation Part 1

IMG_3431_web_camper1That’s right. It says Part 1 up there in the title. That’s because I can tell, this is going to be a long project.

A few weeks back I started thinking about getting a camper. I had all sorts of fabulous dreams about what a camper could do for us…family outings, quilt shop stoppings, glamping in style…you know, all the usual stuff you think about when getting a camper.

I did a lot of looking on google and my local classifieds.  I have an obsession for Airstreams and have been eying them for five years now but felt they were out of my price range. So I turned to looking for a more retro design.

So what was I looking for? Here was my list of must-haves:
+ sleeps 5-6
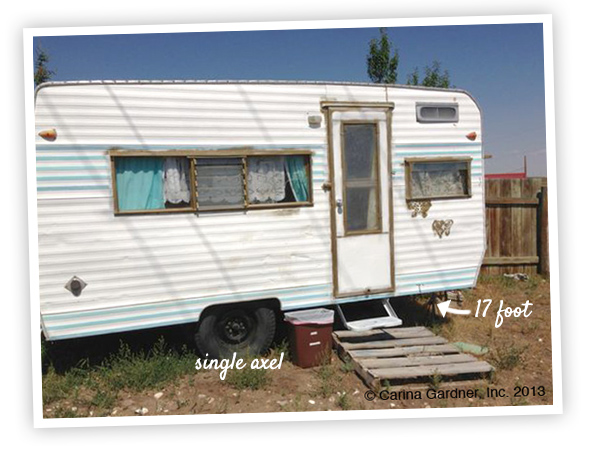
+single axle (for those of you who, like me, had no idea what that means, it’s just one set of wheels)
+ smallish (as in-not hard on my car)
+bathroom
+1950s-1960s design
+functional equipment and tanks

Did I mention this was a dream list? Because I wasn’t about to find something in my price range with all of these things.
IMG_3431_web_camper2

I happened upon an ad for the camper above on a local news website from a couple of guys named Chad and John. They find and sell used trailers and will even LOOK for one that matches your needs and price range. I am waiting on the Facebook Page and will post a link to it for those of you in the Utah area. They have been awesome to work with.

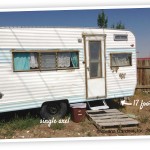
Anyway, I fell in love with the layout of this camper. It is a 1969 Jet Airway (barely in my date range!) and is 17 feet long. I walked through a couple of their 12 foot trailers. I loved the small size but felt the lack of bathrooms (rare in a 12 foot camper) was not a negotiable feature (who wants to take their kids to the campsite bathroom at midnight?). Other pluses, this camper had a single axel and my car could easily tow it.

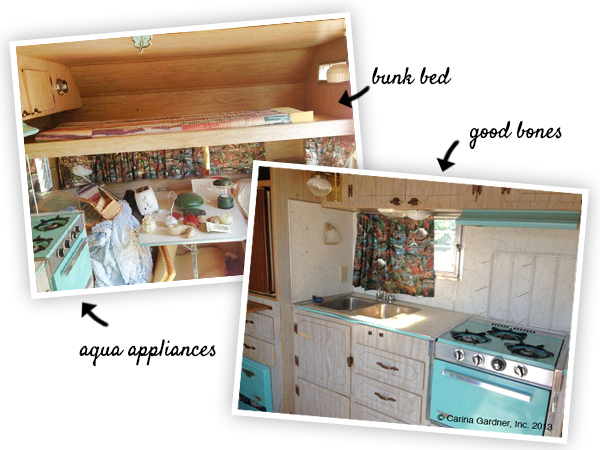
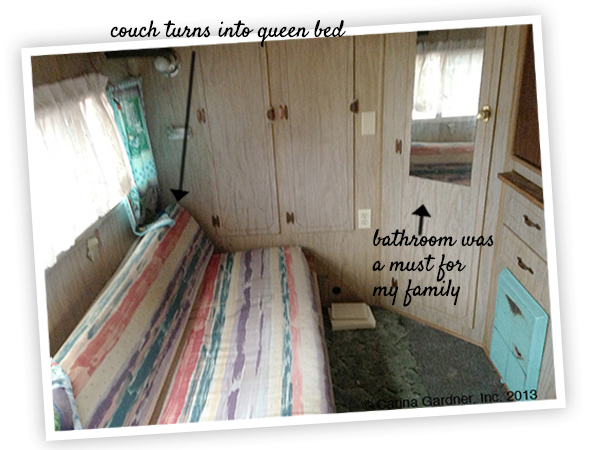
Another bonus was that it has a couch that pulls out into a queen bed, dinette that turns into a bed, and then a bunk that slides back above the dinette. Sleeping space, check!
IMG_3431_web_camper3

Obviously, this old girl needed some work. The problem is, I didn’t know HOW MUCH work I was in for. I took the camper to a local restoration shop. Brandon (his website will also be in the next post) tore the thing apart  and, well, let’s say, it wasn’t pretty what he found. Cut lines, broken floors, water damage, and more.

This is where I took a deep breath.
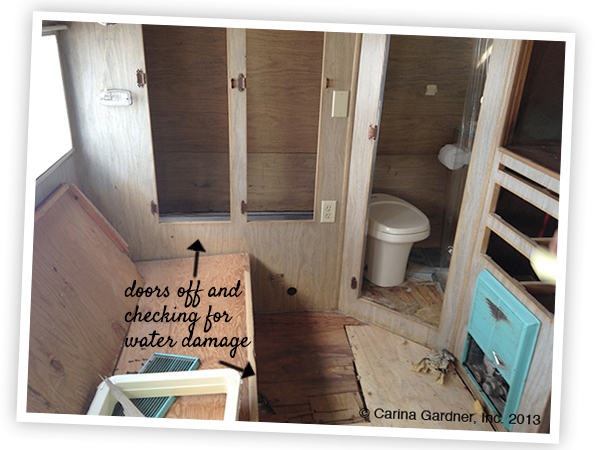
IMG_3431_web_camper4

I would love to say I’m a DIYer, but I’m not. I like to make things pretty (designer, remember?) so if it has to do with electricity and plumbing, I’m not your girl. What originally looked like a 2 week quick fix has turned into a several week renovation.I guess no trip to St. George for UEAA weekend. Sigh.
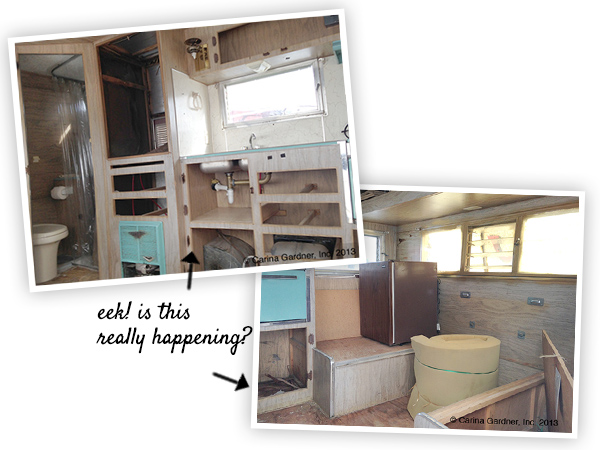
IMG_3431_web_camper5

These last few pictures are from today when I went over to verify everything that has to be done. Maybe I’ll give you the list, if you think it will be fun or useful. Tell me in the comments. Either way, it’s ALOT of stuff. Brandon will be working on the technical while I will be painting, sewing, and tiling (okay, well, I will do cosmetic DIY stuff).

In the meantime, I will be sewing curtains and cushions. I will also be picking out lighting fixtures, colors for the exterior and inside, and choosing wallpaper and tile. I’ll show you my project sheet soon. I think you will like. Think white, aqua, red, black, pink, and polka dot. It’s going to be fun!

Dreaming of going glamping (while kids dream of glamping late-overs),
Carina

Silhouette Design Store JOANN Stores

Movie Nights in the Park

IMG_2398_web

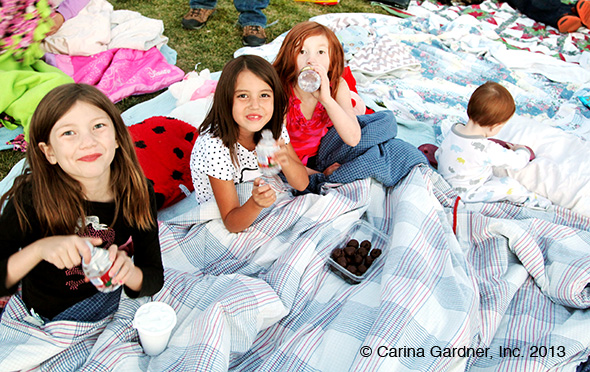
We introduced our kids to The Neverending Story on Friday at Millcreek Movie Night. (Pictured here is Siri, cousin Lola, Felicity, and Charlie—who is busy eating a flip flop—good parenting at work here.) I love these outdoor movie nights that the county offers. I became friends with the fabulous lady behind it—Aimee McConkie—when we all lived in Minnesota. So much work goes into these events. Oh ya, and she does it for free. Just because she believes in community. She’s A-M-A-Z-I-N-G.

This has been a different summer for me since Josh is home and we aren’t a slave to the billable hour. Here’s what we have been up to:
+ I go to work early and come home early. It’s lovely!
+ Josh has been in charge of the kids.
+ Turns out Josh is super hard core about the girls doing reading time, workbooks, and chores in the morning.
+ Siri and I have been taping a new Create and Make class. It has been so intense!
+ I’ve been taping and writing a new chalkboard class and paper class.
+ I’ve started work on fall sewing patterns. I.can. not. believe. it.
+ I started work on a new free quilt pattern for  my new fabric line Evening Blooms.
+ I have been crazy about decluttering the house and yard.
+ I think I might finally be making some headway.
+ And will yard sale it all in a couple of weeks.
+ We have been to Lagoon
+ And will probably go a lot this summer since our kids are not getting real vacation (or any camping).
+ I finally feel like I have time to read again. Obsessed with a Coco Chanel biography I have been reading.
+ I’m trying to get serious about diecutting files. More on this soon!
+ Siri and I filmed another CGTV episode. It’s not up yet. Sigh.
+ Somehow my office/warehouse got small overnight.
+ That’s what happens when four people come to work all at the same time.
+ I’ve a few more things coming out this fall for Deseret Book. I’m so excited about them!
+ I’m finishing up my 2014 fabric lines. Think “boy” wink, wink.

And with that, I am off to finish up some photos and head to Lagoon.
Happy Summer!
Carina

Silhouette Design Store JOANN Stores

Summer Begins

IMG_2352_webHello! It’s Monday morning, bright and early, and I very happily set to work this morning on my 2014 fabric lines. There has been so much going on these last few months that I am welcoming a moment to really sit down, draw, and think. There aren’t many moments like this since the office has also been pretty busy these days. Two new little summer interns (my sister-in-laws) and a new warehouse manager come into the office daily now. The office is pretty tiny so having that many people in and out makes things a little tight, but we are all making do and having fun with it all.

To accommodate everyone’s comings and goings as well as to get ready for summer, I started a new schedule. I try to get into the office by 6 or 6:30am. It means I go home pretty early in the day so that I can hang out with the kids and Josh.

I wish I was one of those people that could work with white noise, but I can’t. I like the silence. So coming in early to work helps me a lot. It’s nice feeling like I have accomplished so much by 9am and even better when I go home at 3pm to help with Siri’s  harp lesson and make dinner.

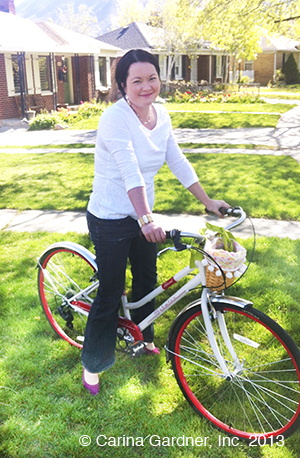
IMG_2380In the summer, I hope to be able to jump on my bike to head home around 1pm so I get to savor summer too. I have the best commute ever. I’m not sure if it is even a block. It’s definitely less than a 5 minute walk. But I like taking my little cruiser because if I need to run home for a second to help out or grab something, I can.
Hoping for a fabulous summer with lots of camp outs, bonfires, gardening, swimming, and some good ol’ fashion sitting (my favorite thing to do—usually in the sun, on a porch, and holding my Charlie). The kids’ final day of school is Wednesday and I suspect there will be some festivities (possibly the traditional camp out in the backyard).

Are you as ready for summer as I am?

Carina

Silhouette Design Store JOANN Stores

Mother’s Day Weekend and Dishware Debut Recap

IMG_1543_web

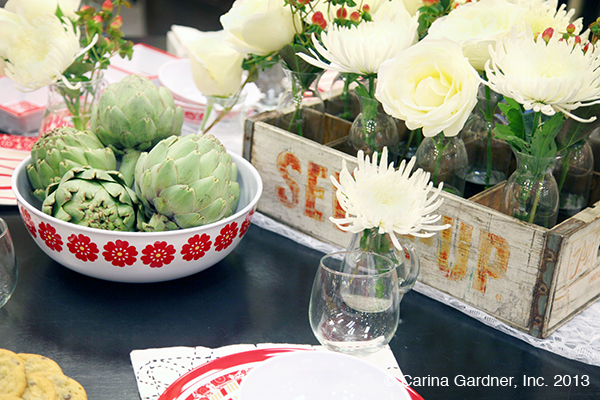
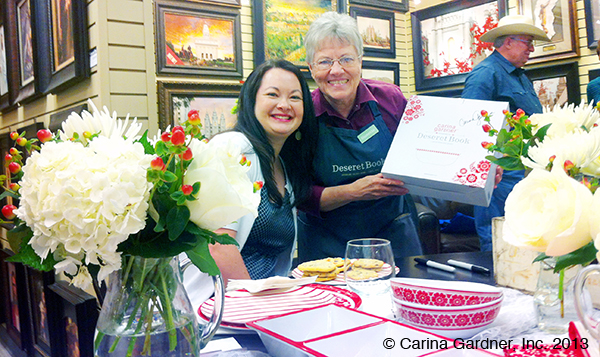
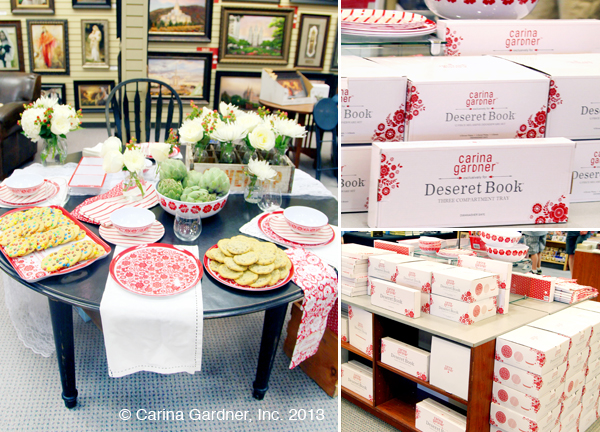
Hope everyone had a wonderful Mother’s Day! The first half of my day was spent at Deseret Book signing dishware. A big thank you to everyone who came to visit me at the Fort Union Deseret Book to catch the debut of my dishware collection! It was such a treat to chat with you and give your children cookies.  For those of you who did not make it and avoided the excessive sugar, I managed to snap a few photos so you could see the display.

IMG_2503_web

mothersday_web3

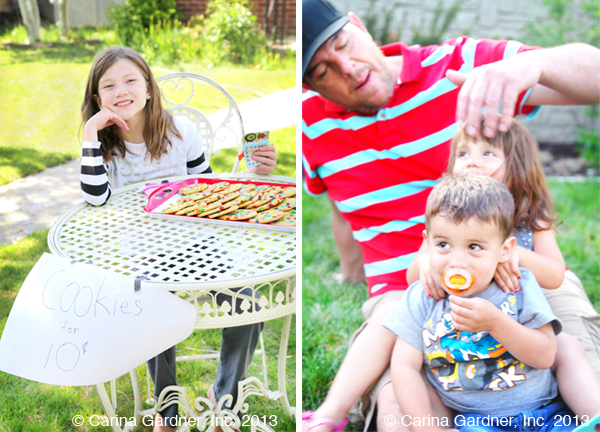
I knew exactly what to do with the cookies that were not eaten—I had Siri try to pawn them off on the neighbor kids. (She tried to sell them but I told her I would pay her the 10 cents for every kid who walked by and took one.) We still managed to have enough cookies for the family party that evening and the children at church the next day. Umm, I think I over-ordered. (photo below—Siri happily selling cookies.)

mothersday_web1

The second part of my Saturday was spent with Josh’s family cleaning out his grandmother’s yard. Dinner followed at his mother’s house. (Above-Josh’s brother Nate and Nate’s twins London and Quinn).

IMG_1583_web

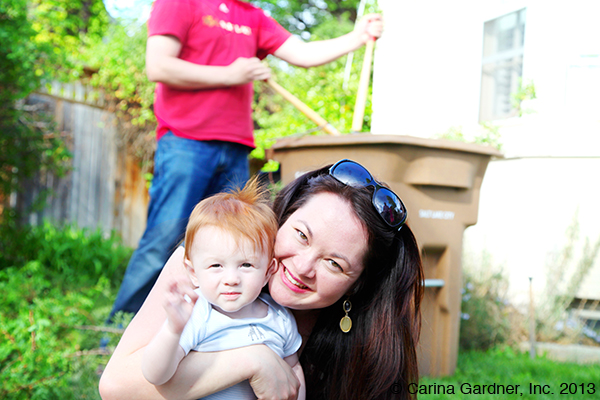
It was the most beautiful day for yardwork although, other than hacking at a rose bush, I mostly played with Charlie (photos above and below). At least it looks like there is some yardwork being done behind me!

IMG_1637_web

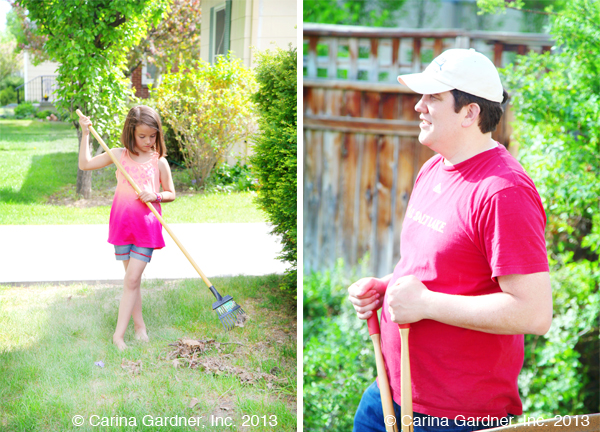
My niece Lola rakes for a moment (photo below) and Josh stops his pruning for a moment to chat (photo below). I’m guessing the photos I didn’t catch (in particular of my mother-in-law Mary planting all the flowers) was were all the real work was happening.

mothersday_web2

Having a family chin-dig on Saturday was so nice because it meant our little family relaxed (and I slept in-the perfect mother’s day present) today.

This week Josh and I are off to Portland for Quilt Market. I plan on posting lots of photos. I’m not doing a booth and instead plan on spending some time filming, talking to other designers, teaching schoolhouse, and doing make and takes at the Riley Blake booth. I’m so looking forward to it!

Cheers!

Carina

Silhouette Design Store JOANN Stores