Glamper Renovation — Full Reveal! Part 5

IMG_6096_blog
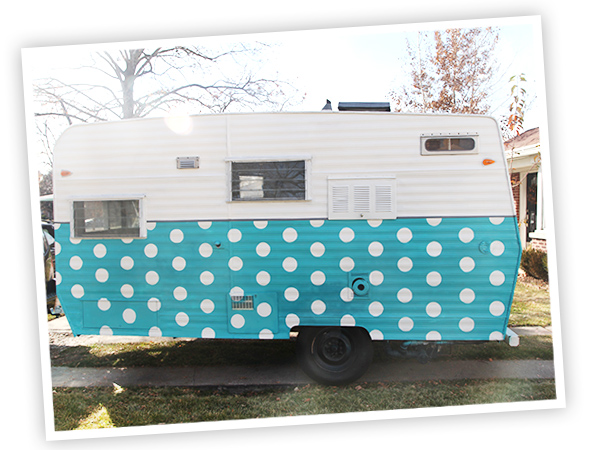
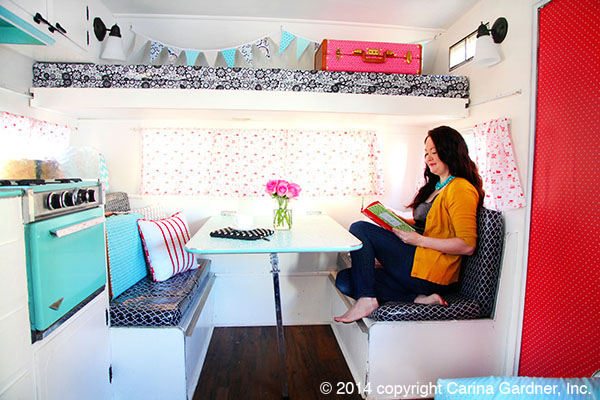
It’s taken several months, but our glamper is finally finished! I think we have named her Lucy (I’m still a but noncommittal since I have trouble not just calling her “the glamper.”) I’m so happy with how the interiors turned out. There was much sewing, wallpapering, painting and contast cleaning. I’m so excited for the memories that our little family will be creating in her. At the moment, she is my personal office since I stole away to St. George to finish taking pictures of her and get some much needed work under my belt.

I hope you enjoy the photos and come see her on the Glamper Tour this spring! I will be revealing the places a little later this week.

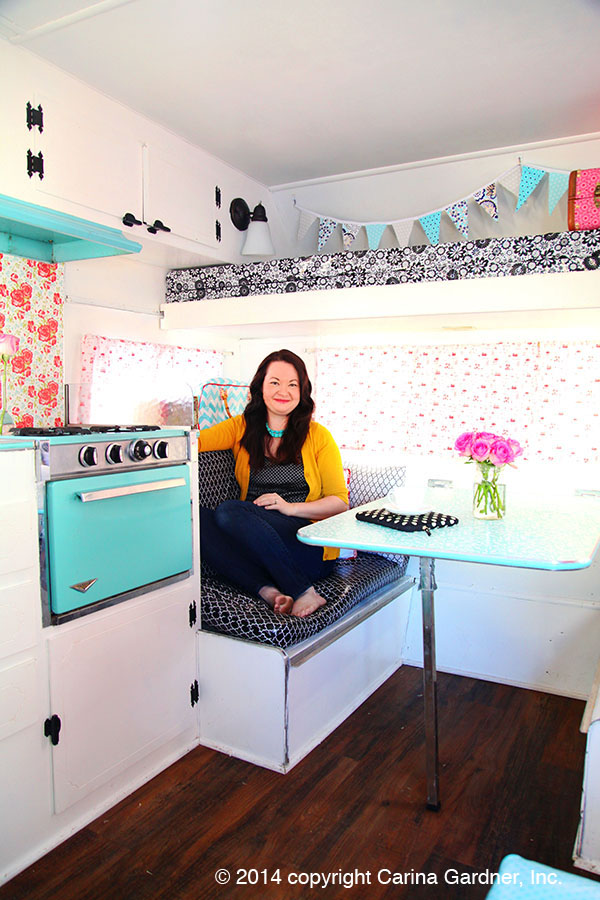
BTW, all the photos of me were shot by my fabulous assistant Susan. I know, she rocks.

Here are some of the highlights (check them out in the photos).

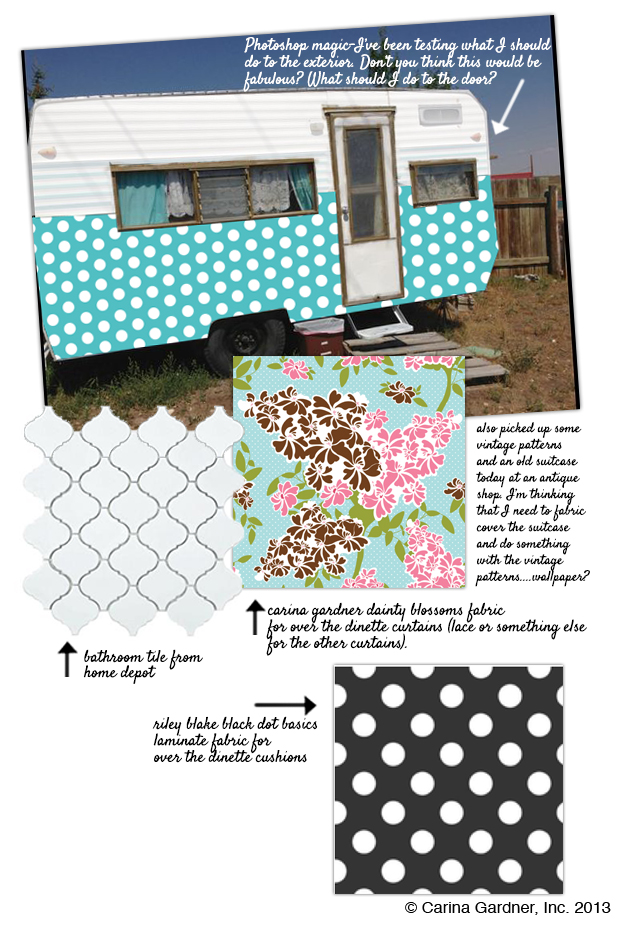
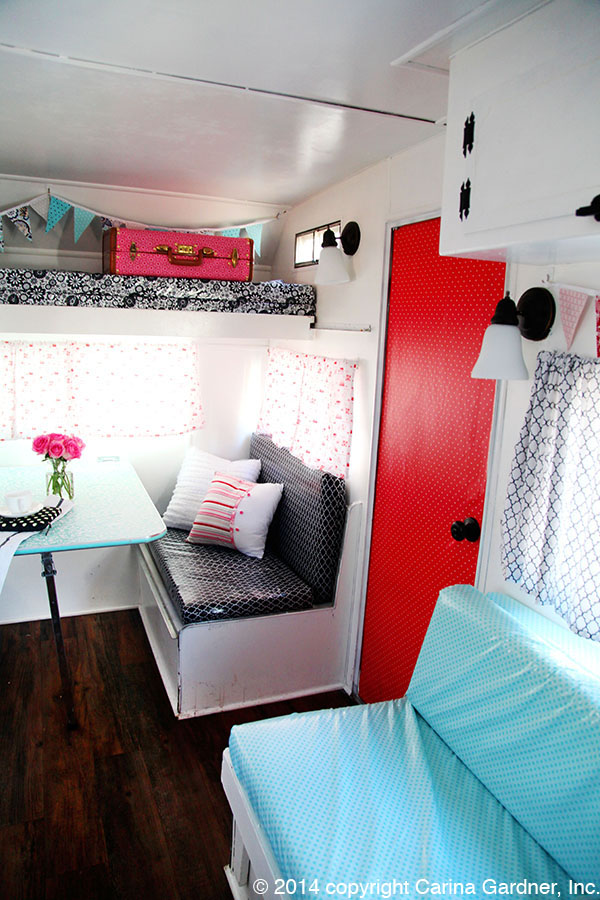
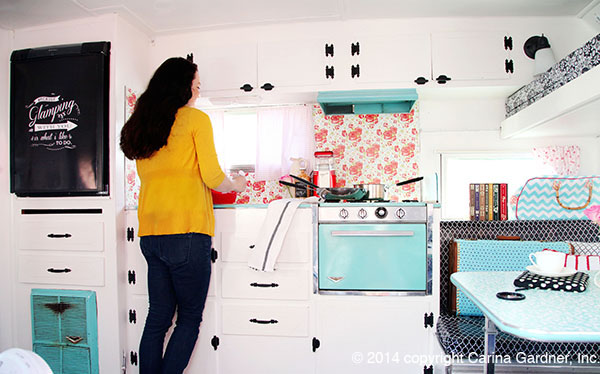
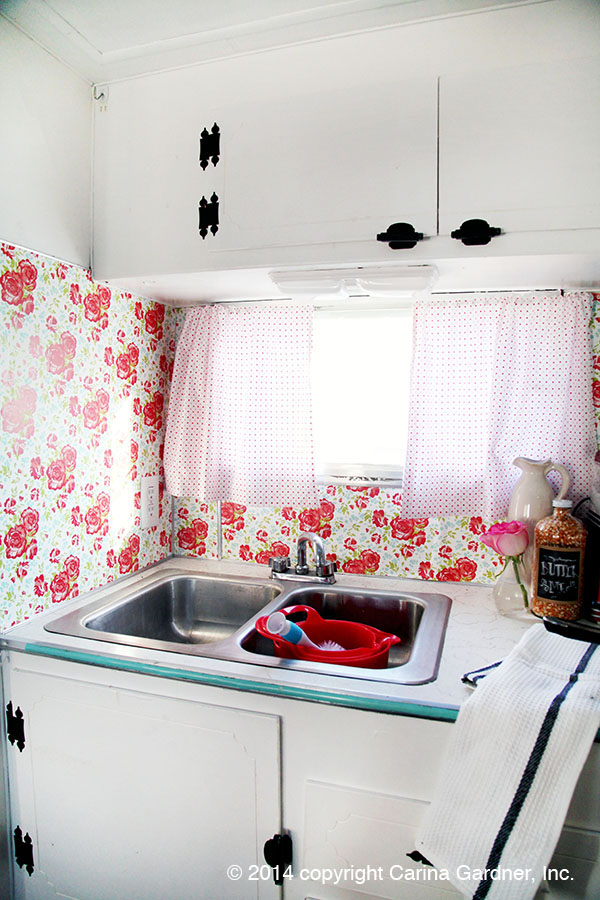
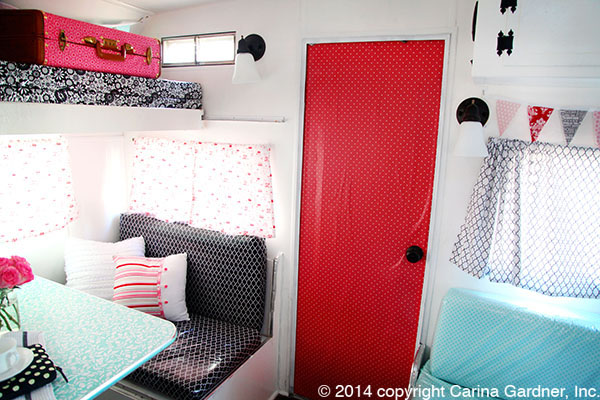
1. Wallpapered door, table, and kitchen (patterns from my October 2014 fabric line…yet to be seen)
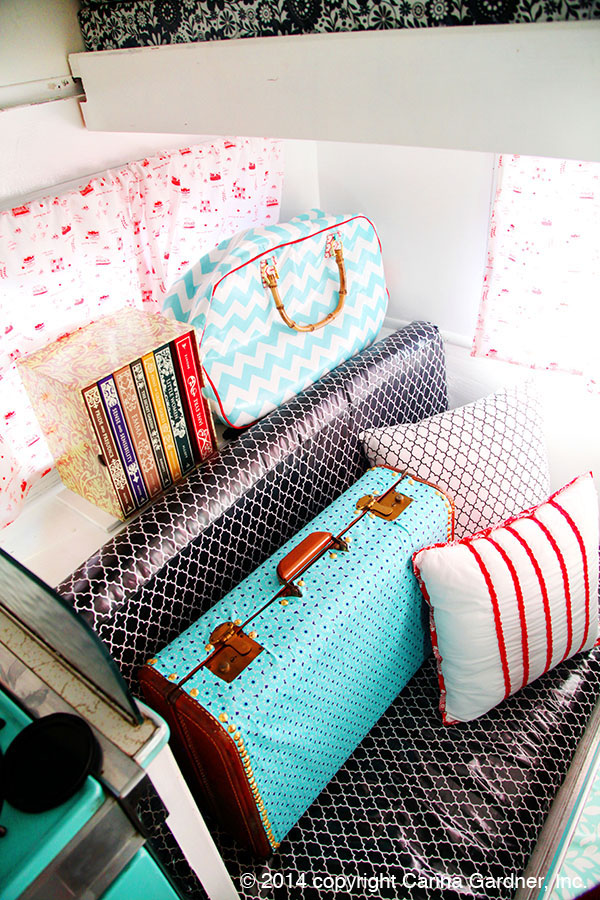
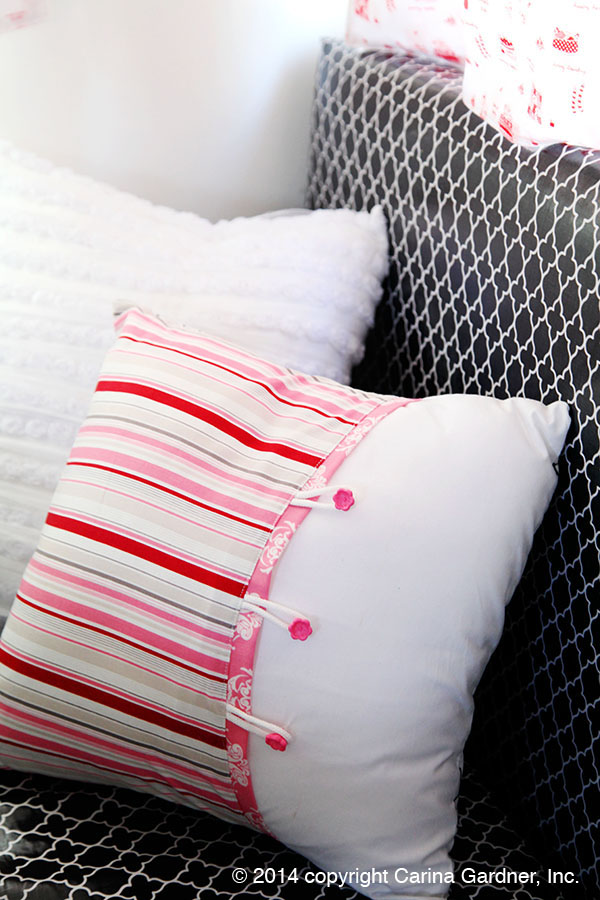
2. Laminates from Riley Blake on all the cushions (best decision EVER!)
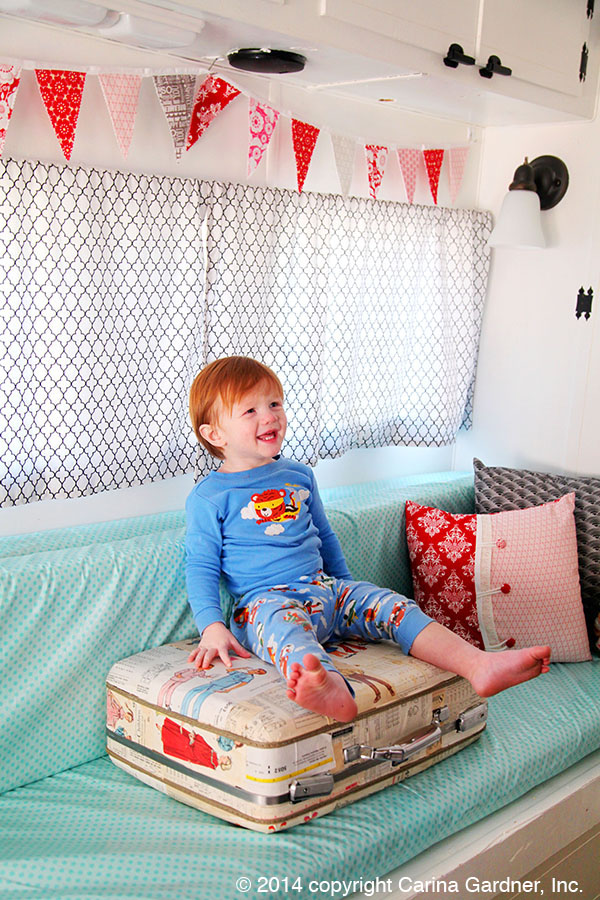
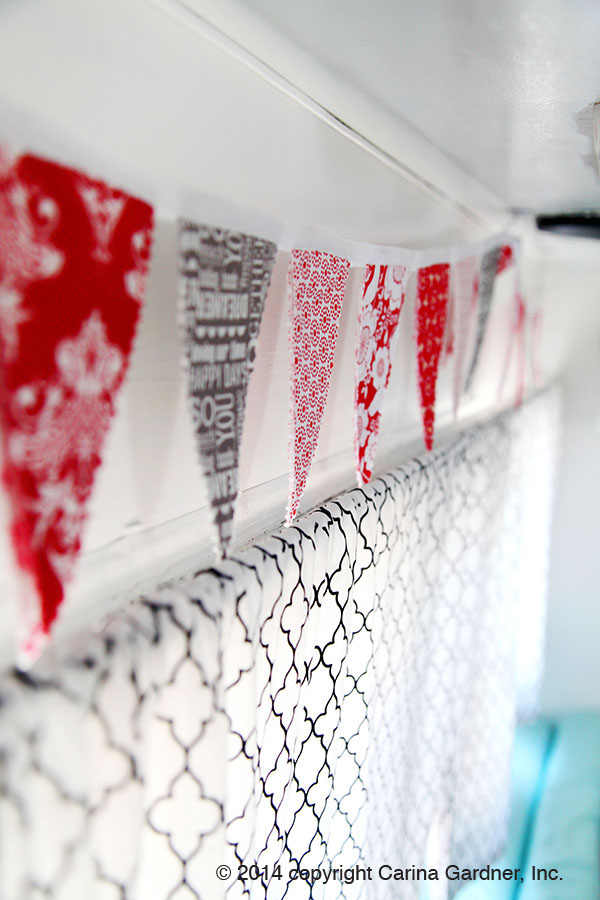
3. Curtains featuring my Evening Blooms fabric collection and Tasha Noel’s Simple Life all by Riley Blake.
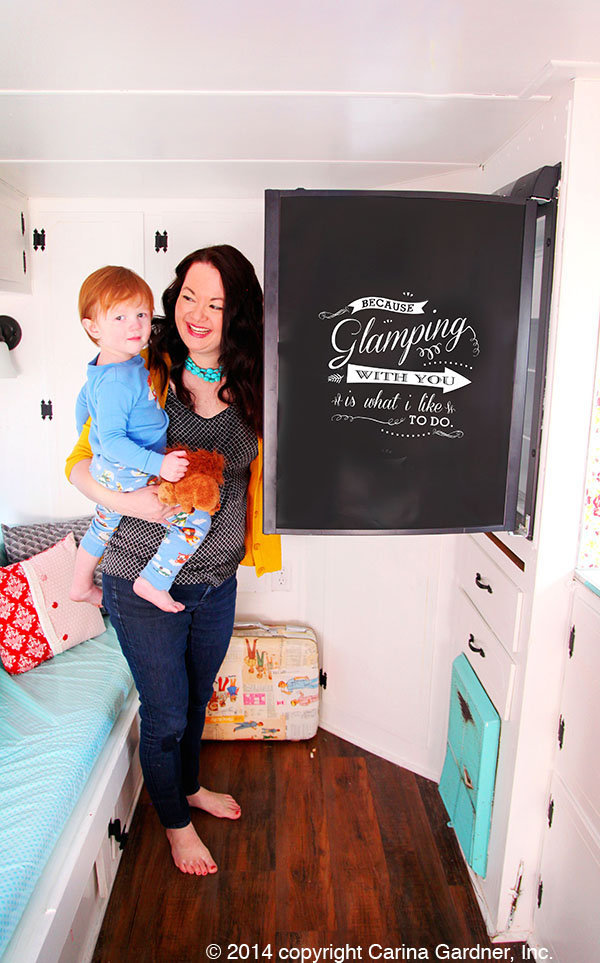
4. Refrigerator covered with some chalk art I made (printed at Costco…they have the best price for 30 x 20 images!)

GLAMPER_carinagardner_1_web copy
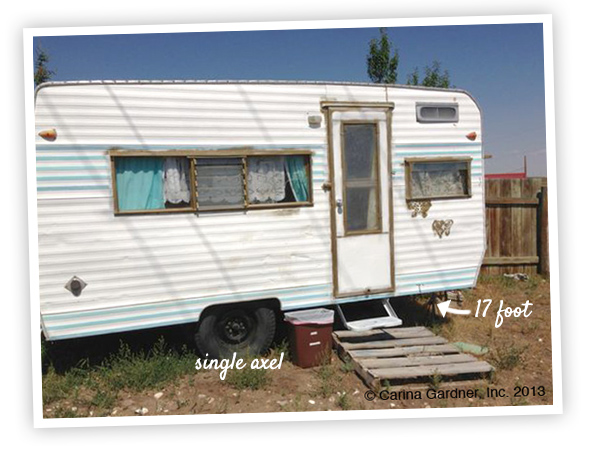
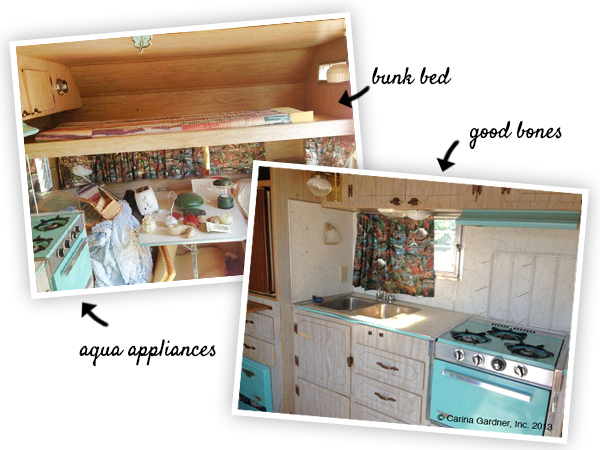
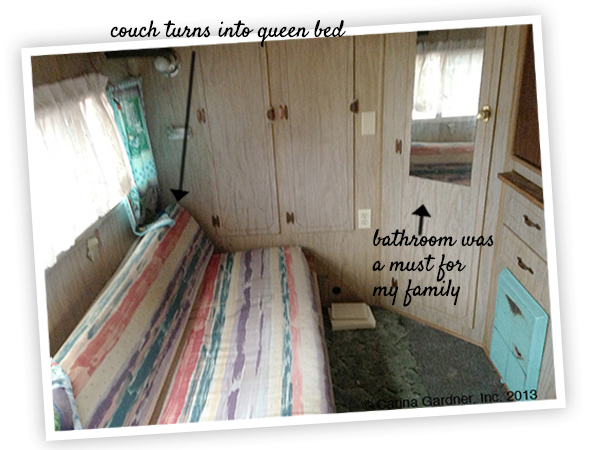
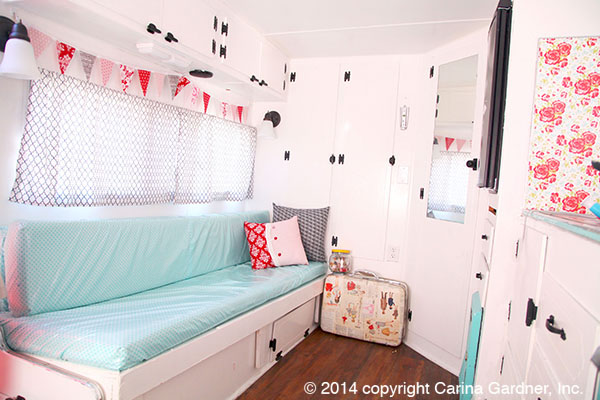
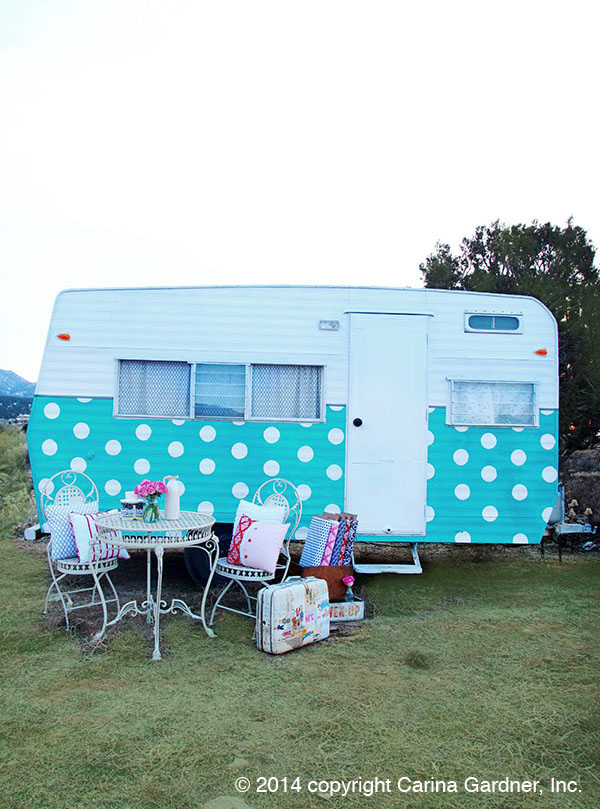
Some of the pictures make Lucy look bigger than she is. Keep in mind she is 17 feet long and every cushioned surface becomes a bed (bunk on the top with the double cushions pull out, dinette becomes the bottom bunk, and sofa turns in to a double bed). Oh ya, and even though it isn’t pictured here, check out the silver piece between the bathroom door (it has a mirror on it) and the sofa. That’s were I hang the 24 inch TV when we aren’t on the go.

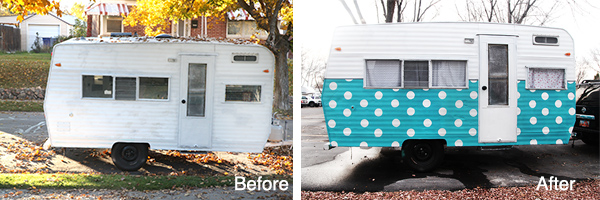
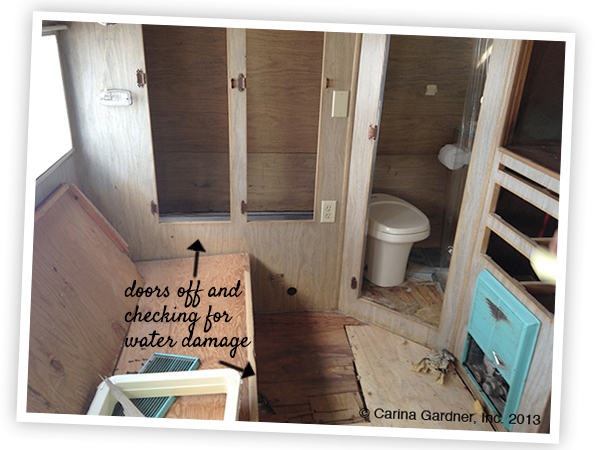
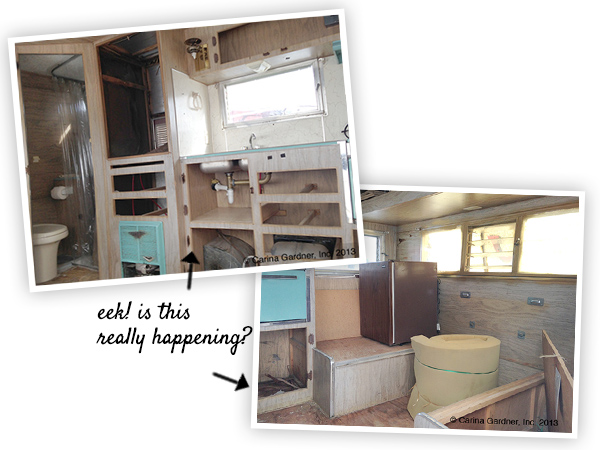
Want to see the befores?

Glamper Renov Part 1
Glamper Renov Part 2
Glamper Renov Part 3
Glamper Renov Part 4

Recap of Glamper Visit to Pine Needles Quilt Shop
Recap of Glamper Visit to My Girlfriend’s Quilt Shoppe
Recap of Glamper Visit to Quiltique

Enjoy!

Carina

PS. You’ll notice no pictures of the bathroom in this post. That is the one part of the glamper that may take more time to renovate. I’ll show you once I’ve finished making decisions about where it is going to go. This renovation never ends!

GLAMPER_carinagardner_8_web  GLAMPER_carinagardner_2_web  IMG_6310_blogGLAMPER_carinagardner_7_web GLAMPER_carinagardner_5_web    GLAMPER_carinagardner_10_web   IMG_6159_blog

GLAMPER_carinagardner_9_web   IMG_6173_blogIMG_6286_blog IMG_6304_blog  IMG_6295_blogGLAMPER_carinagardner_3_web      GLAMPER_carinagardner_6_web


Silhouette Design Store JOANN Stores

Glamper Renovation Part 4- Exterior Finished!

glamper4

It’s been so busy I haven’t had a chance to post the finished exterior of the glamper! And just in time too! I was watching the weather closely to paint the exterior and parts of the interior.

IMG_5267_web

The polka dots turned out to be a bit of a chore. At the end of the day, I’m glad I did it because it gives my glamper such a fun look. To get the polka dots I cut 5 inch circles out with a circle cutter with an 18mm blade. I then spaced them out 5 inches apart both vertically and horizontally. Because I was using a spray, I knew the circles wouldn’t come out “clean”. Once the paint was dry, I just figured that I was going to be able to use a stencil to outfit the edges with my white paint.

Because of all the crinkles on the glamper, this turned out to be an impossible plan. I ended up hand painting every single dot! Eek! Thankfully I got a little help (see photo below).

4_web_glamper1

I did a touch up coat of white on the top of the glamper and a tiny gray stripe between the top and bottom. It was two days of torment well worth it!

4_web_glamper_2

Here’s a quick view of the other side of the glamper:

4_web_glamper_3

I’ve also been working hard on the exterior and finally finished painting the bathroom, touch-ups, most of the hardware is in, the fridge installed, tv hardware installed, the cushions all sewn, and most of the curtains finished. I’m still a bit out before I can show you all of it. In fact, I have a hankering to decorate it for Christmas so the first shots of the interior you might see all “Christmas-ed up.”

If you haven’t seen the previous posts on the Glamper, here are some quick links for you:

Glamper Renovation Part 3
Glamper Renovation Part 2
Glamper Renovation Part 1

Carina


Silhouette Design Store JOANN Stores

Glamper/Camper Renovation Part 2

Sewing Summit’s Quilt Shop Hop today (which by the way was awesome!), I ran over to Brandon’s to check out the official renovation list. As per request from the Part 1 comments, here’s the abbreviated list I am having him work on. He gave me a invoice that separates out labor and cost of parts. I love that because it gives me a good idea of what I am really paying for. We are hoping the trailer will be done in a month, but I suspect it will be more like 6 weeks.

InteriorDesignBoard

So far I am about $800 over budget but I know there are things I haven’t compensated for. Plus I haven’t calculated in any of MY costs for beautifying this baby (paint, fabric, light fixtures).

-Install new Fridge
-Remove and replace Water Heater (Atwood 6 Gallon Gas Water Heater)
-Replace fresh water tank (24 Gallon)
-Remove and install new toilet and fittings
-Install new water pump
-Install new battery (12 Volt Marine Deep Cycle Battery)
-Remove Rotten Floor including Bathroom Floor
-Install Inverter/Charger (Progressive Dynamics 45 AMPS)
-Install Propane Tank (2, 5 Gal tanks)
-Remove rotten material for fridge and rebuild
-Replace trailer cable,
-Repack hubs and bearing inspection
-Power check, shoe inspection, axle inspection

You can see these are not exactly little things. And it doesn’t include the possibility of replacing a ceiling panel, ceiling vent/fan, and putting in the flooring for me. I can’t imagine doing all of those things myself so I’m grateful to have Brandon. The last thing you want on happy-family-mini-vaca is for everything to breakdown.

Above are some of the materials I’m considering for the interiors (because that’s the fun part). You like the photoshop magic? I tried a few different colors before I settled on this one. I’m going to have to see if I can find a color chip to match.

I also started a glamper pinterest board to keep me organized. If you have any inspiration(or have done a glamper yourself) please leave a comment with a link on this post! I would love to see!

Also, if you know anything about 12v, gas, and 120 v lighting fixtures, please send me links! I’m finding it difficult to find cute fixtures.

I also promised this information:

Brandon (who is repairing my camper) is at http://campereparadise.com/wp/. He is based in Salt Lake City and while the website doesn’t show alot, the trailers in his repair shop does. He has a few that are for sale as well.

Carina

Silhouette Design Store JOANN Stores

Glamper/Camper Renovation Part 1

IMG_3431_web_camper1That’s right. It says Part 1 up there in the title. That’s because I can tell, this is going to be a long project.

A few weeks back I started thinking about getting a camper. I had all sorts of fabulous dreams about what a camper could do for us…family outings, quilt shop stoppings, glamping in style…you know, all the usual stuff you think about when getting a camper.

I did a lot of looking on google and my local classifieds.  I have an obsession for Airstreams and have been eying them for five years now but felt they were out of my price range. So I turned to looking for a more retro design.

So what was I looking for? Here was my list of must-haves:
+ sleeps 5-6
+single axle (for those of you who, like me, had no idea what that means, it’s just one set of wheels)
+ smallish (as in-not hard on my car)
+bathroom
+1950s-1960s design
+functional equipment and tanks

Did I mention this was a dream list? Because I wasn’t about to find something in my price range with all of these things.

IMG_3431_web_camper2

I happened upon an ad for the camper above on a local news website from a couple of guys named Chad and John. They find and sell used trailers and will even LOOK for one that matches your needs and price range. I am waiting on the Facebook Page and will post a link to it for those of you in the Utah area. They have been awesome to work with.

Anyway, I fell in love with the layout of this camper. It is a 1969 Jet Airway (barely in my date range!) and is 17 feet long. I walked through a couple of their 12 foot trailers. I loved the small size but felt the lack of bathrooms (rare in a 12 foot camper) was not a negotiable feature (who wants to take their kids to the campsite bathroom at midnight?). Other pluses, this camper had a single axel and my car could easily tow it.

Another bonus was that it has a couch that pulls out into a queen bed, dinette that turns into a bed, and then a bunk that slides back above the dinette. Sleeping space, check!

IMG_3431_web_camper3

Obviously, this old girl needed some work. The problem is, I didn’t know HOW MUCH work I was in for. I took the camper to a local restoration shop. Brandon (his website will also be in the next post) tore the thing apart  and, well, let’s say, it wasn’t pretty what he found. Cut lines, broken floors, water damage, and more.

This is where I took a deep breath.

IMG_3431_web_camper4

I would love to say I’m a DIYer, but I’m not. I like to make things pretty (designer, remember?) so if it has to do with electricity and plumbing, I’m not your girl. What originally looked like a 2 week quick fix has turned into a several week renovation.I guess no trip to St. George for UEAA weekend. Sigh.

IMG_3431_web_camper5

These last few pictures are from today when I went over to verify everything that has to be done. Maybe I’ll give you the list, if you think it will be fun or useful. Tell me in the comments. Either way, it’s ALOT of stuff. Brandon will be working on the technical while I will be painting, sewing, and tiling (okay, well, I will do cosmetic DIY stuff).

In the meantime, I will be sewing curtains and cushions. I will also be picking out lighting fixtures, colors for the exterior and inside, and choosing wallpaper and tile. I’ll show you my project sheet soon. I think you will like. Think white, aqua, red, black, pink, and polka dot. It’s going to be fun!

Dreaming of going glamping (while kids dream of glamping late-overs),
Carina

Silhouette Design Store JOANN Stores