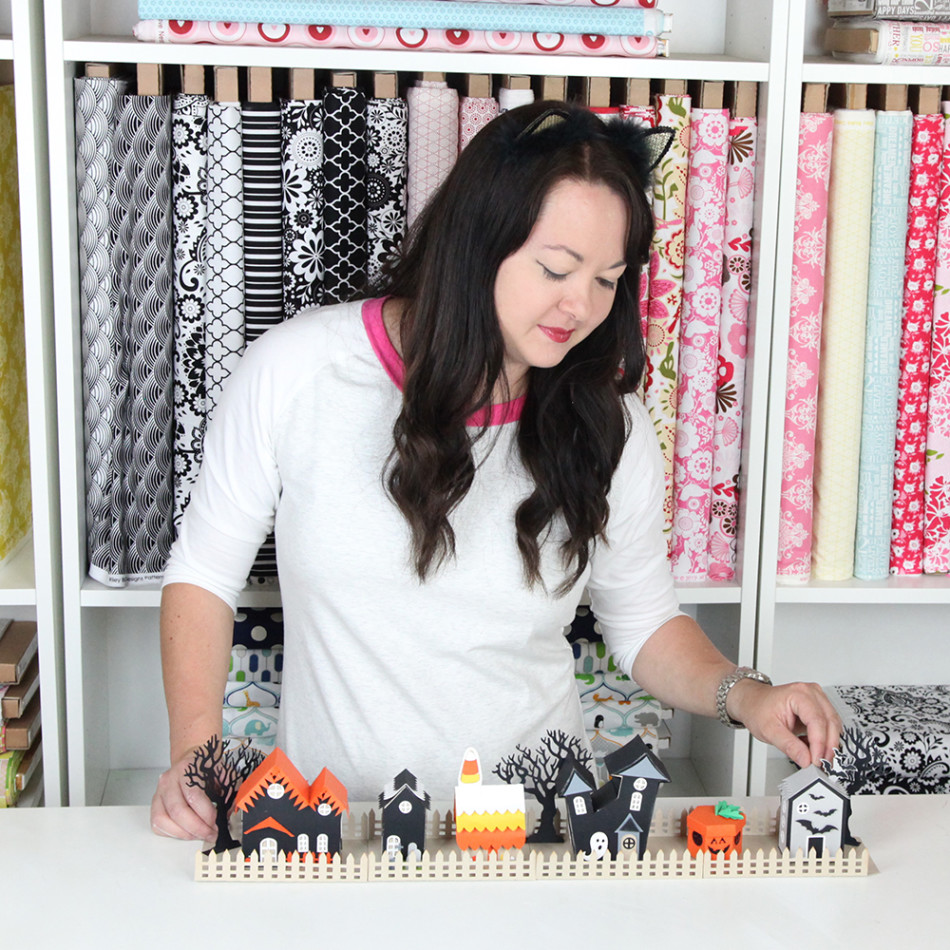
I know it’s early September but Halloween is around the corner and I know I’m gearing up for some serious decorating. I’m releasing a Tiny Halloween Village, this week on Silhouette. I think you will love it, especially if you did last year’s Halloween Village. Yes, All the pieces in the new set WORK WITH the Halloween village from last year! So mix and match!
This set (as the name suggests) is a little smaller. Why you ask? Because it all fits neatly on 8.5 in. x 11 in. paper! Yep! No sizing down for the Silhouette Portrait users! Hooray!
I have a new video with the tutorial of how to put together each of these new Tiny Halloween pieces here!
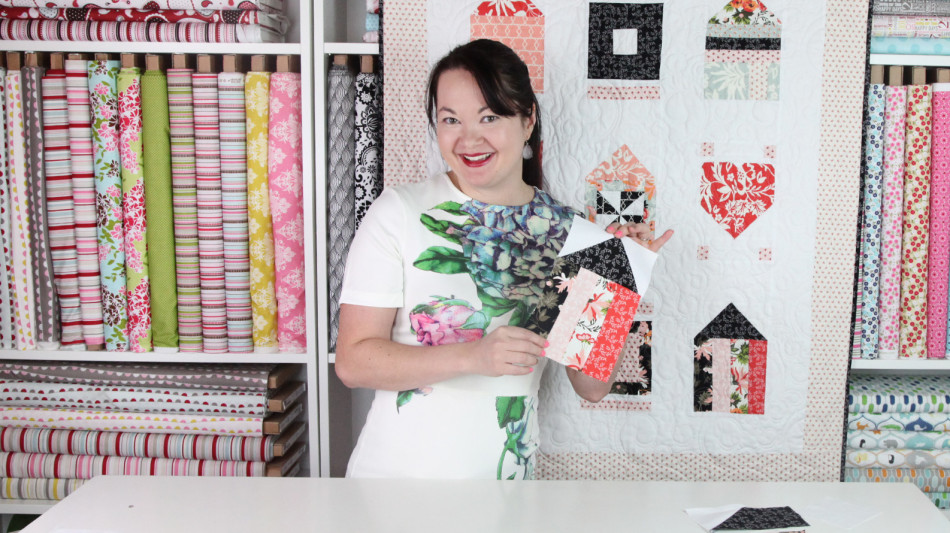
This months Block of the month is this cute square block for the home sweet home quilt. This is my Eighth block for our 2016 Block of the Month. Grab the download in the store and watch the video below to join in!
I love summer and all of the treats that come with it! These 3D Ice-cream treats are so cute and wonderful. There are a few different kinds of popsicles, an ice cream sandwich, and a cute candy favor box. You can get them in my store and on Silhouette on Monday. Check out these tutorials for help in putting them together.
Today is the start of our wonderful BlogHop with Riley Blake Designs for my new collection Posy Garden! I can’t wait for you to see all the amazing goodness that is about to be unveiled over the next two weeks! It’s going to be awesome!
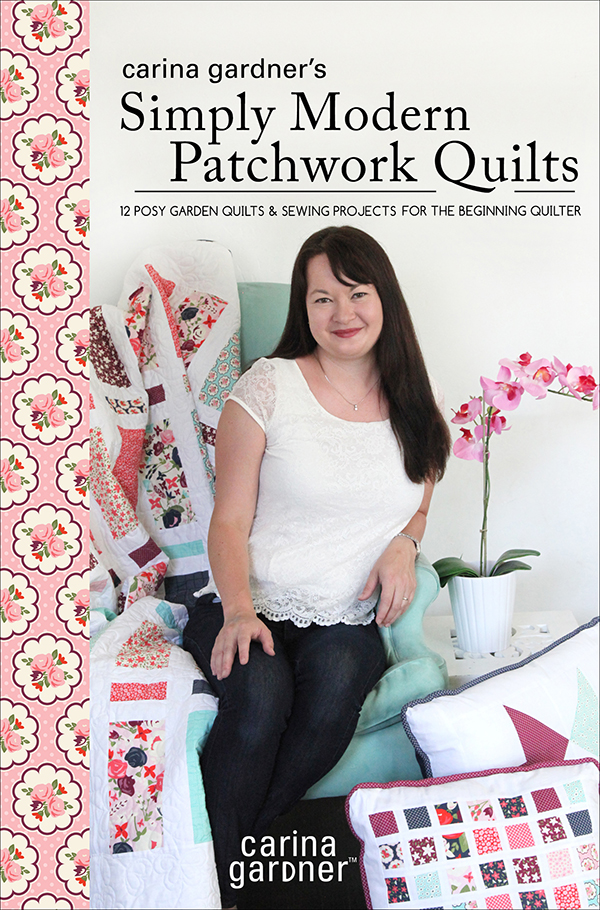
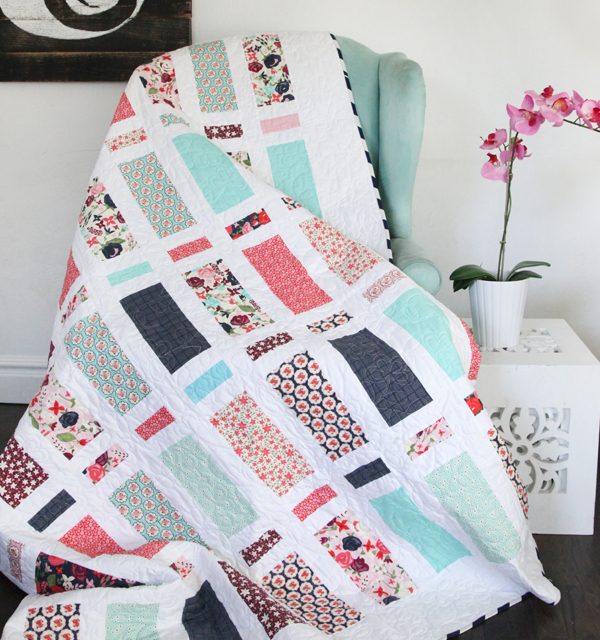
Along with that! My new (and first!) eBook called Simply Modern Patchwork Quiltsgoes on presale today! Eeek! I’m so excited! It will release on August 15th in the Kindle Store on Amazon. I’ll add links here as soon as the presale goes live! I know we are doing a HEFTY discount for the presale so keep your eyes open for it!
***NOTE: It’s on PRESALE NOW! Go to Amazon to purchase it here. The presale price is $4.99. which is 50% off the regular price of $9.99 through AUGUST 15th when it becomes available! That’s less than 50 cents per pattern! Make sure and grab it during the presale period!
There are also four contributing pattern designers to the book including Amy Webb, Amanda Neiderhauser, Christine Cook, and Angie Tackett! These ladies did a fabulous job and I can’t wait for you to see what they have done!
As for the Bloghop, here is the list you are going to want to visit everyday! Come back to this post to link over to these ladies blogs!
I’ll also be reposting their projects over the next two weeks on instagram if you want to follow over there.
I’m so excited to see all their amazing projects! It’s going to keep myself from sewing all week!
Carina
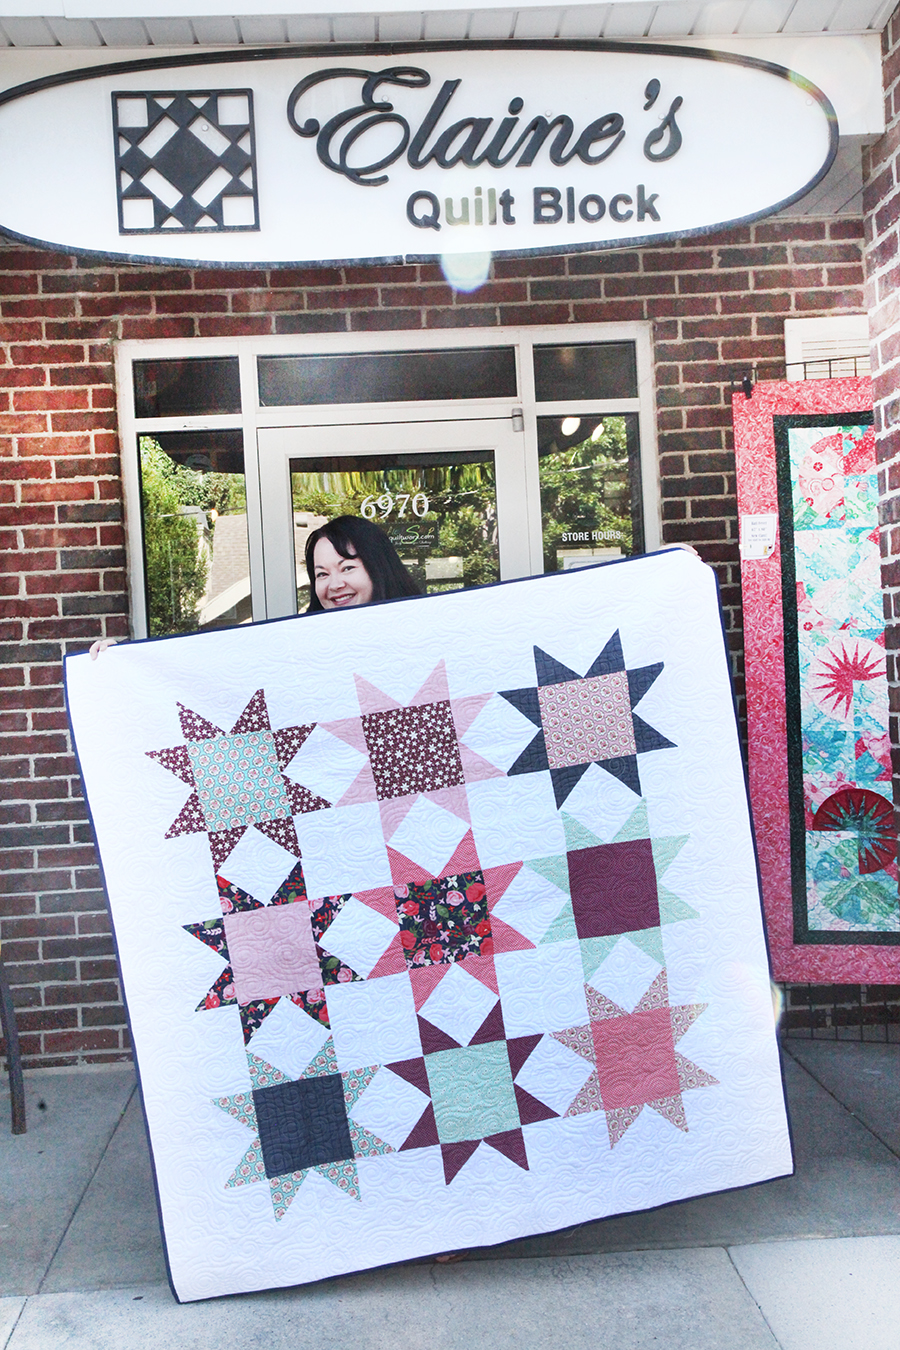
Psst! If you are in Utah, make sure to come visit me at Elaine’s Quilt shop this weekend on August 6th! I’m teaching a free class in the morning and the Clean Star Quilt in the afternoon. My glamper will also be there to tour all day!
This week’s Silhouette release make me think I need a vacation! All of my files are beach related. You can use them for all kinds of things summer. We released them in my shop today in bundles. On Monday, they will be in my Silhouette shop as well! They’re great for any of your summer projects! Happy crafting!
Summer has gotten off to a great start, and I have a house block for you for your Home Sweet Home Quilt! This is my seventh block for our 2016 Block of the Month. Grab the download in the store and watch the video below to join in!
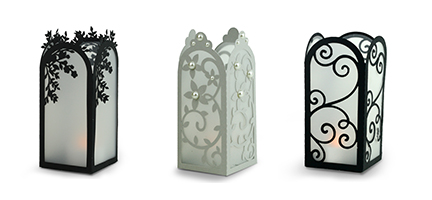
It’s party and wedding season! Both of my SVG releases are wedding or party related. You can find them in my Silhouette Store here. This week I have tealight candle holders that you can use for decoration or center pieces. I used translucent binding cover that you can get at your local office supply store for the windows. They’re super simple and easy to cut out and all you need is a battery powered tealight to put in it. They look great by them selves or with other decorations for a center piece.
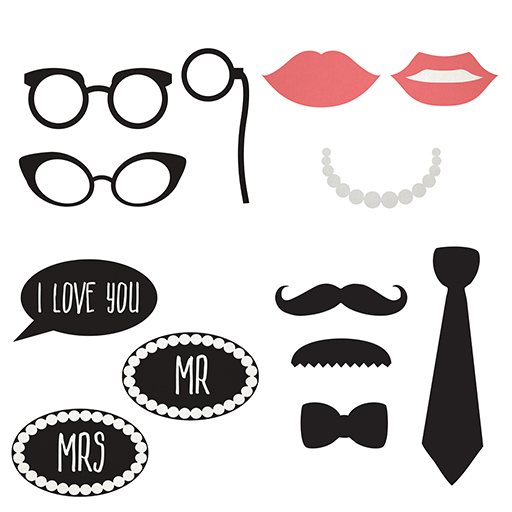
I also released wedding props that you can use for a photo booth at a wedding or other party. Aren’t the mustaches fun? These are also easy to cut out. Just attach them to a wooden dowel with hot glue or tape and you’re ready to take pictures!
This is the first week we are releasing our SVG files in bundles here before they are released in the Silhouette Store! That’s right, you can get them early! This week’s releases are in the store right now. We are also doing a 40% off SVG sale this weekend only. Now through Sunday you can get 40% off all SVGS! This week we released sets of Stacked Pillowboxes and Flower Spheres!
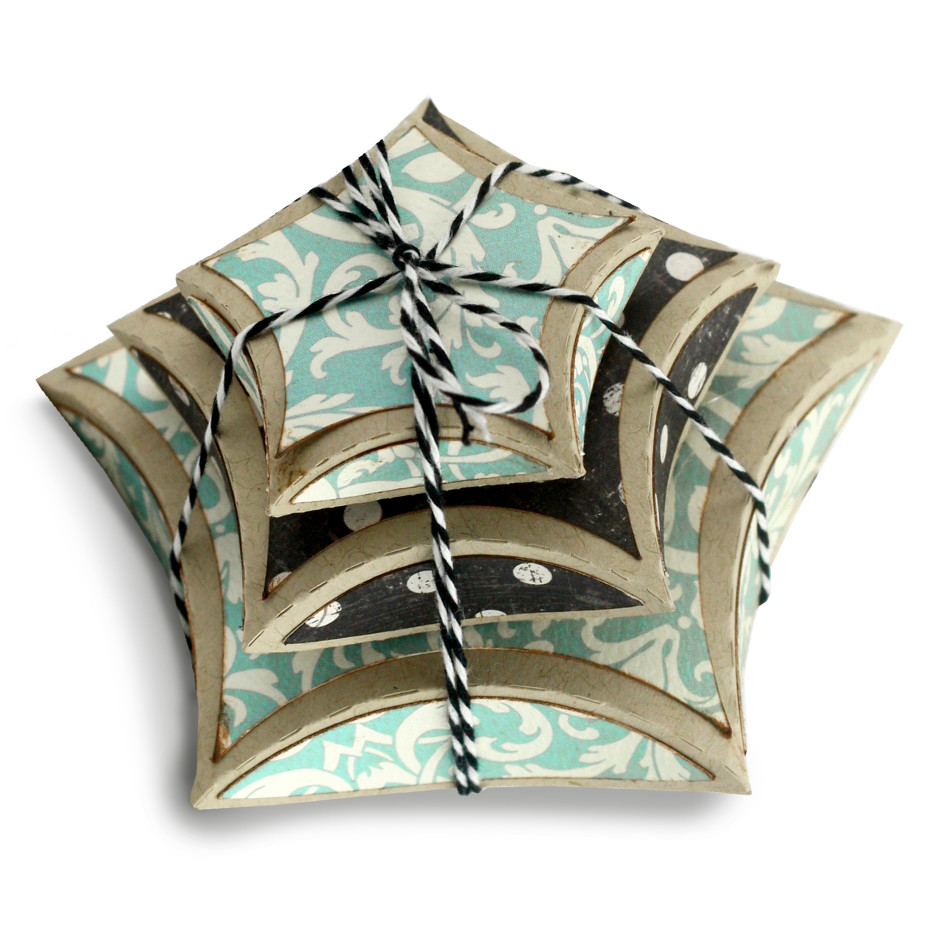
These Stacked Pillowboxes, found in my shop here and here, are perfect for small gifts or as favor boxes for your next party. There’s a triangle, square, pentagon, and hexagon shape set. They’re simple to cut out and put together! You can also decorate them with your favorite scrapbook paper. We tied our up with twine for a cute package set!
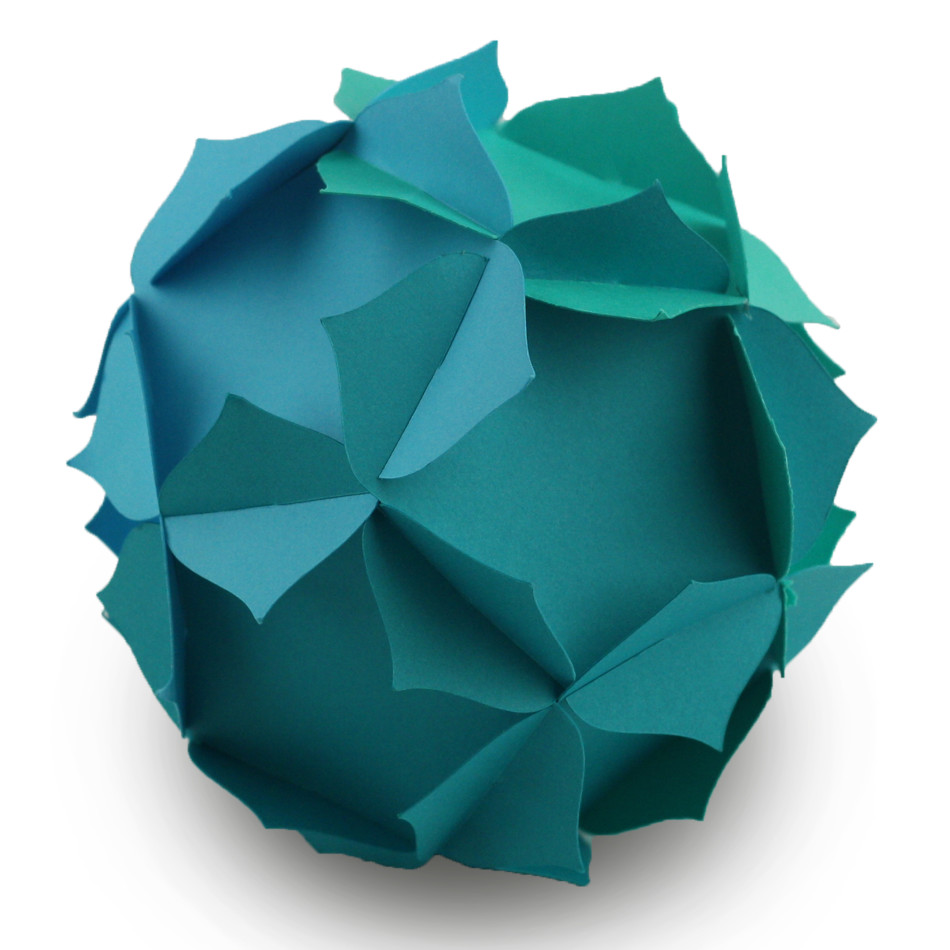
Flower Spheres are super versatile project that go together without any glue! Each pieces has slits that slide together to create a sphere. These flower balls are a fun decoration for a room or party. We made ours with three different colors to give it a fun ombre vibe. You could also use patterned paper or glue other decorations onto them. Here are some short instructions to go with the video:
Cut 12 of the shapes on your machine
slip the pieces together using the slots on the sides of the shape.
(Optional) add a string if you are interested in hanging your flower ball.
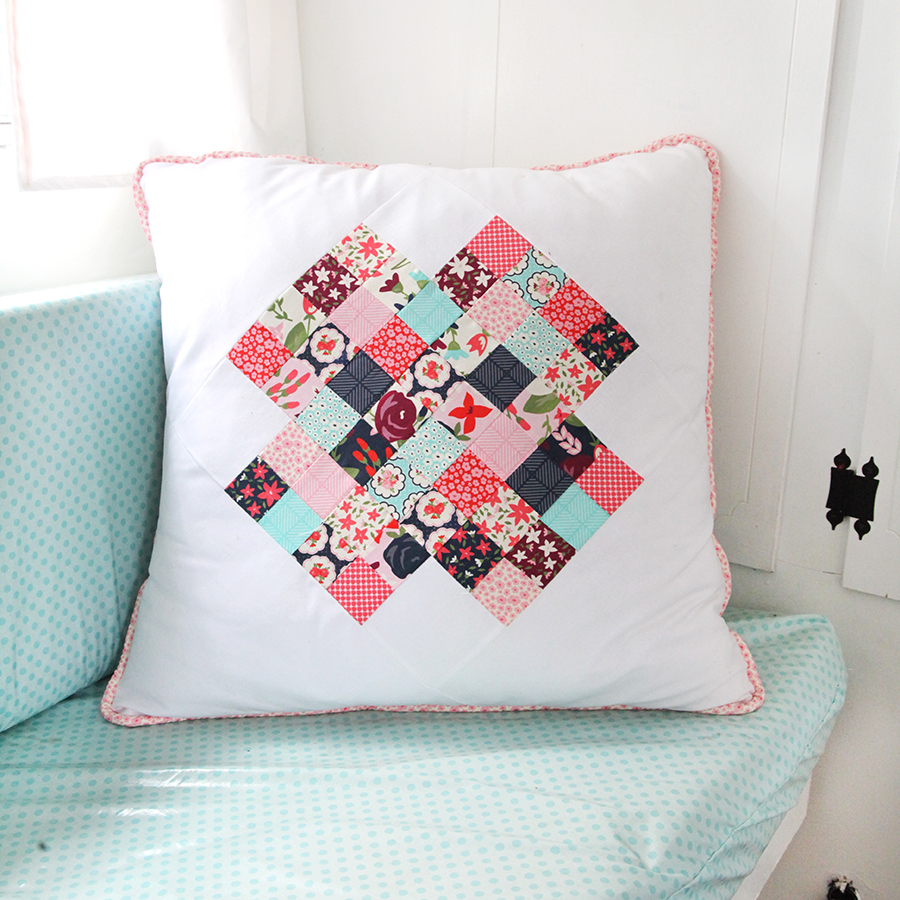
That’s right! I’m going to be at Elaine’s Quilt Block! Put Saturday, August 6, 2016 on your calendar because I am pulling in my glamper and teaching classes! Here’s what is happening!
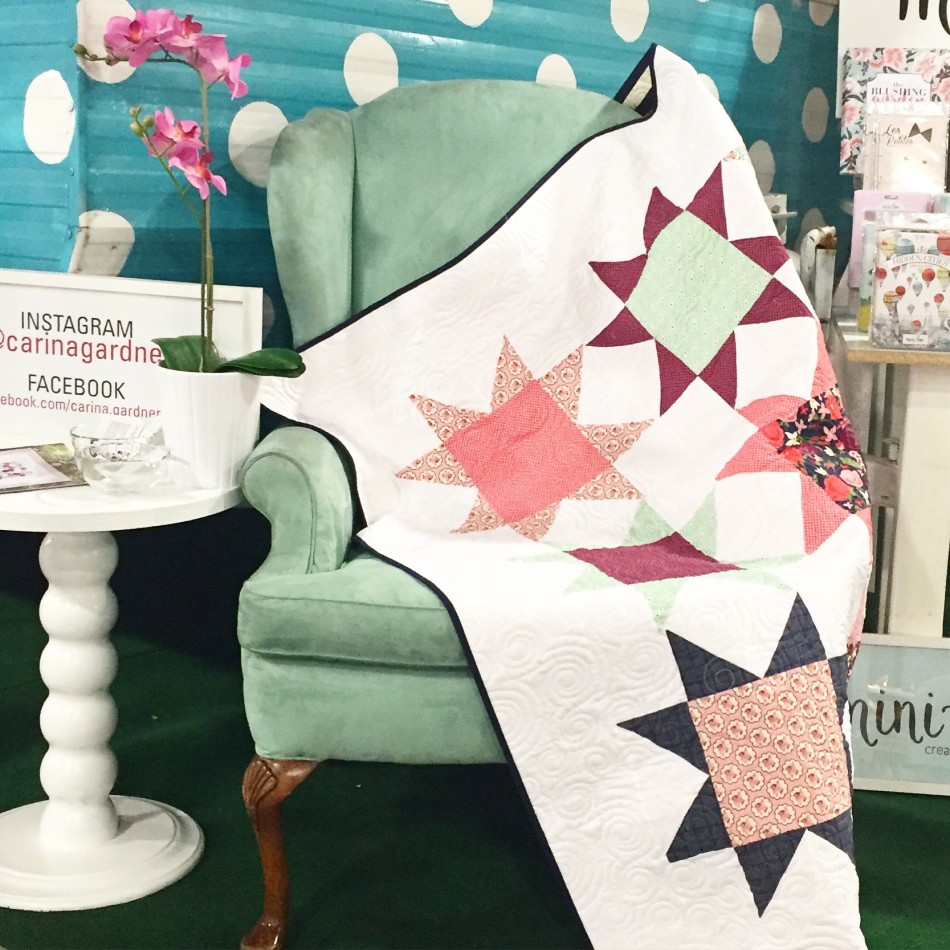
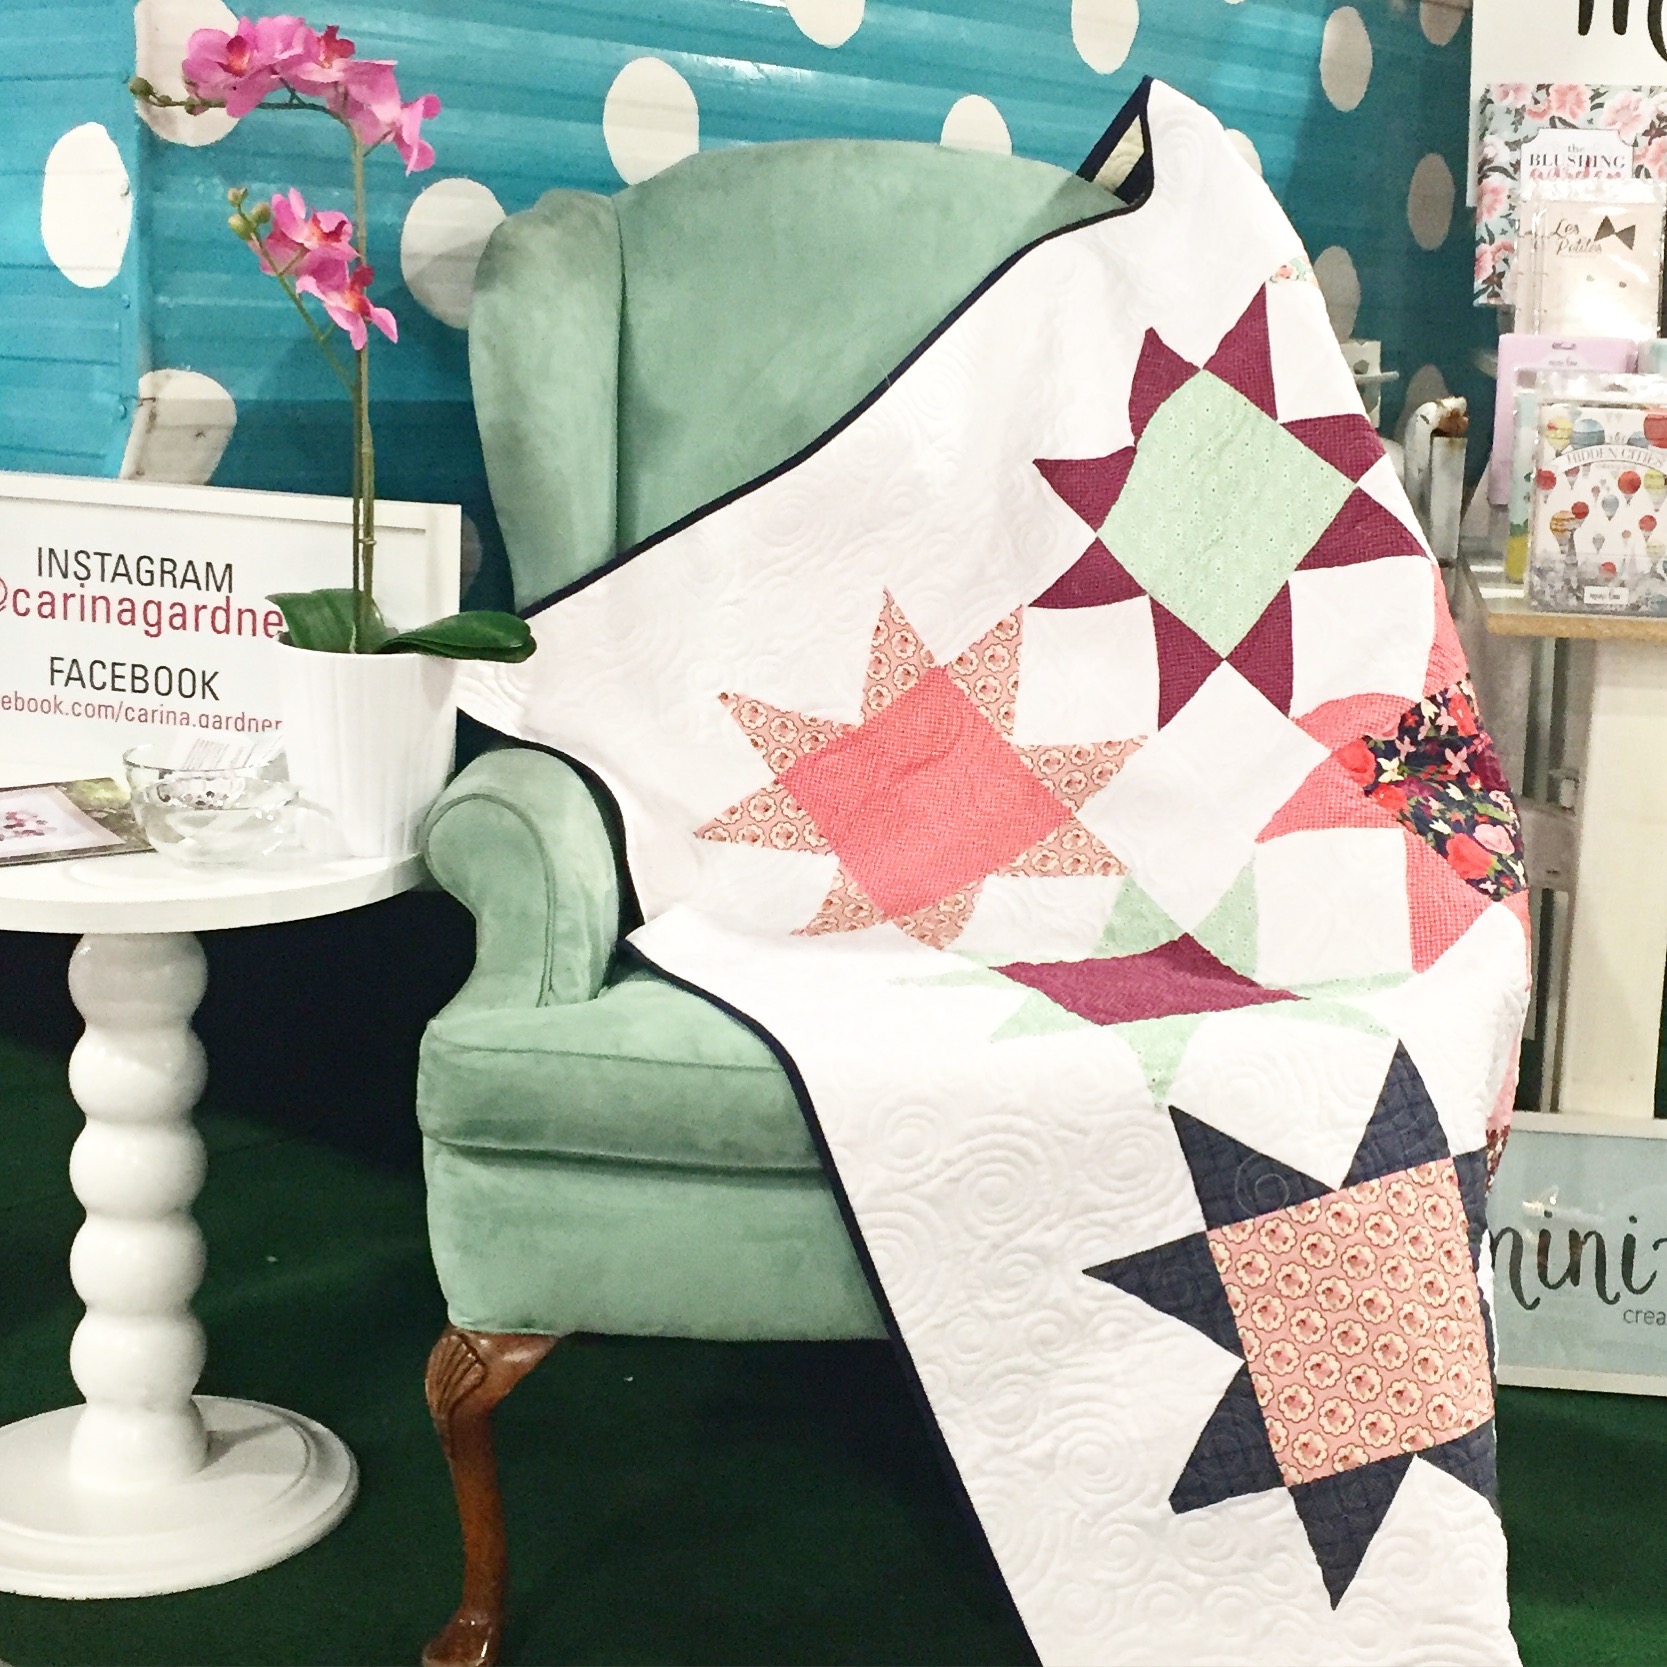
When: SATURDAY, AUGUST 6, 2016 Where: ELAINE’S QUILT BLOCK 6970 S 3000 E Salt Lake City, UT 84121 What: Classes, Glamper Walk Through, Kits, and Raffles! Class Times: 10am-12pm Modern Granny Square Pillow or Mini Quilt (Shown below) 1pm-3pm Clean Star Quilt (shown in the pic to the left)
Here’s the deal on classes: There is a Posy Garden Kit you will need to buy from Elaine’s for each of the classes. There is a class cost that I believe will be $24.99. I will have raffles sponsored from Riley Blake and I will be making a grand prize for someone to win at the end of the day. Be sure to check Elaine’s Quilt Block for registration and more information on this!
Raffles will be happening throughout the day. I know there will be some cool things happening to enter into that (more on that on instagram!).
The glamper will be set up like we had it for Quilt Market.
I hope you will come join me because we are going to have a wonderful time! I’m so excited to launch Posy Garden.
I have been loving these Fairy Jars. There’s something magical about them. They might look a little intimidating to make, but trust me, they’re pretty simple. All you need is transparent paper, which you can get it at your local office supply store. The transparent paper makes up the jar part, and the rest is regular paper. To put it together, all I used was hot glue. Watch the video tutorial for more help on putting it together. Happy crafting!
Here’s another fabulous explosion box. The pinwheels are tiny to put together but are so cute. Be sure to add a small jewel or pearl to the center because it will cover up any “mess” made by your hot glue gun or tape. This one can be found in my Silhouette Shop or my Bundle shop!
Happy creating!
Carina
I ADORE 4th of July! That is why I made a ton of 4th of July stuff for my Silhouette Shop and the Bundle shop this week (well, that and I promised my church I would provide the 4th of July centerpieces for the Holiday Breakfast). I have a bunch of new Mini Episodes for you to watch how I put these together. This one is the Star Explosion Box.
Enjoy!
Carina
These motion card are put together like most folding cards the little piece that moves in the card is attached by using a 1/4” inch pop dot.
Instructions:
1. Cut all pieces and assemble all Parts that attach to the card.
2. Assemble the portion of the card that will move around.
3. place a 1/4” pop dot on to the back of the movable piece.
4. push the pop dot through the slot in the card.
5. Attach one of the circles to the back of the pop dot. (at this point your motion piece should be attached)
6. Take the second circle (the one with the dashed score line in it) and fold it in half. Now glue half of it to the circle on the back of the pop dot. (this gives it a little bit of a handle so its easer to make the motion piece move.)
This cards are great and can be used for gifts as well as or little standup albums .
The steps to making these cards are:
Cut out all the cards that you want to chain together
Glue the elements onto the inner portion of the card
After you have all the elements glued down. glue the borders onto the frame that goes along the out side
Take the long tab and glue it the it to the next card in the chain and repeat until you have the desired amount chained
Fold back and forth along the score lines
Now take the tabs or tab on the inner card and glue it to the the next inner card.
Make sure you pass through the frames (don’t try to go outside the frames)
Now you can fold up your card and give it to someone, or you can put it on display.
Note that if you are folding the card. It will only fold in one way. if it doesn’t seem to be folding together better tray folding the inner cards the same as the outer cards.
Watch the videos so you can see how we put our cards together.
I LOVE the Off Set Tool in Illustrator. It’s fast and easy to use. Best of all, it has so many applications for use. I like it when I am creating dielines for stickers or diecuts. I also adore it for anything that needs a bleed. It works like a charm for nested objects. Take a look and hopefully it will be useful to you as well!
I’m still decompressing a bit from market. In fact, when we finished and pulled the entire double booth down, I looked through my photos on my phone and realized that I had been so busy, I hardly took ANY pictures. WHHHAAAT? Whoops.
In the end, you’ll have to visit the hastag #carinaglamps on instagram to see all the going ons that happened in my booth over the course of the three glorious days at Quilt Market 2016 in Salt Lake City.
First off, a story. My glamper was suppose to go in before all the pipe and drape went up in the convention center.
Ya. They forgot about me. When I called the Tuesday before set up, they realized their mistake. So I pulled it in at 8am Wednesday before everyone else came to set up (important since we didn’t want to drive over anyone else and their booths). One of the dock workers pulled it into the Salt Palace for me since exhibitors were technically not allowed in yet. All good.
A bit later, a DIFFERENT dock worker came and asked me if I wanted the door facing out. I’m not sure what the expression on my face was, but I can tell you I was extremely puzzled and confused. I think I mumbled a, “Um, yes? I mean, I want people to actually go INTO it.” Apparently, they had pulled the glamper in BACKWARDS with the door facing the inside of the booth (as in, no one would be able to actually get into it). I believe I heard the dock worker mumble something along the lines of, “I told those idiots that.” as he ran in to the scene of the crime.
Needless to say, they fixed it. I’m not sure how well my booth would have gone over if no one was able to actually go into it to see all the pretty Posy Garden fabric (heehee!).
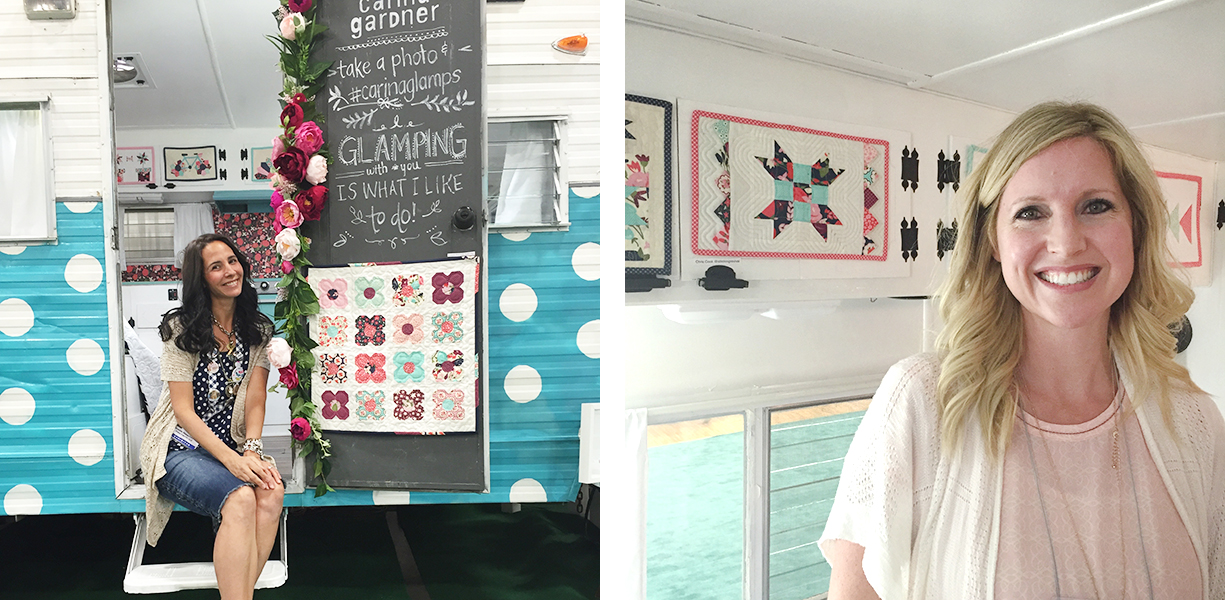
Because I didn’t leave my booth much, I only have highlights for you. Maybe the biggest highlight (for me) was that the booth won the Creativity Award. I was SO honored! I hadn’t thought about booth awards and I felt grateful to get one. (Photos below: Left—Creativity Booth Award; Right: Baby Coco visits the glamper)
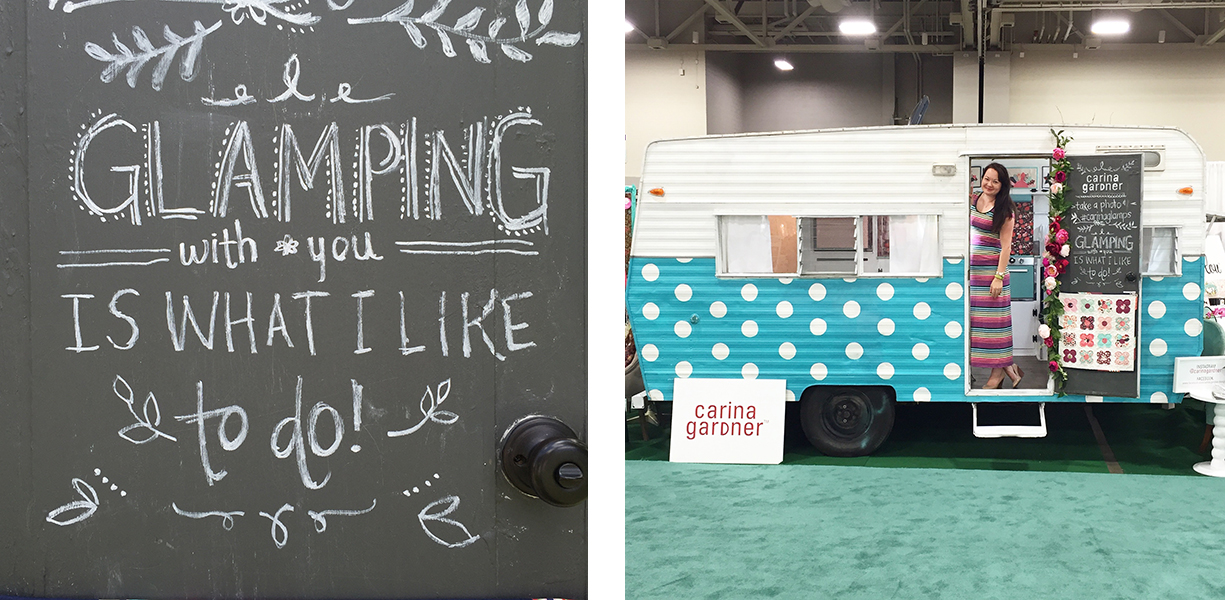
(Photo below: Left—I spent a lot of time on the chalkboards for this booth; Right—First day of the show.)
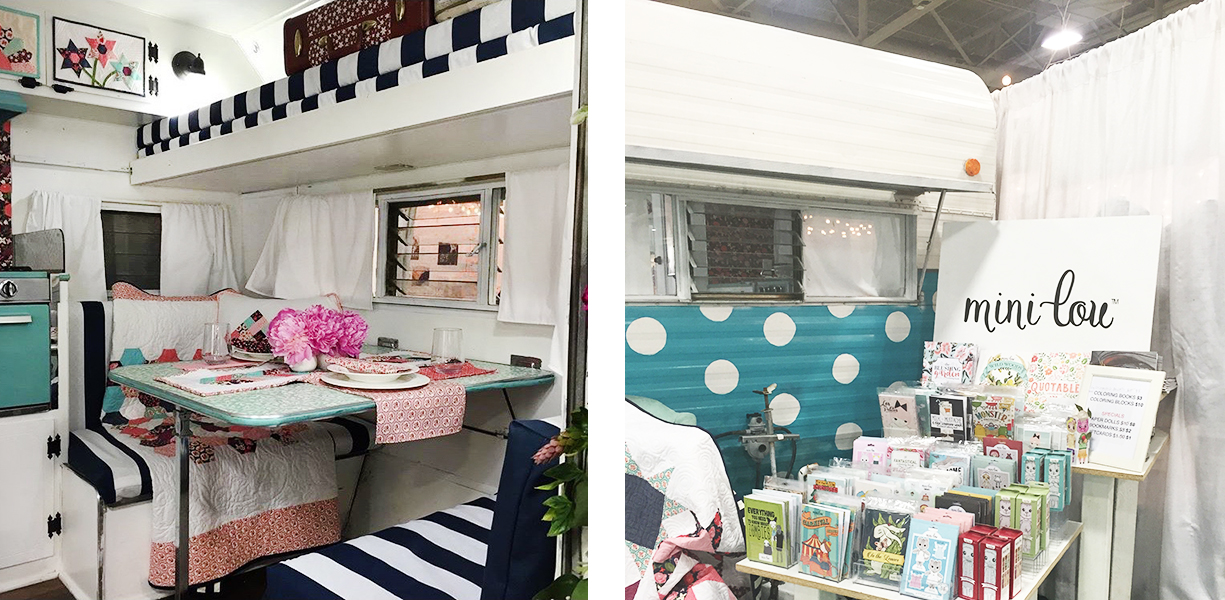
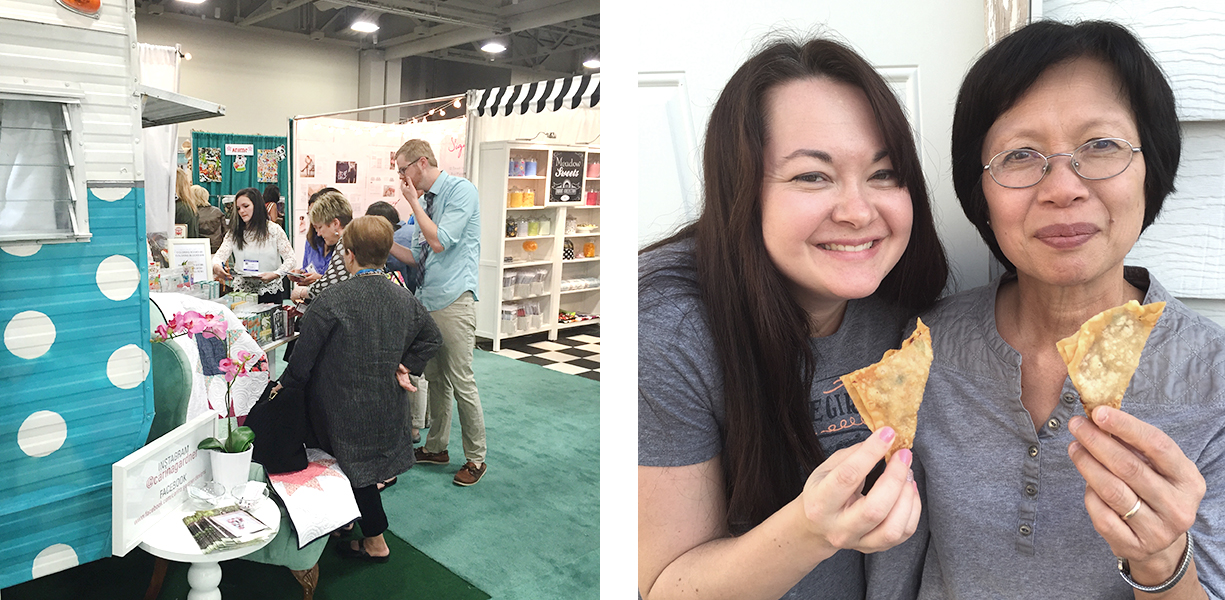
Most of my double booth was taken up by the glamper (which is about 10′ Wide and 17′ in Length), but we also had a fun section of MiniLou at the front and a section in the back for patterns and block of the month. And that darling sign above (the white one with my logo on it) was made by my sister who has a darling etsy shop: https://www.etsy.com/shop/SKWoodDesigns. She also made the MiniLou one below. (Photos below: Left—this was taken by @emmalinebags; Right—MiniLou).
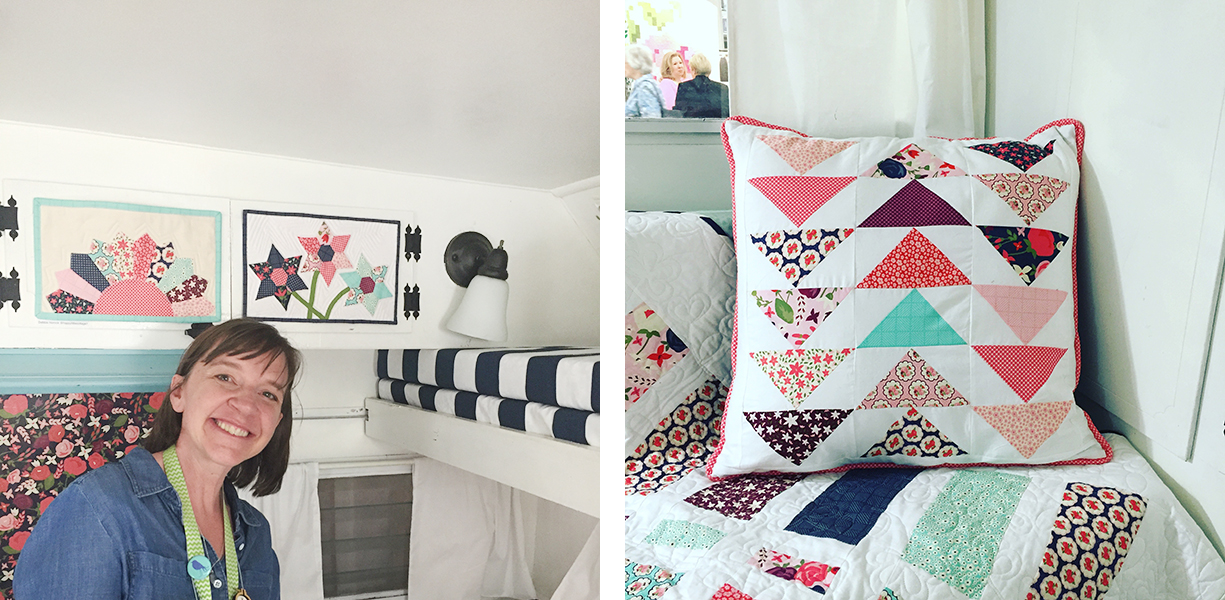
I wish I could take credit for all the wonderful sewing in the glamper, but I can’t. I had some fabulous sewers put together many of the projects in the booth. A big thank you to @stitchingrevival Christine Cook, @quiltstorymeg Megan, @mystitchstory Angie Tackett, @amylouwhosews Amy Webb, @farmwifejournal Cherilyn Dunn, @diaryofaquilter Amy Smart 20.2, @jedicraftgirl Amanda Neiderhauser and @happylittlecottage1 Debbie Homick. They made wonderful minis for the glamper.
(Photos below: Left—Amy Smart shows off her mini; Right—Flying Geese Pillow and Garden Patch Quilt I made using my Posy Garden fabric).
(Photos below: Amanda Niederhauser and her mini; Christine Cook and her mini).
Last but not least, my mom came into town and helped with my kids, sewing, and cleaning to get me ready for market. She sewed all the curtains, cushions, and gulp, the piping for all the pillows. Did I mention I HATE doing the piping. Ya, she saved me!
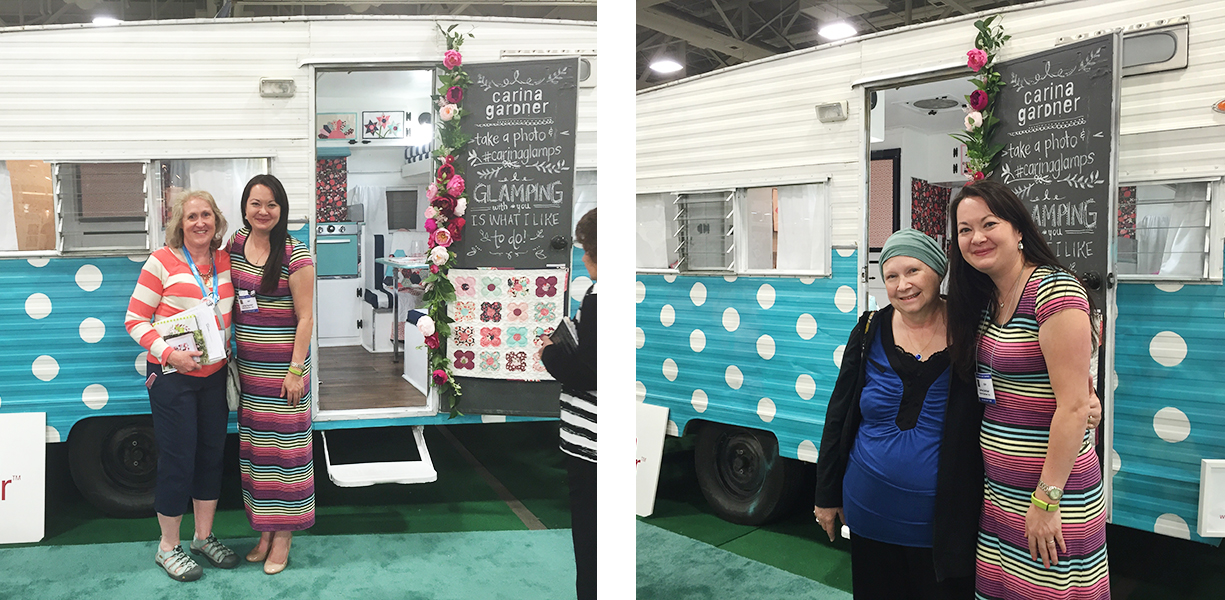
(Photos below: Left—Minilou was all the rage at market!; Right—My mom and me at the Chinese bash we threw after market.—That’s my I-am-happy-it-is-all-over-with smile-wink, wink.).
It was so fun to catch up with new and old friends. The photos below include Heather Spurlock who works at Elaine’s Quilt Shop (BTW the glamper will be there with classes in August! Stay tuned!) and Deanna Hartvigsen who used to be with Mormon Handicraft but has since retired. Deanna is a dear friend and recently has gone through several rounds of chemotherapy. I couldn’t have been more glad to see her!
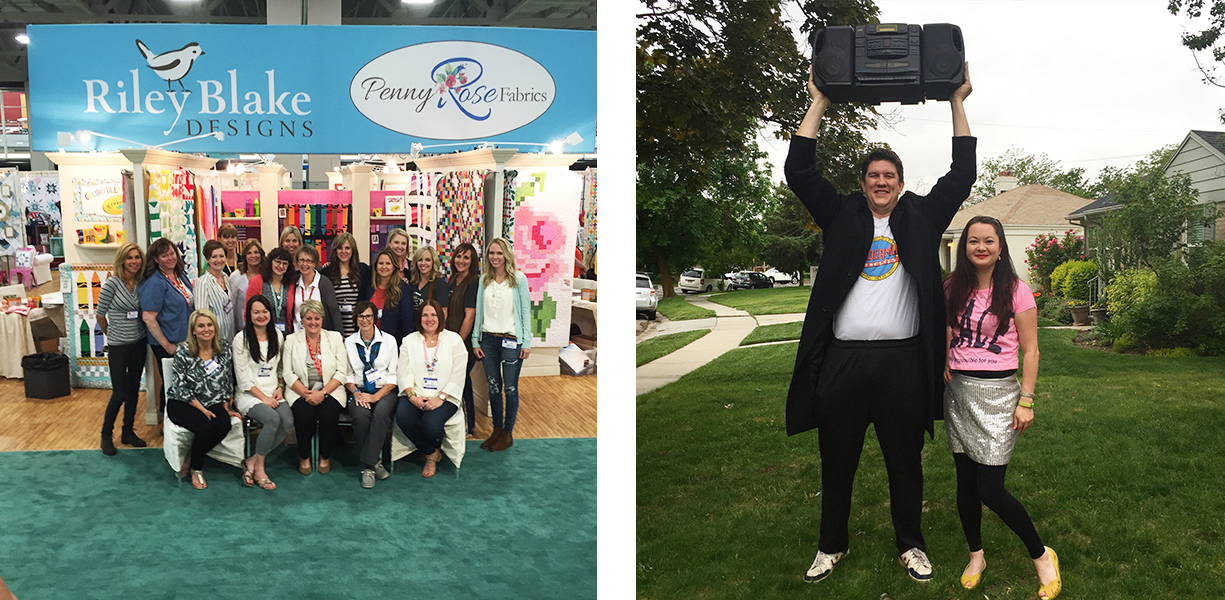
The photo to the left is of MOST of the Riley Blake designers. A few of the designers were missing in this shot.
The other photo is of Josh and I dressed up for the Riley Blake 80’s party. Anybody want to guess at Josh’s movie reference?
Any that’s the wrap up! It’s always such a treat to be part of the Riley Blake team and I can’t wait for Posy Garden to hit a store near you! Hopefully, I’ll have the swatch book up for it soon!
I’m still recovering from Quilt Market and I’m hoping to have photos up by Thursday! We had a great show and I can’t wait to tell you all about it. For now, I’ve added my shadow box to the Mini Episodes! We have been making so many gorgeous little videos of the new Carina Gardner and MiniLou products coming out in our Bundle Shop and in the Silhouette shops. You’ll see them premier on instagram so check it all out there!
Tomorrow is the kick off of Quilt Market. Earlier this week, Felicity and I were part of the runway show at Riley Blake’s Retail Fabric Extravaganza. I also did a drop for Riley Blake’s awesome Fabric is Fun 60 days of giveaways that has been going on.
On Wednesday my team and I installed the glamper into the Salt Palace and finished setting up the booth. (We are in Booth #2031 BTW! Come by if you are here). Today I have a Schoolhouse and I’ll be selling MiniLou at Sample Spree.
It’s been a tough few weeks finishing up our mid year launch of products for MiniLou and finishing everything I needed done before Quilt Market. There’s a lot more that goes into Quilt Market than just the sewing (although that takes up a lot of the time!). Organizing other quilters to make projects, ordering catalogs, designing new business cards, ordering flooring/lighting/walls, and getting babysitting are just a few of the things that were on my to-do list.
Speaking of babysitting, my mom was in for the save. She showed up last Saturday and has helped me sew, watch kids, cook, and clean this whole week. Such a blessing! That kind of help is priceless and I owe you one, Mom!
Quilt Market Summary will be up sometime soon!
XOXO-Carina
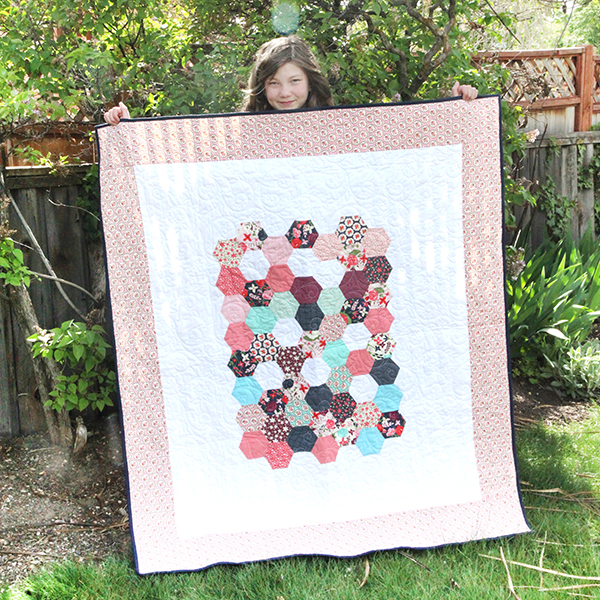
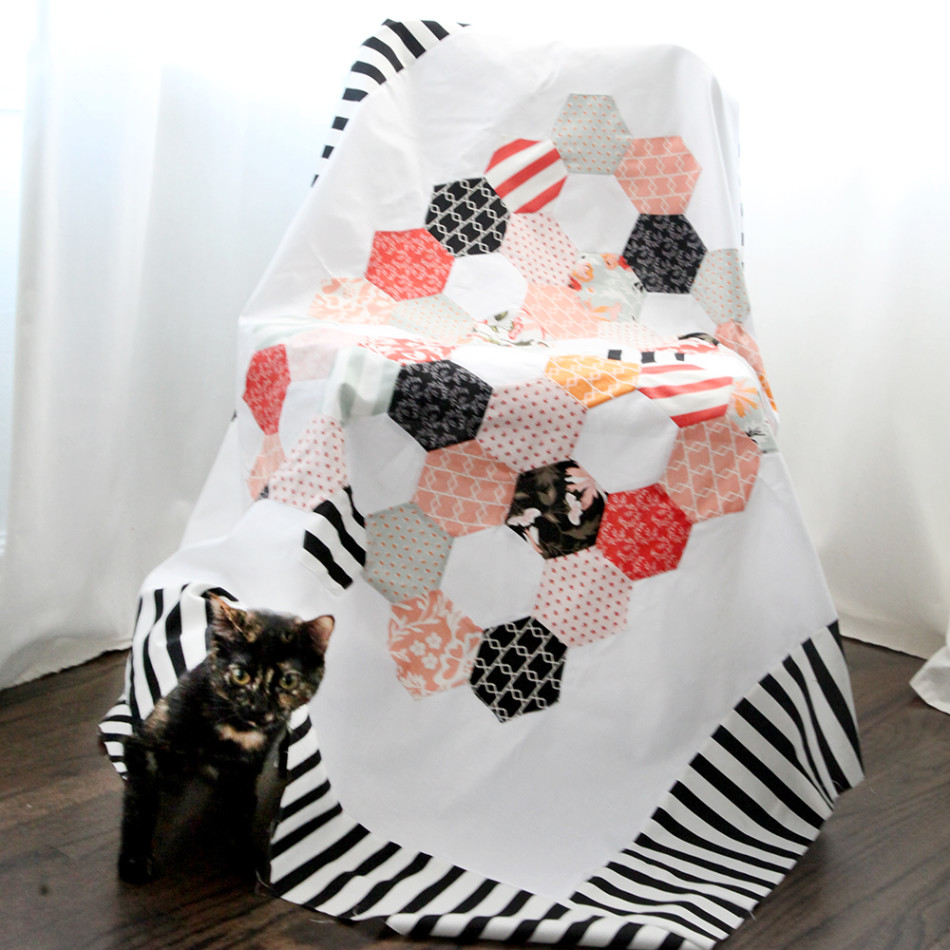
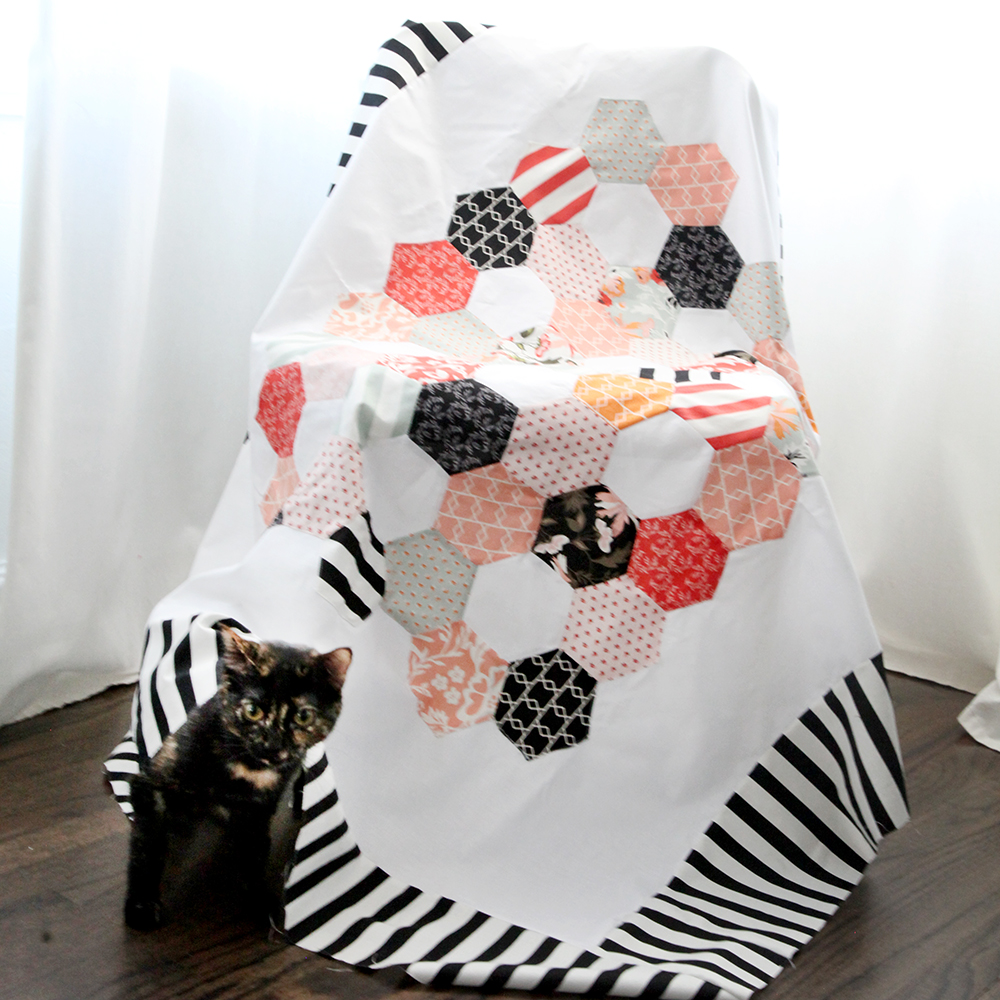
(Photo above is my Perfect Hexagon Quilt Sewing Pattern in my Posy Garden fabric line available in quilt stores July 2016. Photo to the left was made by Megan Jimenez of @quiltstorymeg)
So I had a blog fail last week and didn’t write a bit. Getting myself on a schedule for this might be harder than I thought. Today I wanted to introduce you to our new Mini Episodes on the CGTV Channel. They have their own page now (click on CGTV then Mini Episodes) and you’ll see all of the videos I have that are 1 minute or less. I have a new instagram (@carinagardnerpapercrafts) that sort of inspired me to make this new line of episodes. I have several small videos that didn’t have a place to live, including periscopes, quilt tops, tutorials, ect. On this new instagram feed I am trying to do several of my SVG tutorials in this method so you can see how I make them. Because I needed a place for these (and they didn’t fit into the regular CGTV Channel), we created the “mini episodes.” I’m still in the process of uploading some of the older mini episodes to this page so keep an eye out for that.
To kick things off, I have a new tutorial for you! I have a short little video showing you the power and simplicity of Clipping Masks in Photoshop. I hope you enjoy!
It might FEEL too late to throw something together for Mother’s Day but it really isn’t. Sometimes I think we get caught up in putting together something REALLY fabulous or REALLY intricate and while that is great once in a while, I think it’s just as appreciated to put together a simple card or pillow box (with a gift card in it for extra ease!).
This year is one of the first years I’ll be with my mom ON Mother’s Day (she’s flying in!). And she KNOWS it’s a busy time of year for me and there is a good chance I’m not going to have time to shop for that incredibly thoughtful gift (she’s also incredibly easy going about gifts).
Because of this, I’m going to be giving her a stack of fabric (something she will definitely use) and maybe something sweet to send home with her. And time. I’m going to really try and spend some time with her.
I know what types of things, I want from my kids…hugs, kisses, maybe a chance to put up my feet instead of cleaning the kitchen (let’s be honest, I wish for that everyday). But mostly I want time. It goes quickly, doesn’t it?
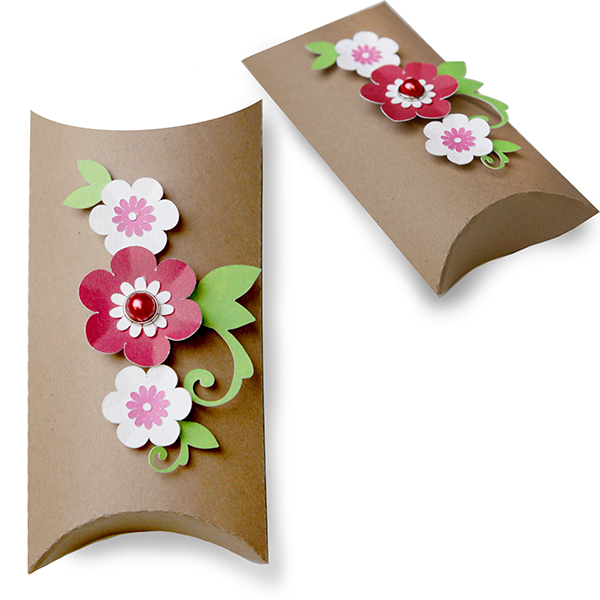
I love a little pillowbox with a giftcard in it. Thoughtful but easy.
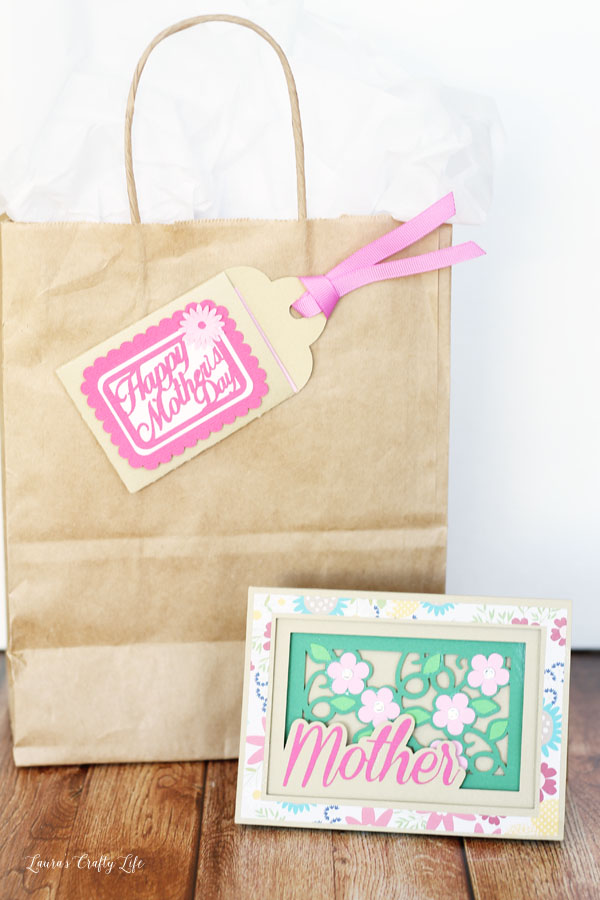
I also have a Mother’s Day bundle in our SVG shop (for all types of cutting machines) that makes me pretty happy! Laura from LaurasCraftyLife made the sweetest gift and tutorial for Cricut users on how to put these projects together. Check it out if you have a chance! The shadow box card takes a moment to put together but everything else requires a couple of cuts and then you are off to the races!
Hope you are prepping for a fabulous Mother’s Day!
This little thing called Quilt Market has taken over my life. For the next two weeks, I will be cutting, sewing, tucking, and painting (yes, painting!) to get everything ready for Quilt Market.
For those of you who do not know what Quilt Market is, it is a tradeshow for retailers to purchase the new fabric lines coming out. It is twice a year and this spring, it happens to be in Salt Lake. If you are REALLY curious about what Quilt Market is like, you can check out the video I did of several booths in Portland 2013. Skip through to see the different booths (there are a lot!).
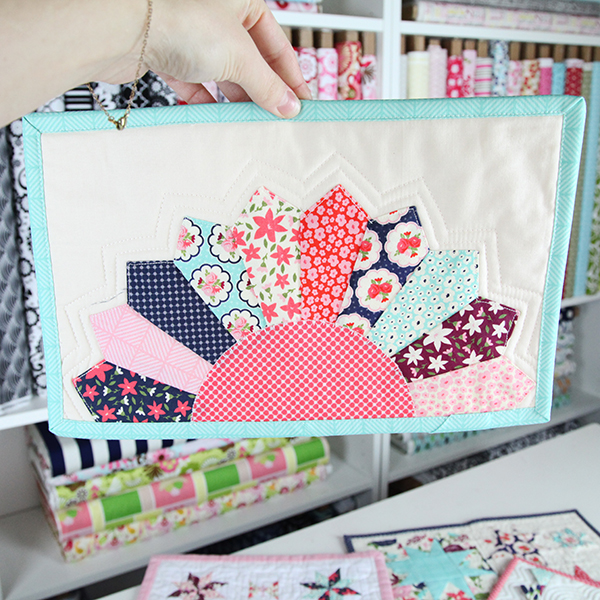
Anyway, I have some sneaky peeks of some of the mini quilts that have been arriving for the glamper. Because this Quilt Market is in Salt Lake, I have the awesome opportunity to feature the glamper in my booth!
(The photo above is a mini made by Debbie of @HappyLittleCottage1).
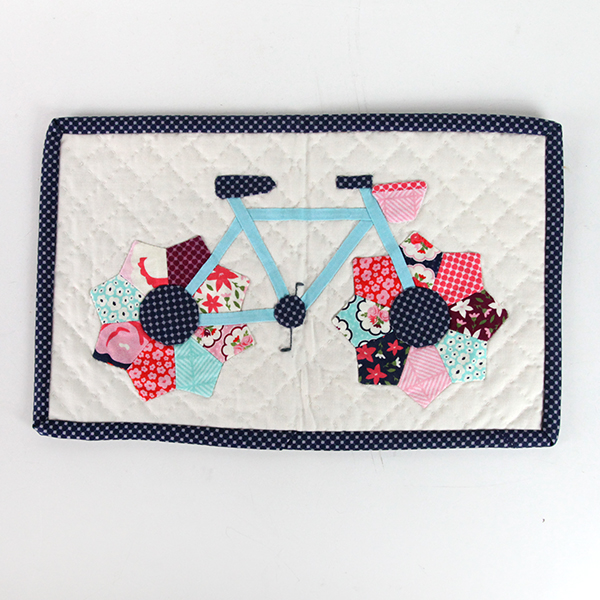
This darling little bike one is made by Cherilyn of @FarmWifeJournal. All the little hand stitching is SO sweet!
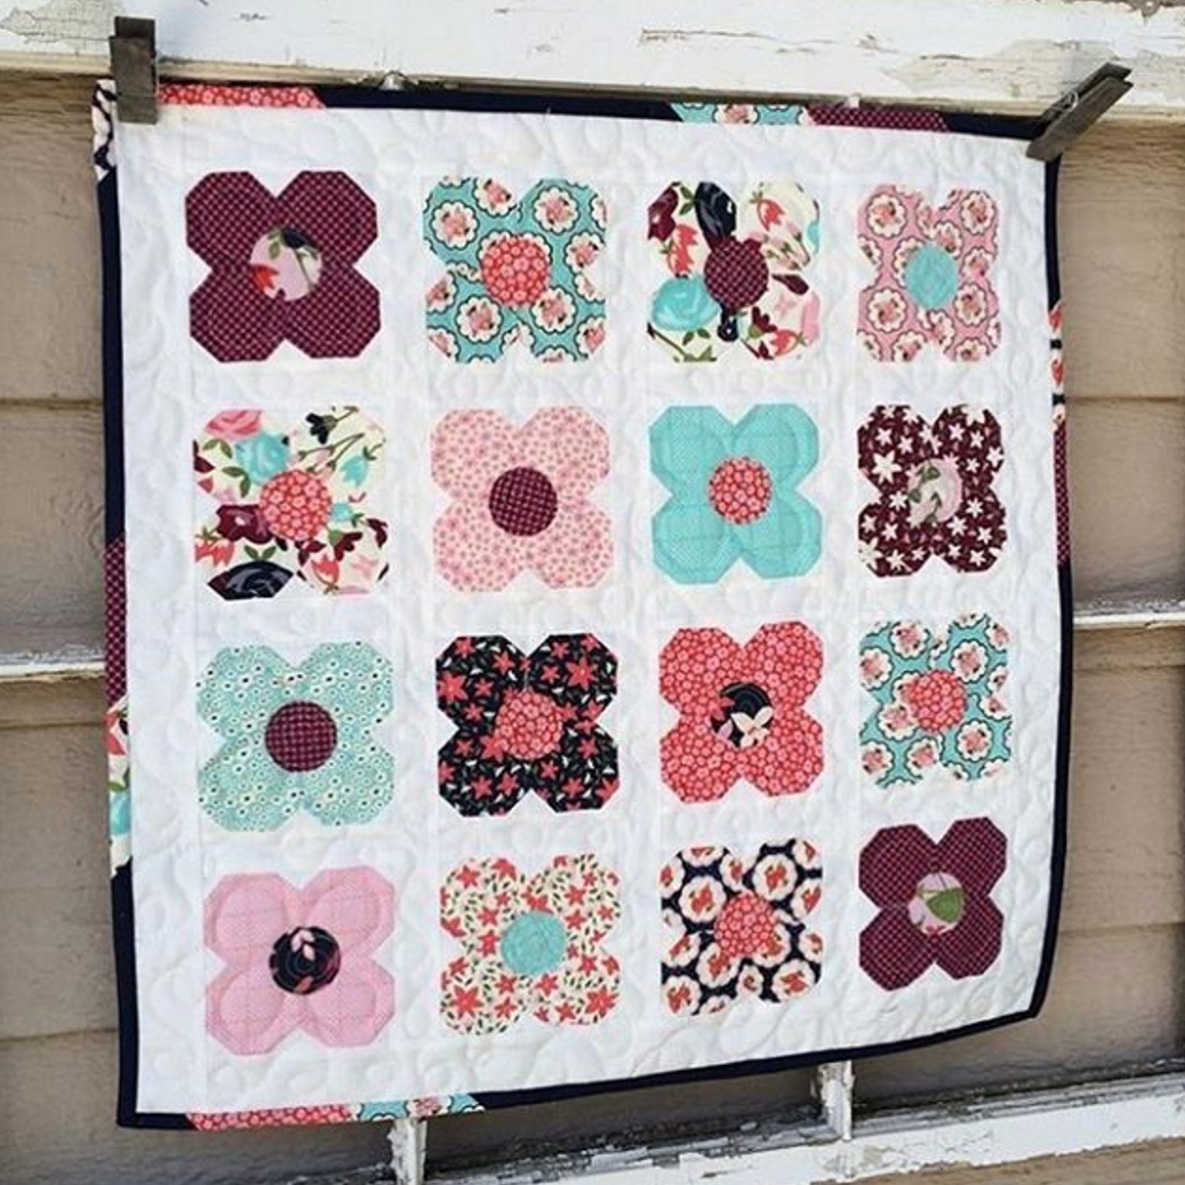
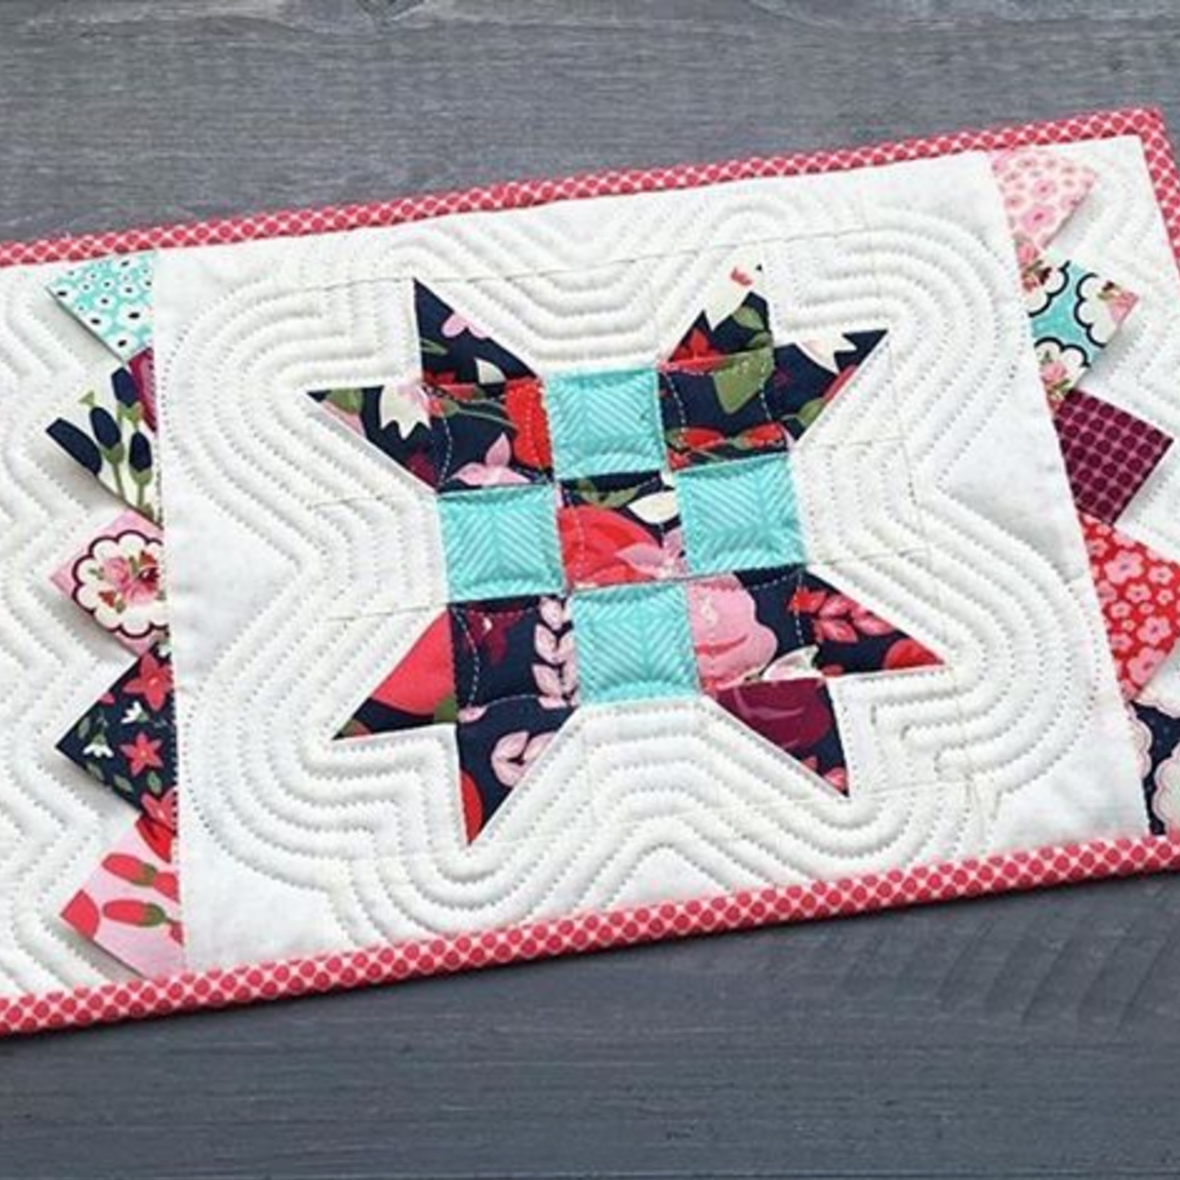
Most of these mini’s will be placed on the cabinets of the glamper for the show. We’ll also use them in a glamper stop we are doing at Elaine’s Quilt Shop a little later in the summer when my new fabric line Posy Garden is released (Right now we are using digital prints and strike offs!).
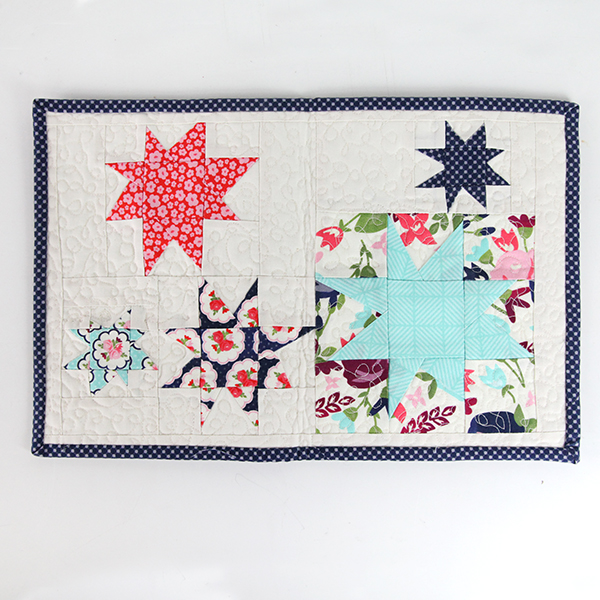
This one was made by Amy of @AmyLouWhoSews….little twinkling stars! Love!
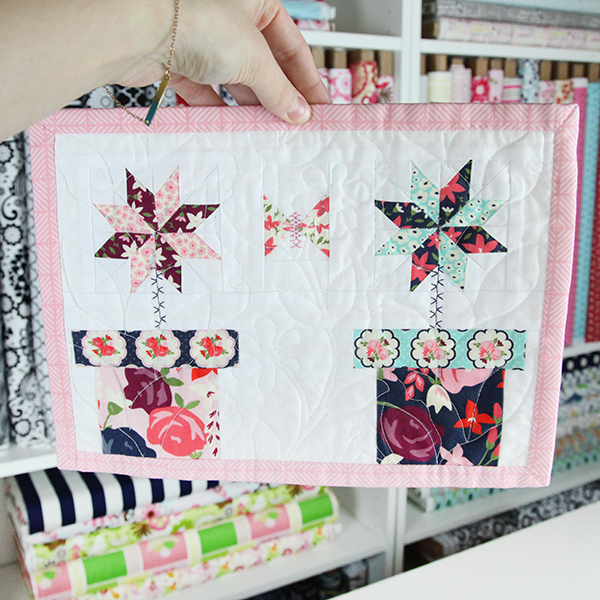
The beauty above was made by Angie of @MyStitchStory. Love the little hand sewing of the stems of these flowers.
This little flower mini was made by Amanda of @JediCraftGirl. I love how well this one features all of the fabrics in the Posy Garden fabric collection!
How about the sweetness (and awesome machine quilting?) done by Christine of @StitchingRevival.
I have a couple more that we haven’t photographed yet, so you’ll just have to wait on those. But what a fabulous sneak peek, right?
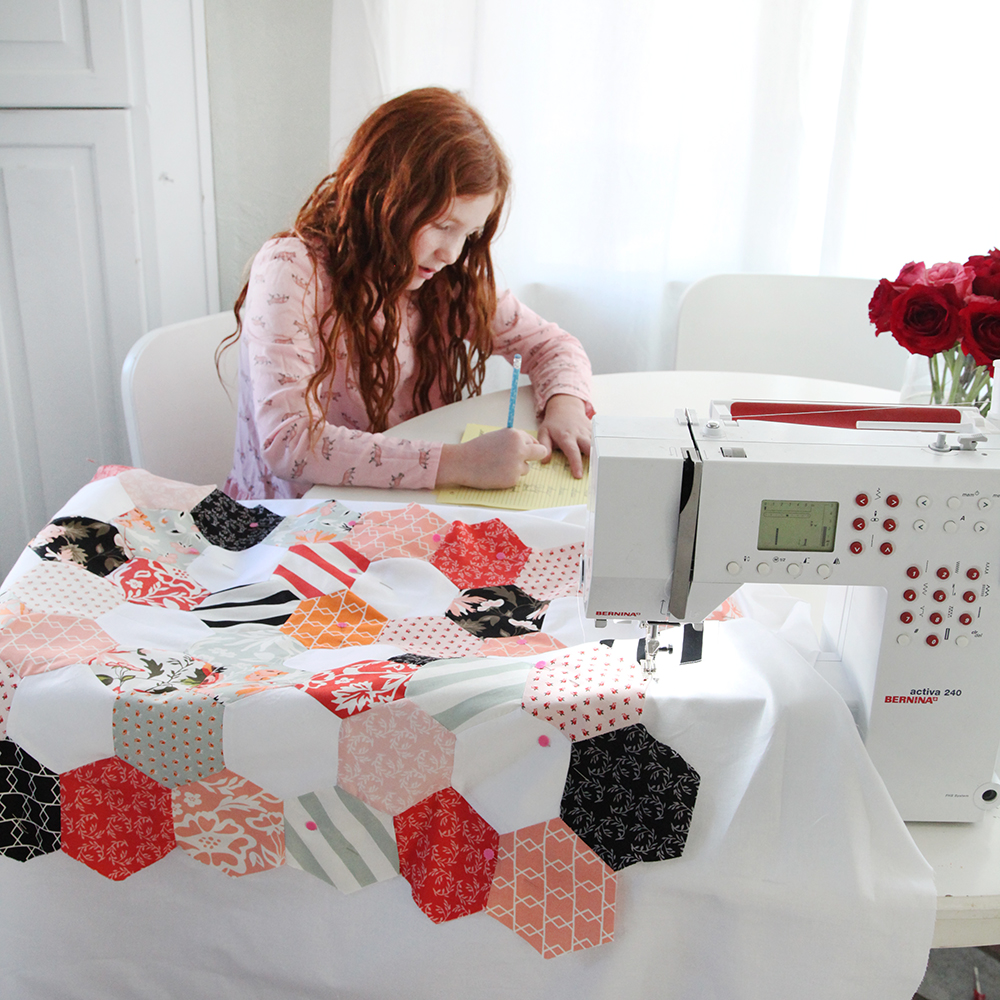
This is one of those quilts that started MONTHS back…actually when I was in Dallas at a tradeshow for MiniLou. I accepted to teach at the Sew Simply Stitched Retreat and needed to come up with a couple of projects to teach. I love hexagon quilts, and I ADORE all of those gorgeous English Paper Pieced Hexis so naturally one of my projects turned into this Perfect Hexagon Quilt.
FINALLY, this April I released the pattern in my shop. Y-seams can be a little daunting so after teaching it at the retreat, I decided to make a video tutorial that went along with the pattern. This is the first pattern I have done this for—a private video that comes with the purchase of the pattern. Cool, huh?
I’m hoping people like it so that I can make more of these types of videos! (The video below I originally did for my instagram feed. It was so fun I decided to add it here! This is the Perfect Hexagon Quilt done in my new Posy Garden fabric that should arrive July 2016!)
I’ve made two versions of this quilt now. I’m really excited about the one I made in my new line Posy Garden that I’ll be showcasing at Spring Quilt Market (that is in the video above).
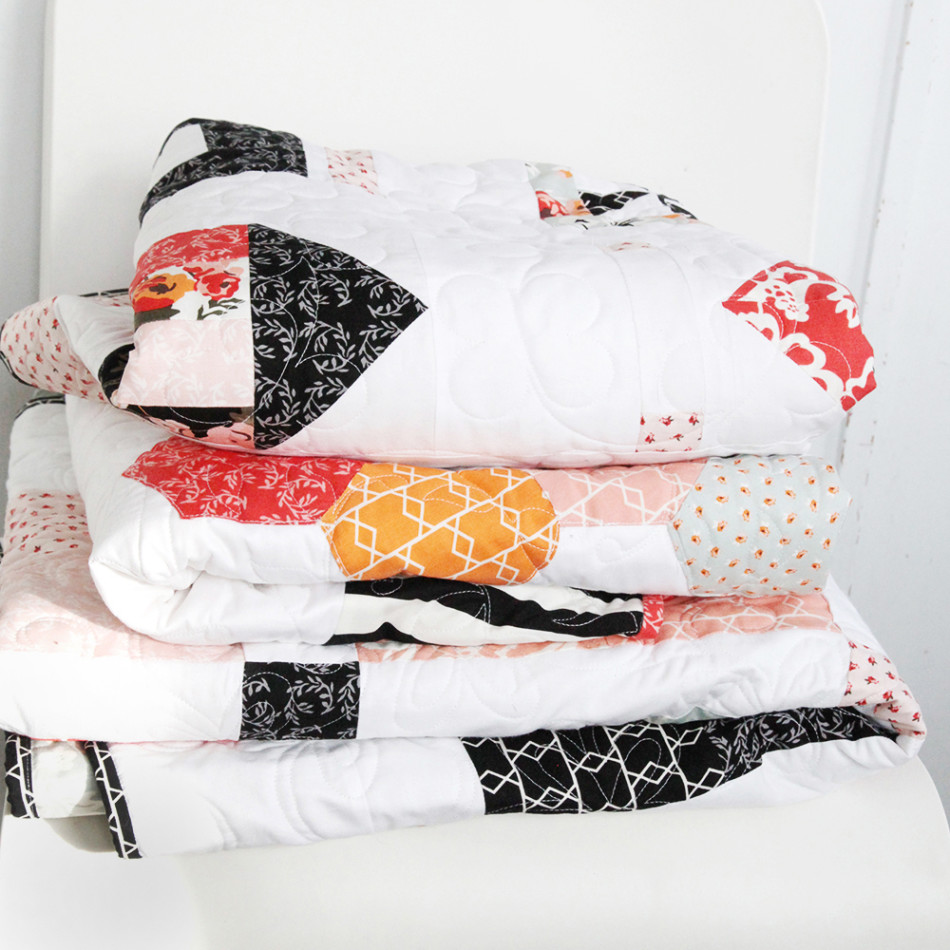
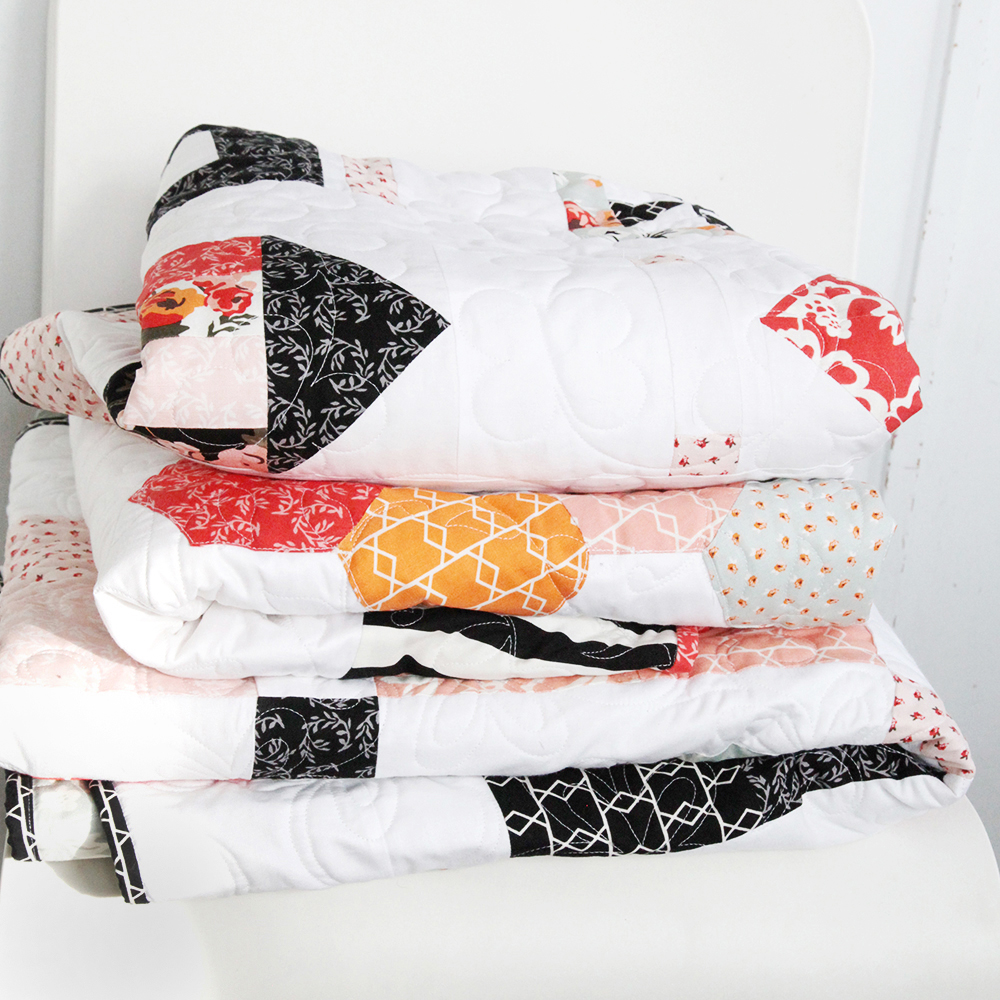
The other quilt is done in Apricot and Persimmon. It’s been a really versatile fabric line and I’d loved everything I have made with it.
The photo to the left captures a look at what a lot of my afternoons look like. Kids doing homework while mom tries work out how to get the fabric to do what she wants:).
Want to learn more about the Hexi Pattern and video? Check it out below:
Now, I’m off to cello lessons tonight and ready for Friday to kick off the weekend! Lots of Posy Garden sewing for me these next couple of days! I’ll try to sneak in some fun pictures of the progress on the glamper next week!
Hi guys! A week ago I attended SNAP (which was amazing, BTW) and I was so INSPIRED by all the gorgeous work everyone was doing, that I really sat down and tried to work out what I needed to be doing better. Blogging was a top priority on my list—along with fixing my email newsletter and a million other little things that you tend to let slip when you are busy running two companies and a family.
Because I know myself, I’ve decided to force myself to keep you up-to-date with blogposts twice a week on Tuesdays and Thursdays. Yes, it is not very spontaneous, but I’m finding if I don’t build a system to make it happen, it doesn’t. And I hope you guys will like hearing more about what we are doing at CGInc.
So here I am blogging.
Among my April-New-Year’s-Resolutions (since I have already stopped doing all the ones I made up in January, haha) is to also fix my email list (equally as deficient as the blogging). For those of you who were on my main list, you’ll note that we basically sent out a single monthly newsletter with EVERYTHING new from the month. It was fun and informative but A LOT of information at ONE go. And things ALWAYS got skipped over. It was simply too much stuff.
So the newsletter went on the chopping block.
NOW, if you join the newsletter, you can choose a group. This is so you can only get information on the hobbies you like most that I design for. I am send out a weekly newsletter for the sewing and svg/paper folks and a bi monthly newsletter for the class folks. My first newsletters for this went out today! Hooray for getting organized!
This has been a long time coming. And what’s more, even if you belonged to the old newsletter list, you will need to resubscribe to these new lists. I sent out an email to everyone allowing them to add themselves to the new lists but if you didn’t get it, you can add yourself below.
So after weeks of my production assistant and designer telling me it was TIME, I finally gave in and we are hosting bundles of SVG files on our site! This is a bit of a leap of faith on my part. I’m so hopeful that you will like what we have done and those of you with different types of machines (other than a Silhouette) have access to my designs!
So here is the deal: Each of our file sets include an svg file that works with most softwares & the Silhouette Designer Software AND it includes a studio file for the free Silhouette Software. In our descriptions, we have linked instructions, our private facebook groups, and added video tutorials so you can watch instructions DIRECTLY in the instructions. How cool is that?
Everyday, the team is uploading new bundles to the site so that you have access to all of my SVGS as well as MiniLou’s SVGs. Now all your cutting and crafting is easier than ever! Go check it out!
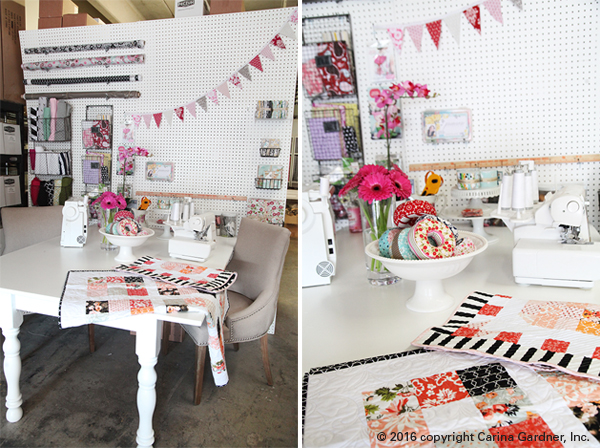
I’ve been thinking about taking photos of my offices and warehouse for some time now, and am excited to (finally!) give you a walk around the Carina Gardner, Inc. and MiniLou offices!
Here’s some of the backstory: We’ve been in this warehouse/office for a little over a year at this point. Before this, I had two small office spaces near my house, but when I started MiniLou in September 2014, I outgrew the space. Suddenly, I was storing inventory…more than my house or the other little office could handle.
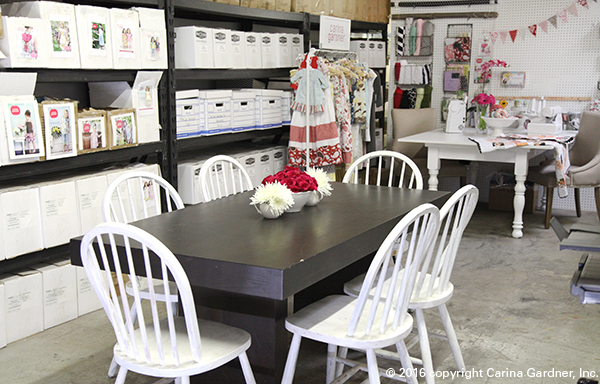
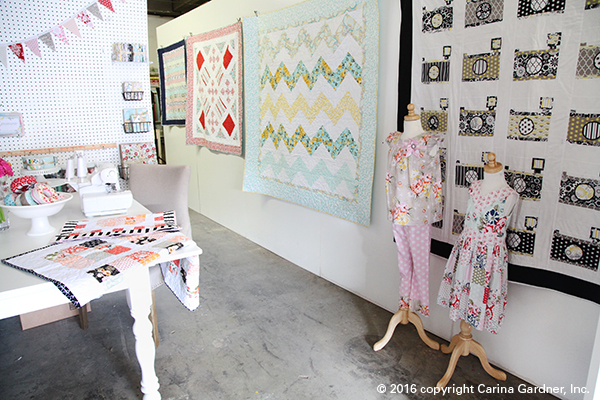
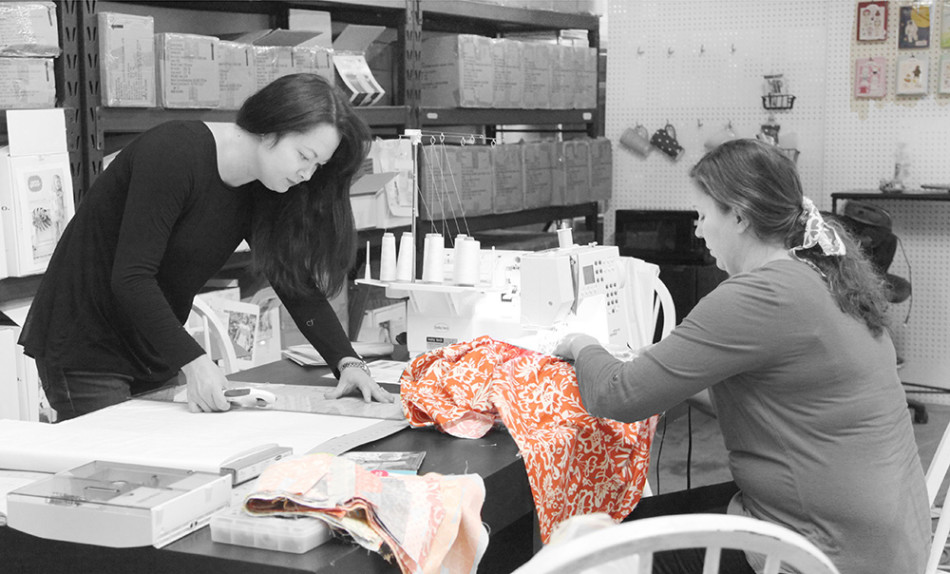
So I moved myself into this 1000 square foot warehouse. When I moved in last February, there was a reception area that I painted and re-floored. Then we built out two more offices in June. Because the space is small (but open!), every bit had to have purpose. Our staff meetings are held in the open warehouse. Videos are made on the back wall while simultaneously storing several of the fabric collections. The sewing table sits next to boxes of coloring books. You get the picture! Every bit of the space is used.
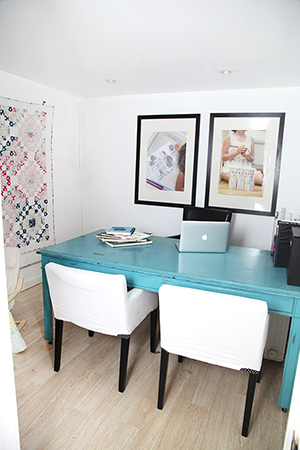
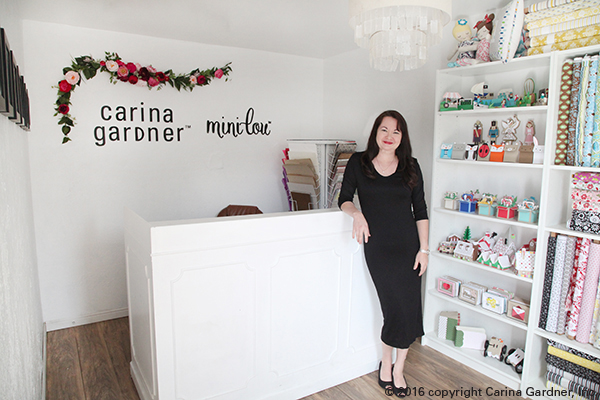
Photo to the left: My office. All the furniture was pulled from my home office to make space in my house for my Charlie-boy. Photo below: Our reception is filled with fabric and diecutting projects. Production Assistant and Fulfillment Manager Holly Christensen mans this area. Flowers on the back wall commissioned from The Lovely Ave.
Photo below: More pictures of our reception. It’s a pretty happy place to walk into everyday!
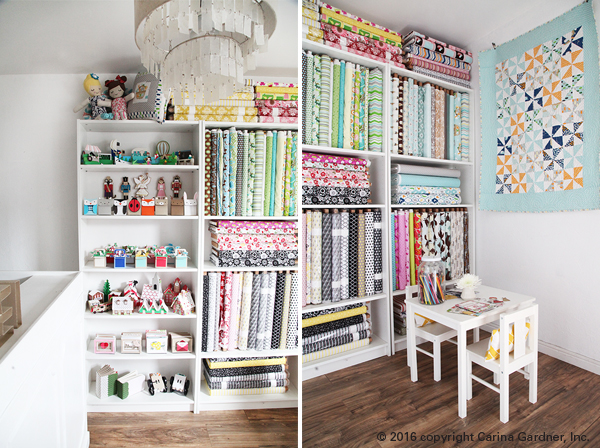
Our reception area has a play area while storing about half of the fabrics we have in the office (the other half is in our video area and the newest lines are all in my office at my house). The opposite wall (not shown) includes a showcase of some of MiniLou’s coloring book covers.
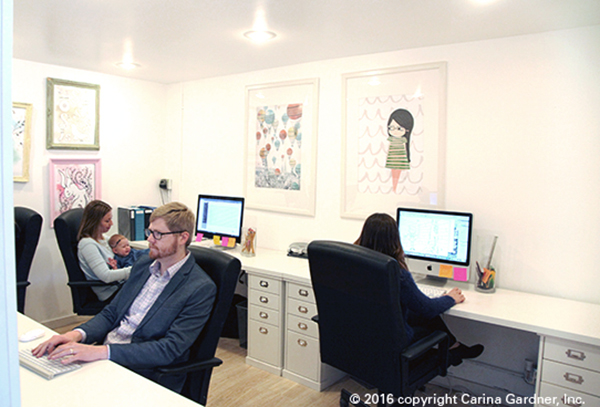
The first office (below) houses most of the team including our sales director, graphic designer, illustrator, and pattern production assistant.
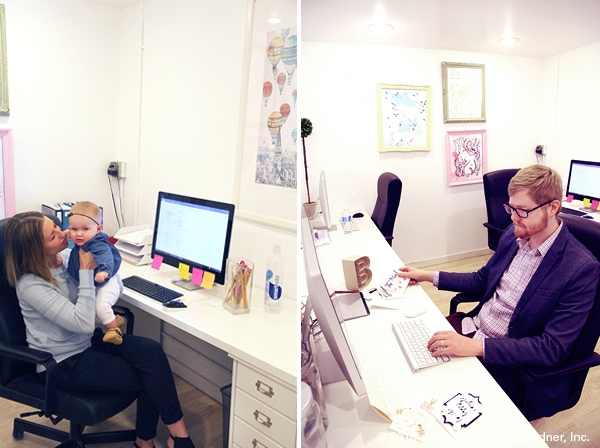
Photos below: Sales Director Dori Kesler sometimes brings baby Ellie to work. Ellie’s pretty use to the drill since she’s been coming since she was born. Graphic Designer Tom Sturzenegger works on our svgs to prep them for release.
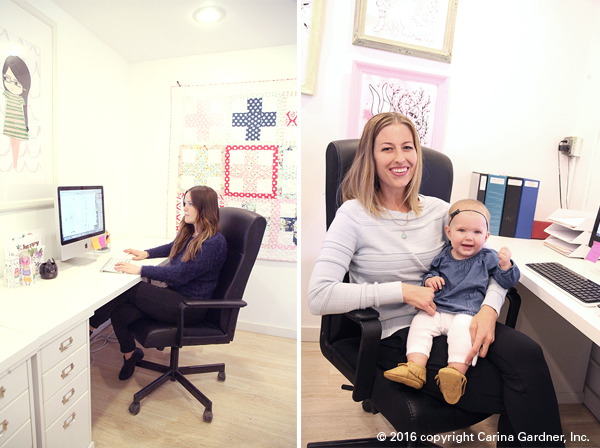
Photo below: Illustrator Jill Johnson works on new artwork for MiniLou. More pictures of baby Ellie! It can’t be helped!
Photos below: The sewing area and conference table are in the warehouse. Here Pattern Production Assistant Arianna Phillips and I develop ideas of patterns and sew up samples. The table is spacious so that we can roll out bolts of fabric and quilts. The conference table sometimes also gets overrun with projects.
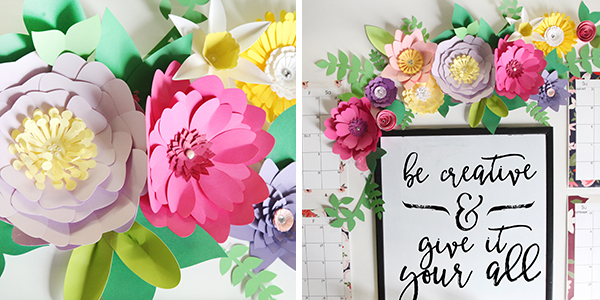
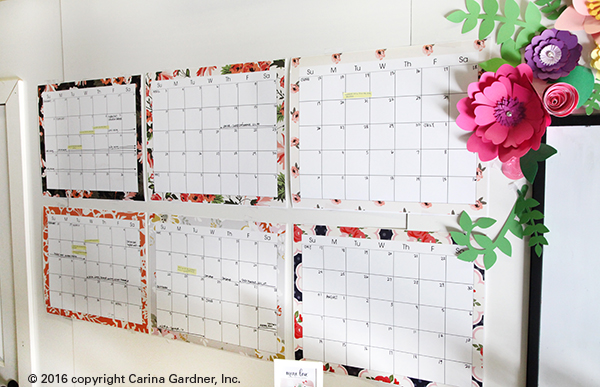
Photos below: These are the flowers from one of the CGInc Silhouette releases. It brightens up some of the stuff you have to have in an office (but maybe are not that pretty) including our fridge, microwave, and printer. The calendars were custom printed with my most recent fabric collections.
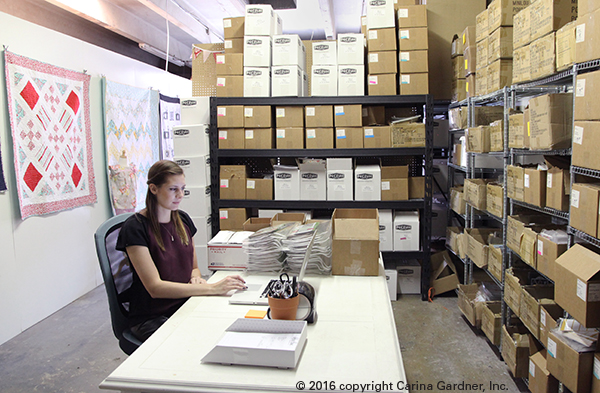
Photo below: The back of the warehouse includes Holly’s second desk, the video taping area, and my office.
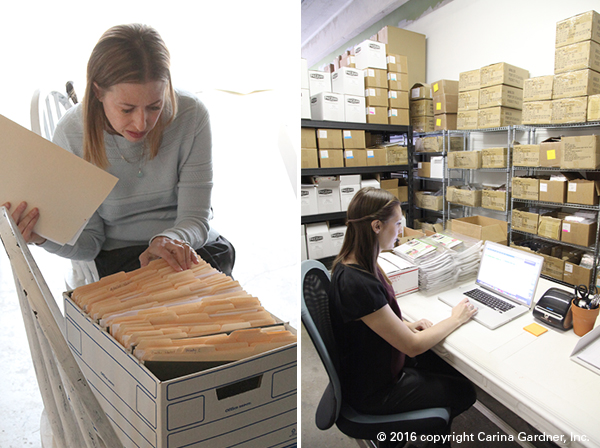
Photo below: Production Assistant and Fulfillment Manager Holly Christensen pulls orders to our MiniLou retailers.
Because we are such a small team, everyone works with everyone else in one way or another. I love the synergy that creates as well as the creativity! It’s a great team and I feel lucky to have them all working for ML and CGInc!
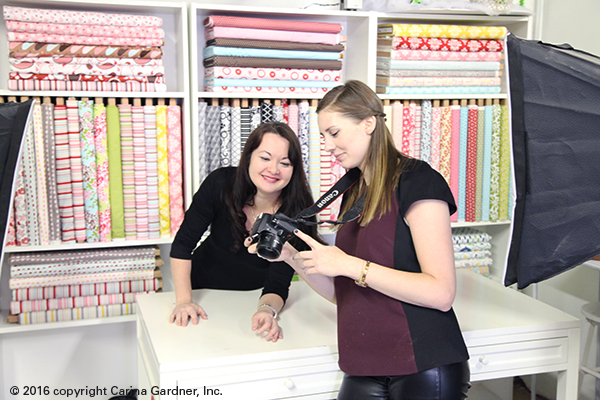
Photo below: We video tape for a class or CGTV episode 2-5 times a month. And all of our photography for our SVG files happens in this area as well! Because what we do is so visual, we spend a lot of time with the cameras.
Photos below: My office is really Charlie’s office. I often get kicked out to the conference table because Charlie is in the office most afternoons with me and all day with me twice a week. He’s my buddy and has his own chair, tv, and consistently eats all the candy out of the candy jars in the front (you know, when Tom hasn’t gotten to them first).
Hope you had fun taking a peek at where we work! I loved showing you our space and how my little companies have grown. Hope you are having a wonderful day!
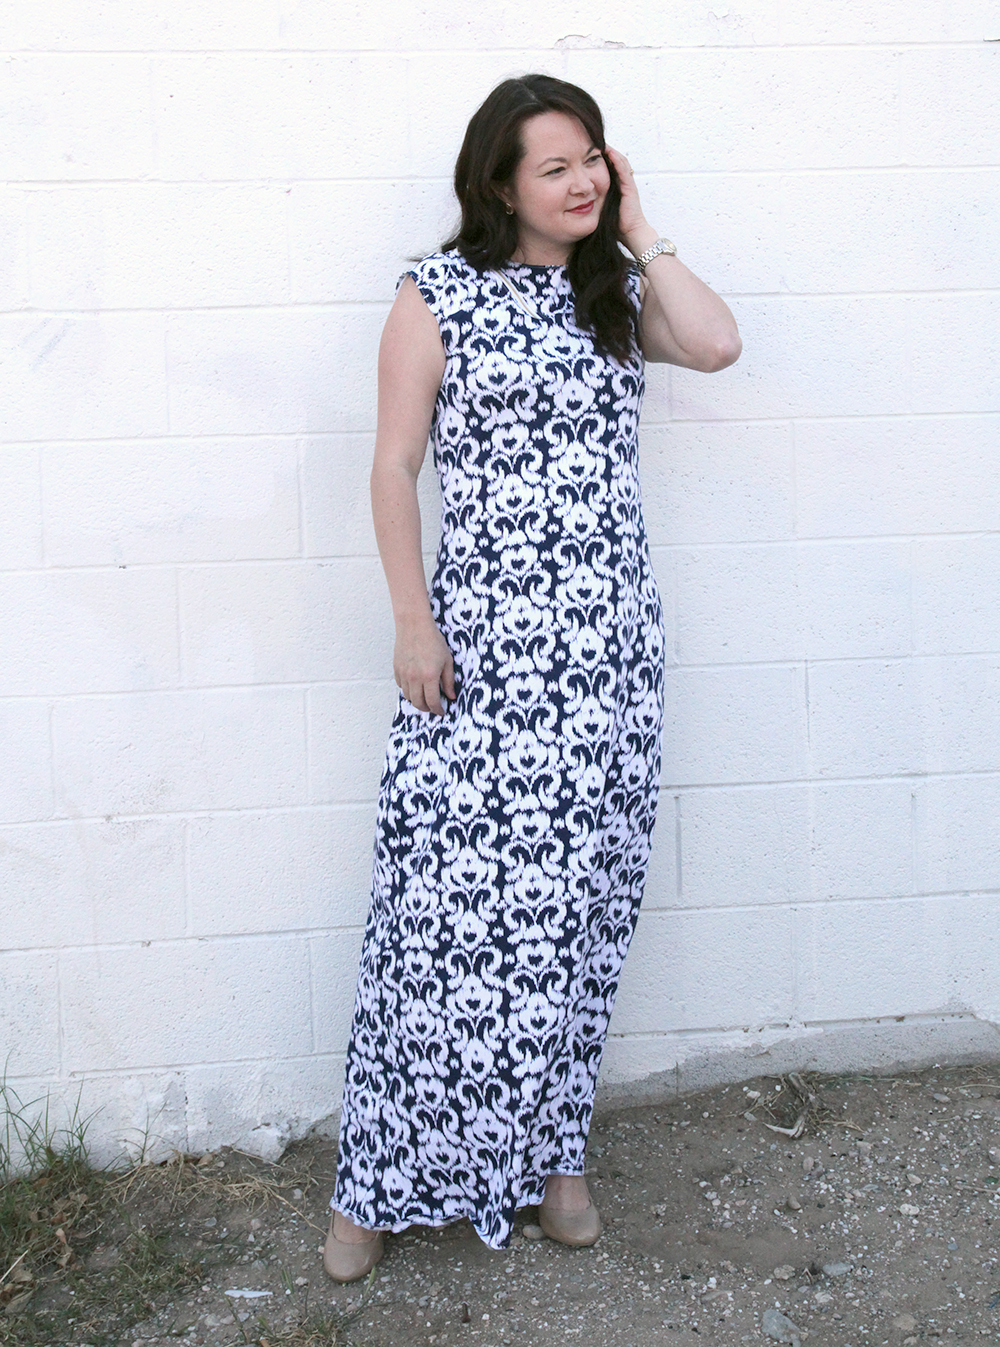
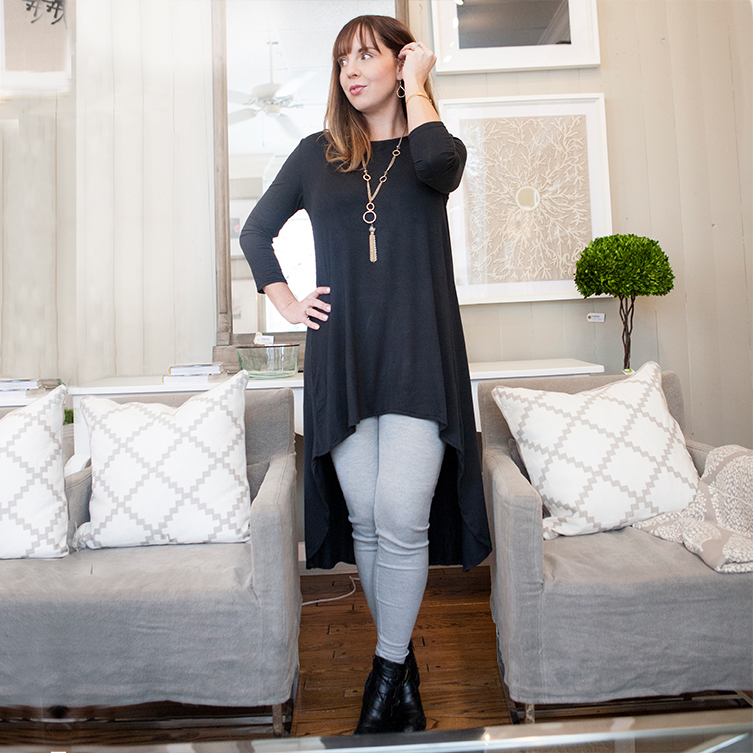
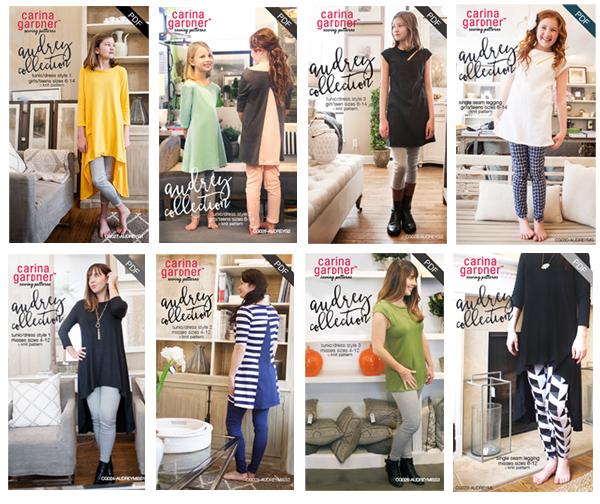
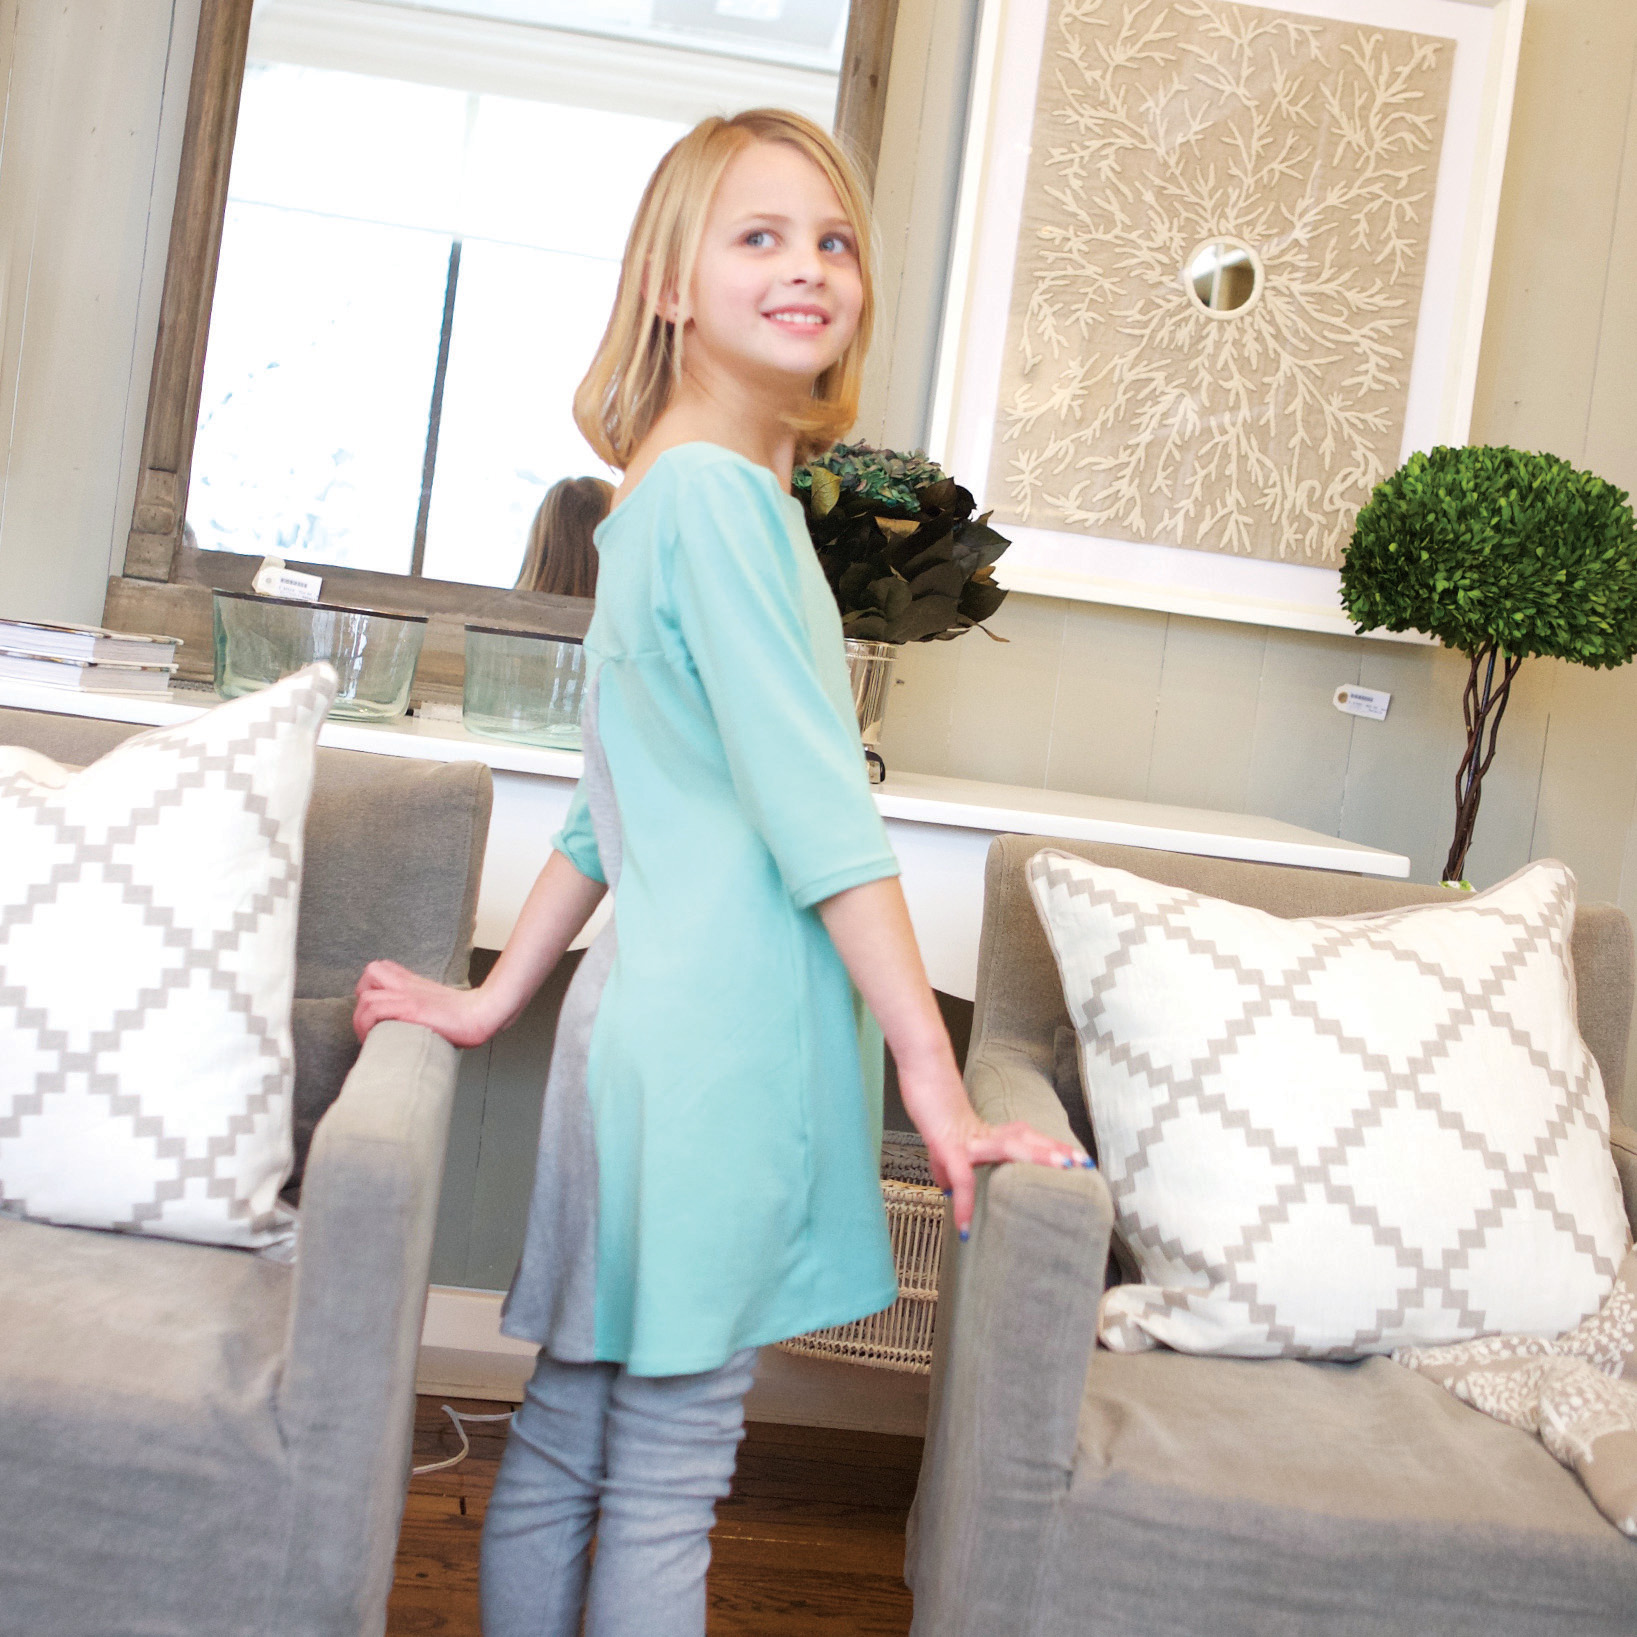
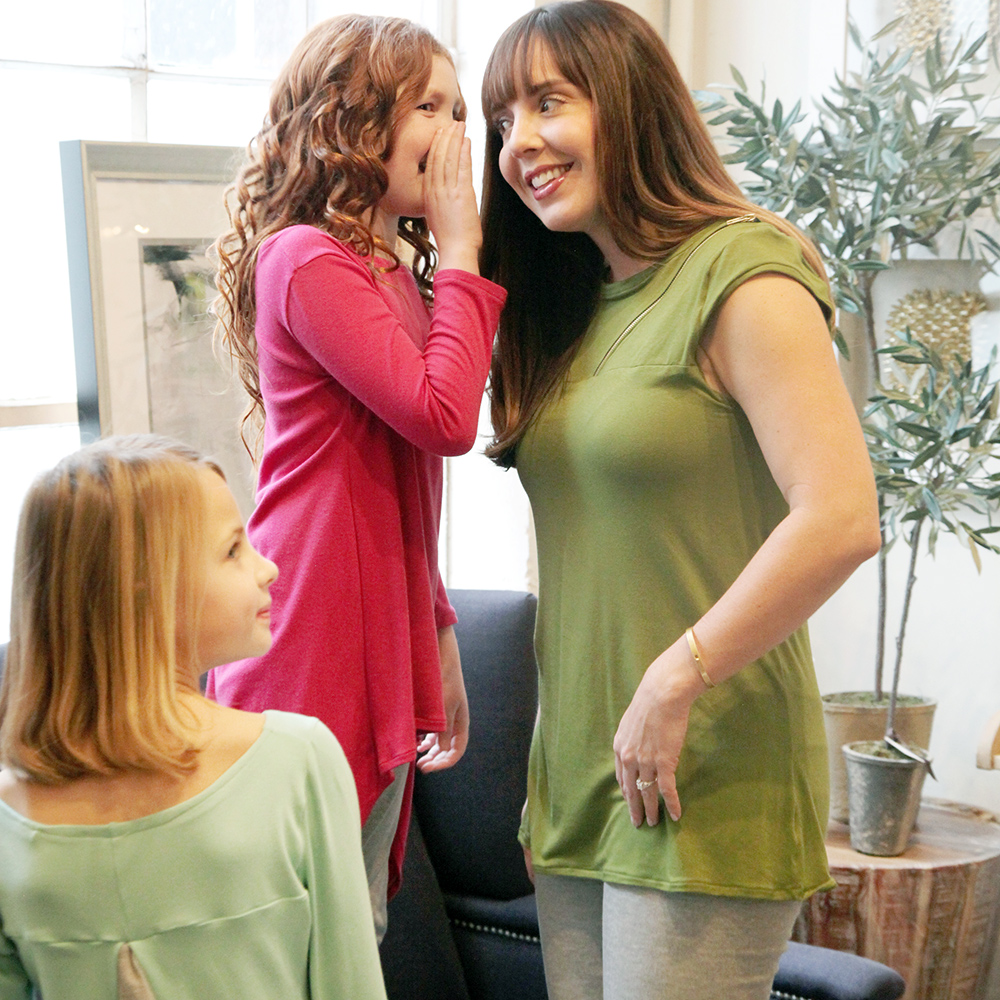
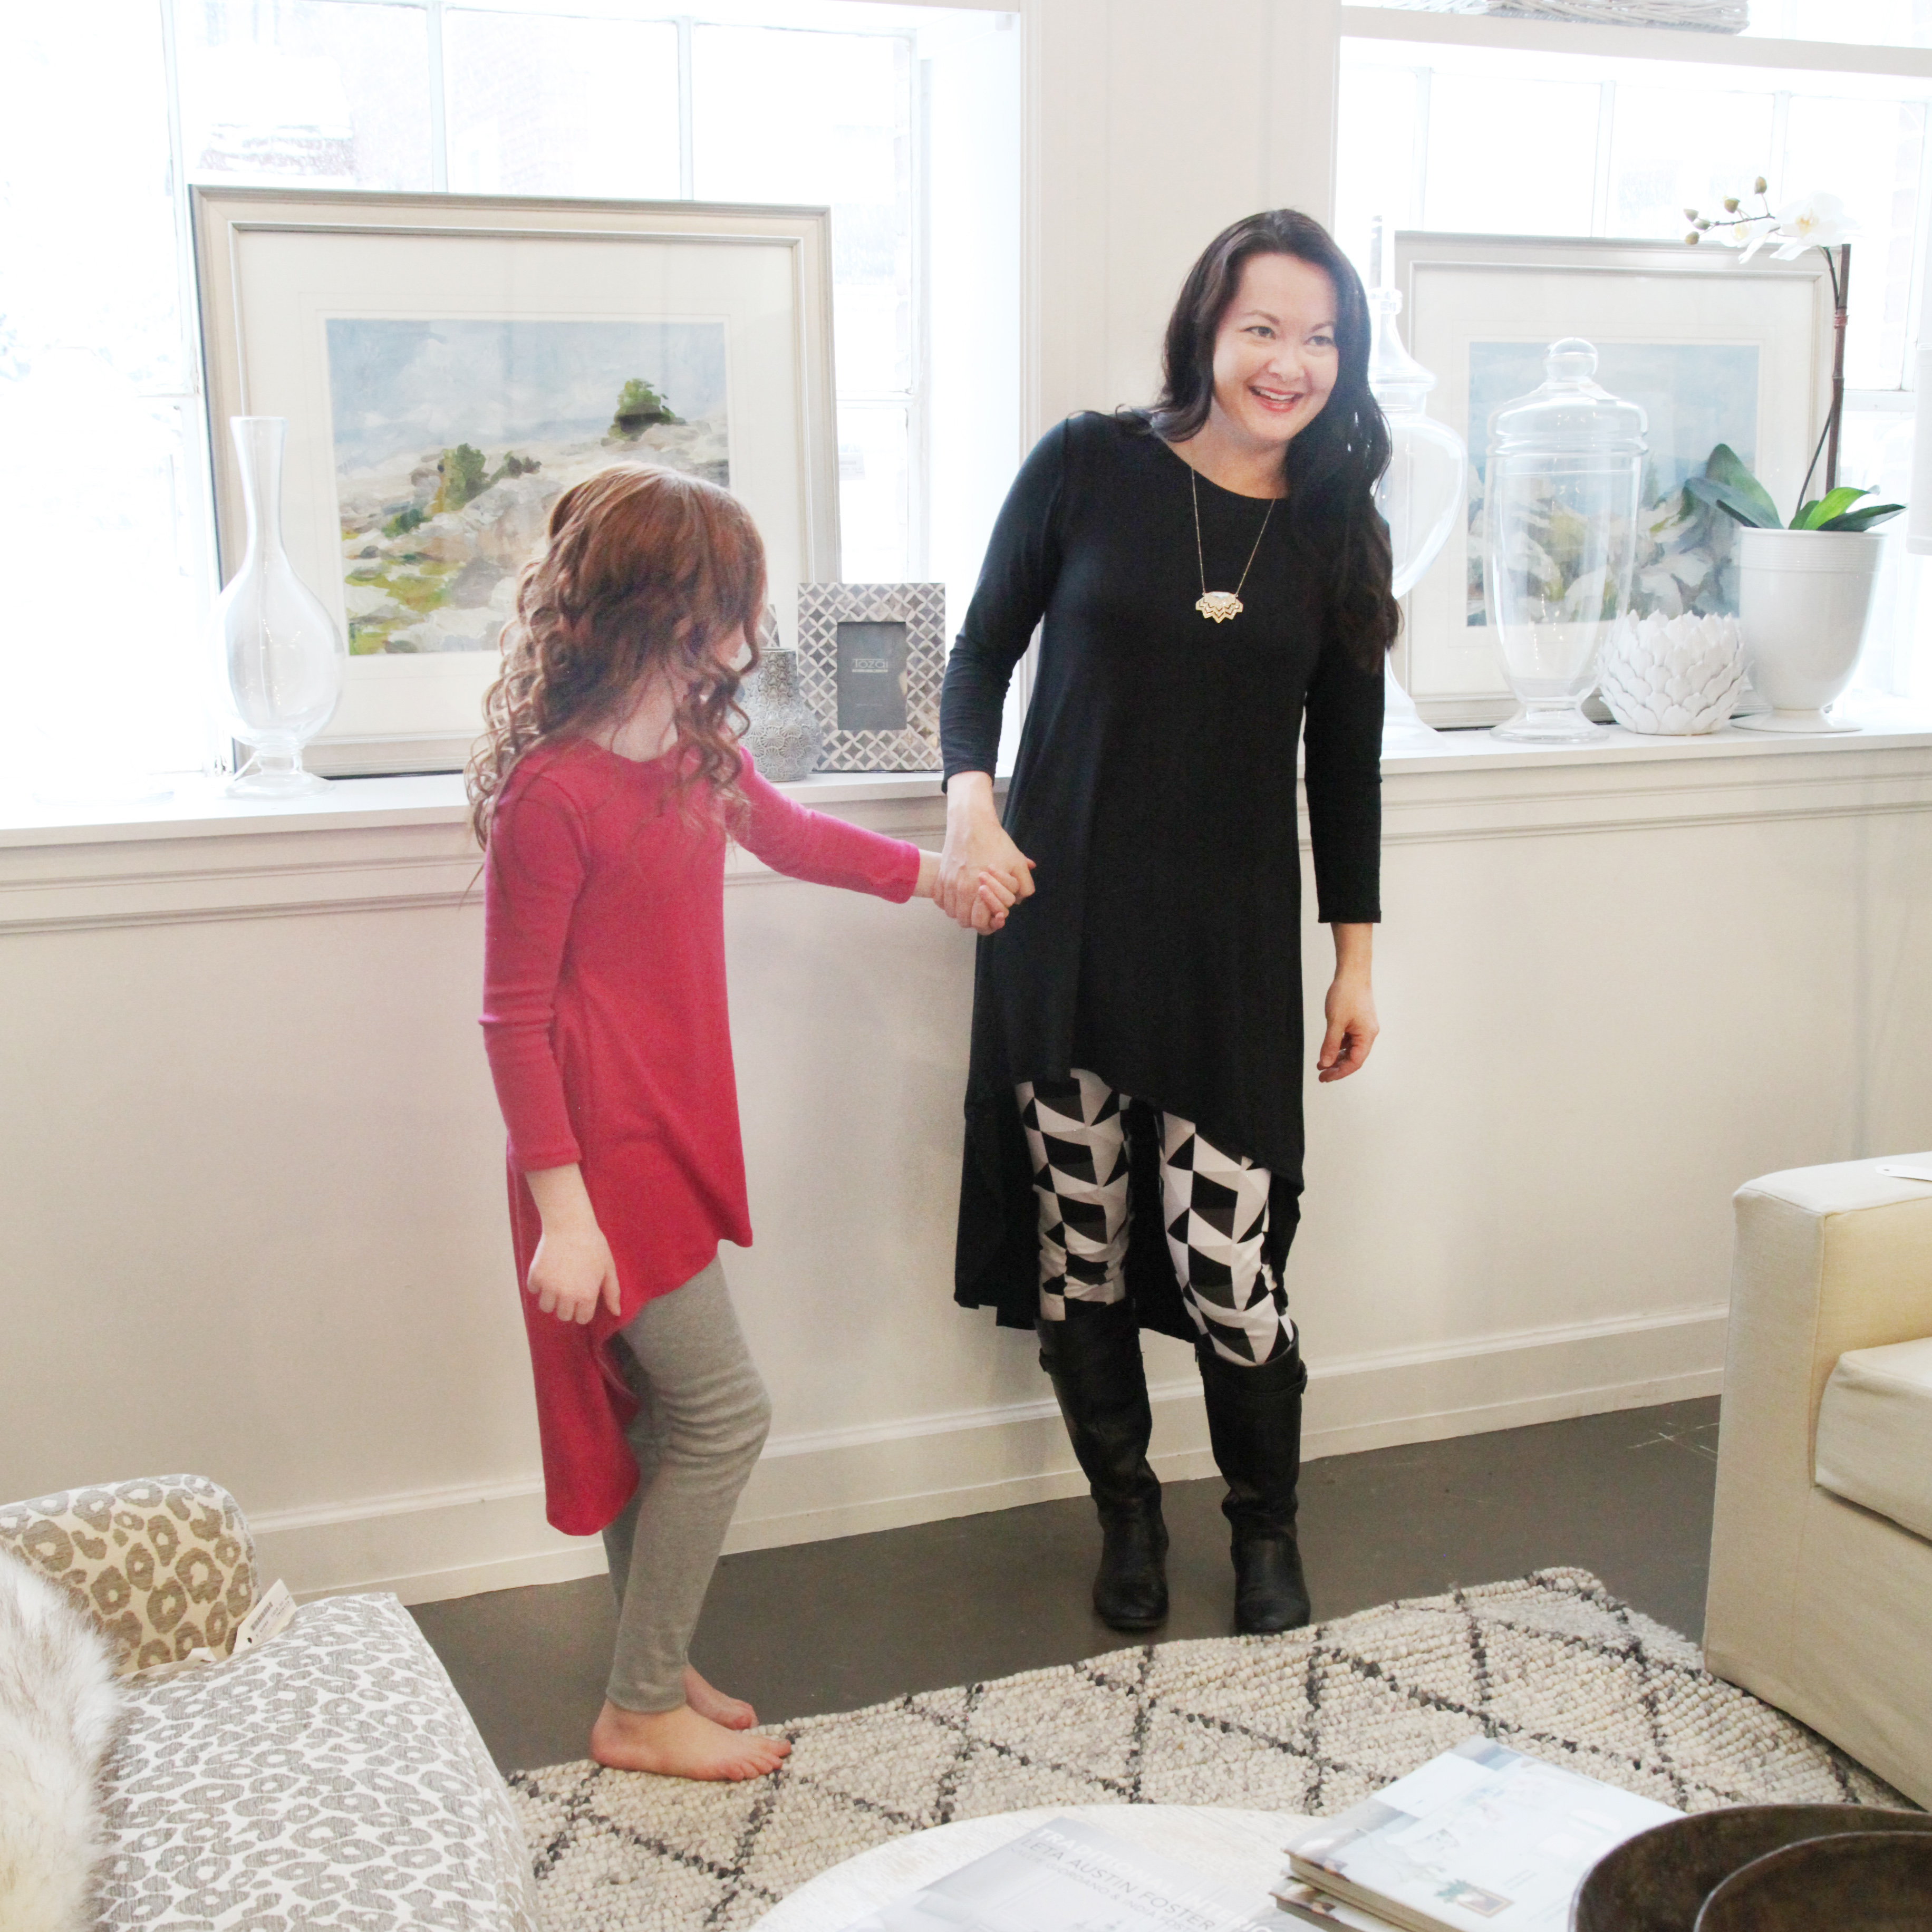
Looking back, I’m not sure I even did a blogpost on the Audrey Sewing Collection that premiered in the shop last month. It’s my first knit collection and includes 4 patterns for Misses and 4 patterns for Girls/Teens. The whole collection makes me pretty happy…easy-to-sew, easy-to-wear clothing.
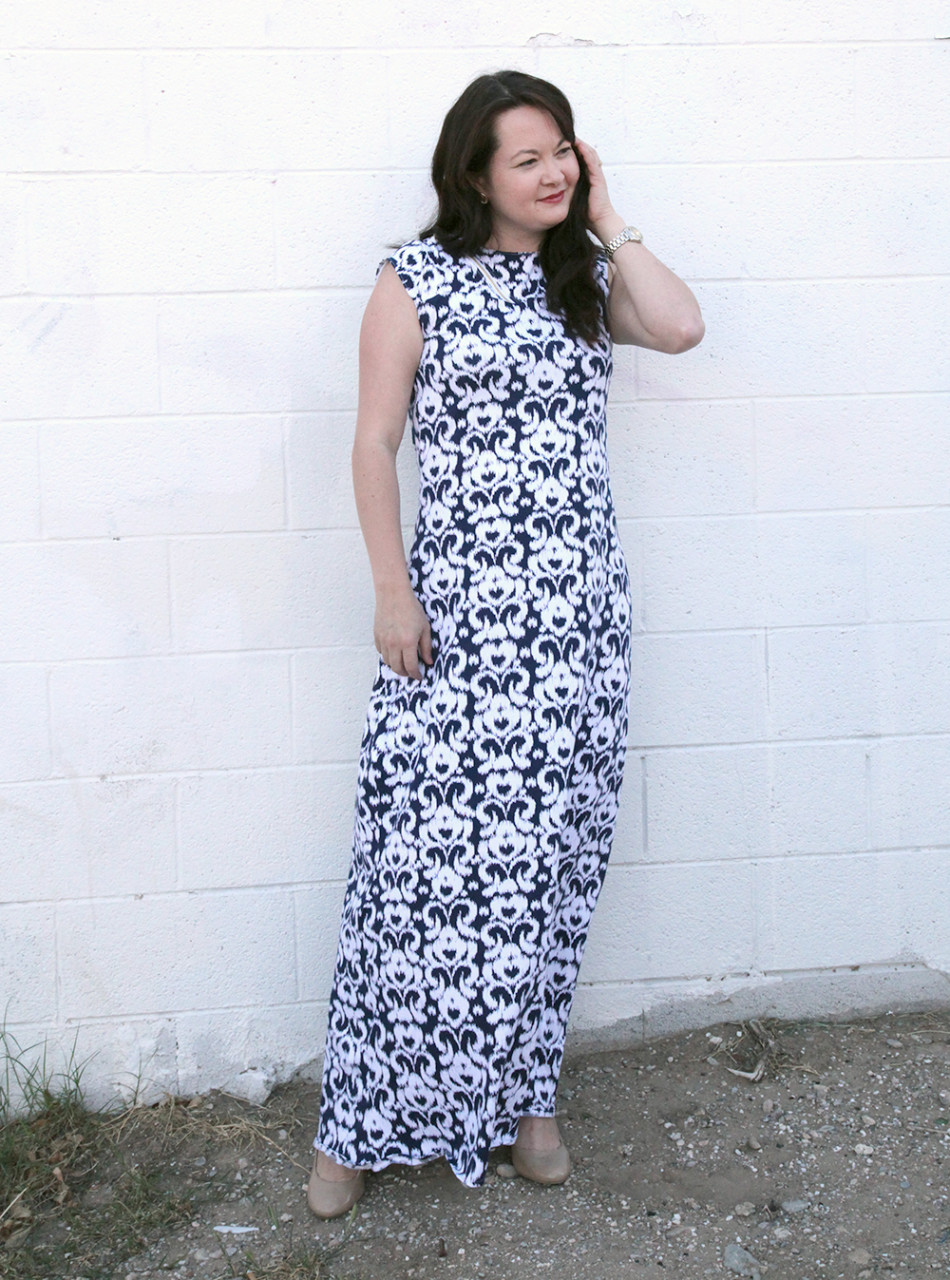
So here’s my first hack with the collection. First of all, I’m a big fan of a summer dress or tunic (hence those lengths throughout the collection). Second, I’m a huge fan of a Maxi! For those of you who have already bought the sewing patterns, you can see that making a maxi seemed out of the question. There are already SO many pieces for you to tape together to make your pattern.
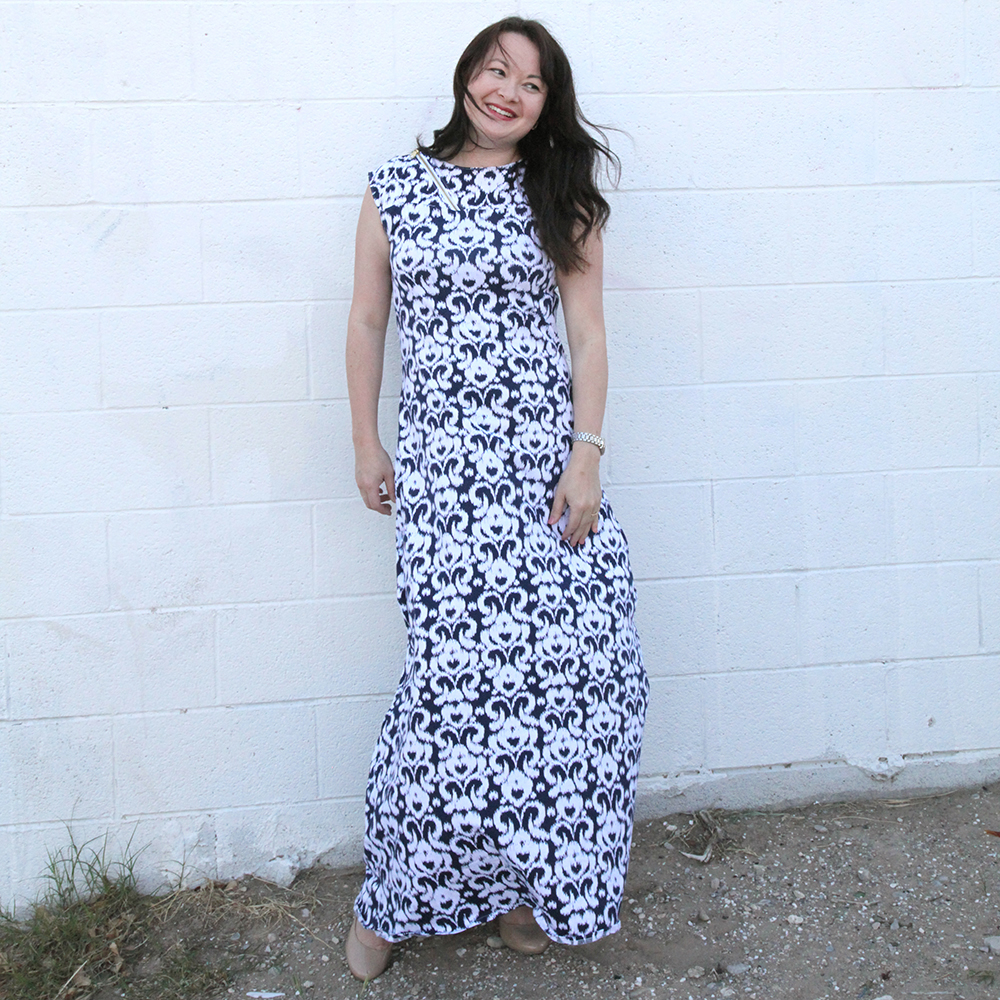
So here’s your hack. Simply add 28 inches of length to the front and back tunic pieces at the bottom. I’d also purchase an extra yard of fabric. Easy right? I don’t get all crazy about straight lines, ect. You just need the length. Longer is always better since you can hem it down.
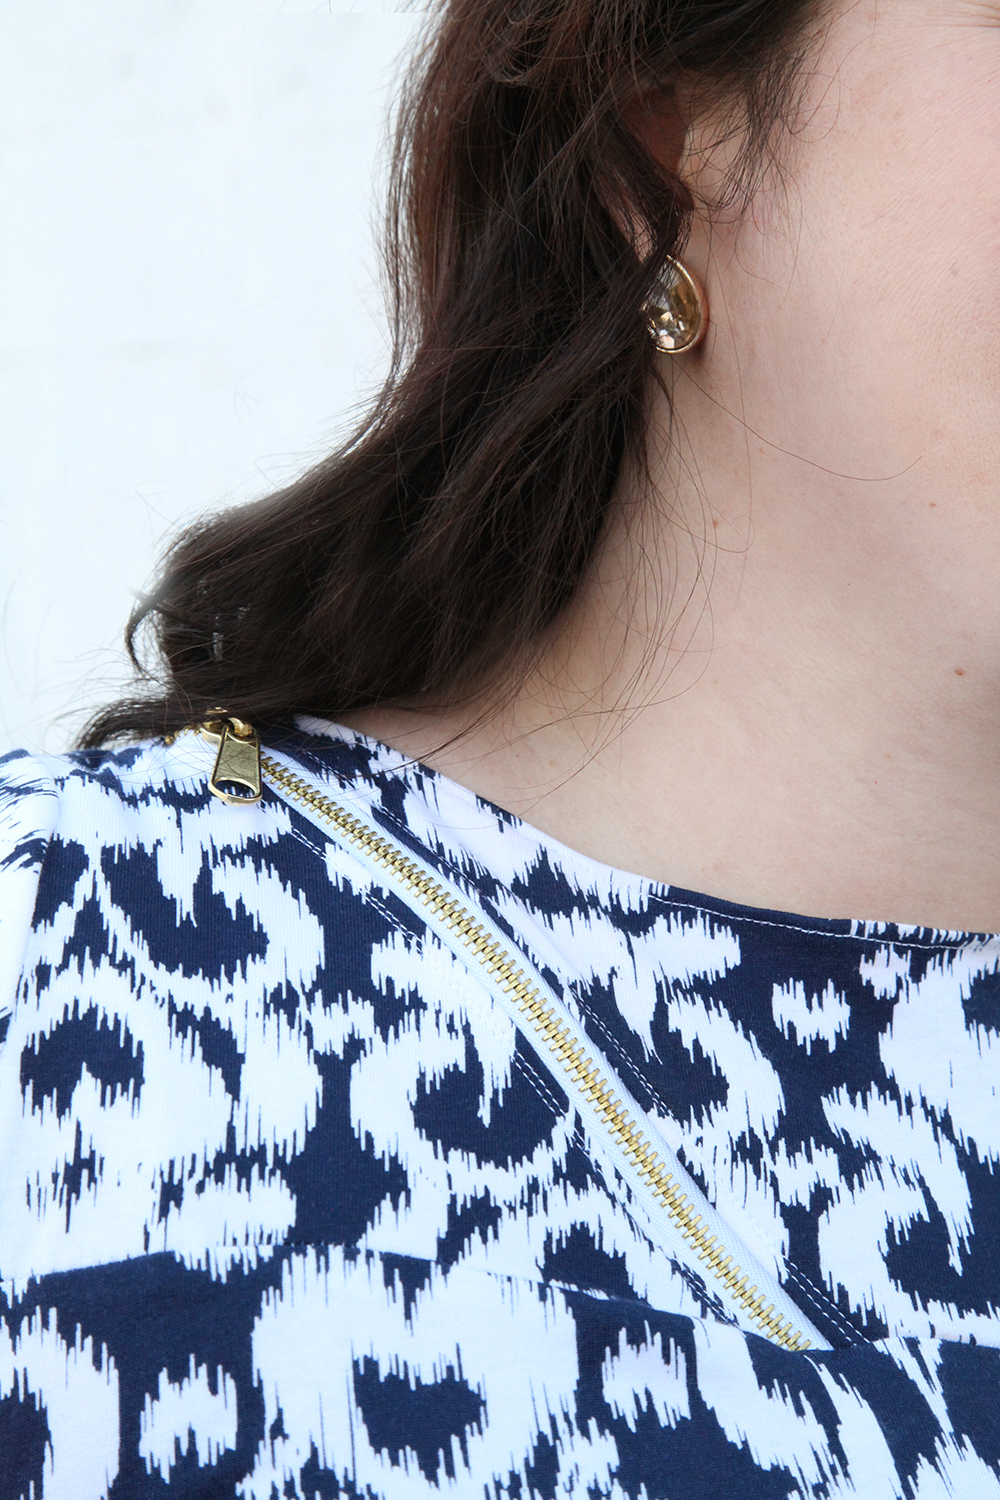
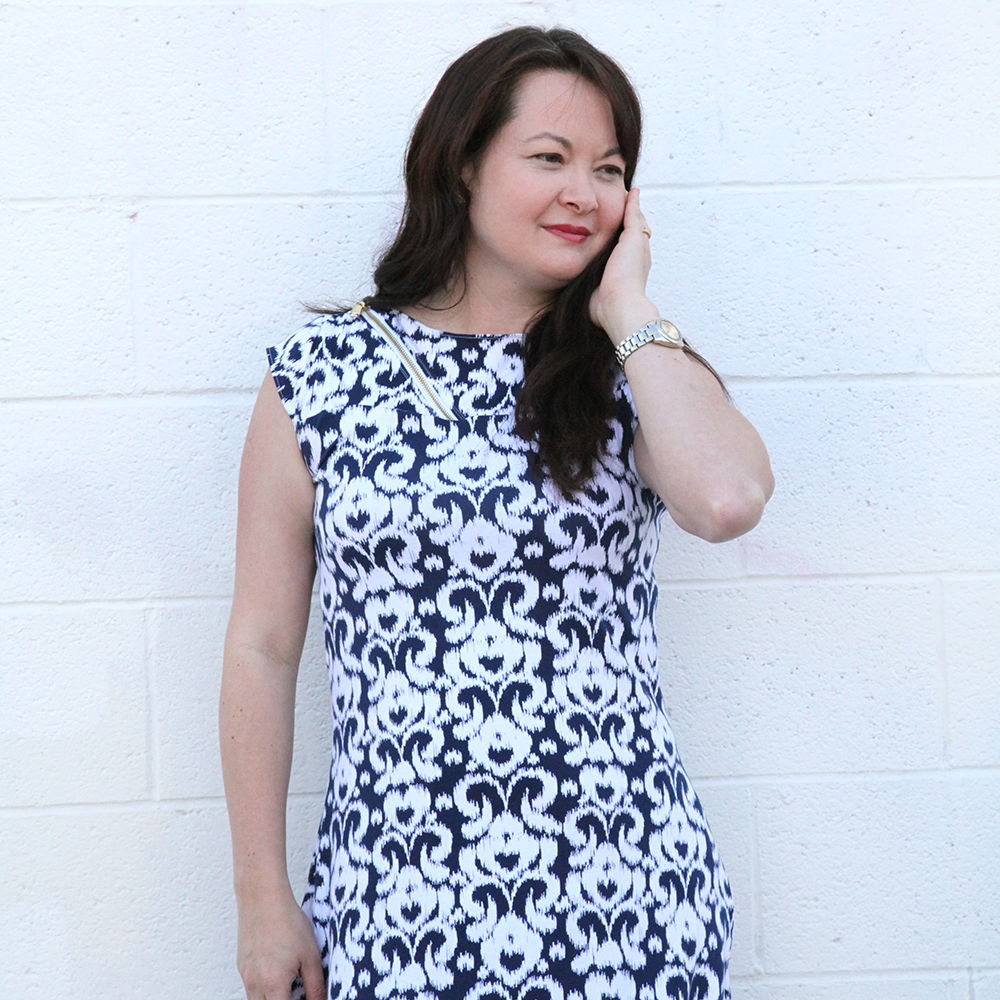
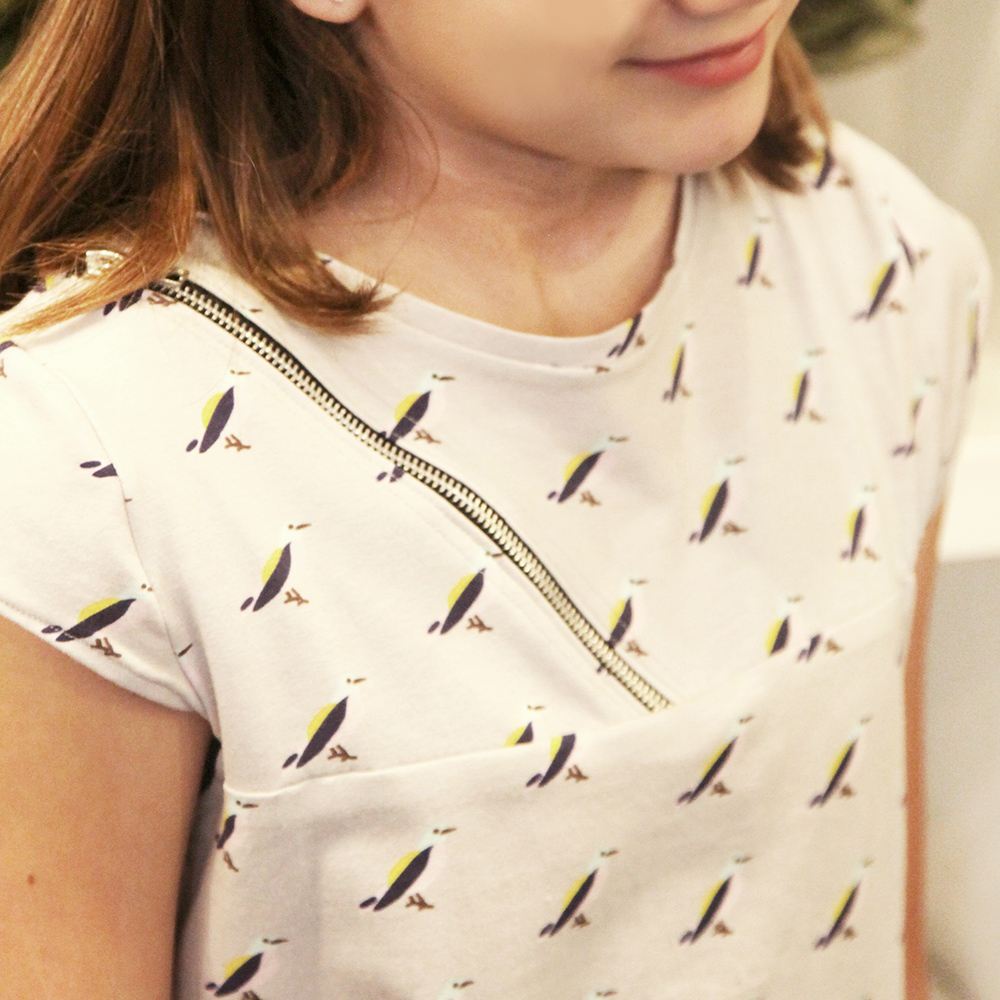
The fabric you see pictured is Riley Blake’s new ikat knit in navy. I’ve made the short versions of this pattern before but never the maxi and it took me about an hour and a half to make. I used the Misses Style 3 Pattern and used a gold zipper I got from my local craft store.
We took these pictures near one of my favorite restaurants in Las Vegas (we were there for a toy show for my kids company MiniLou) called Eat. It’s a brunch place and the eggs benedict on the weekends is to die for. Or the cinnamon biscuits. Or the egg truffle sandwich. Or the…well, you get the picture.
You can check out the video where I show you how to put together the Style 3 zipper (It’s easier than it looks!) although I did manage to break 4 stretch needles on the zipper because I wasn’t careful about where I was going.
I like using a stretch interfacing when making this. It holds the zipper and fabric together nicely.
And that’s it! I plan on making this with several of the other Riley Blake knits. Comfortable summer clothing, here I come!
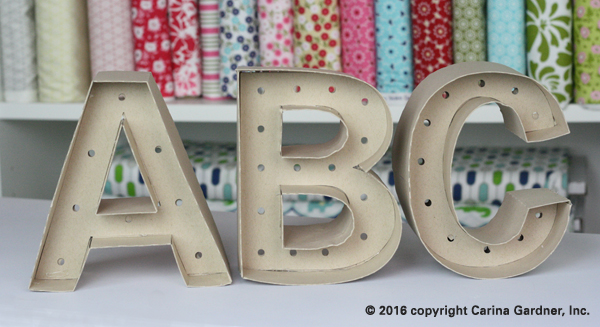
Hi guys! I’m in Vegas today at the ToyFest West Tradeshow for MiniLou. I’m having a great time, but I got on today to post about our fabulous new Marquee letters coming out on Silhouette and DigiPlayground.
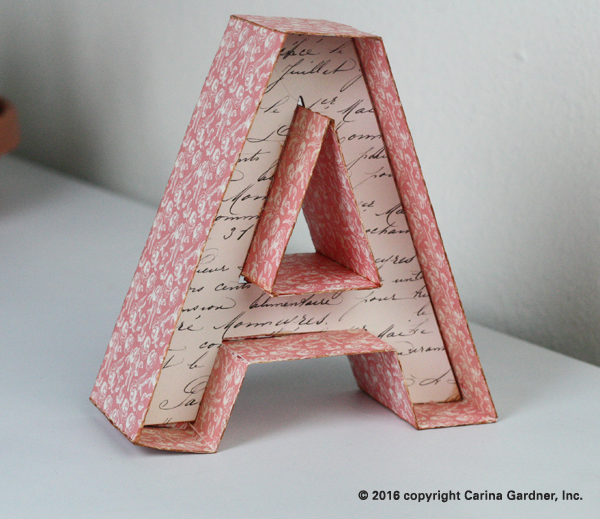
These Marquee Letters are so fun for any occasion! You could use them for party decor, in your child’s room with their name, weddings, and more! The possibilities are endless. Seriously. I. Love. These.
Bonus, these are fun to put together. I will warn you though, they do take some time and patience because there are a lot of working parts. (Note: They are so worth it!)
You can do so many different things with them (I have a list below). Don’t worry if your first one doesn’t turn out the way you want it, it took us a few tries to get them perfect, so be patient and don’t rush it. The slower and more precise you are, the better they will turn out!
Here are some ideas of what you can do with Marquee Letters:
String Christmas lights through the holes (who doesn’t want their name in lights?)
Cut them out in cute scrapbook paper (I cut out the A on the right in my Amour Line for Carta Bella)
Spray paint them any color
Put glitter on them using spray adhesive
Have your kids decorate them with paint, jewels, buttons, ribbon, or anything crafty
Put fresh flowers in them
Cut out some of our SVG flowers to decorate them found here, here, and here
Cut them out in different colors to add to any holiday decor
Our Marquees come with both “holes” and “non-holed.” This is for lights, buttons or other effects (even for back-lit lights).
This tutorial will help you with all of our Marquee Letters. We chose A and G because they are a couple of the more complicated letters. A is straight and G is curvy so you should be able to make any letter with these two tutorials. We have a list of tips for making the other letters at the bottom of this post if you need more instruction. Over the course of the next few weeks, we will release the whole alphabet and a few symbols, so don’t worry if you don’t see the whole alphabet on my Silhouette and Digiplayground shops yet.
Letter A tutorial
1. Cut out all svg files. We did the ones for this tutorial in kraft paper, but the possibilities are endless!
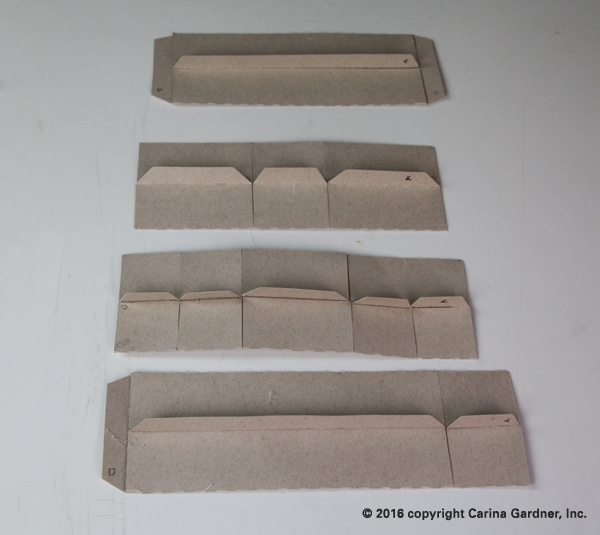
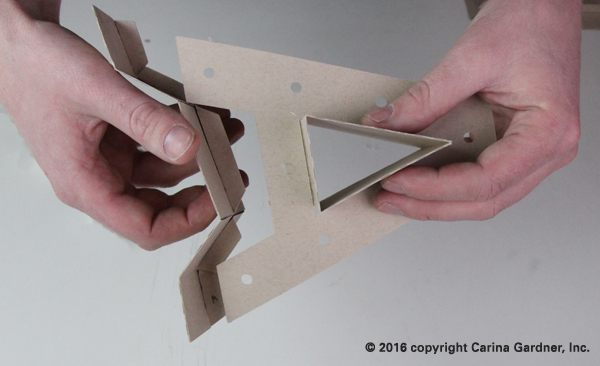
2. Start by folding the score marks on the outside pieces.
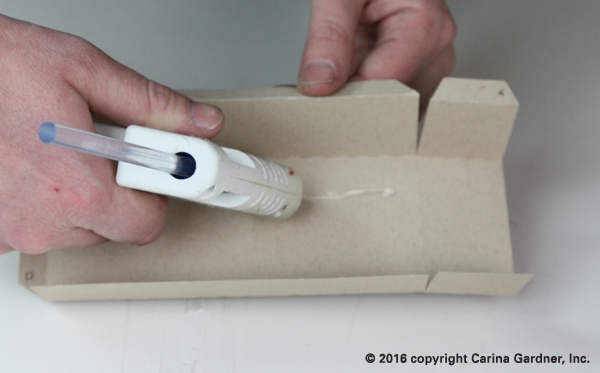
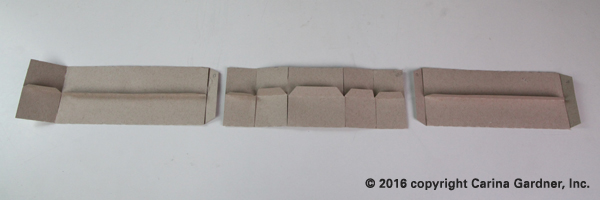
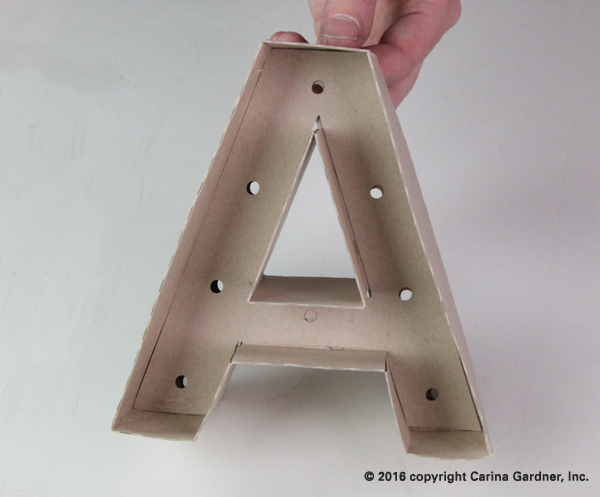
3. Once you have the sides folded, glue the flaps down the middle, making sure to keep the tab up. On the end without a tab, leave a little room without glue so the other tab can fit. They should look like the picture below for the letter A.
Helpful Hints: You’ll notice that there are shapes cut out in the tabs. These show you what order and where each of the pieces should be glued to. The shape on one end will match to a shape on the end of another piece. It might be hard to identify which pieces go where. If you look at where they are placed in the file when you open it, you will get a better idea. Because every letter is different, you will need to look at them and figure out where they go before you start glueing. All of the corners have score marks, so you will not have to fold anything on your own, if you have to fold something, the piece is in the wrong place.
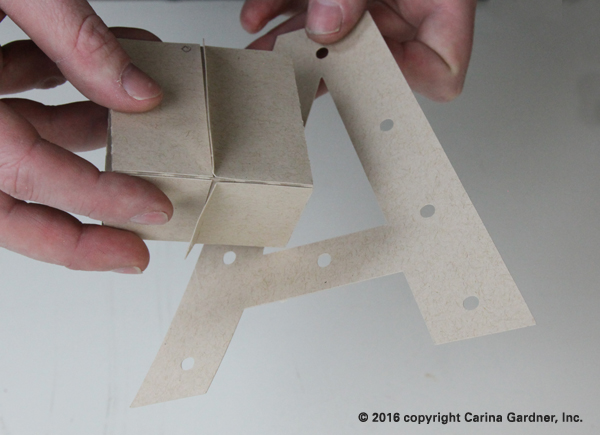
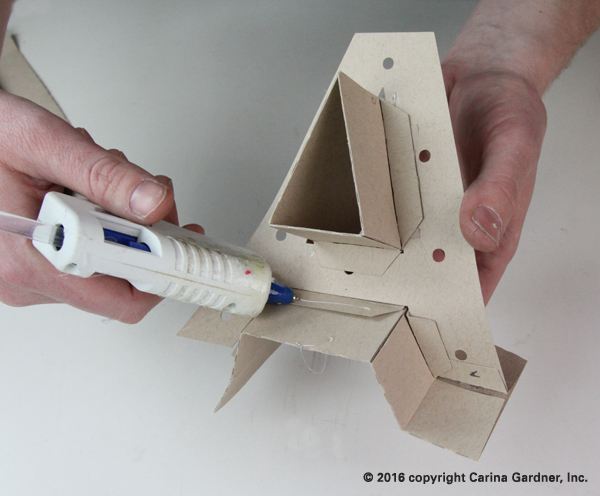
1. For A, start with the center edges. Take the piece for the middle and fold it. The tabs should be on the outside so they can be glued to the letter. Doing the center is easier before the outside edges are on.
2. Glue the inside tabs to the letter making sure all of the tabs are on the same side of the letter.
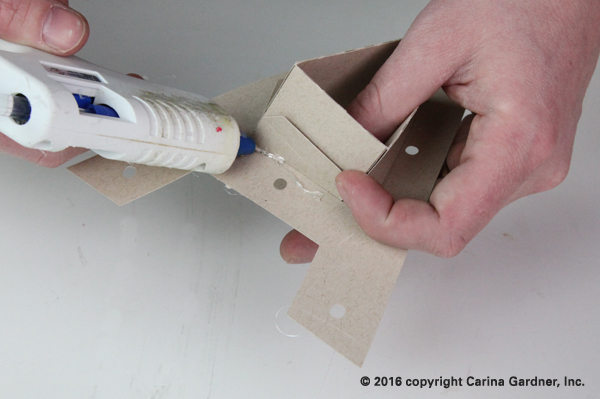
3. For the outside, start with the piece that goes on the bottom. Glue the tabs to the letter the same way as the center. Do one straight edge at a time.
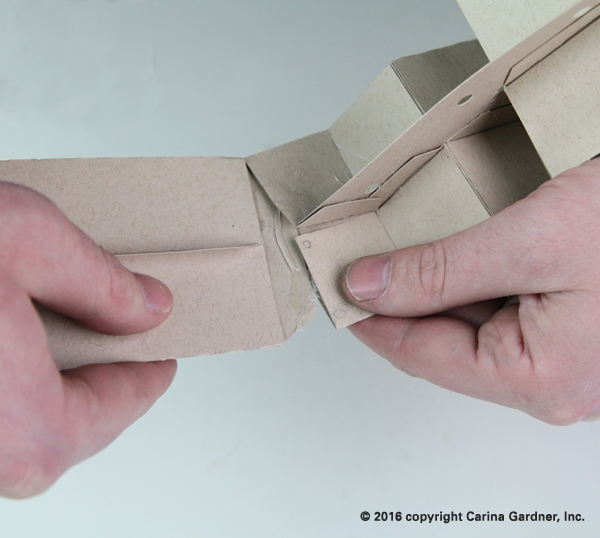
4. After the bottom piece is glued, take the two side pieces and insert the tabs into the correct side piece (the symbols should match) and glue them in place.
5. After the inserted tabs are glued, glue the tabs to the letter one side at a time until you get all the way around, then insert and glue the last tab into place.
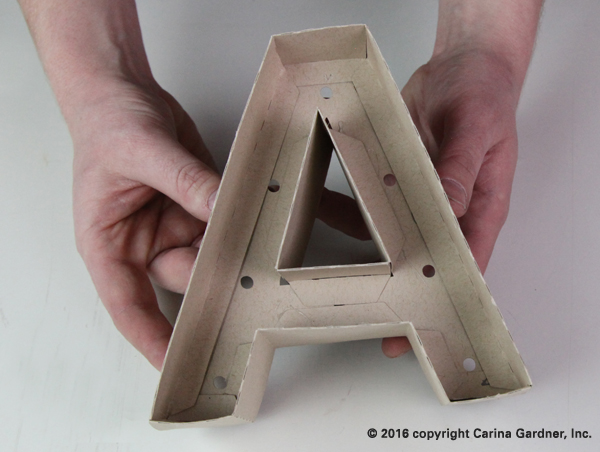
6. Take the second letter and glue it into place. Make sure to glue it so it covered the tabs.
That’s it for Letter A! You should be able to put together all of the straight letters now!
G Marquee Letter
1. Cut out all svg files. We did the ones for this tutorial in kraft paper, but you could do any color!
2. Start by folding the score marks on the outside pieces.
3. Once you have them folded, glue the flaps to the middle, making sure to keep the tab up. They should look like the picture below for the letter G.
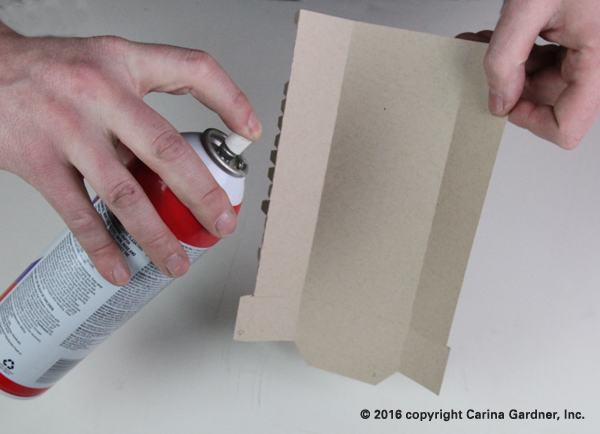
Helpful Hint: G is a curvy letter, which means that the flat outside pieces have to bend more. Because the paper needs to be more flexible, we did not use hot glue for the outside pieces. We used a spray adhesive. You don’t necessarily need a spray adhesive for this, you can use hot glue or whatever you have, but the final product will look better and be easier to glue into place.
4.When all of the outside pieces are folded and glued, take a minute to figure out which pieces go on which part of the letter.
Helpful Hints: You’ll notice that there are shapes cut out in the tabs. These show you what order and where each of the pieces should be glue to. The shape on one end will match to a shape on the end of another piece. It might be hard to identify which pieces go where. If you look at where they are placed in the file when you open it, you will get a better idea. Because every letter is different, you will need to look at them and figure out where they go before you start glueing. All of the corners have score marks, so you will not have to fold anything on your own, if you have to fold something, the piece is in the wrong place.
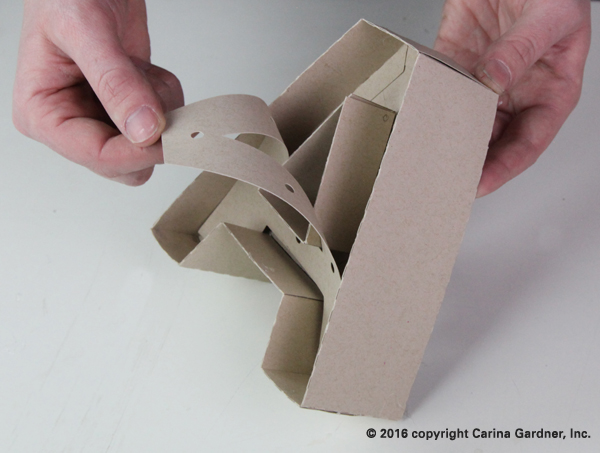
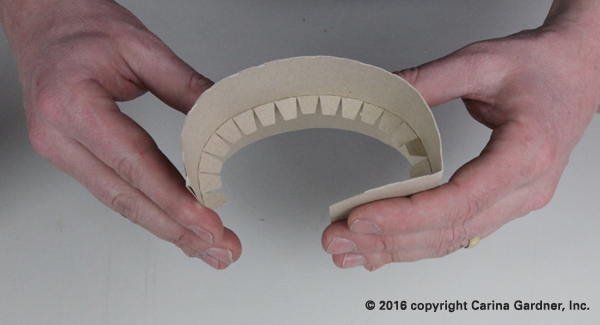
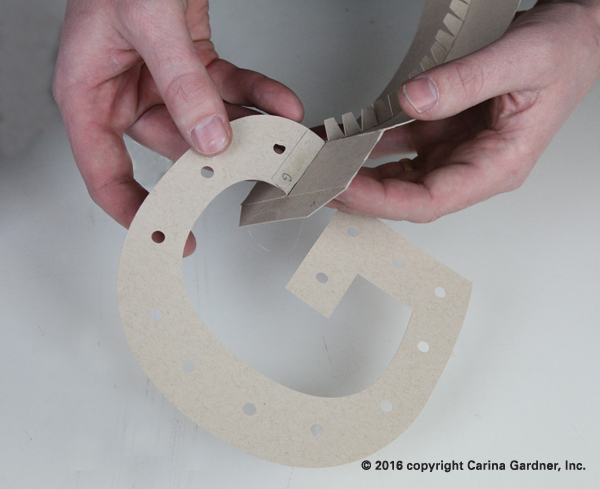
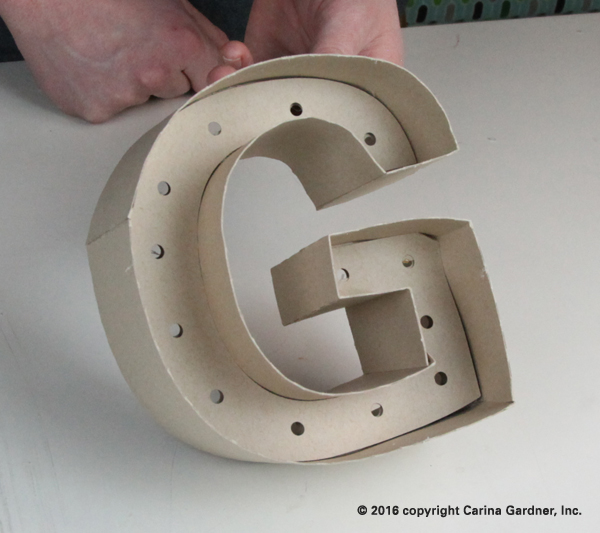
5. When all of your outside pieces are folded and glued, pre-bend the pieces that will go on the curve (these pieces have smaller tabs than the straight pieces). This will make your letter easier to glue together and make it look better. The picture shows how much you need to bend it.
6. For G, start with the smaller straight piece on the top of the G (see picture). Glue the tab to the letter.
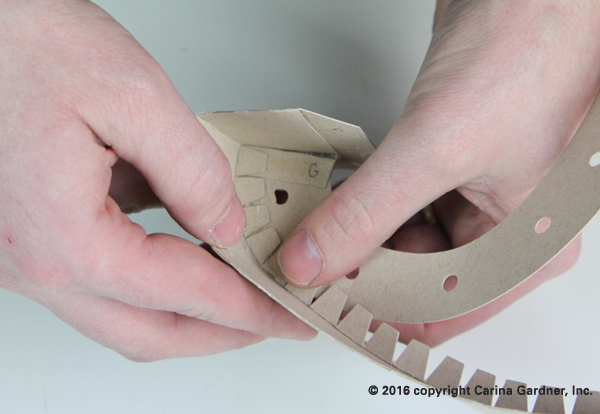
7. Then, start gluing the tabs around the curve with hot glue. Do one or two tabs at a time, making sure the outside piece line up with the outline of the letter. Don’t rush this too much, if you take it slow and make sure each piece lines up with the letter, your letter will turn out a lot better.
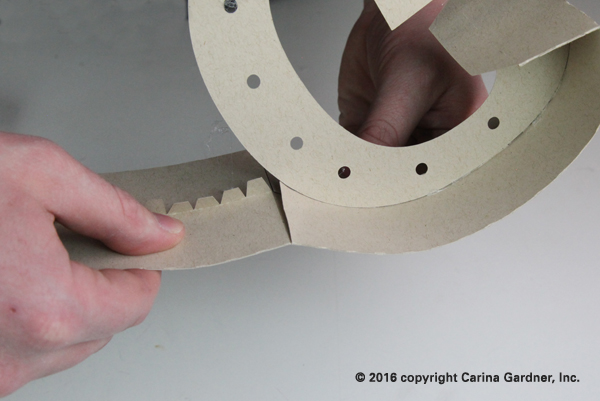
8. Once your first outside piece is glued on, take the next outside piece (make sure the symbols match up) and insert and glue the tab into the piece that is already attached to the letter.
9. Keep going around the letter, gluing all of the tabs down.
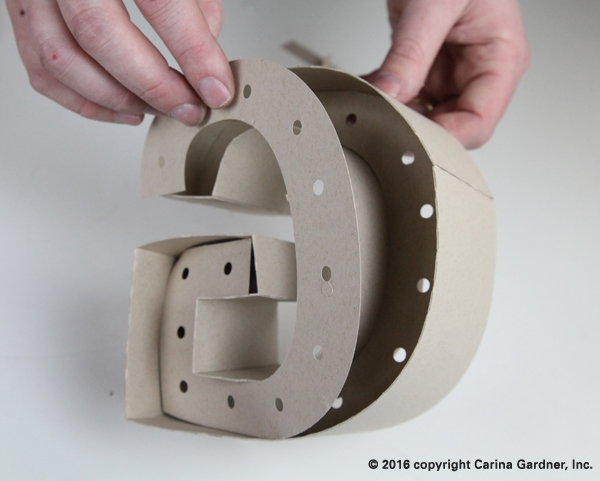
10. After all of the outside pieces are glued onto the letter, take the second letter and glue it into place.
Now you have the letter G and are a pro at the curvy letters!
Some other tips for all letters:
Figure out which pieces go where before you start gluing. The symbols will help you, but it still can be a little tricky
Make sure you have the letters right side up. Letter like H and E might look symmetrical but there are small differences in the height and length in parts of the letters. Before you glue the second letter on, the holes should line up, and if they don’t, the letter is in the wrong way.
Here are some notes on the other letters. The tutorials should be able to help you make any letter. Because each letter is a little different, here are some tips I have for each letter:
A. see tutorial B. do the two inside holes then outside C. do the outside then the inside and don’t forget to pre-bend the curvy pieces D. do the inside then the outside E. when you put in the second letter, make sure you put it in the right way, or it won’t fit correctly
F. G. see tutorial H. when you put in the second letter, make sure the smaller half is on the top, even though they look similar, or it won’t fit correctly
I.
J. do the outside curve then the inside curve
K. take the two pieces that go in the “V” parts and glue the tabs that make the point. Attach the “V” parts to the letter first, then add the surrounding edge pieces
L.
M.take the two pieces that go in the “V” parts and glue the tabs that make the point. Attach the “V” parts to the letter first, then add the surrounding edge pieces
N. take the two pieces that go in the “V” parts and glue the tabs that make the point. Attach the “V” parts to the letter first, then add the surrounding edge pieces
O. do the inside then the outside
P. do the inside hole then the outside
Q. do the inside first, then start with the flat edges on the outside and go around
R. do the inside hole, then the outside
S. the curved pieces are similar in length, but not the same, double check you know where each piece goes before you start glueing
T.
U. do the outside then the inside
V. take the two pieces that go in the top part of the V and glue the tabs that make the point. Attach the “V” parts to the letter first, then add the surrounding edge pieces
W. take the two pieces that go in the “V” parts and glue the tabs that make the point. Attach the “V” parts to the letter first, then add the surrounding edge pieces
X. take the two pieces that go in the “V” parts and glue the tabs that make the point. Attach the “V” parts to the letter first, then add the surrounding edge pieces. Also, when you put in the second letter, make sure the smaller half is on the top, even though they look similar, or it won’t fit correctly.
Y. take the two pieces that go in the “V” parts and glue the tabs that make the point. Attach the “V” parts to the letter first, then add the surrounding edge pieces
Z. take the two pieces that go in the “V” parts and glue the tabs that make the point. Attach the “V” parts to the letter first, then add the surrounding edge pieces. Also, when you put in the second letter, make sure the smaller half is on the top, even though they look similar, or it won’t fit correctly.
You can find the whole Alphabet on my Silhouette and Digiplayground Shops. Look for Numbers coming in the next few weeks!
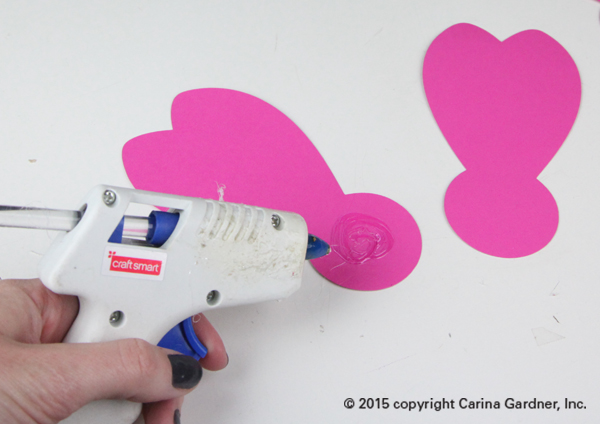
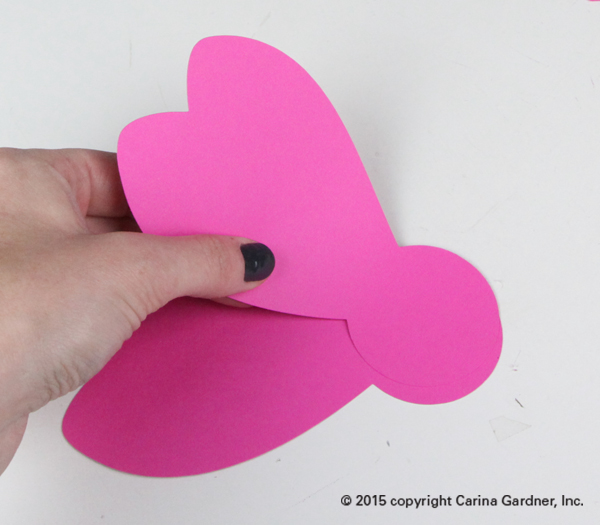
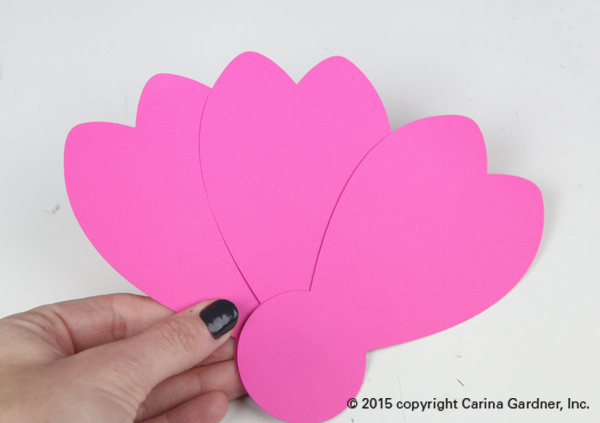
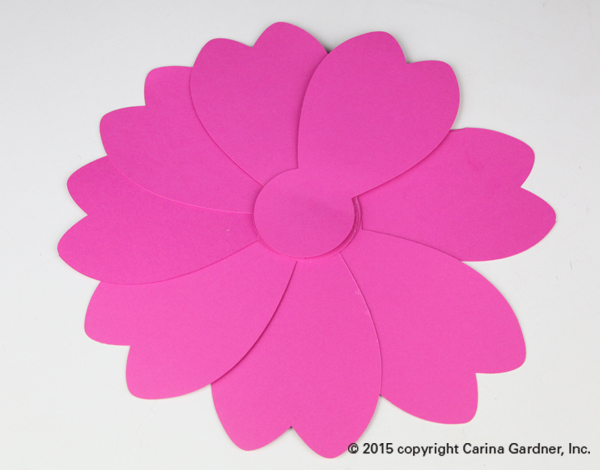
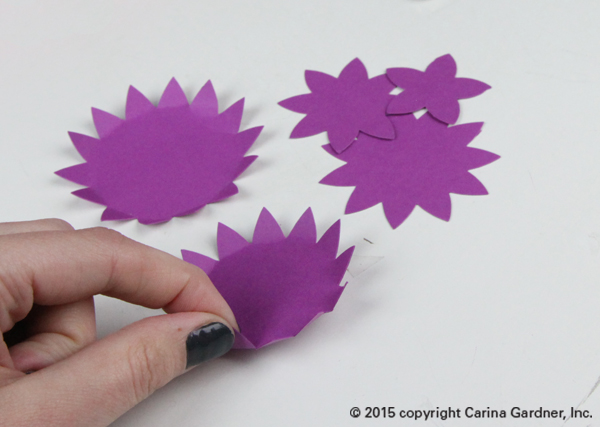
2. Start with the big single petals. These are going to be the first layer of the flower. Take two petals and glue them together using the middle circle. Make sure the circles line up and to fan the petals out about a half of an inch. See the pictures below for how to space them.
3. Glue the petals one by one making sure the centers align and the spacing is even as you go.
4. Once you are done with the big petals, they should look like this.
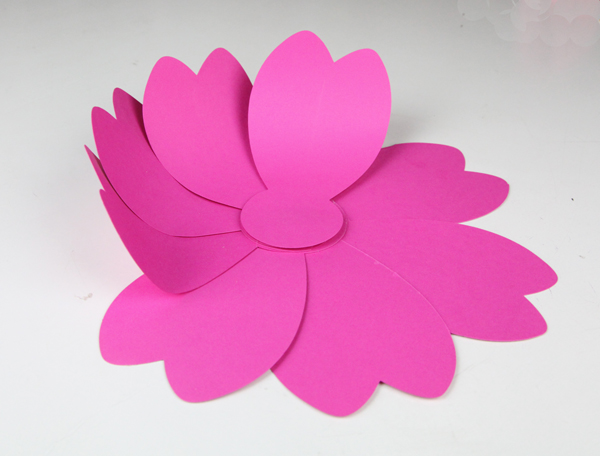
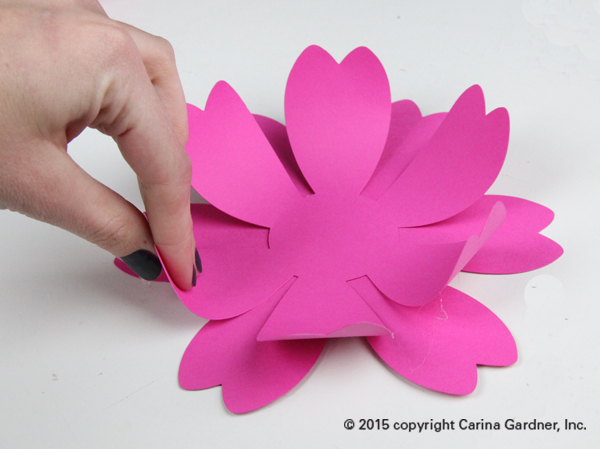
5. To add dimension to your flower, finger press the petals so they curve upward.
6. Once your done with the first layer, take the smaller petals and glue the centers together, offsetting the petals.
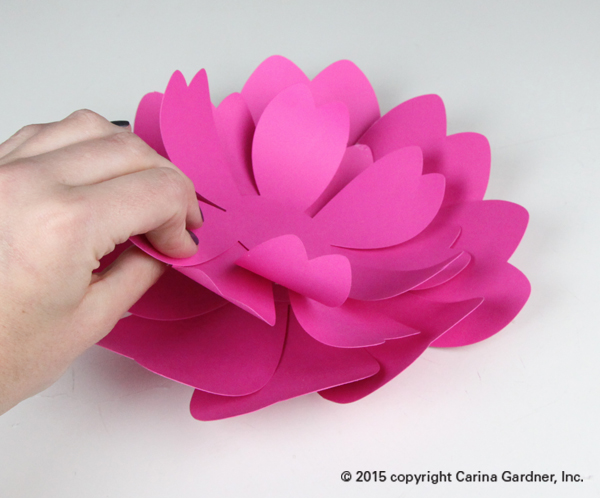
7. Now, finger press the petals upwards the same way as you did the first layer.
8. To add the two layers together, glue the center and put the smaller layer on top being sure to offset the petals.
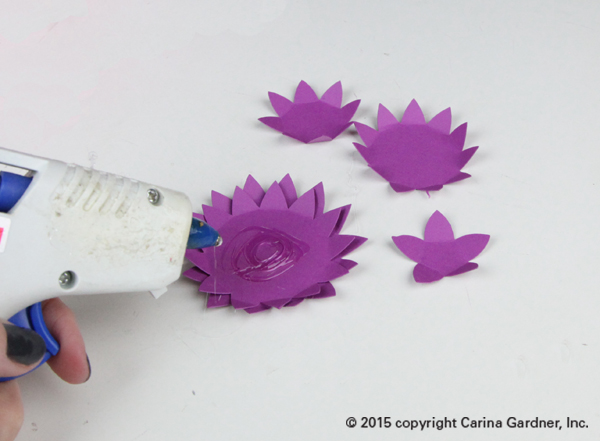
9. For the middle of the flower, start by folding the points upward. For the middle, it is easier to fold them before gluing them.
10. Then, start with the biggest later and glue the centers together going from biggest on the bottom to smallest on the top. We added a big gem to the center to give it a fancy, fun look.
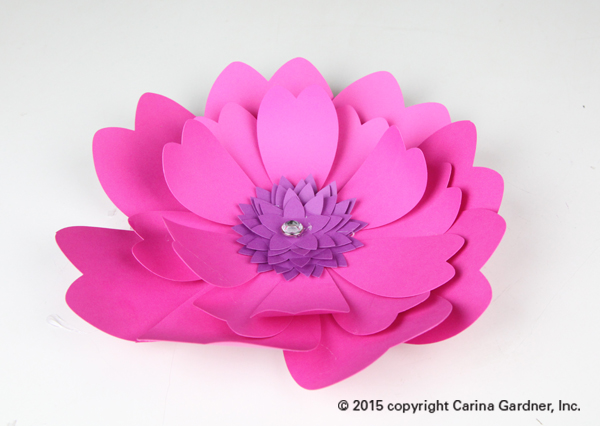
11. To finish, glue the centerpiece to the middle of the flower and you’re done!
Make the whole set of big flowers to get in the mood for spring or decorate for a party!
Large Rosey Flower
1. Cut out all svg files.
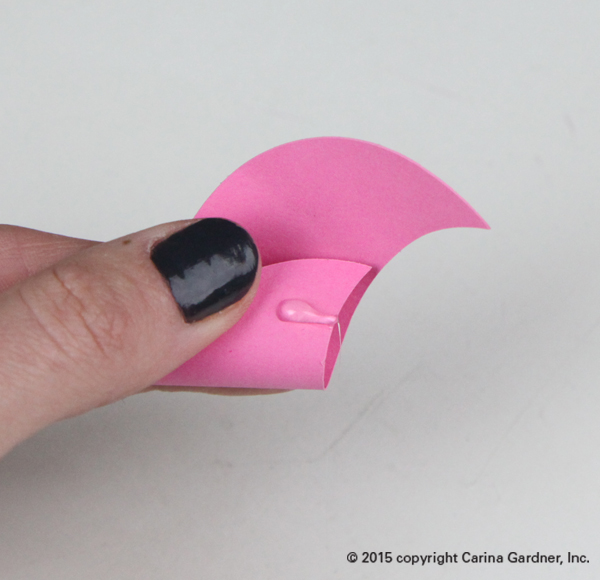
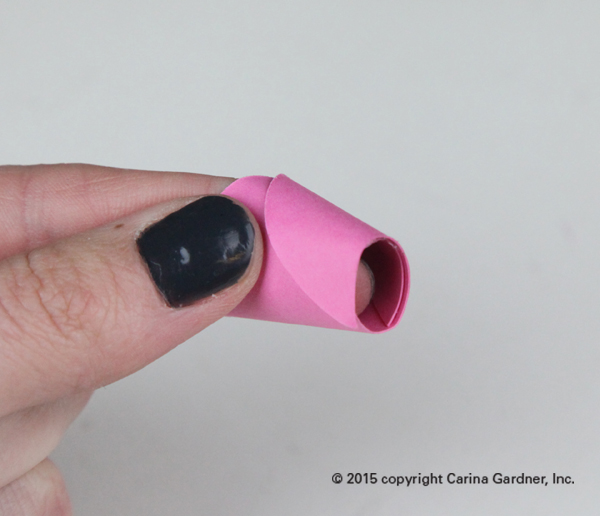
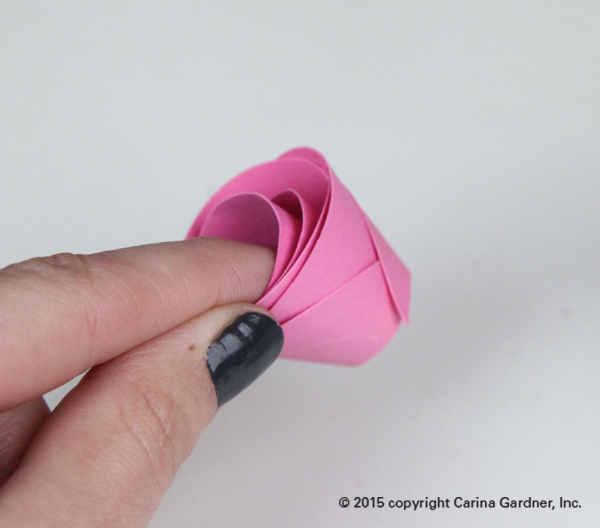
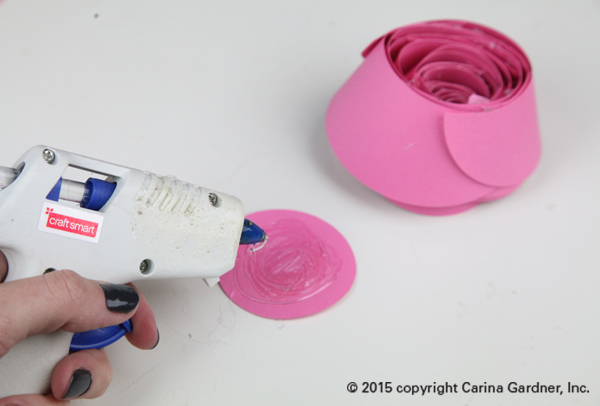
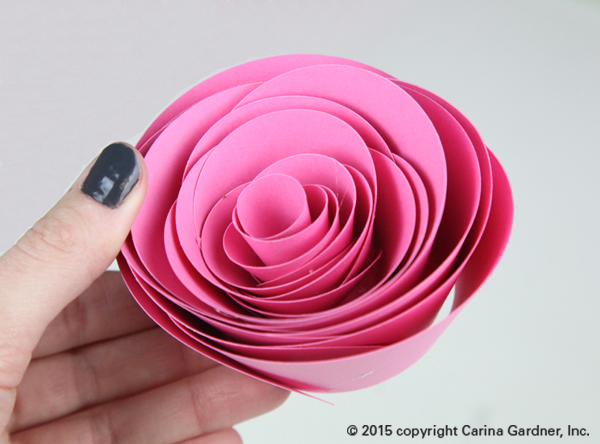
2. Start with the smallest petals. Take one and wrap it around your index finger. Put a drop of glue to glue the ends together close to the bottom. Make sure the bottom of the petal is flat. You’ll want to make sure you do this as you go. This will make the petals flare out more and give the rose more levels.
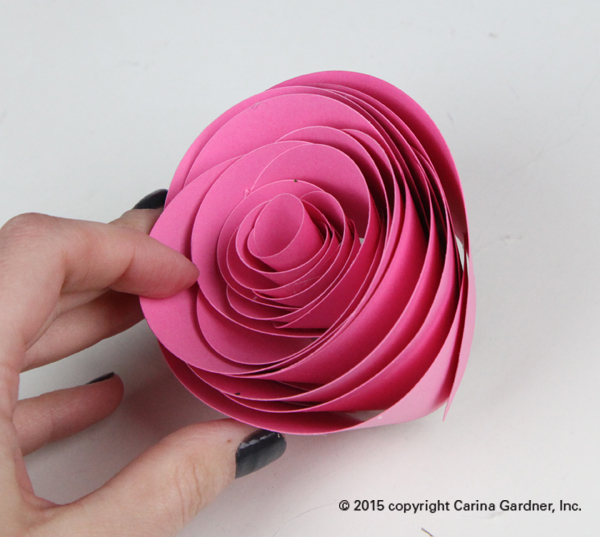
3. Keep the rose on your index finger and wrap the petals around it. Change up where you start wrapping the petals. You don’t need to wrap the petals very tightly. You will get a more rose looking flower if you put the glue on towards the bottom and make sure the bottom of the petals align and stay flat.
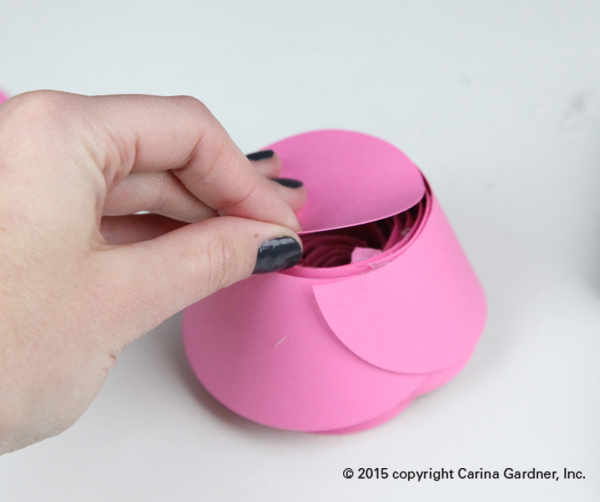
4. Once you’re done wrapping all of the petals, take the circle and glue it to the bottom. This covers up any spaces you have in the bottom and if you want to use it to decorate, it’s easier to attach.
That’s it! Now you can make a whole bouquet or put it with an arrangement!
Some day in the near future I’m going to give you guys a tour of my offices and maybe a day in my life. To come out with as many products as we do at CGInc and MiniLou, well, it means we make A LOT of stuff EVERYDAY. Case in point, yesterday I designed a MiniLou fabric line and today I am finishing up a Cartabella Halloween line. Seriously, the best part of my creative life. And it isn’t just me. It’s my entire team of doers. I’ll be sure to introduce them as well.
But because of my design schedule and the number of tradeshows I already attend, I am careful about the number of events I am willing to commit to. But when Sherie from Sew Simply Stitched asked if I would teach at their first annual Quilt Retreat, it was a resounding yes! I love teaching in my home state of Utah and LOVE meeting quilters in a retreat environment. I love getting to know other sewing pattern enthusiasts and just being able to HANG OUT with them! Are you coming? I hope to see you there.
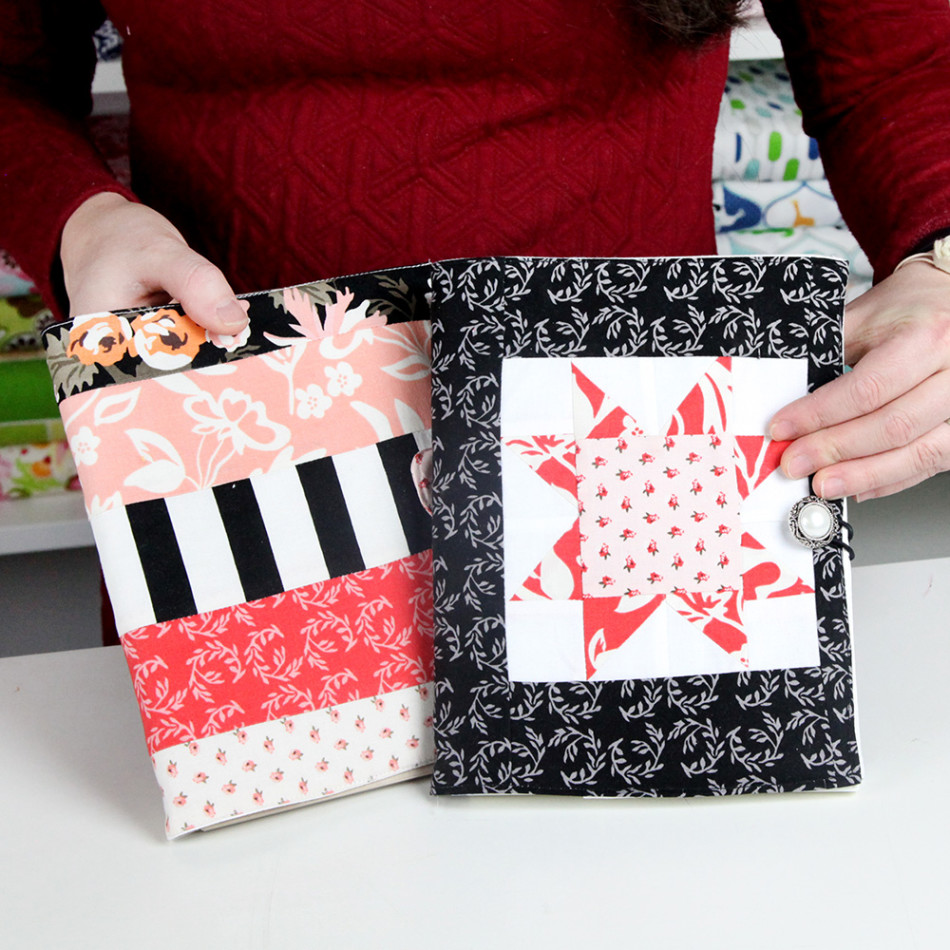
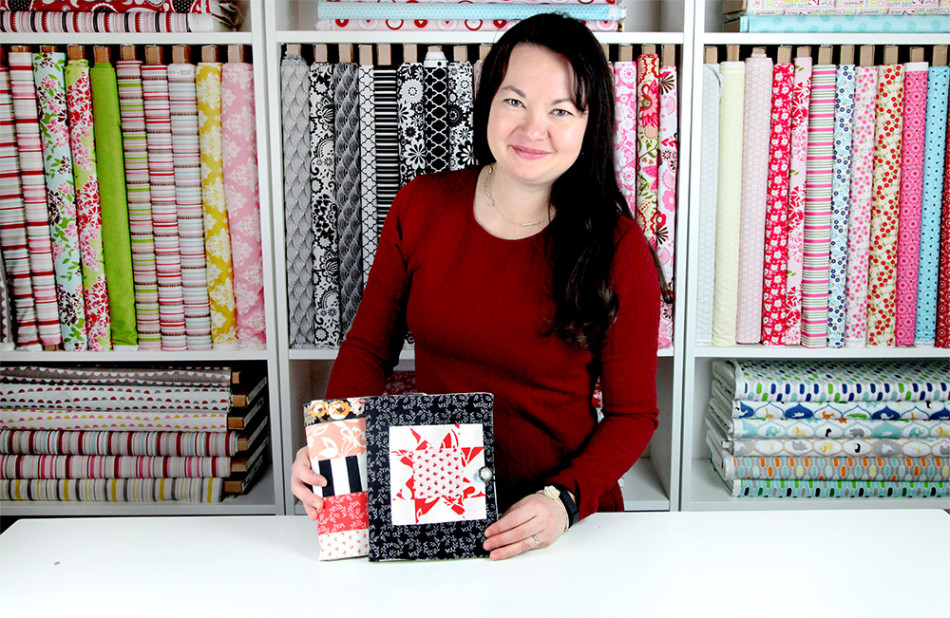
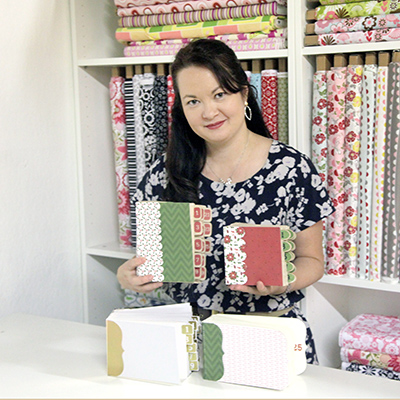
For those of you who haven’t heard about it (registration for it only opened a couple of weeks ago), here’s some more info. The retreat is from March 17-19 at the Gracie Event Center in Roosevelt, Utah. I’m teaching two classes on making hexagon quilts and one on these fun sketchbook covers (photo above).
Here’s the details:
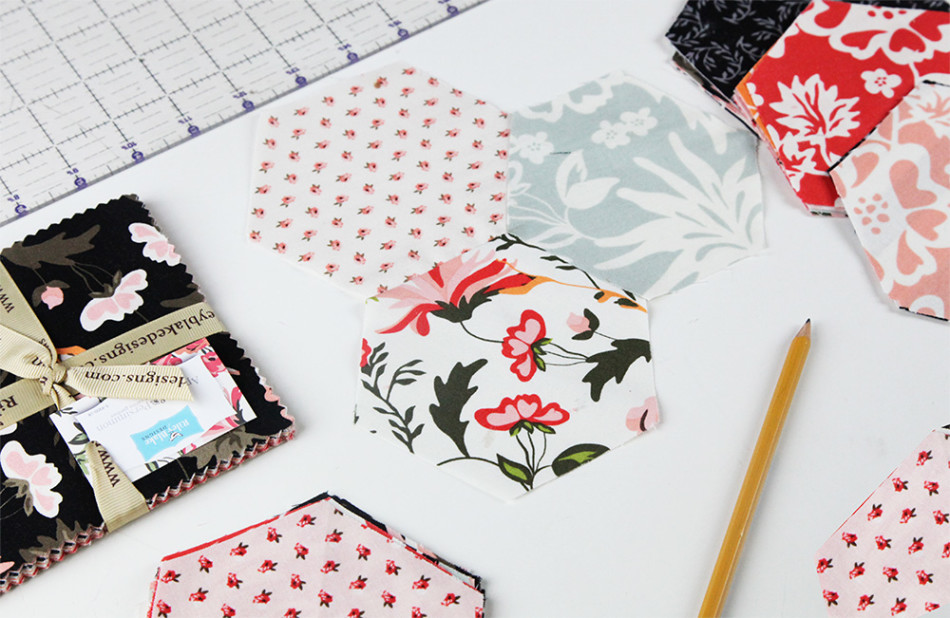
CLASS 1 Perfect Hexagons at any Size with a Straight Ruler Fabric and pattern designer Carina Gardner shows you how to cut out the perfect hexagon from squares and a straight ruler! No need for fancy rulers or templates! She will demonstrate how to sew a Y seam with your hexagons so that you can build a beautiful baby quilt.
Supplies
4 packs of 5 inch precut squares (with at least 15 fabrics)
OR cut out fifty-nine 5 inch squares
Pencil
Rotary Blade and Mat
Straight Ruler
CLASS 2
Pieced Notebook Cover Class
Fabric and pattern designer Carina Gardner helps you sew together a beautiful pieced notebook cover for a gift or your own doodle book! She will demonstrate how to put all the pieces together and give you the dimensions for variations on the notebook cover! This cover coordinates with the Kathy’s Zentangle class notebook.
Choose one cover to make in class:
5.5 x 8.5 Sketchbook (aslo used in Zentangle Class)
Supplies
Button
Hair tie
Rotary Blade and Mat
Straight Ruler
For the Eight Pointed Star Cover:
Fabric scraps including a
3 in square for the center of the star
4 in x 9 in scrap for points of the star
1/3 yd white fabric
1/3 yd outside cover fabric (shown in the picture as the black fabric) OR one fat quarter
For Striped Cover:
1 Rolie Poly or several fabric scraps at least 24 inches in length
1/3 yd white fabric
I can promise you, it’s going to be a good time! I have a slew of raffle prizes we will be doing throughout my class, learning great techniques, listening to fun music, and getting to know each other. We are going to try really hard to finish an entire baby hexagon quilt during my 3 hour class.
You can register at the Sew Simply Website here: http://www.sewsimplystitched.com/events. For all you sewing enthusiasts, we also created a fun (private) facebook group if you want to join in here: https://www.facebook.com/groups/558135217677951/. You can share your projects and ask questions. We add tips, exclusive coupons, and sneak peeks of what’s ahead.
It’s the month of love, and I have a heart block for you for your Home Sweet Home Quilt! This is my second block for our 2016 Block of the Month. Grab the download in the store and watch the video below to join in! Make sure and follow me on instagram (@carinagardner) to post your blocks for our fabric giveaway every month!
Happy Sewing!
Carina
(PS Check instagram for our Block of the Month Quilt giveaway….that’s right! I’m giving away the full quilt sometime this week! Be sure to check it out!)
We started working on this collection in December. I’ve never been so ambitious before and tried to release 8 sewing patterns at once! But it was an idea that came from loving and wanting to produce a knit collection that was simple to sew and beautiful to wear. Easy enough of a concept….quite a bit more difficult to execute.
And I couldn’t have done it alone! My pattern production assistant worked tirelessly on this collection and made edit after edit as I pinned, cut, and tried to find the SIMPLIEST way to put these patterns together. I hope you love the results!
This is the first time I have released MISSES and TEEN sizing! You’ll notice that as my family changes in age, I find myself wanting to make what my own kids are wearing.
So here’s the run down on these patterns.
There are 3 styles of knit patterns. ALL are easy to make but Style 1 is the easiest and Style 3 the hardest. As you can guess, Style 2 is right in between the other two.
Style 1 is short in front and longer in the back. Style 2 is an A-line with a gusset in the back. Style 3 features a zipper in a yoke on the front. Each of these variations changes the look and styling of the patterns.
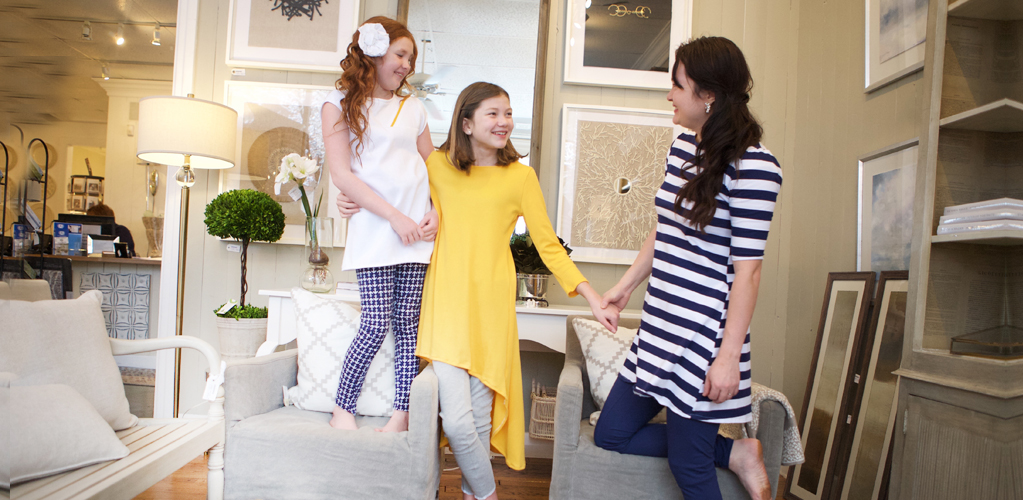
There are two lengths on each of the tunic patterns. There is a “blouse/tunic” version (shorter) and a “dress” version (longer). Here’s the deal: they are both LONG. These tunics are meant to be worn with leggings and if you are anything like me, I won’t wear leggings unless they cover my bottom! In the picture above, Felicity (white) is wearing the TUNIC length Style 3, Siri (yellow) is wearing the DRESS length Style 1, and I (stripes) am wearing the TUNIC length Style 2.
The sleeves are INTERCHANGABLE. There is a 3/4 length sleeve on Style 1, an elbow length sleeve on Style 2, and a cap sleeve on Style 3.
The patterns come in TWO sizes: Misses AND Girl/Teen. The Misses size include 4,6,8,10, and 12. The Girls sizes include 6,8,10,12,14. If you are a size 2 in Misses, you can easily move down to the 14 in Girls/Teen.
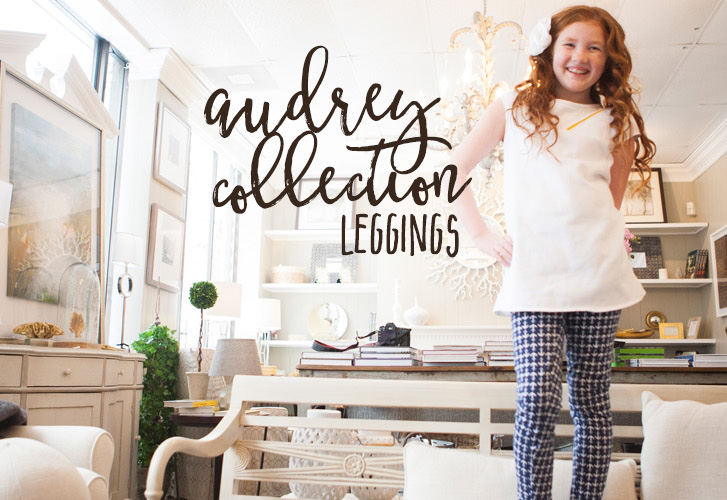
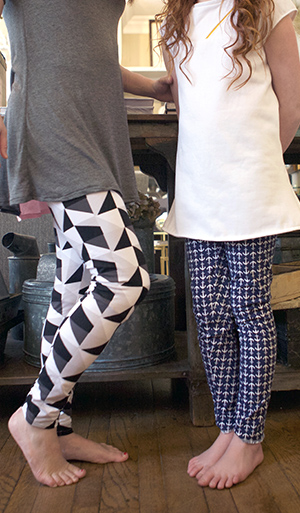
Did I mention the final two patterns are a Miss and Girl/Teen legging? Yep! SOOO simple to sew together since there is a single seam. We love using the Riley Blake knits for these!
I know some of you are probably afraid to work with knits, but it is a lot simpler than you would think! I have a few pointers for those of you getting started and made a couple of videos to make the process so much easier! Check them out below.
Here are a couple of “important” things that I always do when I start to work with knits:
Change my needle to a STRETCH needle. These can be bought for ALL brands of sewing machine and is meant for knits. This will make your sewing go SO much smoother!
Use the thread that matches the fabric content. So if I have a 60% Polyester and a 40% Cotton fabric, I use a Polyester thread. The only time I do not follow this rule is when I have a cotton based fabric with a small percentage of stretch (like a 5% spandex like a Riley Blake knit). Then I will use a polyester thread because it has more give then a cotton thread.
Surprisingly, you do NOT have to serge knits. It looks nicer and will last longer, but you shouldn’t fret just because you don’t have a serger. You should take a chance on knits with just your regular sewing machine!
(Here are the two videos: Getting Started with Knits and a Tutorial on Style 3!)
Make sure and take advantage of the 20% sale going on right now on PDF patterns in the shop in honor of the new collection! Put in code AUDREYNEW20. The sale should last through February 2016. it includes ALL PDF patterns including Kid cottons and quilt patterns!
I’d love to hear what you are doing with knits! Join my Facebook page to tell me or my Private Sewing Group on Facebook! As always, I love getting feedback on the patterns and projects I am working on.
Finally, there is a good chance we will have handmade Style 1 in Misses S, M, L available for sale in a couple of weeks. We will have a very limited few since these are being made inhouse. Keep your eyes out for these!
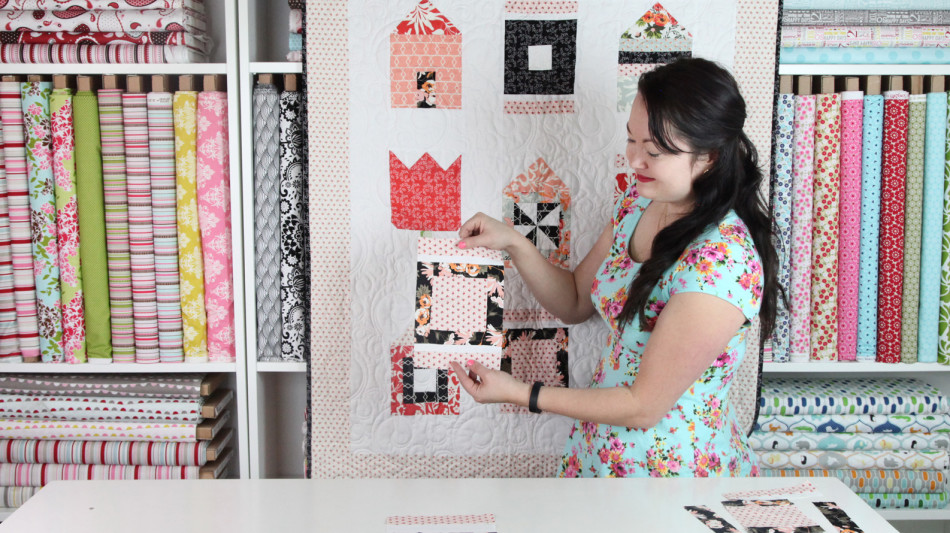
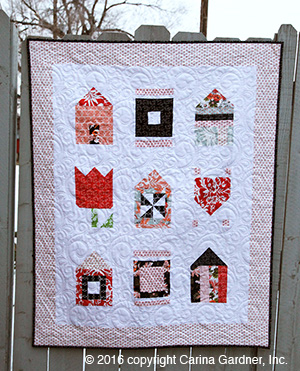
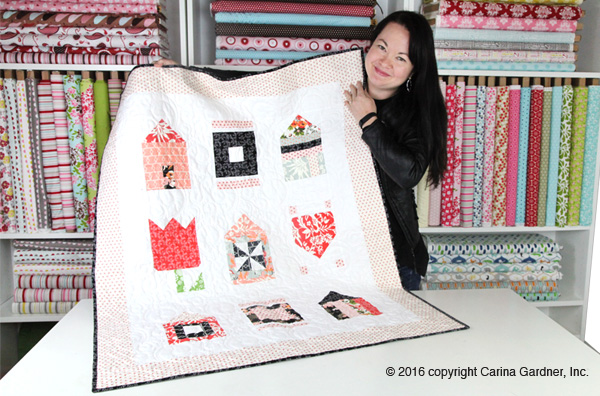
It’s my first ever Block of the Month! I’m excited to start this year off with a bang! The sampler quilt we are making is called Home Sweet Home and includes darling houses, a tulip, heart, and more!
Every month a new video will be posted on the 15th with a new tutorial. Be sure to also visit the store to download the free pdf of the block measurements that day as well. Our first video posts today so go check it out here: https://carinagardner.com/2016bom/.
You should also check out all the awesome things we are doing on instagram with this quilt! Follow me at @carinagardner to check it out!
Hope you make this quilt with me! I can’t wait to see what you do with it!
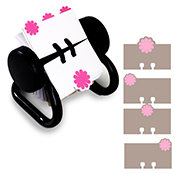
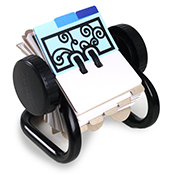
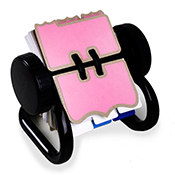
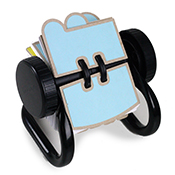
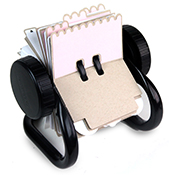
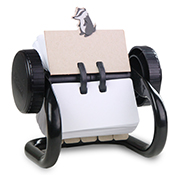
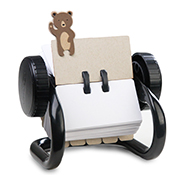
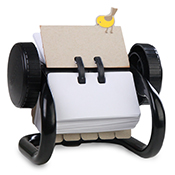
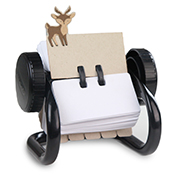
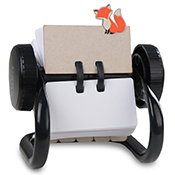
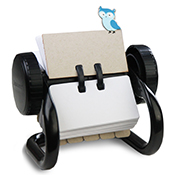
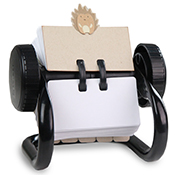
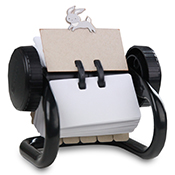
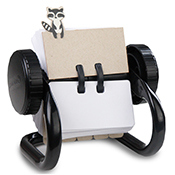
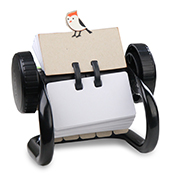
I love putting together a little “planner” at the beginning of the year. This year I focused on Mini rotating file systems. These make me so happy and can be used in so many ways. I love that these could be potential albums, event planners, birthday planners, and so much more. I personally adore the little fox tab!
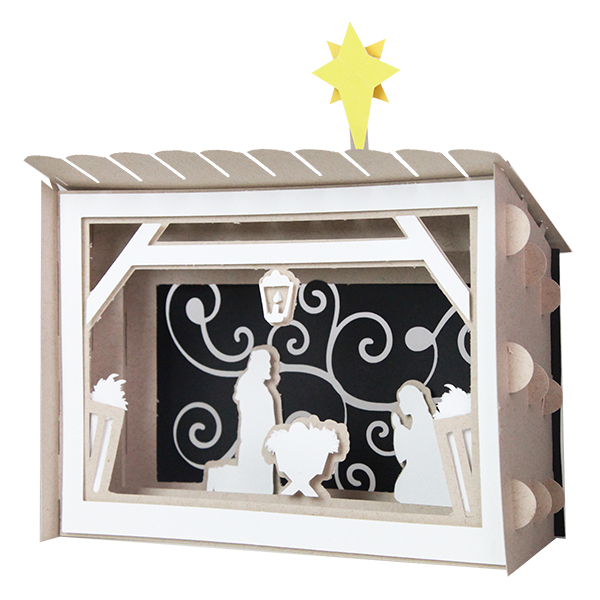
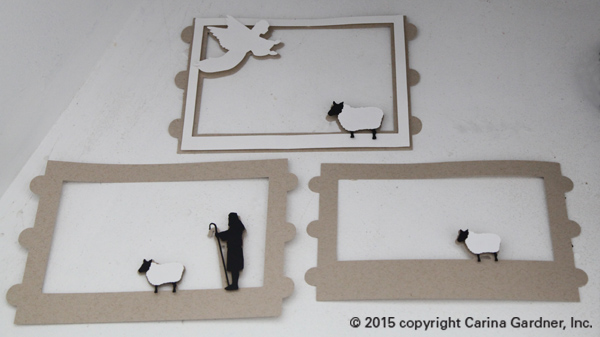
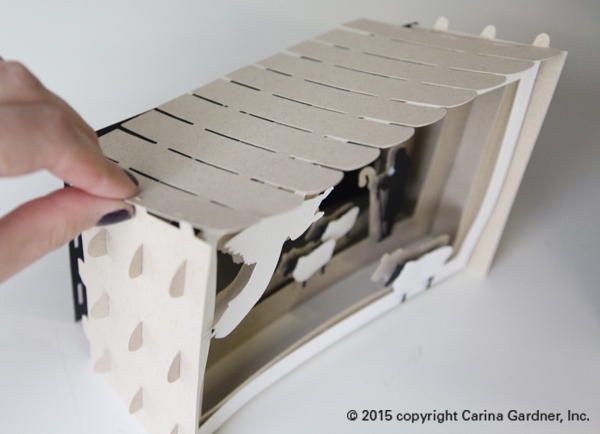
These darling Shadow Box Scenes pop together and then can be pulled apart and stored flat. For me, that makes for the perfect piece of Christmas decor! There are five scenes in all for you to enjoy the holidays!
1. Cut out the svg files. The sides, roof, and frames I cut out in kraft paper, the shepherd, background, and the main part of the sheep in black, and the frame, angel, and sheep fur in white.
2. Begin with the frames. Pop dot and attach the angel, shepherd, sheep, and white frame in their appropriate places. Once you have all the figures in place, you can start putting the nativity together.
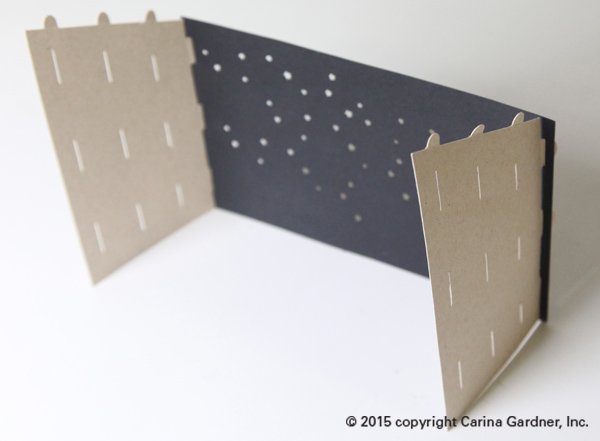
3. Now, put the background and two side pieces together by slipping the tabs on the short ends of the sides into the slits of the background.
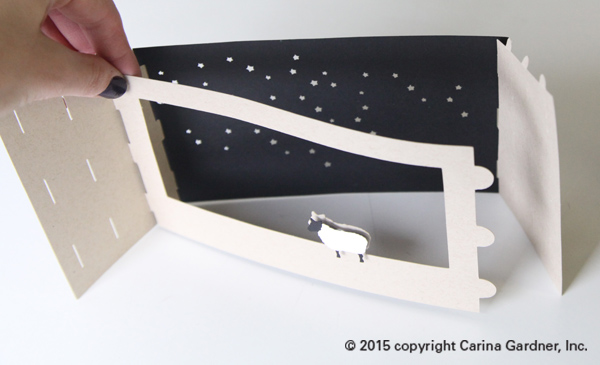
4. The frames attach similarly. Put the tabs on the ends of the frames into the slits in the side piece. Do this for all of the frames. Remember, the frames go in a certain order for it to have the shadowbox effect. The frame with the thickest bottom goes in the back and the thinnest goes in the front.
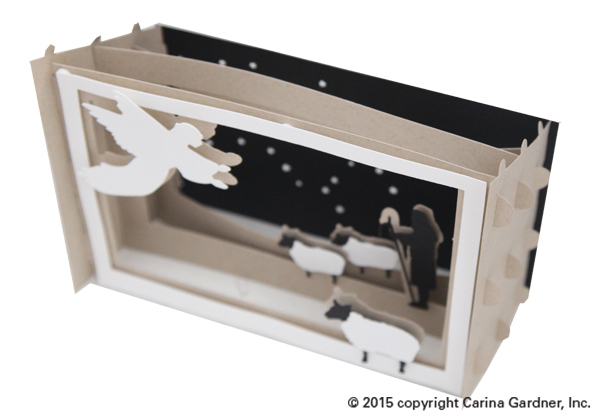
It will look like this when all of the frames are in.
5. For the roof, start with one side and put the tabs of the side piece into the slits of the roof. Do this for the other side. Make sure the side of the roof with the rounded edges goes in the front.
You’re done with your Nativity! I hope you have a chance to make the entire collection!
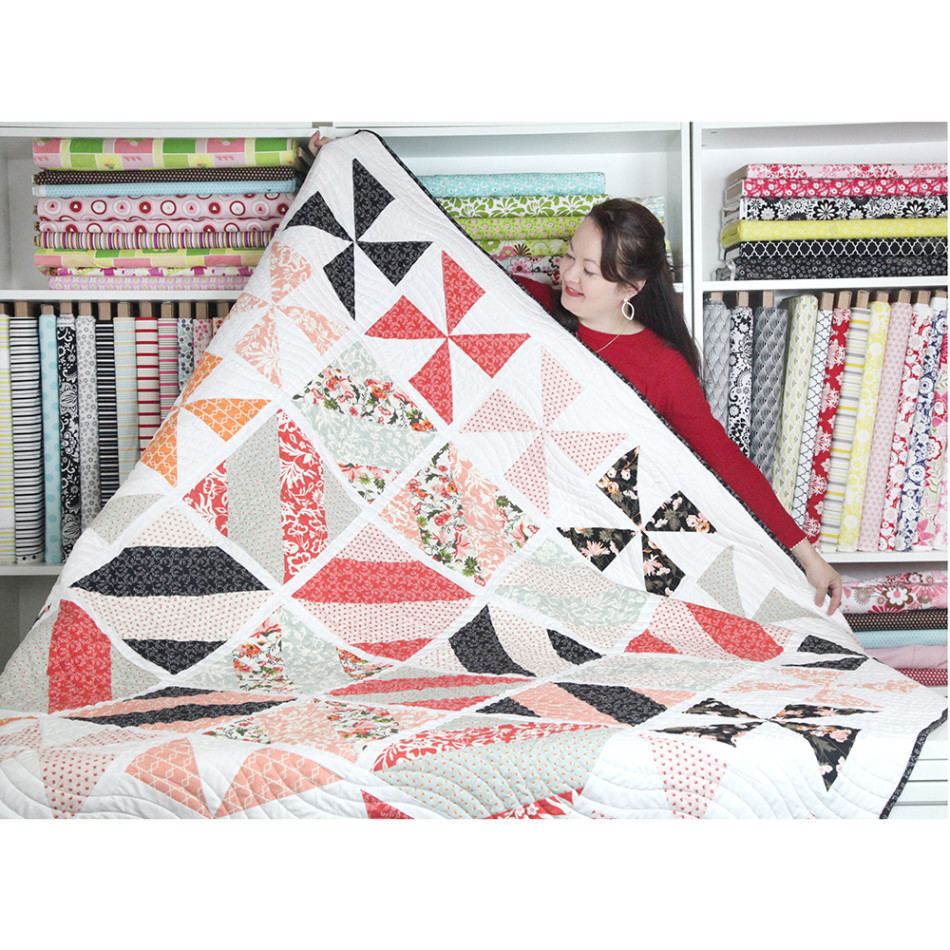
Finally finished the pattern, the video, and I’m giving away the Anything Goes Quilt PDF Pattern I made on instagram this weekend (be sure to check this out!). This quilt is so versatile! I use the Magic 8 technique to get a lot of triangles cut and sewn all at once. I named it the Anything Goes pattern because it really can make so many different kinds of quilts—flying geese, hour glass, pinwheels, chevrons, and more!
Hope you have a chance to try it out! You can purchase the pattern for it (and see some great options!) here.
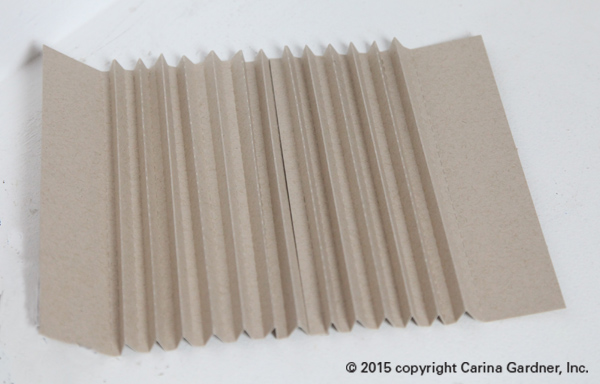
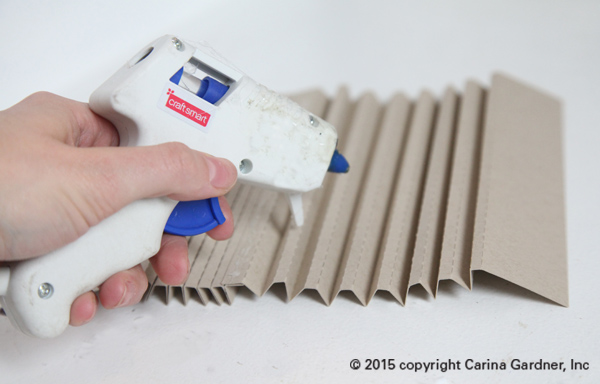
2. Begin with two pieces of the binding and fold along the dotted lines, then glue them together by overlapping the short sides.
3. Turn it over, and glue the wider folds together so the back looks flat and the front has tabs sticking out.
4. Take your pages and fold all of the creases inwards. (The picture below shows the binding on backwards. All those little glued together pieces will become the pages for the album).
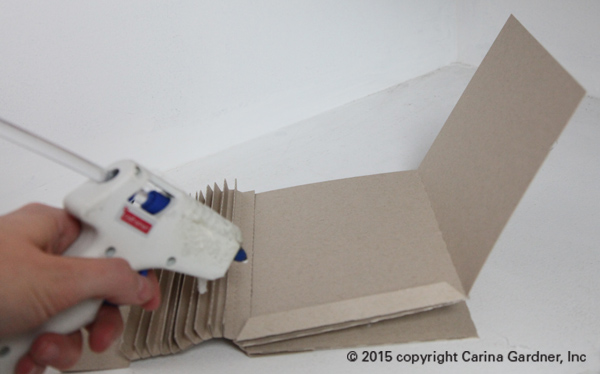
5. Now to add the pages! Glue along the long edge of each page and attach the long edge to the back of one of the folds in the binding. This will create a double-sided/double thick page.
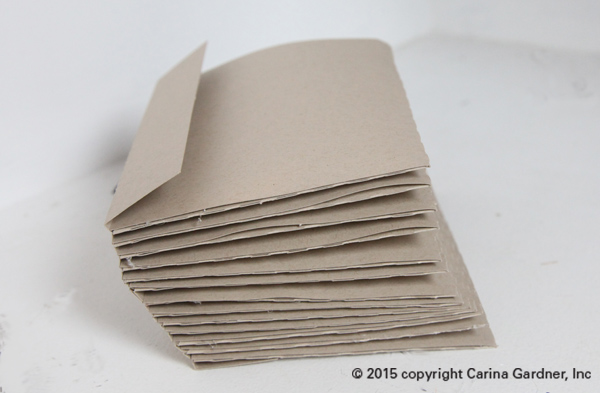
6. Glue the top side of the edge of the long page, as well as the bottom tab and fold the page over. This should create an envelope with an open top. Add a page to each one of the binding pieces.
7. Add the cover by gluing the left side of the cover to the bottom side of the flap. This makes the inside look clean and the binding flap will be covered with the binding cover later.
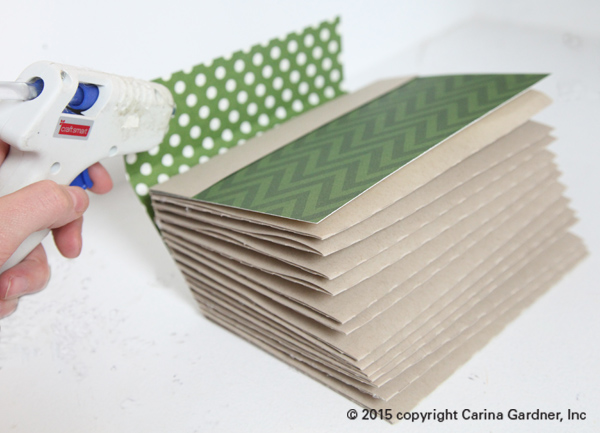
8. Glue the binding cover by matching up the crease of the binding cover with the square of the book. Glue the front, binding, and back side separately.
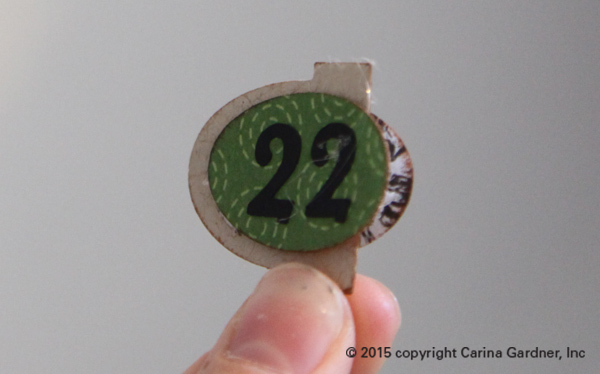
9. For the tabs, glue each number onto an oval (or whatever shape you have). Note: one of the albums (bracket) does not use this step.
10. Glue half of the ovals onto each tab, leaving space to slide the tabs into the slits and for the ovals to go on top of the page. There are 13 tabs, so each tab will have two numbers (one and two will be on one tab, three and four another etc.)
11. Slide the tabs into the appropriate slit on each page. Leave the oval out and glue the other half of the oval onto the outside of the page. Glue odd numbers to the front and even numbers on the back of each tab.
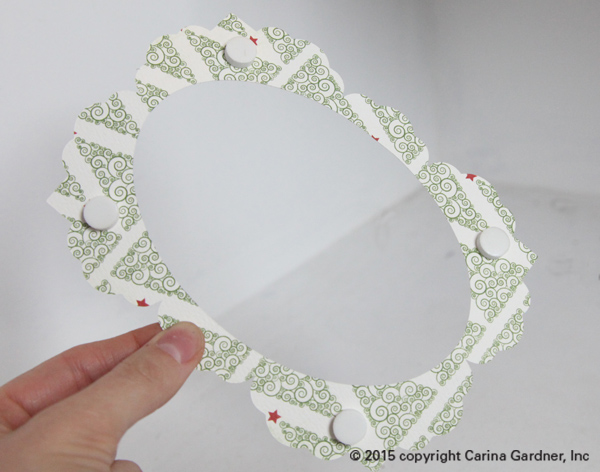
12. For the frames, take each frame and place pot dots on the back.
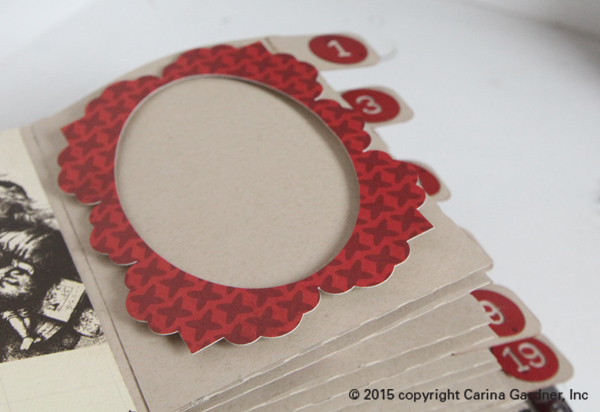
13. Place the frame in the center of the page and make sure the pop dots are firmly in place.
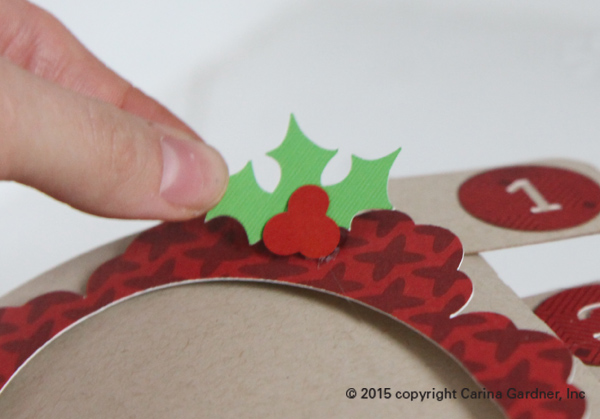
14. Glue the leaves to the berries and attach to the corner of the frame.
15. Place pictures and memories on each page to fill your 25 days of December Album!
Just a quick little post to show off the video Riley Blake just came out with on Apricot and Persimmon (see below). We have been working a lot on this line and should have some cute new quilts and projects out soon! (picture above of my fabulous pattern production assistant and I trying to finish up some samples of Love Next Ruffle Dress—now in pdf format!).
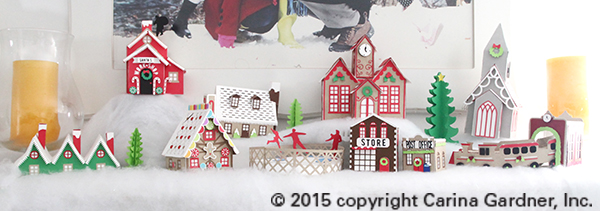
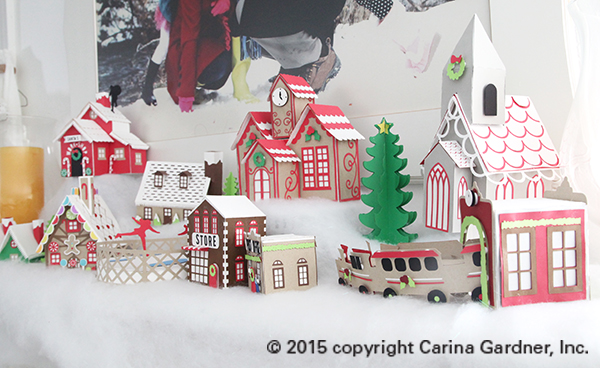
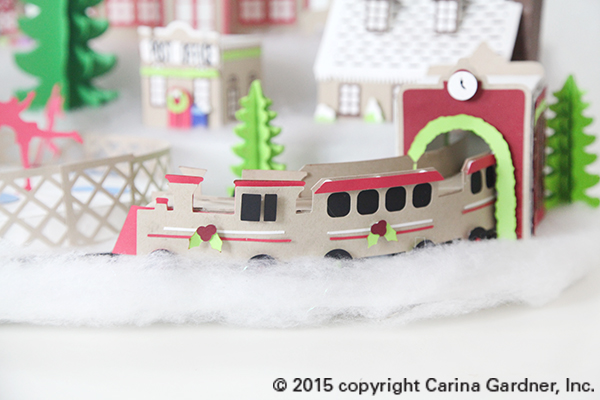
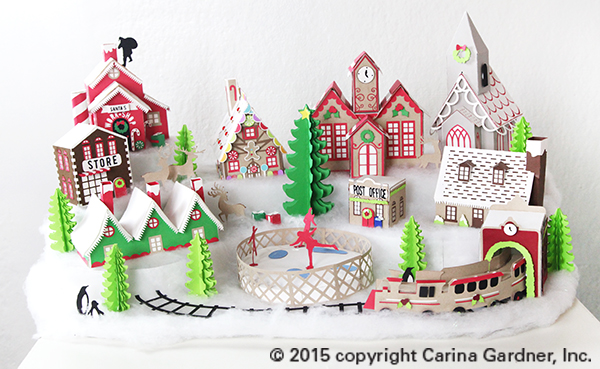
I’ve been working on this Christmas Village for weeks now. Every time one of the little houses got put together, I couldn’t help but smile! Everything about this little village makes me so happy.
There are quite a few pieces, and they all can be purchased from Silhouette. Each building is very intricate and there are a lot of parts. I have a quick video on some of the harder pieces so you can see how they go together (see above).
As for displaying this village, there are soooo many options. I have two I’d like to suggest here for you. The first is a display made completely from foam core. I have a free svg file for you to make a template of the one I made and some instructions on how to put it together below. (The photo below is the display I created with foam core. You can make this too!)
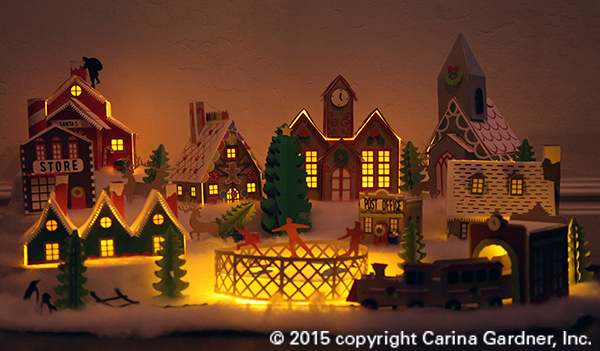
The second way I would display it is on a mantle or coffee table. I love mine on top of our white piano. The best part is at night when we put electric tealights underneath and the entire thing lights up (picture of this below!).
If you place your village on a mantel, depending on the number of pieces you build, I suggest using cake plates and cups turned upside down to give dimension and layer to your village. Cover these with ‘snow’ you can purchase from your local craft store to hide these layers. Instant snow drift!
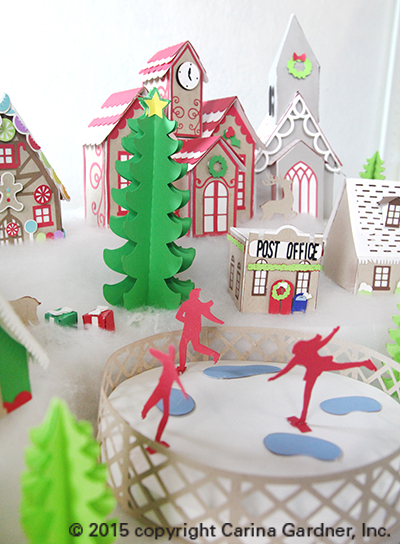
The two photos below is of the Christmas Village on top of my piano (about the size of the mantel). I love it up there! Every piece is so unique and darling. My family is really going to enjoy it this holiday season!
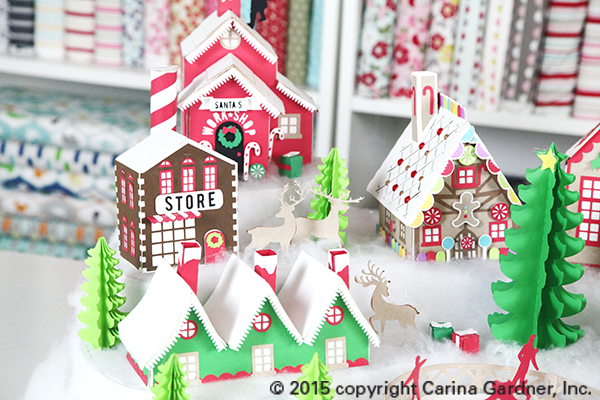
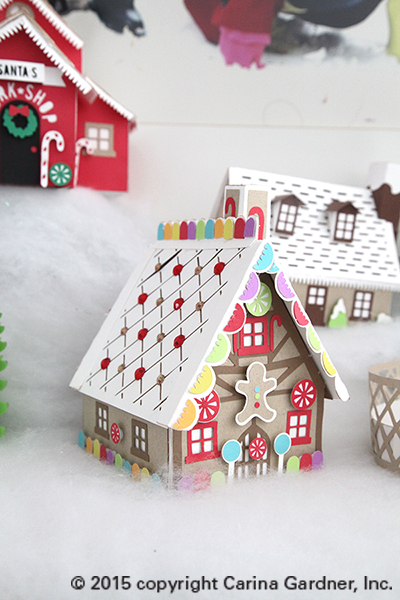
There are so many great pieces in this village. They will be release over the next two weeks (so keep an eye out for them!). The picture below is of the Santa’s Workshop, General Store, Gingerbread House, Trees, and Deer.
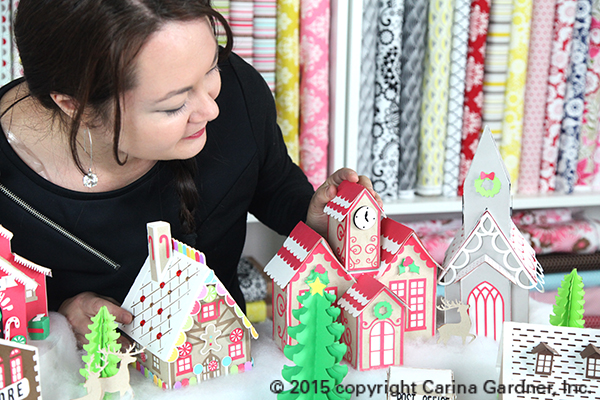
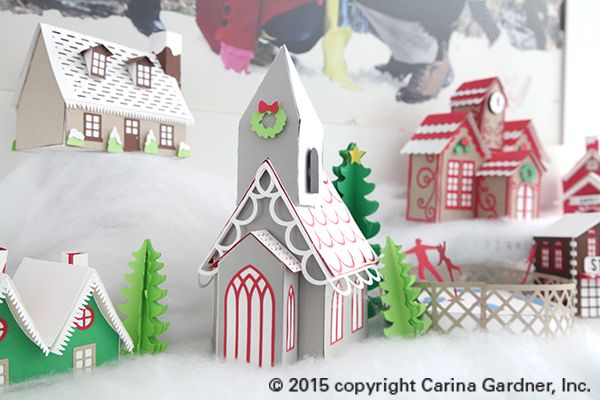
Picture below highlights the Clock Tower, Chapel, and Gingerbread House.
The train comes in two files—a Train Station with tracks and a curved 3D Train.
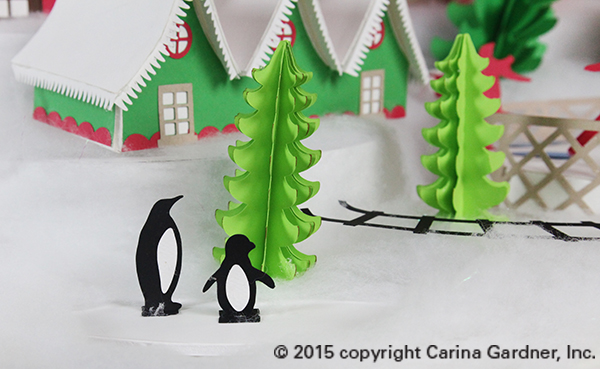
Happy little penguins anyone?
Check out the Snow Cottage, Elf Houses (with curved roof!) and the Chapel.
Turn off the lights and watch them glow! Instant Christmas Magic!
Download the zip. You will need 5-6 pieces of 20 inch x 30 inch foam core in white. You will also need a hot glue gun, a small package of ‘snow’, and x-acto knife.
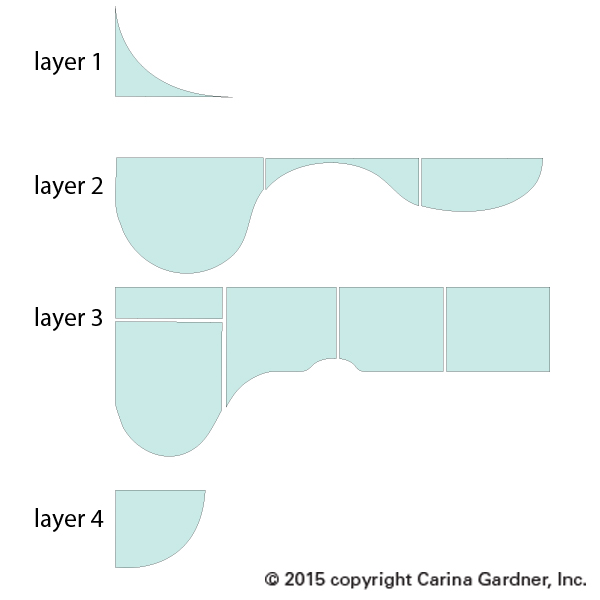
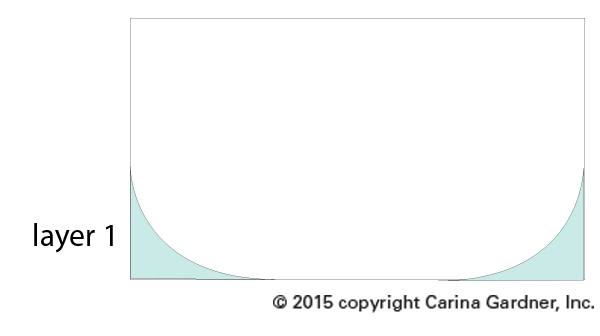
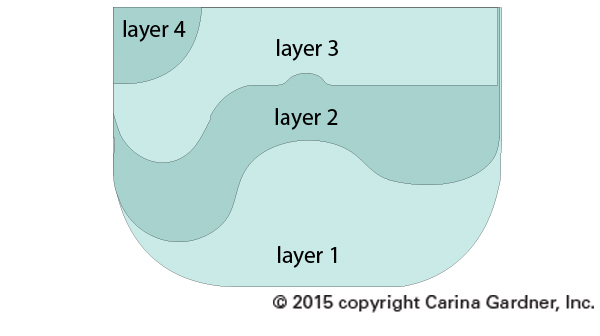
There are four layers to this display. The zip contains 4 documents that may look a bit jumbled (everything needed to fit on a 12 x 12 template for Cricut users). All you need to do is pull all the pieces apart and cut each of them out. Then layout your template like I have below:
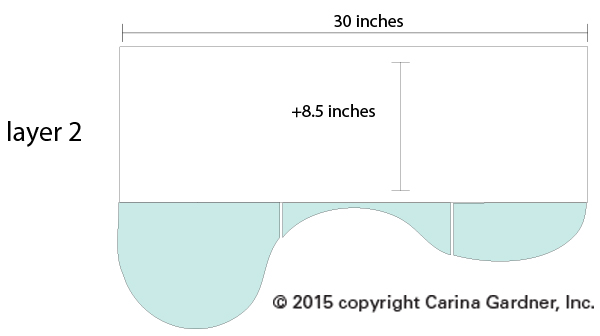
3. After cutting out your pieces you will lay the template onto each layer. Layer 1 you will use the template to cut away two edges of the display. Layer 2 you will need to add a width of 8.5 inches to add the depth. Layers 3 and 4 you can cut out as is.
4. Use an x-acto knife to cut these out. Don’t worry about making it perfect! Your snow will cover your mistakes!
5. Once the layers are cut out, you will want to create dimension by cut out several 2 inch strips the full length of the 30 inches on the extra foam core you have. Slice lightly into one side of the strips so that you can bend them to the shapes of your layers. Start with layer 2. Start at the side front and hot glue the 2 inch strip along the curve. Don’t worry about mistakes or gaps! Your snow will cover all of this! Once you have glued the strip along the edge of layer 2 you will glue it down to layer 1. Continue with all the layers using the diagram below to help determine how to place everything.
6. Once everything is glued together, simply layer snow on the display. I glued a little bit to the board to help everything stay in place. To glue the trees, deer, and penguins to the display, I moved the snow to the side and glued these pieces directly onto the foam core. Then I moved the snow back into place.
I hope you have fun making this display and the entire Christmas Village!
We’ve been working on the Thankful Tree for a few weeks now and I’m so excited to have it in my home! It’s the perfect LARGE scale tree (about 4 feet in height) to put in your home to celebrate Thanksgiving. We will be using the Apple Basket to place all of our leaves so the kids can pull one out everyday to write what they are thankful for throughout November.
Check out this short video so you can see the tree (in scale) and all the options we have available for it! You can purchase the files at Silhouette and DigiPlayground.
I’m so excited for today! I’ve been planning this launch for a few weeks now! The team and I have some cool things planned. What kind of cool things you ask? Well, since you asked…
First off, we are now releasing PDF Patterns! Yes, that’s right. This is the official launch of you being able to purchase my patterns in PDF format. You can still also purchase most of my patterns in their physical form (from our website or from your local quilt shop). Not all of my physical patterns have been converted to PDF. You will see us release all of them in the coming weeks along with new ones.
This is awesome on so many levels for you and me! Since I started MiniLou, we simply have not had the space to house the number of patterns I was carrying for CGInc. So NOW because we can release pdf patterns, you will see MORE kids clothing, kids projects, beginner projects, and for the first time ever QUILTS!
The timing is right for this launch because not only am I kicking off the PDF Patterns, I am excited to be releasing my newest fabric collection for Riley Blake Designs called Apricot and Persimmon. The colors in this line are so autumn-y and yummy. (I should have the full digi book for this collection out sometime next week).
So what are we doing for this launch? I’ll admit, most of the action will be happening on my instagram feed (@carinagardner). Here’s what’s happening:
We are randomly giving away sewing pattern gift certificates on instagram and facebook all weekend!
We are teaming up with Michelle Jensen (my machine quilter) and MiniLou (my kids toy company) to do a DROP on instagram (hints and where it will be can be found on instagram @carinagardner and @miniloukids). This drop will include one of you WINNING a Persimmon Nine Patch Quilt. Yes! The actual quilt!
I have consolidated all of our FREE fabric projects into the shop so you can grab them and go!
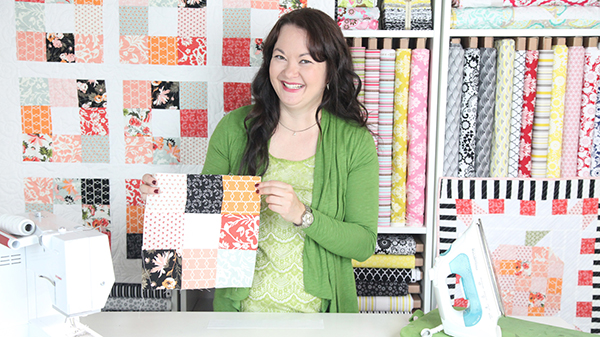
I have two new videos that feature the Persimmon Nine Patch Quilt and the Patchwork Plus Quilt (See below!)! The best part is that I will be doing ALOT more videos featuring difficult parts of the patterns or helpful sewing hints.
For this launch I am releasing three brand new PDF Sewing Patterns that have never been released as a physical pattern—Persimmon Nine Patch Quilt, the Patchwork Plus Quilt, and the Apricot MiniQuilt.
Be sure to join us on instagram and facebook for the festivities! Check out the videos below!



 I’m still decompressing a bit from market. In fact, when we finished and pulled the entire double booth down, I looked through my photos on my phone and realized that I had been so busy, I hardly took ANY pictures. WHHHAAAT? Whoops.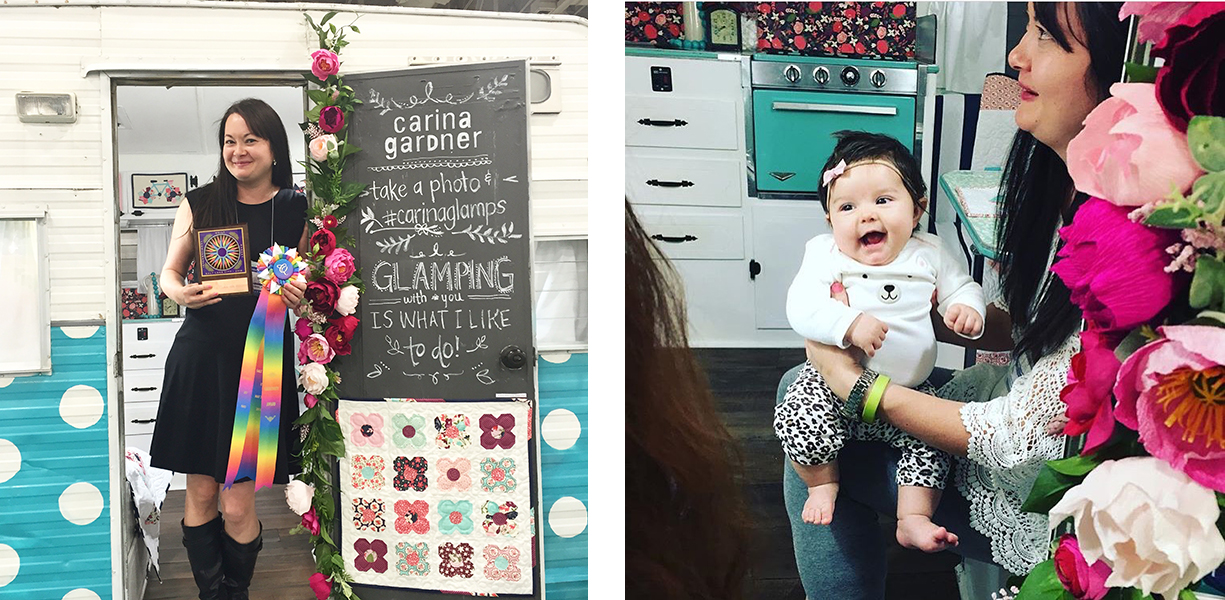
 Speaking of babysitting, my mom was in for the save. She showed up last Saturday and has helped me sew, watch kids, cook, and clean this whole week. Such a blessing! That kind of help is priceless and I owe you one, Mom!
 Hi guys! A week ago I attended
 You can do so many different things with them (I have a list below). Don’t worry if your first one doesn’t turn out the way you want it, it took us a few tries to get them perfect, so be patient and don’t rush it. The slower and more precise you are, the better they will turn out!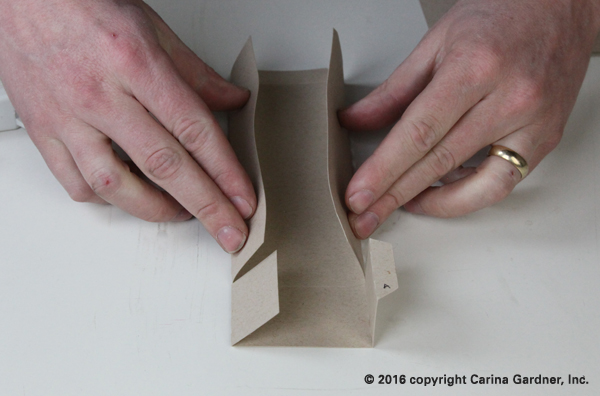

 The second way I would display it is on a mantle or coffee table. I love mine on top of our white piano. The best part is at night when we put electric tealights underneath and the entire thing lights up (picture of this below!).