I was just on decor8blog and Holly was asking what our obsessions are right now. I’ve actually been meaning to post a couple of things I love right now, so here they are:
I think this is the Univers font of silverware. The proportions are so beautiful and timeless. Modern, sleek, and classic! It’s from Crate and Barrel and called the Cirrus Set. I found this doll on etsy. The link is:http://www.etsy.com/view_listing.php?ref=vl_other_1&listing_id=14182467. I think it is super darling. This one’s from cb2.com. I’ve been in love with peekabo tables for a while. Other than budget, I have no idea how it would fare with my 1 and 4 year olds….I’m not sure it’s made to stand up to finger prints….but I love it anyway! This one certainly is not for everyone. I LOVE Bertoia chairs though. I like the shape and design.
Hi everyone! I know I haven’t written for a while because I was in Los Cabos this last week doing a convention for work. The resort we stayed at was BEAUTIFUL! I’d highly recommend it to anyone. It’s called the Westin Resort and Spa. Got lots of sun and “baby” pena coladas as they call them (non alcoholic). Josh went fishing on Tuesday (he was sea sick the entire time) and we went on a catamaran cruise with snorkeling (the coral reef wasn’t so great, but it was fun anyway) and I loved all the people at the convention! Here are some pics!
If you want to see cute videos of the girls, SuiKim has some on her blog (she watched them). SuiKim and Steven’s Blog
Check out the shop for the new Halloween and Fall line! Here’s a peek at a couple of quickpages and kits! This is NOT the entire line…go to the shop to see it all!
So when I’m not working on Digi Nirvana (and a new website coming soon:)), I have this thing called a day job, lol. I’m a Communications and Event Director for an association. So this coming week, my first big convention that I have been planning is in Los Cabos, Mexico (yes, a tough life, I know). Anyway, it’s the first real time that we have been away from both of the girls. And it’s not just some mini-trip. It’s a WHOLE WEEK! I’m a tiny bit freaked out and every time I think of it, I think of something new that needs to be taken care of before we leave. Wait, it just happened again…I had to stop writing this post and make another note in my planner! So I have been procrastinating writing up the itinerary for the girls (need for such a thing because of preschool, relative switching, etc). Plus, my sister will be watching them for part of the time (SuiKim) and she’s never watched them before (you’ll be great, hon! I’m just a nervous wreck!) And of course, YOU know all your kids routines, but other people don’t so it is all very crazy!
So headsup, not much blogging that week, but I will FOR sure get some pics and info up when I get back!
One thing that we are doing, which I’m really excited about (and makes me less nervous) is creating video footage for each night and morning for the kids…fixing it up in iMovie and making a DVD for the girls. That way they get a book read each night from us and “I love you’s” in the mornings…and perhaps a count down for when we are coming home. Wondering if any of you have done this before…and even if you haven’t, what would you put in your bedtime and morning videos to your kids?
Hi everyone! I just published an article for the Daily Scrapper on Autism and Scrapbooking. Take a look at http://www.thedailyscrapper.com. There is also a link to contribute to Walk for Autism. (and eventually a follow up article by Tammy, a person I interviewed for the article).
Okay…2 really. The first is for anyone who thinks they need website hosting. I had BIG problems with my previous hosting company. Whatever you do DO NOT use dot5hosting! They made everything a hassle and I sat on the phone for over an hour at a time (I think I left my phone on one time for an hour and a half!) just to speak to someone completely incompetent! Anyway, so I made the switch in June to this new hosting company (by the way, did I mention that the old hosting company LOST all my databases?, which is all of you had to create new logins at the store?). Thenew hosting company’s name is bluehost.com and I am doing another website (You guys will see it’s launch October 1st!) and the entire process to get the domain name, upload my shopping cart system, and do a redirect took 10 MINUTES! It rocked!!!!!! Thanks bluehost!!!!
Okay, the second service announcement is a bit personal, but I would feel like an absolute idiot to keep this information to myself. This is for all the mom’s out there! I first heard of the BioFit bra from my sister-in-law’s friend Lacy a couple of weeks ago. As it happens, I was looking for a bra and went to Victoria Secrets to find one. I just happened to try this one on…..OM Gosh!!!! It is heaven!!!!!!! I am telling you, if you have suffered what many of us breastfeeding moms have suffered, this bra is for you! It’s a bit expensive, but COMPLETELY worth it! Okay, done with all the talk that may make my husband blush when he reads this.
In other news, my daugher Siri has 4 new invisible friends….do any of you have kids with invisible friends? We’ve never experienced it before, but for the most part, it is hilarious! Two of the friends are brother and sister (Jack and Chelsea). They live in Minnesota and their mom drops them between Utah and MInnesota (we moved from Minnesota to Utah 3 months ago). She also has a BABY invisible friend named Caroline (same as her cousin Caroline who happens to be older than her). I think she likes invisible baby Caroline because she can tell her what to do (something that isn’t always the case with real life older cousin Caroline). Oh, and the last invisible friend is Sierre. Aparently invisible Caorline and Sierre are cousins. I didn’t think there was anything to analyze there, but now I’m looking at this and thinking is Sierre Siri’s alter ego?
If any of you have kids with invisible friends, I’d like to hear about it…I’m wondering how long this will last. I don’t think it’s a big deal (it’s actually pretty funny), but I’d just interested! Happy Friday everyone!
Hi everyone! Alicia’s new line is up! It’s adorable! Take a look at in the shop!!! VISIT SHOP
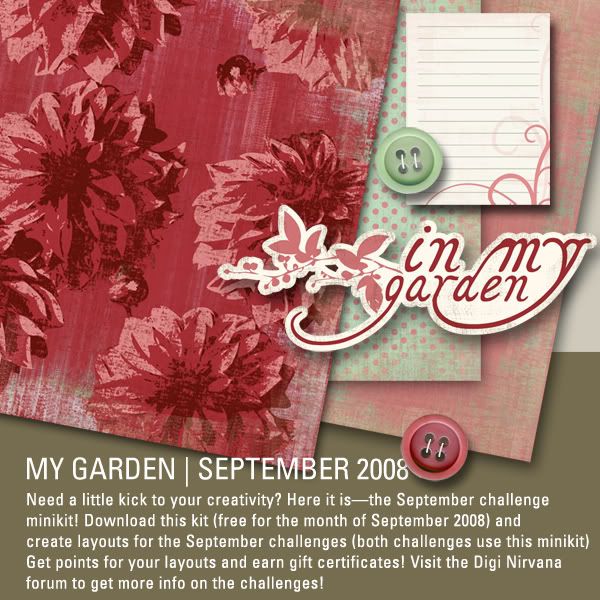
There is also a new September Challenge minikit FREEBIE in the shop. It will be free until September 30th! Be sure to pick it up this month and participate in the challenges in the forum. It’s on the home page of the shop...
A LITTLE NIRVANA FROM SIRI: Siri: “The shortest times are the longest times of all.” (Don’t ask me! She usually says it when I say, “two more minutes.”)
Right now, you’ll notice that Megan’s got a couple of new kits up. Enjoy! Alicia will have a new line out for the store for labor day. And a week after that, I’ll have all the new autumn and halloween kits and elements up. So tons of new products coming to the store! Keep checking back as the front page of the shop will be changing weekly!
Okay, once again, I’m behind in my updates. I just need another hour in my day (preferably when the kids are asleep to get everything finished that I say I am going to finish hehee). So I was going to report on the surprise party I threw for Josh’s graduation (and for taking the bar).
After changing the date once (from July to August…and yes, the invites were already sent out and I had to call everyone back. Josh failed to inform me of a class he was taking on Saturday) and changing the time once (August 2nd at 11:45am got rearranged to 12:45 pm when Josh told me the NIGHT BEFORE THE PARTY that he had an MPRE class until 1pm—man, I was stressed!), we had a really great party! Josh was COMPLETELY surprised. It made it worth it because he was SO confused and then just happy!
My sister-in-law Taylor feeding Fliss a lime.
View from the other side of the table…lol
Two cousins with lollipops!
A photograph by Taylor Siri bathed in gopher-colored balloons!
Thanks to everyone who came! It was so fun!
As for the store, there’s a new challenge minikit freebie on the homepage of the shop. In the forum, you can win gift certificate money by using the challenge freebie for layouts! Here’s the link to the forum challenges to see how it works. It’s easy and fun. Here’s a peek at the freebie:
So after some not-so-lazy days, I finished this little collection! I hope you all enjoy it! There are sales going on right now on the accessories, multipacks and quickpages. Be sure to check out the shop!
Here are the quickpages!
Also, I WILL get the photos up of Josh’s surprise graduation party soon! A thank you to everyone for keeping it a secret! It was a big success!
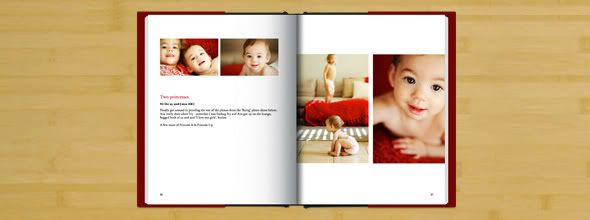
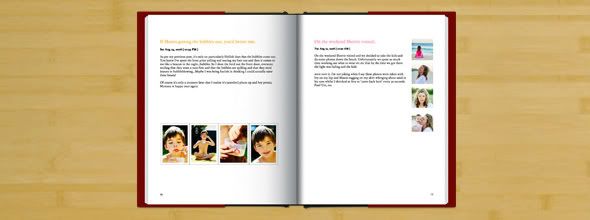
So I was perusing digishoptalk today and someone posted a link I have been looking for! It’s a company that changes your blog into a book. The thing that I love the most about it, is that this sort of takes care of two birds with one stone. I can blog/journal…well, at least the highlights, and then get it into a family book! It makes me so happy! I like digi scrapping because I think it really captures the moments in our lives that are interesting and beautiful, but I tend to put a lot of “other” stuff on my blog…things I’m into, funny antidotes about the kids, etc.
In Utah, we have a Pioneer Day celebration on the 24th of July. I’ve never really celebrated it before (mostly because I only lived in Utah as an undergrad), but we had a great time going to the parade and having a bbq with friends and family. Here are some of the highlights:
water balloon toss with Liz and Caroline (me and Siri).
Felicity doing a lot of wandering around (and generally having a great time) at the bbq
My two angels! (Flissa has her bottle because she was almost ready for bed)
Siri’s obsession with Bob and Judy’s Sugar Plum Princess and fairy dolls (yes, she took these pictures)
Watching the fireworks
Making “snakes” (Siri’s favorite part!)
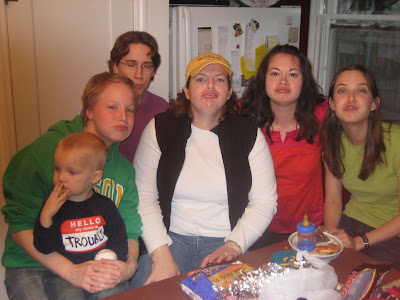
And because I have been a slacker (and didn’t post these ON Pioneer Day), I also have photos of Lola’s Birthday Party from last night. It was at Nate and Michelle’s house and was SO fun! The first part was outside…there was a huge wind storm that can in and blew away napkins, plates, chips…I even chased after a sack and got made fun of (I couldn’t really tell if I was going to really get it or not, so I kept stopping then chasing…you can imagine how ridiculous I looked).
I can’t believe Lola is 2! Happy Birthday Lola!
Felicity with flower in her hair and lay
The birthday girl!
Siri posing for the camera
Tim and Jack
I feel like this is the face I got from her every time I snapped a picture!
Here’s a sneak peak of things to come! The Lazy Days collection will be out in a couple of weeks. Be sure to keep an eye out for this vintage line! It’s going to be beautiful!
I just saw that on http://www.decor8.blogspot.com there is a giveaway going on…there is some REALLY awesome stuff and I totally adore this blog! Go check it out! I know it means less of chance for me but,l holy cow, it is great stuff! I want everyone to get a chance at it! Get motivated to be creative! Here are a couple of the photos. Feel free to go and see more pics!
Here’s a new layout I just finished using the new swatches line at Digi Nirvana. Credits:Swatches Collection: Frame Elements, Mary Paper Pack, Mary Elements, swirl from Bess Elements all from http://www.diginirvana.com/zen_cart/store
So I was with my friend Jen B. (Art Director at My Minds Eye) yesterday and she gave me a peek at the new line at My Minds Eye (that’s a scrapbooking company for all you non-scrappers out there). Holy cow, it is BEAUTIFUL. They have all these gorgeous elements with glitter letters and glitter paper. Normally, I am not a “glitter” person, but she COMPLETELY converted me! The stuff is fabulous and will be showing at the CHA conference this weekend. If you want to peek at the lines, look here: mymindseye.com.
It’s pretty awesome to look at on the Internet, but wait until you HOLD the stuff! It is awesome!
Hey all! Theresa is giving away parts of the swatches collection today at DigiShopTalk and Digi Nirvana’s Forum (in the Happy Place). You should take a look and give it a try when you get a chance! It’s free to sign up in the forum and there are giveaways every week.
Happy Scrapbooking! More of the SWATCHES COLLECTION to come!
Hi everyone! Digi nirvana is having a 99 cent sale starting Monday July 14 and ending Wednesday July 16! Be sure to check it out! Tons of items will be included in this sale including kits, paper packs, elements, and alphas!
Hi ladies! For anyone I have talked to about starting a Digi Scrap Club, I have two new polls up for you guys to answer! Take a look and we will talk! If you have any other suggestions on the Digi Scrap Club, be sure to post them here! The first one will be at my house and I will give a tutorial on Adobe Photoshop Elements at the beginning for everyone just getting started! Bring your laptap!
We had a great fourth of July! We went to Kaysville to be with family and check out the water parade. We then had a quiet BBQ at Mary’s house and walked to the Sugarhouse fireworks (If I had any idea it was going to be a mile there and back…I don’t know if I would have agreed!).
here’s some pics! Flissa and her second cousin Austin getting in the pool clothing and all! Siri, cold and wet. Uncle Nate, cousin Lola, Siri and Flissa and fireworks!
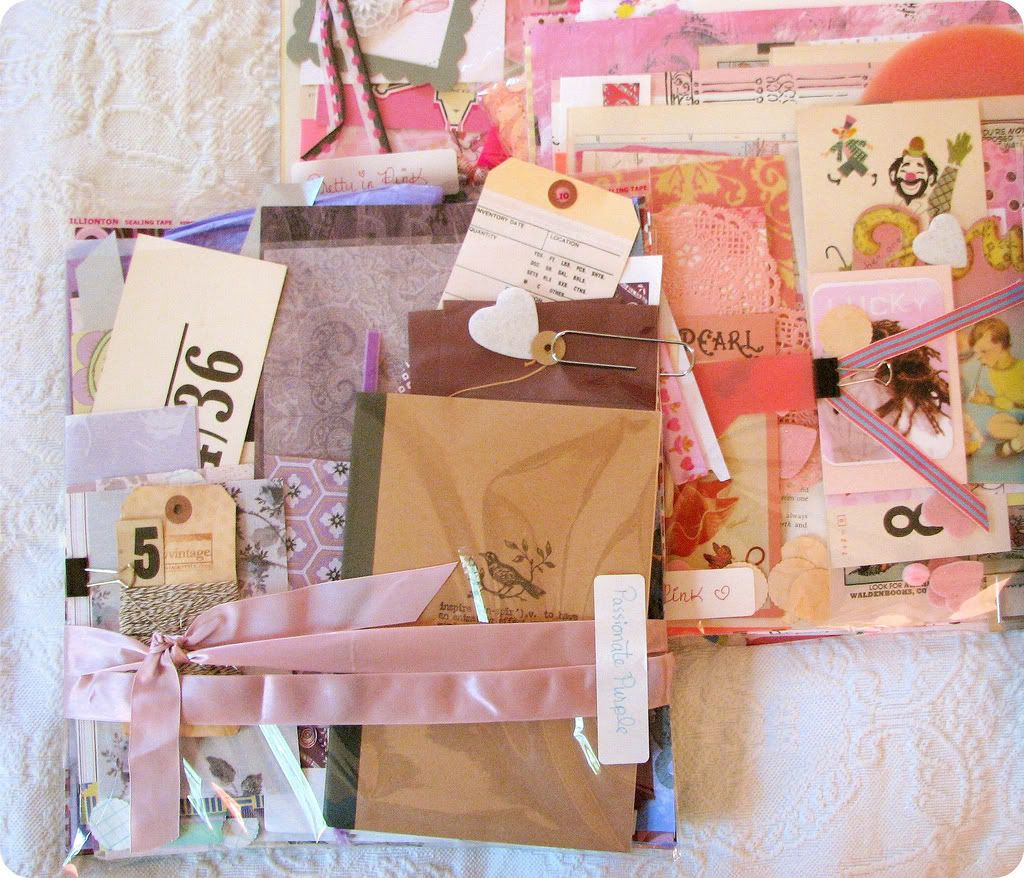
So I’ve been meaning to post this picture of Josh and his big win. We were at the Millcreek Festival (organized by our good friend Aimee McConkie) and we stopped by the Zion’s Bank booth. Siri really wanted a soda…but anyone who stopped at that booth had to sing for a treat. So Josh being the good father that he is, asked what they wanted him to sing. They said they didn’t care as long as it wasn’t “Happy Birthday” (they were pretty sick of that one). So Josh sang, “Hey Jude.” The girls loved it so much that Josh was declared the official winner of the day and won this fun goodie basket.
These a couple of quick pictures we took this morning! I just felt like the girls looked so sweet this morning! (I guess I feel that everyday but I actually had the camera within reaching distance this morning).
Siri was insistent on taking a couple of pictures of me and Flissa. Not bad for 4-year-old with the light behind her subjects, eh?
Congrats on the winners in the Happy Place in the forum! Have fun with your free letters of love quickbooks!
I saw this on Liz Budd’s site and I had to try it because I am such a Jane Austin fan (or freak…which every you prefer). This is what I am (if you click on the link you can take a the test).
Take the Quiz here!
I am not the least surprised that I am Elizabeth Bennett!:)
My sister-in-law had me make this for my nephew’s upcoming first birthday…Isn’t he a cute guy!
In other wonderful news, the website is back in business! You’ll notice some of the descriptions are missing, but those will come back soon. There is also a brand new forum! Check out the happy place because the first 50 people to signup and make a comment in that column will get a gift certificate to sample something from the shop.
It is the never-ending website saga. So, just to let everyone know what has been happening. My hosting company changed to a new platform 3 weeks ago. Long story short, the platform did not support my downloads. It took two weeks for them to figure this out, so I had to move to a NEW hosting company. Well, before all the files could be retrieved from the old hosting company, they deleted the account. So NOW they are uploading all of the databases again so they can be moved over to the new hosting company. The new website design has been finished for a long time and I have just been calling everyday to get the status and HOPE they are finished with this process. So I am REALLY sorry everyone, but the good part is there will be new stuff up and a new look when it goes online. Everyone keep your fingers crossed that it goes up by Wednesday! I am SO ready for this to be over with so I can just design again!
So I am told that Digi Nirvana will be back up and running sometime on Monday. I am SO sorry for the inconvenience everyone! The website is coming back new and improved! There will even be a new forum (which probably won’t be up until Wednesday).
In other news, Siri had an emergency room visit at 1am in the morning last night. I’m not going into the details because it is too sad and too gross. Basically, she had been vomiting for 24 hours and was getting worse. Turns out she was clogged from the other end. She is feeling much better today (after nap and fluids), but is complaining because she wants to eat (and, of course, cannot). She is now on the BRAT (banana, rice, applesauce, toast) diet for a couple of days. It’s been a rough week with the girls but we’re glad both of them are okay (Flissa was sick for a couple of days with the stomach flu before this AND there is the bleeding thumb incident—what, haven’t told you about it? Basically, she had a thumb that would not stop bleeding…not much more other than a frantic mom, a run to the pediatricians office and a frantic mom).
So I think Josh would disagree with my top ten, but here it is:
TOP TEN REASONS I WILL MISS MINNESOTA
10. The Mall of America + Ikea (yes, right next to each other)—What? You didn’t expect this to make my list? Come on! I lived in MINNESOTA…what else was there to do in the sub zero weather?
9. The Lakes—It’s not called the Land of Ten Thousand Lakes for nothing! Michelle V., I’m totally going to miss being a Beach bum with you this summer!
8. Duluth & the Olcott House—Lake Superior was beautiful and the bed & breakfast a total treat!
7. CTC, University of Minnesota Student Housing—Yes, the management was unpredictable, but did you see our backyard playground? Not to mention the community! Miss you Alicia & Nick, Hun Woo, Lucia & Noelle, Lucy, Abby, Heather & Kyla, Lori, Smith family, Moss family, and the entire Gudmunssen clan!!!
6. The Children’s Museum & the Minnesota Zoo—I couldn’t choose one. I just couldn’t. I loved them both so much!
5. The St. Anthony neighborhood strip—Muffeletta (yummy calamari!), library (within walking distance), Bibelot (my one-stop shop for gifts), and the Speedy Mart (Only one diaper left?)
4. Praire Home Companion—I will have to listen every Sunday to remind myself of the place where the women are strong, the men are good looking, and all the children are above average. PS If you ever get a chance to go to the live show, it is COMPLETELY worth it!
3. The State Fair—Yes, cheese curds and deep-fried candy bar on a stick, you will be missed! What other place in the world can I pay to eat a month’s worth of calories and then get sick from them on the rides (I believe Michelle and Matt will never be forgiven!). Oh, and I have to include my favorite stuff for anyone going this year: the corn on the cob, deep fried cookies, Sweet Martha’s Cookies, Australian potatoes, (of course, the cheese curds and deep fried candy bar), wild rice hamburger, corn dog, and mini donuts.
2. Our 4th of July Tradition—I actually have no idea how we are going to pull this one off in UT. Our fab tradition always included a day at Bunker Beach (swimming and sun bathing) then the fireworks in Stillwater, MN (which of course included dinner, a visit to the creamery for ice cream, and the bulk candy store). Oh, how I am going to miss those fireworks on the St. Croix coordinated to music!!!
1. All the friends we left behind—This was a no brainer. A bit sentimental, but the truth. We miss you all and will see you next summer when Josh and Steve go to boundary waters (Charis & Amy P., What do you think about house guests?)! And, darn it, I’ve got to figure out a reason to go to NYC so I can visit you guys in PA, Julie and Greg!
The number one reason I will not miss Minnesota? The weather—but I’m guessing this is at the top of every Minnesotan’s list.
I have to say “sorry” to all about the current state of the website. It is entirely out of my hands right now with my hosting company doing all sorts of weird things to it. It has been so frustrating, but be prepared to see the new website this coming week with addition of two more designers, Alicia and Megan!
Oh, and Amy P. I just downloaded the ‘trail’ pictures, and I will be sure to get that story up soon!
Because, I can’t get to those pics right now (and I REALLY should go to bed), I will just share one quick story. We attended our new ward on Sunday. We are really liking it (but we miss you St. Paul Ward!). Siri, jumped right into Primary and had a great time. It also so happened that the Sunbeams were giving the sharing time for the entire Primary that day. All the sunbeams decorated little yellow visors and wore yellow shirts over their church clothing. The children were asked several different questions, but this was the best one: “How can you shine for him (Heavenly Father)?”
One child said, “When I obey my father and mother.” Another said, “When I am a good big sister.” Then it was Siri, who was asked, “How can you shine for him?” Her very serious reply, “By rainbows.” Ha ha ha! Just trying to make our mark on the new ward!
I wish I had the time to write more about the antics of our move…hopefully, I will get around to writing up everything this weekend. But, just so everyone knows, we are here safe and sound after airport waiting, slap-happy midnight cleaning parties, and hurried-graduations.
We will miss everyone in Minnesota. We made so many good friends. Josh and I will have to write our top ten list soon!
Hope everyone is having a very happy scrapbooking!!! Make sure and grab this coupon for my store! It’s 25% off your entire purchase!
Coupon Code: NSD25
Last night Brooke threw us a ‘going away’ party. It was so fun, but made me a little sad. Maybe that’s a good thing, right? Because that means we have made so many wonderful friends here and we’ll miss it. We came to Minnesota with the intention of being here for 2 years to finish Master’s degrees. Six years later, 3 1/2 graduate degrees and 2 kids, we are moving back to Utah. Oh how time flys!
This is Kate M. and Michelle’s little girl, Ethnie. Amelia and Siri—Aren’t they adorable? Brooke (the fabulous hostess) and Sue Angela and me (The party was for Angela, too. Although I wish I could say I was going to do the exciting things that she is about to do this next year! She’s moving to NYC and has a summer trip to Alaska planned. Oh, so jealous!) Charis somehow managed to get Flissa’s hair up into 2 ponytails. Nice work, Charis. Too bad you have a boy. lol Josh and Steve with the boyfriend and girlfriend. Arranged marriages are great, aren’t they? Three days apart in age….pretty adorable! Sammy REFUSED to take that look off her face no matter what funny faces I made! Aren’t those cheeks yummy? Ellie, thanks for smiling. Kate and Siri, while the adults were having too much fun to pay attention, ran out into the pouring rain to jump on the trampoline. And it was cold (look what these two are wearing)! I love these big hugs! We are going to miss you Kate! Keaton, Lachelle, Emily, Amy, me, and Charis. Before this picture was taken, Amy was telling us a great story about her wallpaper…Amy you need to post a picture of what Andrew did on your blog! Okay, this picture is an ode to Amy who suggested we all (well, I’m not sure what you call it—make air raspberries?) make these faces. She said that her brother has a blog where there are only pictures of people doing this. Fascinating, fascinating. Fliss with a cookie. Cute Michelle and me! I’m going to miss you, Michelle!
Here are the pics of Flissy’s first birthday. I obviously wasn’t thinking straight because I made her an ice cream cake. It was SO cold for her little hands! But she loves ice cream (I mean, I am guessing she likes ice cream…I would never feed sugar to a child under the age of 1! lol…please, please this is SO sarcastic!), so I think she liked it. Isn’t she a dear? And can you believe how much she looks like Josh?
In other news, Tomorrow is National Scrapbooking Day! In honor of it, I have a sale going on at Digi Nirvana. If you have never digi scraped before, this is a great way to get into it—a HUGE sale! Lots of stuff in store will be 25%-50% off and here is a coupon for an extra 25% off of that:
Here’s a new layout I did of Siri sliding in our backyard. It uses some of my new kits and the new Element-ary Line. This layout uses papers from the Playtime for the girls Kit, Cupcake Kit, and Flora Kit, Element-ary Aviary Elements, Element-ary Glittery Overlays, Element-ary Glittery Swirls, Element-ary Inked Edges, and Alpha from the Playtime for the Guys Kit. Check out the new Elementary Line in the store-Here’s a preview:
So I was taking a little browse around the Internet neigborhood and found this article on the 30 typefaces any graphic designer couldn’t live without. It includes 15 serifs and 15 san-serif. I”d say that I am 80% in agreement:). I would have added Baskerville to the serif list (I favor it over Caslon). Otherwise, it’s a great little clip on type!
In other news, the Playtime Kits are up and 20% off this weekend! Check it out in the store.
My baby is 1! Flissa turned 1 today…I really felt like she was a little toddler today, not a baby anymore. Will post photos soon of the chocolate, ice cream feast! I haven’t had time to blog as it is the end of semester for Josh and my students, our upcoming move, and getting a new little kit line out by this Friday at Digi Nirvana. I also will post some of my students final projects…I think you’ll like them!
I saw this in Domino Magazine a long time ago and I am always checking back at this website because the stuff is so gorgeous! The site is called Funktion Home. The aprons and kitchen towels are adorable. Here’s my favorite. It’s called the Belinda. Aren’t those fabrics gorgeous! Yummy, yummy! Definitely NOT your grandma’s apron:). The site even has matching aprons for your little girls!
We had Chinese on Friday. Siri opened her fortune cookie and this is what it said:
It made me laugh since, of course, we are moving in a month. Because of the move, I interviewed for a job in Utah earlier Friday morning that was in a field I’ve never worked in before. I opened my fortune cookie and this is what it said:
Funny, huh? Maybe I should buy a few more fortune cookies to find out where to buy a house. lol.
Siri gave her first talk in church today. Of course, her mother forgot about it. I wrote her the talk as we walked to Primary. She said everything SO clearly and put her mouth right up to the mic. She even knew the name of the new prophet and said it when I whispered, “The name of the new prophet is…” (she was suppose to repeat after me)but instead she said, “President S. Monson.” (to answer my question). She held up a picture over the mic and wasn’t afraid at all! I was so proud of her!
Her are some pics of the girls. Flissy was so happy to just walk through the tennis court with all those other kids zippying in and out on their bikes. Josh brought these cupcakes to me and Siri from the Vice Pres. Mondale birthday bash at the law school. Siri said that one of the chocolate toppings looked like ‘fur’ and one looked like a ‘dragonfly.” She insisted on eating the dragonfly one. Can you tell which one is the ‘fur’ one and which is the ‘draonfly’ one? If you figure it out, let me know.
This is a week ago when Siri and I went to the circus. She declared that she wanted to take a class when she grows up to learn how to ‘go so high’ like the acrobats.
Here’s my most recently layout with my Yes Kit at digi nirvana.
The journaling says, “when I explained to Siri that when we move we wouldn’t see the people that lived here (Minnesota) anymore, she buried her head in a pillow and broke into tears, “You mean I won’t see Lucia anymore?” It broke my heart! “


 Okay, this picture is an ode to Amy who suggested we all (well, I’m not sure what you call it—make air raspberries?) make these faces. She said that her brother has a blog where there are only pictures of people doing this. Fascinating, fascinating.


