A Walk Through the Offices of Carina Gardner and MiniLou

IMG_1390_1_webI’ve been thinking about taking photos of my offices and warehouse for some time now, and am excited to (finally!) give you a walk around the Carina Gardner, Inc. and MiniLou offices!

Here’s some of the backstory: We’ve been in this warehouse/office for a little over a year at this point. Before this, I had two small office spaces near my house, but when I started MiniLou in September 2014, I outgrew the space. Suddenly, I was storing inventory…more than my house or the other little office could handle.

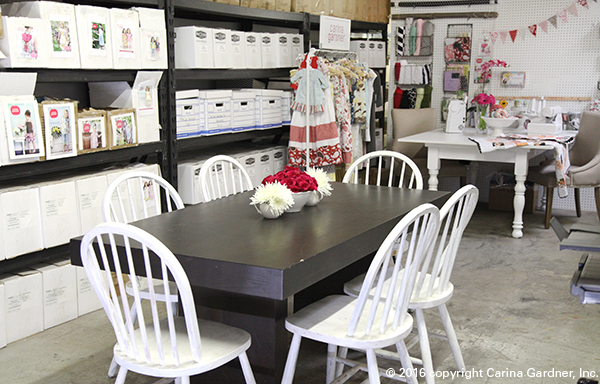
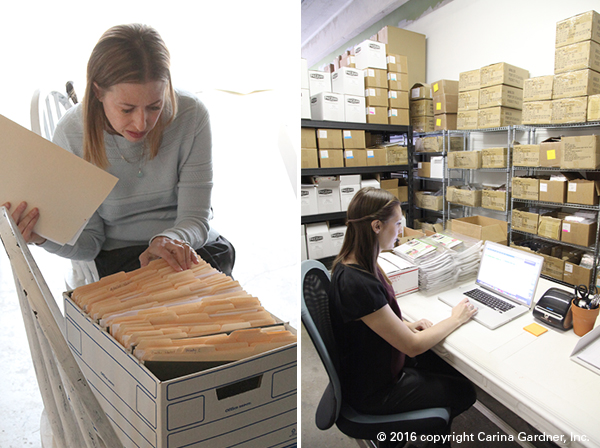
So I moved myself into this 1000 square foot warehouse. When I moved in last February, there was a reception area that I painted and re-floored. Then we built out two more offices in June. Because the space is small (but open!), every bit had to have purpose. Our staff meetings are held in the open warehouse. Videos are made on the back wall while simultaneously storing several of the fabric collections. The sewing table sits next to boxes of coloring books. You get the picture! Every bit of the space is used.

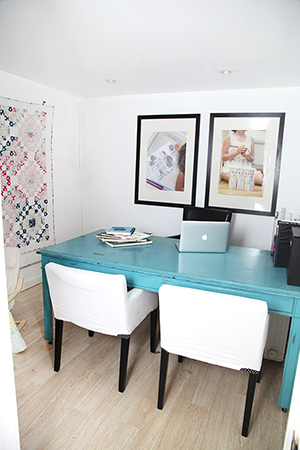
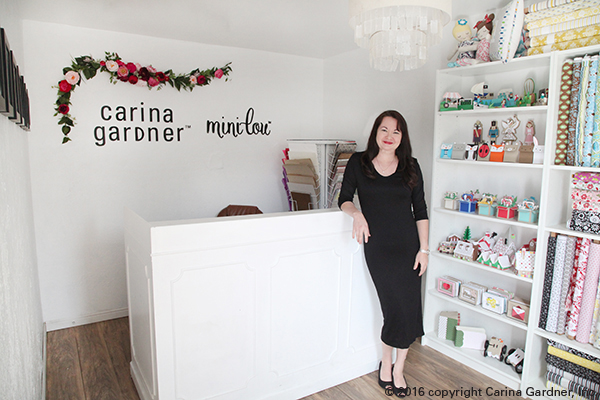
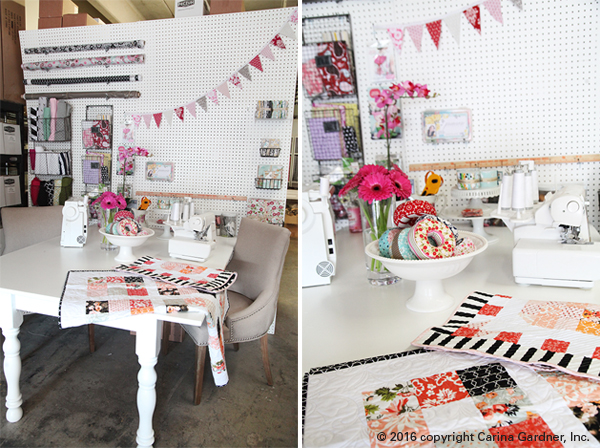
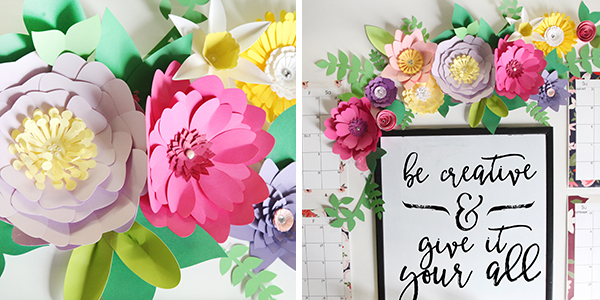
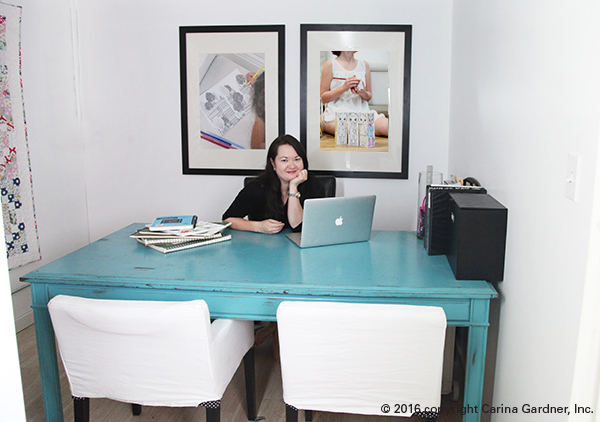
Photo to the left: My office. All the furniture was pulled from my home office to make space in my house for my Charlie-boy. Photo below: Our reception is filled with fabric and diecutting projects. Production Assistant and Fulfillment Manager Holly Christensen mans this area. Flowers on the back wall commissioned from The Lovely Ave.

IMG_0258_1_web

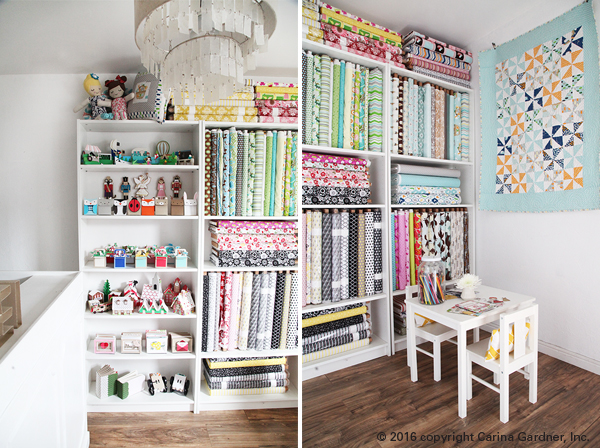
Photo below: More pictures of our reception. It’s a pretty happy place to walk into everyday!

Our reception area has a play area while storing about half of the fabrics we have in the office (the other half is in our video area and the newest lines are all in my office at my house). The opposite wall (not shown) includes a showcase of some of MiniLou’s coloring book covers.

Office_CG_2

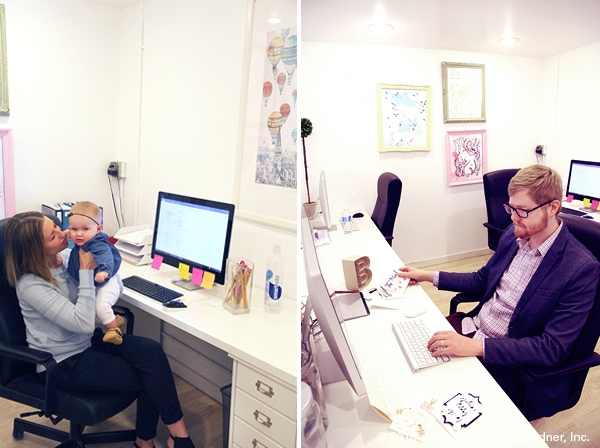
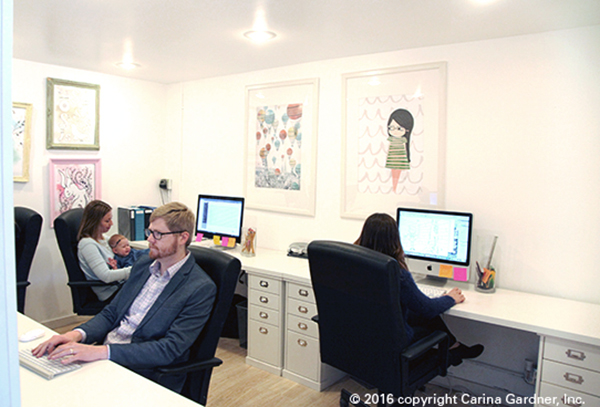
The first office (below) houses most of the team including our sales director, graphic designer, illustrator, and pattern production assistant.

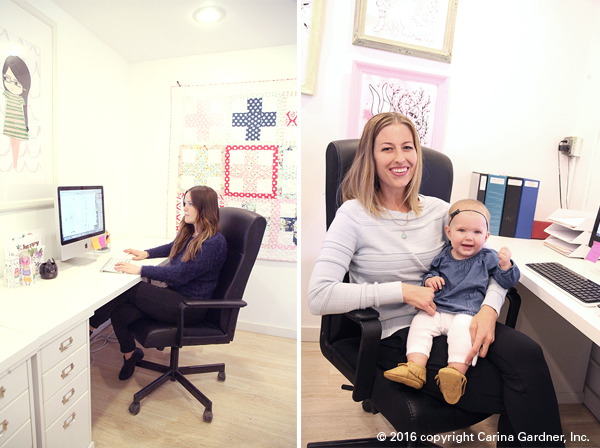
Photos below: Sales Director Dori Kesler sometimes brings baby Ellie to work. Ellie’s pretty use to the drill since she’s been coming since she was born. Graphic Designer Tom Sturzenegger works on our svgs to prep them for release.

Office_CG_4

IMG_0314_1_web

Photo below: Illustrator Jill Johnson works on new artwork for MiniLou. More pictures of baby Ellie! It can’t be helped!

Office_CG_5

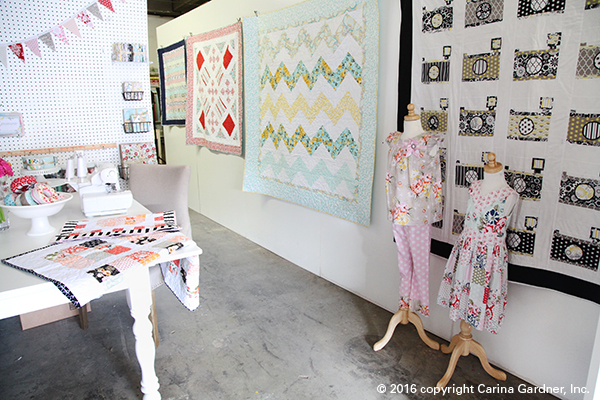
Photos below: The sewing area and conference table are in the warehouse. Here Pattern Production Assistant Arianna Phillips and I develop ideas of patterns and sew up samples. The table is spacious so that we can roll out bolts of fabric and quilts. The conference table sometimes also gets overrun with projects.

Office_CG_1

IMG_0910_1_web

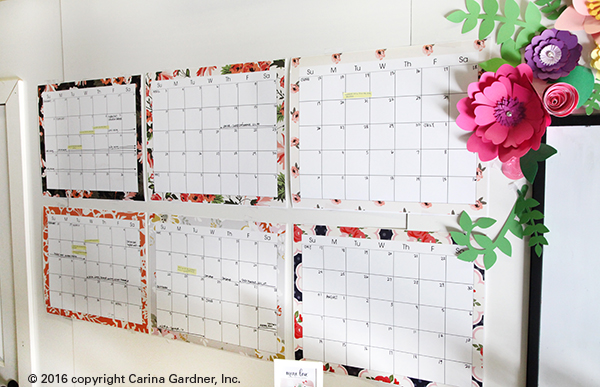
Photos below: These are the flowers from one of the CGInc Silhouette releases. It brightens up some of the stuff you have to have in an office (but maybe are not that pretty) including our fridge, microwave, and printer. The calendars were custom printed with my most recent fabric collections.

square_office_carinagardner

IMG_0886_1_web

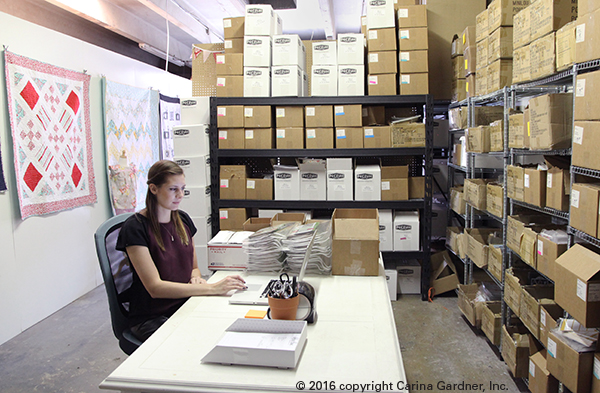
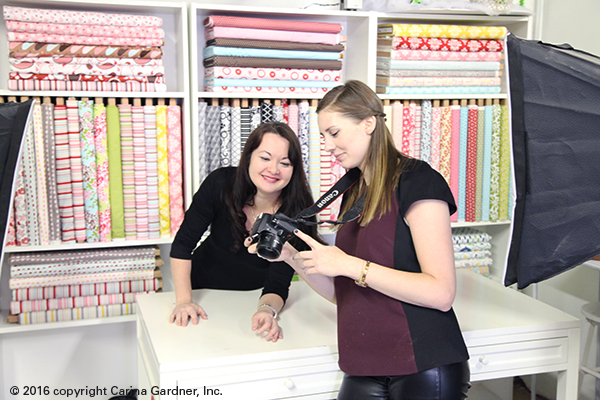
Photo below: The back of the warehouse includes Holly’s second desk, the video taping area, and my office.

IMG_0867_1_web

Photo below: Production Assistant and Fulfillment Manager Holly Christensen pulls orders to our MiniLou retailers.

IMG_0692_1_web

Because we are such a small team, everyone works with everyone else in one way or another. I love the synergy that creates as well as the creativity! It’s a great team and I feel lucky to have them all working for ML and CGInc!

Office_CG_3

Photo below: We video tape for a class or CGTV episode 2-5 times a month. And all of our photography for our SVG files happens in this area as well! Because what we do is so visual, we spend a lot of time with the cameras.

IMG_0840_1_web

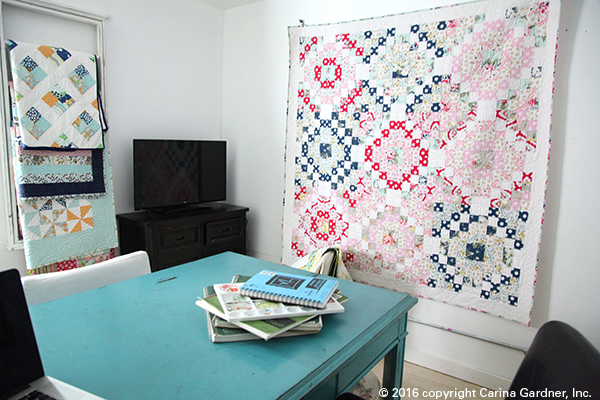
Photos below: My office is really Charlie’s office. I often get kicked out to the conference table because Charlie is in the office most afternoons with me and all day with me twice a week. He’s my buddy and has his own chair, tv, and consistently eats all the candy out of the candy jars in the front (you know, when Tom hasn’t gotten to them first).

IMG_1431_1_web

IMG_1419_1_web

IMG_1424_1 copy

Hope you had fun taking a peek at where we work! I loved showing you our space and how my little companies have grown. Hope you are having a wonderful day!

XOXO, Carina


Silhouette Design Store JOANN Stores

A Walk Through the Offices of Carina Gardner and MiniLou Read More »

Audrey Sewing Pattern Collection Maxi Dress Hack

IMG_1120_1croppedLooking back, I’m not sure I even did a blogpost on the Audrey Sewing Collection that premiered in the shop last month. It’s my first knit collection and includes 4 patterns for Misses and 4 patterns for Girls/Teens. The whole collection makes me pretty happy…easy-to-sew, easy-to-wear clothing.

So here’s my first hack with the collection. First of all, I’m a big fan of a summer dress or tunic (hence those lengths throughout the collection). Second, I’m a huge fan of a Maxi! For those of you who have already bought the sewing patterns, you can see that making a maxi seemed out of the question. There are already SO many pieces for you to tape together to make your pattern.

So here’s your hack. Simply add 28 inches of length to the front and back tunic pieces at the bottom. I’d also purchase an extra yard of fabric. Easy right? I don’t get all crazy about straight lines, ect. You just need the length. Longer is always better since you can hem it down.

IMG_1128_1_instagram

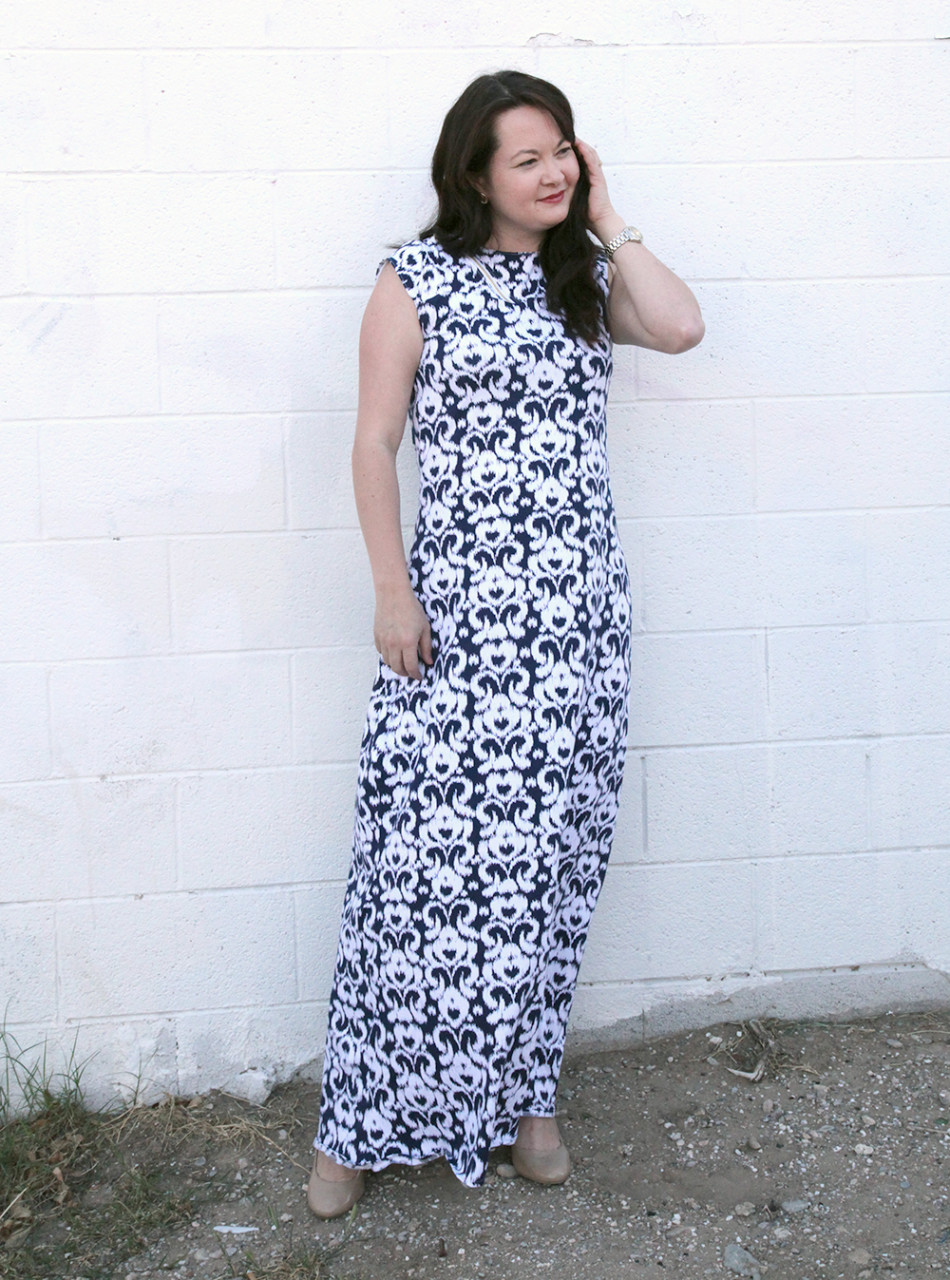
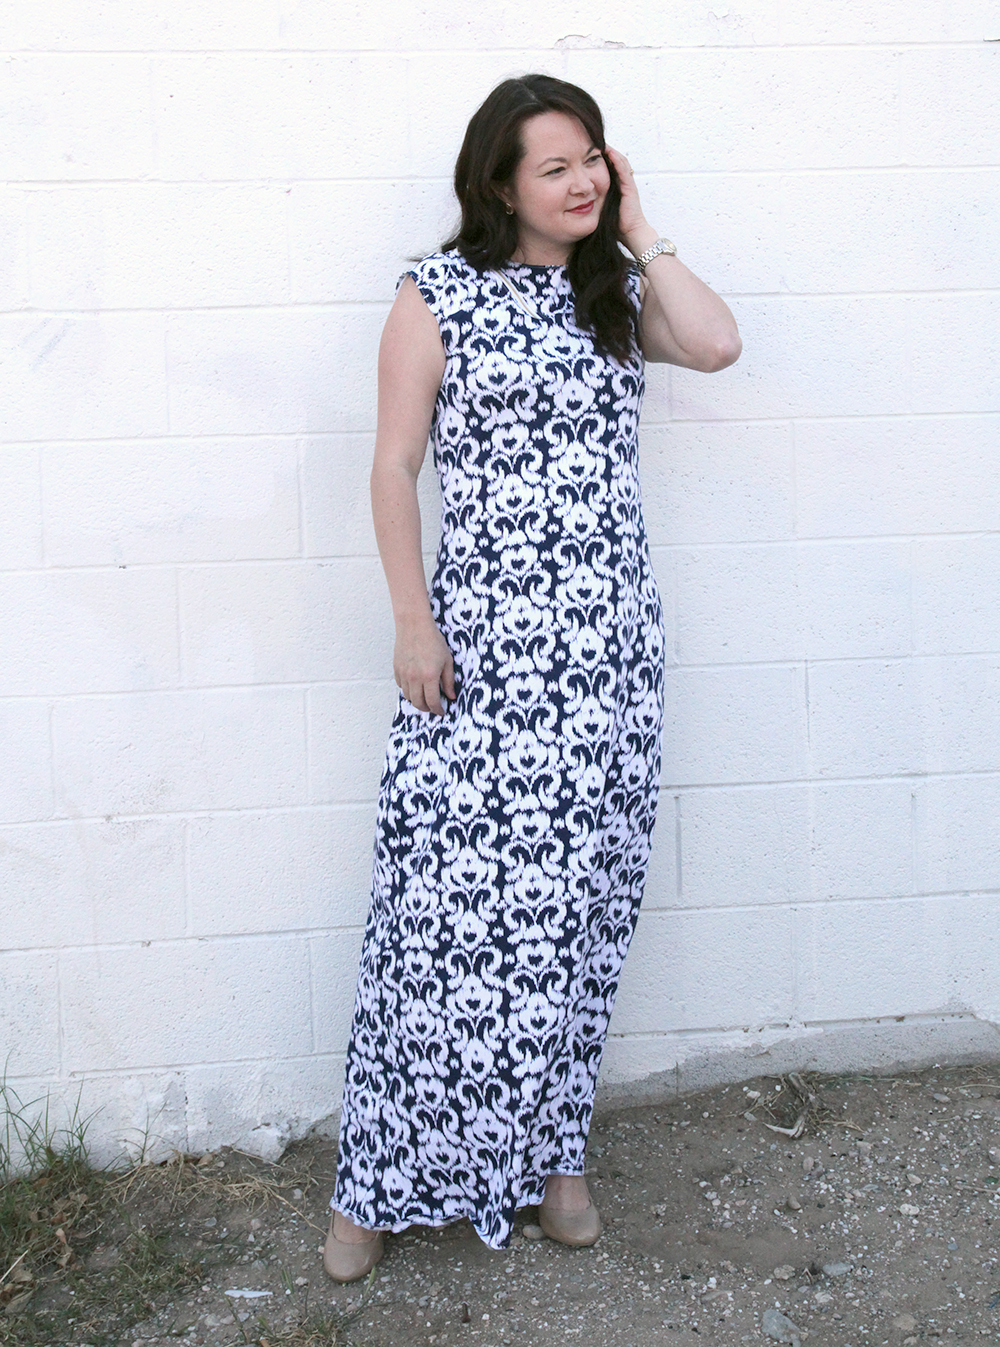
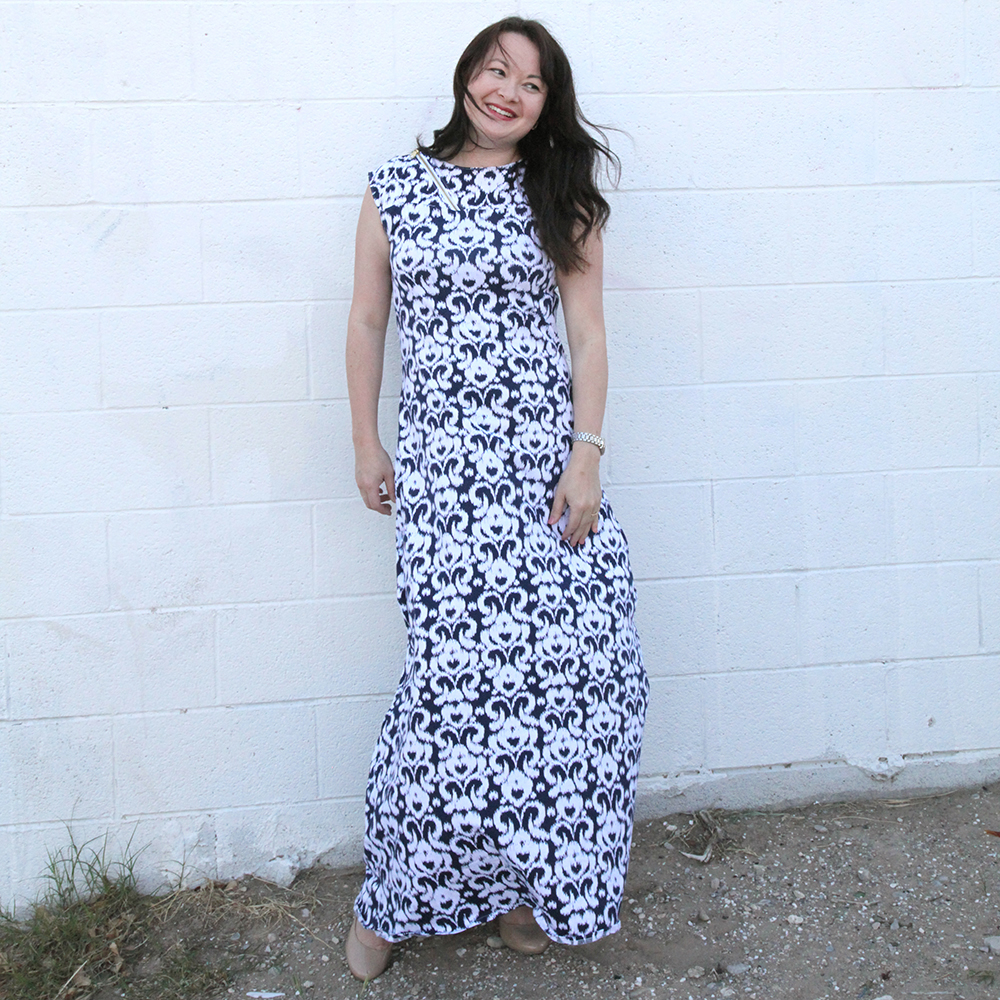
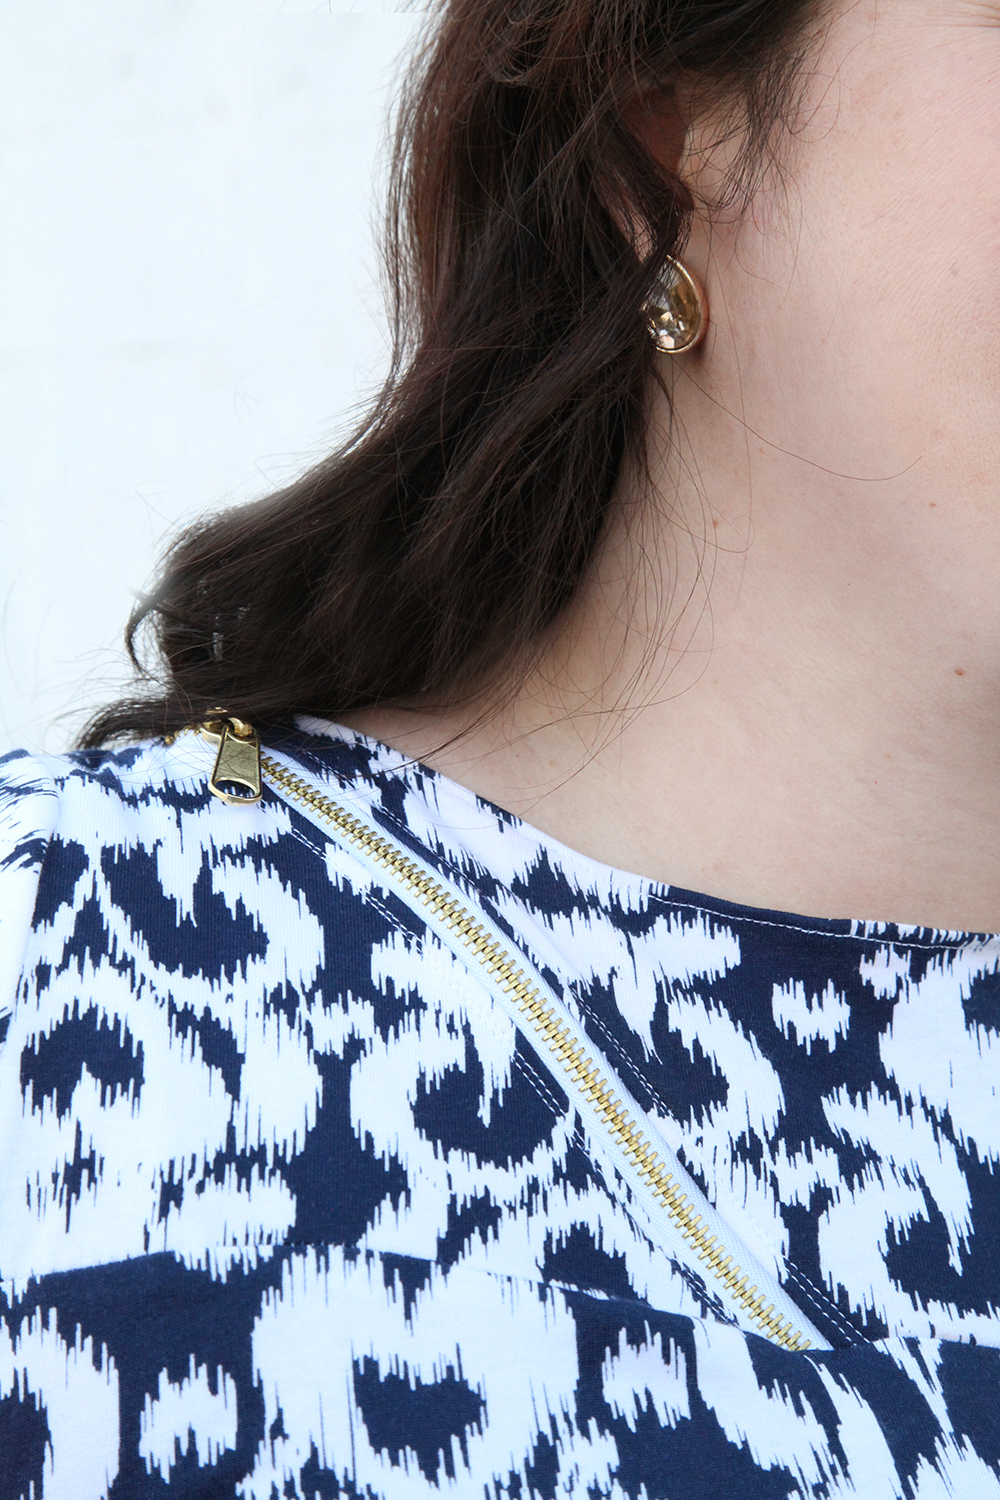
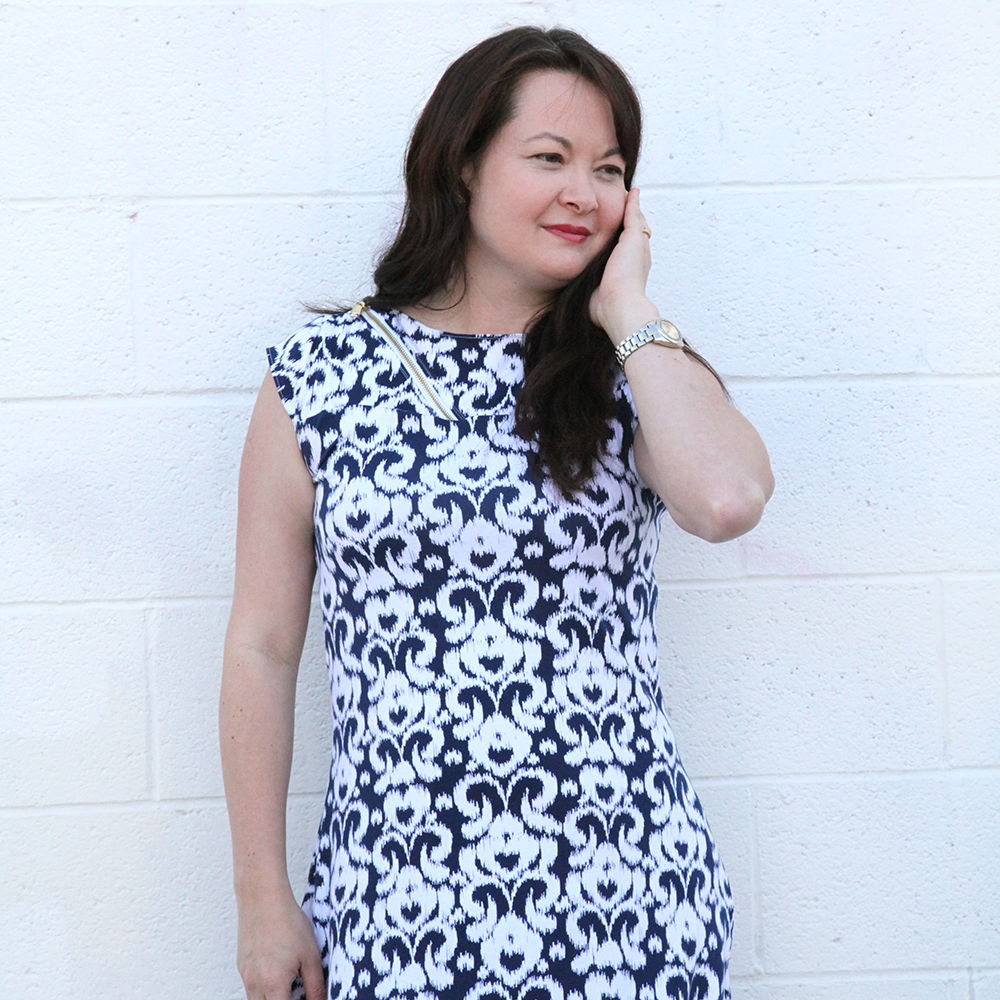
IMG_1151_1_webThe fabric you see pictured is Riley Blake’s new ikat knit in navy. I’ve made the short versions of this pattern before but never the maxi and it took me about an hour and a half to make. I used the Misses Style 3 Pattern and used a gold zipper I got from my local craft store.

We took these pictures near one of my favorite restaurants in Las Vegas (we were there for a toy show for my kids company MiniLou) called Eat. It’s a brunch place and the eggs benedict on the weekends is to die for. Or the cinnamon biscuits. Or the egg truffle sandwich. Or the…well, you get the picture.

You can check out the video where I show you how to put together the Style 3 zipper (It’s easier than it looks!) although I did manage to break 4 stretch needles on the zipper because I wasn’t careful about where I was going.

I like using a stretch interfacing when making this. It holds the zipper and fabric together nicely.

IMG_1125_1_web_instagram

And that’s it! I plan on making this with several of the other Riley Blake knits. Comfortable summer clothing, here I come!

XOXO, Carina

Silhouette Design Store JOANN Stores

Audrey Sewing Pattern Collection Maxi Dress Hack Read More »

Marquee Letter Tutorial and Inspiration for Silhouette and Digiplayground

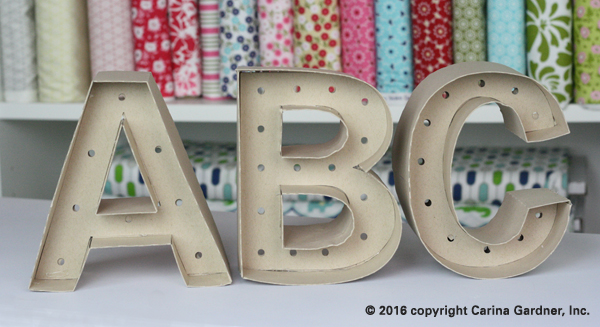
IMG_2758_webHi guys! I’m in Vegas today at the ToyFest West Tradeshow for MiniLou. I’m having a great time, but I got on today to post about our fabulous new Marquee letters coming out on Silhouette and DigiPlayground.

These Marquee Letters are so fun for any occasion!  You could use them for party decor, in your child’s room with their name,  weddings, and more!  The possibilities are endless. Seriously. I. Love. These.

Bonus, these are fun to put together. I will warn you though, they do take some time and patience because there are a lot of working parts. (Note:  They are so worth it!)
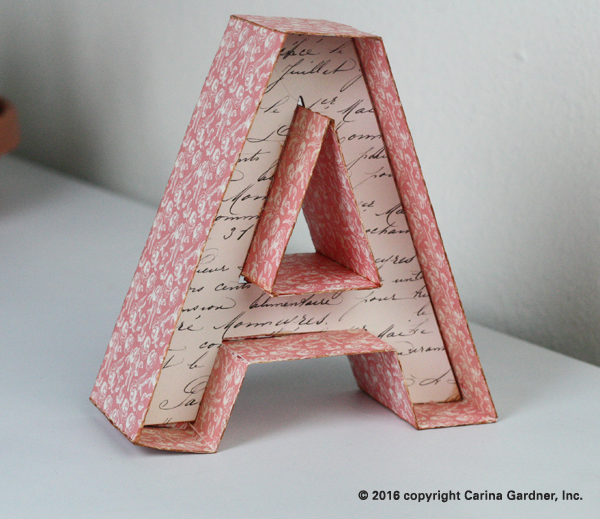
IMG_2748_webYou can do so many different things with them (I have a list below).  Don’t worry if your first one doesn’t turn out the way you want it, it took us a few tries to get them perfect, so be patient and don’t rush it.   The slower and more precise you are, the better they will turn out!

Here are some ideas of what you can do with Marquee Letters:

  • String Christmas lights through the holes (who doesn’t want their name in lights?)
  • Cut them out in cute scrapbook paper (I cut out the A on the right in my Amour Line for Carta Bella)
  • Spray paint them any color
  • Put glitter on them using spray adhesive
  • Have your kids decorate them with paint, jewels, buttons, ribbon, or anything crafty
  • Put fresh flowers in them
  • Cut out some of our SVG flowers to decorate them found herehere, and here
  • Cut them out in different colors to add to any holiday decor

Our Marquees come with both “holes” and “non-holed.” This is for lights, buttons or other effects (even for back-lit lights).

This tutorial will help you with all of our Marquee Letters.  We chose A and G because they are a couple of the more complicated letters.  A is straight and G is curvy so you should be able to make any letter with these two tutorials.  We have a list of tips for making the other letters at the bottom of this post if you need more instruction.  Over the course of the next few weeks, we will release the whole alphabet and a few symbols, so don’t worry if you don’t see the whole alphabet on my Silhouette and Digiplayground shops yet.  

Letter A tutorial

1. Cut out all svg files.  We did the ones for this tutorial in kraft paper, but the possibilities are endless!

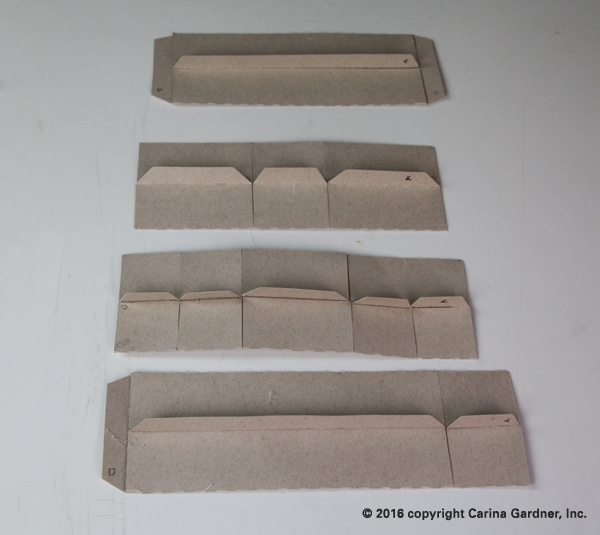
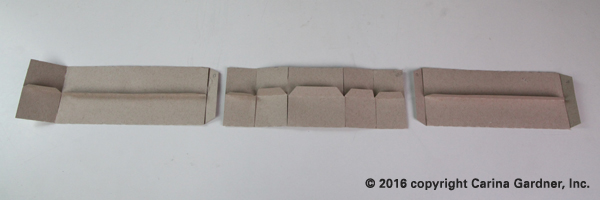
2. Start by folding the score marks on the outside pieces.IMG_0932_web
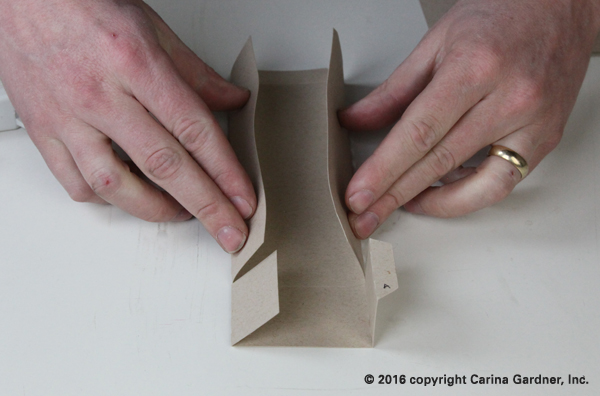
3. Once you have the sides folded, glue the flaps down the middle, making sure to keep the tab up.  On the end without a tab, leave a little room without glue so the other tab can fit. They should look like the picture below for the letter A.   
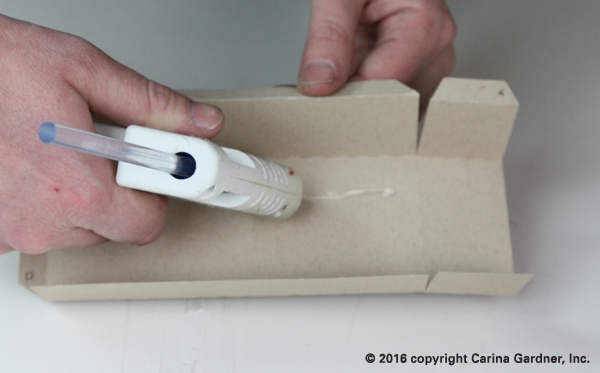
IMG_0933_webIMG_0934_web

Helpful Hints: You’ll notice that there are shapes cut out in the tabs.  These show you what order and where each of the pieces should be glued to.  The shape on one end will match to a shape on the end of another piece.  It might be hard to identify which pieces go where.  If you look at where they are placed in the file when you open it, you will get a better idea.  Because every letter is different, you will need to look at them and figure out where they go before you start glueing.  All of the corners have score marks, so you will not have to fold anything on your own, if you have to fold something, the piece is in the wrong place.  
IMG_0946_web

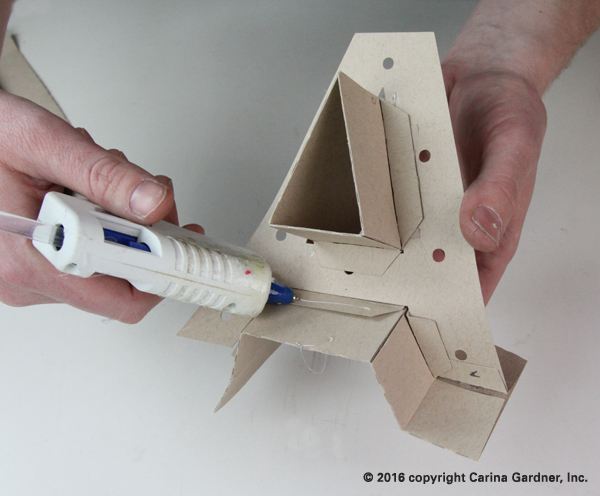
1. For A, start with the center edges.  Take the piece for the middle and fold it.  The tabs should be on the outside so they can be glued to the letter. Doing the center is easier before the outside edges are on.   
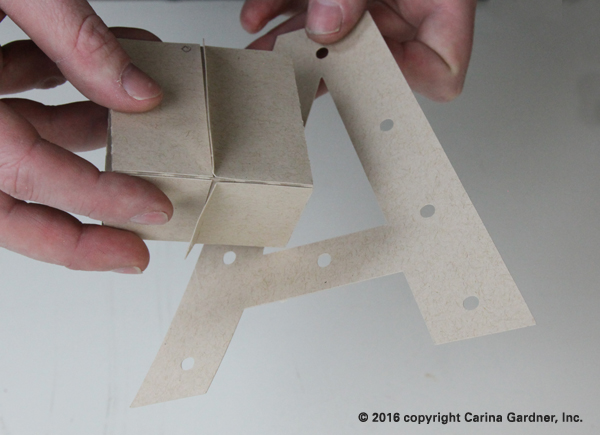
IMG_0936_web

2. Glue the inside tabs to the letter making sure all of the tabs are on the same side of the letter.
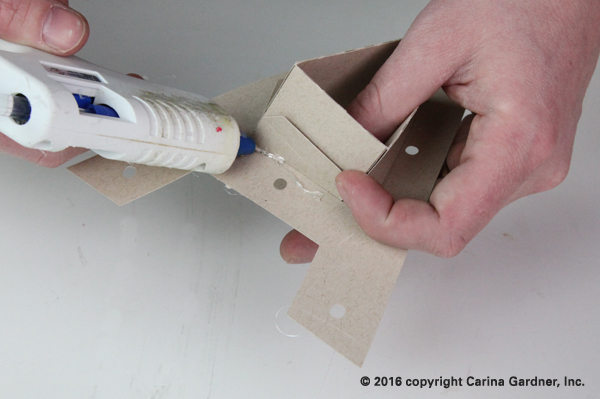
IMG_0940_web

3. For the outside, start with the piece that goes on the bottom.  Glue the tabs to the letter the same way as the center. Do one straight edge at a time.
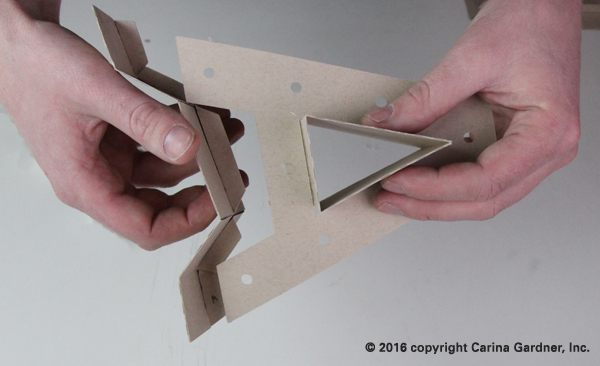
IMG_0941_webIMG_0948_web

4. After the bottom piece is glued, take the two side pieces and insert the tabs into the correct side piece (the symbols should match) and glue them in place.
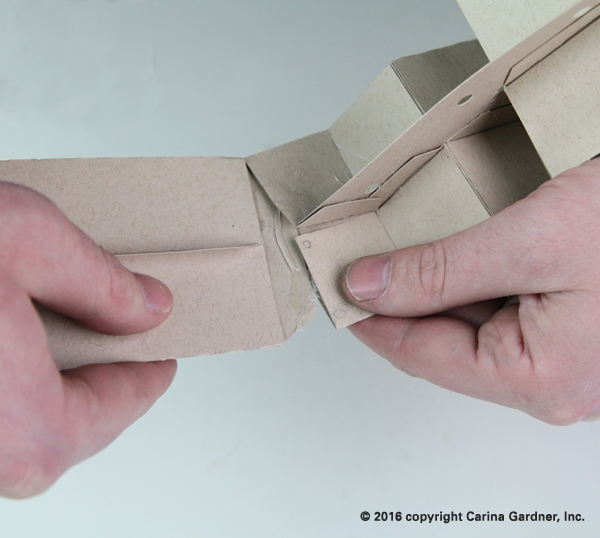
IMG_0950_web

5. After the inserted tabs are glued, glue the tabs to the letter one side at a time until you get all the way around, then insert and glue the last tab into place.
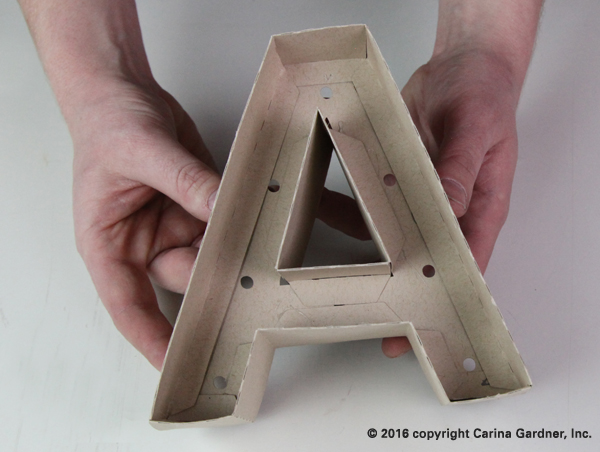
IMG_0953_web

6. Take the second letter and glue it into place.  Make sure to glue it so it covered the tabs.  
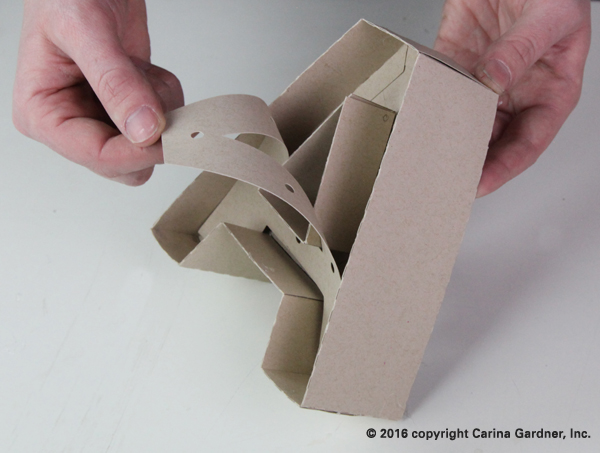
IMG_0956_web

That’s it for Letter A!  You should be able to put together all of the straight letters now!
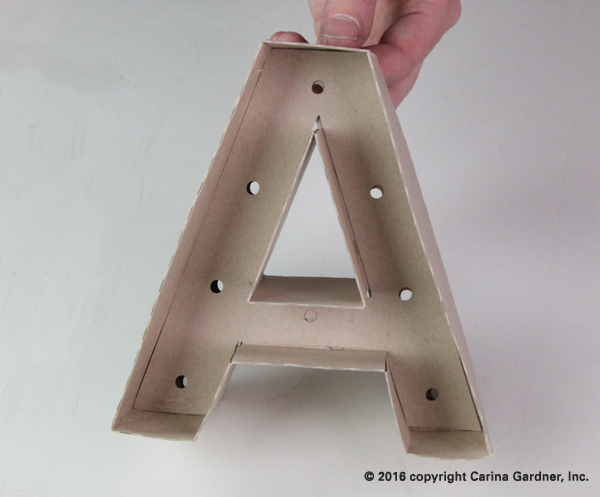
IMG_0958_web


G Marquee Letter

1. Cut out all svg files.  We did the ones for this tutorial in kraft paper, but you could do any color!

2. Start by folding the score marks on the outside pieces.  

3. Once you have them folded, glue the flaps to the middle, making sure to keep the tab up.  They should look like the picture below for the letter G.  
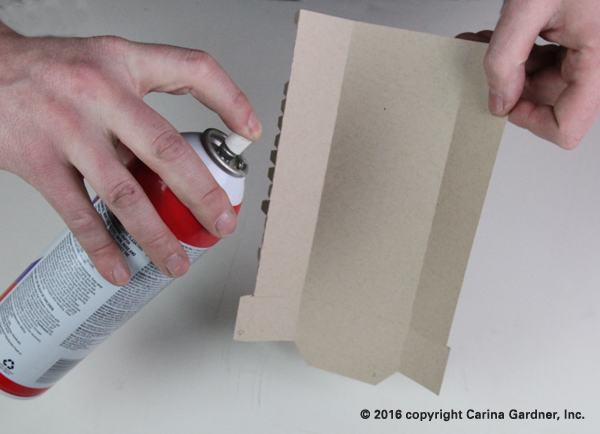
IMG_0965_web

Helpful Hint: G is a curvy letter, which means that the flat outside pieces have to bend more.  Because the paper needs to be more flexible, we did not use hot glue for the outside pieces.  We used a spray adhesive.  You don’t necessarily need a spray adhesive for this, you can use hot glue or whatever you have, but the final product will look better and be easier to glue into place.

4.When all of the outside pieces are folded and glued, take a minute to figure out which pieces go on which part of the letter.  

Helpful Hints: You’ll notice that there are shapes cut out in the tabs.  These show you what order and where each of the pieces should be glue to.  The shape on one end will match to a shape on the end of another piece.  It might be hard to identify which pieces go where.  If you look at where they are placed in the file when you open it, you will get a better idea.  Because every letter is different, you will need to look at them and figure out where they go before you start glueing.  All of the corners have score marks, so you will not have to fold anything on your own, if you have to fold something, the piece is in the wrong place.  

5. When all of your outside pieces are folded and glued, pre-bend the pieces that will go on the curve (these pieces have smaller tabs than the straight pieces).  This will make your letter easier to glue together and make it look better.  The picture shows how much you need to bend it.
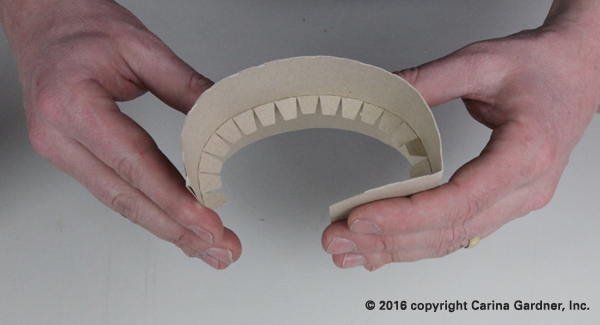
IMG_0967_web

6. For G, start with the smaller straight piece on the top of the G (see picture).  Glue the tab to the letter.  
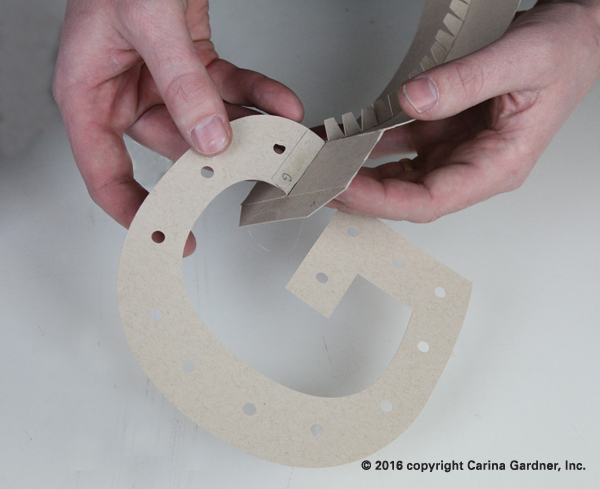
IMG_0971_web

7. Then, start gluing the tabs around the curve with hot glue.  Do one or two tabs at a time, making sure the outside piece line up with the outline of the letter.  Don’t rush this too much, if you take it slow and make sure each piece lines up with the letter, your letter will turn out a lot better.
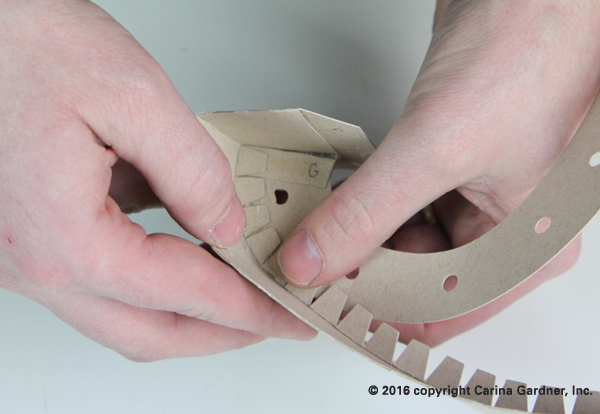
IMG_0972_web

8. Once your first outside piece is glued on, take the next outside piece (make sure the symbols match up) and insert and glue the tab into the piece that is already attached to the letter.  
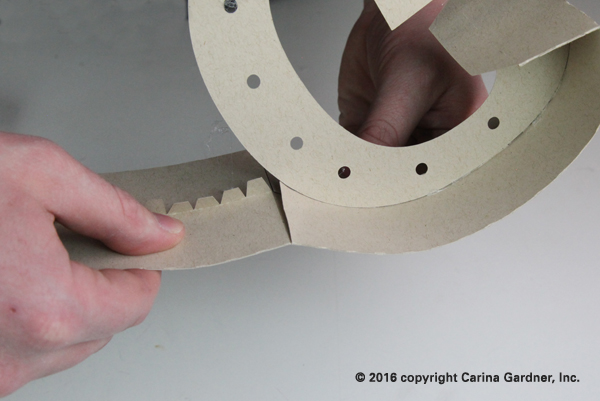
IMG_0974_web

9. Keep going around the letter, gluing all of the tabs down.  

10. After all of the outside pieces are glued onto the letter, take the second letter and glue it into place.  
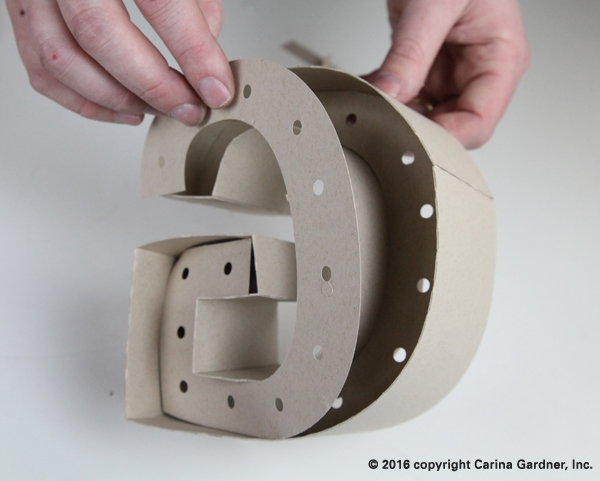
IMG_0980_web

Now you have the letter G and are a pro at the curvy letters!
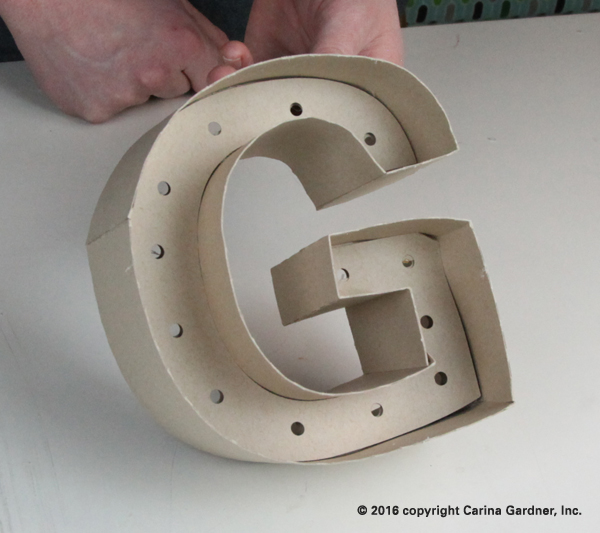
IMG_0986_web


Some other tips for all letters:

  • Figure out which pieces go where before you start gluing.  The symbols will help you, but it still can be a little tricky
  • Make sure you have the letters right side up.  Letter like H and E might look symmetrical but there are small differences in the height and length in parts of the letters.  Before you glue the second letter on, the holes should line up, and if they don’t, the letter is in the wrong way.

Here are some notes on the other letters.  The tutorials should be able to help you make any letter.  Because each letter is a little different, here are some tips I have for each letter:

A. see tutorial
B. do the two inside holes then outside
C. do the outside then the inside and don’t forget to pre-bend the curvy pieces
D. do the inside then the outside
E. when you put in the second letter, make sure you put it in the right way, or it won’t fit correctly
F.
G. see tutorial
H. when you put in the second letter, make sure the smaller half is on the top, even though they look similar, or it won’t fit correctly
I.
J. do the outside curve then the inside curve
K. take the two pieces that go in the “V” parts and glue the tabs that make the point.  Attach the “V” parts to the letter first, then add the surrounding edge pieces
L.
M.take the two pieces that go in the “V” parts and glue the tabs that make the point.  Attach the “V” parts to the letter first, then add the surrounding edge pieces
N. take the two pieces that go in the “V” parts and glue the tabs that make the point.  Attach the “V” parts to the letter first, then add the surrounding edge pieces
O.  do the inside then the outside
P. do the inside hole then the outside
Q. do the inside first, then start with the flat edges on the outside and go around
R. do the inside hole, then the outside
S. the curved pieces are similar in length, but not the same, double check you know where each piece goes before you start glueing
T.
U. do the outside then the inside
V. take the two pieces that go in the top part of the V and glue the tabs that make the point.  Attach the “V” parts to the letter first, then add the surrounding edge pieces
W. take the two pieces that go in the “V” parts and glue the tabs that make the point.  Attach the “V” parts to the letter first, then add the surrounding edge pieces
X. take the two pieces that go in the “V” parts and glue the tabs that make the point.  Attach the “V” parts to the letter first, then add the surrounding edge pieces.  Also, when you put in the second letter, make sure the smaller half is on the top, even though they look similar, or it won’t fit correctly.
Y. take the two pieces that go in the “V” parts and glue the tabs that make the point.  Attach the “V” parts to the letter first, then add the surrounding edge pieces
Z. take the two pieces that go in the “V” parts and glue the tabs that make the point.  Attach the “V” parts to the letter first, then add the surrounding edge pieces.  Also, when you put in the second letter, make sure the smaller half is on the top, even though they look similar, or it won’t fit correctly.

You can find the whole Alphabet on my Silhouette and Digiplayground Shops.  Look for Numbers coming in the next few weeks! 


Happy creating!
Carina

Silhouette Design Store JOANN Stores

Marquee Letter Tutorial and Inspiration for Silhouette and Digiplayground Read More »

Flower Tutorial for Silhouette and Digiplayground

Here are the links to my Silhouette and Digiplayground Shops.

Large Lovely Flower

1. Cut out all svg files.

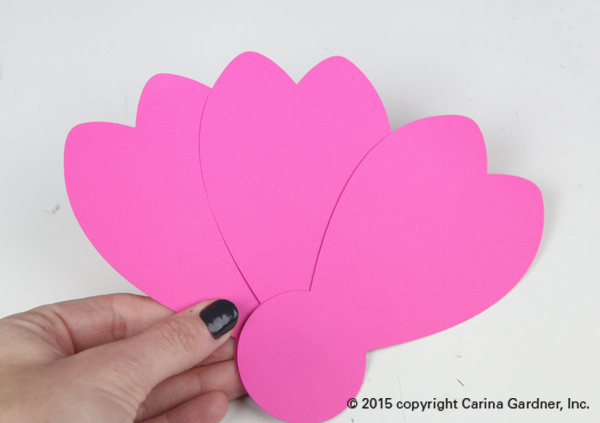
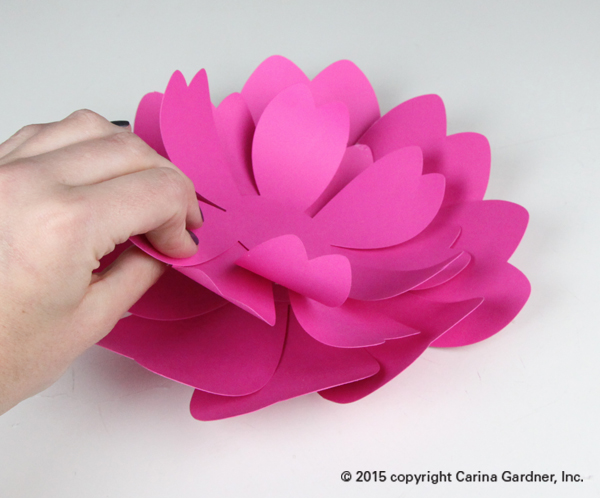
2. Start with the big single petals. These are going to be the first layer of the flower. Take two petals and glue them together using the middle circle. Make sure the circles line up and to fan the petals out about a half of an inch. See the pictures below for how to space them.

IMG_0034_webIMG_0032_web

3. Glue the petals one by one making sure the centers align and the spacing is even as you go.

IMG_0035_web

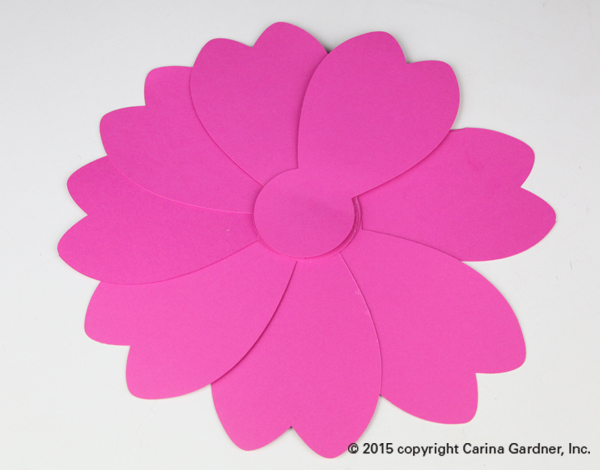
4. Once you are done with the big petals, they should look like this.

IMG_0037_web

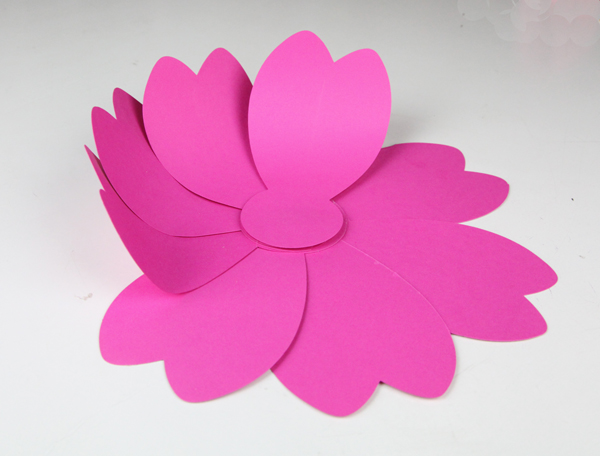
5. To add dimension to your flower, finger press the petals so they curve upward.

IMG_0041_web

6. Once your done with the first layer, take the smaller petals and glue the centers together, offsetting the petals.

7. Now, finger press the petals upwards the same way as you did the first layer.

IMG_0044_web

8. To add the two layers together, glue the center and put the smaller layer on top being sure to offset the petals.

IMG_0048_web

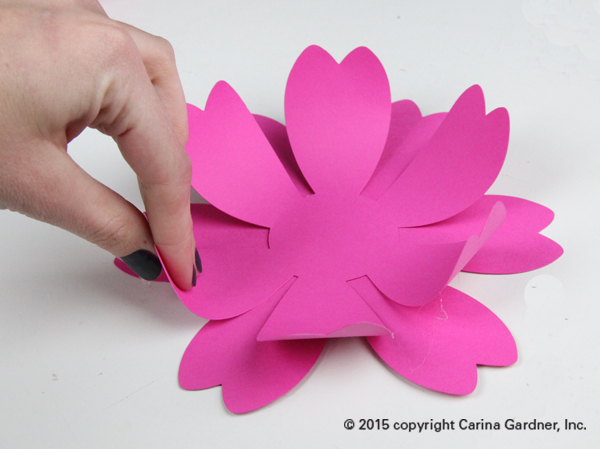
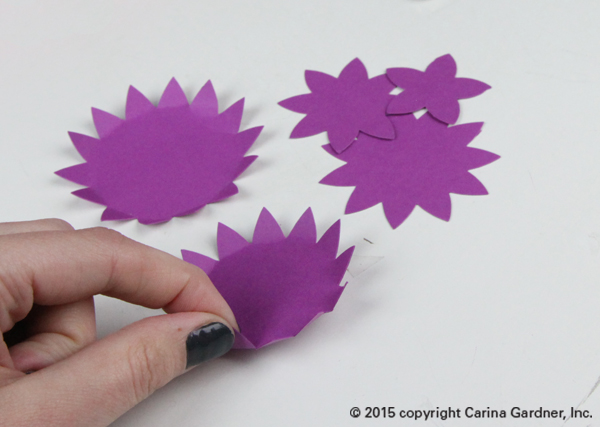
9. For the middle of the flower, start by folding the points upward.  For the middle, it is easier to fold them before gluing them.

IMG_0049_web

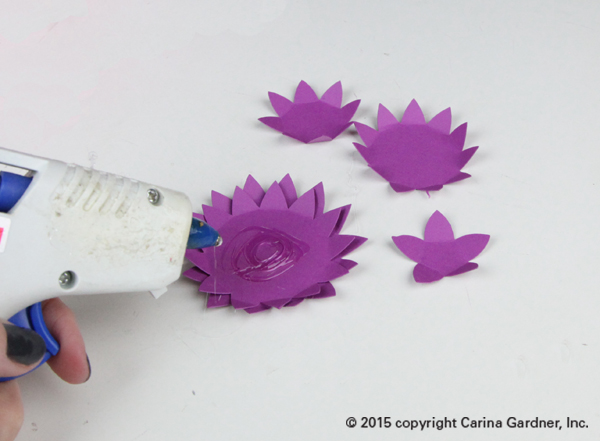
10. Then, start with the biggest later and glue the centers together going from biggest on the bottom to smallest on the top. We added a big gem to the center to give it a fancy, fun look.

IMG_0053_web

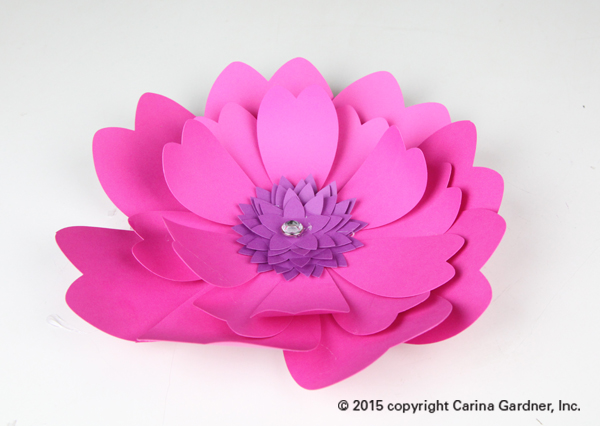
11. To finish, glue the centerpiece to the middle of the flower and you’re done!

IMG_0056_web

Make the whole set of big flowers to get in the mood for spring or decorate for a party!

Large Rosey Flower

1. Cut out all svg files.

2. Start with the smallest petals. Take one and wrap it around your index finger. Put a drop of glue to glue the ends together close to the bottom. Make sure the bottom of the petal is flat.  You’ll want to make sure you do this as you go. This will make the petals flare out more and give the rose more levels.

IMG_0063_webIMG_0065_web

3. Keep the rose on your index finger and wrap the petals around it. Change up where you start wrapping the petals. You don’t need to wrap the petals very tightly. You will get a more rose looking flower if you put the glue on towards the bottom and make sure the bottom of the petals align and stay flat.

IMG_0068_webIMG_0070_web

4.  Once you’re done wrapping all of the petals, take the circle and glue it to the bottom. This covers up any spaces you have in the bottom and if you want to use it to decorate, it’s easier to attach.

IMG_0072_webIMG_0073_web

That’s it! Now you can make a whole bouquet or put it with an arrangement!

IMG_0079_web

Silhouette Design Store JOANN Stores

Flower Tutorial for Silhouette and Digiplayground Read More »

Join Me for the Sew Simply Stitched Quilt Retreat in March 2016

IMG_4862_instagram_webSome day in the near future I’m going to give you guys a tour of my offices and maybe a day in my life. To come out with as many products as we do at CGInc and MiniLou, well, it means we make A LOT of stuff EVERYDAY. Case in point, yesterday I designed a MiniLou fabric line and today I am finishing up a Cartabella Halloween line. Seriously, the best part of my creative life. And it isn’t just me. It’s my entire team of doers. I’ll be sure to introduce them as well.

But because of my design schedule and the number of tradeshows I already attend, I am careful about the number of events I am willing to commit to. But when Sherie from Sew Simply Stitched asked if I would teach at their first annual Quilt Retreat, it was a resounding yes! I love teaching in my home state of Utah and LOVE meeting quilters in a retreat environment. I love getting to know other sewing pattern enthusiasts and just being able to HANG OUT with them! Are you coming? I hope to see you there.

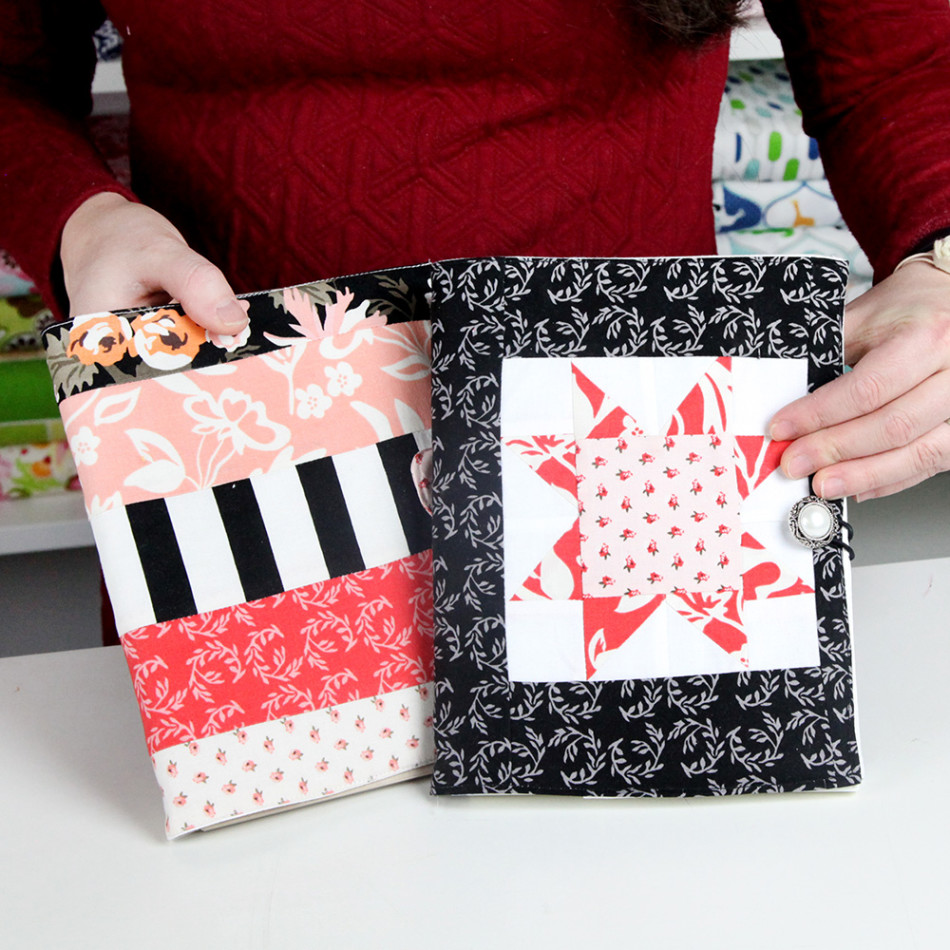
For those of you who haven’t heard about it (registration for it only opened a couple of weeks ago), here’s some more info. The retreat is from March 17-19 at the Gracie Event Center in Roosevelt, Utah. I’m teaching two classes on making hexagon quilts and one on these fun sketchbook covers (photo above).

IMG_4880_carinagardner_hexagonclass_web

Here’s the details:

CLASS 1
Perfect Hexagons at any Size with a Straight Ruler
Fabric and pattern designer Carina Gardner shows you how to cut out the perfect hexagon from squares and a straight ruler! No need for fancy rulers or templates! She will demonstrate how to sew a Y seam with your hexagons so that you can build a beautiful baby quilt. 

Supplies
  • 4 packs of 5 inch precut squares (with at least 15 fabrics) 
  • OR cut out fifty-nine 5 inch squares 
  • Pencil
  • Rotary Blade and Mat
  • Straight Ruler

CLASS 2

Pieced Notebook Cover Class
Fabric and pattern designer Carina Gardner helps you sew together a beautiful pieced notebook cover for a gift or your own doodle book! She will demonstrate how to put all the pieces together and give you the dimensions for variations on the notebook cover! This cover coordinates with the Kathy’s Zentangle class notebook.
Choose one cover to make in class:
5.5 x 8.5 Sketchbook (aslo used in Zentangle Class)
Supplies
  • Button
  • Hair tie
  • Rotary Blade and Mat
  • Straight Ruler
For the Eight Pointed Star Cover:
  • Fabric scraps including a 
  • 3 in square for the center of the star
  • 4 in x 9 in scrap for points of the star
  • 1/3 yd white fabric
  • 1/3 yd outside cover fabric (shown in the picture as the black fabric) OR one fat quarter
For Striped Cover:
  • 1 Rolie Poly or several fabric scraps at least 24 inches in length
  • 1/3 yd white fabric

IMG_4842_1_web

I can promise you, it’s going to be a good time! I have a slew of raffle prizes we will be doing throughout my class, learning great techniques, listening to fun music, and getting to know each other. We are going to try really hard to finish an entire baby hexagon quilt during my 3 hour class.

You can register at the Sew Simply Website here: http://www.sewsimplystitched.com/events. For all you sewing enthusiasts, we also created a fun (private) facebook group if you want to join in here: https://www.facebook.com/groups/558135217677951/. You can share your projects and ask questions. We add tips, exclusive coupons, and sneak peeks of what’s ahead.

Happy Sewing! See you at the retreat!

Carina


Silhouette Design Store JOANN Stores

Join Me for the Sew Simply Stitched Quilt Retreat in March 2016 Read More »

February Block of Month 2016

It’s the month of love, and I have a heart block for you for your Home Sweet Home Quilt! This is my second block for our 2016 Block of the Month. Grab the download in the store and watch the video below to join in! Make sure and follow me on instagram (@carinagardner) to post your blocks for our fabric giveaway every month!

Happy Sewing!
Carina

(PS Check instagram for our Block of the Month Quilt giveaway….that’s right! I’m giving away the full quilt sometime this week! Be sure to check it out!)

Silhouette Design Store JOANN Stores

February Block of Month 2016 Read More »

New Audrey Sewing Pattern Collection

cg024_audrymiss1cover_instagramWe started working on this collection in December. I’ve never been so ambitious before and tried to release 8 sewing patterns at once! But it was an idea that came from loving and wanting to produce a knit collection that was simple to sew and beautiful to wear. Easy enough of a concept….quite a bit more difficult to execute.

And I couldn’t have done it alone! My pattern production assistant worked tirelessly on this collection and made edit after edit as I pinned, cut, and tried to find the SIMPLIEST way to put these patterns together. I hope you love the results!

patterns_newsletterfeb2016

This is the first time I have released MISSES and TEEN sizing! You’ll notice that as my family changes in age, I find myself wanting to make what my own kids are wearing.

audreybanner1

So here’s the run down on these patterns.
cg024_audrymiss1_page2_instagram

  1. There are 3 styles of knit patterns. ALL are easy to make but Style 1 is the easiest and Style 3 the hardest. As you can guess, Style 2 is right in between the other two.
  2. Style 1 is short in front and longer in the back. Style 2 is an A-line with a gusset in the back. Style 3 features a zipper in a yoke on the front. Each of these variations changes the look and styling of the patterns.
  3. There are two lengths on each of the tunic patterns. There is a “blouse/tunic” version (shorter) and a “dress” version (longer). Here’s the deal: they are both LONG. These tunics are meant to be worn with leggings and if you are anything like me, I won’t wear leggings unless they cover my bottom! In the picture above, Felicity (white) is wearing the TUNIC length Style 3, Siri (yellow) is wearing the DRESS length Style 1, and I (stripes) am wearing the TUNIC length Style 2.
  4. IMG_5047_1_instagramThe sleeves are INTERCHANGABLE. There is a 3/4 length sleeve on Style 1, an elbow length sleeve on Style 2, and a cap sleeve on Style 3.
  5. The patterns come in TWO sizes: Misses AND Girl/Teen. The Misses size include 4,6,8,10, and 12. The Girls sizes include 6,8,10,12,14. If you are a size 2 in Misses, you can easily move down to the 14 in Girls/Teen.


Did I mention the final two patterns are a Miss and Girl/Teen legging? Yep! SOOO simple to sew together since there is a single seam. We love using the Riley Blake knits for these!

homebanner_22016_knit1_1

cg034_leggingcover_webI know some of you are probably afraid to work with knits, but it is a lot simpler than you would think! I have a few pointers for those of you getting started and made a couple of videos to make the process so much easier! Check them out below.

Here are a couple of “important” things that I always do when I start to work with knits:

  1. Change my needle to a STRETCH needle. These can be bought for ALL brands of sewing machine and is meant for knits. This will make your sewing go SO much smoother!
  2. Use the thread that matches the fabric content. So if I have a 60% Polyester and a 40% Cotton fabric, I use a Polyester thread. The only time I do not follow this rule is when I have a cotton based fabric with a small percentage of stretch (like a 5% spandex like a Riley Blake knit). Then I will use a polyester thread because it has more give then a cotton thread.
  3. Surprisingly, you do NOT have to serge knits. It looks nicer and will last longer, but you shouldn’t fret just because you don’t have a serger. You should take a chance on knits with just your regular sewing machine!

(Here are the two videos: Getting Started with Knits and a Tutorial on Style 3!)

IMG_4920_instagrma_webMake sure and take advantage of the 20% sale going on right now on PDF patterns in the shop in honor of the new collection! Put in code AUDREYNEW20. The sale should last through February 2016. it includes ALL PDF patterns including Kid cottons and quilt patterns!

I’d love to hear what you are doing with knits! Join my Facebook page to tell me or my Private Sewing Group on Facebook! As always, I love getting feedback on the patterns and projects I am working on.


IMG_5063_1_instagramFinally, there is a good chance we will have handmade Style 1 in Misses S, M, L available for sale in a couple of weeks. We will have a very limited few since these are being made inhouse. Keep your eyes out for these!

Happy sewing!

Carina

Silhouette Design Store JOANN Stores

New Audrey Sewing Pattern Collection Read More »

2016 Block of Month Begins!

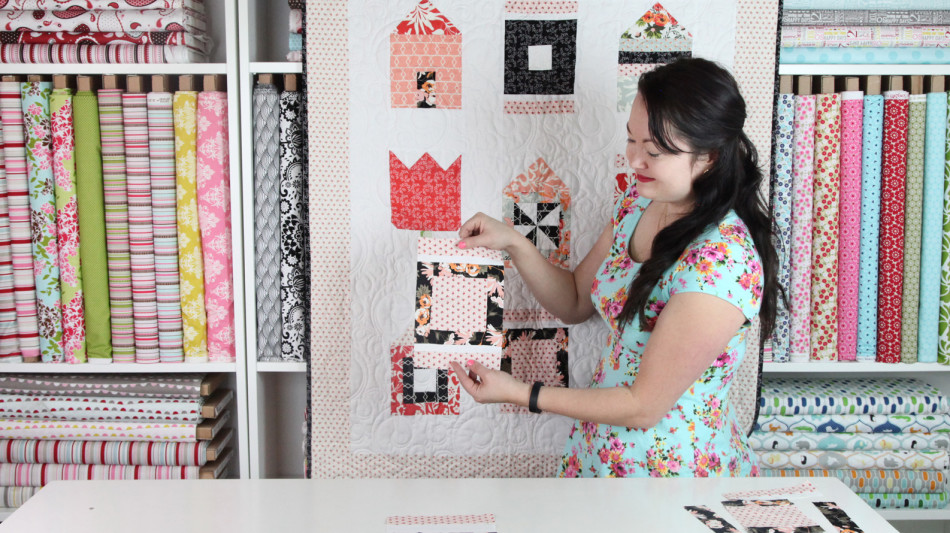
IMG_3912_1_webIt’s my first ever Block of the Month! I’m excited to start this year off with a bang! The sampler quilt we are making is called Home Sweet Home and includes darling houses, a tulip, heart, and more!

Every month a new video will be posted on the 15th with a new tutorial. Be sure to also visit the store to download the free pdf of the block measurements that day as well. Our first video posts today so go check it out here: https://carinagardner.com/2016bom/.

You should also check out all the awesome things we are doing on instagram with this quilt! Follow me at @carinagardner to check it out!

Hope you make this quilt with me! I can’t wait to see what you do with it!

XOXO,
Carina

2016bom_carinagardner_mainphotobanner

Silhouette Design Store JOANN Stores

2016 Block of Month Begins! Read More »

Rotating File System for Silhouette and DigiPlayground

I love putting together a little “planner” at the beginning of the year. This year I focused on Mini rotating file systems. These make me so happy and can be used in so many ways. I love that these could be potential albums, event planners, birthday planners, and so much more. I personally adore the little fox tab!

You can find these in my Silhouette and Digiplayground shops!

Enjoy!
Carina
DS-C-W-CG-monthsDS-C-W-CG-alphabetset1 DS-C-W-CG-numberpages1DS-C-W-CG-ballon pages1  DS-C-W-CG-flourishtabs   DS-C-W-CG-swirl pages1DS-C-W-CG-rolodexbracket1 DS-C-W-CG-rolodexcircletab1 DS-C-W-CG-rolodexscallop1  rotatingfilesystembadger rotatingfilesystembear rotatingfilesystembird rotatingfilesystemdeer rotatingfilesystemfox rotatingfilesystemowl rotatingfilesystemporcupine rotatingfilesystemrabbit rotatingfilesystemraccoon rotatingfilesystemwoodpecker


Silhouette Design Store JOANN Stores

Rotating File System for Silhouette and DigiPlayground Read More »

Nativity Tutorial for Silhouette and Digiplayground

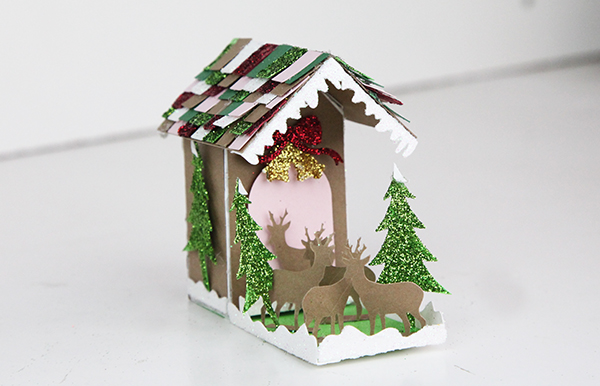
DS-C-W-CG-Nativity shadow boxDIGIThese darling Shadow Box Scenes pop together and then can be pulled apart and stored flat. For me, that makes for the perfect piece of Christmas decor! There are five scenes in all for you to enjoy the holidays!

Here are the links to my Silhouette shop and DigiPlayground shop so you can pick up one of these albums!

Here’s how to put this together:

1. Cut out the svg files.  The sides, roof, and frames I cut out in kraft paper, the shepherd, background, and the main part of the sheep in black, and the frame, angel, and sheep fur in white.

2. Begin with the frames.  Pop dot and attach the angel, shepherd, sheep, and white frame in their appropriate places.  Once you have all the figures in place, you can start putting the nativity together.

IMG_1837_web

3. Now, put the background and two side pieces together by slipping the tabs on the short ends of the sides into the slits of the background.

IMG_1827_web

4. The frames attach similarly.  Put the tabs on the ends of the frames into the slits in the side piece.  Do this for all of the frames.  Remember, the frames go in a certain order for it to have the shadowbox effect.  The frame with the thickest bottom goes in the back and the thinnest goes in the front.

IMG_1828_web

It will look like this when all of the frames are in.

IMG_1841_web

5. For the roof, start with one side and put the tabs of the side piece into the slits of the roof.  Do this for the other side.  Make sure the side of the roof with the rounded edges goes in the front.

IMG_1831_web

You’re done with your Nativity! I hope you have a chance to make the entire collection!

Carina

Silhouette Design Store JOANN Stores

Nativity Tutorial for Silhouette and Digiplayground Read More »

Anything Goes Quilt and Magic 8 Tutorial

carinagardner_november232015_2_webFinally finished the pattern, the video, and I’m giving away the Anything Goes Quilt PDF Pattern I made on instagram this weekend (be sure to check this out!). This quilt is so versatile! I use the Magic 8 technique to get a lot of triangles cut and sewn all at once. I named it the Anything Goes pattern because it really can make so many different kinds of quilts—flying geese, hour glass, pinwheels, chevrons, and more!

Hope you have a chance to try it out! You can purchase the pattern for it (and see some great options!) here.

Sew lovely,
Carina


Silhouette Design Store JOANN Stores

Anything Goes Quilt and Magic 8 Tutorial Read More »

Tutorial for 25 Days of December French Fold Album for Silhouette and DigiPlayground

carinagardner_november182015_2_web

My 25 Days of December French Fold albums have finally hit the shops! It’s just in time to make one before December 1st hits and you start taking photos.

These are a little different than my 25 Days of December from last year because these feature a french fold and hidden binding.

Here are the links to my Silhouette shop and DigiPlayground shop so you can pick up one of these albums!

Here’s how to put this together:

1. Cut out the svg files.  The main body of the book I cut out in kraft paper and the cover and frames are my Have a Merry Christmas papers for Cartabella.

2. Begin with two pieces of the binding and fold along the dotted lines, then glue them together by overlapping the short sides.

IMG_1028_web

3. Turn it over, and glue the wider folds together so the back looks flat and the front has tabs sticking out.

4. Take your pages and fold all of the creases inwards. (The picture below shows the binding on backwards. All those little glued together pieces will become the pages for the album).

IMG_1030_web

5. Now to add the pages! Glue along the long edge of each page and attach the long edge to the back of one of the folds in the binding. This will create a double-sided/double thick page.

6. Glue the top side of the edge of the long page, as well as the bottom tab and fold the page over.  This should create an envelope with an open top.  Add a page to each one of the binding pieces.


IMG_1038_web


IMG_1041_web

7.  Add the cover by gluing the left side of the cover to the bottom side of the flap.  This makes the inside look clean and the binding flap will be covered with the binding cover later.

8. Glue the binding cover by matching up the crease of the binding cover with the square of the book.  Glue the front, binding, and back side separately.

IMG_1043_web

9. For the tabs,  glue each number onto an oval (or whatever shape you have). Note: one of the albums (bracket) does not use this step.

10.  Glue half of the ovals onto each tab, leaving space to slide the tabs into the slits and for the ovals to go on top of the page.  There are 13 tabs, so each tab will have two numbers (one and two will be on one tab, three and four another etc.)

IMG_1277_web

11.  Slide the tabs into the appropriate slit on each page.  Leave the oval out and glue the other half of the oval onto the outside of the page. Glue odd numbers to the front and even numbers on the back of each tab.

12. For the frames, take each frame and place pot dots on the back.

IMG_1056_web

13. Place the frame in the center of the page and make sure the pop dots are firmly in place.

IMG_1057_web

14. Glue the leaves to the berries and attach to the corner of the frame.

IMG_1058_web

15.  Place pictures and memories on each page to fill your 25 days of December Album!

Happy crafting!

Carina


Silhouette Design Store JOANN Stores

Tutorial for 25 Days of December French Fold Album for Silhouette and DigiPlayground Read More »

Christmas Village Tutorial for Silhouette and DigiPlayground


IMG_0774_webI’ve been working on this Christmas Village for weeks now. Every time one of the little houses got put together, I couldn’t help but smile! Everything about this little village makes me so happy.

There are quite a few pieces, and they all can be purchased from Silhouette and DigiPlayground. Each building is very intricate and there are a lot of parts. I have a quick video on some of the harder pieces so you can see how they go together (see above).

As for displaying this village, there are soooo many options. I have two I’d like to suggest here for you. The first is a display made completely from foam core. I have a free svg file for you to make a template of the one I made and some instructions on how to put it together below. (The photo below is the display I created with foam core. You can make this too!)

IMG_0645_web

IMG_0673_webThe second way I would display it is on a mantle or coffee table. I love mine on top of our white piano. The best part is at night when we put electric tealights underneath and the entire thing lights up (picture of this below!).

If you place your village on a mantel, depending on the number of pieces you build, I suggest using cake plates and cups turned upside down to give dimension and layer to your village. Cover these with ‘snow’ you can purchase from your local craft store to hide these layers. Instant snow drift!

The two photos below is of the Christmas Village on top of my piano (about the size of the mantel). I love it up there! Every piece is so unique and darling. My family is really going to enjoy it this holiday season!

IMG_0772_web

IMG_0771_1web

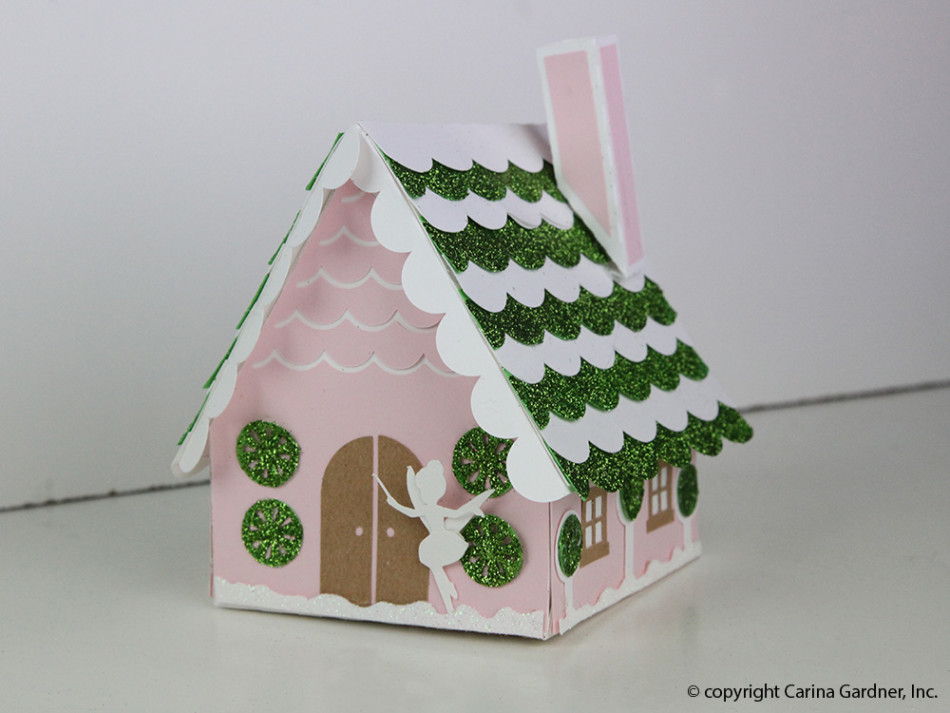
There are so many great pieces in this village. They will be release over the next two weeks (so keep an eye out for them!). The picture below is of the Santa’s Workshop, General Store, Gingerbread House, Trees, and Deer.

IMG_0597_web

Picture below highlights the Clock Tower, Chapel, and Gingerbread House.

IMG_0643_web

The train comes in two files—a Train Station with tracks and a curved 3D Train.

IMG_0654_web

Happy little penguins anyone?

IMG_0765_web

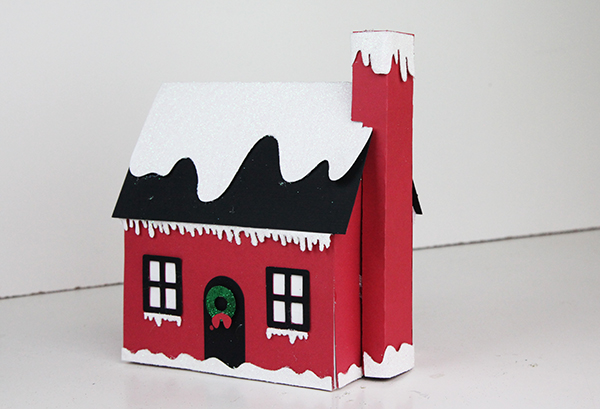
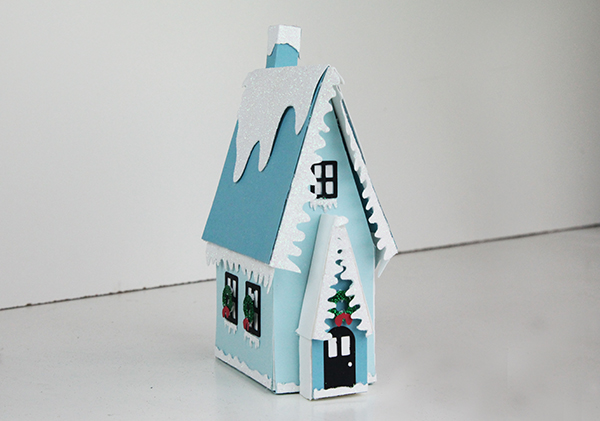
Check out the Snow Cottage, Elf Houses (with curved roof!) and the Chapel.

IMG_0809_web

Turn off the lights and watch them glow! Instant Christmas Magic!

IMG_0863_web

Here’s the tutorial for the Display:

Download the Free Display Template Here—CarinaGardner_ChristmasVillage_Display.zip

If you are having trouble with the link, then try copying and pasting this: https://carinagardner.com/freedownload/carinagardner_christmasvillage_display.zip

  1. Download the zip. You will need 5-6 pieces of 20 inch x 30 inch foam core in white. You will also need a hot glue gun, a small package of ‘snow’, and x-acto knife.
  2. There are four layers to this display. The zip contains 4 documents that may look a bit jumbled (everything needed to fit on a 12 x 12 template for Cricut users). All you need to do is pull all the pieces apart and cut each of them out. Then layout your template like I have below:

instructions_display_christmasvillage_1

3. After cutting out your pieces you will lay the template onto each layer. Layer 1 you will use the template to cut away two edges of the display. Layer 2 you will need to add a width of 8.5 inches to add the depth. Layers 3 and 4 you can cut out as is.

instructions_display_christmasvillage_2 instructions_display_christmasvillage_3

4. Use an x-acto knife to cut these out. Don’t worry about making it perfect! Your snow will cover your mistakes!

5. Once the layers are cut out, you will want to create dimension by cut out several 2 inch strips the full length of the 30 inches on the extra foam core you have. Slice lightly into one side of the strips so that you can bend them to the shapes of your layers. Start with layer 2. Start at the side front and hot glue the 2 inch strip along the curve. Don’t worry about mistakes or gaps! Your snow will cover all of this!  Once you have glued the strip along the edge of layer 2 you will glue it down to layer 1. Continue with all the layers using the diagram below to help determine how to place everything.

instructions_display_christmasvillage_4

6. Once everything is glued together, simply layer snow on the display. I glued a little bit to the board to help everything stay in place. To glue the trees, deer, and penguins to the display, I moved the snow to the side and glued these pieces directly onto the foam core. Then I moved the snow back into place.

I hope you have fun making this display and the entire Christmas Village!

Carina


Silhouette Design Store JOANN Stores

Christmas Village Tutorial for Silhouette and DigiPlayground Read More »

Thankful Tree Video and Tutorial for Silhouette and DigiPlayground

We’ve been working on the Thankful Tree for a few weeks now and I’m so excited to have it in my home! It’s the perfect LARGE scale tree (about 4 feet in height) to put in your home to celebrate Thanksgiving. We will be using the Apple Basket to place all of our leaves so the kids can pull one out everyday to write what they are thankful for throughout November.

Check out this short video so you can see the tree (in scale) and all the options we have available for it! You can purchase the files at Silhouette and DigiPlayground.

Enjoy! Carina

Silhouette Design Store JOANN Stores

Thankful Tree Video and Tutorial for Silhouette and DigiPlayground Read More »

Launch Party! PDF Sewing Patterns Now Available at CarinaGardnerShop.com

carinagardner_october162015_1

I’m so excited for today! I’ve been planning this launch for a few weeks now! The team and I have some cool things planned. What kind of cool things you ask? Well, since you asked…

First off, we are now releasing PDF Patterns! Yes, that’s right. This is the official launch of you being able to purchase my patterns in PDF format. You can still also purchase most of my patterns in their physical form (from our website or from your local quilt shop). Not all of my physical patterns have been converted to PDF. You will see us release all of them in the coming weeks along with new ones.

This is awesome on so many levels for you and me! Since I started MiniLou, we simply have not had the space to house the number of patterns I was carrying for CGInc. So NOW because we can release pdf patterns, you will see MORE kids clothing, kids projects, beginner projects, and for the first time ever QUILTS!

episode15_web

The timing is right for this launch because not only am I kicking off the PDF Patterns, I am excited to be releasing my newest fabric collection for Riley Blake Designs called Apricot and Persimmon. The colors in this line are so autumn-y and yummy. (I should have the full digi book for this collection out sometime next week).

So what are we doing for this launch? I’ll admit, most of the action will be happening on my instagram feed (@carinagardner). Here’s what’s happening:

  • The PDF shop will be 30% off  october 16-21. Visit the sale>>>
  • We are randomly giving away sewing pattern gift certificates on instagram and facebook all weekend!
  • We are teaming up with Michelle Jensen (my machine quilter) and MiniLou (my kids toy company) to do a DROP on instagram (hints and where it will be can be found on instagram @carinagardner and @miniloukids). This drop will include one of you WINNING a Persimmon Nine Patch Quilt. Yes! The actual quilt!
  • I have consolidated all of our FREE fabric projects into the shop so you can grab them and go!
  • I have two new videos that feature the Persimmon Nine Patch Quilt and the Patchwork Plus Quilt (See below!)! The best part is that I will be doing ALOT more videos featuring difficult parts of the patterns or helpful sewing hints.
  • For this launch I am releasing three brand new PDF Sewing Patterns that have never been released as a physical pattern—Persimmon Nine Patch Quilt, the Patchwork Plus Quilt, and the Apricot MiniQuilt.

Be sure to join us on instagram and facebook for the festivities! Check out the videos below!

Hope you enjoy! Feel free to check out the entire CGTV channel here: https://carinagardner.com/carina-gardner-tv/
Carina
Episode 14: Patchwork Plus Quilt

Episode 15: Persimmon Nine Patch Quilt

Silhouette Design Store JOANN Stores

Launch Party! PDF Sewing Patterns Now Available at CarinaGardnerShop.com Read More »

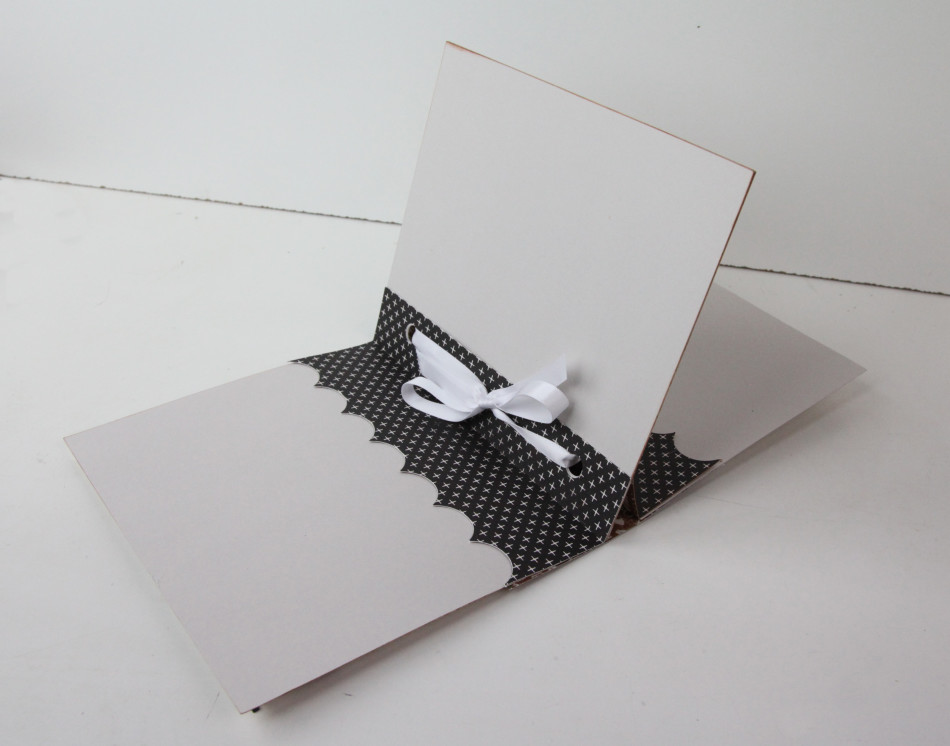
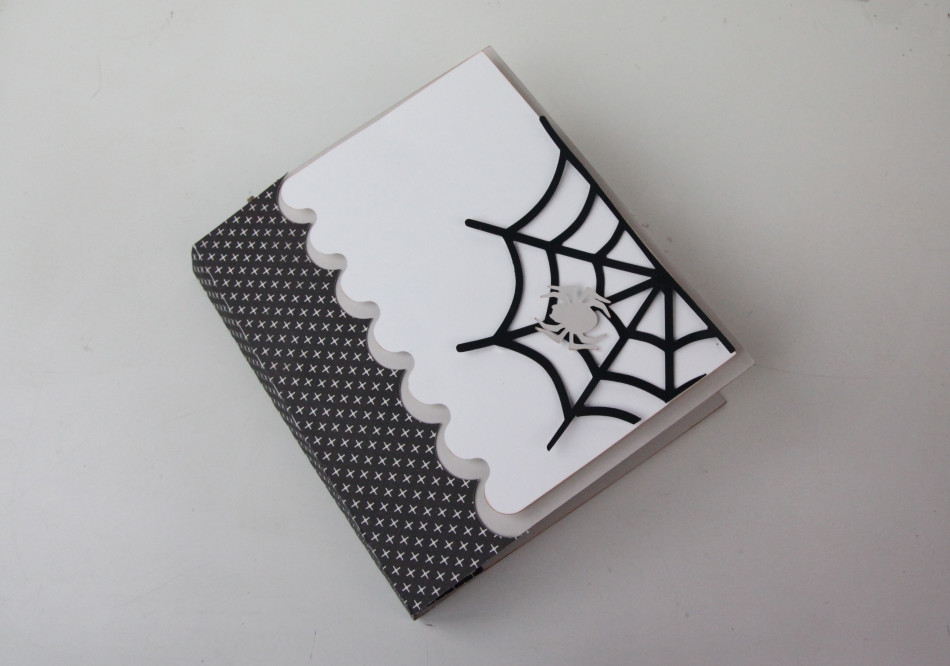
Hexagon Halloween Ornament

DS-C-8.6824W-CG-Spider Ornament

I love some dead branches in a vase as halloween decor. These little ornaments are the perfect accessory for those branches! They’d also be cute strung in front of a window or as a banner.

Every one of these ornaments are made a little differently. I’ve chosen to show you how to put together the hardest one. Most are simply layered with hexagons and shapes. Feel free to mix and match all of the ornaments in this collection!

Here are the links to my Silhouette shop and DigiPlayground shop.

Here’s how to put this together:

1. Cut out the svg files.  The main body of the ornament I cut out in a deep gray and the interior is a matte black with white spider webs and red spider.

IMG_9216_web

2. Next take the hexagon sides and fold the flap that is connected to the long rectangle piece back onto itself and glue down. Repeat on the other side.

IMG_9223_web

3. Fold all hex flaps away from each other so that they create a flat surface that you are going to glue your rectangle piece to. There are fold marks where each side of the hexagon’s flaps should be glued to your long rectangle. Repeat all the way around until you end with 2 open slits at the top

IMG_9228_web

4.  Slip the ornament hangers from the hexagon through those two open slits and glue together.

IMG_9231_web

5. Take your flat hexagon accent pieces and pop dot them on each side of your ornament.

IMG_9235_web

6. Lay the spider web over the top of your ornament with the long webs aligning with the corners of your hexagon. Bend them over the edges to give you a good idea where to glue. Neatly tuck your folded spider web string to the inside of the corner to the hexagon and glue together. Repeat all the way around and the other side.

IMG_9236_web

7. Once your finished pop dot your spider to the web and you’re done!

Hope you have fun making these!

Carina.

Silhouette Design Store JOANN Stores

Hexagon Halloween Ornament Read More »

Halloween Crate Tutorial for Silhouette and Digiplayground

DS-C-10.0843W-CG-Ghost Crate

It’s my favorite time of year! That’s probably why I get so excited for all of these Halloween projects. This post is for a tutorial on the Light Up Halloween Crates. You can purchase them from both the Silhouette and Digiplayground shops. (Links to the crates will become available as they go live).

These are incredibly simple to put together. I’m planning on putting in the windows at the house and as centerpieces on my coffee table. You can place an electric tea light in the center (I love the black ones!) for a but of ambiance!

Here are the links to my Silhouette Shop and DigiPlayground Shop.

Here’s how to put it together:

1. Cut out the svg files, cut two of each side piece, four total. Ink the edges of your crate to create some dimension.

IMG_8796_web

2. Glue accent pieces to the inside of the crate side pieces.

IMG_8805_web

2. Once you have glued on all the accent pieces onto the sides, take the bottom flat geometric piece and slip the pointed edge through the slot at the bottom, just below the ghost.

IMG_8817_web

3. Next, grab the opposite side piece and slip the tabs through the slots provided in your first piece. Again, insert bottom pointed edge just below ghost and repeat this step all the way around.

IMG_8820_web

Place a tea light in the center and you are done!

Enjoy,

Carina

Silhouette Design Store JOANN Stores

Halloween Crate Tutorial for Silhouette and Digiplayground Read More »

Pineapple Costume Tutorial

IMG_8980_webSome years I can convince my kids that going to the store and buying a costume is the way to go. Not this year. Both of my girls wanted homemade costumes. Siri wanted to be iPhone Siri (you can see her costume on my instagram feed @carinagardner) and Felicity asked to be a pineapple.

I know pineapples have been trending recently, but the truth is, in our family the word ‘pineapple’ has been trending for a couple of years. A while back, Siri decided that she loved the way the word ‘pineapple’ sounded and used it as her go-to, everyday word (“Can I get you a drink, Siri?” “Pineapple.” “Are you ready for bed, Siri? “Pinnneapppppllle.”…you get the idea). Does she actually like to EAT pineapples? Of course not! That would make too much sense :).

Ironically, it was Felicity who decided that being a pineapple was a must this year (although I can see Siri trying to steal this costume).

Here’s a little info on how to put this costume together. Your materials may be a little different than mine so feel free to make adjustments on how you make this sublime fruity treat.

PINEAPPLE COSTUME TUTORIAL
Materials

  • Either one very long yellow T-shirt or two T-shirts (Mine is a size 10 and the materials fit this size. Make adjustments for smaller or bigger T-shirts.)
  • 1/2 yard of yellow felt
  • 1/4 yard of green felt
  • headband
  • hot glue
  • 1 1/2 yards of double-sided iron-on adhesive

IMG_8877_web2

1. If you are working with two T-shirts, cut one in half to add to the bottom of the first T-shirt. Match up the RAW edge of the second/cut T-shirt to the bottom of the first T-shirt. That way you do not have to hem the bottom of the outfit. I used a serger with right-sides together of the T-shirts to sew these two pieces together into a long dress.

IMG_8858_1_web IMG_8862_1 copy

2. Once your T-shirt is now a ‘dress’, cut out yellow felt pieces using the pattern provided below. Pin them all the way around the dress as shown here. This will help you determine how many pieces you will need. The pattern can be made smaller or larger to accommodate the size of your outfit.IMG_8877_web

3. Next, use the double-sided adhesive (using the instructions on the adhesive you buy) to adhere the adhesive to the felt pineapple pieces.

IMG_8881_web

I used Heat and Bond and ironed on the adhesive on one side of the pineapple piece. Then, I pulled off the white protective layer on the felt piece and placed it on the dress. I ironed it directly onto the dress with the adhesive-side down (facing the dress).

IMG_8885_web IMG_8889_web

And you are done with the dress! Now for the headband!

4. The headband could be made so many different ways. Use my method or try putting it together anyway you want with the pattern pieces I’ve provided. You can also choose to do all of this with a hot glue gun if you want to avoid sewing!

I cut out 4 each of the three leaf patterns. I folded in half the medium and large leaves and sewed them about half way up. (You could simply hot glue them up instead.)

IMG_8892_web IMG_8894_web

5. I then sewed together two of the biggest pieces like the image below.

IMG_8896_web

6. Then I laid a third piece in the middle of the two sewn together pieces. I sewed it to the front. I then sewed the fourth piece to the back center.

IMG_8898_web IMG_8902_web

This will create a little symmetrical bunch.

7. Your next trick is to add the medium sized leaves to this bunch. I sewed mine but in retrospect I should have hot glued it! It was really thick and difficult to get through the machine. Simply, place them evenly around the large leaves.

IMG_8904_web

8. For the smallest leaves, I used hot glue and spaced evenly around the bunch.

IMG_8908_web

9. I cut a circle and hot glued it to the center of the bunch. Then I glued up the edges and trimmed them. This is simply to keep the bunch together and add a bit of yellow to the bottom.

IMG_8910_web

9. Finally, I cut a small round circle and sandwiched a headband between the pineapple top and the felt circle. Hot glue these altogether and you are done!

IMG_8912_web

Here are the pattern pieces you will need to make this costume:

DOWNLOAD THE PINEAPPLE PATTERN PIECES

There’s a bit of work involved to make this costume but it was completely worth it! Felicity was giddy with the end result! Does your child want to be a pineapple? Download the pattern and get started! Halloween is around the corner!

Happy creating!
Carina

Silhouette Design Store JOANN Stores

Pineapple Costume Tutorial Read More »

Halloween Inspiration

IMG_8541_webHalloween has officially begun at my house! Our little family celebrated by going to Frightmares last weekend and starting work on costumes—well, the kids started thinking about their costumes, and I started working on them.

(Photo to the left of Silhouette Halloween Tags now in the shop).

I’m always a happy girl when this time of year rolls around. I feel renewed with the autumn weather. I’m ready for the heat to be replaced by cool breezes and and falling leaves.

And then, of course, there is the all the halloween decor. Many years, I don’t get to pulling things out until the last minute. But these year, our studio has producing so many fun halloween designs! The end result—lots of goodies to hang all over my home.


IMG_8515_web

(All of these designs can be found in my silhouette shop and digiplayground shop)

IMG_8501_web

And yes, we’ve already watched The Nightmare Before Christmas and Hocus Pocus.

IMG_8506_web

Hope you have a moment this week to pull out or make some pretty things! I’m going to get to work on costumes and start planning my Halloween kids party!

Happy Haunting,
Carina

Silhouette Design Store JOANN Stores

Halloween Inspiration Read More »

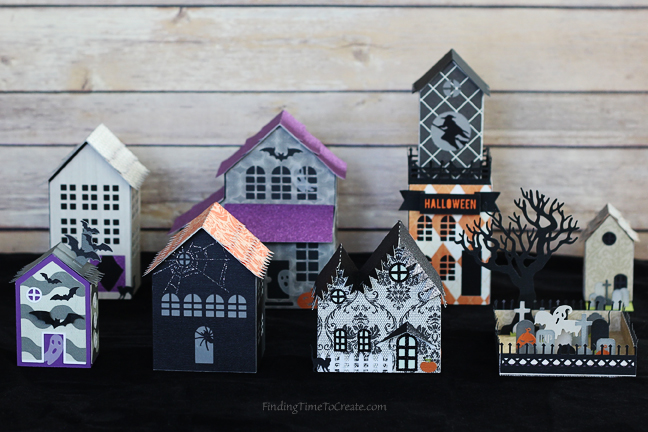
Episode 13: Halloween Haunted Mansion for Silhouette and DigiPlayground.com

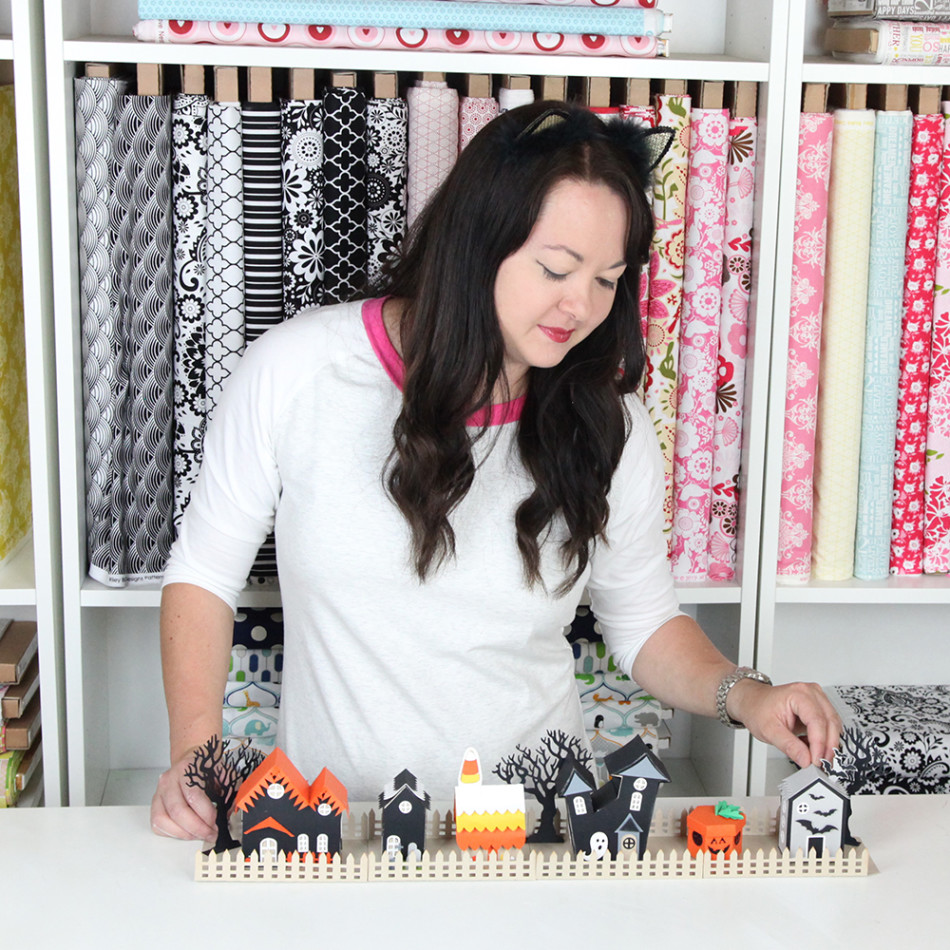
IMG_7894_webThis idea has been in the works for several weeks now. I’m so thrilled to finally be able to present my Halloween Haunted Village! This is made completely from SVGS files that you can purchase from my Silhouette Online Shop or DigiPlayground.com (for other cutting machines).

There are several pieces to this village. You can mix and match or purchase the entire village. Here are the pieces you can buy in this set (links for purchase available 9/21/15):

Pumpkin Mansion
Ghost Mansion
Spider House
Witch Tower
Haunted Tree
Haunted Fence
Coffin
Cat House
Tiny Bat House
Tiny Crow House
Cemetary

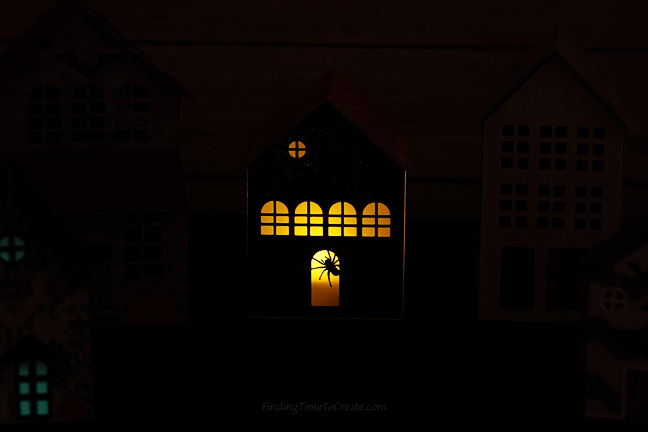
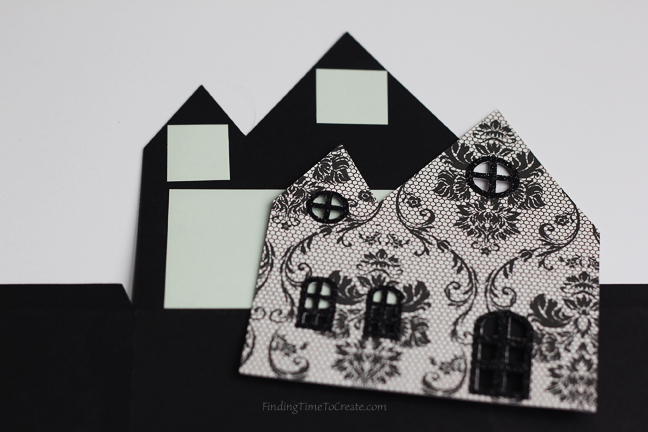
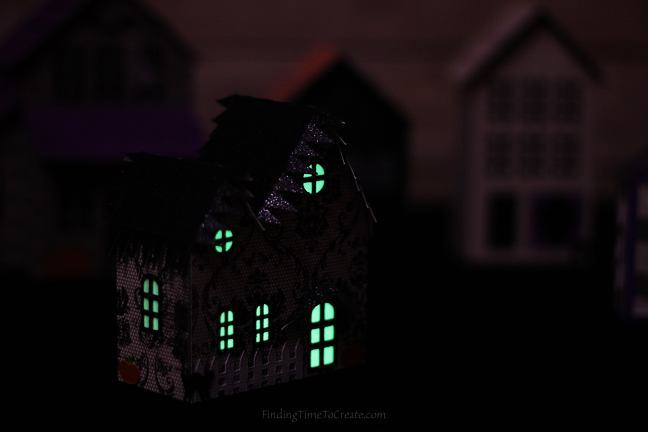
Most of these pieces (in particular the larger pieces) have a circular opening at the bottom so you can place an electric tealight. I can’t describe how awesome this village looks when all the lights are off and the tea lights make these IMG_7899_1_webhouse glow! If you want ALL the larger houses to glow, make sure you use, orange, white, cream, or transparent paper (like vellum) for the bases of your houses. Several of my houses (shown here) use a black or kraft paper base. These do not show the light nearly as well as the lighter based houses.

My kids were thrilled with this set! Charlie ended up playing in my office for most of the afternoon with the lights off, moving around the pieces and tea lights in this set!

IMG_7943_1_web

Of course, this set has a lot of working parts so there is a video on how to assemble it! I cover several of the pieces that I feel will help you. I hope you enjoy it!

Carina

Silhouette Design Store JOANN Stores

Episode 13: Halloween Haunted Mansion for Silhouette and DigiPlayground.com Read More »

2015-2016 Carina Gardner and MiniLou Team Calls!

I’m so excited that we are finally able to open up three calls for a creative team, design team, and style team for MiniLou and Carina Gardner, Inc.! I’ve been wanting to do this for a while now so I’m glad we are getting this in before the holiday season commences.

These are small teams where we send you product in exchange for you coming up with ideas, doing a small write up, and taking photos. All submissions need to be sent to our Marketing Director Jill at marketingdirector@carinagardner.com or marketingdirector@mini-lou.com. Here’s the breakdown:

DIGITEAM_CALL2

For the time being, we are only taking submissions that require physical products from the US. If you are International and want to apply for digital scrapbooking product and/or silhouette files/svg products, we are happy to receive submissions from you!
Have questions? Feel free to email us!

Looking forward to seeing your submissions!

Carina

Silhouette Design Store JOANN Stores

2015-2016 Carina Gardner and MiniLou Team Calls! Read More »

Carina Gardner SVG Files Now at DigiPlayground.com!

DPG-re-grand-opening2

I just got back from a quick vacay with the kids before school begins next week (You can see me taking a leap from a rope swing on my facebook page here). When I opened my email, I found this gem (the image to the left). So the time has come to make a big announcement…

For all of you out there with digital diecutting machines (but not a Silhouette), you can now get my SVG files for YOUR machine at DigiPlayground.com! I have been working on this for the last couple of months and there are files up there ready to go!

Every week, we are working on getting new files up so be sure to check back often. I have a 900 + back log of silhouette files that we are reshaping for your digital diecutting machines and all of them will be available at DigiPlayground. So you will see a mix of new and old going up every week.

Annnddd…to top it off there is a 40% off sale going on NOW through the end of the week (ends August 23, 2015). Take advantage and stock up on some goodies!

Happy cutting!

Carina

PS. Psst, exciting news about MiniLou! SVGs for KIDS ONLY projects and activities are coming soon here: http://digiplayground.com/MiniLou/

Silhouette Design Store JOANN Stores

Carina Gardner SVG Files Now at DigiPlayground.com! Read More »

Episode 12: Circus Party Train Album Tutorial for Silhouette

I’m so excited to share with you my Circus Party Train Album. As suggested, it is an accordion train that fits nicely into a single album. This album is made using my Circus Party papers that I designed for Carta Bella. The album can be purchased from my Silhouette Shop. I hope you enjoy!

Carina

(links will be available soon)

CircusPartyTrainAlbumCaboose CircusPartyTrainAlbumCage CircusPartyTrainAlbumElephant CircusPartyTrainAlbumEngine CircusPartyTrainAlbumEnvelopes CircusPartyTrainAlbumEssentials CircusPartyTrainAlbumLion CircusPartyTrainAlbumPocket

Silhouette Design Store JOANN Stores

Episode 12: Circus Party Train Album Tutorial for Silhouette Read More »

Pen Pal Letters—Silhouette and Digital Scrapbooking Tutorial

IMG_7136_1webI was recently introduced to these amazing letters that you place in Artist Trading Card Page Protectors. The idea was introduced by Janette Lane, and I have been so inspired by what she is doing. Creating these little works of art means quite a bit of scrapbooking paper, washi tape, ephemera, and other little bits and goodies. I have been wanting to make some of these letters for my girls (letters to them when they are older), and created a number of silhouette and digital scrapbooking files so that I can make them. Links for all the current products I have that relate to these kinds of letters are below (in both my silhouette and digital scrapbooking shop).

Be sure you check out Janette and what she is doing because it is truly inspiring!

The image above and to the left I did for my daughter Siri who is a harpist. You’ll notice the envelope at the bottom that I plan on putting her letter in. I’ll also write a few things I love about her on the “I love” card from the starter set. I’ll add a few stories about her growing up on the tabbed set.

I think I’ll hide it away for her 18th birthday. It will be a treat for both of us!

IMG_7117_web

The one below I made for Felicity for her 18th birthday. The envelope is in the left hand corner and I am loving this little fold over scalloped tab I am using in the center top to write a little story about her now. I’m hoping she loves the silly ipod in the bottom left hand corner and the tabbed pieces in the right hand corner (I might throw a few fun pictures in there for her).

IMG_7138_1web

My take on the Pen Pal Letters is simply another way to document bits of our lives for my kids. I love the way Janette is using them to build a fun community and create something beautiful!

IMG_7119_web

Happy pen pal-ing!

Carina

Please note: some products not released yet and links are not available.

DIGITAL SCRAPBOOKING PRODUCTS:

CarinaGardner_penpal_bakingbeachprev copy CarinaGardner_penpal_birthdaygamesprev copy CarinaGardner_penpal_fullprev CarinaGardner_penpal_hellostarterprev copy CarinaGardner_penpal_musicdaysprev copy CarinaGardner_penpal_tabbedprev copy

__________________________________________________________________________________________

SILHOUETTE PRODUCTS:

(link to all the silhouette Pen Pal Letters here)

penpal2.5x3.5letters_verticalenvelopespenpal2.5x3.5letters_horizontalenvelopespenpal2.5x3.5letters_starterpack1penpal2.5x3.5letters_starterpack2penpal2.5x3.5letters_starterpack3penpal2.5x3.5letters_bakingpack1 penpal2.5x3.5letters_bakingpack2 penpal2.5x3.5letters_bakingpack3

penpal2.5x3.5letters_beach1 penpal2.5x3.5letters_beach2 penpal2.5x3.5letters_beach3 penpal2.5x3.5letters_birthday1 penpal2.5x3.5letters_birthday2 penpal2.5x3.5letters_birthday3penpal2.5x3.5letters_days1 penpal2.5x3.5letters_days2 penpal2.5x3.5letters_days3 penpal2.5x3.5letters_games penpal2.5x3.5letters_games2 penpal2.5x3.5letters_games3 penpal2.5x3.5letters_tabbed_h penpal2.5x3.5letters_tabbed_v01penpal2.5x3.5letters_hellopack1 01penpal2.5x3.5letters_hellopack2 01penpal2.5x3.5letters_hellopack3

Silhouette Design Store JOANN Stores

Pen Pal Letters—Silhouette and Digital Scrapbooking Tutorial Read More »

Alphabet Photo Album Tutorial for Silhouette

I’m so excited about my Alphabet Photo Album series that can be purchased from Silhouette. There are so any ways to use this album. Tutorial below along with a few ideas for using this album!

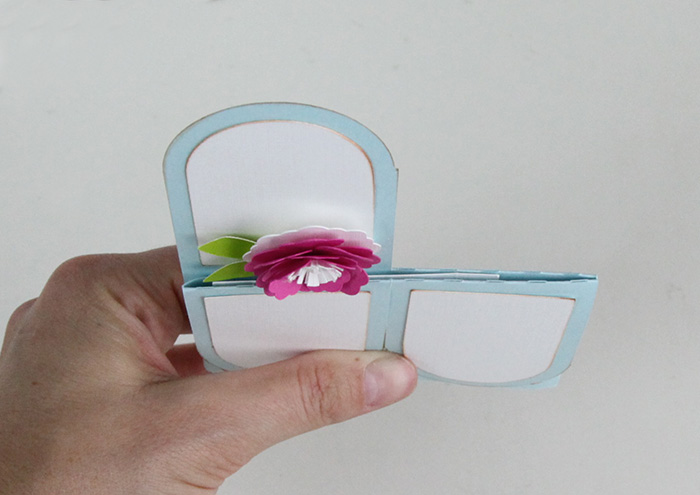
IMG_6845_1_web

IDEAS AND INSPIRATION

1. Cut a single photo into one letter. Simply lay a large photo behind the letter and trim the photo.

2. Use multiple letters together to create a name (like C-H-A-R-L-I-E) and only put photos of that person in it.

3. Choose a theme like S-U-M-M-E-R and capture favorite moments from the season.

4. Add journaling and/or capture a specific photo shoot or time of year.

IMG_6845_1_web1

5. Create an alphabet album highlighting each letter. For example, an apple orchard experience with your children all captured in the letter ‘A’ or a swim party in the letter ‘S’.

6. Do a single letter album to highlight a holiday. For example, ‘C’ for Christmas—

7. Or highlight the holiday by spelling out the holiday like E-A-S-T-E-R.

There are so many great ways to use this album for a gift or keepsake. Here’s how you put it together.

TUTORIAL

1. Cut  out SVG files. You will have two pieces—a front overlay and a back piece with holes for attaching it to other album pieces. (PS All the Alphabet Photo Album pieces go together).

IMG_6837_1_web

2. Use tape or a glue stick to adhere the photograph to the back of a framed window. I used scotch tape, but you may use whatever adhesive you would like to make  your picture stay in place.

IMG_6839_1_web

IMG_6840_1_web

3.Finally, simply place the letter on back piece to create a simple collage of fun photos.

Hope you get to make one of these fun album!

Carina

A_AlbumB_AlbumC_AlbumD_AlbumE_AlbumF_AlbumG_AlbumH_AlbumI_AlbumJ_AlbumK_AlbumL_AlbumM_AlbumN_AlbumO_AlbumP_AlbumQ_AlbumR_Album

S_Album

T_Album

U_Album

V_Album

W_Album

X_Album

Y_Album

Z_Album


Silhouette Design Store JOANN Stores

Alphabet Photo Album Tutorial for Silhouette Read More »

Rectangle Card Boxes Tutorial for Silhouette

I’ve been adding quite a few of these box cards to my silhouette shop recently. They aren’t hard to put together but there are a few steps. Each of my boxes are different so you will need to make adjustments to this tutorial based on the type of box you have purchased.

A couple of notes about these boxes. They aren’t true boxes in that they do not have a bottom. Once you have put them together, you should be able to fold them flat. Some of the boxes come with flaps along the edges (like the whale box) and some come without (like the ice cream box).

Here’s how to put it together:

1. Cut out the svg files. Glue accent pieces to the outside of the box. Note that most of these boxes should have a large accent piece on the back of the box AND the inside of the box. Usually you just need to cut the piece twice but on some of the designs the inside is different than the accent piece on the outside.

IMG_6811_1_web

IMG_6812_1web

2. Glue the flap on the main piece to the back of the box to create the main box.

IMG_6814_1_web

It should look like this:

IMG_6817_1_web

3. Glue on all the accent pieces to the inside pieces (for example, the whale on the back piece shown here). Then fold on glue flap forward and one glue flap backwards.

IMG_6818_1_web

IMG_6819_web

4. Next glue the flaps into the box. Space the different pieces inside evenly. Most of these boxes come with 2-3 inside pieces. You can also fold the box flap to glue down the box pieces. Some of the boxes come with a single inside piece and a couple of little accessories (usually an object on a stick) that you just glue directly to the box.

IMG_6821_1_web


IMG_6823_1web

And that’s it! It’s a cute card or fun gift idea!

Hope you have fun making these!

Carina

DS-9.3W-CG-babyboxcard DS-9.3W-CG-deerboxcard DS-9.3W-CG-icecreamboxcard
DS-9.3W-CG-jukeboxcard
DS-9.3W-CG-unicornboxcard
DS-9.3W-CG-whaleboxcard1

Silhouette Design Store JOANN Stores

Rectangle Card Boxes Tutorial for Silhouette Read More »

Filled Basket Silhouette Tutorial

DS-16.5W-CG-strawberrybox

I probably redesigned this basket a half a dozen times but I think it was worth it! The end result just makes me smile!

These little baskets are 3D and take a bit of time (and creativity) to put together. Stick a little gift card in it for a friend or use it for home decor! These baskets DO NOT fold flat (they have a full bottom on them).

I hope you get a chance to make one of these darling little baskets! You can fill them as “full” as you want with the addition of little “bits” that can be glued in the front or back. You also have the option of making this front and back (by gluing the accessories —like flowers or strawberries) to the front and back of each piece).

DS-16.5W-CG-flowerbasket

Here’s how to put these together:

1. Cut out the svg files.

2. Glue the accent pieces to the main box. This includes the side squares and the “lid” accent pieces.IMG_6380_web

2. Next glue down all the embellishments (like the strawberries or flowers) to the inside pieces (shown below in kraft paper). You can pop dot them but because mine was full, I chose to simply glue them down. Add any embellishments (like diamonds to the centers of the flowers) at this point. Note: You can finger press anything at this point to add dimension. You’ll see that with the flowers, I chose to only glue the centers and finger press the petals to give the flowers more depth.

3. Next, you’ll need to glue in the tabs. You can see I got a little picture crazy with this because it’s a little hard to explain. I like gluing in the center piece (with the handle) first. I fold one tab forward and one tab backwards. You can see in the photo below, I glue that handle piece to the center of one of the sides of my box.

IMG_6382_web

I then glue the front piece on (as shown below). I glue the flap going forward like the handle piece.

IMG_6383_web IMG_6385_web

I then glue the back piece on. You’ll notice that I try to evenly space them.

IMG_6386_web

Fold up the box and see how you are doing on your spacing. This will also help you gauge where to glue the opposite side flaps on.

IMG_6391_web

4. Glue the inside pieces to the opposite side of the box. I like to just glue one of the flaps first. I started with the first inside piece (you can see in the photo below). I placed hot glue on it (you can use any kind of adhesive you want) and then positioned it to the opposite side of the box.IMG_6392_web

It should look like the photo below.

IMG_6394_web

I finish gluing the other two flaps onto the opposite side of the box.

5. Once I have all the middle pieces positioned, I then glue the rest of the box together.

IMG_6401_web

IMG_6402_web

From the top, it will look like this (see photo below).

IMG_6408_web

6. There may be several accent pieces in the file you have. For example, there are “strawberries on a stick” in the strawberry basket file as well as some greenery. I placed the strawberries randomly in the box and glued them to the front of the box and behind the inside pieces. I glued the greenery to the front of the box. For the flowers, I simply added some flowers to parts of the box to give it a more “full” look.

IMG_6412_web

DS-16.5W-CG-strawberrybox

The point is to add some depth to the boxes contents.

Hope you have fun making one!

Carina

DS-16.5W-CG-flowerbasket DS-16.5W-CG-strawberrybox DS-16.5W-CG-butterflybasket1

Silhouette Design Store JOANN Stores

Filled Basket Silhouette Tutorial Read More »

Layered Cake Tutorial for Silhouette

DS-15.6W-CG-layeredweddingcake

There are lots of weddings happening around me, and I was inspired to make some cake! Some Silhouette Cake of course!

These layered cakes are all put together about the same way (with some slight deviations based on design). You can mix and match the designs (like using the butterflies with the scallop shapes of the flowers) because all of the cakes are made exactly the same size.

The crazy thing is that these are even cuter in real life! I think we might have to leave these out in the office for a while to enjoy them!

Check the bottom of the post for links to specific designs you can find in my Silhouette Shop!

Here’s how you put these sweet treats together:

DS-15.6W-CG-butterflylayeredweddingcake1. Cut out all the svg files.

2. Layer with adhesive (or pop dots as shown in my picture) the bottom mats with the small one on top of the larger one.

IMG_6421_web

3. Put together the main form of the “cake” by gluing the boxes together. Put adhesive on the glue flaps to form the sides of the box.

IMG_6428_web

4. Place the matching “top” to the box and glue down the sides.

IMG_6431_web IMG_6433_web

You should have three (or more) boxes finished.

IMG_6437_web

5. Glue the boxes to the mats in order of largest to smallest.

IMG_6439_web IMG_6440_web

6. Finally, embellish the cake the the decorative items that come with the cake. I like a diagonal design but you can place them any way you want! For the topper, I try to use the biggest item (like the cut out butterfly) or gather together several of the same items (like 4 flowers all together). I used embellishments (like little diamonds or pearls to help accessorize).

IMG_6443_web IMG_6446_web

And that’s it! You’ve made a darling layered cake! Hope you had fun making it!

Carina

(Links available as the product becomes available)

DS-15.6W-CG-butterflylayeredweddingcake DS-15.6W-CG-layeredweddingcake

Silhouette Design Store JOANN Stores

Layered Cake Tutorial for Silhouette Read More »

Mobile Tutorial for Silhouette

teddybearmobileThis week among my Silhouette releases are mobiles. They do take some time to put together but they are really cute and make the cutest party and home decor items!

I use a lot of solid papers for this project and was loving my hot glue gun because it made putting it altogether quick. The “umbrella” piece at the top can be used for more than just the mobile (size down for umbrella drinks or other party items).

Here’s how to put this together:

1. Cut out the pieces as shown in the file.

2. Glue all the accent pieces to the top of the “umbrella”. (Note you can do this between Steps 4 and 5 as I show in the photos as well.)

3. Fold on the scorelines of the “umbrella” and place a ribbon with a knot on the end of it in the center hole. If you want to place hanging icons from the center ribbon, leave a long tail.

IMG_6255_web

4. Glue the flap of the “umbrella” together with the ribbon in the center.

IMG_6258_web

5. Put together the “object” you will be placing on the mobile. For example, if you have the teddy bears, assemble each teddy bear individually. If you have the floral mobile, you can finger press the petals and make each flower individually. For my mobiles, I had 4 ribbons—the center ribbon, and three shorter ribbons. On each of the short ribbons, I hung two objects each. For the center, I hung 3 objects. So that is a total of  9 objects, right? But you have to DOUBLE that number, because you will want to make each object DOUBLE-SIDED since they will be floating. So I cut out 18 objects in total for each of my mobiles. Feel free to change up the number and size of your objects. (e.g. the scallop frame mobile only uses 3 frames so I only cut out 6 pieces in total).

If you left a long tail for the center ribbon, you can add you objects directly to that center ribbon. If you did not, you can always easily knot another piece of ribbon to the center knot. Place two or three objects on this center ribbon and space carefully. Glue one side of the object onto the ribbon first, then sandwich the ribbon by adding a second object.

IMG_6262_web

6. Add the other ribbons with either tape or hot glue. Be sure to space them into thirds if you are using three more ribbons. Add objects to these ribbons as well.

IMG_6304_1_web

And that’s it! It’s a lot of cutting and gluing but makes for an awesome project! Hope you have fun making these!


***NEW: Tutorial for putting together the airplane in the Airplane Mobile

I added this little tutorial because putting together the airplane (while not complicated) is a little hard to see in the photos. So here is how you put these together.

1. After cutting out all the pieces, you will want to add all the accent pieces as MIRROR IMAGES. Then fold the tail wings out. You can see that the tails on both cut out pieces are folded out to opposite sides. You need to put everything on as a mirror image so that you have accent pieces on BOTH sides of the airplane.

IMG_6499_web

2. To place the planes on the ribbon, you will sandwich the ribbon between the two planes. Glue together the sides without the accent pieces.

IMG_6503_web

3. You can add the wings at this point (with the ribbon sandwiched between the two planes) or you can do this before you add the plane to the ribbon.

IMG_6506_web

Here’s a final look at the airplane from the top view.

IMG_6507_web

Hopefully this helps you put together the airplane mobile!

Carina

PS. Other goings on at CGInc and ML : MiniLou Kickstarter Video, MiniLou Online Shop Opening, Release of my CartaBella line Circus Party

Links to my mobiles in the Silhouette Store

teddybearmobile sunstarmoonmobile scallopframemobile floralmobileairplanemobile_1

Silhouette Design Store JOANN Stores

Mobile Tutorial for Silhouette Read More »

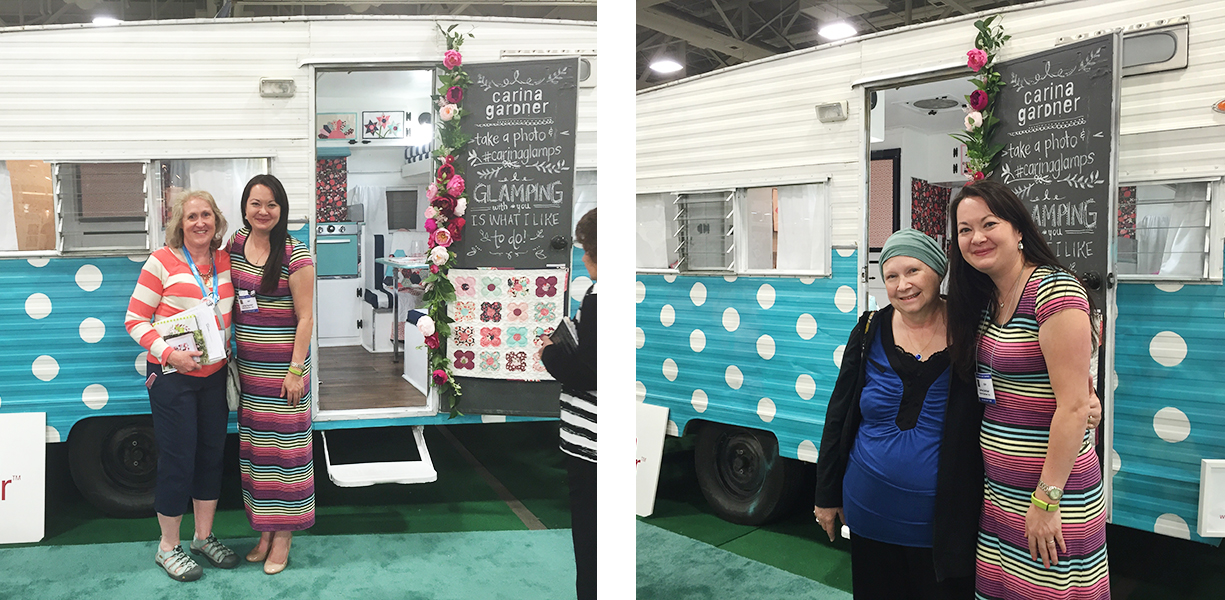
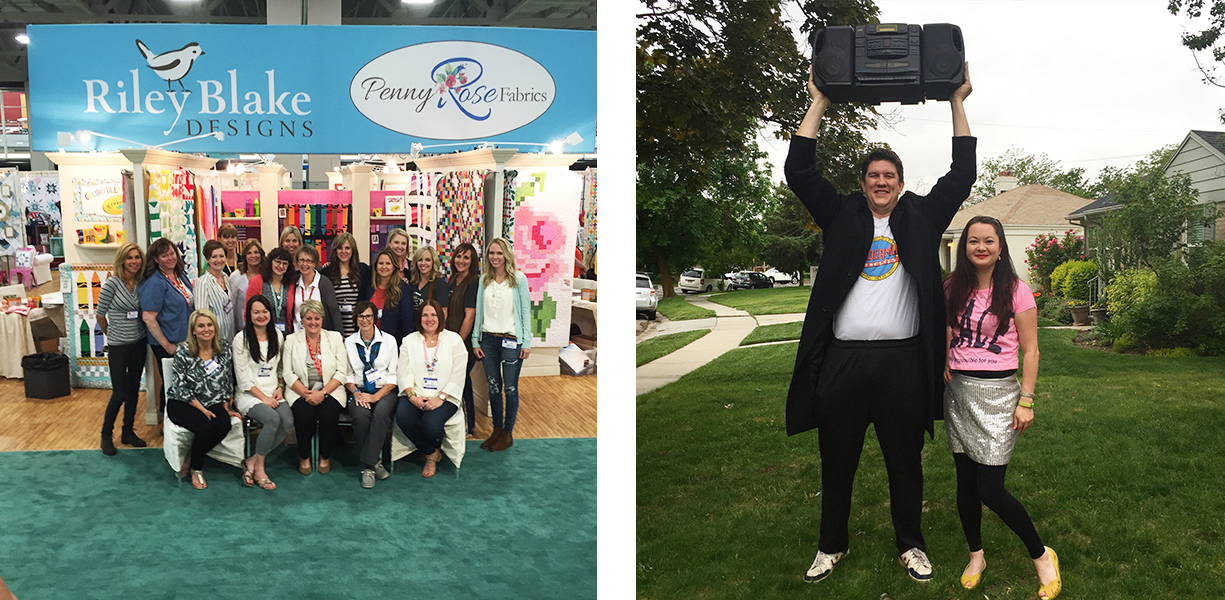
Riley Blake Blog Tour

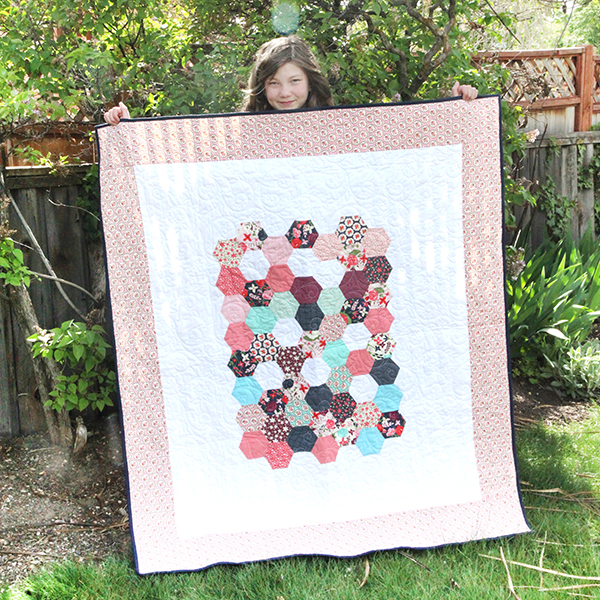
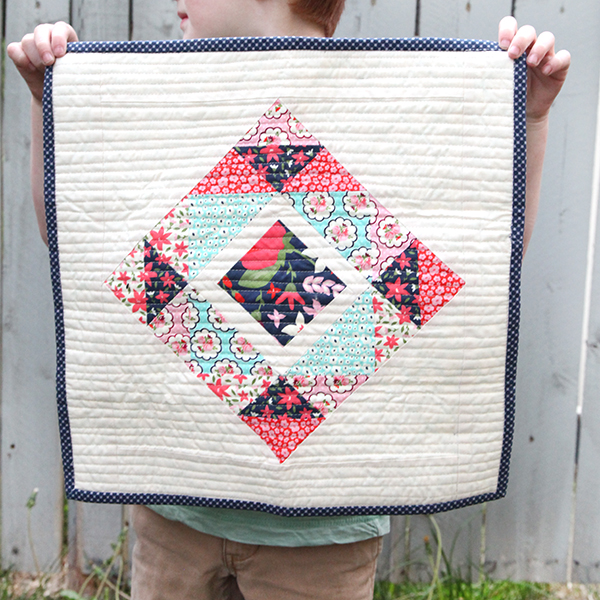
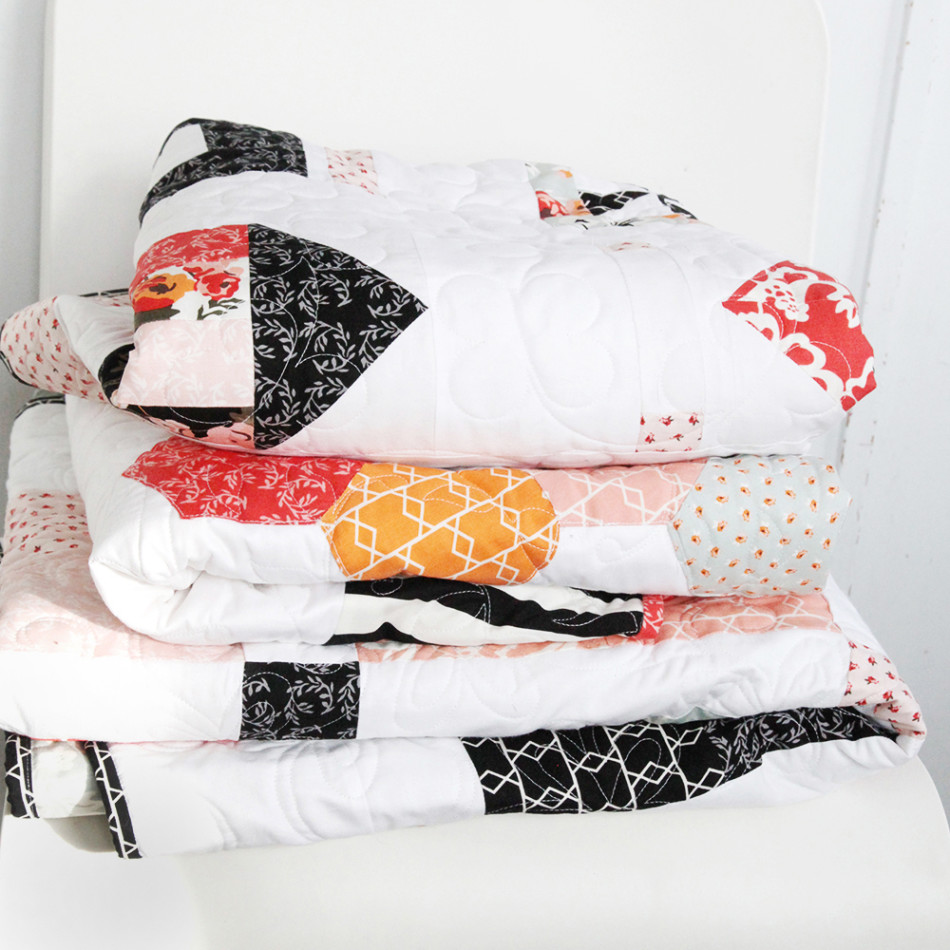
Hexiquilt_webI’m finally back from Quilt Market and so excited to be part of the Riley Blake Blog Tour! I have a few pics from Quilt Market in Minneapolis in this post too.

So building Wiltshire Daisy began with color. That doesn’t always happen for me. I generally start with a concept and begin drawing the master fabric from an image in my head. This time I knew I wanted to create a gray and pink colorway. I began drawing the cabbage roses and started adding little drops of orange and yellow into the mix. Yellow and pink are two of my favorite colors together (I call them citrus—lemon and grapefruit). It seemed natural at that point to also throw in the orange (for some extra citrus flavor).

(photo to the left—Baby Hexi Quilt—free pattern coming to the blog in the next two weeks / photo below, right—Me at Quilt Market arranging my booth / photo below, left—my girls sporting Wiltshire Daisy dresses I whipped up one Sunday for church)IMG_9517_web1

Wiltshire Daisy is probably my favorite line to date. It’s very soft and shabby chic. (photo below, right—Little Love Nest Ruffle Dress for the 18 inch doll in the gray master fabric / photo below, left—my Quilt Market booth in the Riley Blake Booth with Emily Taylor)

IMG_9517_web2

If you love this fabric, make sure and take a peek at the free Around the World Quilt pattern here. You can also follow me on instagram to see what else I’m making with this fabric (as well as a sneak peek at my fall line for Riley Blake!).

Happy Sewing!

Carina

PS My new kids company MiniLou has 23 days left in the MiniLou Kickstarter Campaign. Check out our cute video!

CHECK OUT THESE OTHER STOPS ON THE BLOG TOUR!

5/15 – Where Women Cook
5/18 – Becky Marie Designs
8/18 – Pattern Anthology
5/19 – Carina Gardner
5/21 – Lori Holt
5/21 – Tasha Noel
5/22 – Lori Whitlock
5/22 – Cinderberry Stitches
5/23 – Eleanor Dugan
5/26 – Simple Simon
5/26 – The Quilted Fish
5/28 – Melly & Me
5/28 – Elea Lutz
5/29 – Zoe Pearn
5/29 – Doohikey Designs
5/30 –Samantha Walker
5/30 – Kelly Panacci
  Silhouette Design Store JOANN Stores

Riley Blake Blog Tour Read More »

MiniLou Kickstarter Campaign

The video below has been my life the last week! Seriously. Armed with my amateur video software and a style vision, I video taped, animated, and coaxed children into speaking into my hilariously big microphone. Totally worth it! Check out this 1 minute of cuteness!

Somehow it seems fitting that this campaign goes live on Mother’s Day since MiniLou was inspired by my children. Feel free to read my story on the Kickstarter page here.

So what is this all about? Ever since starting MiniLou seven months ago, I knew that we were going to need additional funding to bring in more products. So far, MiniLou is 100% funded by me. Kickstarter is a platform where you can become a member of my campaign and receive certain benefits for being a part of the MiniLou community.

The money funded by the project will go towards making three new pocket paper pals (Hansel and Gretel by Carla Chaves, Zombie Apocalypse by Emily Taylor, and Family Farm by Katie Jarman) and one new coloring book (Preston the Pirate by Deena Rutter).

minilou_pocketpaperpal_newinventory copy

In return, we have some amazing rewards for our backers. In addition to rewards where we send you MiniLou products, most of the levels have an awesome printable (or multiple printables) so that those out of our mailing range will get something as well. The downloads will be exclusive for Kickstarter members only. Check out the rewards on the sidebar here:  https://www.kickstarter.com/projects/1022554917/miniloucreative-play-for-kids.

minilou_coloringbook_kickstarter_blog

minilou_coloringblock_kickstarter_blog

minilou_pocketpaperpal_kickstarter_blog


Want to help me spread the word about our Kickstarter Campaign (or just show the video to your friends and kids)? Here is the link: https://www.kickstarter.com/projects/1022554917/miniloucreative-play-for-kids.

I really can’t thank you enough for your help on this! Starting a new business (and maintaining your current one) is draining, time-consuming, and stressful. But it has been soooo worth it. Bringing a little more beauty, a sweet new memory, or a new avenue for imagination makes what I do rewarding. I am grateful for your support for CGInc and MiniLou!!!!!

Thank you again for being a part of my two little companies!
Carina

The MiniLou Kickstarter Campaign
On instagram: @miniloukids
On facebook: https://www.facebook.com/miniloukids

Silhouette Design Store JOANN Stores

MiniLou Kickstarter Campaign Read More »

Vellum Top Boxes for Silhouette

vellumtopcircleopeningboxThis week I made a bunch of these darling little vellum topped boxes. They make the cutest favor boxes and gift items. You can purchase them from the Silhouette Shop here.

All the boxes that work with this tutorial (and links!) are down at the bottom of this post.

Here’s how to put together these boxes:


_____________________________________________________________________________________

1. Cut out on Silhouette files. The main body of the box is shown in kraft paper. I used plain velum to go underneath the circle cut out on top, and a patterned blue paper for the accent panels.

2. Fold scored lines on the box. This creates a visual image of where your accent panels should be placed.

IMG_6224_web

3. Glue vellum or transparent paper to the INSIDE of your folds into the opening on the top to create a “peek-a-boo” window.

IMG_6227_web

4. Glue accent papers into place using adhesive. I used a glue gun to put it together quickly. A glue stick or glue dots would also work great.

IMG_6230_web

5. Finally, put glue on the flaps and attach the sides of the box to finish the box.

IMG_6242_web IMG_6246_web IMG_6252_web

And that’s it! It’s the best little party, wedding, or birthday favor box or treat box!

Happy crafting!
Carina

vellumtopbirdbox vellumtopbutterflybox vellumtopcircleopeningbox vellumtopdewbox vellumtopdinosaurbox vellumtopfloralopeningbox vellumtopscallopbox vellumtopsinglebracketbox vellumtoptulipbox vellumtopvinebox

Silhouette Design Store JOANN Stores

Vellum Top Boxes for Silhouette Read More »

Folding Flap Sliding Box Tutorial for Silhouette

FoldingFlapSlidingBox

I know so many of my posts these days are Silhouette tutorials. I hope that they are so helpful for those of you that are “making” with your machines.

This cute little box is created with an “envelope” folding flap. Here’s how to put it together.

1. Cut out the silhouette files.  The main body of the box I cut out in white and the flap in kraft paper. The accent papers are in pink.

2.This box is double enforced—that is, I created it so that the sides of the box are stronger by doubling up the paper. So you have to fold all the score lines on the box and then glue down the extra flaps. Do this to all four flaps.

IMG_5866_web

IMG_5862_web

3. Then put glue on the glue flaps and attach the sides of the box together to finish the box.

IMG_5871_web

4. To create the flap, glue down the accent pieces to the main flap. Be sure to match up the small, half circle notches on the accent paper and the flap.

IMG_5898_web

5. Fold the flap around the box and attach using the notch. You can use a clear sticker or use the notch to hold the flap together.

IMG_5899_web

And that’s it! There so many uses for this cute box from favor boxes, small gifts, or even as a card.

Happy creating!

Carina

Silhouette Design Store JOANN Stores

Folding Flap Sliding Box Tutorial for Silhouette Read More »

Star Decor Instructions for Silhouette

IMG_5921_webI’ve had a lot of questions about my Metal Star Accents and in particular if I was going to make a base for this. So here they are! I have a 5 pointed star and a 6 pointed star made completely from paper! You can use the accents on them but will need to resize them to fit your star (The metal star accents were created to be used with a METAL CRAFT STAR that you can purchase from your local craft or scrapbooking store. They will need to be resized to fit on these paper stars.) If you are looking for links to all of these products, I have put them at the end of this post. You can also check out my Silhouette shop for more products like this.

Putting together these paper stars is pretty easy. You can, of course, sized down your star. The photo to the left shows you how large the star is if you cut it at it’s original size in the file. It requires a Cameo (12 x 12 papers) but if you size it down you could make a smaller star on your Portrait.

Here’s how to put it together:

1. Cut out five pieces of the same sized triangle shape on your machine for the 5 pointed star and six pieces of the 6 pointed star.

2. Fold at all the score lines. (Use the photo here as as guide).

IMG_5901_web

3. Glue the flap of the star and connect it to another point of the star.

IMG_5908_web

4. Continue adding points to the star until you come to the first point.

Note: If you plan on adding the metal star accents, I would do this at the 2nd step while the star is flat. You can use modge podge for a glossy look or simply use a hot glue gun, pop dots, or a glue stick to put on the metal star accents.

Hope you have fun making these!
Carina

5metalstardecorbottom_NEW 6metalstardecorbottom butterflymetalstardecor flowermetalstardecor happybirthdaymetalstardecor polkadotmetalstardecor rosemetalstardecor starmetalstardecor stripemetalstardecor  swirlmetalstardecor

fallmetalstardecor

Silhouette Design Store JOANN Stores

Star Decor Instructions for Silhouette Read More »

Travel Stories Album for Silhouette

Watch the Travel Stories Album video for an introduction into my Carta Bella Paper line and how to put together the album using SVG files from my Silhouette Shop! The final size of this album is about 5.5 inches x 11 inches (with a few things pocking out like tabs and pages).

I am so excited about this album especially because I love some of the little add ons. In particular, I adore the filmstrips that go in this collection and plan on using them not just for the album but for lots of other projects.

IMG_5760_1_web

IMG_5764_1_webI hope you get a chance to play about with this paper line and/or the silhouette files! I also hope you have a GREAT excuse to make an album (aka, an amazing summer adventure perhaps?).

Happy Crafting!

Carina

____________________________________________________________________________

TravelStoriesDeepPocketAlbum   TravelStoriesHalfPocketwithLayeredBracketNotes TravelStoriesHotAirBalloonLayoutAlbum TravelStoriesPhotoFilmStrips TravelStoriesSidePocketAlbum TravelStoriesTabbedAlbum

Silhouette Design Store JOANN Stores

Travel Stories Album for Silhouette Read More »

3D Intricate Cutout Boxes for Silhouette

3dlatticebirdboxThese little intricately cut out boxes are one of my favorite projects right now! I can imagine them hanging in some overhead branches for a party or as little electric candle holders on a table. Any way you decide to use these, you will love the effect!

Here is the quick tutorial (and tips) for putting these intricate cutout boxes together.

1. Cut out the silhouette file.  The main body of the box is about 2 inches deep, wide and tall. It fits on an 8.5 inch x 11 inch paper.

2. Fold all the score lines and glue all the flaps to create the main body of the box.

IMG_5768_1_web

3. Fold up all the “circle” pieces at the top of the box. For dimension, you can finger press the triangle piece at the top to give it some curvature. You can also create a straight box by folding all the triangle pieces flat and putting a ribbon through all the pieces at once. However, if you want the box to have dimension, “sew” the ribbon through each of the holes individually. Hint, fold UP the circles at the top. There will be slight gaps between the triangles once the ribbon is tied on.

IMG_5770_1_web

IMG_5785_1_web

Other notes: This box can be scaled larger or smaller. Cut at a slower speed on your machine for to catch all the fine details. A sticker mat will also help the cutting process on these!

Hope you have fun making these!
Carina
(for all my silhouette designs, visit my silhouette store at http://www.silhouettedesignstore.com/?page=view-artist&artist_id=252689).

3dlatticebirdbox3dlacybox 3dmotherbox

3dbutterflybox 3ddecorativebox 3dfatherbox 3dstripesbox

Silhouette Design Store JOANN Stores

3D Intricate Cutout Boxes for Silhouette Read More »

Wiltshire Daisy Around the World Quilt Pattern—Free Pattern Download

IMG_5413_1_web_blogThe Wiltshire Daisy™ Around the World Quilt has been my Sunday sewing for quite a few weeks now. This is one of those quilts that it didn’t seem to matter how I photographed it, it still looked better in person than through the lens of my camera.

And I am SUPER excited to share with you a really great contest that I’m teaming up with Emily Taylor and Riley Blake for you to do!

First of all, everyone WINS because each of us has a free quilt tutorial for you to download. Mine is the Wiltshire Daisy Around the World Quilt and Block (scroll down to the bottom of the post). Riley Blake’s Tulip Chain Quilt and Emily’s Florabella Fancy Quilt are so adorable! To make it easy for you guys, for a short period of time, you can just go to the PatternJam site (click here) and download all three patterns at once.

freequiltpatterns_1

IMG_5347_2_web
IMG_5371_1_web_blog

Second, we are throwing an amazing contest so that you can win the FABRIC TO MAKE YOUR QUILT AND $100 VISA GIFT CARD. I know, right?

Here’s what you get to do:

Go to PatternJam.com and customize the Floribella Fancy Quilt, Around the World Quilt, and/or Tulip Chain Quilt using the Emily’s Florabella, my Wiltshire Daisy, and/or Riley Blake’s Solids. It’s seriously so fun to do!  There you will see instructions for making the quilt using the Pattern Jam software  and you can pin it to the contest Pinterest board. The most pins wins the contest so make sure and spread the word and get people to pin your quilt!

Here are a few steps to help you if you want to enter:

1. Be a part of the Pinterest Board—http://love.patternjam.com/design-contest/
2. Go to PatternJam.com and register: https://patternjam.com/ by clicking on GET STARTED NOW.
3. Click on DESIGNER PATTERNS> Choose Either Around the World, Tulip Chain, or Fancy Florabella.
4. Once you have chosen a quilt, then choose FABRICS and choose either the Riley Blake Solids, Wiltshire Daisy, or Florabella fabric (or a mix of them).
5. Once you have designed a quilt, save it to your library. Click on MY ACCOUNT and you can see your library and PIN it from there.
6. Join the contest board here.

If you just want to download my Wiltshire Daisy Around the World Quilt, you can do that below:

carinagardner2015_wiltshiredaisy2inchquilt_web

The Pinterest Contest goes until April 24th! So go and make some fabulous quilts!
Carina

Silhouette Design Store JOANN Stores

Wiltshire Daisy Around the World Quilt Pattern—Free Pattern Download Read More »

Wiltshire Daisy Fabric Collection

wiltshiretitlepage_webIt has only taken me a month to finally post about my newest collection Wiltshire Daisy for Riley Blake. I’ve already seen so many amazing projects and even have a couple of my own to share soon. If you haven’t seen the collection, I’m posting my digi magazine of it here for you to enjoy. It may take a minute to load on your computer so if you see a blank space below, give it a second:).

_______________________________________________________________________________________________


I debut my second 18″ doll panel in this collection. It includes a blouse, capris, headband, and handbag. There are photo instructions on the Riley Blake blog here if you want to see them (the capris are done a little differently then my instructions, but are still so very cute!). AND I have illustrated instructions now available here.

wiltshiredaisyinstructions_blog

Hope this makes you sew happy!
Carina

Silhouette Design Store JOANN Stores

Wiltshire Daisy Fabric Collection Read More »

Pocket Albums, Window Album, and Flower Ornament Instructions for Silhouette

squarephotopocketalbumYou’re getting a little bit of everything from my releases this week so scroll on down to the tutorial that applies to you! It’s been a busy spring break, and I’ve been wanting to make some albums since coming back from Park City and St. George. I hope you have fun with these!
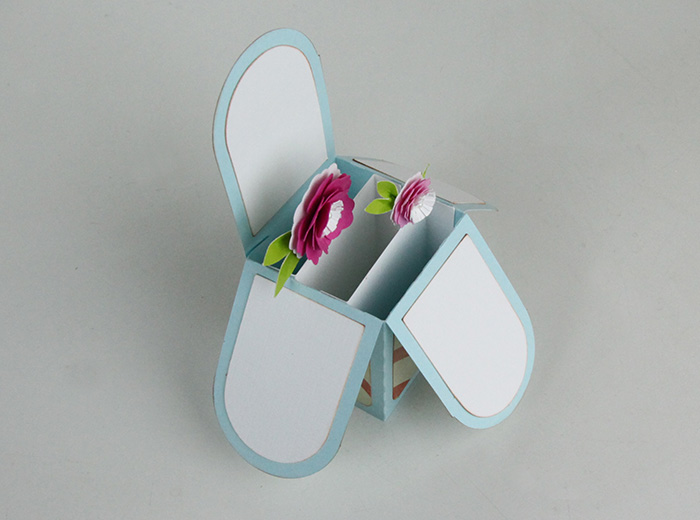
4 INCH SQUARE PHOTO POCKET ALBUM
LINK TO THIS ALBUM >>>
These albums are built for a 4 inch photo. Specifically, I like instagram photos for these pockets but it could even be 4 inch x 6 inch photos you have cut down. You can put a photo or write in a title on the front bracket emblem on the cover page. It’s completely up to you!
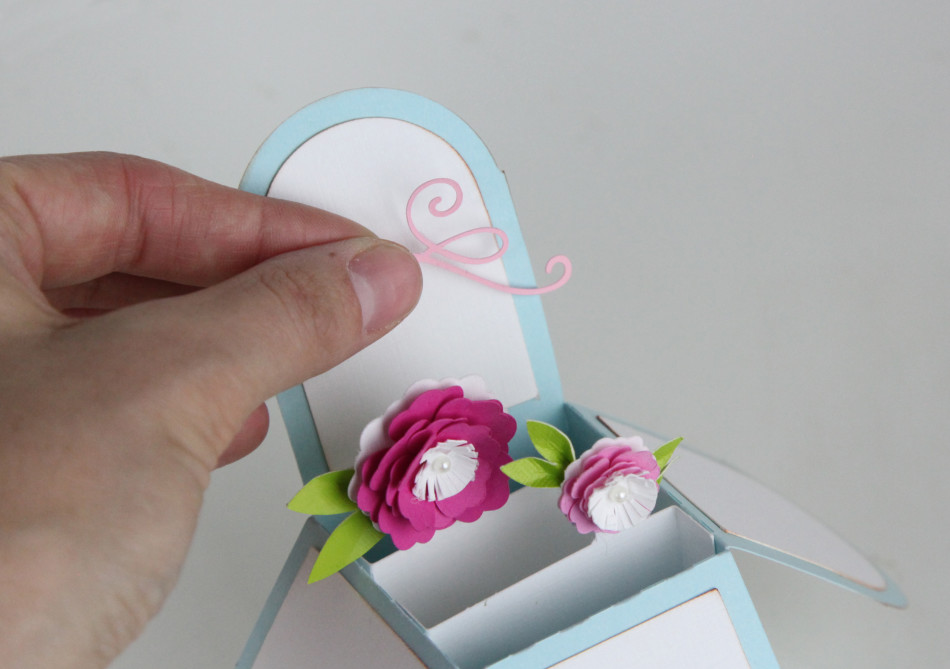
1. Cut out all the pieces in the svg file. I used kraft paper for all the main pieces and colored paper for the accent pieces. I cut out two cover pages and several pocket pages.

2. Fold along the score lines. Fold over the pieces with the bracket shape to create the pocket. Use glue (I like hot glue or a photo-friendly adhesive) on each of the glue flaps and create the pocket. There are two flaps that need to be glued (see photo below).

IMG_5551_1_web IMG_5554_1_web

3. Glue the accent paper to the front of the pocket and add a journaling card (available with the svg file) or a photo.

4. Create the cover by layering the 4 inch square (the same one used for the pocket inserts), then the bracket without the window, then finally the bracket shape with the window. Place a photo or title between the two bracket pieces if you want. I used pop dots but you can also simply glue everything into place.

5. Use ribbon, O-ring, or twine to put the album together.

4 INCH  x 6 INCH HORIZONTAL PHOTO POCKET ALBUM AND WINDOW ALBUM
LINK TO 4×6 HORIZONTAL PHOTO POCKET ALBUM >>>
LINK TO 4×6 WINDOW PHOTO POCKET ALBUM >>>
4x6horizontalphotopocketalbum 4x6windowphotopocketalbumThese two albums are meant to fit your 4 x 6 photos and are quick to put together. Because most of us are generally working with 12 inch x 12 inch paper, it was necessary to have a separate pocket piece that you attached to a cover piece to create a “page.” Note that the pockets for the Window Album can be a bit flimsy and I suggest either using heavy stock or cut a piece of transparency or other clear paper to create the window and hold in the photos. I also recommend setting this album under a stack of books once it is glued to make sure the thin areas that create the “window” are study and straight.

These two albums also work together if you wanted some window pockets and some horizontal pockets. So mix and match away!
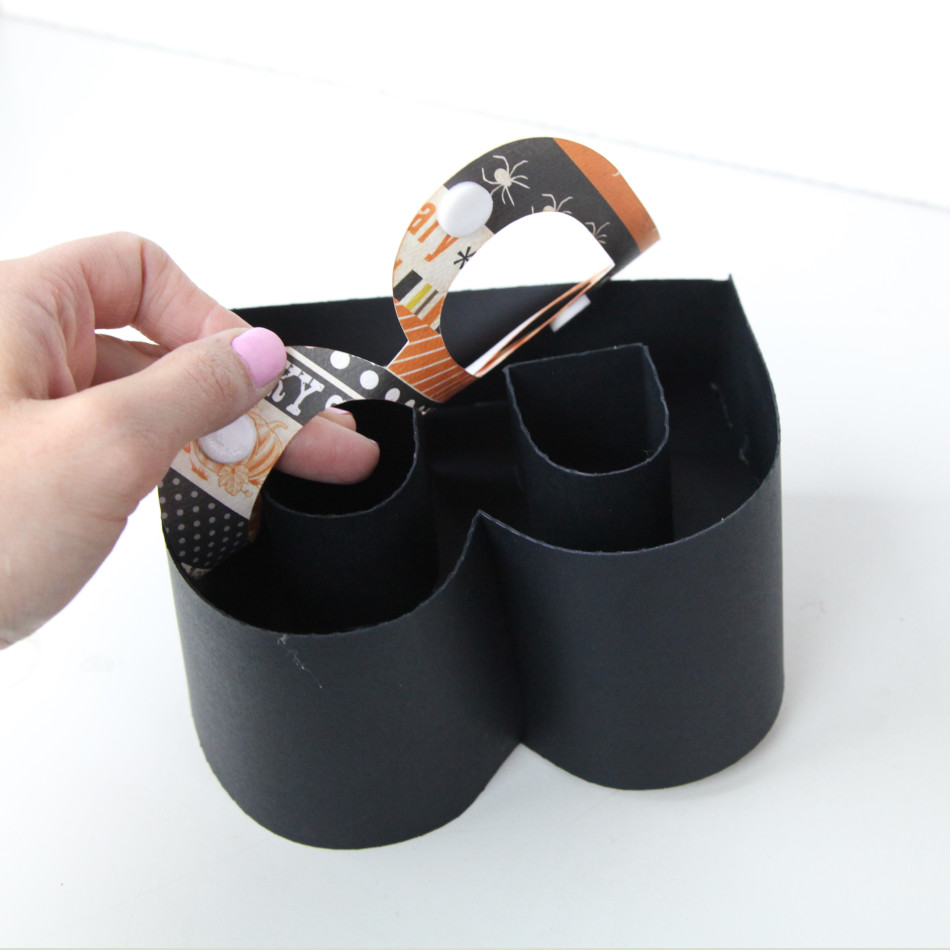
1. Cut out all the pieces in the svg file. I used kraft paper for all the main pieces and colored paper for the accent pieces. You will need to cut out two cover pages and for each “pocket page” you will need one cover page and one pocket piece.

2.  Fold the score lines of the pocket piece. Use glue (hot glue or a photo-friendly adhesive) on each of the glue flaps and create the pocket. There are three flaps that need to be glued (see photos below).

3. Glue the accent paper to the front of the pocket for the Horizontal Album. Add a journaling card (available with the svg file) or a photo.

4. Create the cover by layering the cut outs as shown in the two images.

5. Use ribbon, O-ring, or twine to put the album together.

4X6 Horizontal Album (Glue Flaps)IMG_5555_1_web IMG_5565_1_web

IMG_5559_1_web

4X6 Window Album (Glue Flaps)

IMG_5567_1_web IMG_5572_1_web

DaffodilOrnamentDAFFODIL FLOWER PHOTO ORNAMENT
LINK TO THIS PROJECT >>>
If you are looking for a cute, quick project, these flower ornaments are so fun. I can see using them for kids projects or fun home decor.

1. Cut out all the pieces in the svg file. This file is only three pieces but if you wanted to layer up the petals more you could.

2. Attach the center of the flower (orange) to the yellow petals WITHOUT the ribbon hole, but gluing the tabs to the back of the hole. (See photos below). Two of the “scallops” will overlap once the center is completely done. (See photo below.)

3. Attach a photo between the two yellow petal pieces. Glue the yellow pieces together.

4. Add ribbon or twine to hang.

IMG_5574_1_web IMG_5577_1_web IMG_5579_1_web

SpringtimeFlowerOrnamentSPRINGTIME FLOWER PHOTO ORNAMENT
LINK TO THIS PROJECT >>>
This one is really basic to put together. It also cuts quick on your machine.

1. Cut out all the pieces in the svg file. This file is only four pieces but if you wanted to layer up the petals more you could.

2. Attach a photo to the back flower piece (with the hole for hanging the ornament). Layer and finger press all the petals. Glue them down.

3. Add the short center cut out (shown in white) last.

4. Add ribbon or twine to hang.


Hope you have fun creating these!
—Carina

Silhouette Design Store JOANN Stores

Pocket Albums, Window Album, and Flower Ornament Instructions for Silhouette Read More »

Digital Scrapbooking, St. George, and Stuff

IMG_5250_1_webI’m going to admit something right off the bat and that this is a procrastination post. I just looked at my list (a mile long) and really all I want to do is snuggle up in front of the TV and start a new show (like Call of the Midwife or Death Comes to Pemberley…anyone seen either of those?). There is a time and place for everything and tonight, well, tonight the work comes first.

Before you feel too sad for me, I just got back today from a short weekend getaway with my family in St. George. I loved seeing Charlie romp, climb, and dig in the slot canyon, the sand dunes, and the park. The girls swam and swam and swam (did I mention the water was cold?—oh to be young again).

While I was gone, I got some awesome photos from my amazing machine quilter Michelle Jensen (@mixiheart on instagram), and I’m so excited to share the pattern soon. It will be free along with an awesome collaboration with pattern jam (more on this to come).

Annndd, while I wish I could say I didn’t work at all while I was gone, I was happy to spend one night getting my digital scrapbooking done for this week. Two weeks ago I came out with a Spring Sunshine Paper Pack and this week I’ll have tags for them. I even managed to put together a couple of layouts. Making the layouts reminded me of all the things I needed while digi scrapping. I see a big collection in my future:).

Print

(Layout above: Papers and Tags from Spring Sunshine, Ribbon from Bella Bella 2 Thick Ribbons)

Print

(Layout above: Papers and Tags from Spring Sunshine, Tape from Bella Bella 2, and Stamp from Journaling Stamps).

Hope you are having a fun spring break (or at least spring) as well. Back to the list.

Carina

Silhouette Design Store JOANN Stores

Digital Scrapbooking, St. George, and Stuff Read More »

Cute Animal Nesting Boxes for Silhouette

IMG_5153_1_web I know it’s been a lot of Silhouette posts on the blog lately so I promise to have some fabric and scrapbooking posts soon! This week’s releases for Silhouette are these darling little animal nesting boxes and layered gift card tags. Below is the tutorial for putting together these boxes. I create a lot of nesting boxes for my Silhouette Shop and generally they are all put together like the tutorial below.

Each svg files set comes with two boxes that nest together (the smaller one fits into the bigger one).

These make darling gifts, easter items, or fun spring decor (filled with candy!) for your home. When I finished making mine, my kids spent quite a bit of time just playing with them and stacking them.

To make these boxes, all you need is kraft paper, solid scrapbooking paper, pop dots (optional), glue (I use a hot glue gun and glue stick), and your cutting machine.

1. Cut out all your pieces on your machine.IMG_5099_1_web

2. Fold all the score lines on the boxes and lids. Put glue on the glue flaps (I used a hot glue gun for this) to put together each box and lid.

IMG_5100_1_web

IMG_5102_1_web

3. Assemble the faces of the animals. Place black squares behind the eyes (all in the svg file), pink behind the cheeks, white behind the whiskers. Use a glue stick for this part. For the frog or any other animal that requires a separate “background”, glue the animal to the background with hot glue. Note: The chick’s feet are placed ON TOP of the face not as the eyes and cheeks are.

IMG_5103_1_webIMG_5104_1_web

4. Glue the ears or feathers to the top of the lid. Once these are glued on, glue the small strips of paper to the lid to cover the ears and other portions of the lid. Glue the assembled face piece and other accent papers to the box.

IMG_5148_MULTI

5. Add the tail or any other accessories with pop dots or glue.

IMG_5056_1_web

And that’s it! Assembly does take some time but the end result is really darling. Charlie calls each set the ‘baby’ and ‘mommy.’ The animals ‘nest’ together so if you wanted to put a baby bunny in the mommy chick you could. The ears or feather simply fold down (there are score lines) when you place the baby in the mommy.
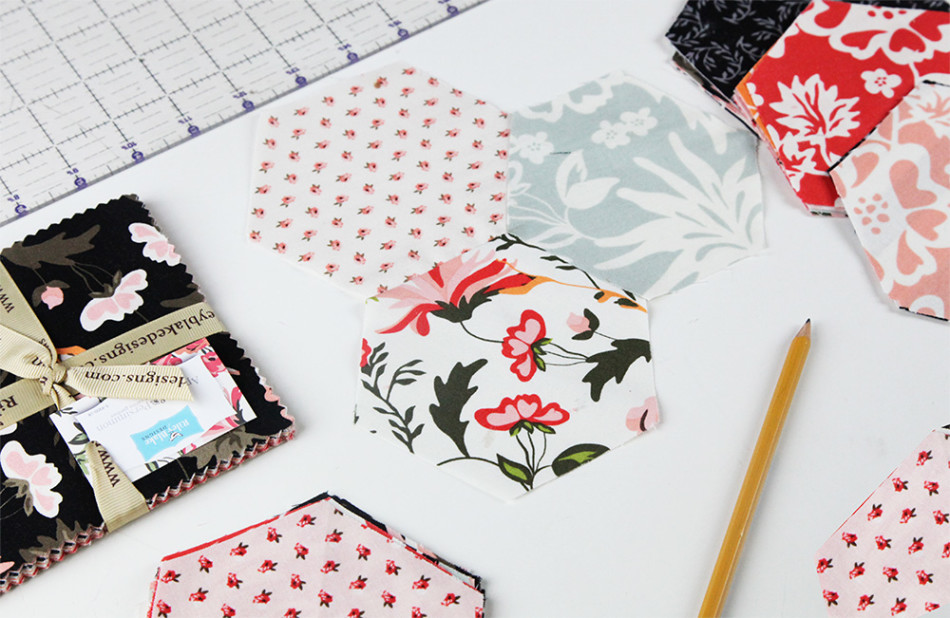
IMG_5125_1_web

IMG_5112_1_web

I haven’t included instructions for the layered tags here because there are basic instructions for them in the description (they are simply cut out and adhered together with pop dots or glue).

Hope you are having wonderful spring weather! Craft on!
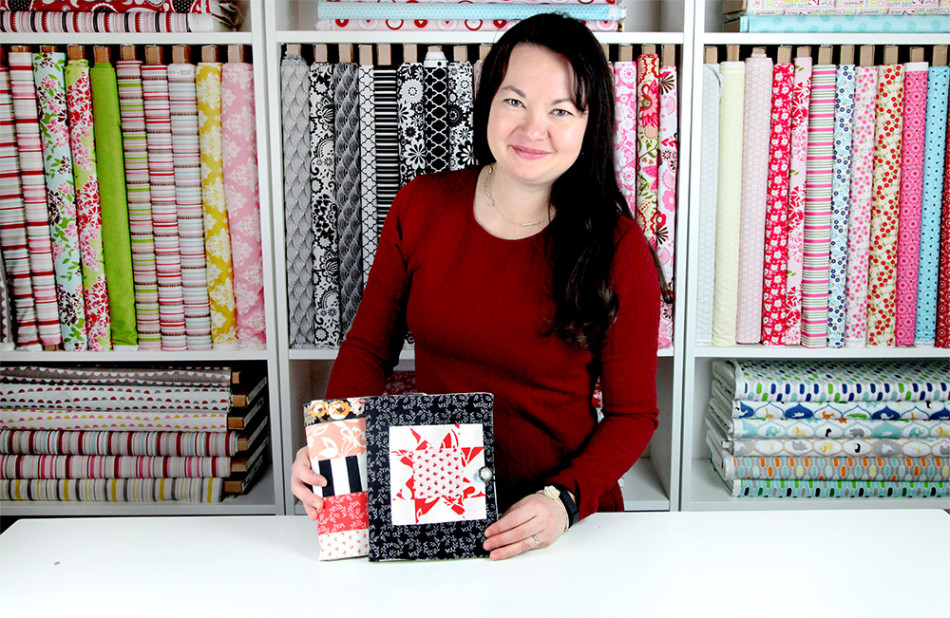
Carina

(Links will be provided when they become available in the silhouette store on March 30).

____________________________________________________________________________________________

Nesting Animal Boxes

nestingbunnyboxesnestingkittyboxes nestingchickboxes nestingfrogboxesnestinglambboxes nestingpandaboxes nestingpiggyboxes

____________________________________________________________________________________________

Layered Gift Card Tags

bunnygiftcardtag butterflygiftcardtag gamecontrollergiftcardtag happybirthdaygiftcardtag ringsgiftcardtag tulipgiftcardtag


Silhouette Design Store JOANN Stores

Cute Animal Nesting Boxes for Silhouette Read More »