Easy Cake Decorator

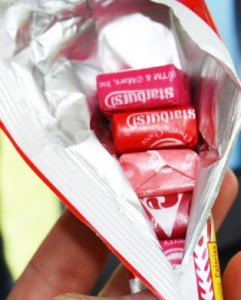
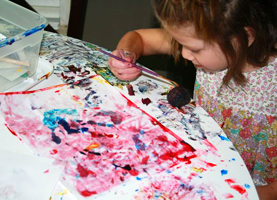
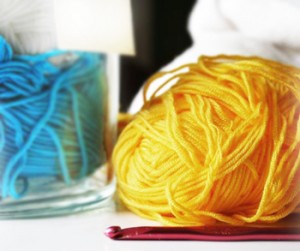
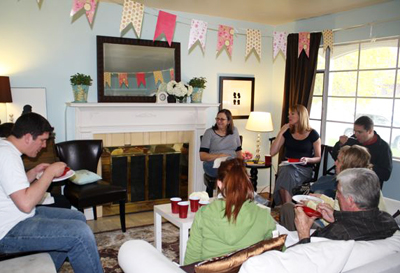
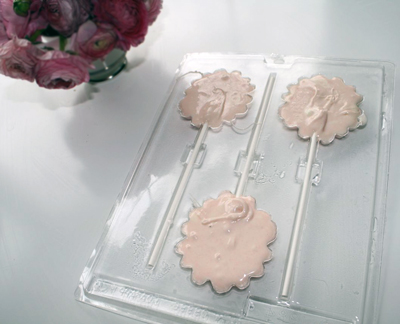
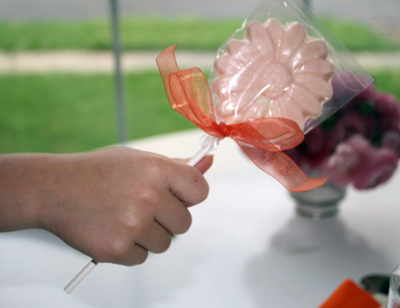
As part of Heather Bailey's March of Tools, I am trying to remember tools in my life that I can't live without...especially when I recently use them. While I spend most of my "tool time" with my computer and other technical gadgets (and will be posting more and tutorials on them soon;), I decided to throw this wrench in the works. My first gadget for the March of tools is my dumbed-down cake decorator. I decided to feature it because I have been using it a lot lately (a lot for me anyway!). Siri, Flissa, and I made cupcakes today for an early St. Patrick's Day.

marchoftools1 

I like the idea of using multiple tips, but truthfully, if I'm making cupcakes for preschool or a birthday, I'm probably going to use the same three tips that I know how to use. This little instrument makes life pretty easy with clean up AND decorating. I believe I got it from Michael's about 6 years ago. I've been using it ever since!

So there it is! My first featured tool. Not very clever, but a great tool nonetheless! (Plus the first one I've had time to take a photograph of.) 

[ad]

Silhouette Design Store JOANN Stores

Easy Cake Decorator Read More »

Interview with Designer Holly Jones & Giveaway from My Cute Stamps

I have a very special interview with designer Holly Jones today! She is the owner and creator of My Cute Stamps, an absolutely DARLING store with her beautiful clear stamps! She also has a fabulous blog Creating Cupcakes. She's also offered a darling stamp set to be given away to someone! Let's meet her:

logo

hollyjones

CarinaWhat kind of “designer” do you consider yourself? 

Holly: I started out as a graphic designer but as I worked at various jobs, I soon realized that I preferred Illustration over design. Now I consider myself an Illustrator.

Carina: Do you consider yourself a “creative” person?
HollyYes, growing up my dad owned a small print shop. I preferred playing with his trash (discarded papers, glue, inks, & etc.) more than I enjoyed playing with any of my toys. I love to learn new creative skills. I enjoy drawing, stamping, paper crafting, knitting, jewelry making, the list goes on & on.

CarinaDo you always feel creative?

HollyMost of the time. Most days I feel like there isn't enough time to create everything I want to create.

Carina:  What kind of jobs have you had?

HollyMy 3 favorite jobs include: 1) Working at the computer lab it college. This is where I learned to use the computer & graphic design programs. I didn't have a computer of my own until a few years ago, so it was fun to be able to use one everyday at work. 2) Being a "live in Nanny". I got to explore the Eastern states with a great family whom I still keep in contact with. 3) Designer & Illustrator for Stampin' Up! I worked here designing papers, products & stamp sets. I really enjoyed the environment and my fun and creative co-workers.
Carina: Tell me about being a mom and your “design work”.

Holly:  I work at home with my 2 cute girls. I wouldn't trade it for anything, It can be challenging at times. My girls are both young and demand a lot of attention, so I really don't get much work done until they go to bed at night. My oldest daughter is 4. She loves crafts, she has recently been interested in drawing her own stamp sets. She keeps asking when we will be selling her cute designs. I don't think it will be much longer before she's ahead of me in her creative skills.

Carina: What do you do now?

Holly:  Right now my husband and I have two businesses, Vinyl Wall Art & My Cute Stamps. He does most of the orders & technical stuff, while I do all the design work and marketing. I'm currently designing some new Reposition-able vinyl for Vinyl Wall Art, and getting our display for the Stamp business ready for the Salt Lake Scrapbook USA expo which takes place next week.

Carina: Tell me more about My Cute Stamps? What made you get started with that?

HollyInitially, I started doing Wall Art because I had a 2 year non-compete contract with Stampin' Up! I still enjoy designing wall art, but I missed designing for the craft industry. My non-compete contract with Stampin' Up! ended in October (the same month as my birthday) My husband thought it would be fun to order me some stamps that I designed in celebration of both occasions. I really loved designing the stamps, and had forgotten how much I love to design products for the crafting industry. I posted some of my stamp designs on the internet, and the response was fabulous, so we decided to set it up as a business. I'm really glad we did. I'm having a great time coming up with new set ideas & new product ideas (coming soon.)

Carina: What is your favorite stamp set?

Holly: It would be Eek! A Monster!

monster4


monster2

Carina: Where do you see yourself in 10 years with your designwork?

HollyI hope to have an entire line of products within the next 10 years. More than just stamps, perhaps coordinating papers, and craft kits.

Carina: What makes My Cute Stamps Unique?

Holly: When I design new stamps, I really try to keep in mind how the stamps will be used. I try to make each set as versatile as possible. I want the end user to be able to use each set for multiple occasions and projects. 

GIVEAWAY FROM HOLLY!

A big thank you to Holly for doing the interview! And she has been really generous to giveaway this darling stamp set: Spunky Nature Stamp Set! It's my favorite set! 

spunkynature21

spunkynature


spunkynature3

What do you have to do to win it? Comment on this blog and your name will be entered into the drawing! If you go over to check out My Cute Stamps and tell me your favorite set, I'll put your name in twice! Easy! This giveaway will end on Saturday at 9AM MST and winners will be announced on Saturday morning at 10AM MST.  Good luck!

Silhouette Design Store JOANN Stores

Interview with Designer Holly Jones & Giveaway from My Cute Stamps Read More »

And the Winners of Peony Place Are...

Thank you to everyone who participated in this giveaway! I really loved hearing your comments and hope you will keep coming back for design projects and more! Be sure to stop by tomorrow for another giveaway and an interview with a fantastic designer, Holly Jones!

Winners announced! I will be emailing the winners in just a second! I used random.org:). Drum roll, please!

winner1winner2winner3

21- Manic Mother

56- Michelle in AR

13- Lena Loo

Congrats Ladies! I'll be contacting you with your winnings!

[ad]

Silhouette Design Store JOANN Stores

And the Winners of Peony Place Are... Read More »

Adding Color to My Life and Another Frame Project

As many of you know, I live in rental that we aren't suppose to paint. So a lot of my tricks to decorating are things that are "movable." Well, last week I got the okay to paint the living room and kitchen! What a dream! I'm not done accessorizing and I've pulled everything down from the walls. I have a million little projects to work on for this home and I'll be sure to post them here!

Okay, so here's the before:

img_1273So this is my kitchen. Very big, I know.

img_1275My Living Room...there was a pony parade going on!

img_1276img_1277

Here are the colors I chose:

img_1281

I actually tried out the taupe and knew it was just right...but the tiffany was a little dark for my taste. My finally color ended up being the shade lighter than this color, which wasn't exactly right, but will do for now. It needs just a hint of green.

img_1287

This is the shade darker...glad I tried it before buying the gallon! And the final results! TA DA! Ummm, I love color! It changes the entire space...notice I haven't changed a lot else (I DID pick up the ponies, but they'll be back!:)

img_1428

img_1437

img_1441

Darling little bird and number balls found at Thai Pan Trading! $2 for the bird and $1.50 for the balls!

img_1442I once saw this on a show...the kids books stayed in the room on a tray. Heaven knows that our kid books are ALWAYS in this room, so it seemed right to sort of "organize" them by putting them on a tray.

img_1443

I only painted the bottom half of the kitchen taupe. High contrast heaven!


img_1465

I've already have a dozen more projects for all these rooms. I have curtains...but I'm not sure if we are going to be able to hang them in here because of the plaster in the wall...it makes it hard to drill!

MY FRAME PROJECT—Painting the frame, take 2

Okay, back to the living room...notice that great focal point frame (and nothing else on the wall? hehee...)? I found that at Home Goods on clearance and painted it. 'Painted it' is an understatement because I actually worked on it THREE times because I could get the color right. I thought I wanted it to be white. It didn't work. I mean, NOT AT ALL. It looked terrible (By the way, that frame WILL get hung...just haven't gotten round to it yet). Then, I decided to be bold and paint it red.Also a bad idea...but not as bad as the white. The THIRD time I painted it brown, but left some of the red peeping through (just a tiny bit). It was exactly what I needed. I want it to be a focal point and it had to compete with the curtains.
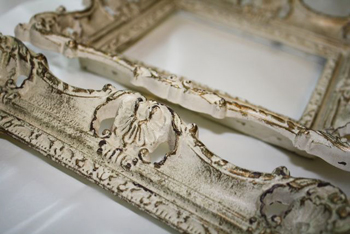
Here's how the frame started out. Gold, ugh, not for me. I love how ornate it is though!

img_1294

img_1300Here's the white phase, which leads very nicely into the red and brown phases.

img_1427While the red phase looks COMPLETELY scary here, I'm glad I did it because it acts as an undertone for the brown and gives it dimension. It's not FLAT.

img_1435

The final un-hung frame. I've been a busy gir1. I'm about to fall asleep writing this! I'm off to bed early tonight! And remember to check tomorrow! I have an interview with Holly Jones and a great giveaway from her super darling store My Cute Stamps!

[ad]

Silhouette Design Store JOANN Stores

Adding Color to My Life and Another Frame Project Read More »

Free Task List Design and Peony Place GiveAway!

It's a freebie day! If you're like me, you are all over the place all day long: kids, work, dinner, shopping...the list goes on and on! And sometimes I'll think of something TODAY, that I need to remember TOMORROW...so I came up with these cute little task lists that are SUPER easy to use. They are formatted on a 8.5 x 11 paper and you just need to cut it right down the middle. I put the tasks into boxes with lines because I sort of like to categorize what I'm trying to accomplish...home stuff, work stuff, etc. It's also sorted into TODAY and TOMORROW.img_1419

img_1422tasklist

Download the TASK LIST here.


Hope you enjoy this freebie! Today is sort of a "double take" because the SITS girls is having their Spring Fling and I've decided to fling some digital scrapbooking your way! All you have to do to be entered into this giveaway is comment on this thread. Easy-peasy!

I'll do a drawing for the winners...for every 20 commenters I will draw a name and you get to choose ONE KIT from my new Peony Place collection! So get people to visit and comment! I'd love to give out a lot!!!! Here are the kits you get to choose from!

carinagardner_2ps_peonyplace_floralfantasysetprev

carinagardner_2ps_peonyplace_skylitset1prev

carinagardner_2ps_peonyplace_springtimesweetnessprev

I will be announcing the winners on Wednesday morning at 10am MST! So check back:)!

Also be sure and check out the 20% off coupon and $40 gift certificate we are giving away at the SITS girls for Card Nirvana!

Need the SITS GIRL discount at Card Nirvana this week: CODE: SITS20MARCH

cardnirvana_sitsgirl20coupon

And the last thing that you need to know is that I have a very special interview and free gift that I will be giving out on Thursday! So be sure to check back for that giveaway! Happy Tuesday!
[ad]

Silhouette Design Store JOANN Stores

Free Task List Design and Peony Place GiveAway! Read More »

Tomorrow's Freebies!

I'm here to post about the wonderful stuff going on tomorrow here at my blog, card nirvana, and the SITS girls! The first thing is happening right here!!!! I am giving away for every 20 commentors, 1 digitial kit of my new digital scrapbooking line (which hits Two Peas in A Bucket next Tuesday...it's not even out yet!), The new line is called Peony Place and it's a collection set up in digital scrapbooking sets. Not a digital scrapbooker? These papers are still great to print out for hybrid projects like cards and holiday projects! All you have to do is comment on TOMORROW's thread and you will be added to the drawing! I will draw one person for every 20 people who comments ( so if 40 people comments, I'll draw 2 people and so on). How easy is that? I'll also have a new freebie card up for you to pick up, so you should dash by to at least get the details on that! So everyone wins:).

Tomorrow's winners gets to choose from these:

carinagardner_2ps_peonyplace_floralfantasysetprev

carinagardner_2ps_peonyplace_skylitset1prev

carinagardner_2ps_peonyplace_springtimesweetnessprev

Perfect for spring, don't you think? Here's a layout I did of my daughter Siri using the Floral Fantasy!

carinagardner_2ps_peonyplace_floralfantasy_layout_sm

Okay, so at card nirvana, you are going to be able to pick up a freebie tomorrow! So check here first and then you are going to want to hop over there.

Finally, Card Nirvana is giving away a $40 gift certificate (that's a lot of cards!) with the SITS girls. You'll need to check out their site tomorrow to be available. They also have the coupon code for a 20% off discount at Card Nirvana! If you have had your eye on something, now is the time to buy it! Head on over there and see what you can see!

Can't wait to see you tomorrow!

[ad]

Silhouette Design Store JOANN Stores

Tomorrow's Freebies! Read More »

Spring Arrivals at Card Nirvana

Like a mad woman I have been adding cards to Card Nirvana, my downloadable-printable card store! I created Card Nirvana so anyone could download a card already set up  with crop marks and with as many invitations as could fit on a page. So all of the invitations are set up on 8.5" x 11" paper. Most cards, invitations, and place cards are set up 2 to a page or 4 to a page depending on the size. The best part is that for people who are not into Photoshop, the cards are set up in Adobe Acrobat so you can change the type! It's really easy to use and you can create your invitations in just a few minutes from your home printer. I use the cards all the time for my daughter's birthday parties and my holiday cards. You can find out more about what you get in a download by clicking here.

You can also check out the freebies and sales here.

So go check out some of the fabulous new cards! Here's a sampling of some of the new stuff! All these cards are created by Jen Allyson or myself! Click on the photo to go to that category at card nirvana!

blog_eastercardsThe place card is on sale right now so check it out! I can't wait to use them for my easter dinner!

blog_partyblog_bridalshowerYou'll also find our awesome wedding announcements when you click on the image above.

blog_birthday

Thanks for looking! New cards are uploaded all the time so check back for new invites and cards!

[ad]

Silhouette Design Store JOANN Stores

Spring Arrivals at Card Nirvana Read More »

Cake, cake, and cake

If this doesn't make you happy, then I don't know what will! At Apartment Therapy's sister site Kitchn there is a post called Layers, Icing, and Sprinkles: 14 Birthday Cakes.

How delectable is this?

01_rect540

Makes you want to go and make a beautiful cake, huh? Here's a couple more to make your mouth water:

06_rect54004_rect540

Felicity is turning two in April and I will definately be trying to use one of their cakes (there are 14 and I could eat them all right now!). Go take a look at how beautiful they are! I'll be posting a little later on a book I found that makes me oh, so happy! A few pretty photos to boot for inspiration!

And a quick newsbite: I buckled down and painted my living room yesterday! The jury is still out on the color. I'll be posting it once I have the room a little more put together! Still need to get the curtains up...

[ad]

Silhouette Design Store JOANN Stores

Cake, cake, and cake Read More »

Two Peas Releases Today!

Hello all! Here are my Two Peas Digital Scrapbooking Release today! Take a look! More Bella Bella 2 and a Hybrid Project!

Here's the Hybrid Project! I'll be posting more pictures and instructions on putting together your own Tiny Town soon!

carinagardner_2ps_tinytown_candysetprev

More Bella Bella 2! Links will be up soon for these! Just go to my regular 2Peas shop area for now!

carinagardner_2ps_bellabellaset5prev1

carinagardner_2ps_bellabella_tapedupprev

carinagardner_2ps_bellabella_quotablesprev

carinagardner_2ps_bellabella_tagsprev

I thought I'd give you a sneak peek at next weeks releases because I could also show you some great ways to use the Bella Bella Products (examples from the album!)

carinagardner_2ps_bellabella2_album1prev

Here's a closeup of the layout from some pictures I took of Siri on the playground.

carinagardner_2ps_bellabella2_album1_page8_siri

More products for next weeks release: one more Bella Bella 2 accesories and a digikit—April Showers!

carinagardner_2ps_bellabella_thickribbonsprev

carinagardner_2ps_aprilshowersprev

[ad]

Silhouette Design Store JOANN Stores

Two Peas Releases Today! Read More »

When It's Beautiful, It's Beautiful

There's something about spring that makes me want to buy fresh flowers everyday! I don't buy flowers very often, but sometimes I do give myself a treat and grab some flowers when I'm out grocery shopping. My favorite flowers are peonies (I'm actually starting a new line called Peony Place...look for it at 2Peas in a couple of weeks!) and Josh use to buy them in the spring for me in Minnesota in the Farmer's Market on Nicollet Mall.

So here's my "springtime" moment for you! Flowers from the deco files at Domino Magazine! I found flowers used beautifully in rooms and on their own! Enjoy!

flowers1

flowers2

I am SO into this room...there's something so homey, but COOL about it. You know what I mean? I just love the flowers...so casual but sophisticated!

room1

I'm in LOVE with this arrangement....and  the room!

plants1room2

[ad]

Silhouette Design Store JOANN Stores

When It's Beautiful, It's Beautiful Read More »

Why Parenting is Rewarding

I just finished laying my two daughters down to bed and I sang our traditional, "Baby's Boat A Silver Moon." I was drawing on Siri's back (my five year old), and when I finished the song, I told them good night, I love them, and was about to leave the room. Siri said, "Stop Mom! I need to draw a heart on your back so you will always remember that I love you!"

How sweet is that?

And that is why I'm a mommy. For moments like that.

Silhouette Design Store JOANN Stores

Why Parenting is Rewarding Read More »

My New Mini-Office Space & Free Tag Download

I have to call it a space because that is what it is. It's not a room. It's not a studio. It's a space. A 4 feet x 6 feet bit of space to be exact (if you count all of the rug). It located in my bedroom (something I don't recommend, but under current circumstances could not be helped) and it was a strain to get a vertical shot of the thing! But here it is, in all it's mini-glory!

overall11

Basically, I tried to use things I already had around the house. I supplemented it with stuff from Ikea, Antique Shops, and Home Goods (for my budget). I tried really hard to stick to the basics—storage and lighting. I added the numbers because I was inspired by a page in a Pottery Barn decorating book. I REALLY wish I could paint the wall to give everything a nice pop...but since I can't paint, I'll try to bring in color other ways (for example, I'd love to paint that wood table I have that is acting as my desk).

overall21

My big bargain buy was a total accident! I got that new chair for $12 down from $150 at Home Goods. It's a great basic color and I can see recovering it in the near future. I'm also in love with the lamp!

This is the top view of the shelves. I bought the shelves from Ikea. Since I have so little space, I worked my way up to utilize space.

topshelf1

My desktop...lots of sketching, facebooking, and designing happen here.

tabletop1

Here was my "number" inspiration to help tie things together a bit. It makes it all a little more graphic:). I printed numbers, used sign stickers, and house numbers.I need a seriously big number to put on the wall but haven't found one yet.

topview2

51

acrylicbox1

Here's the inspiration for the numbers: A Pottery Barn decorating book.

inspirationpottey1My tray on the desk keeps me "organized". Well, sort of, I just dump things in it. It makes the desk less cluttered. It also holds my ugly hard drive (hidden under my Arts & Crafts book!).

tray1

Here are my easy-peasy tags for my jars. I used My Minds Eye Rub-On Alphas and printed out the tags from these templates I made. You can download them here:

Tag Templates Download

cardnirvana_tags_freebie_4shared_sm1

They are the same tag, set up for print-ready.

These are the My Minds Eye RubOns.

img_11551

Setting it up on my computer:

img_11561

img_11621I love the rubons because they are so simple and really take all the work out of this project.

c1

jars1

Hope you enjoyed! I'm sure I"ll be changing this minispace as I find more "stuff." I especially want to add more color. Have a great Saturday!

[ad]

Silhouette Design Store JOANN Stores

My New Mini-Office Space & Free Tag Download Read More »

More of Bella Bella 2 at Two Peas in a Bucket

Tuesday! It's basically turned into my most anticipated day because it's so fun to see all the new designs at 2Peas! Mine this week is the continuation of Bella Bella 2 (you'll see paper packs and albums from this line continually released over the next month!)

To see the entire collection so far, click on the flickr slideshow to the right. There are brand new releases along with everything in the entire line (you can get it all at Two Peas in a Bucket!)

Link to entire digital Bella Bella Collection (1 & 2)

Link to paper Bella Bella Collection-Bellezo Paper Pack & French Flea Market Pack at 2Peas (You can also find these at your local scrapbooking store.

This weeks releases:

carinagardner_2ps_bellabellaset3prev

carinagardner_2ps_bellabellaset4prev

carinagardner_2ps_bellabella_beautyoverlaysprev

carinagardner_2ps_bellabella_bellezocards1prev

[ad]

Silhouette Design Store JOANN Stores

More of Bella Bella 2 at Two Peas in a Bucket Read More »

Bella Bella: Find it in Paper, in Digital, and at Two Peas in a Bucket

So I didn't plan on posting twice today but as I was browsing 2Peas, I noticed that my PAPER line Bella Bella from My Minds Eye is on sale there now!!!!!! To top it off, I'm have a 15% off sale coupon at 2Peas with my digital products which includes the digital release of some of my new Bella Bella 2 line. 

Melanie, the Community Manager at 2Peas also just featured one of Bella Bella's packs on here blog. Check it out here. I'm in seventh heaven right now!!!!!

147169_200x200 147190_200x200

[ad]

Silhouette Design Store JOANN Stores

Bella Bella: Find it in Paper, in Digital, and at Two Peas in a Bucket Read More »

My Disappointment | Domino Magazine Will No Longer Be Published

I was just on the Domino Magazine website and what do I find on the front page? That they will no longer creating this fabulous magazine. It's right about now that I am SO glad I saved most of my issues (I told you they'd come in handy, husband!). I loved this magazine because it always showcased beautiful "stuff" with a sophisticated flair. My favorite thing about this magazine was that they told you where they bought everything and how much it costed. Do you know how invaluable that is? I don't know how many time I've been reading a Martha Stewart or Dwell maggy and LOVE something but can't find it on the web ANYWHERE! It's maddening. So this is my sad farewell to Domino! You will be missed!

[ad]

Silhouette Design Store JOANN Stores

My Disappointment | Domino Magazine Will No Longer Be Published Read More »

Frame it! My Kids' New Chalkboard for the Kitchen!

I must admit that domino magazine is the devil. First off, I wouldn't have gotten the idea to start re-decorating my living room if I hadn't actually taken a break from working to read the darn magazine. If I hadn't started thinking about redecorating, I wouldn't have come up with the idea for a chalkboard project. If I hadn't come up with the idea for the chalkboard project, I wouldn't have decided I need to do a few things to update my kitchen too. So here I am, redecorating away! This was my first finished project of the weekend! I'm glad I did it because the girls love it! 

Cost (about) $35

Materials

Old Frame (bought at an antique store) ($10)

Large piece of white board ( 4' x 8') cut down to 24" x 36" ($13 from Lowes)

Staple gun, staples

Paint (2oz bottle of paint or enough to cover surface of the frame) ($3)

Paint Brush | Sponge brush

Roller

Paint Tray

Chalkboard Paint ($13)

Hanging Hardware

Hammer and nails (for hanging)

carinagardner_tools_sm

I like to have my kids in the kitchen with me while I cook (they are usually running back and forth between me and the living room). I needed an art area that didn’t require me cleaning up the table so I came up with this framed chalkboard piece. I’m in a rental so I needed a pretty way to display the board (I couldn't just paint the chalkboard onto the wall), plus, who doesn't like a pop of color that looks like art?

1. If you bought an older frame or something that had artwork in it, you’ll need to pull out all the staples. My frame was bought from an antique shop for $10 and had a lot of old staples that needed to be pulled.

carinagardner_before_sm

2. Paint the frame the color of your choice (I went with a seafoam blue) with your paint 9I used acrylic) and sponge brush or paint brush. Let dry and cover with a second coat if needed.

3. Paint the chalkboard paint on the large piece of white board (mine was 24” x 36”). I covered it using the roller to get a smooth finish for the first coat. I let it dry for 24 hours and then rolled on a second coat. I touched up with a paintbrush.

img_0748_sm

4. After the chalkboard area has dried I stapled the chalkboard piece to the frame using the staple gun.

carinagardner_inprogress_sm

5. I added hanging hardware to the back (follow your hardware instructions) and hung on my kitchen wall.

withoutkids1 

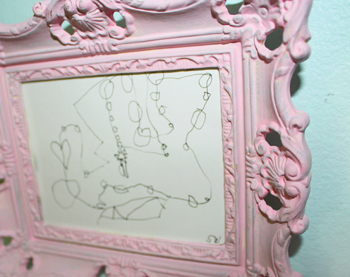
Here's the finished product. And here's my girls enjoying it! Yesterday Siri was helping me cook dinner and she would run between me and the stove (I'm taking the picture from the stove/sink area) and was writing down the instructions (coloring little pictures) on the chalkboard as we made dinner. It was SO cute! I especially liked here picture of the strawberry!


carinagardner_finished1_sm

carinagardner_finished2_sm

Some of my helpful hints

The white board I bought was from Lowes and came in 4” x 8” sheets. I ended up with 2 other HUGE sheets that I just let the kids doodle on until I get around to framing them as well. From this $13 sheet you can basically get 3 great art areas.

 I try to find frames at antique stores, thrift shops, and discounts stores like Home Goods and Tuesday Mornings because then I don’t feel bad about the price and painting it!

img_0773_sm

img_0788_sm

img_0777_sm[ad]


Silhouette Design Store JOANN Stores

Frame it! My Kids' New Chalkboard for the Kitchen! Read More »

My First Artists Date: Antique Shopping

I FINALLY got around to doing my first artists date. I decided to get myself to an antique store for a project I've been meaning to do. I also quickly dropped by Pier 1 to take a look at their sale. Okay, before I go any further and show you what I bought, I need to defend my decision to do an artists date that looks ALOT like aimless shopping:). As a working mother, I never actually leave the house on an errand that is SPECIFICALLY to make my house prettier WITHOUT my kids. Well, at least not since I moved to Salt Lake. I've sort of just been getting by in our rental house. However, I've been feeling a very strong urge to decorate my living room and kitchen the last few days. I had a couple of projects in mind and I needed to get the materials cheap. one thing I knew I wanted was a very large frame. I also wanted  to check out the local antique store. So, I found a place called Moriarty's Antiques. I managed to arrive Saturday morning at 10:30am and it didn't open until 11:00am. Pier 1 was just around the corner so I popped in for a second. They were having a serious sale (a reason I hardly wander out of my house during the January through March months! I ended up buying the red plate in this set:

2257834I only saw the little red salad plate, which I bought all 12 they had in store (now that I see the whole set, I wish they had the bowl in the store too! I would have grabbed that baby up!). I have a set of Crate and Barrel white dishes and this red plate is the perfect accent! How much did I get those darling little plates for? $1.50 a piece... $18 later I'm a happy girl! 

At 11:00am, I was headed to the antique shop where I meandered for an hour. Oh happy, meanderings!!!! I love this artists date thing. I just love antique stores because you can really find unique and loved items that have so many uses...I like finding some new use for these old items! I ended up buying a monster frame that was hideous for only $10!!!! And I'll show it to you soon (I promise) because ever since I bought it, I have been dolling it up for a fantastic kids/kitchen project.

So I would consider my first artists date a total success. I just like giving myself the chance to see something different and new. And I'm addicted now! I can't wait for the next one!

[ad] 

Silhouette Design Store JOANN Stores

My First Artists Date: Antique Shopping Read More »

Discount on My Digital Scrapbooking Products at Two Peas in a Bucket!

I'm having my first ever sale at Two Peas in a Bucket! My entire store  (all 87 products!) will be 15% off from Tuesday, February 17th until Monday, February 23rd. This will include my first 3 products being released from the Bella Bella 2 line (To see the Bella Bella 2 line, just click on the flickr video to the right. Products come out on different weeks during February - March, so check back and see the new products as they are added!)! Enjoy! 


carina gardner's discount at two peas in a bucket

[ad]

Silhouette Design Store JOANN Stores

Discount on My Digital Scrapbooking Products at Two Peas in a Bucket! Read More »

Why the Empty Space?

I have been meaning to write on this topic for sometime, but have kept putting it off. So here it is, a look at empty space and why designers love it and others do not. I started thinking about this because I was doing a project for work and had created this beautiful front cover for a program. The design only covered about one third of the area and was situated in the bottom left corner of the page. The design was sent back to me with a HUGE logo to cover the top portion of the program to "get rid of the empty space."

So my question is, Why are people afraid of empty space? I have heard some of the following remarks: it's boring, it doesn't look like much time was spent on it, it's too simple, or it makes it more interesting if it is all covered up.

It's interesting that these are some of the reasons why "empty space" is a problem. First of all, empty space, or negative space or white space, as a designer would call it, is really important all on its own. Negative space allows us to focus in on what is important and to draw contrast between the foreground and background. The important thing is to make good use of your negative space

What do I mean by this? I mean, make your "empty space" count. Make it important. You do this by really creating an interesting shape with your background or doing things in the design that makes the foreground that much more important. 

I think the use of negative space and this question of "use of empty space" brings up the question of what a designer's responsibilities are. Is our only job to to make things look pretty? I hope not. When I first got into design I felt like it was the perfect marriage between marketing and art. As far as I'm concerned, designers are organizers. We take visual information and organize it in a way that it is easy to understand visually. That's why negative space is so important. We need it to help organize the different elements that need to co-exist and give accurate information.

One way to do this is to simplify your designs. Probably the most famous example of a designer who decided to simplify his design is Lucian Bernhard. This German designer entered a competition for Priester matches and started out with a design with multiple layers of information and imagery. He stripped away everything until all he had left was the brand name and image of the product. 

mp5712priester-matches-posters

He won the competition because the poster clearly showed off the product and brand name. As a designer, that's our job. To create focal point, the area where the eye rests or concentrates, that is strong and lets the audience know right away what the message is.

Here are a few examples negative space used well. Look at them and think very carefully about what your eyes is drawn to. Is there a logically way that you automatically look at this? Are you reading it left to right? Top to bottom? Or does the designer push you another way. 

Saul Bass (famous for his movie poster)


saulbass

KidsHaus RoarGrowl

growl-roar

Milton Glaser's Bob Dylan Poster

dylan_poster

Michelle Brusgaard Photograph

mb_dress

Ellen Lupton's Thinking with Type Cover

thinkingwithtype

BluLima's Let Them Eat Cake Screenprint Poster

letthemeatcake

These are just a few examples to get you thinking about negative space. One thing to be aware of is that negative space doesn't have to be completely solid...it can be a pattern, texture...as long as it acts as the background. I just got a Nordstroms catalog in the mail that does this very thing. Lots of little watercolored silhouettes make up the background and add interest to the cover without taking away from the foreground image.

nordstroms

Here's an article that explains how to use negative space in your artwork. They show some truly minimalist work where negative space is the main event. Check out the image with the -1. See how the use of texture still acts as negative space? Visit Tutorial 9.
negative1


Resources that you should check out!

Here's a short article from a web designer who has a similar perspective on use of negative space. I like his short story and advice. Check out MyIntervals.

[ad]

Silhouette Design Store JOANN Stores

Why the Empty Space? Read More »

Valentine Gifts for Preschoolers

I posted my valentine freebie from card nirvana earlier, and we actually used  them today for Siri's preschool class! I printed them out back and front, Siri wrote in all her schoolmates names. We then attached the heart lollipops to the cards by punching a little hole in the corner. Fast and sweet...just the way it should be!

img_0654

img_0647

img_0656

img_0661

img_0665

img_0669

A note about the chocolate cards—we used a white gel pen to write on them! You can write on them with black ink, but it's a little hard to read.

Want to grab these free cards? Grab them here from Card Nirvana, my digital invitation store!

**The Card Nirvana download is no longer available! You can now download them directly from this link:

https://carinagardner.com/valentineskiddiecard.zip

[ad]

Silhouette Design Store JOANN Stores

Valentine Gifts for Preschoolers Read More »

Kitchen 123: Valentine Project and Heart Freebie

As Valentine's day is approaching, I decided to be festive and actually do a project. You know, one where I am not on the computer. Ya, that doesn't happen a lot. lol. If you want to make this heart tree, it's SO easy and really inexpensive. Use any paper you like...my paper is the Bohemia line from My Minds Eye. I made 9 little "heart trios" as I call them, but you can make any number you like. So here's the project: I took branches from outside and placed them in a vase. I used a piece of scrapbook paper, rolled it, and stuffed it in the vase. Then I put on these little heart trios. Here's how to make them:

First, download my heart freebie here. Print is out as your template. Then you are going to want to cute out hearts from 3 different types of papers. I actually folded my heart template in half and folded the scrapbook paper too so my hearts were symmetrical. Then you want to glue stick three of the hearts together so they look like so:

img_0573

img_0572

img_0569

I then punched a little hole in each of these with a "baby" hole puncher. and hung then on string. I think ribbon would be cute too, but at the moment I don't have ribbon thin enough for this project. So string it was!

img_0586

img_0597

I did tie a little crochet lace around the top of the vase. I love how graphic this paper is because it feels so organic. I'd also suggest painting the branches white. I didn't because I like the natural feeling of the branches, but I think that it could be a cute alternative.

img_0600

Here's my Kitchen 123 Recipe card I made to file away this project (See the recipe card post).

carinagardner_2ps_kitchen123_holidaytabs_recipecard_valentine_ex

Grab the heart template freebie at my 4shared link: Heart Freebie Template

[ad]

Silhouette Design Store JOANN Stores

Kitchen 123: Valentine Project and Heart Freebie Read More »

Kitchen 1 2 3: New recipe card sets coming to 2Peas...See How I Used Them

My kitchen recipes has been a sore spot for, well, forever. I usually keep everything in a plastic bag or pushed into the cook books I love the most. Not exactly contusive for say, actually, FINDING a recipe. And I really do have tons of free floating recipes...things I have ripped out of magazines, recipes friends have written on napkins for me, my grandmother-in-law's pie crust recipe. They are just floating around the house...not the least bit usable until I think of one and dig it out.

So almost more for me than anyone else, I created a line with Jen Allyson at 2Peas that will be released on Tuesday (Feb 10) called Kitchen 123. It is a recipe organization system. I created 2 different types of tab systems and a holiday tab set that I plan on using for more than just kitchen recipes, but for projects too. I'll post my valentine's day project so you can see! But for now, here's how I used the recipe cards:

First, you need to find a good "box." I know if I do this, then it will make it special. I think it would be cool to make the box a project itself. If you do this, post a link in the comments to you photo or blog post on it! I decided to go with something really clean that would show off the design. I got this box from the Container Store. These were MADE to put something pretty in!

20042


Here are my previews of the recipe sets I did along with the photos I took of the box I put together for me. I'm sure as I add cards to it that it will change and grow. But the best part? I plan to keep most of the cards digitally so if one gets oil or water on it, no problem! Just re-print! I did print extra cards with lines though so I could have one handy to write up a recipe. I don't know how many times I've had someone over (or I've been over someone else house) and I asked for the recipe. They it would get written on a piece of paper and, inevitably, end up in my plastic sack!

carinagardner_2ps_kitchen123_adashofloveprev

carinagardner_2ps_kitchen123_antiqueprev

carinagardner_2ps_kitchen123_holidaytabprev

The last one it my favorite! I plan on using it for projects AND recipes! I'm totally making a post on 2peas to get people to give me their holiday projects and recipes!

recipecardbox

recipecard1valentinecards

Silhouette Design Store JOANN Stores

Kitchen 1 2 3: New recipe card sets coming to 2Peas...See How I Used Them Read More »

Valentine's Releases at Two Peas in a Bucket

You may have already seen these two valentine paper packs that I released at Two Peas in a Bucket this week, but in case, you haven't, here they are:

carinagardner_2ps_sweetheartprev_sm

carinagardner_2ps_lovenestprev_sm

This coming week, you'll also see this fun Valentine's release from me (Released Feb 10th).

carinagardner_2ps_heartbeadsprev_sm

I love holidays and it was fun to put together this stuff for I {heart} you day! Here is the layout I did using the Sweetheart paper pack, Love Nest paper pack, Heart Beads, and the Paris & Co. French Frameups.

carinagardner_2ps_lovenest_sirilayout_sm

This is my little girl, Siri. Seriously, this picture makes me smile so much!
[ad]

Silhouette Design Store JOANN Stores

Valentine's Releases at Two Peas in a Bucket Read More »

Second Day of Morning Pages

So this is just a quick entry about the morning pages I'm doing for the Artist's Way. Today was the second day of doing them. It was VERY hard to get myself to do them. The first day it was exciting and fun to do them (and therapeutic). But this morning, well, this morning I had to get up at 6am to do them. I think most of my sentences said, "I'm so tired. Going to back to sleep for a second." I am glad I did them. I think they helped.

Silhouette Design Store JOANN Stores

Second Day of Morning Pages Read More »

A Couple of My Digital Scrapbooking Layouts

Here are a couple of layouts I did using my Paris and Co. Collection at 2Peas. These layouts will also be on sale on Feb 10th with the Paris and Co. 12 x 12 Album! I used the French Frame Ups, Mixed Up Alpha, Princess Papers, Lazy Days Doodles, French Solids, Lil Traveling Journal Bits, Ribbon Stash, Elementary 2 Stitching, Journaling Stamps, Elementary 2 Card Board Cutouts, Elementary 2 elegant alpha brushes.

carinagardner_2ps_parisco_album12x12_9_sirifliss_sm

carinagardner_2ps_parisco_album12x12_2_csf_sm

carinagardner_2ps_parisco_album12x12_1_sm1

Silhouette Design Store JOANN Stores

A Couple of My Digital Scrapbooking Layouts Read More »

My First Day of the Artist's Way

So I buckled down and finally started this morning. I must have subconsicously been trying to avoid it because I meant all weekend to get a pretty notebook to write in and it never happened. I also hemmed and hawed about making an artist's date for myself...and just generally avoided this thing that I have committed myself to do.

But somehow this morning, I was compelled to start my week a little differently. After a rough weekend, I KNEW I needed to do my morning pages. Because I didn't need to get into work until 9am, I was able to sit down at the kitchen table as my kids watched Dora and really get out my 3 pages. I didn't have a notebook, so I just grabbed 2 loose leaf papers and wrote  back and front on them

I won't tell you what I wrote, but I will say I feel much better this morning. It was like venting before my day even happened. I really took it out on that paper!:) I did feel a little of my anxiety release itself into those pages. Whether that happens everyday...we'll have to see. It would definitely compel me to continue writing them!

Either way, I've begun. If you want to do this with me, grab your spiral bound notebook and start sometime this week! Keep me posted so I'll be motivated to continue too. I'll continue to write each morning and I'll post when I've decided on my artist's date this week! And I'd REALLY suggest reading the fist chapter of the book as you do this. It somehow makes the entire experience a little more meaningful, a little more...therapeutic.

Silhouette Design Store JOANN Stores

My First Day of the Artist's Way Read More »

Valentine Day Card Freebies!

Jen and I both got up our Valentine Freebies at Card Nirvana! I think you'll like these cards! Jen put up this fun striped valentine's day card and I have up some mini 3 in.x 4 in. cards that I made for my daughter's preschool friends. I probably will attach them to heart lollipops or some other treat (I'll post it when I do them), but for now, we thought anybody who wanted to use them for Valentine's Day could grab them in advance! The Valentine Stripe card is for photoshop users and the small cards (Valentine Kiddie Cards) are set in a pdf. You can just print as is (there's a cute heart wallpaper to print on the back of the cards) or use the Card Nirvana pdf to TYPE IN YOUR INFO. It's SO easy.

js-stripevalentine

cgvalentineskiddiecards_index

This is what the files look like that you get:

valentinesexample

Happy Heart Day! Have fun with the freebies! If you use them at all post the link here so we can see what you did with them! You can download from 4shared just one card. I'd recommend just going straight to Card Nirvana to pick all the freebies up at once though:).

**The Card Nirvana download is no longer available! You can now download them directly from this link:

https://carinagardner.com/studio/freedownloads/valentineskiddiecard.jpg

[ad]

Silhouette Design Store JOANN Stores

Valentine Day Card Freebies! Read More »

Quick Fix—Kitchen alcove

My quick fix today is a little project for those of us who need "temporary" fixes. Our home is rented and we can't paint (yes, a totally nightmare for a designer!), so I have to come up with creative ways to deal with the eggshell white. I'm always to infuse color and I do this by choosing colors, patterns, and textures that I like, but are pretty easy to re-arrange or recover.

My quick fix today may not apply to your kitchen, but I think you could use this technique on anything...a bathroom cupboard, inner door of an armoire, inside of a closet. I'm using fabric, but you could use vintage wallpaper or wrapping paper (you'll see I use wrapping paper as my pattern).

So here is my dilemma, I have this alcove in my kitchen that I display some of my bigger porcelain bowls. The vinyl pattern on the back is hideous, and there is hardly any contrast between it and the white dishes.
quickfixfabric1
So I decided to cover the back to create a high contrast between the dishes and the wall. I uses some wrapping paper to create my pattern. Just cut and fit to the size of the place you plan to cover.
quickfixfabric2
I cut around the pattern with the fabric I had chosen. I left about an inch of space around the pattern as I cut. I loved this blue and chocolate toile. I picked it up for about $5 in a discount fabric store while with Jen in San Francisco. I bought half a yard to fit my space.
quickfixfabric3
Here's how I folded the corners. You could use masking tape to hold them down as you pinned it to the wall. i was too lazy though and just held it in place as I pinned.
quickfixfabric4
quickfixfabric5
I just used thumbtacks to put these on.
quickfixfabric6
And there it is. Completely removable when I need to move and easy to get on. I did this with my two little girls in the kitchen and it took about 15 minutes. Plus, I can change it if I get sick of it!
quickfixfabric7
quickfixfabric8

Silhouette Design Store JOANN Stores

Quick Fix—Kitchen alcove Read More »

Quick Fix: Bathroom Shelf

Here's my quick fix of the day! I bought this olive dish from EQ3 while in San Francisco with Jen. I think it must be sold out on the website, but it is 75% off in stores so if you are near one you should check it out. I knew I wouldn't use it as an olive dish. I decided to use it for my "quick fix" and use it as a jewelry organizer. I have these open shelves in my bathroom that tend to get pretty messy...well see for yourself! With two girls, there are a lot of hair accessories and "stuff" floating around.

busyshelves

messysmall

Here's my EQ3 find.
eq3

And here's how I used it.
pockets

cleaned-up1

ism_2

frame

Just a little more cleaned up and easier to find things than before. Easy breezy!

Silhouette Design Store JOANN Stores

Quick Fix: Bathroom Shelf Read More »

San Francisco Day 2

San Francisco: Day 2
Day 2 in San Francisco was a rush around day since Jen and I had decided to paint her apartment. She had picked out colors the night before and picked up paint and supplies in the morning.
sf_1
sf_2
jenandbag1
Now that I have mentioned it, I must explain the 7 Layers of Hell. I feel as if I've explained this concept before, coined by one Lachelle Smith while Josh and I lived in student housing at the University of Minnesota. It's basically used in the context of a situation in which you would hate to be doing forever (the reference, I believe comes from Dante's Inferno). Such things may include washing dishes (Lachelle and Nick's 7th layer), checking voicemail (a Jen Shaw favorite), or putting gas the car (yes, one of mine...don't ask me why! I just hate doing it!).

Have a Layer of Hell you want to share? Go ahead. Oh ya, one of my layers includes single cruises (sorry, this is a reference to the post called Airplane Conversations).

Silhouette Design Store JOANN Stores

San Francisco Day 2 Read More »

Airport Conversations

Have you ever sat next to a conversation you NEVER wanted to listen to, but alas, there you were completely stuck. Tonight at the Long Beach airport (on my way to Salt Lake), I got stuck listening to a 20-something year-old conversation. It was like watching The Hills but in real life, and I hate The Hills. “Sarah from the airport” (as she referred to herself) managed to convince some guy that “Erica” had played him. It worked too. I slowly saw her convince him that he saw how “Erica” wasn’t a real person and had been a fake with him. “Sarah from the airport” could have written the book The scheming of womanhood. Her manipulation was so subtle and sly from the inside, while completely obvious from the outside(like watching a TV show). My analysis: “Sarah from the airport” liked the poor-manipulated boy and was jealous of “Erica.” Among “Erica’s” terrible traits: a drinker, a liar, and a player.
I’d like to meet this infamous Erica.

So there it is…the one thing I am FORCED to write about because I am STILL stuck listening to this ridiculous conversation about how “Sarah from the airport” hates drama, while she manages to create it. Classic.

Just be happy you are not currently stuck listening to this.

Silhouette Design Store JOANN Stores

Airport Conversations Read More »

My first trip to San Francisco

Day 1: San Francisco with Jen

I have been on a part-business and part-pleasure trip to California now for 3 days. So I'm here to report on all the fun and fabulous things we have been up to. My girlfriend Jen lives in San Francisco (I am in Salt Lake City) and you can grab her perspective on this trip at theprojectgirl.

So Jen took me to her favorite cupcake place Sprinkles. I am a fan!
xox-img1
My favorite is white coconut frosting over chocolate, fluffy goodness! Who knew that happiness was so easily attained? I also had the red velvet (not at the same time...although I wanted to eat every cupcake they had there!). If you have a favorite, post it!

We spent the first day I was in town shopping the cool boutiques of San Francisco. Check out some of the shops we went to!

stores11
stores21
stores31

Why do I love pretty things so much? These shops were filled with the most adorable things! Ahh, you will like this one...

img_5456_2

Hehee. Might be helpful, huh? Had to buy the book just in case...I'd hate to lose my soul! For some reason I am having trouble loading the photos of my very cute buys at the antique store, so I will have them up in the next post!

Silhouette Design Store JOANN Stores

My first trip to San Francisco Read More »

Initial Review of The Artist's Way

 So today I got on an airplane to visit my friend Jen in San Francisco. While on the plane, I started reading the Artist's Way by Julia Cameron, which is my book of the week. I first heard about this book three or four years ago in a graduate class taught by Marilyn DeLong, which was about untended consequences in design. So I knew the concepts that this book proposed before I sat down and read it...and I have even tried some of these concepts based on my knowledge. Unfortunately, none of them stuck. Now, having read the first 33 pages of the book, I know why. Julia Cameron lays out two things that you have to do to help unleash your inner creativity...morning pages and the artist date. I have tried both without much success....here is why: I was uncommitted. I did them because I knew about them, had them explained to me, but I was praying for a miracle. That these two concepts would simply fix my creativity. Now that I am actually reading the book, I am realizing that the only way to do these, is to read the book and be committed. 

Some of the concepts she has thrown out, definitely hit home. I think that you will find that it does too if you read it. So I am proposing the following: I am going to finish reading the book and try the experiment of doing morning pages and the artist date and report of what happens with me on the blog! How does that sound? I hope being the guinea pig will convince me (and you) that there are new avenues of creativity to be found. 

So what are morning pages and the artist date? I am a little hesitant to tell you because I'm afraid you'll do what I did...do them and not really be committed. But here they are so I can talk about some of the things she says in the book. Morning pages are three pages of stream-of-conscious writing when you first wake up in the morning. This is NOT a journal. It is a forum for getting all the "gunk" out of your head to leave you open for the rest of the day. Julia Cameron has a number of other caveats about how to do the morning pages, but for the purpose of my review, I think this definition works (again, you should read the book to get everything Julia Cameron says). The second tool she proposes are artist dates. You are suppose to dedicate a block of time (1 or 2 hours) to take your self on a date and do something that you really want to do or that would nurture you. Now, I don't know about you, but this is VERY hard for me. Sure, 1 or 2 hours should be easy to come by during the week...but somehow those hours are never there.  When there are kids, jobs, and cleaning to do, when is there time to ever take time for yourself? The sad part is, we with everything going crazy in our lives, probably need to take ourselves on a date the most. Agreed? Julia Cameron makes the argument that if you where in a relationship that you wanted to save, you would go to therapy, find a mediator, and try to save it. Why wouldn't you do the same for yourself (and your creativity)?

So, I will start morning pages (I'll find a beautifully designed book to make it more motivating) and I'll set a time next week to do the artist date. Julia Cameron suggests 12 weeks of this. She says she's been doing it for a decade. It helped her be more creative, perhaps I just need to give it a go if I want the same result? Man, I am so commit-a-phobic! I'll report on the rest of the book ASAP and let you know what happens. If anyone wants to do this with me (always more motivating), please feel free to comment on this post and I'll keep updates on this project going so you can post as well.

Silhouette Design Store JOANN Stores

Initial Review of The Artist's Way Read More »

All about RED

I was in a very serious RED mood yesterday. The girls and I went into DownEast home and look at the two goodies I got!

candlestick2

I am in LOVE with these candlesticks which are currently on my mantle...they accent the Anthopology planters which are blue, gold, and green and match the print which is blue and red. The best part? they were clearanced at $7.99 a piece! Hooray!!!

I also picked up this...not my usual choice...I don't like photos in "wear" but I thought I would maybe do a cool project with this. Plus, it is a super-roomy tote. Discount: $14.99 at DownEast Home. It's made by RedEnvelope.

redenvelopebag

For a bag that will fit my laptop and all my "junk," can't beat the price!!! In fact, I need to figure out what I'm going to do to it soon because I'm going to take it with me to San Fransico tomorrow! It's the perfect airplane bag!

I actually ended up buying a red shirt last night too...LOVING red!

Silhouette Design Store JOANN Stores

All about RED Read More »

Foreground and Background: Learning to see

I think you'll like this first lesson...it's quick, but has lots of examples, which is always fun! The best part is once you understand background and foreground and how it works in design relationships, you will be able to see it in your scrapbook layouts, designs, or projects. It will give you a new sense of how space works FOR and AGAINST you.

Foreground (also called figure-ground) is essentially the focal point, the area in the front of a space. The background is the area that surrounds that focal point. This can be easily shown with a letter.
foreback_a1
Many times it is easier to see the background if the color is reversed out. As a designer, you have the be very aware of what the background is doing (also called negative space) because that may help you rearrange elements so that the foreground or figure is remembered BEST and the background is just that...background. 

Take a look at this example.
foreback_exampleb
This is a paper from my Bella BellaTM Collection at My Minds Eye. I've blocked out the background and foreground for you so you can see what I did. Even though there are several elements in this page, the two focal points both help create a dynamic background. The diagonal works both ways...from the bird to the tree as well as the blank space at the top moving between the two objects. It sort of makes an x. Do you see it? It's what keeps this balanced. It's not PERFECTLY balanced, which is what would have happened if the tree element had gone in the right-hand corner. Instead, it is moved away from the corner to give it a little more interest and to create that funky background-arrow (the negative space).

Many designers like to play with this idea of foreground-background. Check out this clip of 300. I am not promoting the violence (because wow, this is a bit violent for me!), but it does a great job of showing off (and extenuating) the foreground-background relationship. Be sure to pay attention when objects appear as one thing and then are transformed into another... Just watch the first 30 second to a minute of this and you will get the idea.

Did you notice the horse hair into grass (take a second look!) or the landscape into a face and helmet. There is such a high contract between the background and foreground in this that it makes the relationship prominent. 

Here's another one I love (notice how I am showing a lot of black and white? The relatioship is easy to see when there is such a strong contrast). Here's Lemony Snicket's end credits:

Designers really push the limits when they create illusions with the foreground and background. Check this out:
profileblk
ylady

These is a classic examples of foreground and background used to create optical illusions. Do you see the young lady and old lady in the second one? I had to squint and squint to see the old lady and I even had to flip it in photoshop so I could stop looking at the young lady. Hopefully, you had better luck than me! (to see more images like this, go to

http://www.azhearing.com/optical-illusions.htm#yyy and take their test.

Okay, hopefully you get the gist of foreground-background. Just keep the background in mind as you build your images, patterns, and more.

Silhouette Design Store JOANN Stores

Foreground and Background: Learning to see Read More »

How to Become a Designer

Becoming ANYTHING takes work, dedication, and passion. I know many people who really are interested in becoming designers. They want to know what they can do to become one. Many times formal training at a university is not an option, so I have a few words of advice of people who are interested in becoming designers or at least learning how to "see" like a designer. Before I get to the advice, however, I feel like you will find my words more valuable (or at least where I am coming from) if you know how I became a designer.

I didn't go the traditional route to become a designer. I got my bachelor's degree in Marketing Communications. It was safe for someone like me...I never felt "creative" enough to really be a designer. My senior year in my BA, I took a "creative advertising class." The only problem was that I began to feel LIMITED because I couldn't execute anything (all those good ideas going to waste!). You see, I didn't know Photoshop, Illustrator, Quark, or InDesign. Not only that, but I really couldn't tell if something was designed well. I could tell if the advertisement was executed properly but that doesn't matter if the design completely detracts from the goal (and my sad skills always did).

In my frustration, I met a design intern, Jen Allyson at Continuing Education while I was the marketing intern there. There was obviously magic as she taught me my first ways of "seeing" the world a little differently. She taught me to pull out the ugly and inconsistent while pushing me to find the beautiful. My eyes hurt (literally hurt!) for 2 months as she helped me get together a design portfolio for the University of Minnesota so I could go to grad school. Grad School had always been the plan...but not design grad school. Somehow, I made it into the Design Communications program and went on to get a Masters and Ph.D. in design. I taught foundations classes, theory, typography, graphic design history, and packaging learning more and more as I taught. I made plenty of mistakes and had a few successes too. However, after 5 years of teaching, I found that I missed being a designer and needed to get back to my own creativity. I now have many outlets for my creativity (you can see my shops to the side) along with freelance work and in event planning. I had forgotten how much I LOVE being a designer and the passion I feel about it. (BTW, Jen is STILL my best friend, eight years later...)

Which comes to this blog and the information I plan to divulge on it:). I have to say first that I am not an expert, but I will bring to this blog all the design theory, tips, tricks, and information that will help you to learn to "see" as I did. If you are really, and I mean REALLY interested in becoming a designer, here are my first (and very broad) tips for you as you begin this journey. If you don't want to be a designer, you just want to better decorate your home, energize your own creative spirit, or create a better scrapbook page than this is still the blog for you! I'll have interviews with designers of LOTS of different things (graphic designers, industrial designers, interior designers) as well as posts on beautiful things, price comparisons for things I find absolutely delightful, design book reviews, and of course, previews of products coming to 2Peas, Card Nirvana, My Minds Eye, and more!

OKay, I've put it off enough....My Advice to get started designing!

1. Choose your medium

Are you completely passionate about your home? Do you move around furniture every chance you get? Do you doodle designs on napkins at the restaurant? Do you like the lines on a piece of clothing and want to imitate it? Finding your first medium is an important step. I say your first because design is like ivy: it creeps into every part of your life! I am primarily a graphic designer, but I love interiors too. I admire clothing designers, but I don't feel the same passion for it as interiors and graphics (although believe me I will be glued to the TV for Project Runway like the rest of you!). So much of the design theory I add to this site comes from a graphic design background, but you'll find it applicable to many other areas of your life you design.

2. Find ways to learn | Educate yourself

For most of you, formal training is out of the question. However, some tools are necessary and completely FRUSTRATING in this technology age. So if you want to learn how to digital scrapbook or design professionally, you may need to take a class on Photoshop or Illustrator. Believe me, it is way better than doing it the way I learned to do it: on my own. You can check listings at your local community college or rec center for classes or there are a myriad of online opportunities. I will try to scrounge up a list for you guys soon for those of you who want to go this route. I'd recommend for any designer to get your hands on magazines in your chosen field...so Communication Arts and PRINT for graphic designers. I don't know what the official interior designer's magazine, but for just pure eye candy I like domino magazine, dwell, and architectural digest. I will be adding several book reviews and recommendations over the coming blog entries so keep your eyes open, which brings me to my next point, which is

3. Surround yourself with Beauty

What I really mean is to become a designer, you have to re-learn how to see. Those of you who are designers, know what I am talking about. The only way to know the difference between good and bad design (a topic much too extensive to explore here: look for it in future post!) is to surround yourself with GOOD design. Now, I know you are thinking, how do I know if something is "good" design. For now, just try to spend time looking for things in your life that are beautiful to you...we'll get into the "theory" of it soon enough. Is there a card you think is exceptionally beautiful? A couch that just makes you happy? What is it about these things that make you like them? Is it the way they look? How they function? Really think about the objects you have surrounding you and decided why you like or dislike those things. Check out websites for function (was it easy to navigate?) Did you like the colors? Did you like the shape? Read beautiful and inspiring magazines and books, buy pretty things to place in your home, decorate...in essence, LIVE BEAUTIFULLY! This is a tall order (I know, with two little ones and work, I feel lucky if I can get to the dishes), but what I am asking is SMALL steps. I plan on trying to take small steps to make my life more meaningful too...and I'll share what I do with you and I can't wait to hear what you share with me!

4. Practice. practice. practice.

Brillant design doesn't come the first day of trying, nor the second. Even now, when I am working on a design, many times it is the 50th thumbnail that sticks, not the 10th. It sometimes takes getting through a lot of BAD design to get to something really good. Or I should say that sometimes it even takes a lot of good design to get to something great. So you are going to push your self. As Champ Bear would say, "Practice, Practice, Practice." My designwork is certainly better now than it was 8 years ago when I first started out. Practicing your design work, whether in a scrapbook page layout, a furniture rearrangement, or wall-color choice are all ways to PRACTICE what your creative spirit needs. I say your creative spirit because WE ALL have creativity waiting to be released. Hopefully, with projects to come you will be able to do this! I certainly want to as I am ALWAYS needing new ways to develop as a designer.

Okay, so I gave you some tips, but the meat is to come. Welcome to design! Learning to "see" will give you more meaning in your life...don't believe me? Continue to read and we'll see. Perhaps all you need is a quick lesson on 1920s design, an inspiring interview with a designer turned successful business owner, or a post on the golden mean and how to use it. These are the little lessons that helped me learn how to be a designer and I hope they will make your life more meaningful.

Ready, set, design!

Silhouette Design Store JOANN Stores

How to Become a Designer Read More »