SVG

Succulent Inspired Bridal Shower Made with the Silhouette Cameo

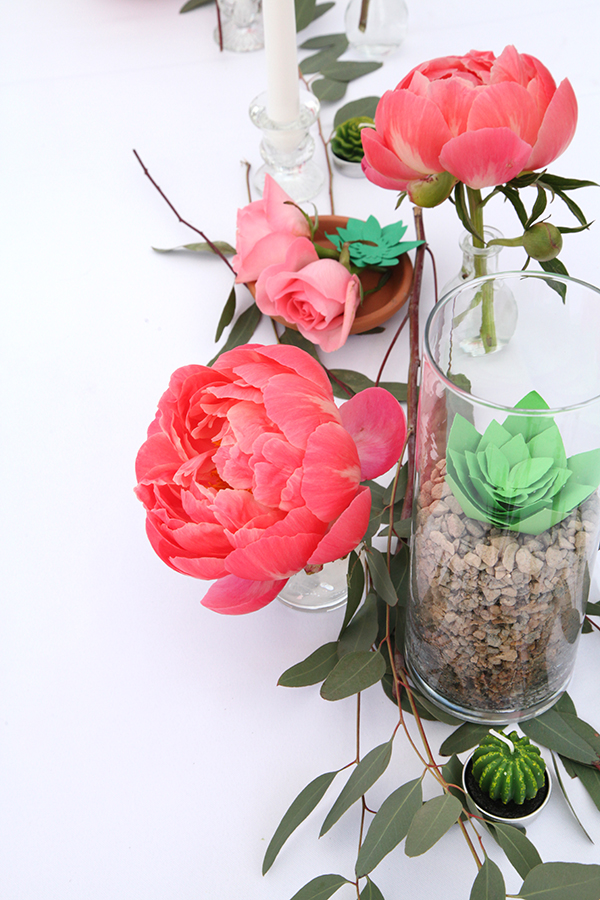
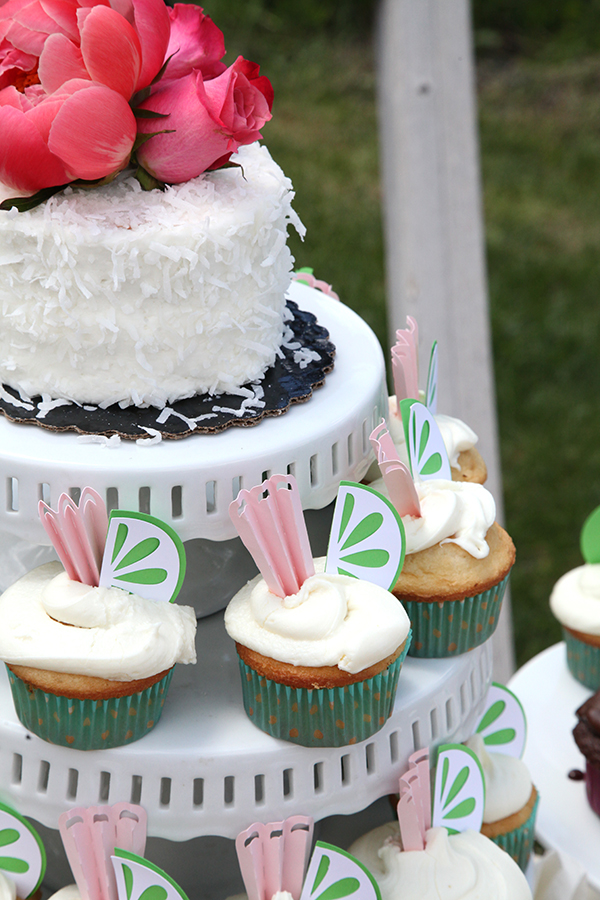
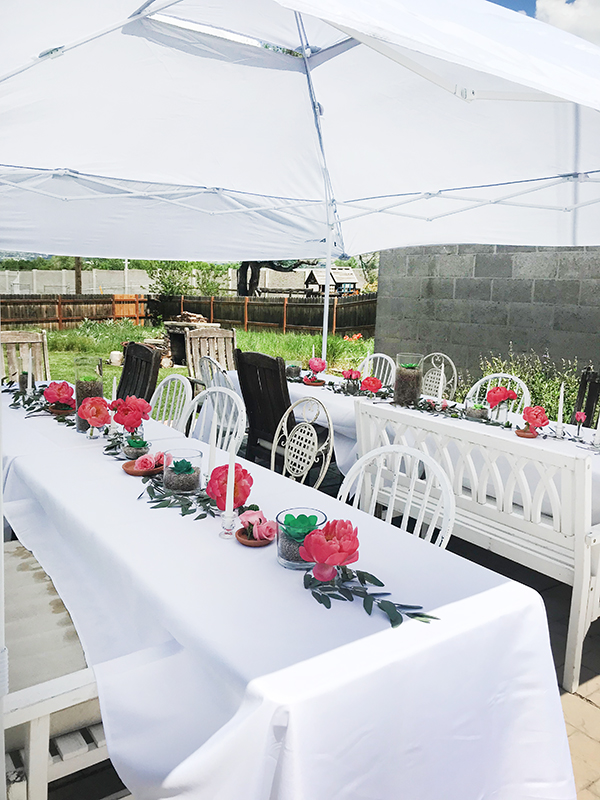
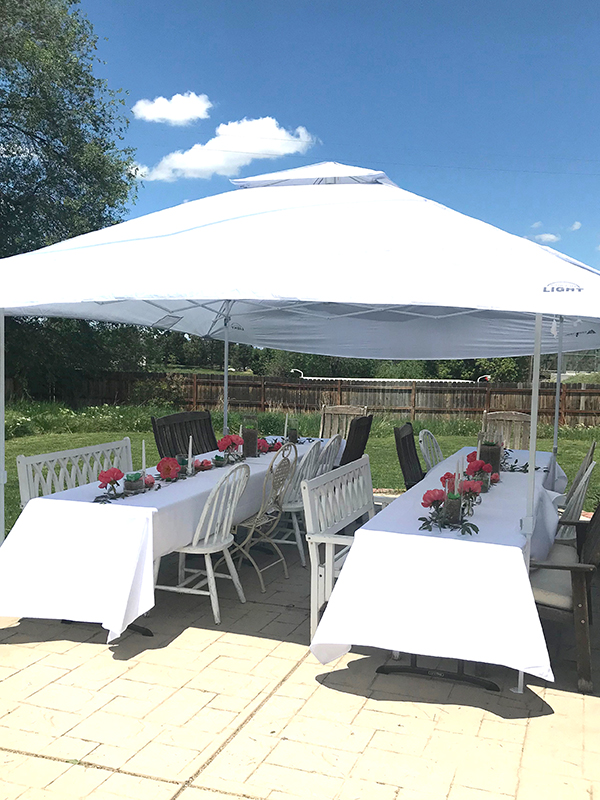
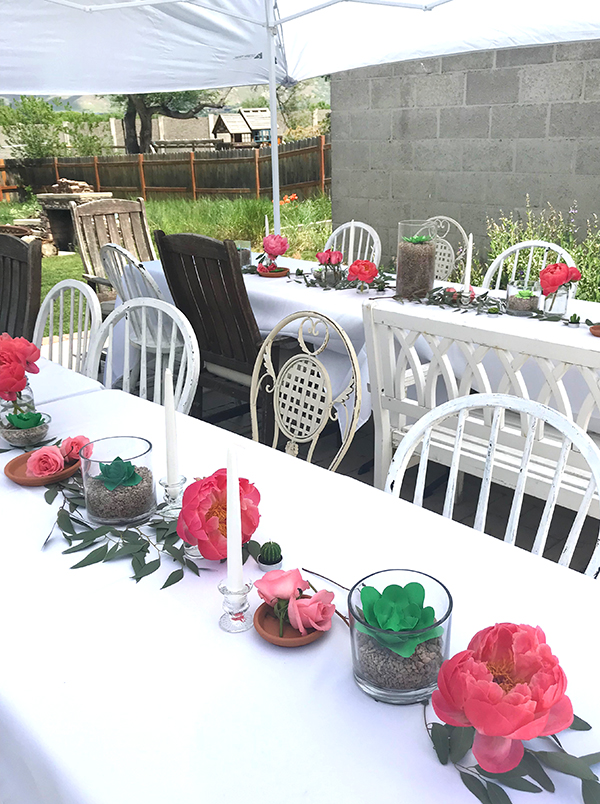
This last weekend I hosted a bridal shower for my sister-in-law. It was a fun get together and I spent the week getting together some fun pieces for the shower!

All of the paper pieces can be found in my Silhouette Shop. There are a lot of different party pieces here so I hope you are inspired by the table scapes and decor!

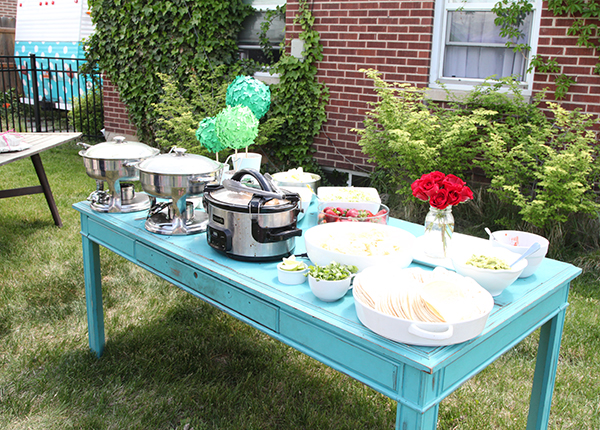
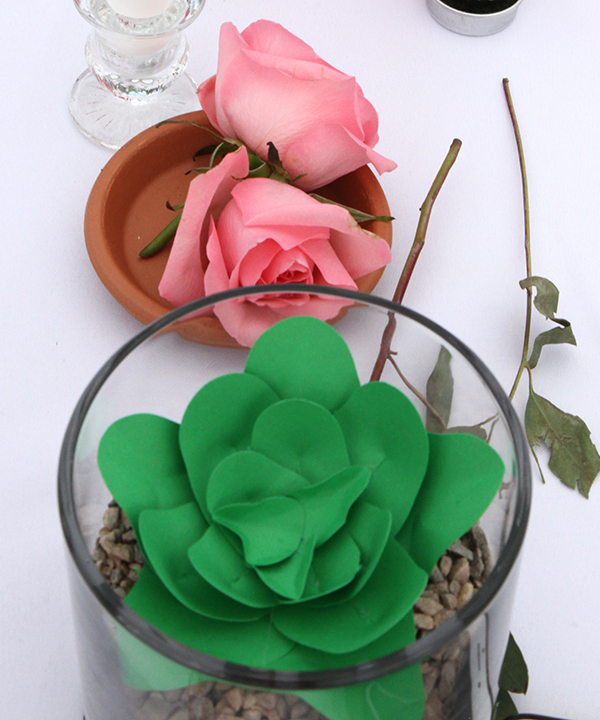
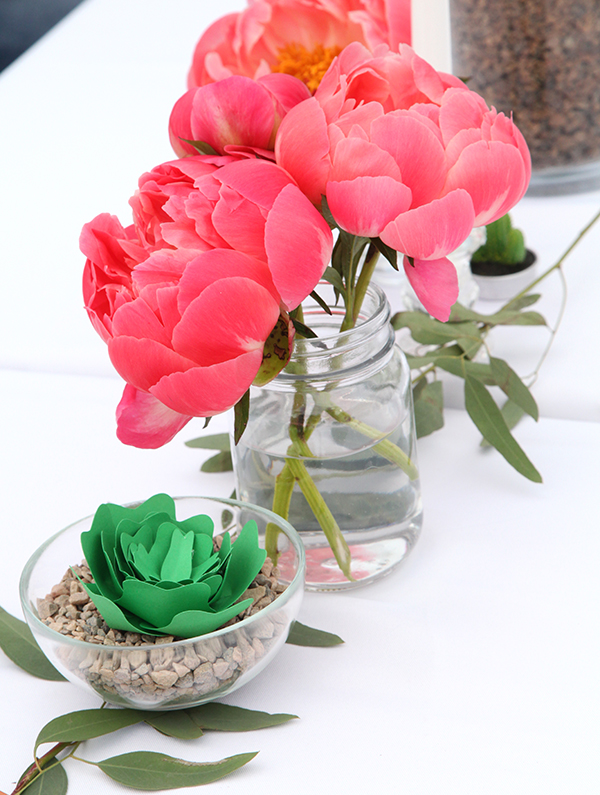
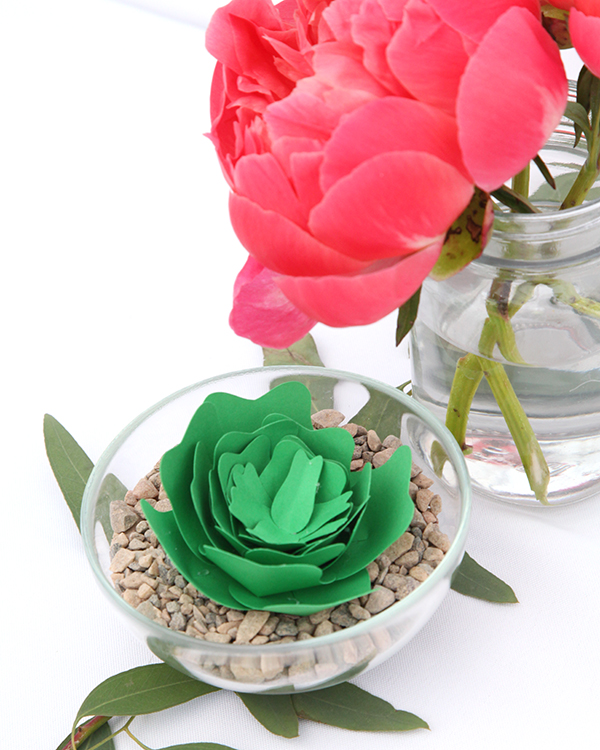
Clearly, I was inspired by succulents for this party. The actual starting point though was the taco bar. Because there was a Mexican theme in the food, I wanted to carry through a bit of “desert” into the decor.

(The taco bar included copycat recipes from Cafe Rio for their shredded chicken, black beans, and rice. I also included guacamole, cilantro, limes, chips, tortillas, and salsa.)

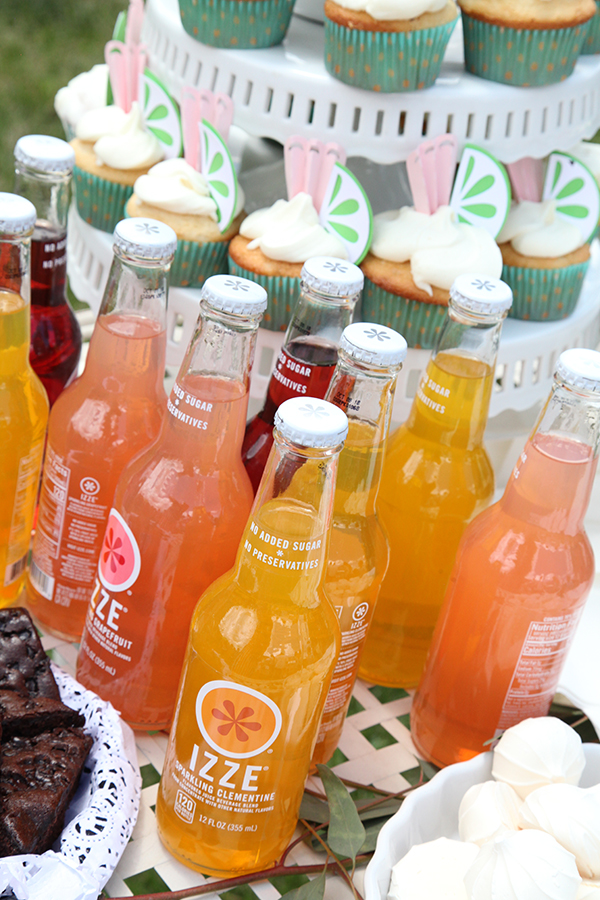
I stuck to bottled drinks and water to keep things simple.

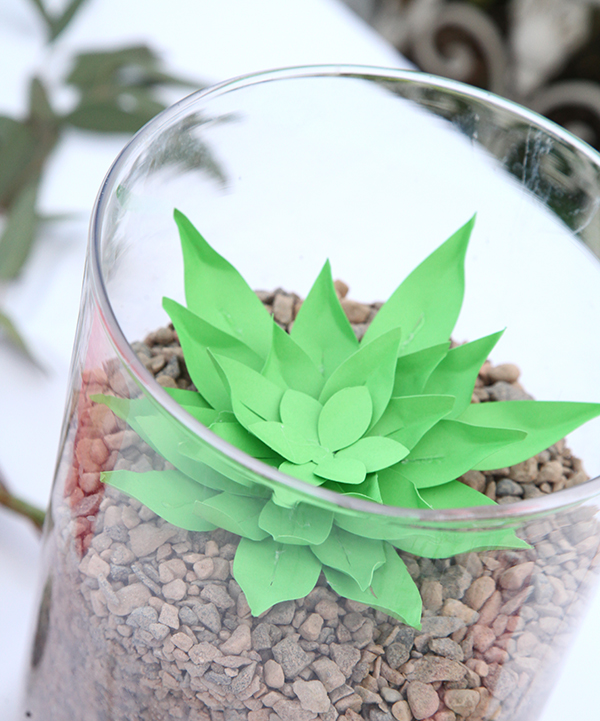
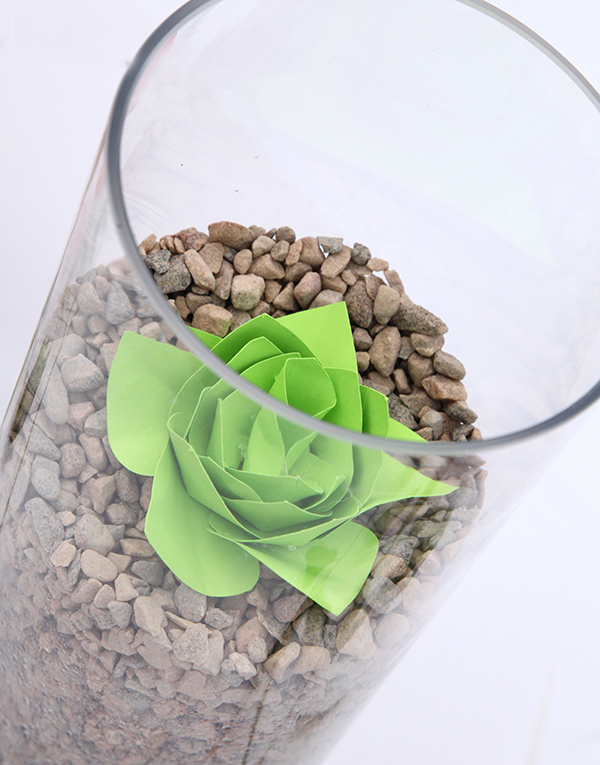
I have instructions on how to put together my basic succulent in a video at the end of this post. You can also go directly to my youtube channel for it.  You can subscribe directly to the channel by clicking here.

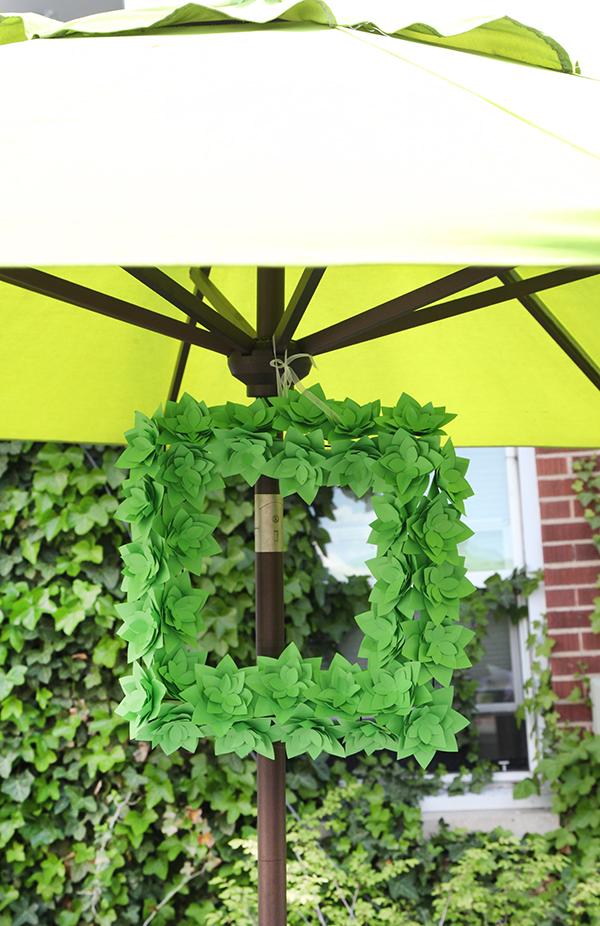
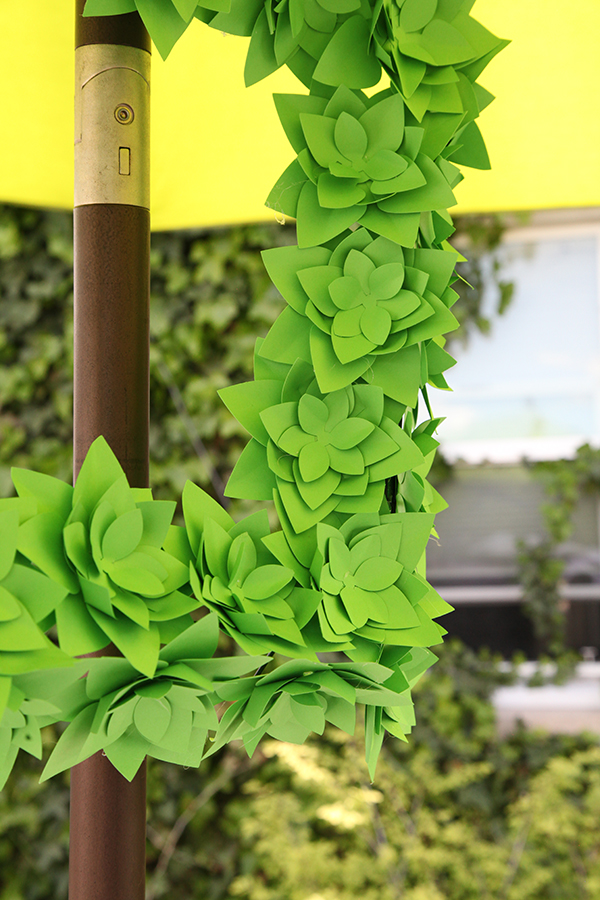
One of my favorite projects was this Succulent Wreath! I show you the wire wreath base and an in progress shot in the tutorial video below.

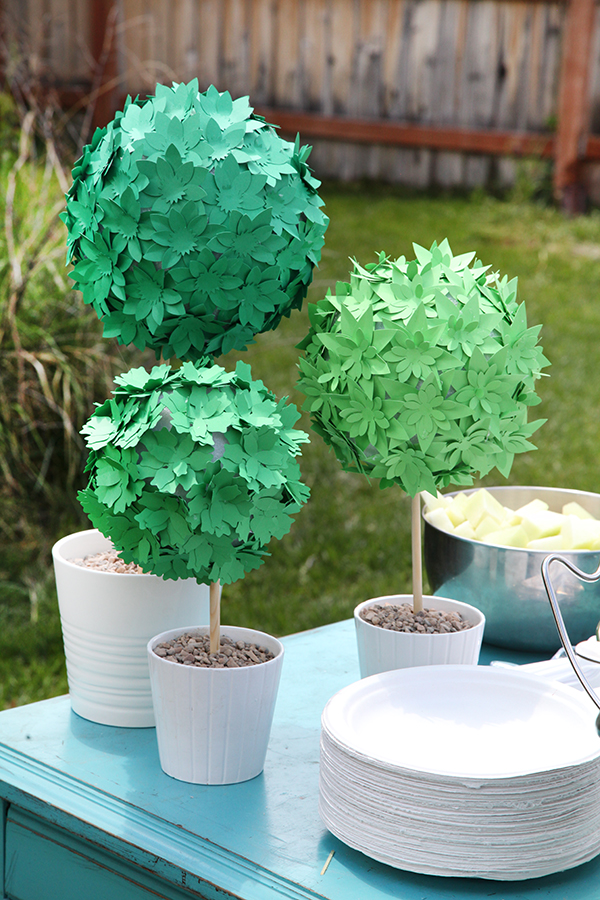
I also love how the topiaries turned out!

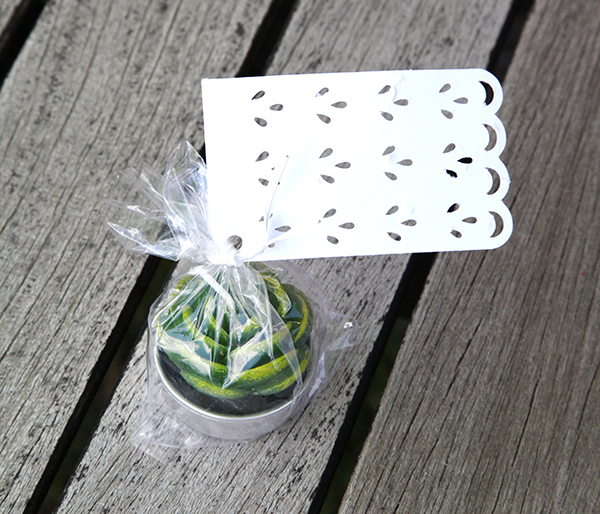
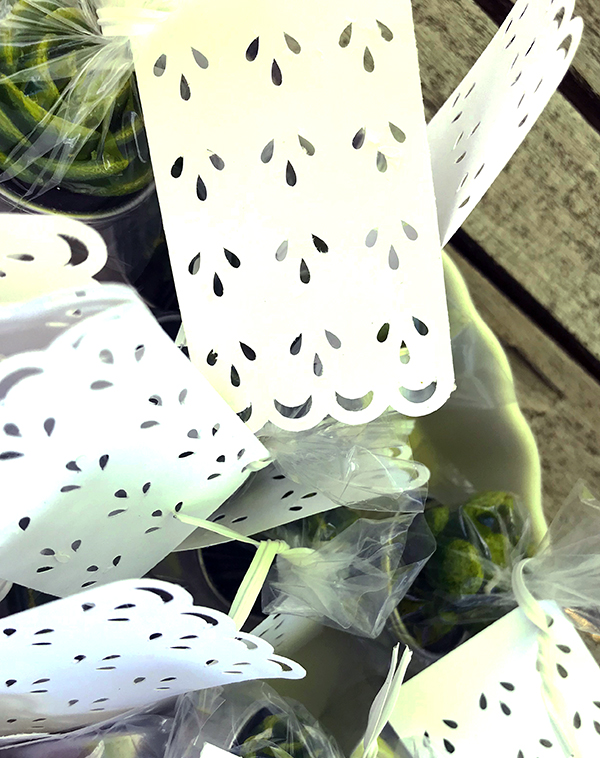
Below: Lacy Favor Cards for the gift!

Inspired to watch the video to see how to make these? I also included a few shots from the event as it was going on! I hope you are inspired for your next party!

XOXO, Carina

Silhouette Design Store JOANN Stores

Succulent Inspired Bridal Shower Made with the Silhouette Cameo Read More »

Instructions for Christmas Silhouette Projects from Merry Christmas eBook

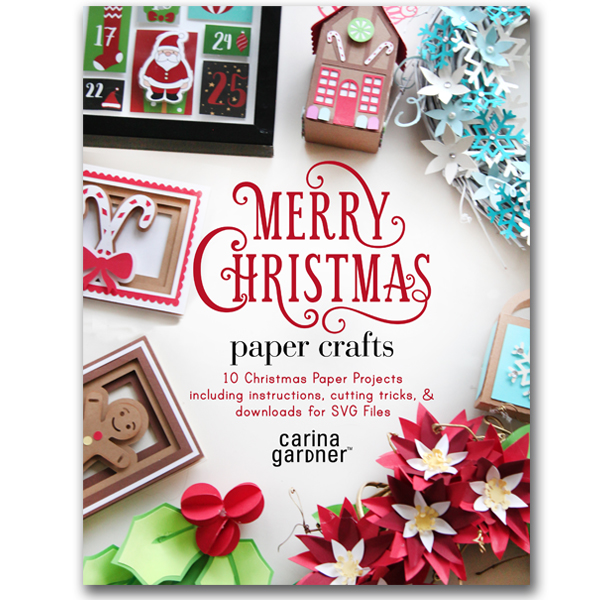
I’m excited to announce the release of my newest eBook Merry Christmas Paper Crafts! This book includes 10 christmas and winter related projects for the crafters with a digital die cutting machine. Every set of instructions included detailed photos and instructions on how to put each project together!

It is available in my store for $9.99 and available in the Silhouette store for $12.99. If you purchase it from my store, you will receive a PDF book and SVG downloads for your machine to all the projects. If you purchase if from the Silhouette store, you get the PDF book and Studio files that will go directly into your silhouette software! Pretty cool, right? Be sure to watch for discounts on BOTH of these books!

I am also offering the projects INDIVIDUALLY in the Silhouette store with my normal releases. These will be priced from .99 to $2.99. Sufficient to say, if you buy the book, you will definitely be getting a deal! 

If you bought an individual item, I have limited instructions below for each of the projects. They should help you put together the projects with ease. Enjoy!

CHRISTMAS HOUSE ORNAMENT

MATERIALS | Pop dots + Hot glue & glue gun or/and glue stick + Ribbon or string to hang the ornament + Papers – assortment of browns, green, white, red, blue, and purple

STEP 1 Begin by cutting out all the pieces in your studio or svg file from your software. Note: The main house piece is best cut on a 12″ x 12″ paper, however, the entire project can be sized down to fit on 8.5″ x 11″ paper by selecting all the pieces and holding the SHIFT key while making smaller.
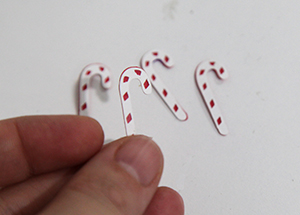
STEP 2 Glue together the white candy cane pieces to the top of the red candy cane pieces. Make sure you have half facing right and half facing left. Next, glue the peppermint tops to the round circles.

STEP 3 Next, fold all the score lines of the main house piece. On the INSIDE of the house, glue the white rectangle and house pieces to the main house.
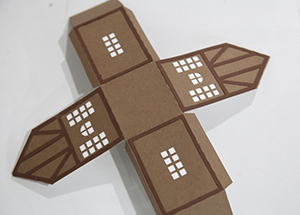
STEP 4 Next glue the dark brown “cottage cut outs” to the outside of the house. Add the red windows and doors. Match the windows and doors up to the holes already cut out of the house.

STEP 5 Place a pop dot on the back of each gumdrop. Add the gumdrops along the bottom sections of the house. Place a pop dot on the back of the peppermints. Place the peppermints to the top area of the house. Glue the candy canes to the house where ever you would like.
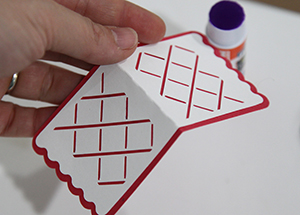
STEP 6 Next, layer the white roof piece above the red roof piece. Glue together.
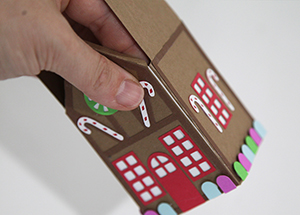
STEP 7 Put together the house by gluing the tabs to the sides of the house. Place glue on the tabs of the roof. Glue into place. There may be a hole in the top. This will be covered by the red and white roof piece. Hot glue the entire roof area of the house. Place the red and white roof on it.
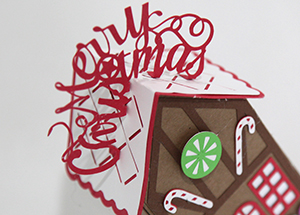
STEP 8 Then fold back the tabs of the “Merry Christmas” sign. Glue the “Merry Christmas” sign into place on the top of the roof using the tabs.
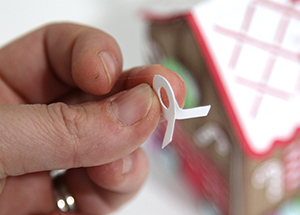
STEP 9 Glue together the circles of the two round tabs. Fold out the bottom tabs. Glue this piece to the CENTER of the roof. Place one tab on one side of the roof and the other tab on the opposite side of the roof. Glue into place. Finally, add a ribbon or string to hang.

MERRY & BRIGHT CARD

MATERIALS | Pop dots + Hot glue & glue gun or/and glue stick + Papers – assortment of blue, green, white, red, yellow, and black
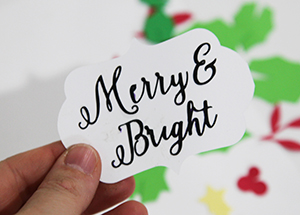
STEP 1 Begin by cutting out all the pieces in your studio or svg file from your software. Glue the phrase “Merry & Bright” to the white cut out.
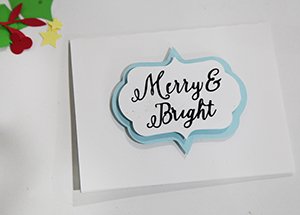
STEP 2 Next, place pop dots on the back. Place on the center of the blue bracket shape. Then, put pop dots on the back of the blue bracket. Place the pieces in the front center of the folded white card.
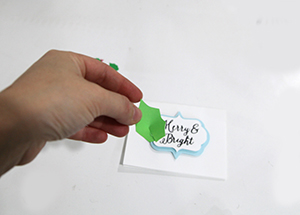
STEP 3 Make the leaves 3D by placing a little glue on the center of each leaf. Then pull the center opening together in the leaf. Hold until the glue has dried. The finished leaf will curve in.

STEP 4 Place all leaves under the blue bracket shape. Glue into place. Fill in the blue and red filler pieces.
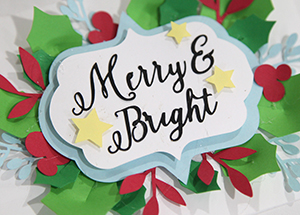
STEP 5 Finally, add the three yellow stars to the center bracket. Use pop dots to make them stand out.

SANTA SLEIGH CENTERPIECE

MATERIALS | Hot glue & glue gun or/and glue stick + Papers – assortment of black, yellow, green, and red

STEP 1 Begin by cutting out all the pieces in your studio or svg file from your software. Note: The long pieces are best cut on 12″ x 12″ paper, however, the entire project can be sized down to fit on 8.5″ x 11″ paper by selecting all the pieces and holding the SHIFT key while making smaller. You can also simply cut a little extra of the long piece and glue them together.
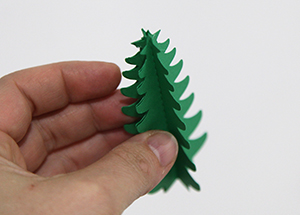
STEP 2 Create the evergreen trees by folding on the scores lines. Glue together two pieces on one side of the tree. Continue to add pieces to create a 3D tree. Glue a total of five pieces per tree. Finish off the tree by gluing the first and fifth piece together. Glue a star to the center of each evergreen tree on every side.
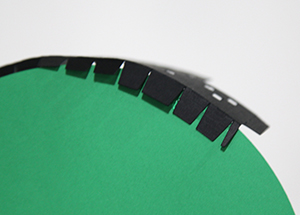
STEP 3 Next fold down the tabs of the black cityscape pieces. Glue the tabs down to the underside of the circle. Glue all the way around until the cityscape ends. Repeat with the second cityscape by gluing a small piece of the sides of the cityscapes together. Then finish gluing the tabs under the circle.
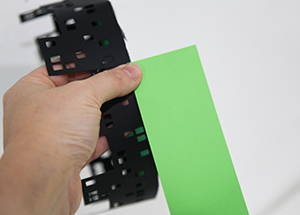
STEP 4 Glue together the two light green pieces. Glue the light green piece to the bottom 1/8th of the cityscape. Follow along the edge until it is completely glued into place. Finish by gluing the ends of the light green pieces together.
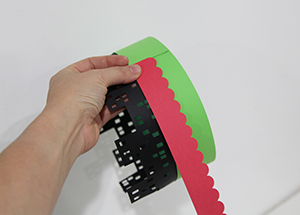
STEP 5 Add the red scallop to the top of the light green piece. Glue all the way around to create a pretty border for the city.
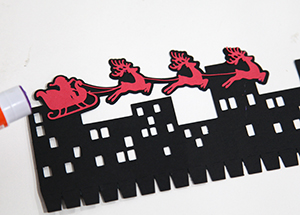
STEP 6 Next glue the santa sleigh to the two black cityscapes that are left. Glue the tabs about 1/4th to 1/3rd inch from the outside edge of the circle. Repeat with the other piece until the inside cityscape with Santa is complete.
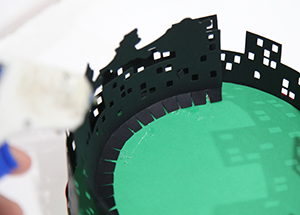
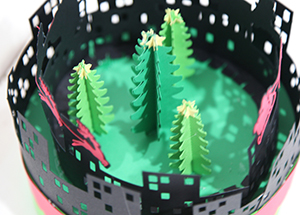
STEP 21 Finally, glue the largest tree to the center of the circle. Add the remaining trees to the center of the circle.
POINSETTIA WREATH

MATERIALS | 10 to 12 inch wreath + Hot glue & glue gun or/and glue stick + Gold spray paint + Papers – assortment of yellows, white, red, and green

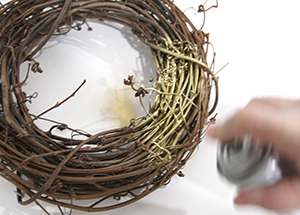
STEP 1 Begin by cutting out all the pieces in your studio or svg file from your software. Spray paint your wreath gold. Let dry.
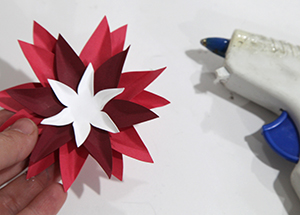
STEP 2 Next, finger press all your flower pieces. Glue together two of the large red pieces. Make sure the petals do not overlap. Glue a smaller dark red piece to the center of the red flower pieces. Next, glue a white flower piece to the center of the red pieces.
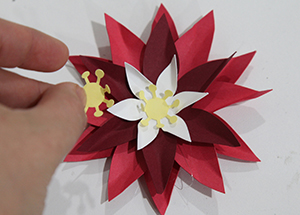
STEP 3 Next, place a yellow center to the middle of the poinsettia. Add a second yellow center to the flower to finish it.
STEP 4 Finger press all the leaves. Glue the flowers to the wreath. Finger press the flowers together to make a tight arrangement. Add green leaves around the edges.
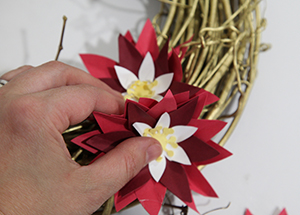
STEP 5 Finish by placing all the flowers and leaves on the wreath.

HANGING MISTLETOE

MATERIALS | Hot glue & glue gun or/and glue stick + Ribbon or string + Papers – assortment of greens and red

STEP 1 Begin by cutting out all the pieces in your studio or svg file from your software.
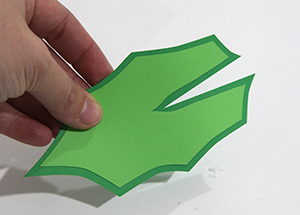
STEP 2 Glue together the darkest leaf color (largest leaf) to the matching medium green leaf. Repeat for the second leaf. Next, glue together the medium leaf color (smaller leaf) to the matching light green leaf. Repeat for the second and third leaves. Next, place a dot of glue on the end of the leaf center and glue together so that the center portion is connected. Repeat with all the leaves.
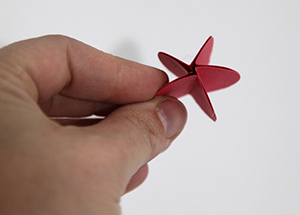
STEP 3 Next, build the berries. There are five berries to create a single 3D berry. Fold the berry in half along the score line. Then glue together one side of the berry to another berry. Repeat this until there are five berries connected. Finally, glue the first berry to the fifth berry to finish. Repeat with all three berries.
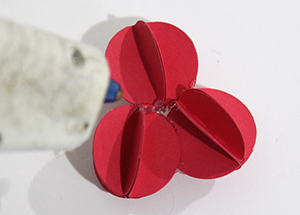
STEP 4 Place the berries in a triangle as shown. Glue together the first two triangles. Hold them together as the glue dries. Glue the third berry to complete the trio. Hold together to secure into place. Add some glue to the center of the berries.
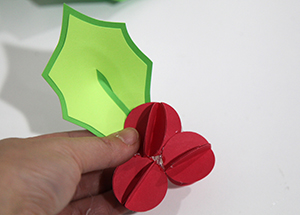
STEP 5 Next glue together a leaf to the berries. Continue gluing leaves to create a bundle of leaves with the berries at the bottom. Hold the leaves in place to make sure the group is glued securely. Finish adding leaves to the set (or only use 3 leaves if you would like).
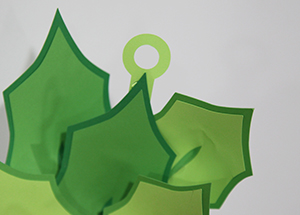
STEP 6 Place the hanging tab to the top center leaf. Glue into place. Place ribbon through the hanging tab to finish.

SNOWFLAKE WREATH

MATERIALS | 10 to 12 inch wreath + Hot glue & glue gun or/and glue stick + White spray paint + Papers – assortment of blues, whites, and creams + Gems and pearls
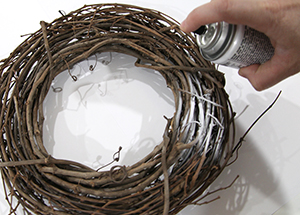
STEP 1 Begin by cutting out all the pieces in your studio or svg file from your software. Spray paint your wreath white. Let dry.
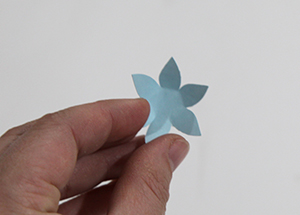
STEP 2 Next, finger press all your flower pieces. I use an all-over pattern for my wreath but you can keep all your objects to one side (like the poinsettia wreath). Begin by gluing a large snowflake to the wreath. Leave big snowflakes all alone or layer them with flower pieces or smaller snowflakes. Add a small accessory like a pearl or gem to the center.
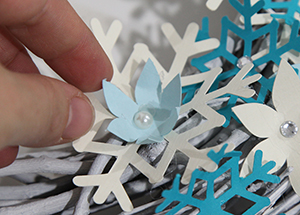
STEP 3 Finish covering the entire wreath mixing the snowflakes and flowers. Add the swirls to the wreath to finish.
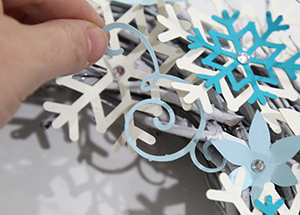
 

ADVENT CALENDAR

MATERIALS | Pop dots + Hot glue & glue gun or/and glue stick + STRONG Magnets + Printout of calendar and santa + A 12 in. x 12 in. shadow box frame + Optional – Laminator

STEP 1 Print all of your pieces (Santa and advent calendar) either on your printer or local printer.
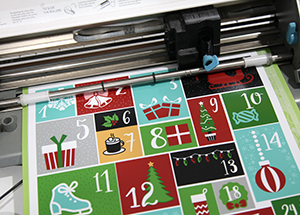
STEP 2 Cut out all the advent calendar in your studio or svg file from your software. If you are using a shadow box, pull out the multiple layers. You will be placing your calendar on the layer closest to the glass front. If you do not have multiple layers, just make sure your final artwork will be as close to the front as possible.
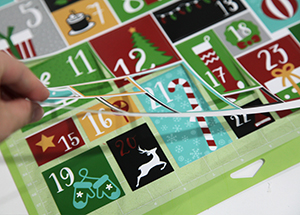
STEP 3 Take off all the pieces from your cutting mat. On your number pieces, place pop dots and hot glue a magnet to the back side of the number. Use a 12 in. x 12 in. piece of paper as your background. Then place the “negative” or “throwaway” piece on TOP of the white background paper to use as your guide on placing all the pieces. Place the “number 1” box into the first spot using the template as your guide.
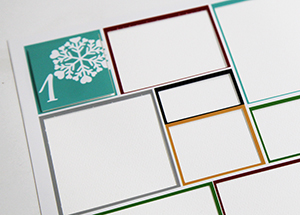
STEP 4 Repeat with every number piece. Make sure all of your magnets are the same side up (all +’s or all -’s). Once all the numbers are glued down, pull off the template carefully. The finished advent calendar will be 3D and easy to place in the shadow box frame. Place the advent calendar in the frame and close.
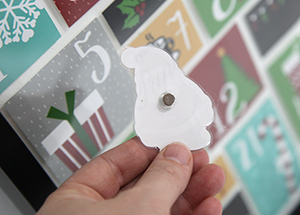
STEP 5 Finally, cut out the santa. To line this up, use a test piece of paper to cut out the Santa shape. Then without moving the paper from the mat, pull the cut out area away and place the printed Santa behind the mat. Pull away the test piece of paper and cut out the Santa printout. Optional: Laminating your Santa will give it more durability. If you don’t have or want to laminate your santa, skip this step and simply glue a magnet to the back and you are done! Optional: If you laminate your Santa, trim away the excess lamination paper.

STEP 6 Hot glue a magnet to the back of the Santa.


Silhouette Design Store JOANN Stores

Instructions for Christmas Silhouette Projects from Merry Christmas eBook Read More »

How to Put Together a Big Paper Flower with Your Silhouette Cameo

I have a new tutorial up on my youtube channel for putting together my new favor bags for Silhouette! You can find all of these styles in my store at: https://www.silhouettedesignstore.com/artists/252689

You can automatically subscribe to the channel here for the latest tutorials!

Silhouette Design Store JOANN Stores

How to Put Together a Big Paper Flower with Your Silhouette Cameo Read More »

How to Put Together Carina Gardner’s 4 Tiered Wedding Cake for Silhouette Cameo

I have a new tutorial up on my youtube channel for putting together my new favor bags for Silhouette! You can find all of these styles in my store at: https://www.silhouettedesignstore.com/artists/252689

You can automatically subscribe to the channel here for the latest tutorials!

Silhouette Design Store JOANN Stores

How to Put Together Carina Gardner’s 4 Tiered Wedding Cake for Silhouette Cameo Read More »

4.25 in. x 5.5 in. Card Tutorial for the Silhouette Cameo

4.25 in. x 5.5 in. Card Tutorial for the Silhouette Cameo Read More »

Round up of 5 Springtime Silhouette Cameo Cuttables!

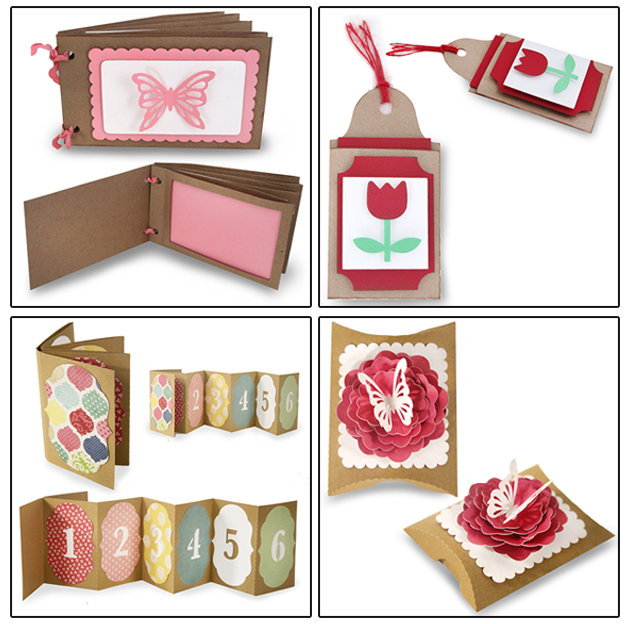
Sometimes I forget to tell you about projects I’m doing or have loved that are amazing! So here’s a ROUND UP of some favorite SPRINGTIME projects that you can get from my Silhouette Shop.

1. ​​Accordion Number Album Design ID #75919 https://www.silhouettedesignstore.com/view-shape/75919

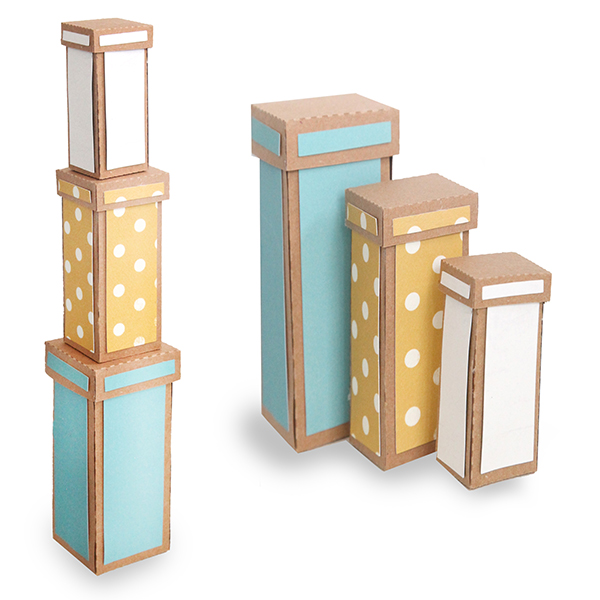
2. 3 Stacked Skinny Square Boxes Design ID #76544 https://www.silhouettedesignstore.com/view-shape/76544

3. Butterfly Perched on a Flower Pillowbox Design ID #76289 https://www.silhouettedesignstore.com/view-shape/76289

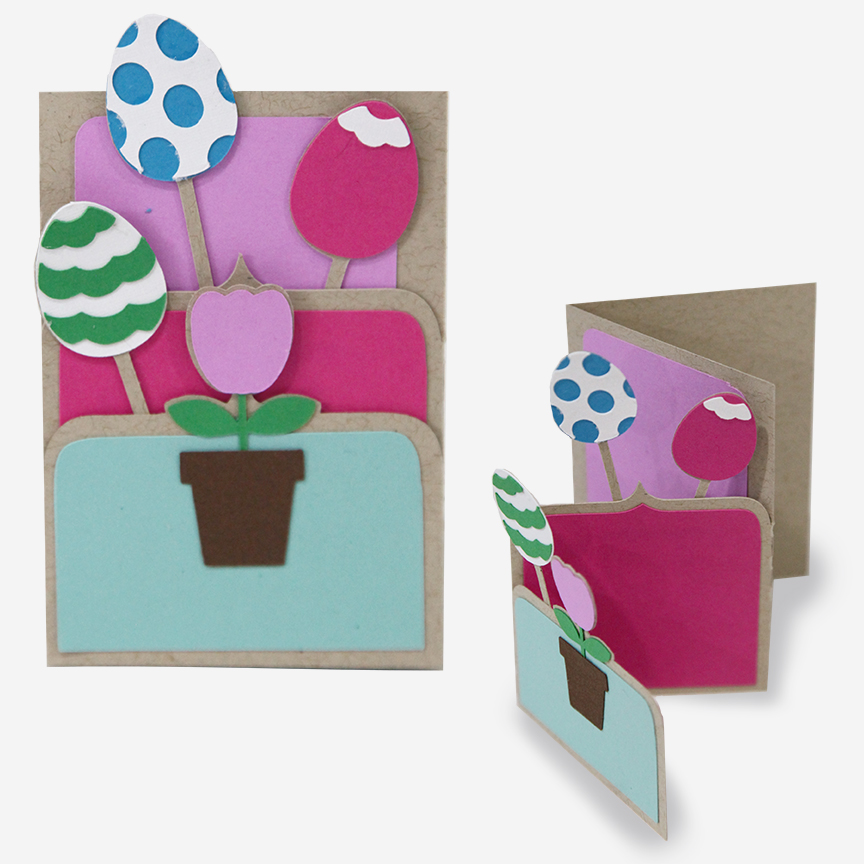
4. Layered tulip gift card Tag Design ID #77394 https://www.silhouettedesignstore.com/view-shape/77394

5. 4 x6 Window Photo Pocket Album Design ID #77713 https://www.silhouettedesignstore.com/view-shape/77713


​Hope you have some fun with these! I also have a fun bonus for you! Use coupon code SPRINGTIME30 for 30% off diecuts from my shop through May 1st!

XOXO- Carina


Silhouette Design Store JOANN Stores

Round up of 5 Springtime Silhouette Cameo Cuttables! Read More »

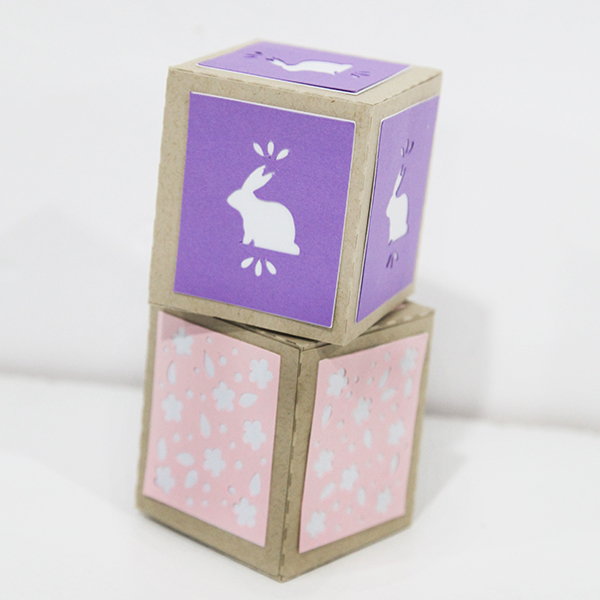
Flat Folding 3D Boxes Tutorial

I’m loving anything that folds down flat (so I can actually keep it!) these days. These foldable boxes are easy to put together. You can find them in my Silhouette SHop here: https://www.silhouettedesignstore.com/artists/252689

Instructions:
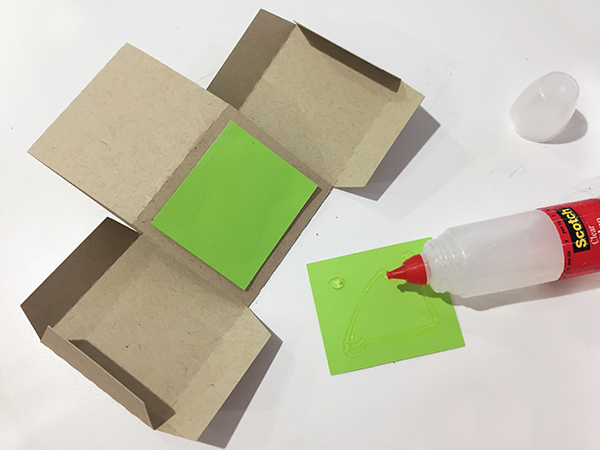
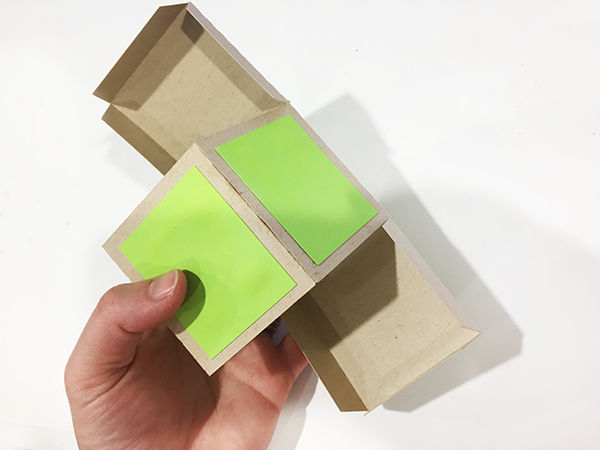
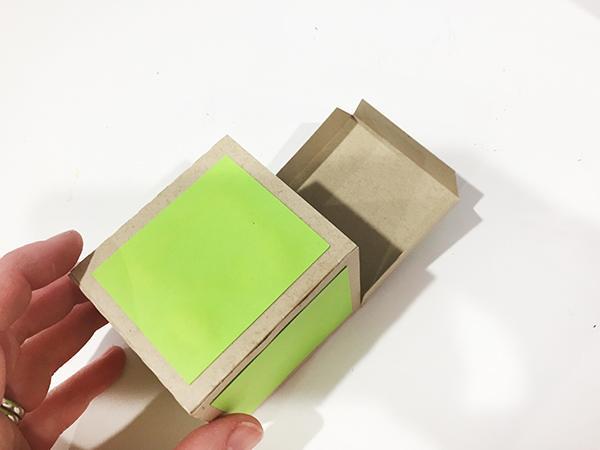
1. Cut out all pieces in your file.
2. If you have layered accent pieces, glue these together first ( for example, a bunny overlay on a white background).
3. Then fold up all the edges of the box. Glue together the inside flap to create the main body of the box.
4. Glue on the accent pieces.
5. Fold the box top and bottom up and slide into place. You do NOT have to glue the top and bottom on.

Happy Crafting!
Carina

Silhouette Design Store JOANN Stores

Flat Folding 3D Boxes Tutorial Read More »

2.25 in. x 3.25 in. Layered Cards and Envelopes on Silhouette

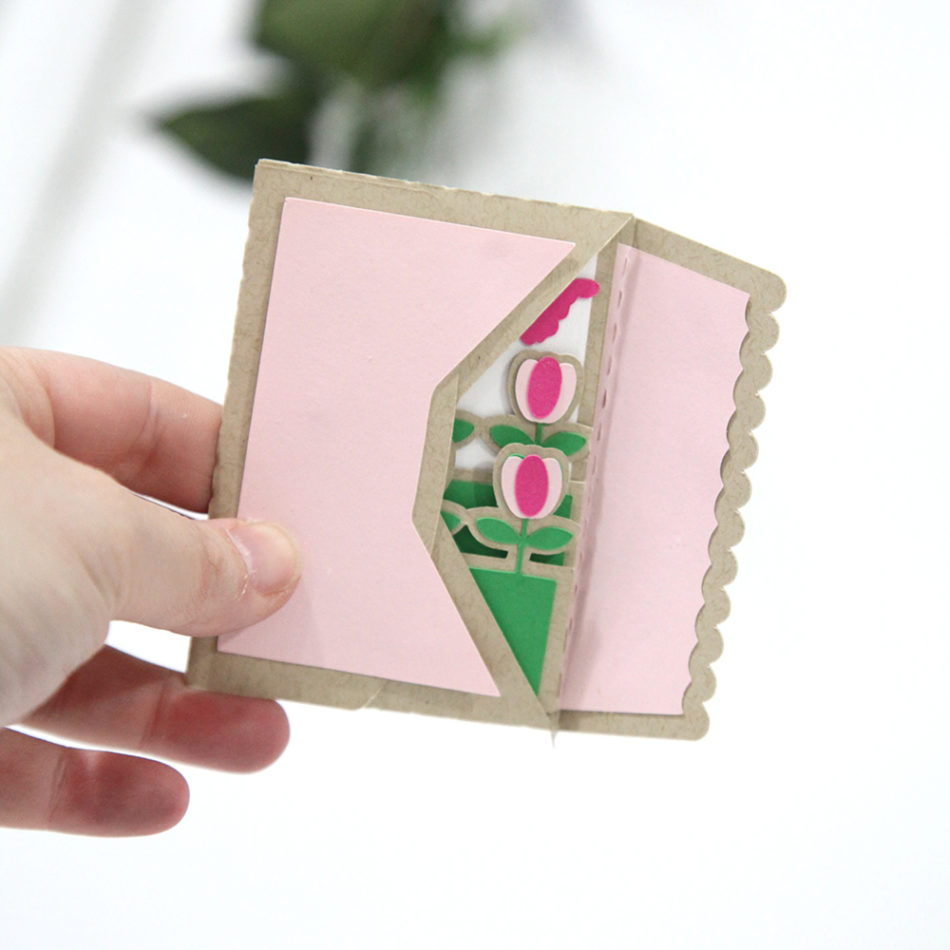
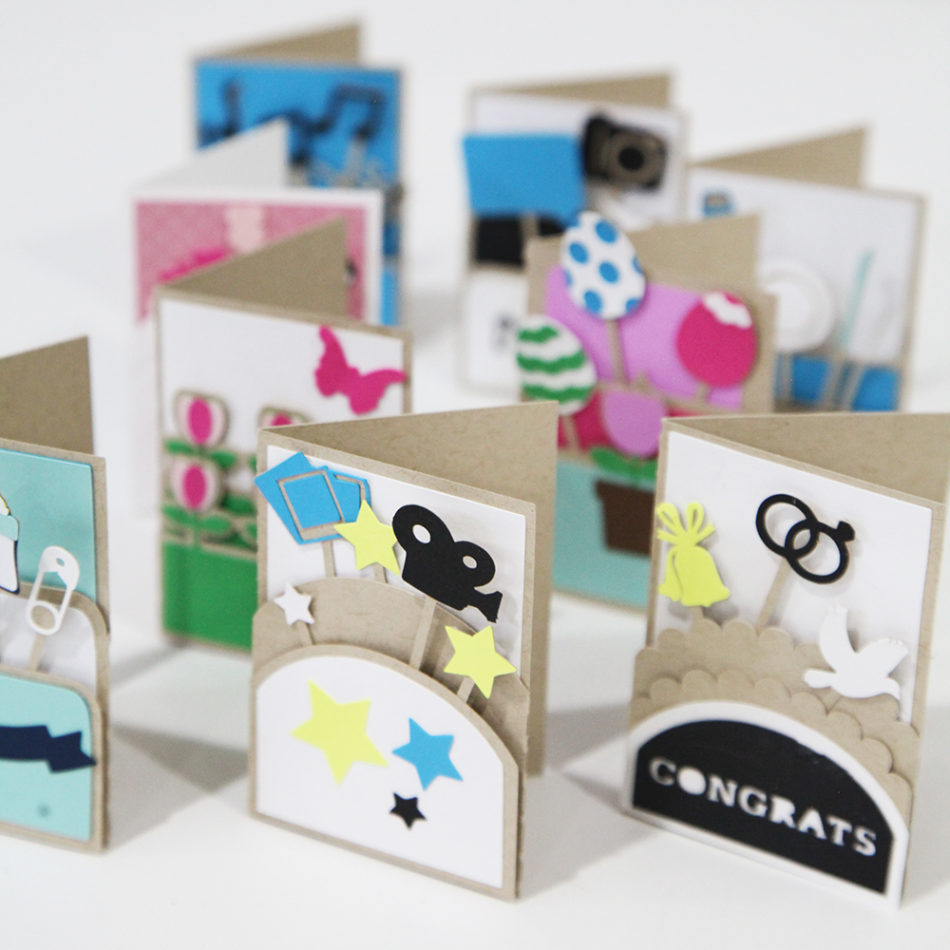
This week my Silhouette release continues with 2.25 in. x 3.25 in. cards. I’m really loving this size! This week the cards are “layered.” I cover a lot of different themes—wedding, baby, spring to name a few.  These Layered Cards are the same size as my Accordion Shadow Box Cards that were released last week. Because of this, I also have envelopes that match up to these cards.

I also have two videos below that will help you make these cards and envelopes. Please subscribe to the youtube channel if you are interested in these tutorials. Many times I am putting up these videos the week before the products are released so you can see what is coming out (your very own sneak peek!)


If you get one of each (layered card or accordion card + an envelope), you will find that it’s a very nice tight fit. Don’t use pop dots because the card will not fit. I may have an envelope come out that allows for a thicker card (tell me on instagram @carinagardnerpapercrafts if you want something like that!).

Happy Crafting!

Carina


Silhouette Design Store JOANN Stores

2.25 in. x 3.25 in. Layered Cards and Envelopes on Silhouette Read More »

Accordion Shadow Box Card Tutorial for Silhouette

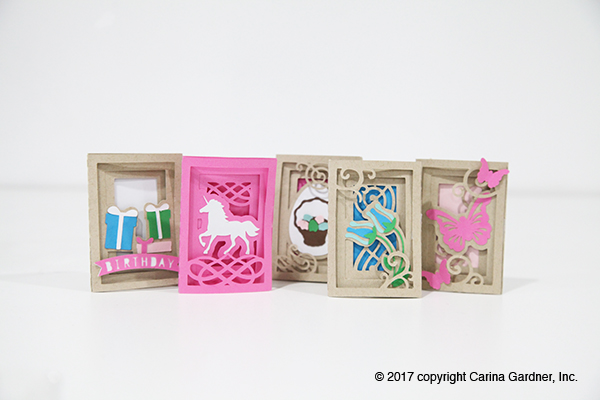
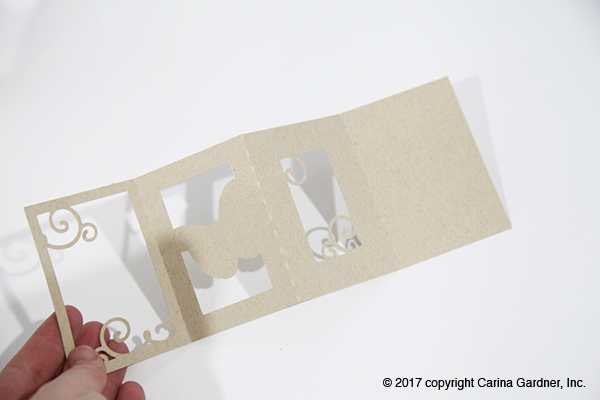
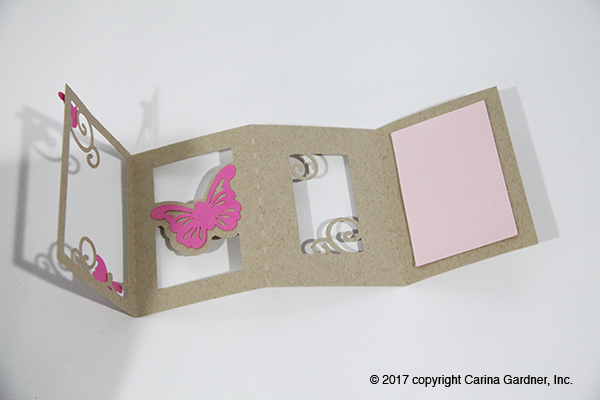
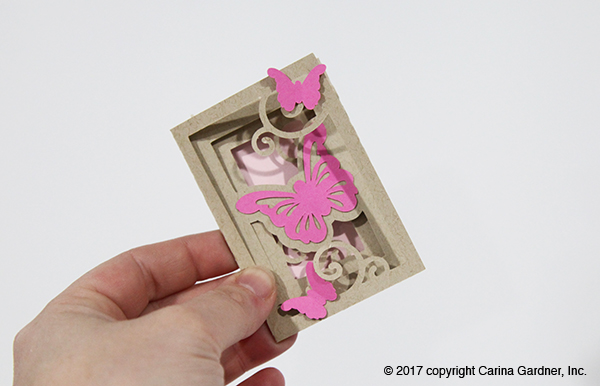
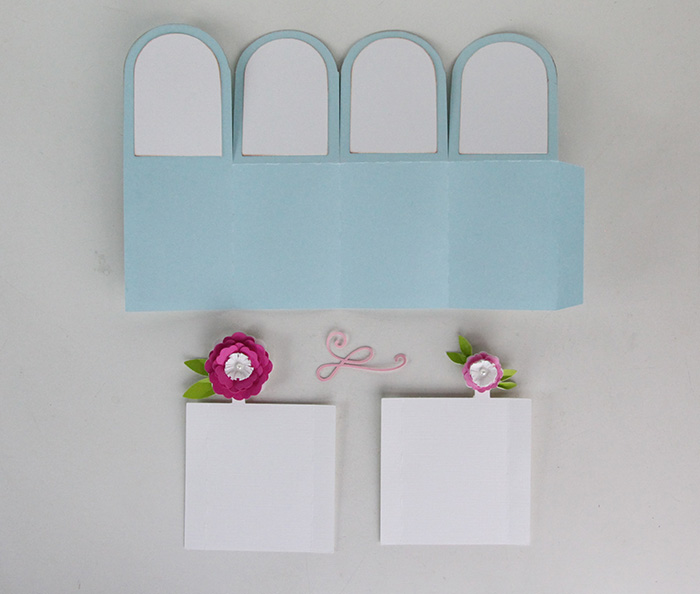
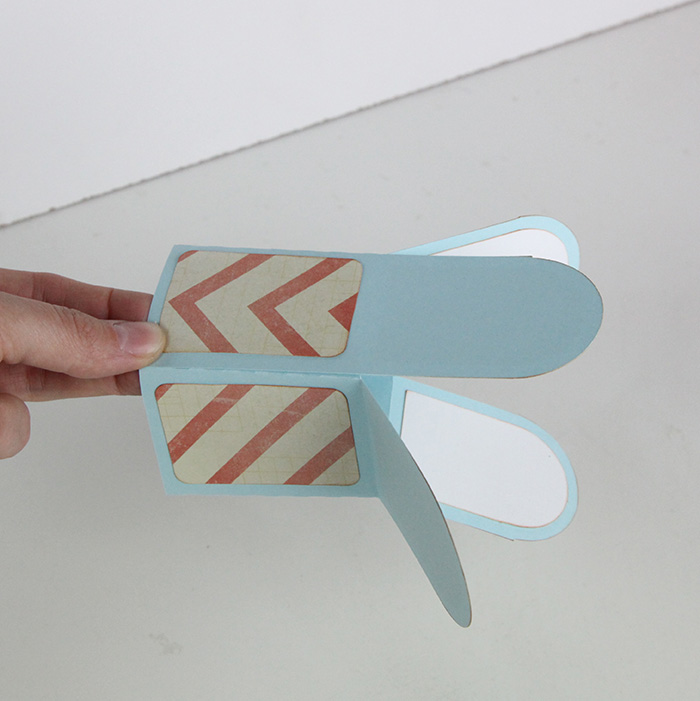
This week I am releasing these cool Accordion Shadow Box Cards! They fold flat and are so sweet. Cards are sized to 2.25 in. x 3.25 in. and can be cut on a portrait or cameo. There are 4 folds with layers of goodness! See how I put it together in the video below OR check out my quick instructions below. These are in my Silhouette Shop: https://www.silhouettedesignstore.com/artists/252689

***EDIT: Some of the Design IDS for this line is Design ID #187756, Design ID #187753,  Design ID #187750, Design ID #187747, Design ID #187744, Design ID #187741, Design ID #187735, Design ID #187729, Design ID #187726, and Design ID #187717.

Happy Crafting!
Carina
PS Make sure and subscribe to my youtube channel because this it the first of many videos that I am doing in this new format! I’m hopeful that you will be able to see clearly what I am doing!

Instructions

  1. Cut out all the pieces in the file.
  2. Fold the main card piece into an accordion shape.

3. Glue all the extra pieces into place using the preview photo as your guide. For items like flowers or butterflies, finger press to give dimension. Be sure to use the folded accordion card to decided where pieces should go so you do not mistakenly add pieces to the wrong side of the card.

Silhouette Design Store JOANN Stores

Accordion Shadow Box Card Tutorial for Silhouette Read More »

5 Reasons Spring is the Best Time to Create

IMG_0022_1webThere are lots of reasons that spring is a favorite time of year for most of us. Whether it’s the sunshine, bulbs in bloom, or the chirping of birds back from their winter hideouts; spring is a time of renewal. For me, I feel re-energized to make again. Here are some of the reasons spring is the best time to get your Silhouette machine out to CREATE!

1. Holiday crafts

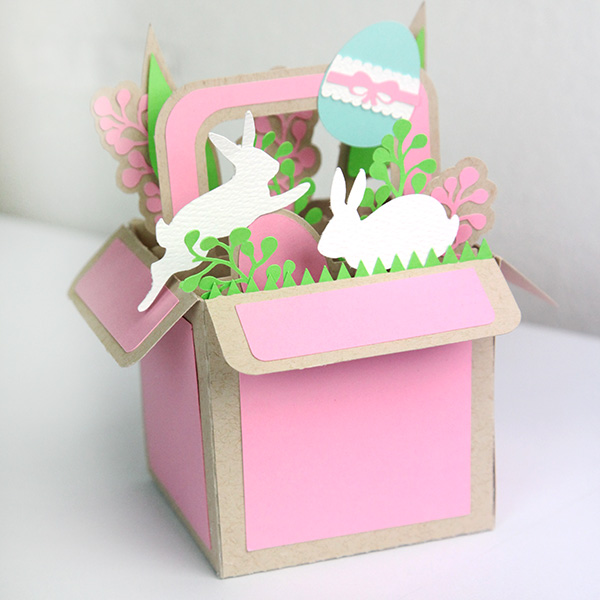
Sure, you love making stuff for Christmas, but what about St. Patrick’s Day, Easter, Mother’s Day, and Graduation? These are some of my favorite holidays to make cards and projects for! (Animal Explosion Basket – Easter Bunny Design ID 122681)

2. Flowers

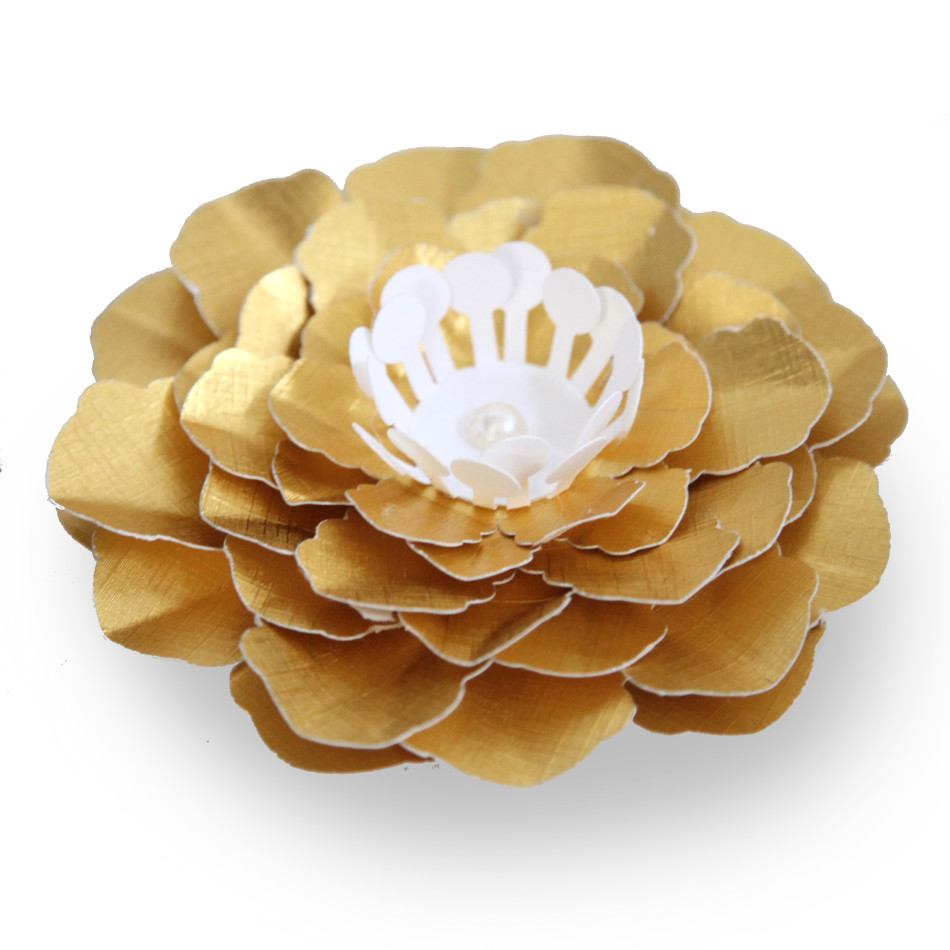
I don’t have to tell you that there are SO many good flower projects in the Silhouette Shop…because there always are! Party it up with some great floral projects! (3D Gold Fringed Petal Flower Design ID 109882)

goldcrimpededgeflower3. Spring Cleaning

You would think this would be a reason NOT to be making stuff, but the truth is once your spring-cleaning is done, there is nothing like sitting down to your craft table to make. That’s right, creating in a clean space is pure happiness. And once you have cleaned, declutters, and dejunked your house, isn’t it the perfect time to make something to fill it back up again (wink)!

4. Butterflies

There’s never a time I like to pull out all the butterfly projects more than in the spring. Who’s with me? (Vellum Top Butterfly Box Design ID 79311)

vellumtopbutterflybox5. Organization

Spring is officially the best time to get organized. There are so many great FUNCTIONAL (not just pretty) projects to get your photos, knick-knacks, and office supplies organized.

Hope you are enjoying spring as much as I am!

XOXO-Carina

Silhouette Design Store JOANN Stores

5 Reasons Spring is the Best Time to Create Read More »

Carina Gardner’s Best Little Album for Silhouette and SnapClickSuppy.com

IMG_7085_instagramwebThis week I’m leaving for long anticipated trip. It’s been a tough week with a lot of sickness and big news so the timing of this trip couldn’t be better. If you want to see what I am doing, I’ll be posting to all three of my feeds depending on where I am: @carinagardner @carinagardnerpapercrafts @miniloukids.

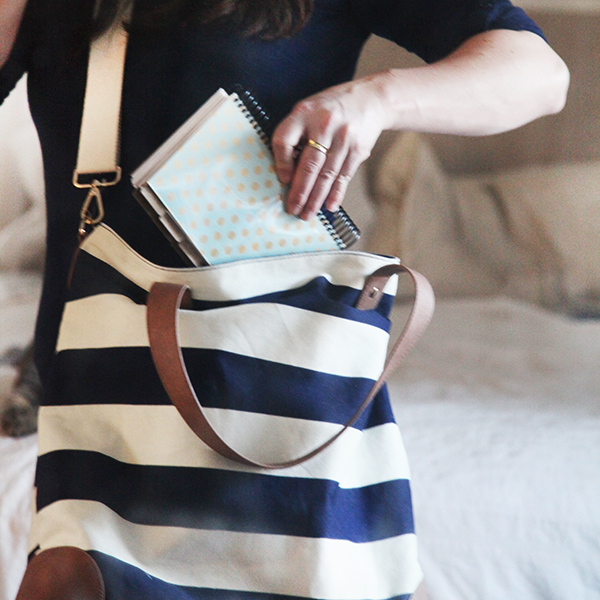
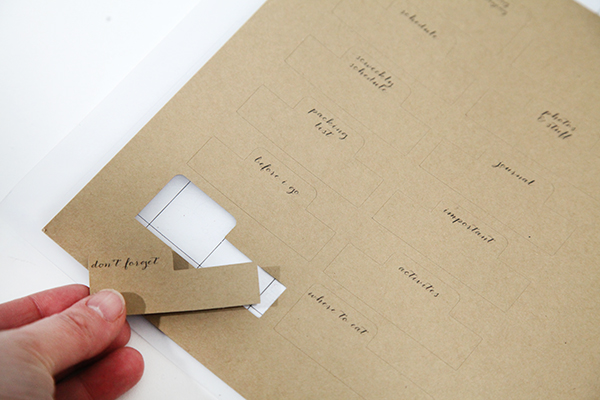
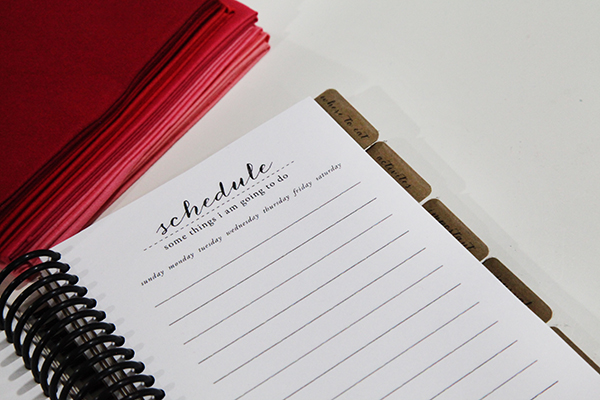
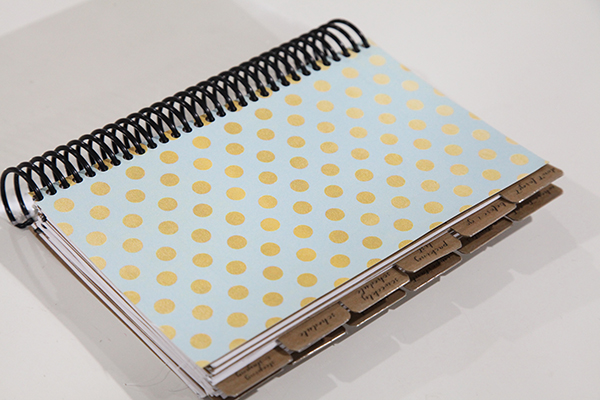
I always make myself a travel book for a trip like this ( think my Hong Kong trip for MiniLou) and this time wasn’t any different. This time, I wanted everything to be tabbed and easy to get to, so I used my Silhouette machine to cut out this book. I did however, get this SPIRAL BOUND instead of using the holes I made for my cutting files. Why? Because I like pre-made holes for regular album making. But for a trip, I think you need a sturdy spiral bound so you can really use the book. Printables are available on Silhouette OR you can also wait until I release them the first week in March for Digital Scrapbooking.

IMG_7102_1web

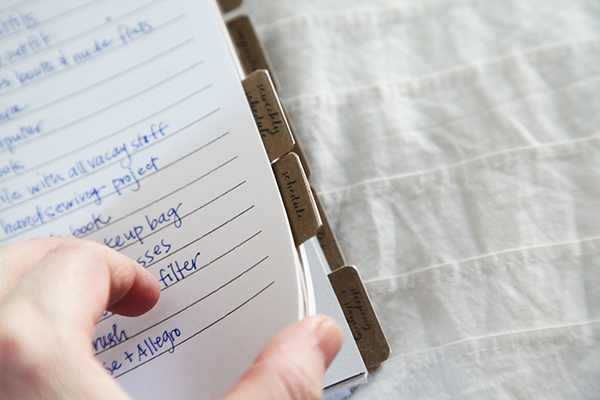
I call this the “Best Little Album” because I’ve gone out of my way to make it SO simple that it would work for your trip to Florida as well as a trip to Europe. You can pick and choose from the 12 printables that correlate with the 6 tab system (so you cut out 12 tabs in all). You can also pick from printable or cut-able covers I’ve provided as well as pockets and accessories. The point is that every piece should work seamlessly so you can mix and match to your hearts content. I know I did.

IMG_7106_1web

For the tabs, the printable is in a separate “tab” file so you can cut tabs out on mutli-colored paper. I’m sure I’ll do that in future travel books but for this one, I decided to go all kraft paper.

IMG_7065_1web

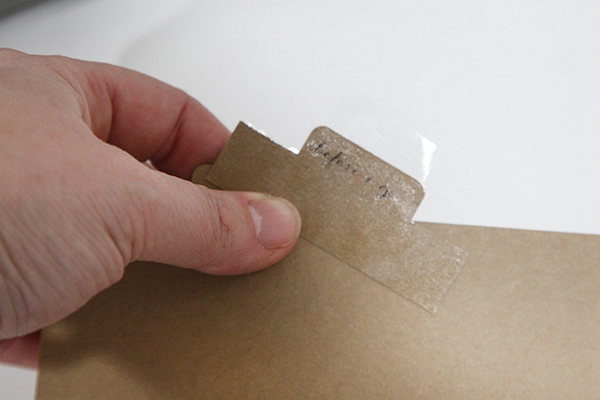
I also “laminated” the tabs with moving tape. Sturdiness is important! There’s nothing worse than having a tab break off midway through a trip or even later when your kids are handling them to look at it photos.

IMG_7066_1web

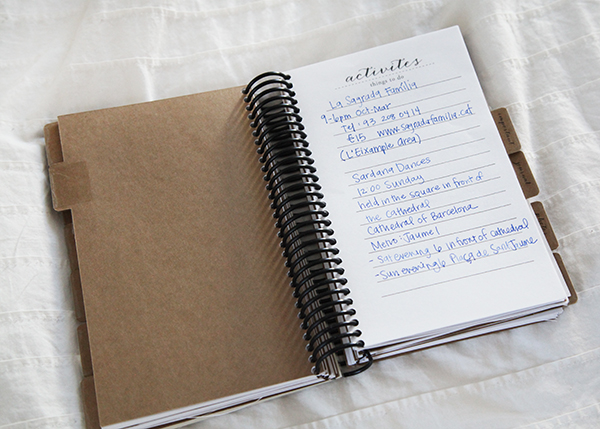
My travel albums are always dual purpose. They contain everything we are going to do, addresses, directions, places to eat, flight information, as well as a journal and a place for photos. That way I don’t have to come home from a trip and “scrapbook it.” It’s done. I staple in tickets to events, museums, and instax photos. I’ll come home and print a few and glue them into the remaining pages. Done and done.

IMG_7074_1web

IMG_7078_1web

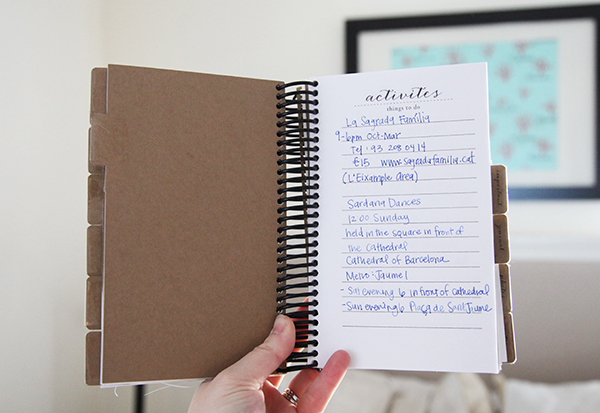
Maybe you can guess where I’m going from the activities I wrote here (wink, wink).

IMG_7097_1web


Search “BEST LITTLE ALBUM” under my Silhouette Artist name to find the entire collection of these! I promise you’ll use this one again and again!

XOXO, Carina


Silhouette Design Store JOANN Stores

Carina Gardner’s Best Little Album for Silhouette and SnapClickSuppy.com Read More »

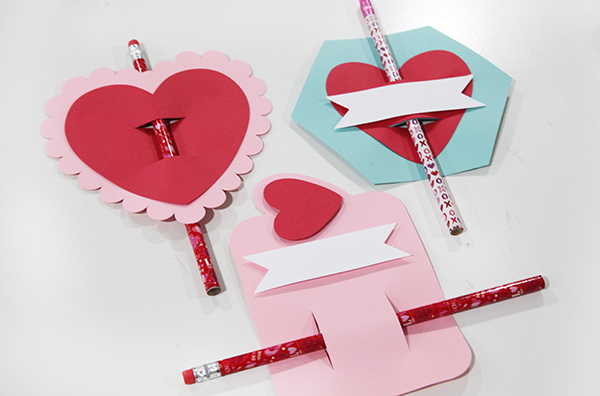
Kids Pencil Valentine Cards

IMG_7052_1web
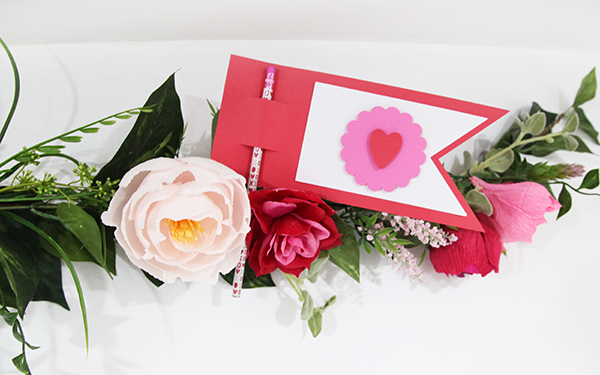
IMG_8715_webThis week is the last one I’ll be releasing Valentine’s so I’m going out with a bang!  I also decided to double dip. These pencil cards are not only my final Valentine’s release but are also Felicity’s class gifts. She’s going to write on each of them, and I’m sure we’ll add a few quotes like “I’m write for you.”

You can find them in my Silhouette shop here.

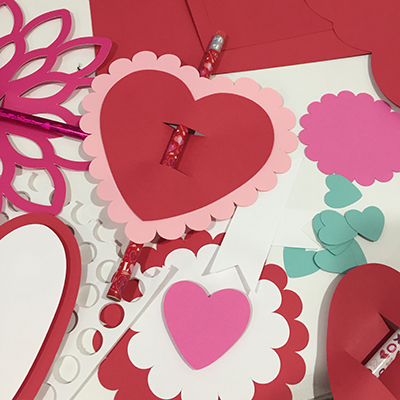
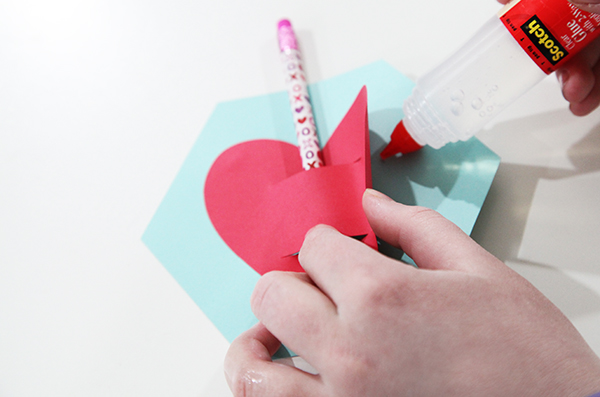
TIP 1: When you are putting these together, I recommend putting your pencil through the slits FIRST and then gluing your pieces into place (see photo below).

There are several designs were two or more papers have slits that match up. Use the slits as your guides. Place the pencil through the slits first and then pull open the edges of the top paper to glue it into place.

TIP 2: I LOVE pop dots with these designs! And glitter. And stamping ink on the edges. I kept them all simple on purpose. So you can jazz them up or use them as a kid activity.

TIP 3: Add a printable. Simply use whatever word processing software you use and write up a cute phrase in a cute font. Print, cut and attach to these Valentine’s cards!

IMG_6996_1web

And in case you missed it (haha), I’ve been releasing Valentine’s for the last month. In fact, we have been releasing Valentine’s for both CGInc. and MiniLou for the past several weeks. You can check both shops here:

Carina Gardner Silhouette Shop

MiniLou Silhouette Shop

IMG_7059_1web

Happy crafting!
Carina


Silhouette Design Store JOANN Stores

Kids Pencil Valentine Cards Read More »

Santa’s Glitter Village SVG Tutorial for Silhouette

img_5692_edited_web

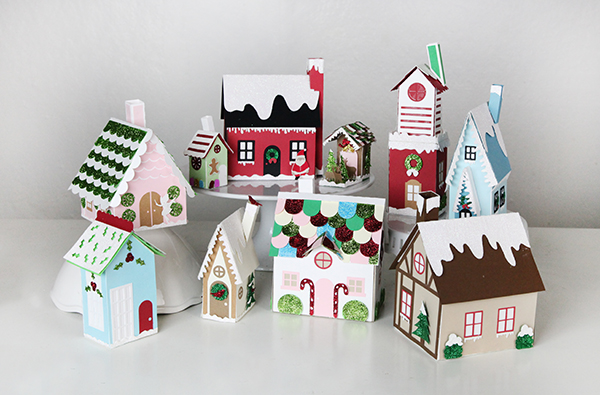
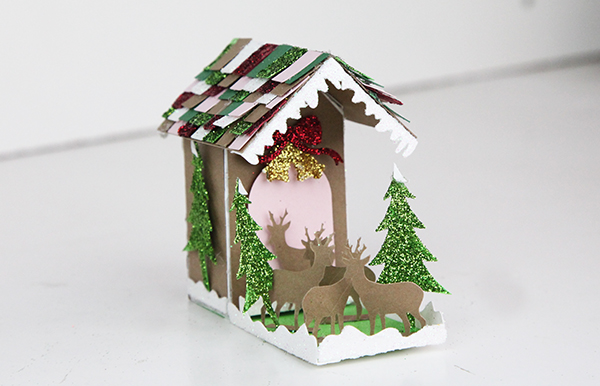
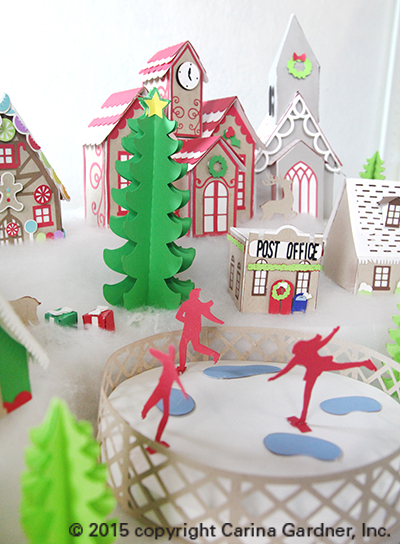
I’m SO excited about the new village I designed this year for Christmas! It’s called Santa’s Glitter Village and you can download all of it from my Silhouette shop! You can add it to any pieces you have from my original Christmas Village or build these separately! There is even a cool download showing you how I made the snowy centerpiece the either village is made on. You can use that for this village too!

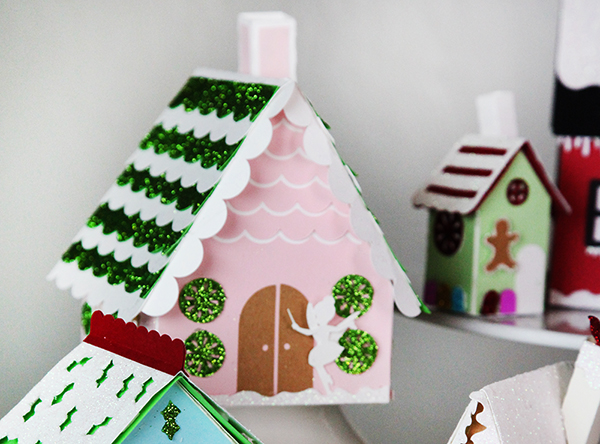
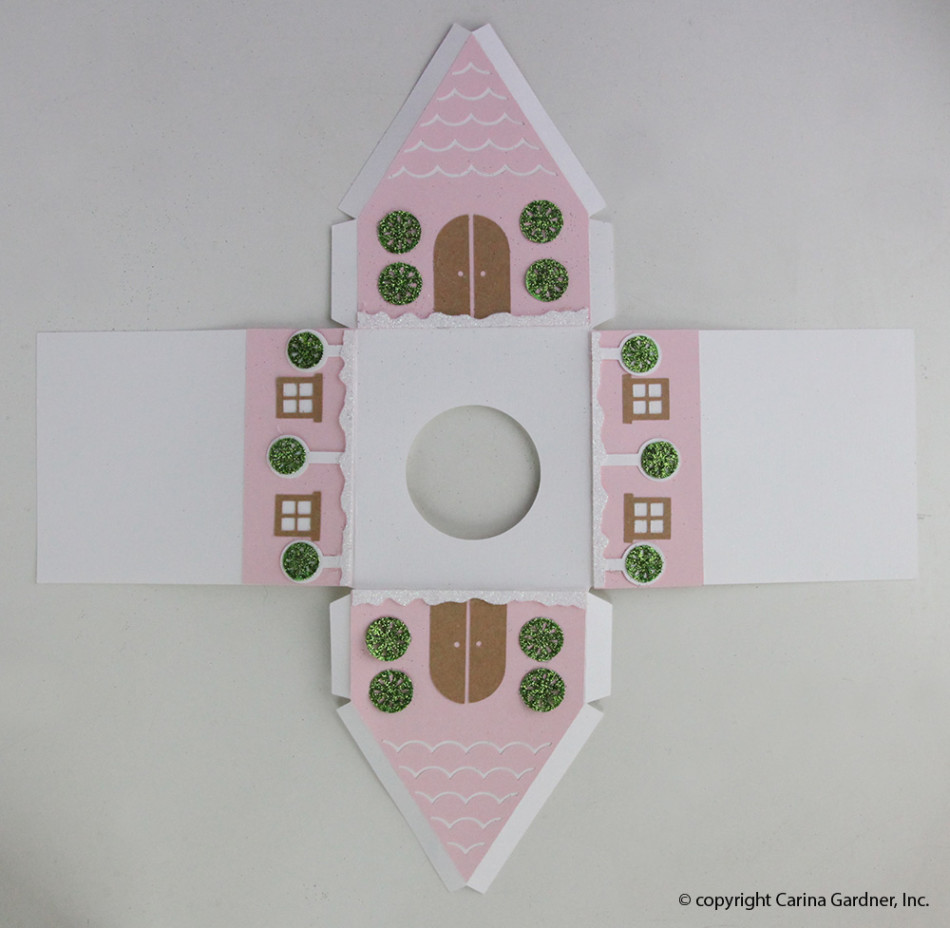
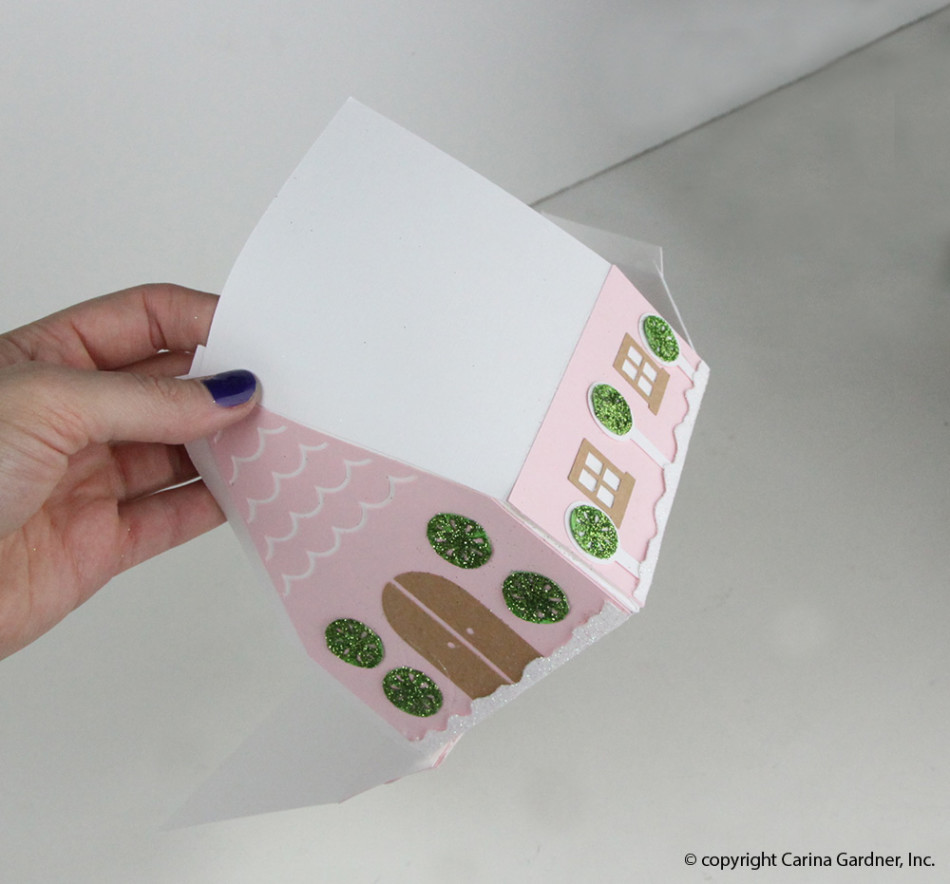
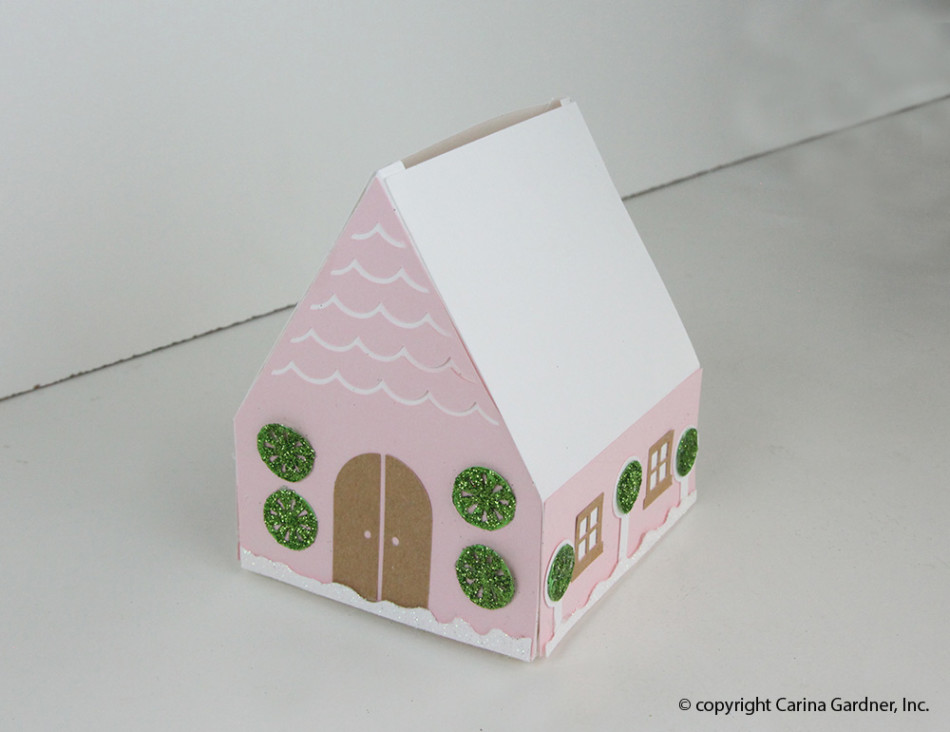
img_5710_1webThis year it is all about GLITTER! I have a great tutorial for you on how you can put together below. I do NOT have individual tutorials on these houses because many of them are made THE SAME. The tutorial I have below is for the Sugar Plum Fairy’s House and most of the buildings are built in this way. There are also extra instructions below for pieces I thought you might like a little extra help with. So scroll on down to see if there is something there that will help you!

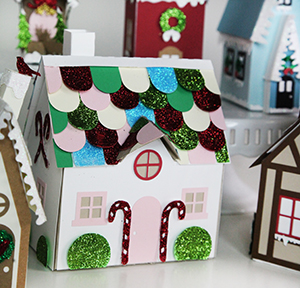
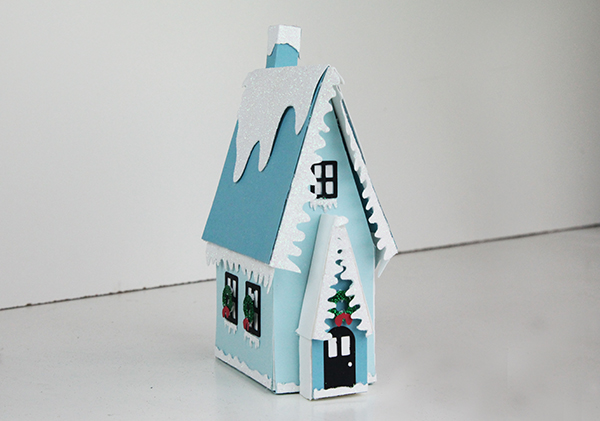
This year, the Santa Glitter Village includes: Santa’s Cottage, Candy Cane Place, a Chapel, Elf Dwelling, Reindeer Stables, Santa’s Tower, Snow Bird House, Sugar Plum Fairy’s House, Tiny Mistletoe House, and the Winter House. Many of these come with openings at the bottom for an electric tea light (or two). The smaller houses do not because a tea light would not fit:).

You can find ALL my tutorials on my main Silhouette landing page here: https://carinagardner.com/silhouette/. I noticed that when I went back to look at previous projects in the Silhouette store, that some of the links are broken. That landing page is your end all for ALL of my tutorials. You can also watch many tutorials I have filmed on my YOUTUBE channel.

I hope you have a wonderful time building Santa’s Glitter Village! Every piece is unique and sweet! I think I’m placing mine on my piano this year.

Happy crafting!

XOXO-Carina

img_5700_1web


Supplies

-Glitter (we used fine glitter, but you could use more course glitter)

-Mod Podge (we used gloss, but you could use any kind)

-foam brush

-1 piece of copy paper

-SVG card cutouts

Instructions

Note:  These instructions work for all of the houses in Santa’s Glitter Village.  At the end of the tutorial there are instructions on how to put a few of the more intricate pieces together.

1.  Cut out all SVGs provided in the file.

2.  Before putting the house together, decide which pieces you want to glitter.  I did mine on the green scallop pieces of roof, peppermint swirls, and snow.

3.  Once you have all of the glitter pieces and supplies, take a piece of copy paper and fold it in half (this makes it easier to put the extra glitter back in the jar later).  This paper will be your working surface to catch the extra glitter and Mod Podge.

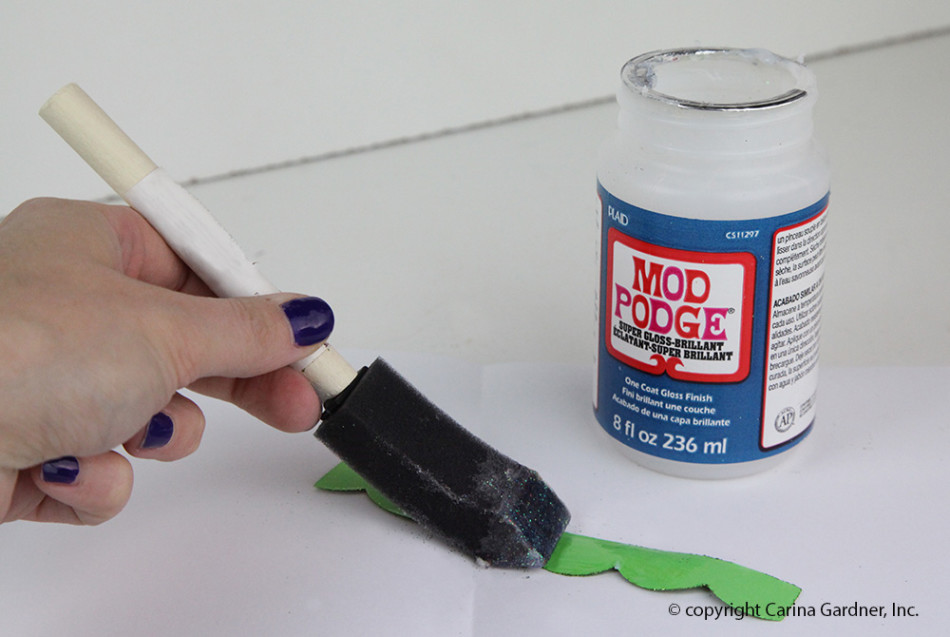
4.  Next, take your foam brush and dip it in Mod Podge.  Cover any area you want glittered with a thin layer of Mod Podge.  Put the copy paper underneath to contain any Mod Podge and glitter that goes over the edge.

img_5560_web-copy

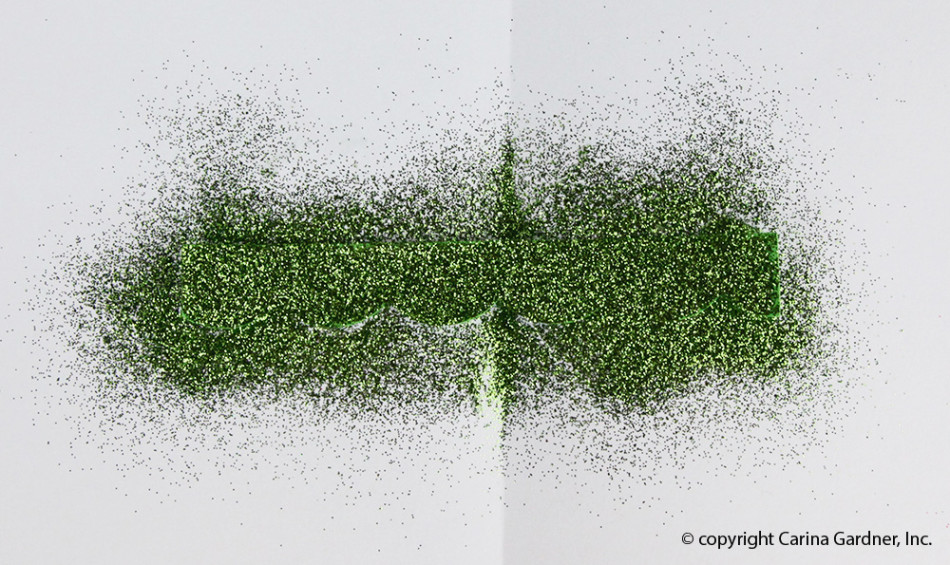
5. After the whole piece is covered in Mod Podge, take the glitter and sprinkle it over the area the Mod Podge covers.  Be very generous with the glitter so it covers everything.  Remember, you will be able to put the extra back in the container so make sure everything is covered well.

img_5564_web

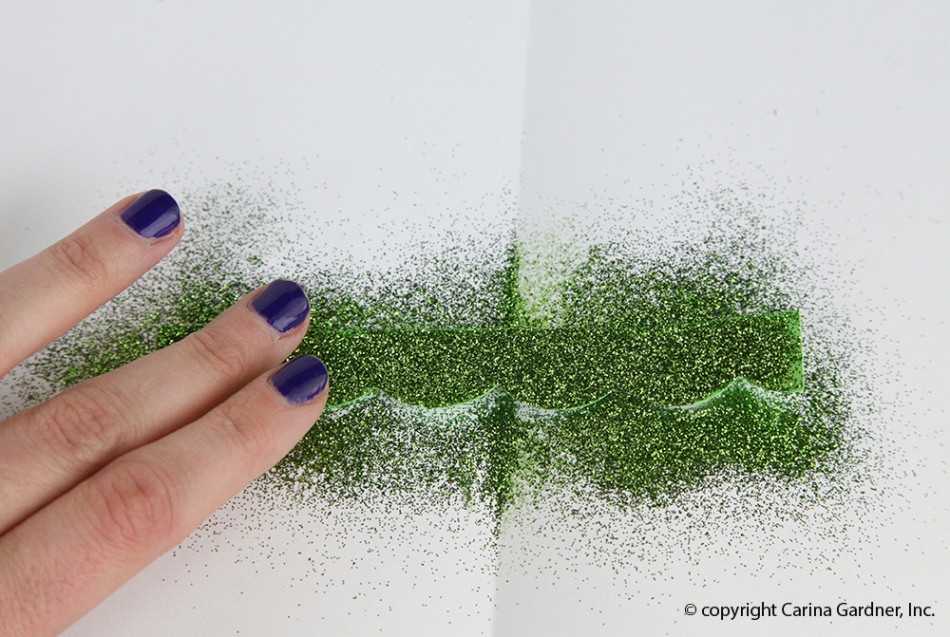
6. To make sure the glitter to stays in place better, use your finger to tap the glitter lightly.  This make sure more glitter adheres to the Mod Podge.img_5569_web

7.  Wait for the Mod Podge to dry a few minutes, and tap off the excess glitter.

Tip:  If you are worried about the glitter transferring too much, you can put another layer of Mod Podge on top.  If you use gloss Mod Podge, the glitter wont lose it’s sparkle.

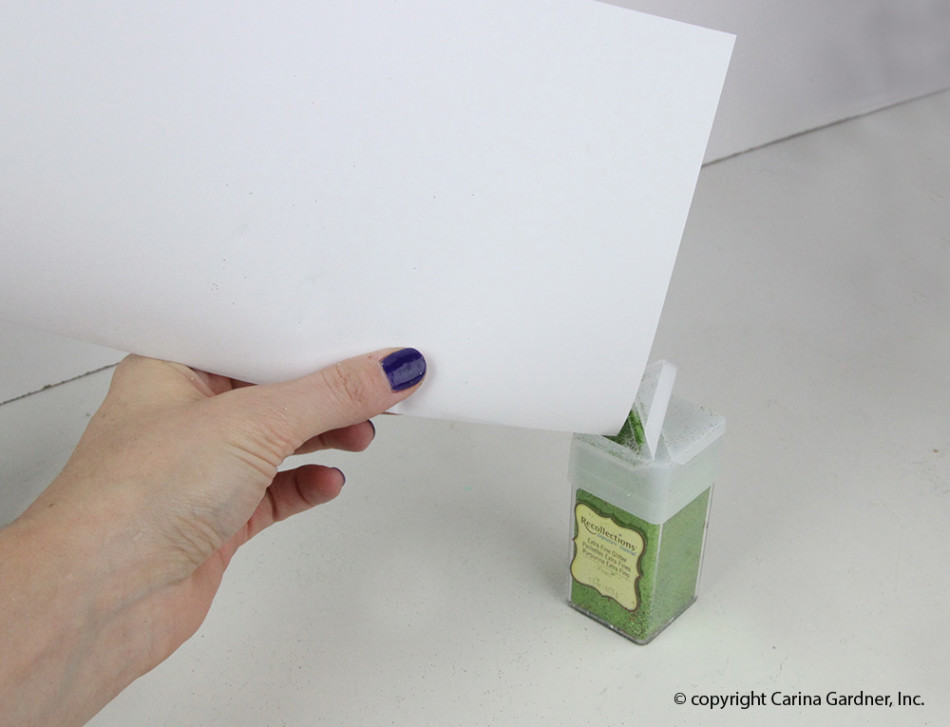
8.  Once you’re done with the glitter, fold the copy paper with the glitter on the inside and pour the excess back into the container.img_5573_web

9.  You’re done with the glitter, now onto how to put together the rest of the house!

10.  To put the house together, first, take the facades and glue all of the embellishments to them.

11.  Next, glue the facades to the side and front pieces.

12.  Then, glue the tabs of the back and side pieces to the tabs of the bottom.  It should form a “T” shape.

img_5576_web

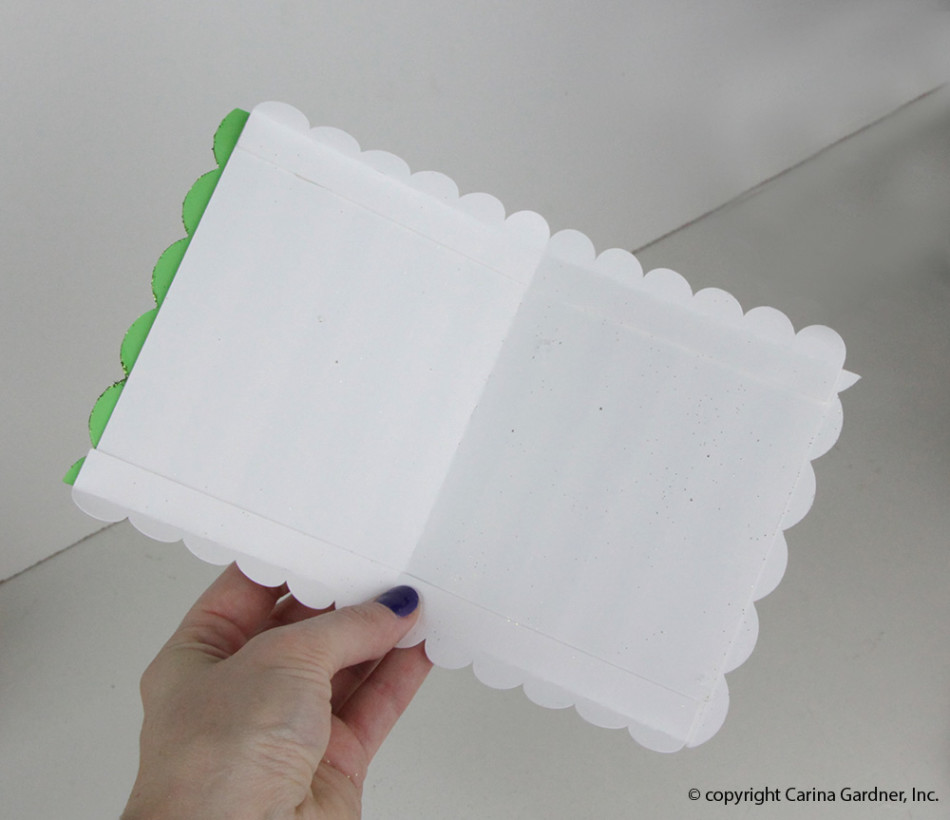
13.  To make the house 3D, hot glue the tab on the side of the front piece to the side piece.  Do this for all of the tabs until you have a house shape.

img_5578_web img_5580_web

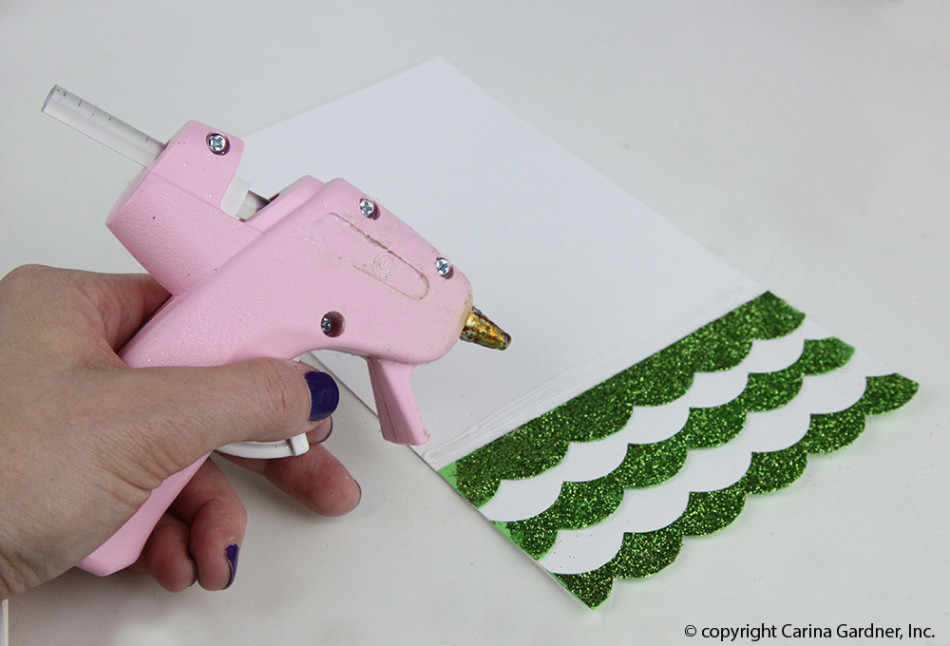
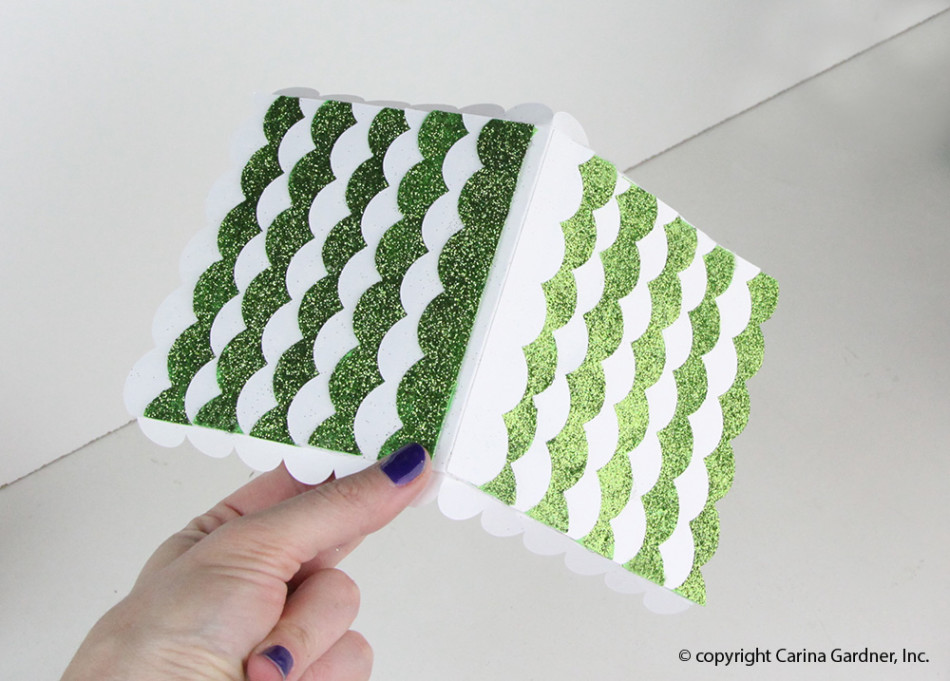
14.  After the house is done, gather your roof pieces.  Hot glue the scallop pieces to the roof piece.  Make sure you overlap each scallop piece and switch off between colors as you glue.  It’s best to estimate your spacing before your start glueing so the scallop pieces cover the roof evenly.img_5586_web

14.  Next, add the long scallop piece to the side of the roof by glueing it on the underside of the roof.

img_5590_web img_5591_web

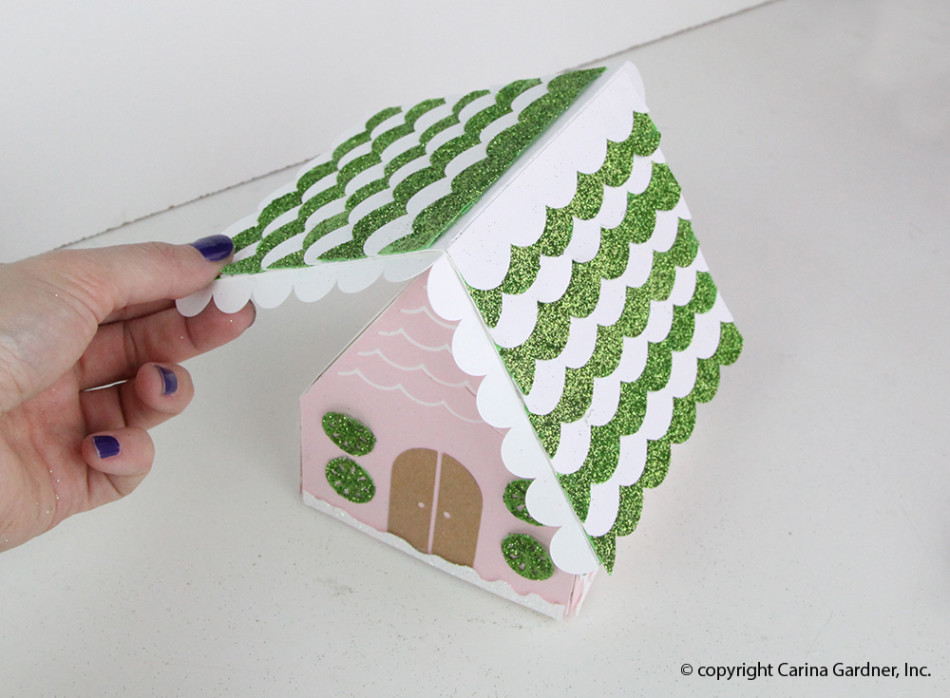
15.  Then add the roof by glueing one side, making sure it’s centered and the top creased is lined up.

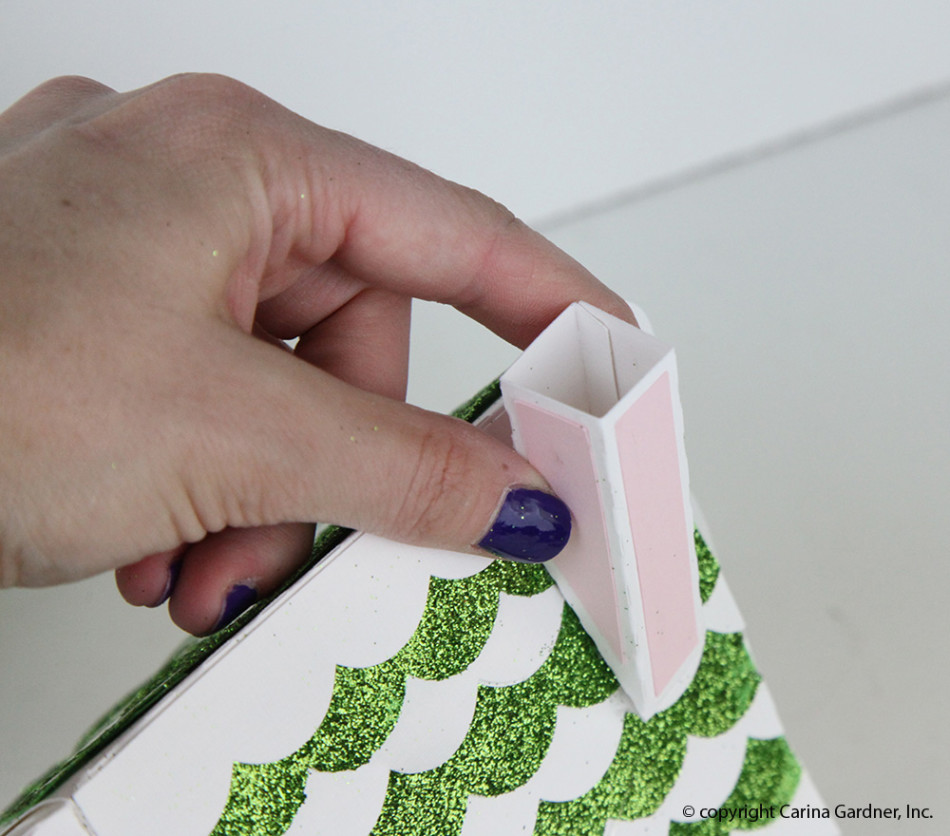
16.  The last thing to add is the chimney!  Take the chimney piece and fold it into a box shape.  Then, glue the tabs on the angled side to the roof.img_5596_web img_5597_web

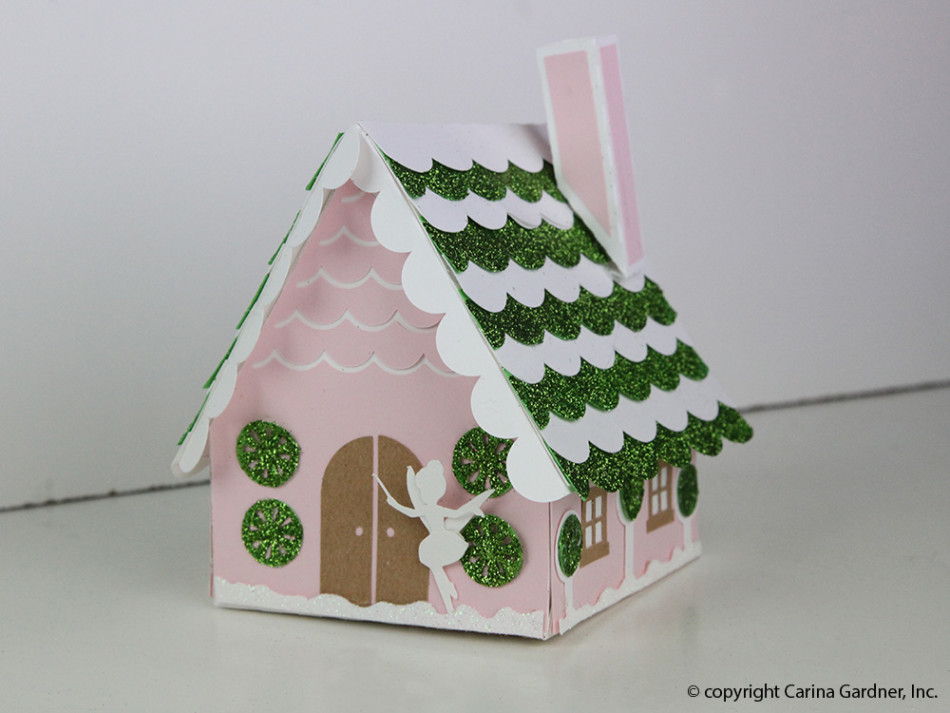
Now you have the most adorable Fairy House for your Glitter Christmas Village!

img_5606_web

Here’s a few more instructions on some of the parts that are specific to each piece.

img_5649_1web

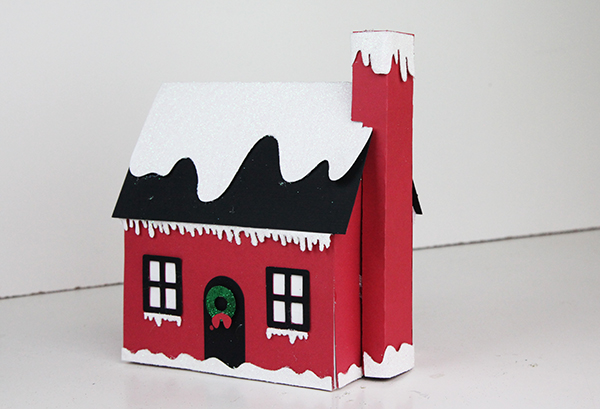
Chimney on Santa’s Cottage:

  1.  Start by folding all of the score lines.
  2.  Next, glue the tab on the long side and glue it so it makes a box.
  3.  Then, Glue the tabs on the open part to the house.

img_5627_1web

Front Door piece on Chapel:

  1. Start by adding all of the embellishments to the facade.
  2. Then, glue the facade to the front/back piece.
  3. Next, take the long bottom piece and glue the tabs to the front/back piece.
  4. Add the roof/snow like you would for the other houses.
  5. To finish, glue the front door piece to the front of the chapel.

img_5669_1_web

Reindeer Stables:

  1. Start by assembling the house.
  2. Then, take the green piece and glue it to the bottom of the house.  The green piece will cover the entire bottom of the house and then extends into a yard.
  3. Next, glue the reindeer and tree tabs to the yard area.

Silhouette Design Store JOANN Stores

Santa’s Glitter Village SVG Tutorial for Silhouette Read More »

Guest Post from Kelly of Finding Time to Create: Her Adorable Halloween Village

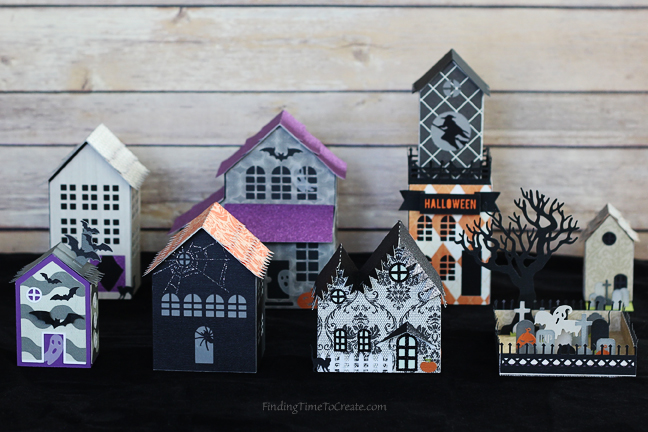
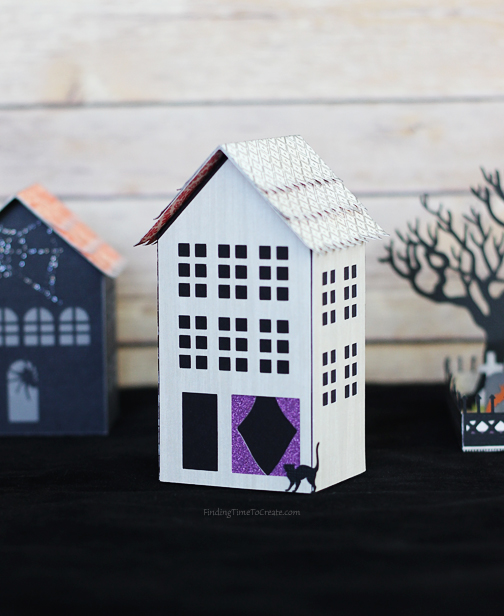
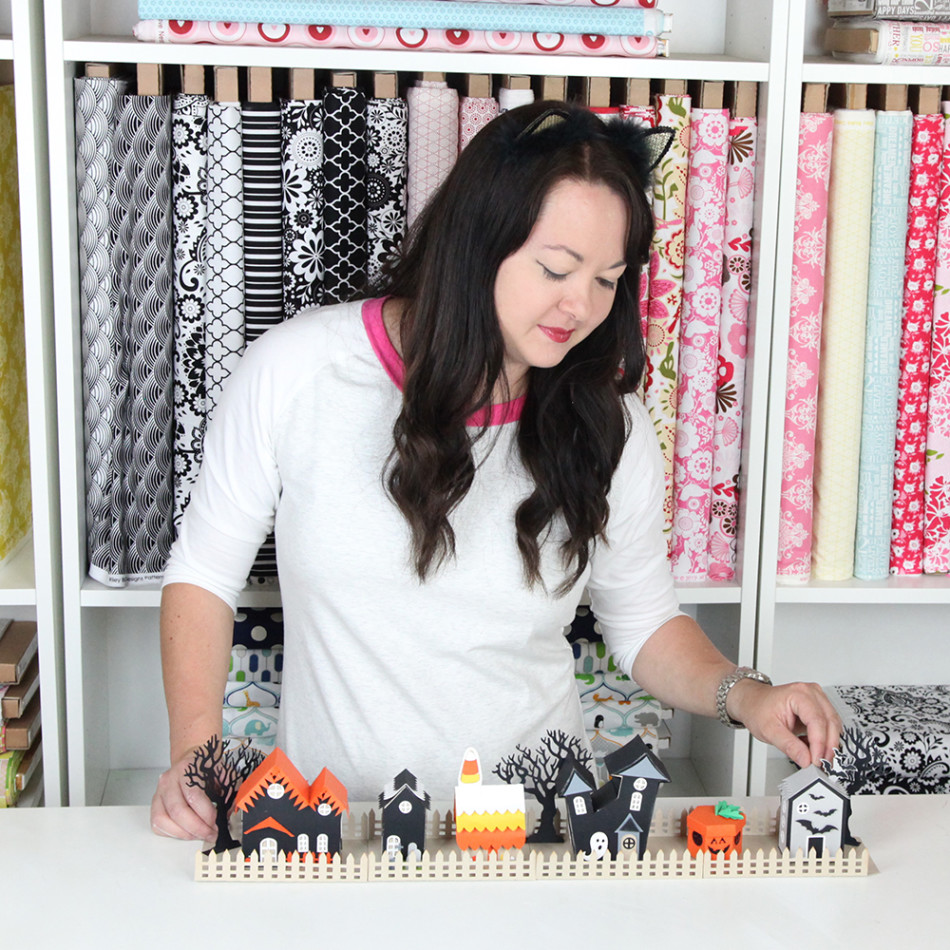
Hello! Kelly here from Finding Time To Create. I absolutely love making paper crafts with my Silhouette CAMEO, so I jumped at the chance to use Carina’s fun Halloween designs this season.

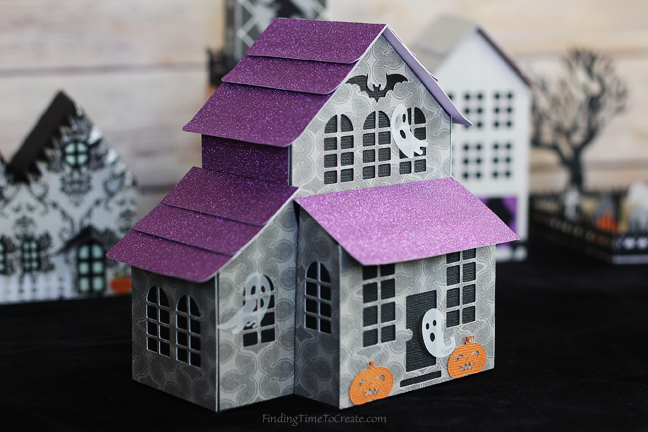
I used designs both from this year’s tiny Halloween village set, and from last year’s Halloween haunted village set. It was fun to mix and match the two sets.

halloween-village-finding-time-to-create

[photo: Halloween Village – Finding Time To Create]

I wanted these to catch your attention in the dark, so I made a couple of the houses with materials that would really pop when it’s dark.

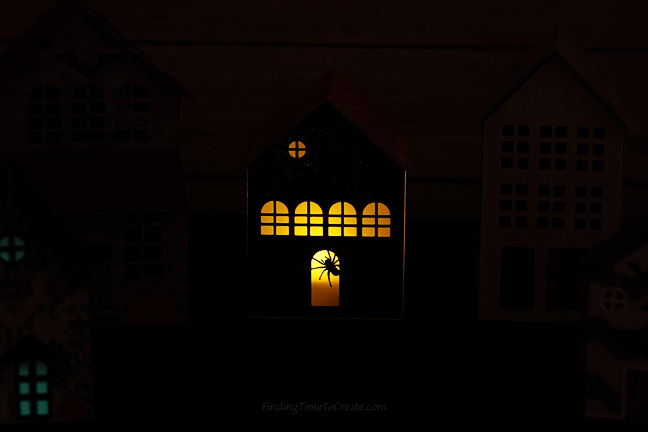
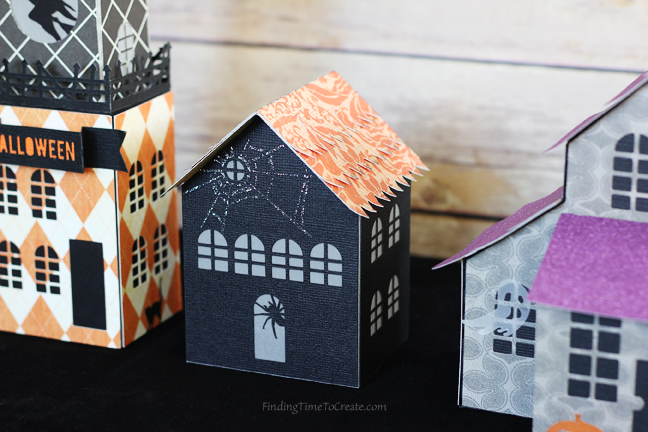
I used vellum as my base for the spider house, which has an opening in the bottom for a battery-operated tea light. That spider on the door looks pretty creepy, don’t you think?

spider-house-night-finding-time-to-create

[photo: Spider house night – Finding Time To Create]

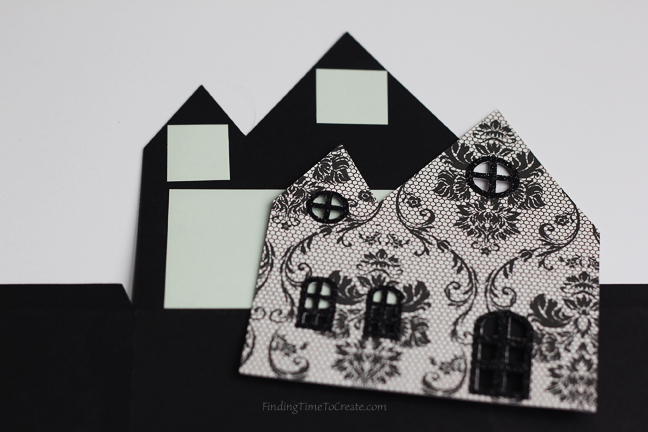
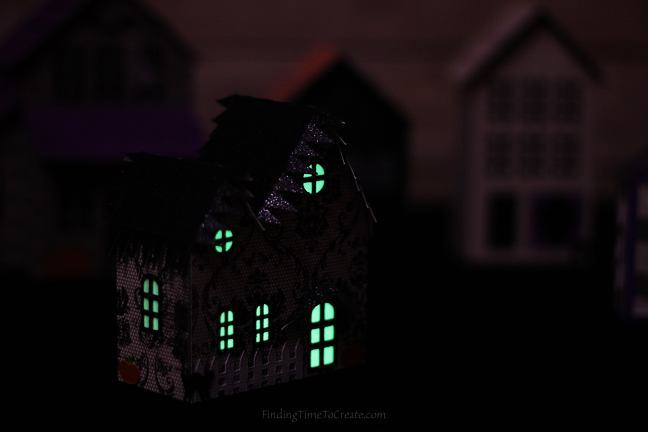
On the tiny village haunted house, I backed the windows with glow-in-the-dark sticker paper. It really makes those windows pop! (This house was my kids’ favorite.)

glow-in-the-dark-sticker-paper-and-glitter-heat-transfer-accents-finding-time-to-create

[photo: Glow in the dark sticker paper and glitter heat transfer accents – Finding Time To Create]

tiny-village-haunted-house-night-finding-time-to-create

[photo: Tiny village haunted house – night – Finding Time To Create]

Glitter makes every paper craft better, so I also used glitter paper for some of the rooftops, and glitter heat transfer for the spider web and some window frames.

spider-house-day-finding-time-to-create

[photo: Spider house day – Finding Time To Create]

You may also notice I cut all the ghosts from vellum, and added a few cats from the cat house throughout the set.

This was such a fun project to make! Thanks for letting me share it with you!
More pictures:

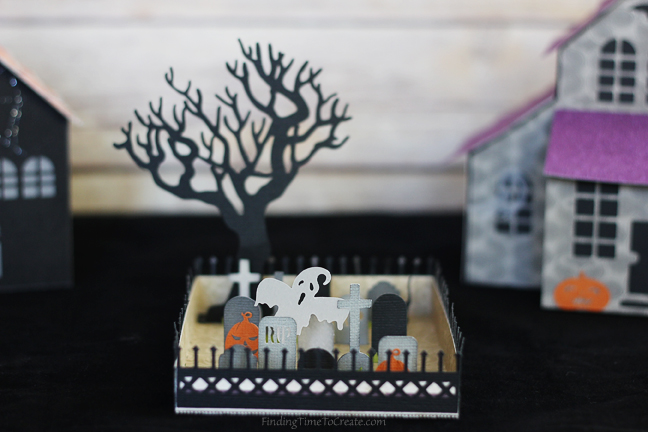
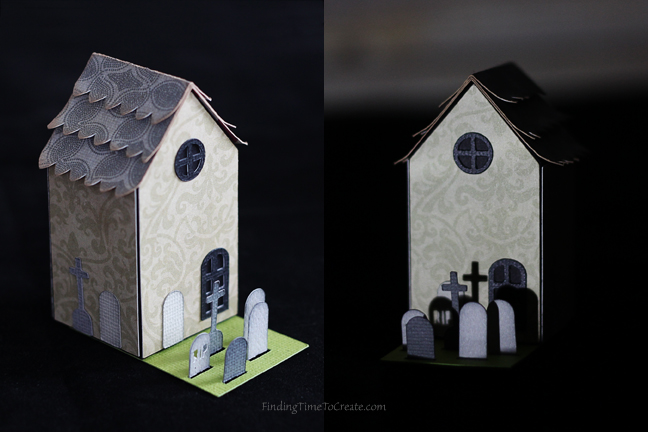
Halloween haunted village – Spooky cemetery and Tiny Halloween village – Haunted tree

cemetery-finding-time-to-create

[photo: Cemetery – Finding Time To Create]

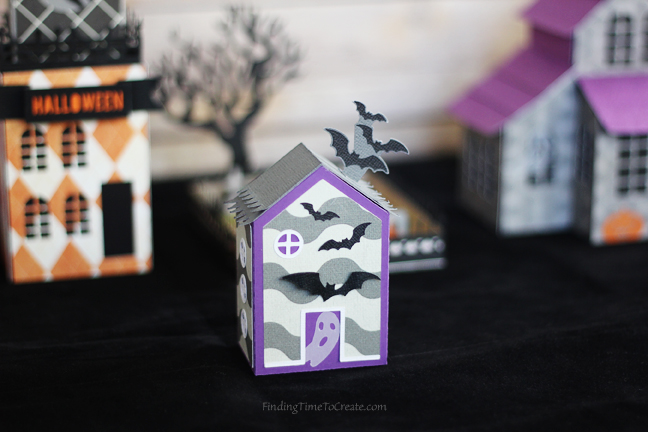
Bitty bat house

bitty-bat-house-finding-time-to-create

[photo: Bitty bat house – Finding Time To Create]

Halloween haunted village – Cat house

cat-house-finding-time-to-create

[photo: Cat house – Finding Time To Create]

Halloween haunted village – Ghost mansion

haunted-mansion-finding-time-to-create

[photo: Haunted mansion – Finding Time To Create]

Tiny Halloween village – Lil graveyard

lil-graveyard-day-and-night-finding-time-to-create


A huge thank you to Kelly for being on my blog and showing us how she put together her Halloween village! It turned out beautiful!
XOXO-Carina

Silhouette Design Store JOANN Stores

Guest Post from Kelly of Finding Time to Create: Her Adorable Halloween Village Read More »

Box Card SVG Tutorial for Silhouette

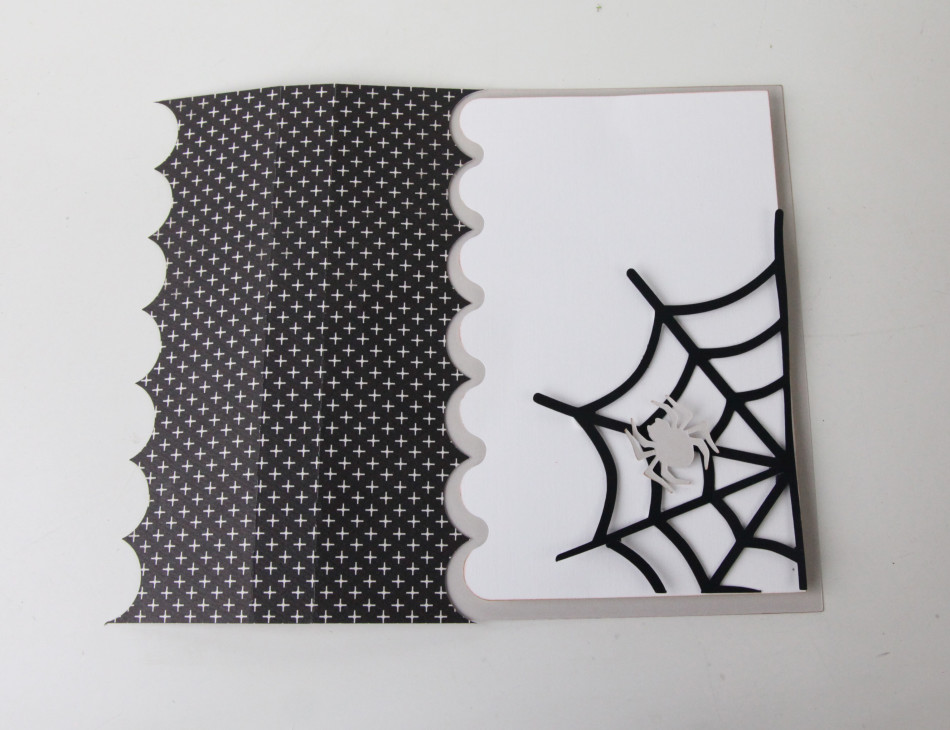
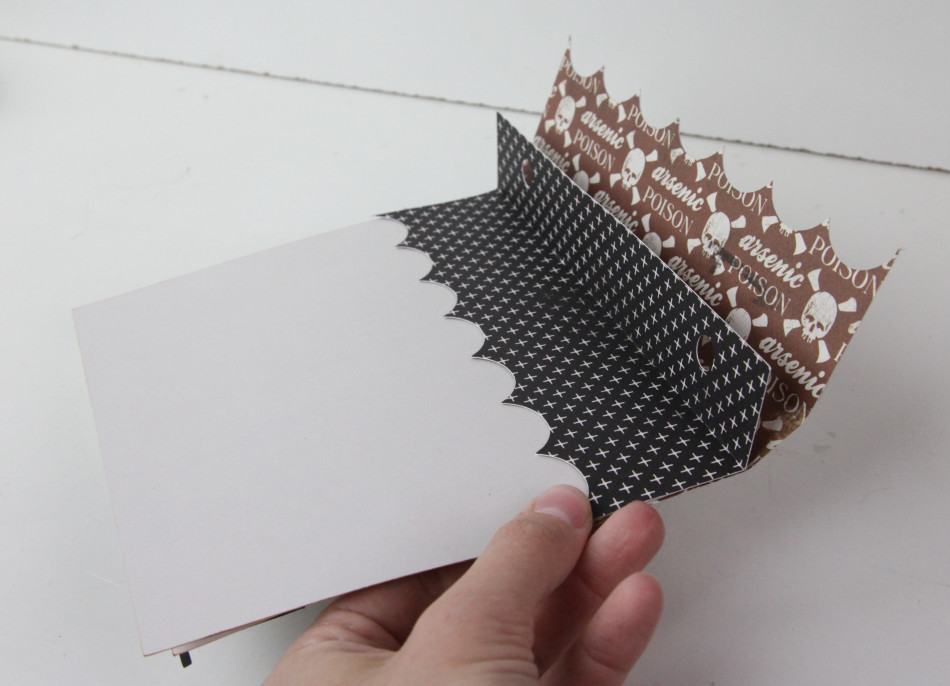
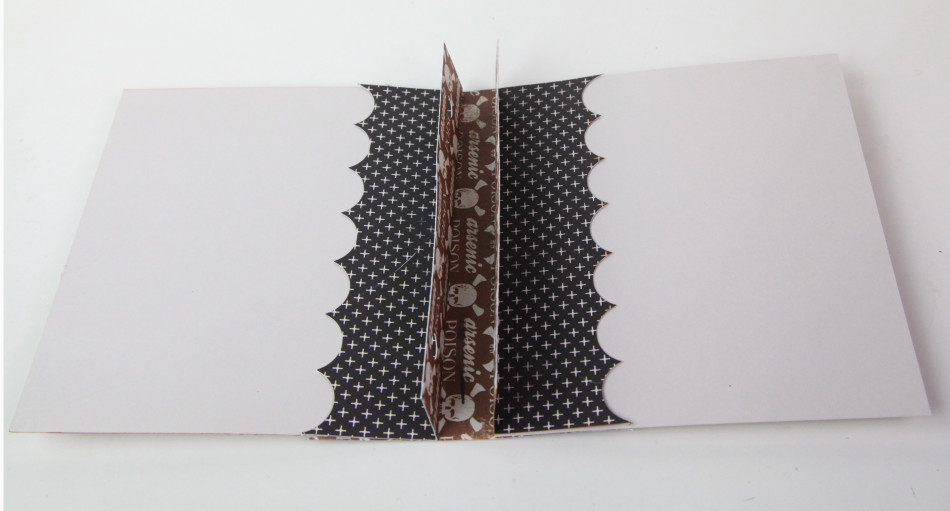
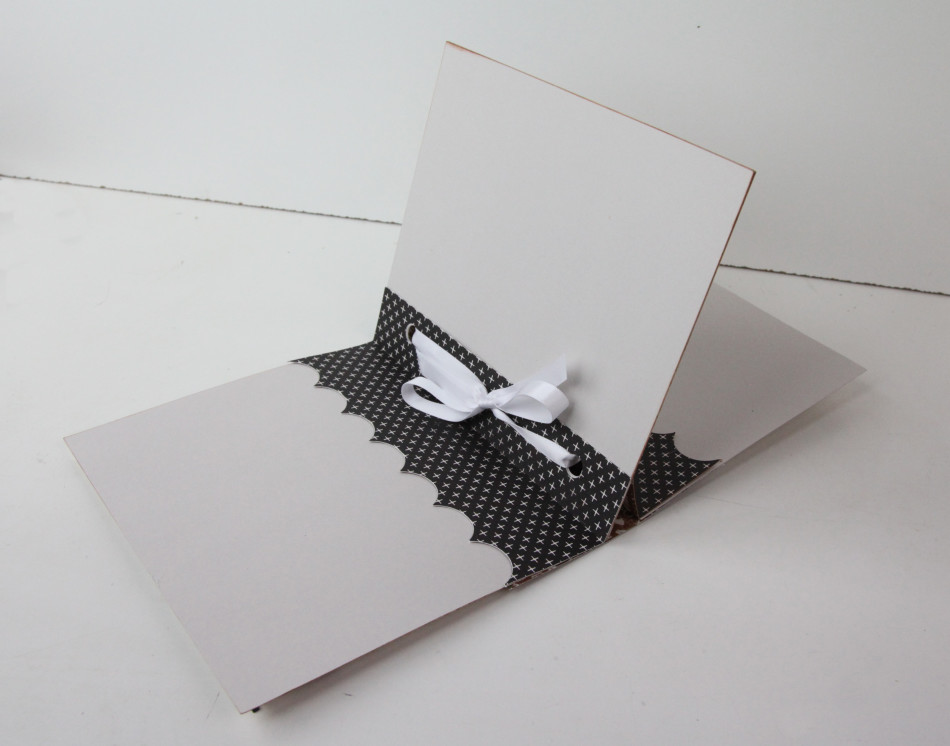
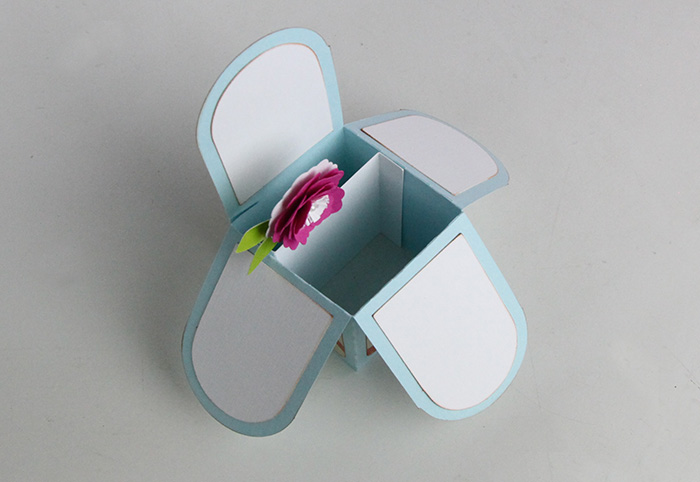
img_4897_webThese adorable box card were released in my Silhouette shop this week!  They are so fun to give and receive.  You can write an note on them or give them with a present.  They fold flat and fit in an A2 envelope so you can mail them easily.  They’re pretty simple to put together, and so fun to give!  Below is the tutorial for how to put them together.

There are several designs hitting the store for these so be sure to always search MiniLou and box cards!

Instructions for putting together Foldable Box Cards

1. Cut out all SVGs provided in the file. Glue on all the accessories to the box as indicated in the photo.

img_4875_web

2. Then, to make the core body of the box, fold the box together, and glue the tab on the inside and fold the flaps down.

img_4878_web

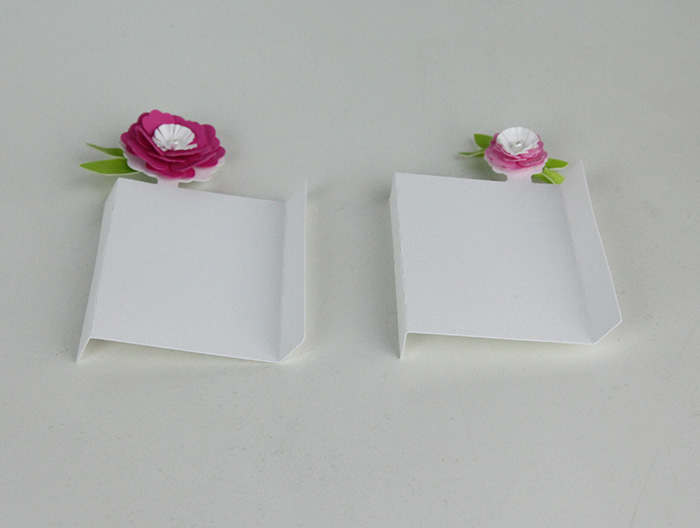
3. Next, Take the inserts and fold them into a “Z” shape.  Fold one tab backwards and one tab forward.

img_4882_web

4.  To attach the inserts, use a glue stick for the tabs and place it in the box without sticking the tabs to the sides.  When you are gluing the tabs, make sure to keep it in the “Z” shape, so each tab has glue on the opposite sides of each other.

img_4885_webimg_4886_web

5.  When you have the insert where you want it, fold the box flat so the tabs attach.  Make sure the top and bottom line up as you do this.

img_4887_webimg_4889_web

6.  Next, glue the second tab on the same way.

img_4891_web

7.  Add any embellishments, and you’ve got an adorable card to put in the mail!img_4893_web

Happy Crafting!

Carina

img_4897_web

Silhouette Design Store JOANN Stores

Box Card SVG Tutorial for Silhouette Read More »

Halloween Boo Marquee Letters Tutorial

img_4593_web

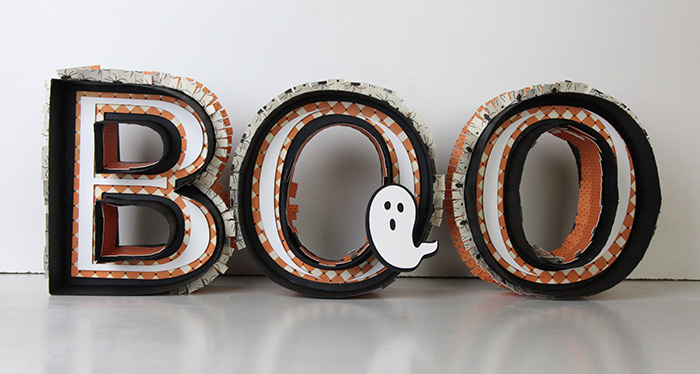
This week I released these fun BOO marquee letters on Silhouette!  They take some time to put together, but are so worth it!  They are similar to my original marquee letters, but have more decorative element to make them fun for Halloween.  Click here if you want a tutorial on how to put the letter part together.  You can see how to put together the festive Halloween pieces below.  Happy crafting!

1.Cut out all SVGS.  We did the letters in black, and the other pieces in fun Halloween scrapbook paper.

2.  For instructions on putting the letter together, click here.

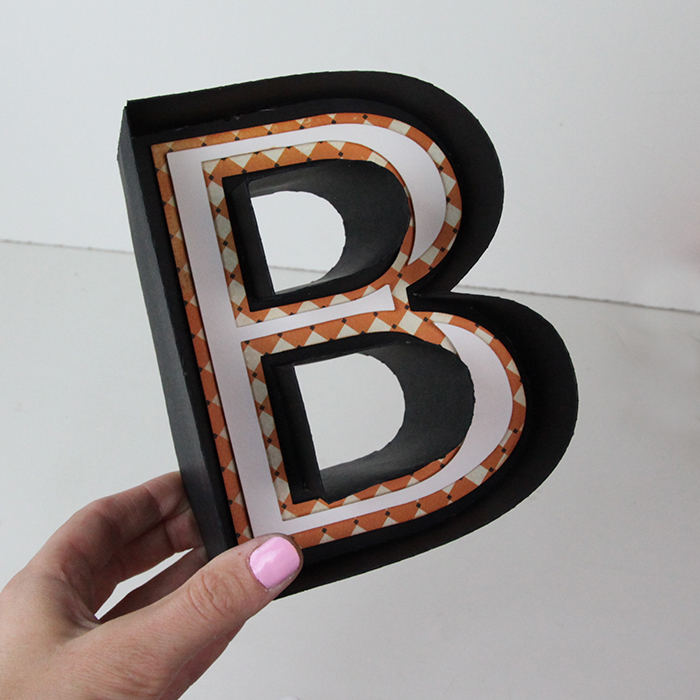
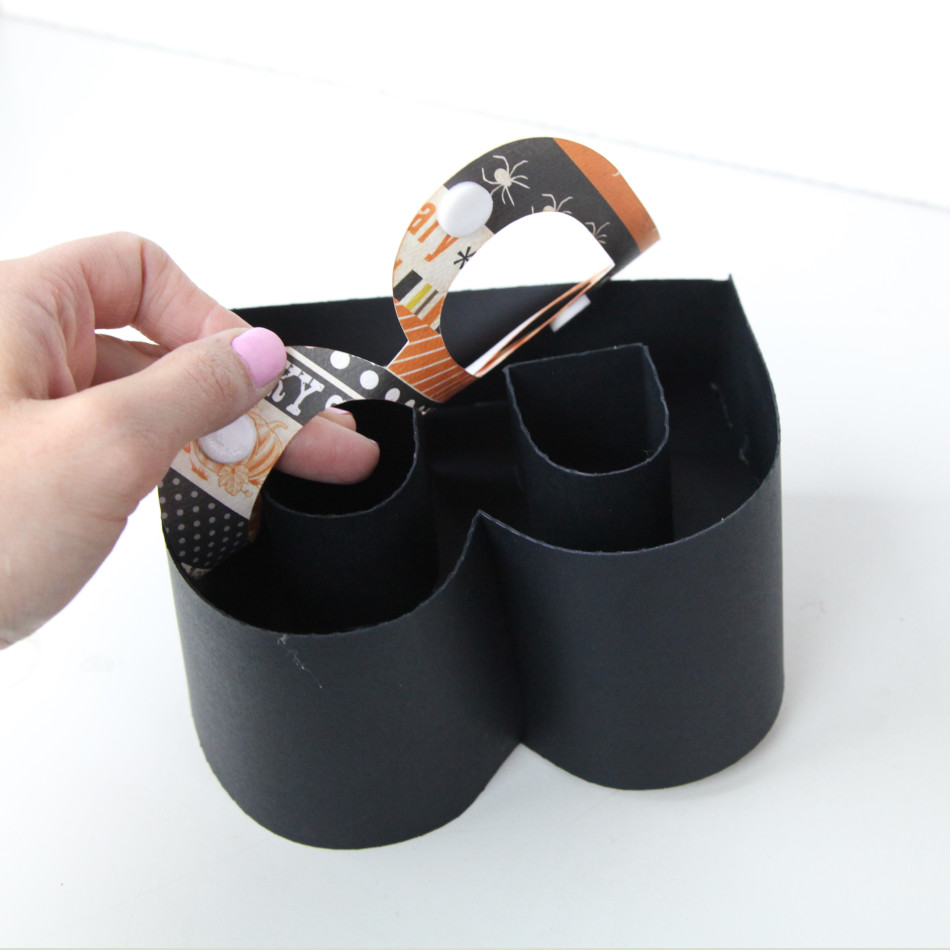
3.  Once your black letter piece is put together, pop dot the back of the flat letter piece and place it in the letter.

img_4408_web

4.  After the flat letter piece is placed in the letter.  Add the skinnier, flat letter pieces to the letter using pop dots.img_4418_web

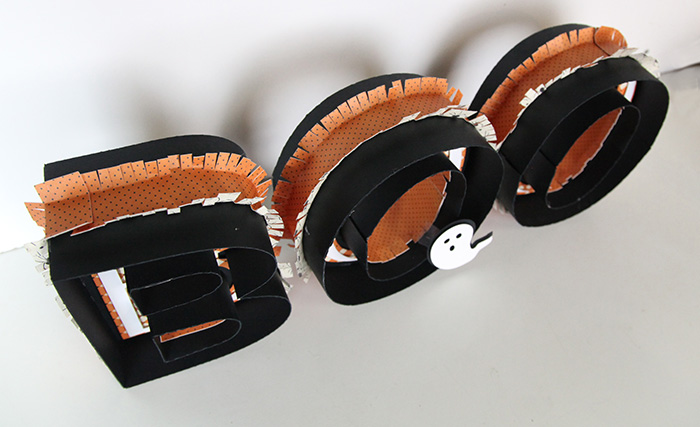
5.  Once the letter part is done, add the fringe to the outside.  Before you start glueing, make sure you know where the fringe pieces fit.  Then hot glue down the center to attach it to the outside of the letter.  Make sure not to glue the fringe to the letter because you want to be able to bend it up.

6.  After all of the fringe pieces are glued down, bend the fringe pieces up.

img_4602_web

That’s all there is to making the BOO marquee letters!  Hope you have a much fun making Halloween decorations as I have!

Silhouette Design Store JOANN Stores

Halloween Boo Marquee Letters Tutorial Read More »

31 Days of Halloween Album Tutorial for Silhouette

Halloween is almost here!  I made some fun 31 days of Halloween albums to document everything going on in October.  Each album comes with the cover and details, three binding pieces, pages (one with score marks and one without depending on how flexible you want your album to be), a mat for photos, and a piece the size of a photo (to use for journaling).  You can also get the numbers and layouts if you want to accessorize your album!

img_4362_in_web

If you want to put pictures in the albums, here is some info on the measurements:
-The skull and cross bone and bat albums are 5 x 8 and fit a horizontal 4 x 6 photo.
-The black cat album is 6 x 6 and fits a square 4 x 4 photo or a 4 in. x 5 in. photo.
-The pumpkin and spider albums are 6 x 7 and fit a vertical 4 x 6 photo.


Here’s the tutorial on how to put these albums together:

  1. Cut out all SVGS.  We used some fun scrapbook paper for the binding to add some Halloween flare.
  2. Put together the details on the cover.  You can use pop dots to give it some fun dimension.
  3. Next, take the cover and glue it to the binding piece.  The edge of the cover should go to the score line.  img_4326_web
  4. Next, glue the scalloped half of the inside binding piece to the back side of the cover.  The score lines should match.  Leave the side with the page holes free so you can use it to attach the pages later.    img_4330_web
  5. Do Steps 3 and 4 again for the back cover.img_4332_web
  6. Now that you have the cover done, take the pages and align the holes together.  Use a ribbon to secure them into the holes.  img_4333_web

That’s all there is to these adorable Halloween albums!  Now you can add your pictures and memories for the 31 days of Halloween!

Happy Crafting!

img_4337_web


Silhouette Design Store JOANN Stores

31 Days of Halloween Album Tutorial for Silhouette Read More »

Tiny Halloween Village Tutorial for Silhouette

img_4151_instagram_webI know it’s early September but Halloween is around the corner and I know I’m gearing up for some serious decorating. I’m releasing a Tiny Halloween Village, this week on Silhouette. I think you will love it, especially if you did last year’s Halloween Village. Yes, All the pieces in the new set WORK WITH the Halloween village from last year! So mix and match!

This set (as the name suggests) is a little smaller. Why you ask? Because it all fits neatly on 8.5 in. x 11 in. paper! Yep! No sizing down for the Silhouette Portrait users! Hooray!

I have a new video with the tutorial of how to put together each of these new Tiny Halloween pieces here!

Silhouette Design Store JOANN Stores

Tiny Halloween Village Tutorial for Silhouette Read More »

Stacked Pillowbox and Flower Ball SVGS for Silhouette and Digital Diecutting and 40% off SVG this Weekend!

This is the first week we are releasing our SVG files in bundles here before they are released in the Silhouette Store!  That’s right, you can get them early!  This week’s releases are in the store right now.  We are also doing a 40% off SVG sale this weekend only.  Now through Sunday you can get 40% off all SVGS!  This week we released sets of Stacked Pillowboxes and Flower Spheres!

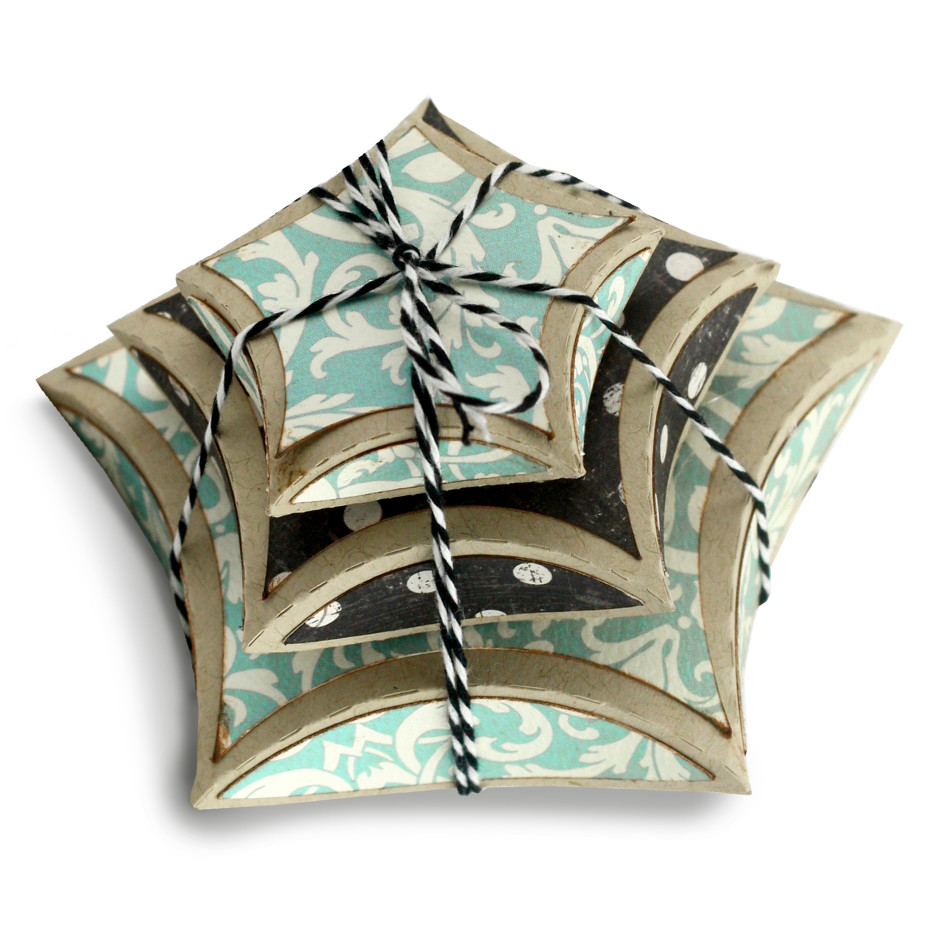
5 sided pillowbox

These Stacked Pillowboxes, found in my shop here and here, are perfect for small gifts or as favor boxes for your next party.  There’s a triangle, square, pentagon, and hexagon shape set.  They’re simple to cut out and put together!  You can also decorate them with your favorite scrapbook paper.  We tied our up with twine for a cute package set!  lilly Ball

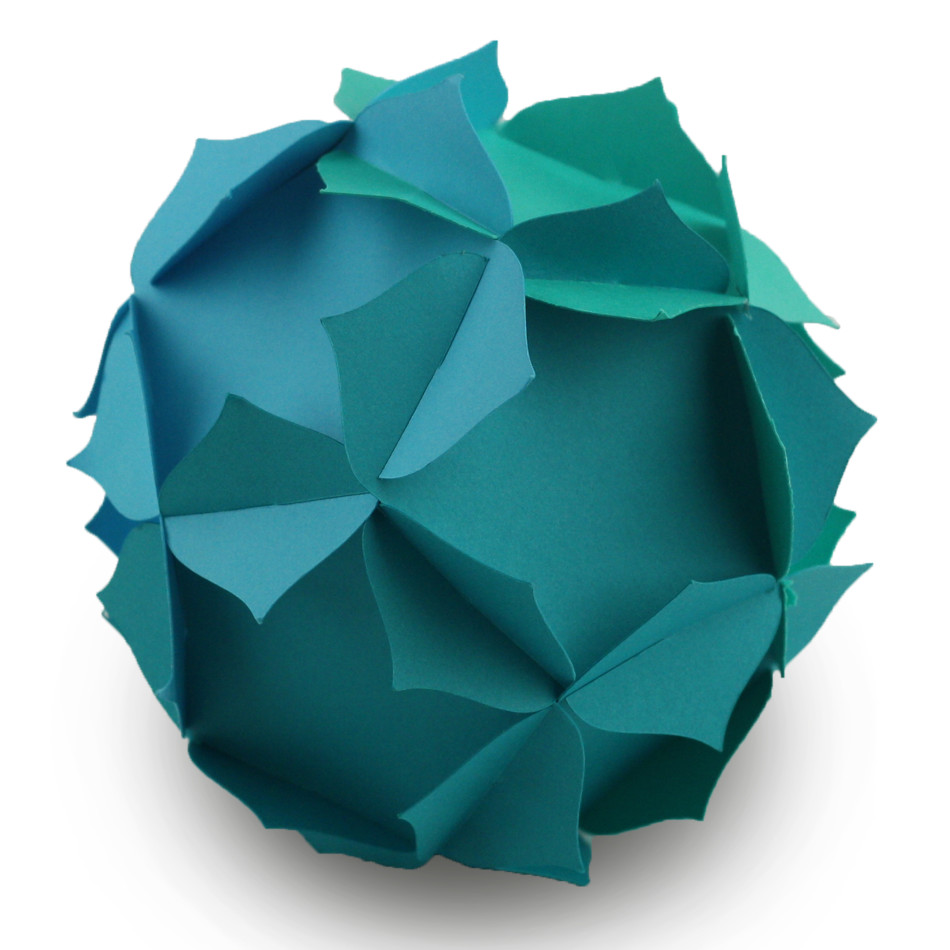
Flower Spheres are super versatile project that go together without any glue!  Each pieces has slits that slide together to create a sphere.  These flower balls are a fun decoration for a room or party.  We made ours with three different colors to give it a fun ombre vibe.  You could also use patterned paper or glue other decorations onto them.  Here are some short instructions to go with the video:

  1. Cut 12 of the shapes on your machine
  2. slip the pieces together using the slots on the sides of the shape.
  3. (Optional) add a string if you are interested in hanging your flower ball.


Silhouette Design Store JOANN Stores

Stacked Pillowbox and Flower Ball SVGS for Silhouette and Digital Diecutting and 40% off SVG this Weekend! Read More »

Motion SVG Cards for Silhouette and Digital Diecutting Files

These motion card are put together like most folding cards the little piece that moves in the card is attached by using a 1/4” inch pop dot.

Instructions:

1. Cut all pieces and assemble all Parts that attach to the card.
2. Assemble the portion of the card that will move around.
3. place a 1/4” pop dot on to the back of the movable piece.
4. push the pop dot through the slot in the card.
5. Attach one of the circles to the back of the pop dot. (at this point your motion piece should be attached)
6. Take the second circle (the one with the dashed score line in it) and fold it in half. Now glue half of it to the circle on the back of the pop dot. (this gives it a little bit of a handle so its easer to make the motion piece move.)


Silhouette Design Store JOANN Stores

Motion SVG Cards for Silhouette and Digital Diecutting Files Read More »

Accordion Folded SVG Cards for Silhouette and Digital Diecutting Files

This cards are great and can be used for gifts as well as or little standup albums .

The steps to making these cards are:

  1. Cut out all the cards that you want to chain together
  2. Glue the elements onto the inner portion of the card
  3. After you have all the elements glued down. glue the borders onto the frame that goes along the out side
  4. Take the long tab and glue it the it to the next card in the chain and repeat until you have the desired amount chained
  5. Fold back and forth along the score lines
  6. Now take the tabs or tab on the inner card and glue it to the the next inner card.
  7. Make sure you pass through the frames (don’t try to go outside the frames)
  8. Now you can fold up your card and give it to someone, or you can put it on display.
  9. Note that if you are folding the card. It will only fold in one way. if it doesn’t seem to be folding together better tray folding the inner cards the same as the outer cards.
  10. Watch the videos so you can see how we put our cards together.


Silhouette Design Store JOANN Stores

Accordion Folded SVG Cards for Silhouette and Digital Diecutting Files Read More »

Last Minute Projects for Mother’s Day

IMG_4595_instagram_webIt might FEEL too late to throw something together for Mother’s Day but it really isn’t. Sometimes I think we get caught up in putting together something REALLY fabulous or REALLY intricate and while that is great once in a while, I think it’s just as appreciated to put together a simple card or pillow box (with a gift card in it for extra ease!).

This year is one of the first years I’ll be with my mom ON Mother’s Day (she’s flying in!). And she KNOWS it’s a busy time of year for me and there is a good chance I’m not going to have time to shop for that incredibly thoughtful gift (she’s also incredibly easy going about gifts).

Because of this, I’m going to be giving her a stack of fabric (something she will definitely use) and maybe something sweet to send home with her. And time. I’m going to really try and spend some time with her.

I know what types of things, I want from my kids…hugs, kisses, maybe a chance to put up my feet instead of cleaning the kitchen (let’s be honest, I wish for that everyday). But mostly I want time. It goes quickly, doesn’t it?

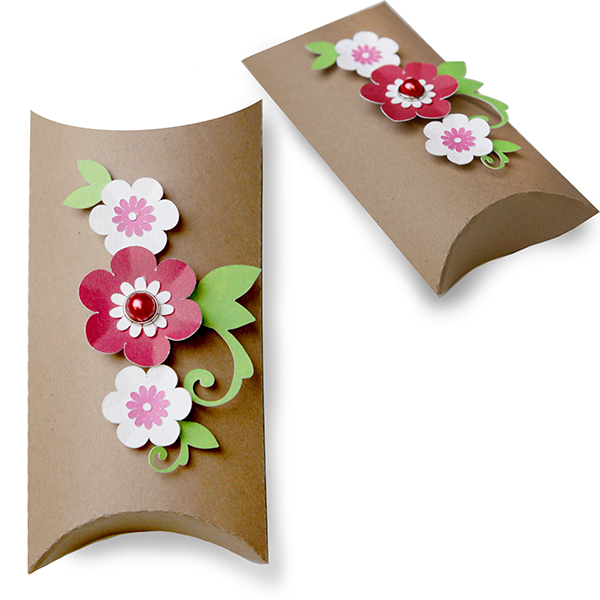
floralpillowbox

I love a little pillowbox with a giftcard in it. Thoughtful but easy.

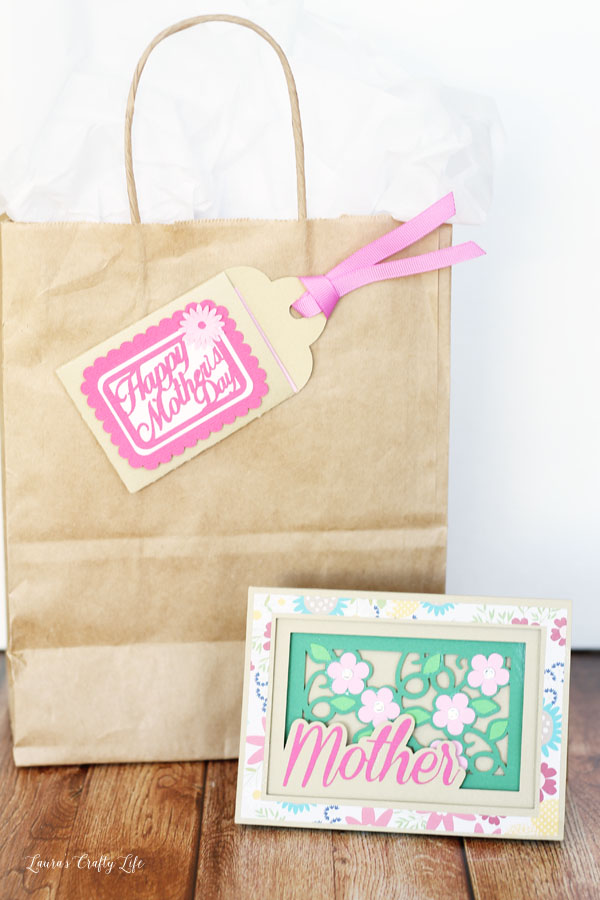
Mothers-Day-Card-and-Gift-TagI also have a Mother’s Day bundle in our SVG shop (for all types of cutting machines) that makes me pretty happy! Laura from LaurasCraftyLife made the sweetest gift and tutorial for Cricut users on how to put these projects together. Check it out if you have a chance! The shadow box card takes a moment to put together but everything else requires a couple of cuts and then you are off to the races!

Hope you are prepping for a fabulous Mother’s Day!

XOXO-Carina

Silhouette Design Store JOANN Stores

Last Minute Projects for Mother’s Day Read More »

CarinaGardner.com Now Has Diecutting File Bundles!

homebanner_32016_svg

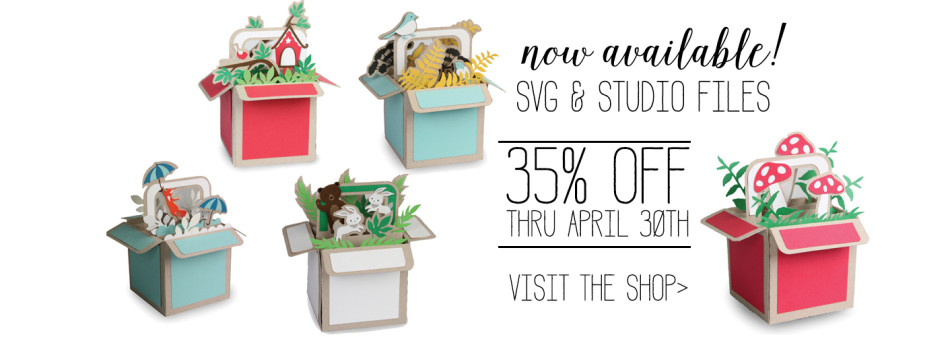
So after weeks of my production assistant and designer telling me it was TIME, I finally gave in and we are hosting bundles of SVG files on our site! This is a bit of a leap of faith on my part. I’m so hopeful that you will like what we have done and those of you with different types of machines (other than a Silhouette) have access to my designs!

So here is the deal: Each of our file sets include an svg file that works with most softwares & the Silhouette Designer Software AND it includes a studio file for the free Silhouette Software. In our descriptions, we have linked instructions, our private facebook groups, and added video tutorials so you can watch instructions DIRECTLY in the instructions. How cool is that?

And the best part is that we are doing a 35% off sale THIS MONTH ONLY to kick everything up! Want to get even more off? Join our private facebook group who get their own coupon codes and our newsletter who also get separate coupon codes.

Everyday, the team is uploading new bundles to the site so that you have access to all of my SVGS as well as MiniLou’s SVGs. Now all your cutting and crafting is easier than ever! Go check it out!

XOXO-Carina

Silhouette Design Store JOANN Stores

CarinaGardner.com Now Has Diecutting File Bundles! Read More »

Marquee Letter Tutorial and Inspiration for Silhouette and Digiplayground

IMG_2758_webHi guys! I’m in Vegas today at the ToyFest West Tradeshow for MiniLou. I’m having a great time, but I got on today to post about our fabulous new Marquee letters coming out on Silhouette and DigiPlayground.

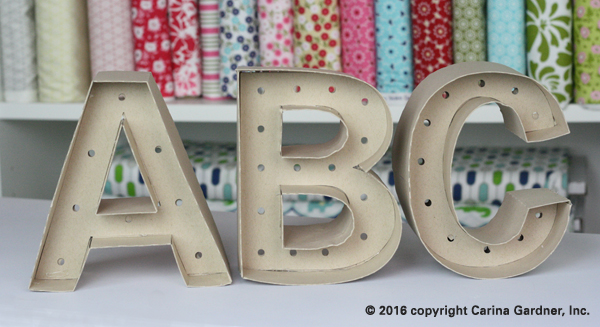
These Marquee Letters are so fun for any occasion!  You could use them for party decor, in your child’s room with their name,  weddings, and more!  The possibilities are endless. Seriously. I. Love. These.

Bonus, these are fun to put together. I will warn you though, they do take some time and patience because there are a lot of working parts. (Note:  They are so worth it!)

IMG_2748_webYou can do so many different things with them (I have a list below).  Don’t worry if your first one doesn’t turn out the way you want it, it took us a few tries to get them perfect, so be patient and don’t rush it.   The slower and more precise you are, the better they will turn out!
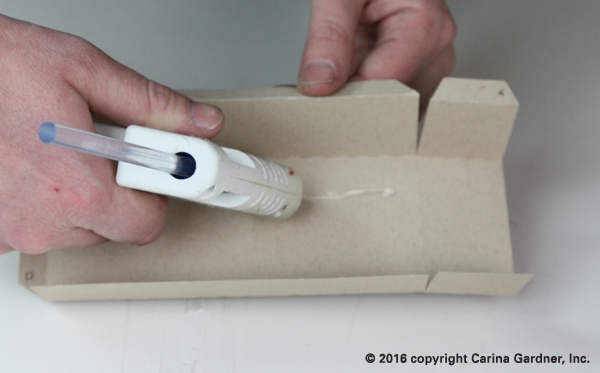
Here are some ideas of what you can do with Marquee Letters:

  • String Christmas lights through the holes (who doesn’t want their name in lights?)
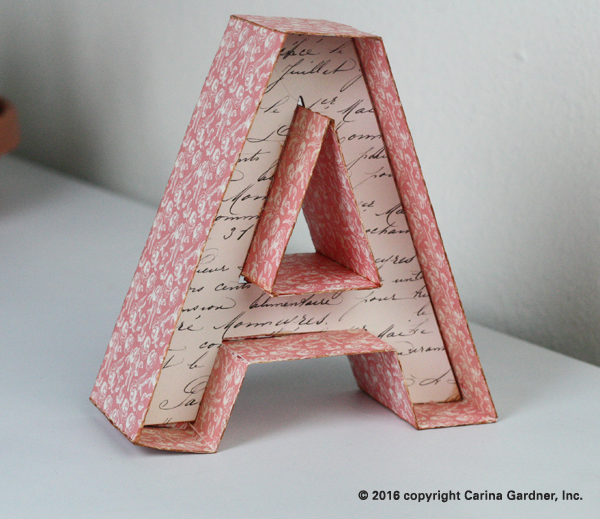
  • Cut them out in cute scrapbook paper (I cut out the A on the right in my Amour Line for Carta Bella)
  • Spray paint them any color
  • Put glitter on them using spray adhesive
  • Have your kids decorate them with paint, jewels, buttons, ribbon, or anything crafty
  • Put fresh flowers in them
  • Cut out some of our SVG flowers to decorate them found herehere, and here
  • Cut them out in different colors to add to any holiday decor

Our Marquees come with both “holes” and “non-holed.” This is for lights, buttons or other effects (even for back-lit lights).

This tutorial will help you with all of our Marquee Letters.  We chose A and G because they are a couple of the more complicated letters.  A is straight and G is curvy so you should be able to make any letter with these two tutorials.  We have a list of tips for making the other letters at the bottom of this post if you need more instruction.  Over the course of the next few weeks, we will release the whole alphabet and a few symbols, so don’t worry if you don’t see the whole alphabet on my Silhouette and Digiplayground shops yet.  

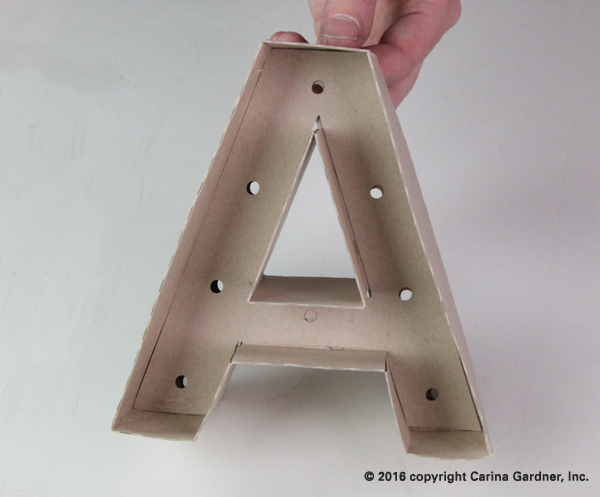
Letter A tutorial

1. Cut out all svg files.  We did the ones for this tutorial in kraft paper, but the possibilities are endless!

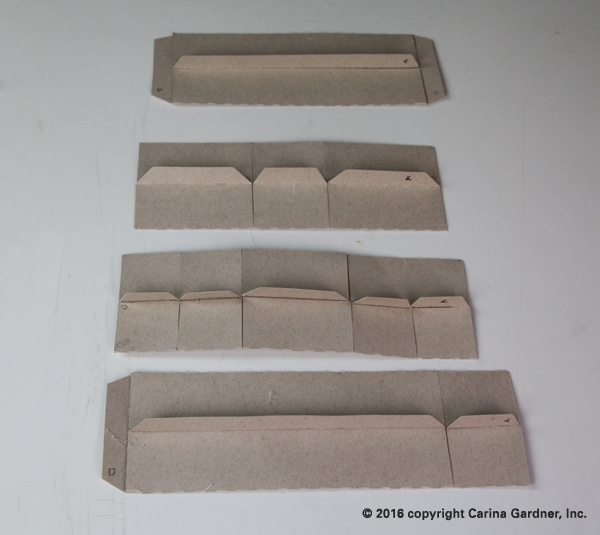
2. Start by folding the score marks on the outside pieces.IMG_0932_web

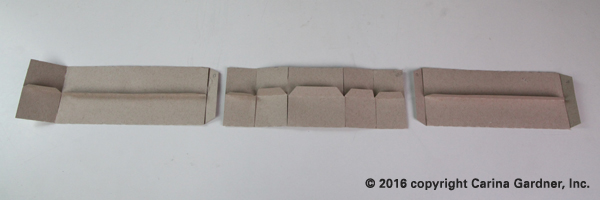
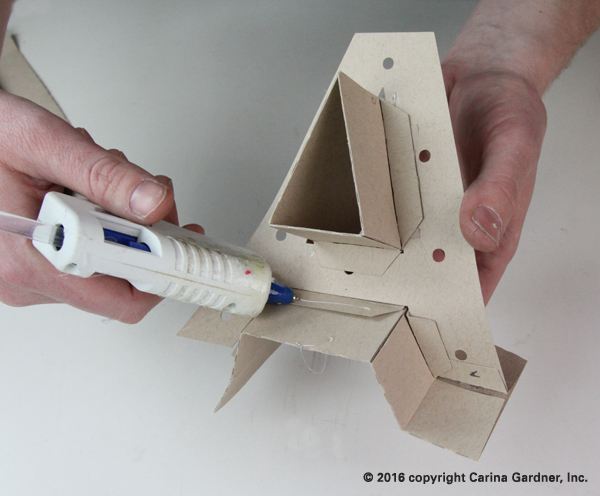
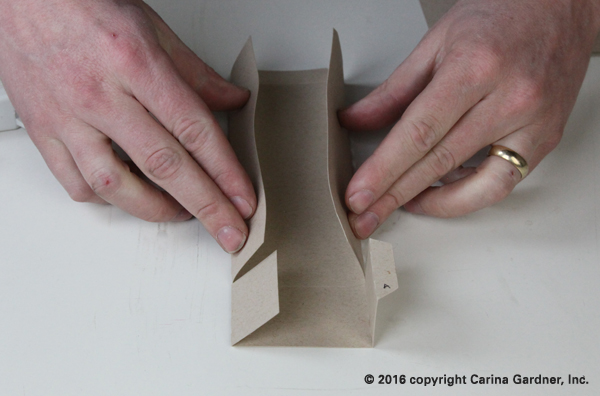
3. Once you have the sides folded, glue the flaps down the middle, making sure to keep the tab up.  On the end without a tab, leave a little room without glue so the other tab can fit. They should look like the picture below for the letter A.   

IMG_0933_webIMG_0934_web

Helpful Hints: You’ll notice that there are shapes cut out in the tabs.  These show you what order and where each of the pieces should be glued to.  The shape on one end will match to a shape on the end of another piece.  It might be hard to identify which pieces go where.  If you look at where they are placed in the file when you open it, you will get a better idea.  Because every letter is different, you will need to look at them and figure out where they go before you start glueing.  All of the corners have score marks, so you will not have to fold anything on your own, if you have to fold something, the piece is in the wrong place.  

IMG_0946_web

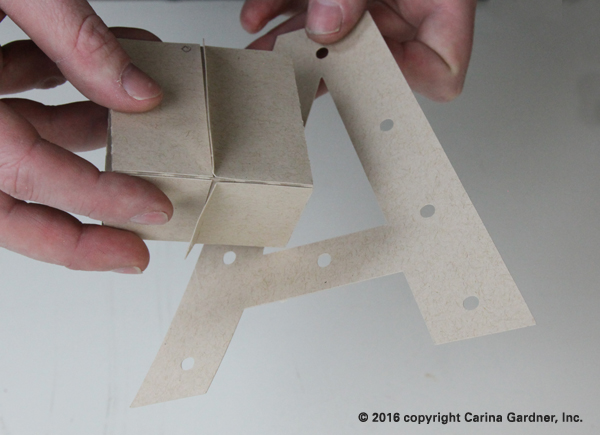
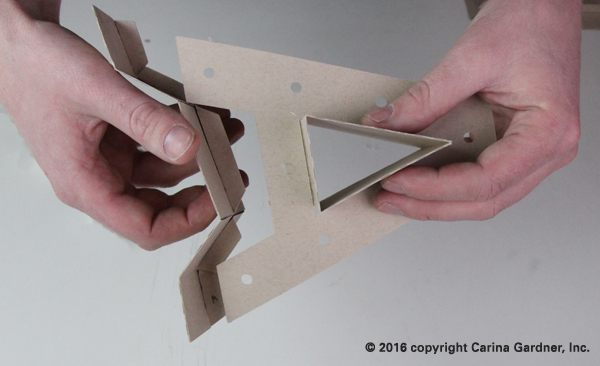
1. For A, start with the center edges.  Take the piece for the middle and fold it.  The tabs should be on the outside so they can be glued to the letter. Doing the center is easier before the outside edges are on.   

IMG_0936_web

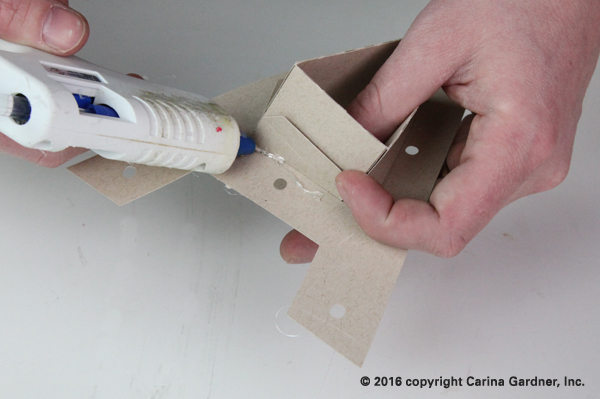
2. Glue the inside tabs to the letter making sure all of the tabs are on the same side of the letter.

IMG_0940_web

3. For the outside, start with the piece that goes on the bottom.  Glue the tabs to the letter the same way as the center. Do one straight edge at a time.

IMG_0941_webIMG_0948_web

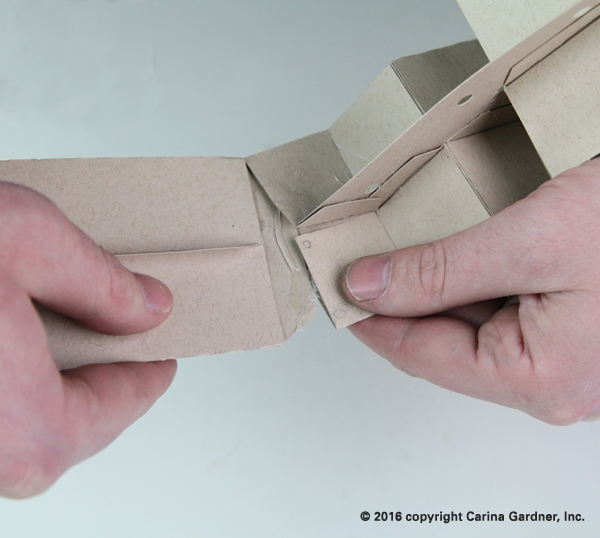
4. After the bottom piece is glued, take the two side pieces and insert the tabs into the correct side piece (the symbols should match) and glue them in place.

IMG_0950_web

5. After the inserted tabs are glued, glue the tabs to the letter one side at a time until you get all the way around, then insert and glue the last tab into place.

IMG_0953_web

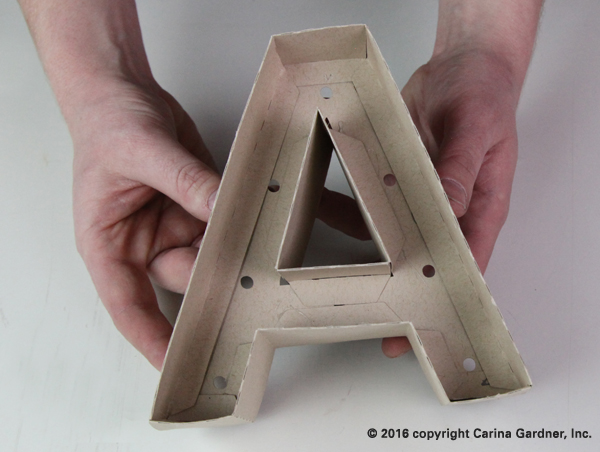
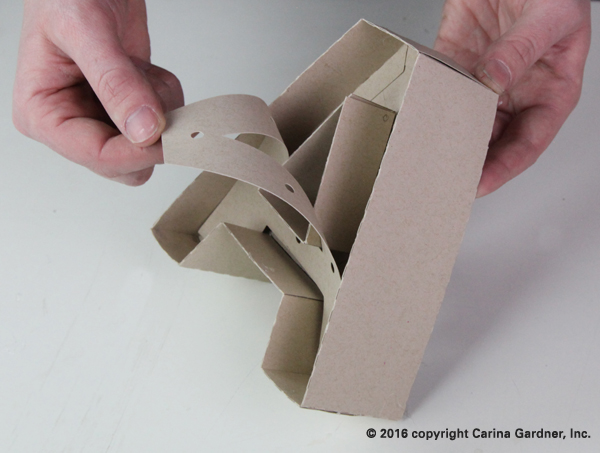
6. Take the second letter and glue it into place.  Make sure to glue it so it covered the tabs.  

IMG_0956_web

That’s it for Letter A!  You should be able to put together all of the straight letters now!

IMG_0958_web


G Marquee Letter

1. Cut out all svg files.  We did the ones for this tutorial in kraft paper, but you could do any color!

2. Start by folding the score marks on the outside pieces.  

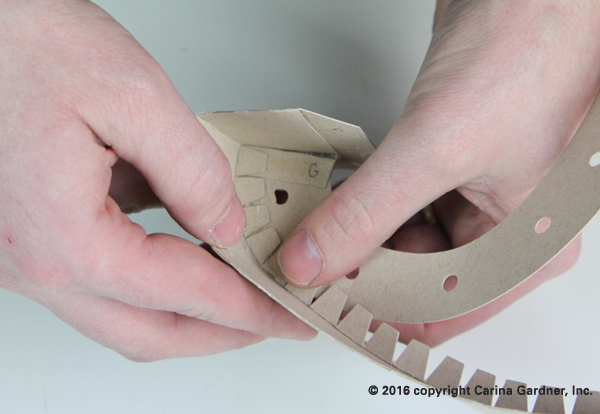
3. Once you have them folded, glue the flaps to the middle, making sure to keep the tab up.  They should look like the picture below for the letter G.  

IMG_0965_web

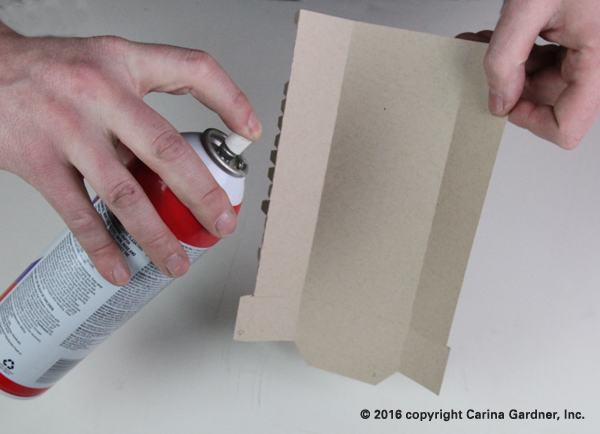
Helpful Hint: G is a curvy letter, which means that the flat outside pieces have to bend more.  Because the paper needs to be more flexible, we did not use hot glue for the outside pieces.  We used a spray adhesive.  You don’t necessarily need a spray adhesive for this, you can use hot glue or whatever you have, but the final product will look better and be easier to glue into place.

4.When all of the outside pieces are folded and glued, take a minute to figure out which pieces go on which part of the letter.  

Helpful Hints: You’ll notice that there are shapes cut out in the tabs.  These show you what order and where each of the pieces should be glue to.  The shape on one end will match to a shape on the end of another piece.  It might be hard to identify which pieces go where.  If you look at where they are placed in the file when you open it, you will get a better idea.  Because every letter is different, you will need to look at them and figure out where they go before you start glueing.  All of the corners have score marks, so you will not have to fold anything on your own, if you have to fold something, the piece is in the wrong place.  

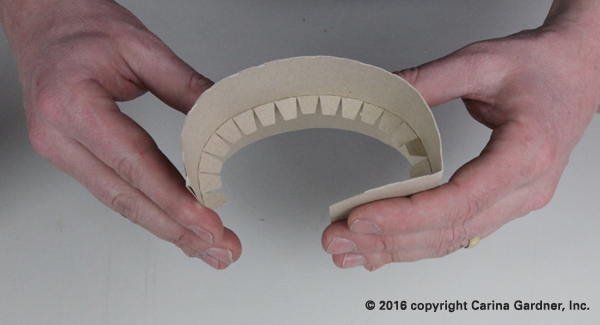
5. When all of your outside pieces are folded and glued, pre-bend the pieces that will go on the curve (these pieces have smaller tabs than the straight pieces).  This will make your letter easier to glue together and make it look better.  The picture shows how much you need to bend it.

IMG_0967_web

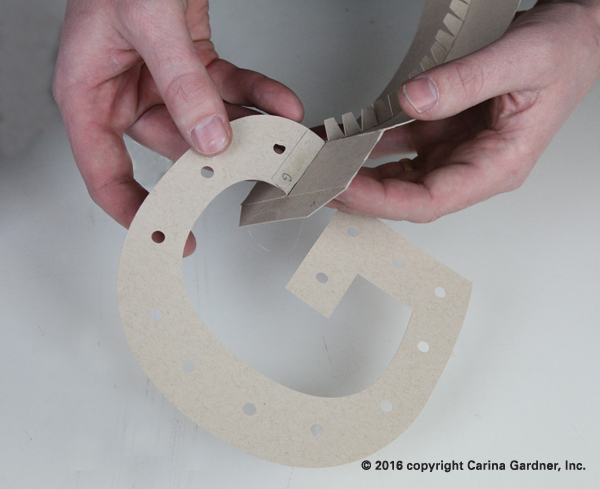
6. For G, start with the smaller straight piece on the top of the G (see picture).  Glue the tab to the letter.  

IMG_0971_web

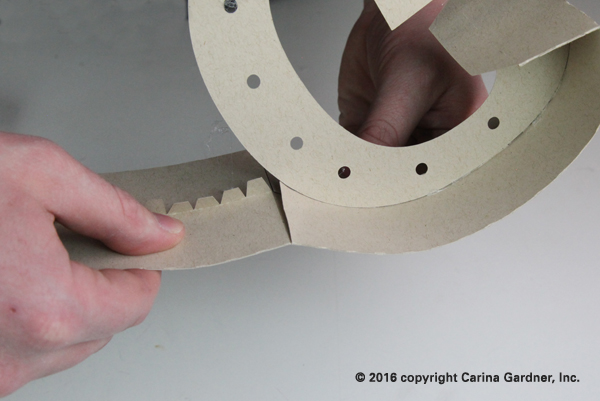
7. Then, start gluing the tabs around the curve with hot glue.  Do one or two tabs at a time, making sure the outside piece line up with the outline of the letter.  Don’t rush this too much, if you take it slow and make sure each piece lines up with the letter, your letter will turn out a lot better.

IMG_0972_web

8. Once your first outside piece is glued on, take the next outside piece (make sure the symbols match up) and insert and glue the tab into the piece that is already attached to the letter.  

IMG_0974_web

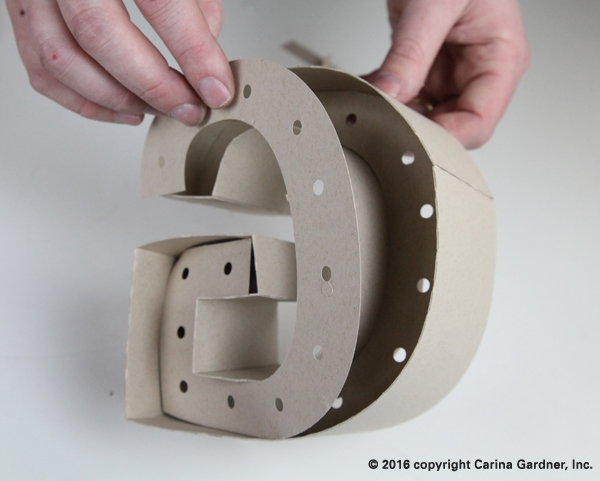
9. Keep going around the letter, gluing all of the tabs down.  

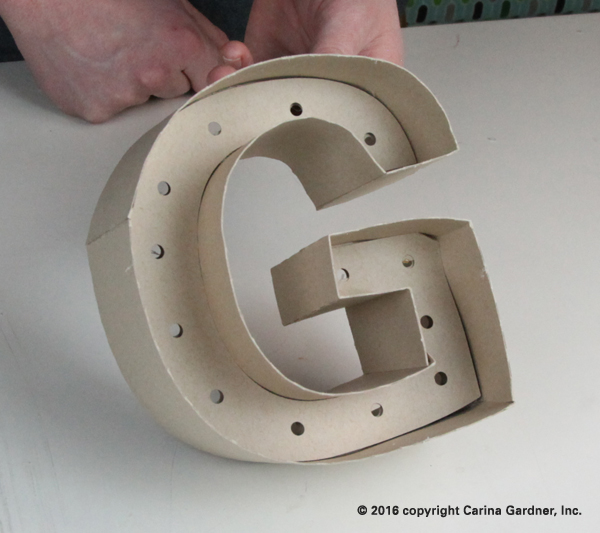
10. After all of the outside pieces are glued onto the letter, take the second letter and glue it into place.  

IMG_0980_web

Now you have the letter G and are a pro at the curvy letters!

IMG_0986_web


Some other tips for all letters:

  • Figure out which pieces go where before you start gluing.  The symbols will help you, but it still can be a little tricky
  • Make sure you have the letters right side up.  Letter like H and E might look symmetrical but there are small differences in the height and length in parts of the letters.  Before you glue the second letter on, the holes should line up, and if they don’t, the letter is in the wrong way.

Here are some notes on the other letters.  The tutorials should be able to help you make any letter.  Because each letter is a little different, here are some tips I have for each letter:

A. see tutorial
B. do the two inside holes then outside
C. do the outside then the inside and don’t forget to pre-bend the curvy pieces
D. do the inside then the outside
E. when you put in the second letter, make sure you put it in the right way, or it won’t fit correctly
F.
G. see tutorial
H. when you put in the second letter, make sure the smaller half is on the top, even though they look similar, or it won’t fit correctly
I.
J. do the outside curve then the inside curve
K. take the two pieces that go in the “V” parts and glue the tabs that make the point.  Attach the “V” parts to the letter first, then add the surrounding edge pieces
L.
M.take the two pieces that go in the “V” parts and glue the tabs that make the point.  Attach the “V” parts to the letter first, then add the surrounding edge pieces
N. take the two pieces that go in the “V” parts and glue the tabs that make the point.  Attach the “V” parts to the letter first, then add the surrounding edge pieces
O.  do the inside then the outside
P. do the inside hole then the outside
Q. do the inside first, then start with the flat edges on the outside and go around
R. do the inside hole, then the outside
S. the curved pieces are similar in length, but not the same, double check you know where each piece goes before you start glueing
T.
U. do the outside then the inside
V. take the two pieces that go in the top part of the V and glue the tabs that make the point.  Attach the “V” parts to the letter first, then add the surrounding edge pieces
W. take the two pieces that go in the “V” parts and glue the tabs that make the point.  Attach the “V” parts to the letter first, then add the surrounding edge pieces
X. take the two pieces that go in the “V” parts and glue the tabs that make the point.  Attach the “V” parts to the letter first, then add the surrounding edge pieces.  Also, when you put in the second letter, make sure the smaller half is on the top, even though they look similar, or it won’t fit correctly.
Y. take the two pieces that go in the “V” parts and glue the tabs that make the point.  Attach the “V” parts to the letter first, then add the surrounding edge pieces
Z. take the two pieces that go in the “V” parts and glue the tabs that make the point.  Attach the “V” parts to the letter first, then add the surrounding edge pieces.  Also, when you put in the second letter, make sure the smaller half is on the top, even though they look similar, or it won’t fit correctly.

You can find the whole Alphabet on my Silhouette and Digiplayground Shops.  Look for Numbers coming in the next few weeks! 


Happy creating!
Carina

Silhouette Design Store JOANN Stores

Marquee Letter Tutorial and Inspiration for Silhouette and Digiplayground Read More »

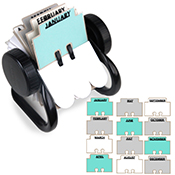
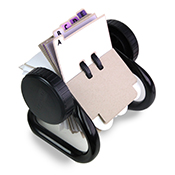
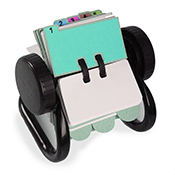
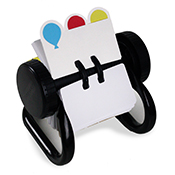
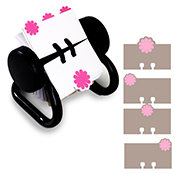
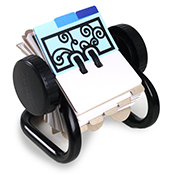
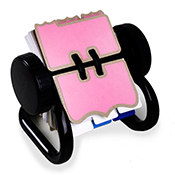
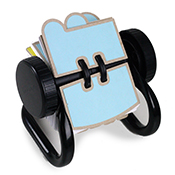
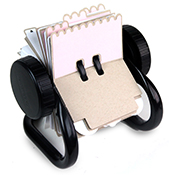
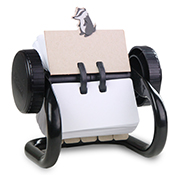
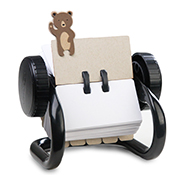
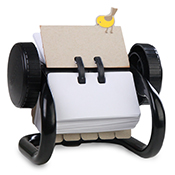
Rotating File System for Silhouette and DigiPlayground

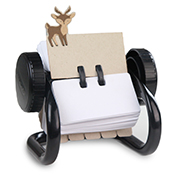
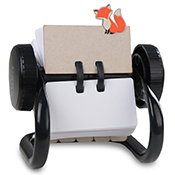
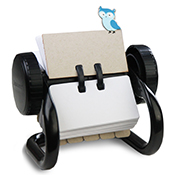
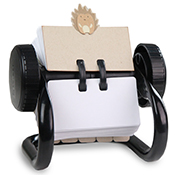
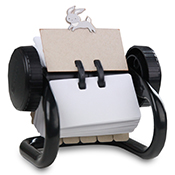
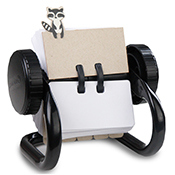
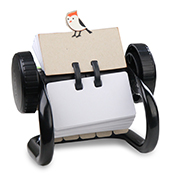
I love putting together a little “planner” at the beginning of the year. This year I focused on Mini rotating file systems. These make me so happy and can be used in so many ways. I love that these could be potential albums, event planners, birthday planners, and so much more. I personally adore the little fox tab!

You can find these in my Silhouette and Digiplayground shops!

Enjoy!
Carina
DS-C-W-CG-monthsDS-C-W-CG-alphabetset1 DS-C-W-CG-numberpages1DS-C-W-CG-ballon pages1  DS-C-W-CG-flourishtabs   DS-C-W-CG-swirl pages1DS-C-W-CG-rolodexbracket1 DS-C-W-CG-rolodexcircletab1 DS-C-W-CG-rolodexscallop1  rotatingfilesystembadger rotatingfilesystembear rotatingfilesystembird rotatingfilesystemdeer rotatingfilesystemfox rotatingfilesystemowl rotatingfilesystemporcupine rotatingfilesystemrabbit rotatingfilesystemraccoon rotatingfilesystemwoodpecker


Silhouette Design Store JOANN Stores

Rotating File System for Silhouette and DigiPlayground Read More »

Christmas Village Tutorial for Silhouette and DigiPlayground


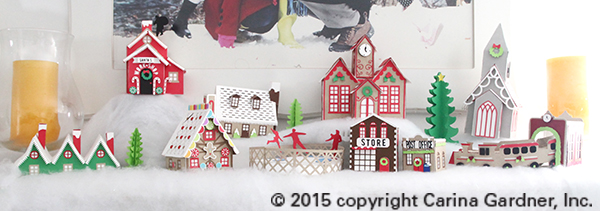
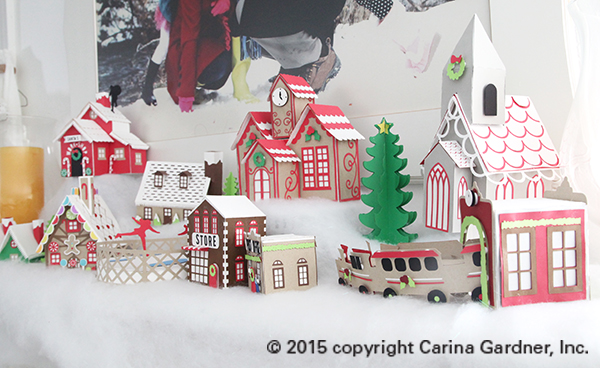
IMG_0774_webI’ve been working on this Christmas Village for weeks now. Every time one of the little houses got put together, I couldn’t help but smile! Everything about this little village makes me so happy.

There are quite a few pieces, and they all can be purchased from Silhouette and DigiPlayground. Each building is very intricate and there are a lot of parts. I have a quick video on some of the harder pieces so you can see how they go together (see above).

As for displaying this village, there are soooo many options. I have two I’d like to suggest here for you. The first is a display made completely from foam core. I have a free svg file for you to make a template of the one I made and some instructions on how to put it together below. (The photo below is the display I created with foam core. You can make this too!)

IMG_0645_web

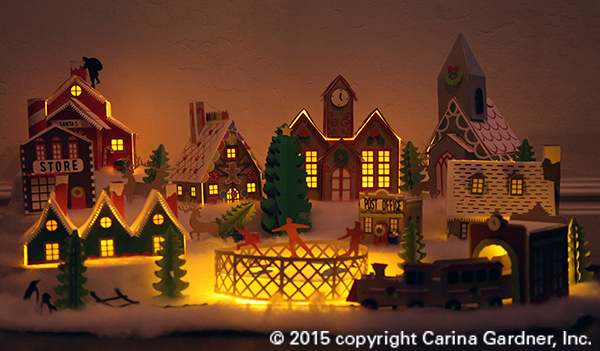
IMG_0673_webThe second way I would display it is on a mantle or coffee table. I love mine on top of our white piano. The best part is at night when we put electric tealights underneath and the entire thing lights up (picture of this below!).

If you place your village on a mantel, depending on the number of pieces you build, I suggest using cake plates and cups turned upside down to give dimension and layer to your village. Cover these with ‘snow’ you can purchase from your local craft store to hide these layers. Instant snow drift!
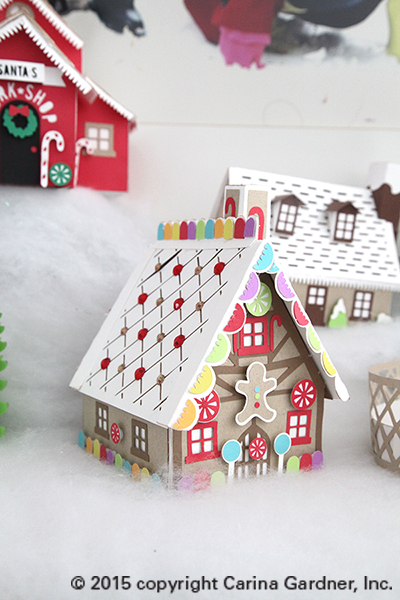
The two photos below is of the Christmas Village on top of my piano (about the size of the mantel). I love it up there! Every piece is so unique and darling. My family is really going to enjoy it this holiday season!
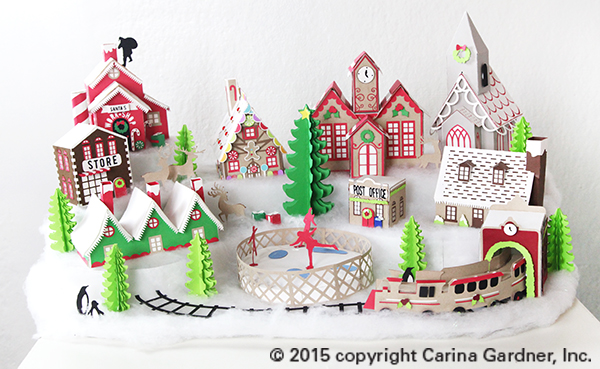
IMG_0772_web

IMG_0771_1web

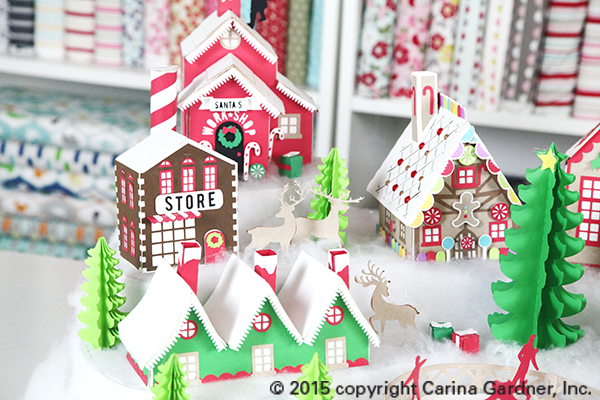
There are so many great pieces in this village. They will be release over the next two weeks (so keep an eye out for them!). The picture below is of the Santa’s Workshop, General Store, Gingerbread House, Trees, and Deer.

IMG_0597_web

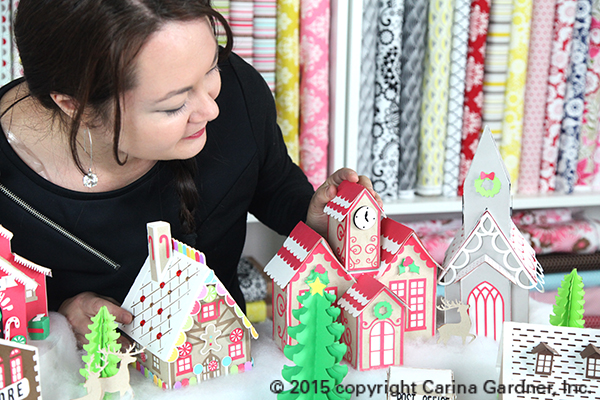
Picture below highlights the Clock Tower, Chapel, and Gingerbread House.

IMG_0643_web

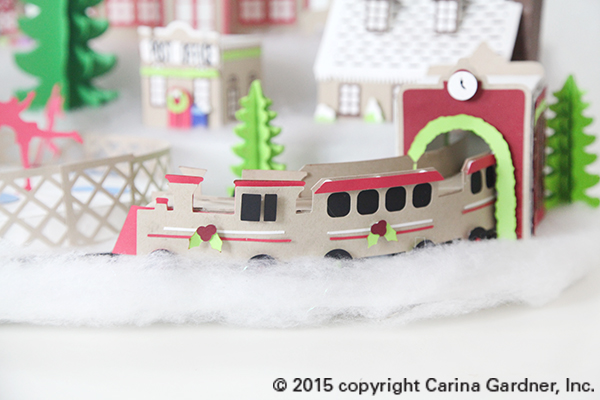
The train comes in two files—a Train Station with tracks and a curved 3D Train.

IMG_0654_web

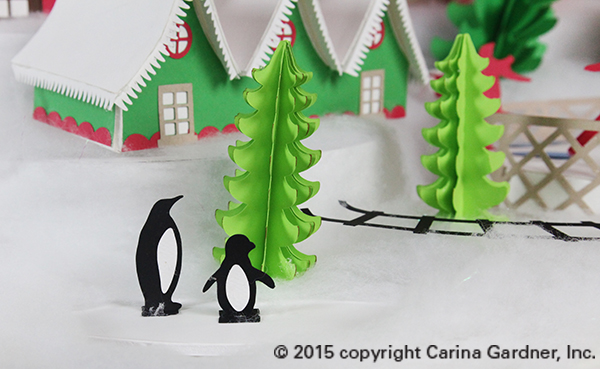
Happy little penguins anyone?

IMG_0765_web

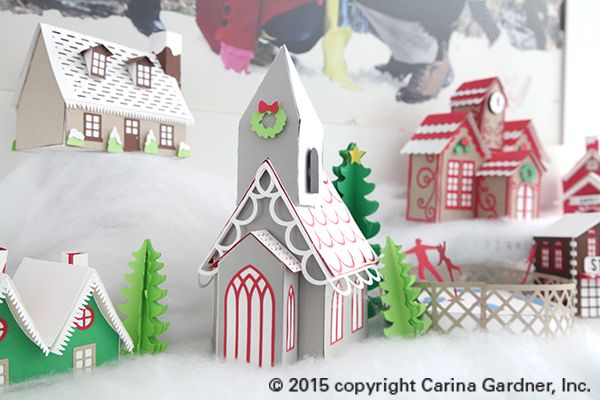
Check out the Snow Cottage, Elf Houses (with curved roof!) and the Chapel.

IMG_0809_web

Turn off the lights and watch them glow! Instant Christmas Magic!

IMG_0863_web

Here’s the tutorial for the Display:

Download the Free Display Template Here—CarinaGardner_ChristmasVillage_Display.zip

If you are having trouble with the link, then try copying and pasting this: https://carinagardner.com/freedownload/carinagardner_christmasvillage_display.zip

  1. Download the zip. You will need 5-6 pieces of 20 inch x 30 inch foam core in white. You will also need a hot glue gun, a small package of ‘snow’, and x-acto knife.
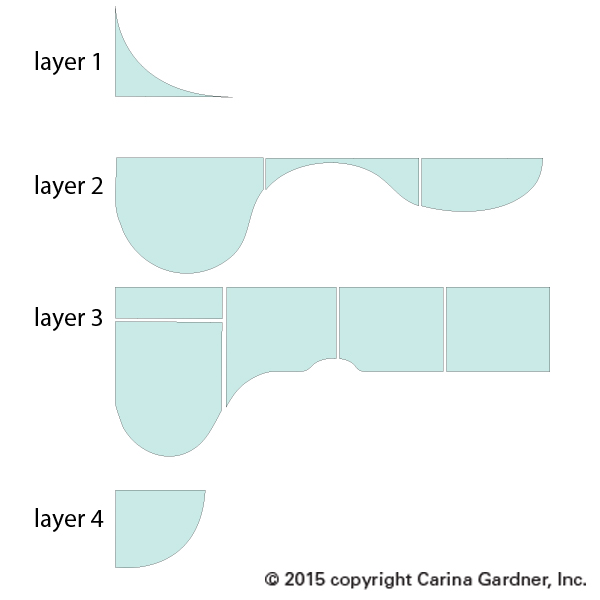
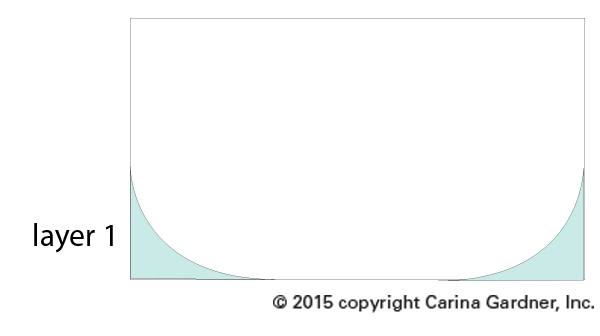
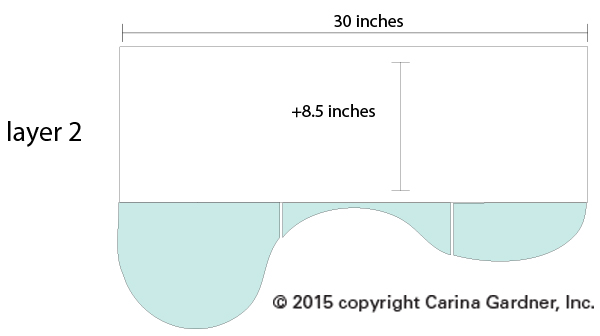
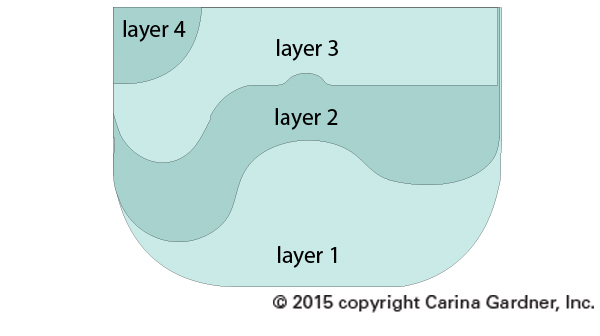
  2. There are four layers to this display. The zip contains 4 documents that may look a bit jumbled (everything needed to fit on a 12 x 12 template for Cricut users). All you need to do is pull all the pieces apart and cut each of them out. Then layout your template like I have below:

instructions_display_christmasvillage_1

3. After cutting out your pieces you will lay the template onto each layer. Layer 1 you will use the template to cut away two edges of the display. Layer 2 you will need to add a width of 8.5 inches to add the depth. Layers 3 and 4 you can cut out as is.

instructions_display_christmasvillage_2 instructions_display_christmasvillage_3

4. Use an x-acto knife to cut these out. Don’t worry about making it perfect! Your snow will cover your mistakes!

5. Once the layers are cut out, you will want to create dimension by cut out several 2 inch strips the full length of the 30 inches on the extra foam core you have. Slice lightly into one side of the strips so that you can bend them to the shapes of your layers. Start with layer 2. Start at the side front and hot glue the 2 inch strip along the curve. Don’t worry about mistakes or gaps! Your snow will cover all of this!  Once you have glued the strip along the edge of layer 2 you will glue it down to layer 1. Continue with all the layers using the diagram below to help determine how to place everything.

instructions_display_christmasvillage_4

6. Once everything is glued together, simply layer snow on the display. I glued a little bit to the board to help everything stay in place. To glue the trees, deer, and penguins to the display, I moved the snow to the side and glued these pieces directly onto the foam core. Then I moved the snow back into place.

I hope you have fun making this display and the entire Christmas Village!

Carina


Silhouette Design Store JOANN Stores

Christmas Village Tutorial for Silhouette and DigiPlayground Read More »

Thankful Tree Video and Tutorial for Silhouette and DigiPlayground

We’ve been working on the Thankful Tree for a few weeks now and I’m so excited to have it in my home! It’s the perfect LARGE scale tree (about 4 feet in height) to put in your home to celebrate Thanksgiving. We will be using the Apple Basket to place all of our leaves so the kids can pull one out everyday to write what they are thankful for throughout November.

Check out this short video so you can see the tree (in scale) and all the options we have available for it! You can purchase the files at Silhouette and DigiPlayground.

Enjoy! Carina

Silhouette Design Store JOANN Stores

Thankful Tree Video and Tutorial for Silhouette and DigiPlayground Read More »

Hexagon Halloween Ornament

DS-C-8.6824W-CG-Spider Ornament

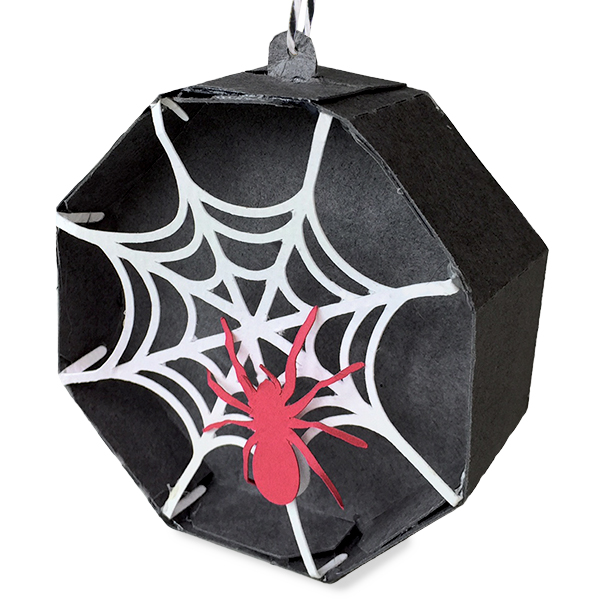
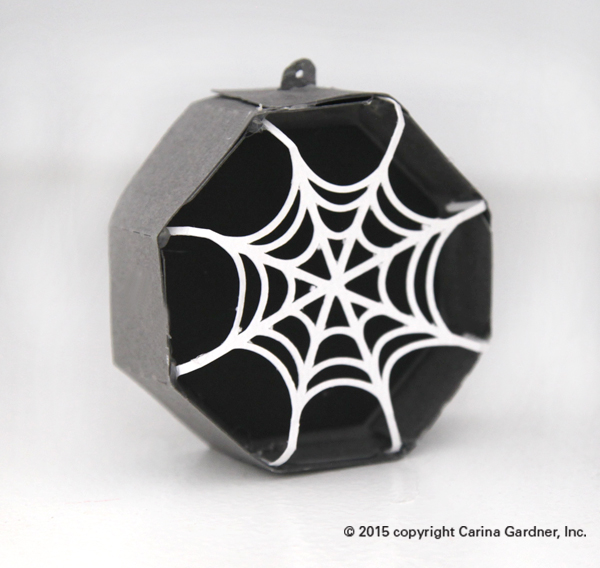
I love some dead branches in a vase as halloween decor. These little ornaments are the perfect accessory for those branches! They’d also be cute strung in front of a window or as a banner.

Every one of these ornaments are made a little differently. I’ve chosen to show you how to put together the hardest one. Most are simply layered with hexagons and shapes. Feel free to mix and match all of the ornaments in this collection!

Here are the links to my Silhouette shop and DigiPlayground shop.

Here’s how to put this together:

1. Cut out the svg files.  The main body of the ornament I cut out in a deep gray and the interior is a matte black with white spider webs and red spider.

IMG_9216_web

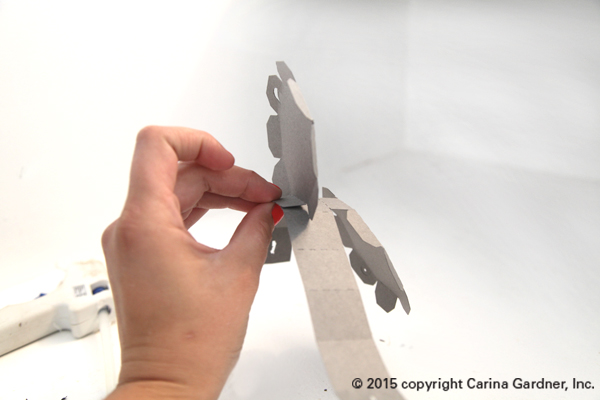
2. Next take the hexagon sides and fold the flap that is connected to the long rectangle piece back onto itself and glue down. Repeat on the other side.

IMG_9223_web

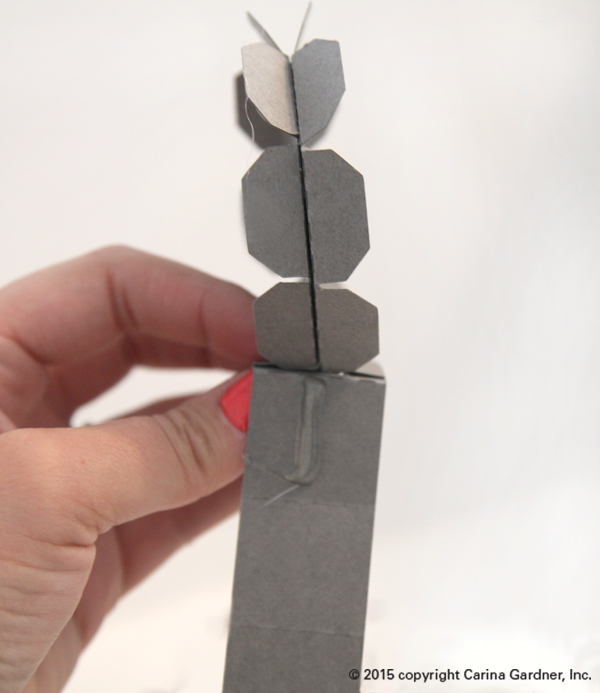
3. Fold all hex flaps away from each other so that they create a flat surface that you are going to glue your rectangle piece to. There are fold marks where each side of the hexagon’s flaps should be glued to your long rectangle. Repeat all the way around until you end with 2 open slits at the top

IMG_9228_web

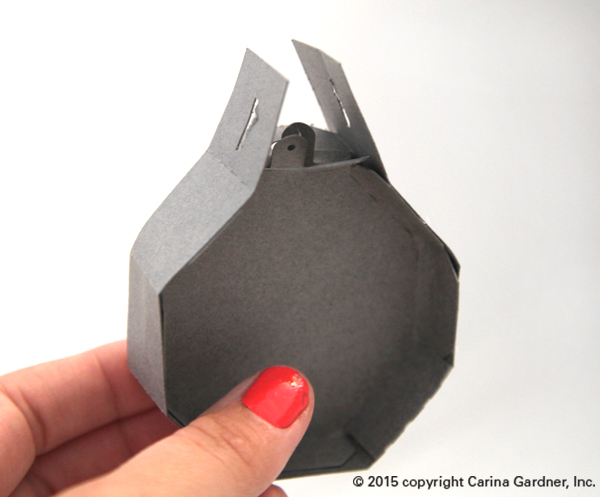
4.  Slip the ornament hangers from the hexagon through those two open slits and glue together.

IMG_9231_web

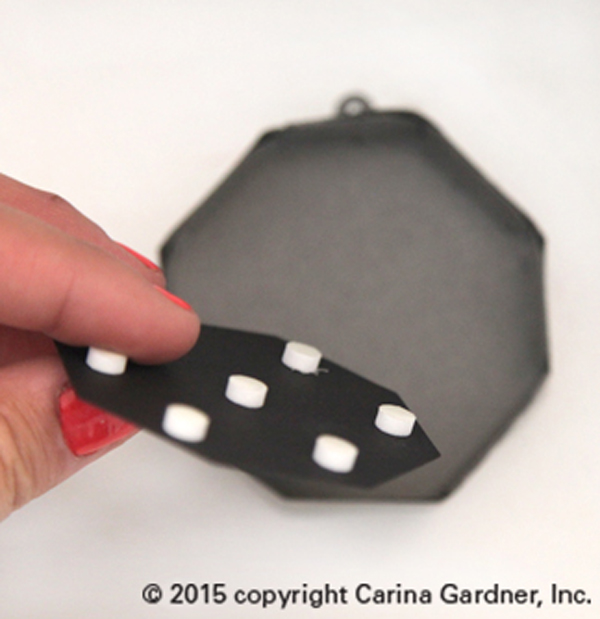
5. Take your flat hexagon accent pieces and pop dot them on each side of your ornament.

IMG_9235_web

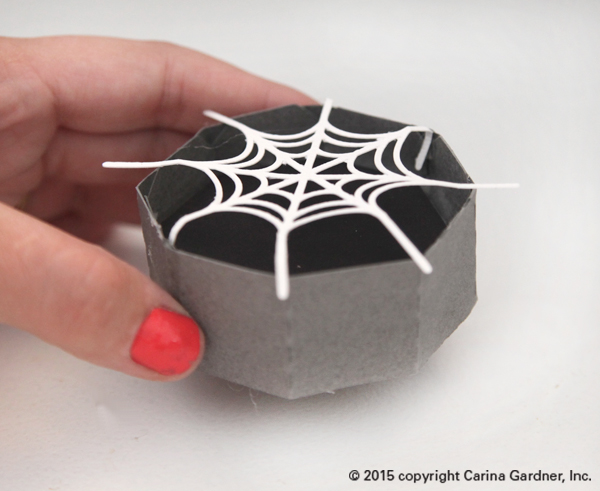
6. Lay the spider web over the top of your ornament with the long webs aligning with the corners of your hexagon. Bend them over the edges to give you a good idea where to glue. Neatly tuck your folded spider web string to the inside of the corner to the hexagon and glue together. Repeat all the way around and the other side.

IMG_9236_web

7. Once your finished pop dot your spider to the web and you’re done!

Hope you have fun making these!

Carina.

Silhouette Design Store JOANN Stores

Hexagon Halloween Ornament Read More »

Halloween Crate Tutorial for Silhouette and Digiplayground

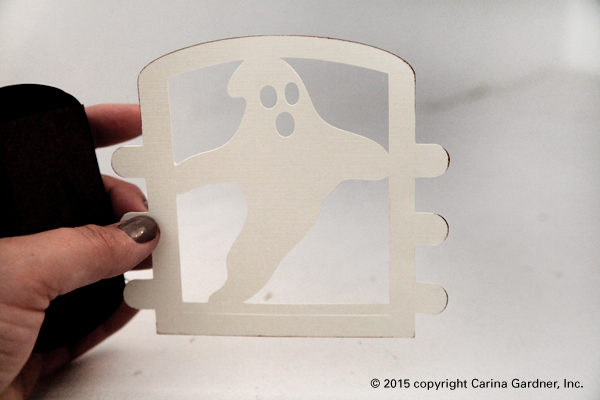
DS-C-10.0843W-CG-Ghost Crate

It’s my favorite time of year! That’s probably why I get so excited for all of these Halloween projects. This post is for a tutorial on the Light Up Halloween Crates. You can purchase them from both the Silhouette and Digiplayground shops. (Links to the crates will become available as they go live).

These are incredibly simple to put together. I’m planning on putting in the windows at the house and as centerpieces on my coffee table. You can place an electric tea light in the center (I love the black ones!) for a but of ambiance!

Here are the links to my Silhouette Shop and DigiPlayground Shop.

Here’s how to put it together:

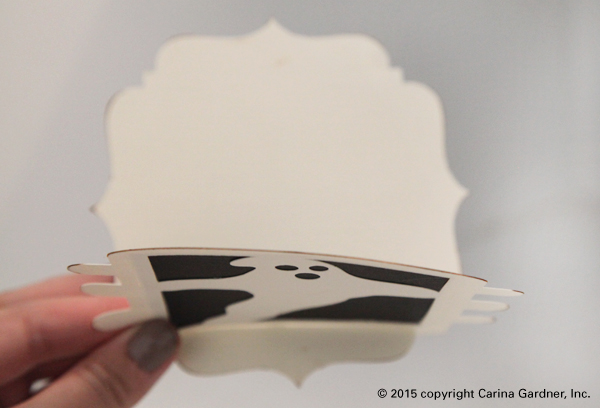
1. Cut out the svg files, cut two of each side piece, four total. Ink the edges of your crate to create some dimension.

IMG_8796_web

2. Glue accent pieces to the inside of the crate side pieces.

IMG_8805_web

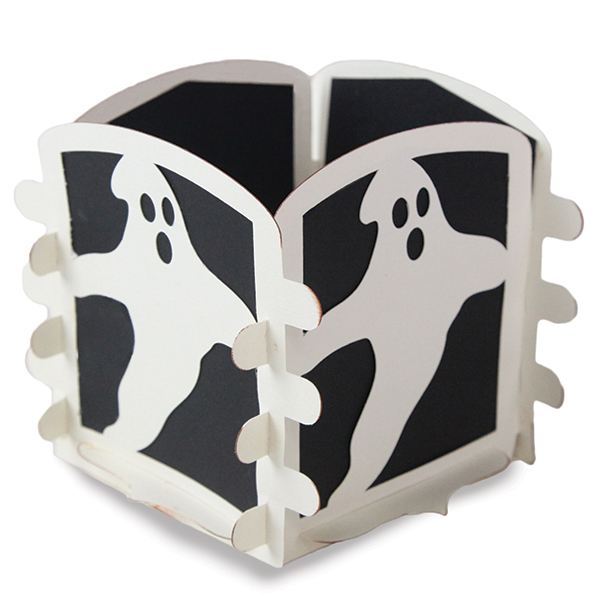
2. Once you have glued on all the accent pieces onto the sides, take the bottom flat geometric piece and slip the pointed edge through the slot at the bottom, just below the ghost.

IMG_8817_web

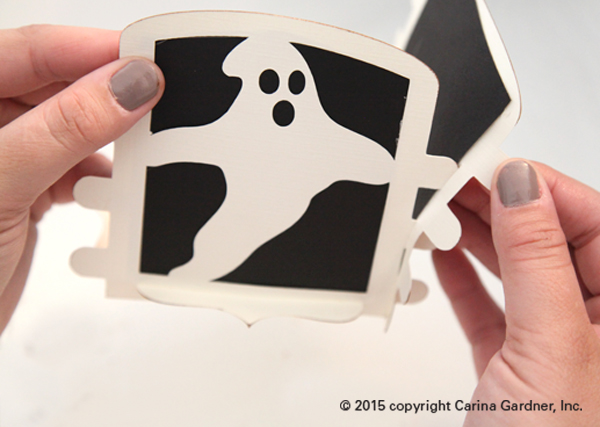
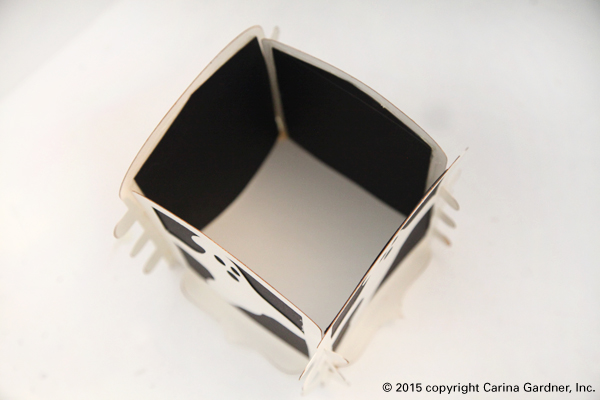
3. Next, grab the opposite side piece and slip the tabs through the slots provided in your first piece. Again, insert bottom pointed edge just below ghost and repeat this step all the way around.

IMG_8820_web

Place a tea light in the center and you are done!

Enjoy,

Carina

Silhouette Design Store JOANN Stores

Halloween Crate Tutorial for Silhouette and Digiplayground Read More »

Halloween Inspiration

IMG_8541_webHalloween has officially begun at my house! Our little family celebrated by going to Frightmares last weekend and starting work on costumes—well, the kids started thinking about their costumes, and I started working on them.

(Photo to the left of Silhouette Halloween Tags now in the shop).

I’m always a happy girl when this time of year rolls around. I feel renewed with the autumn weather. I’m ready for the heat to be replaced by cool breezes and and falling leaves.

And then, of course, there is the all the halloween decor. Many years, I don’t get to pulling things out until the last minute. But these year, our studio has producing so many fun halloween designs! The end result—lots of goodies to hang all over my home.


IMG_8515_web

(All of these designs can be found in my silhouette shop and digiplayground shop)

IMG_8501_web

And yes, we’ve already watched The Nightmare Before Christmas and Hocus Pocus.

IMG_8506_web

Hope you have a moment this week to pull out or make some pretty things! I’m going to get to work on costumes and start planning my Halloween kids party!

Happy Haunting,
Carina

Silhouette Design Store JOANN Stores

Halloween Inspiration Read More »

Episode 13: Halloween Haunted Mansion for Silhouette and DigiPlayground.com

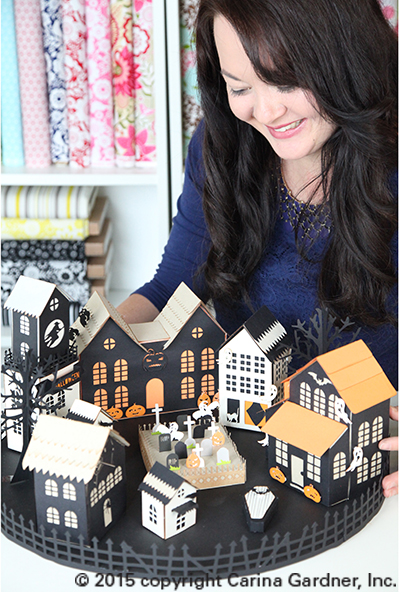
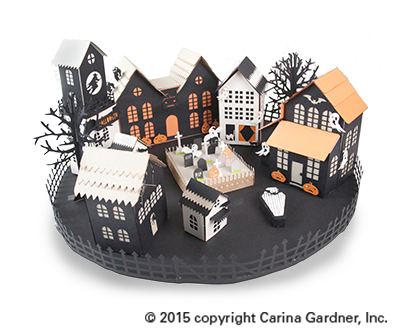
IMG_7894_webThis idea has been in the works for several weeks now. I’m so thrilled to finally be able to present my Halloween Haunted Village! This is made completely from SVGS files that you can purchase from my Silhouette Online Shop or DigiPlayground.com (for other cutting machines).

There are several pieces to this village. You can mix and match or purchase the entire village. Here are the pieces you can buy in this set (links for purchase available 9/21/15):

Pumpkin Mansion
Ghost Mansion
Spider House
Witch Tower
Haunted Tree
Haunted Fence
Coffin
Cat House
Tiny Bat House
Tiny Crow House
Cemetary

Most of these pieces (in particular the larger pieces) have a circular opening at the bottom so you can place an electric tealight. I can’t describe how awesome this village looks when all the lights are off and the tea lights make these IMG_7899_1_webhouse glow! If you want ALL the larger houses to glow, make sure you use, orange, white, cream, or transparent paper (like vellum) for the bases of your houses. Several of my houses (shown here) use a black or kraft paper base. These do not show the light nearly as well as the lighter based houses.
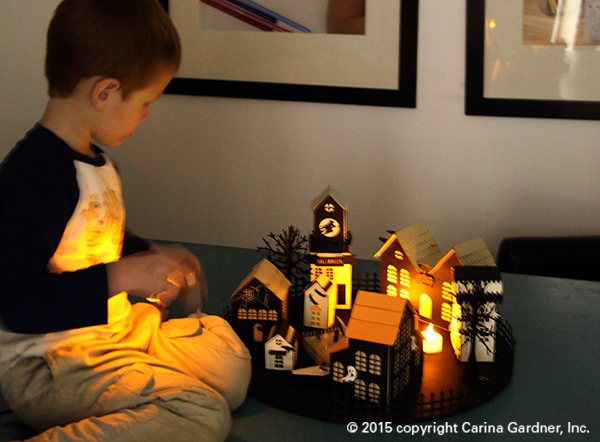
My kids were thrilled with this set! Charlie ended up playing in my office for most of the afternoon with the lights off, moving around the pieces and tea lights in this set!

IMG_7943_1_web

Of course, this set has a lot of working parts so there is a video on how to assemble it! I cover several of the pieces that I feel will help you. I hope you enjoy it!

Carina

Silhouette Design Store JOANN Stores

Episode 13: Halloween Haunted Mansion for Silhouette and DigiPlayground.com Read More »