I know it’s early September but Halloween is around the corner and I know I’m gearing up for some serious decorating. I’m releasing a Tiny Halloween Village, this week on Silhouette. I think you will love it, especially if you did last year’s Halloween Village. Yes, All the pieces in the new set WORK WITH the Halloween village from last year! So mix and match!
This set (as the name suggests) is a little smaller. Why you ask? Because it all fits neatly on 8.5 in. x 11 in. paper! Yep! No sizing down for the Silhouette Portrait users! Hooray!
I have a new video with the tutorial of how to put together each of these new Tiny Halloween pieces here!
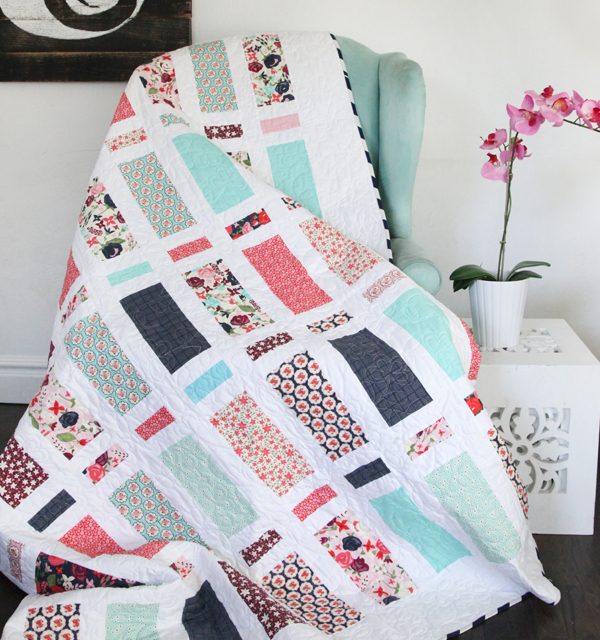
Today is the start of our wonderful BlogHop with Riley Blake Designs for my new collection Posy Garden! I can’t wait for you to see all the amazing goodness that is about to be unveiled over the next two weeks! It’s going to be awesome!
Along with that! My new (and first!) eBook called Simply Modern Patchwork Quiltsgoes on presale today! Eeek! I’m so excited! It will release on August 15th in the Kindle Store on Amazon. I’ll add links here as soon as the presale goes live! I know we are doing a HEFTY discount for the presale so keep your eyes open for it!
***NOTE: It’s on PRESALE NOW! Go to Amazon to purchase it here. The presale price is $4.99. which is 50% off the regular price of $9.99 through AUGUST 15th when it becomes available! That’s less than 50 cents per pattern! Make sure and grab it during the presale period!
There are also four contributing pattern designers to the book including Amy Webb, Amanda Neiderhauser, Christine Cook, and Angie Tackett! These ladies did a fabulous job and I can’t wait for you to see what they have done!
As for the Bloghop, here is the list you are going to want to visit everyday! Come back to this post to link over to these ladies blogs!
I’ll also be reposting their projects over the next two weeks on instagram if you want to follow over there.
I’m so excited to see all their amazing projects! It’s going to keep myself from sewing all week!
Carina
Psst! If you are in Utah, make sure to come visit me at Elaine’s Quilt shop this weekend on August 6th! I’m teaching a free class in the morning and the Clean Star Quilt in the afternoon. My glamper will also be there to tour all day!
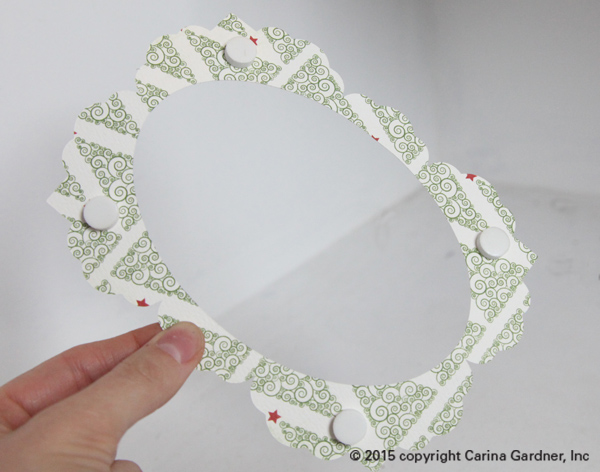
These motion card are put together like most folding cards the little piece that moves in the card is attached by using a 1/4” inch pop dot.
Instructions:
1. Cut all pieces and assemble all Parts that attach to the card.
2. Assemble the portion of the card that will move around.
3. place a 1/4” pop dot on to the back of the movable piece.
4. push the pop dot through the slot in the card.
5. Attach one of the circles to the back of the pop dot. (at this point your motion piece should be attached)
6. Take the second circle (the one with the dashed score line in it) and fold it in half. Now glue half of it to the circle on the back of the pop dot. (this gives it a little bit of a handle so its easer to make the motion piece move.)
This cards are great and can be used for gifts as well as or little standup albums .
The steps to making these cards are:
Cut out all the cards that you want to chain together
Glue the elements onto the inner portion of the card
After you have all the elements glued down. glue the borders onto the frame that goes along the out side
Take the long tab and glue it the it to the next card in the chain and repeat until you have the desired amount chained
Fold back and forth along the score lines
Now take the tabs or tab on the inner card and glue it to the the next inner card.
Make sure you pass through the frames (don’t try to go outside the frames)
Now you can fold up your card and give it to someone, or you can put it on display.
Note that if you are folding the card. It will only fold in one way. if it doesn’t seem to be folding together better tray folding the inner cards the same as the outer cards.
Watch the videos so you can see how we put our cards together.
I LOVE the Off Set Tool in Illustrator. It’s fast and easy to use. Best of all, it has so many applications for use. I like it when I am creating dielines for stickers or diecuts. I also adore it for anything that needs a bleed. It works like a charm for nested objects. Take a look and hopefully it will be useful to you as well!
I’m still recovering from Quilt Market and I’m hoping to have photos up by Thursday! We had a great show and I can’t wait to tell you all about it. For now, I’ve added my shadow box to the Mini Episodes! We have been making so many gorgeous little videos of the new Carina Gardner and MiniLou products coming out in our Bundle Shop and in the Silhouette shops. You’ll see them premier on instagram so check it all out there!
So I had a blog fail last week and didn’t write a bit. Getting myself on a schedule for this might be harder than I thought. Today I wanted to introduce you to our new Mini Episodes on the CGTV Channel. They have their own page now (click on CGTV then Mini Episodes) and you’ll see all of the videos I have that are 1 minute or less. I have a new instagram (@carinagardnerpapercrafts) that sort of inspired me to make this new line of episodes. I have several small videos that didn’t have a place to live, including periscopes, quilt tops, tutorials, ect. On this new instagram feed I am trying to do several of my SVG tutorials in this method so you can see how I make them. Because I needed a place for these (and they didn’t fit into the regular CGTV Channel), we created the “mini episodes.” I’m still in the process of uploading some of the older mini episodes to this page so keep an eye out for that.
To kick things off, I have a new tutorial for you! I have a short little video showing you the power and simplicity of Clipping Masks in Photoshop. I hope you enjoy!
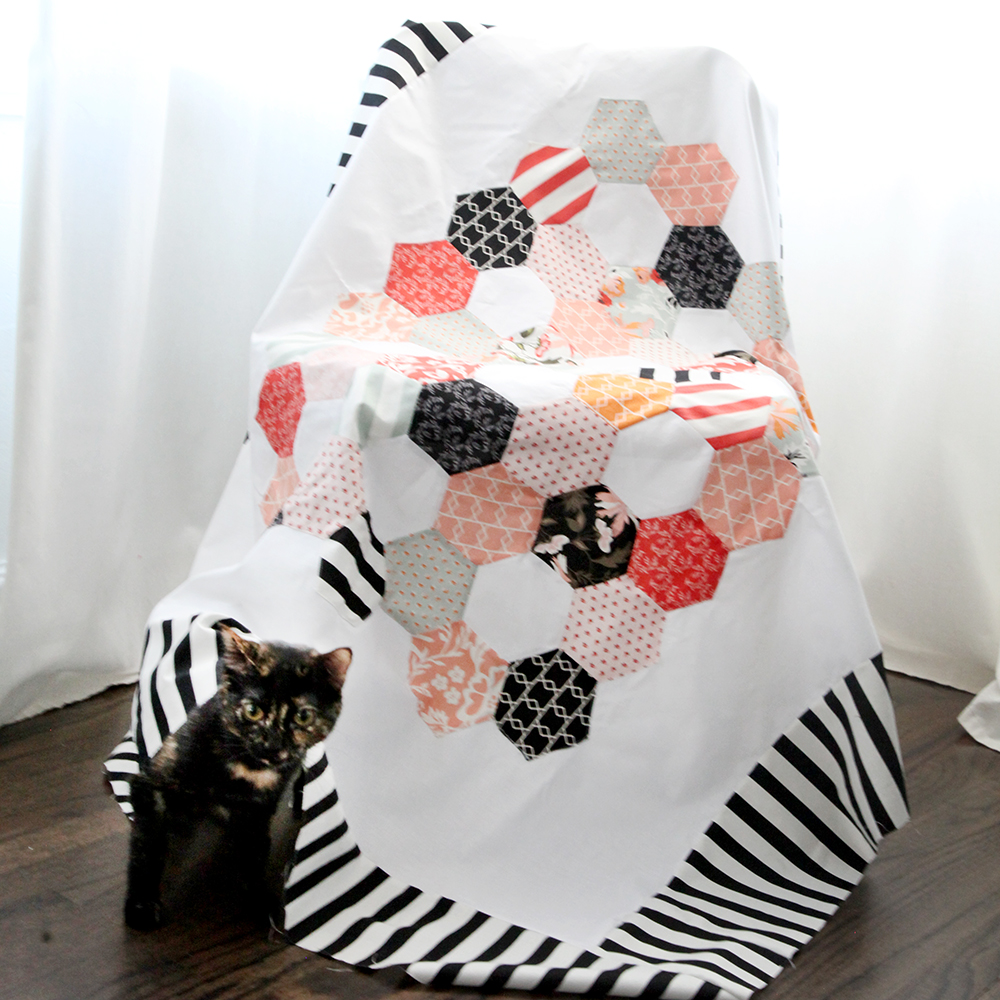
This is one of those quilts that started MONTHS back…actually when I was in Dallas at a tradeshow for MiniLou. I accepted to teach at the Sew Simply Stitched Retreat and needed to come up with a couple of projects to teach. I love hexagon quilts, and I ADORE all of those gorgeous English Paper Pieced Hexis so naturally one of my projects turned into this Perfect Hexagon Quilt.
FINALLY, this April I released the pattern in my shop. Y-seams can be a little daunting so after teaching it at the retreat, I decided to make a video tutorial that went along with the pattern. This is the first pattern I have done this for—a private video that comes with the purchase of the pattern. Cool, huh?
I’m hoping people like it so that I can make more of these types of videos! (The video below I originally did for my instagram feed. It was so fun I decided to add it here! This is the Perfect Hexagon Quilt done in my new Posy Garden fabric that should arrive July 2016!)
I’ve made two versions of this quilt now. I’m really excited about the one I made in my new line Posy Garden that I’ll be showcasing at Spring Quilt Market (that is in the video above).
The other quilt is done in Apricot and Persimmon. It’s been a really versatile fabric line and I’d loved everything I have made with it.
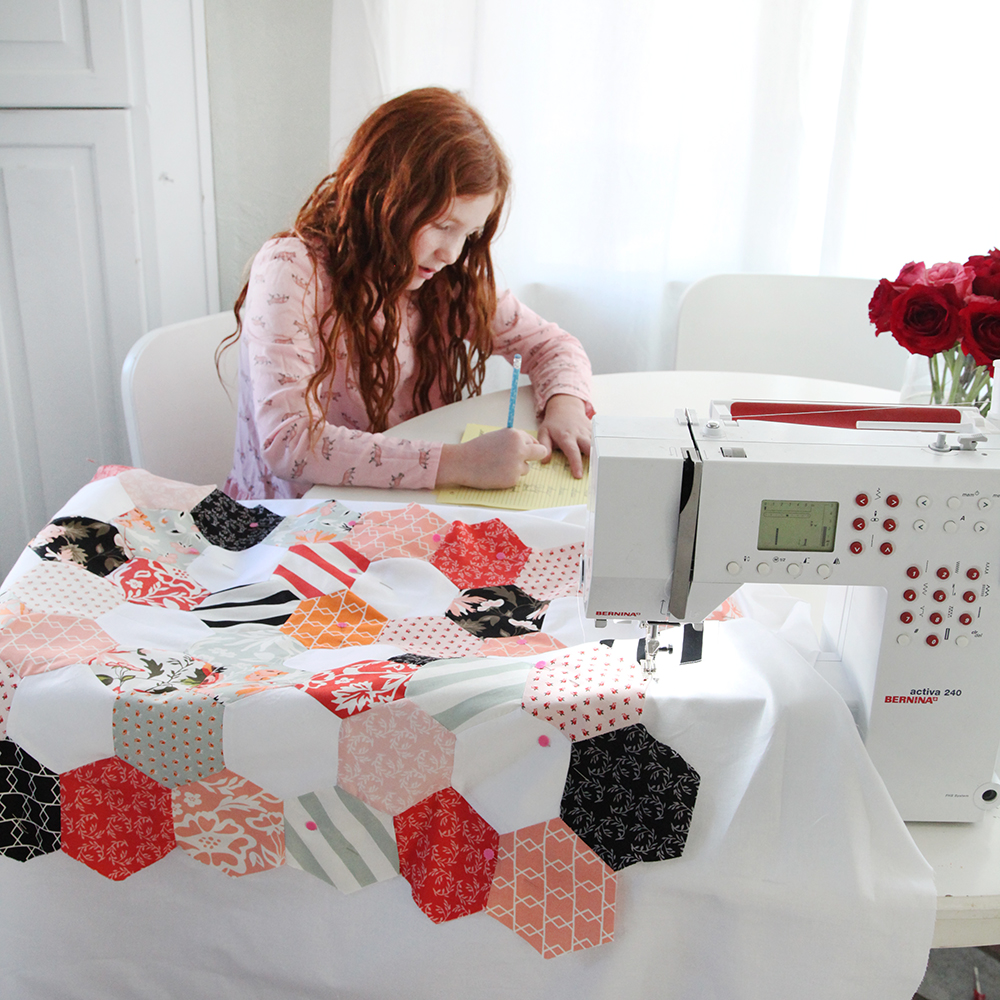
The photo to the left captures a look at what a lot of my afternoons look like. Kids doing homework while mom tries work out how to get the fabric to do what she wants:).
Want to learn more about the Hexi Pattern and video? Check it out below:
Now, I’m off to cello lessons tonight and ready for Friday to kick off the weekend! Lots of Posy Garden sewing for me these next couple of days! I’ll try to sneak in some fun pictures of the progress on the glamper next week!
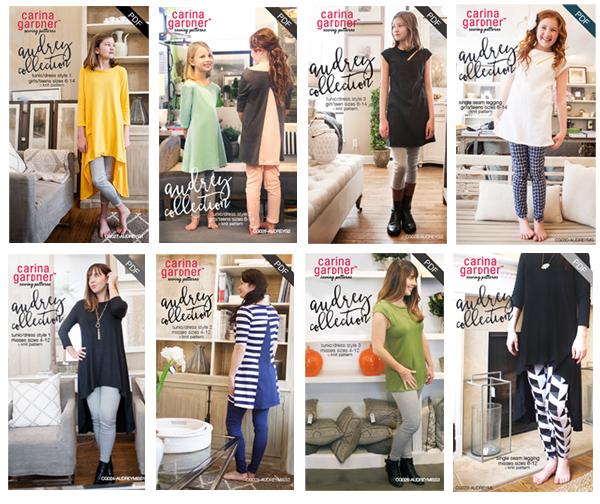
We started working on this collection in December. I’ve never been so ambitious before and tried to release 8 sewing patterns at once! But it was an idea that came from loving and wanting to produce a knit collection that was simple to sew and beautiful to wear. Easy enough of a concept….quite a bit more difficult to execute.
And I couldn’t have done it alone! My pattern production assistant worked tirelessly on this collection and made edit after edit as I pinned, cut, and tried to find the SIMPLIEST way to put these patterns together. I hope you love the results!
This is the first time I have released MISSES and TEEN sizing! You’ll notice that as my family changes in age, I find myself wanting to make what my own kids are wearing.
So here’s the run down on these patterns.
There are 3 styles of knit patterns. ALL are easy to make but Style 1 is the easiest and Style 3 the hardest. As you can guess, Style 2 is right in between the other two.
Style 1 is short in front and longer in the back. Style 2 is an A-line with a gusset in the back. Style 3 features a zipper in a yoke on the front. Each of these variations changes the look and styling of the patterns.
There are two lengths on each of the tunic patterns. There is a “blouse/tunic” version (shorter) and a “dress” version (longer). Here’s the deal: they are both LONG. These tunics are meant to be worn with leggings and if you are anything like me, I won’t wear leggings unless they cover my bottom! In the picture above, Felicity (white) is wearing the TUNIC length Style 3, Siri (yellow) is wearing the DRESS length Style 1, and I (stripes) am wearing the TUNIC length Style 2.
The sleeves are INTERCHANGABLE. There is a 3/4 length sleeve on Style 1, an elbow length sleeve on Style 2, and a cap sleeve on Style 3.
The patterns come in TWO sizes: Misses AND Girl/Teen. The Misses size include 4,6,8,10, and 12. The Girls sizes include 6,8,10,12,14. If you are a size 2 in Misses, you can easily move down to the 14 in Girls/Teen.
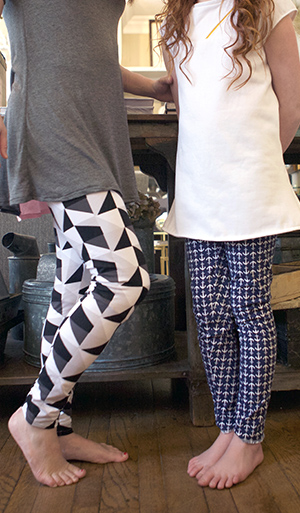
Did I mention the final two patterns are a Miss and Girl/Teen legging? Yep! SOOO simple to sew together since there is a single seam. We love using the Riley Blake knits for these!
I know some of you are probably afraid to work with knits, but it is a lot simpler than you would think! I have a few pointers for those of you getting started and made a couple of videos to make the process so much easier! Check them out below.
Here are a couple of “important” things that I always do when I start to work with knits:
Change my needle to a STRETCH needle. These can be bought for ALL brands of sewing machine and is meant for knits. This will make your sewing go SO much smoother!
Use the thread that matches the fabric content. So if I have a 60% Polyester and a 40% Cotton fabric, I use a Polyester thread. The only time I do not follow this rule is when I have a cotton based fabric with a small percentage of stretch (like a 5% spandex like a Riley Blake knit). Then I will use a polyester thread because it has more give then a cotton thread.
Surprisingly, you do NOT have to serge knits. It looks nicer and will last longer, but you shouldn’t fret just because you don’t have a serger. You should take a chance on knits with just your regular sewing machine!
(Here are the two videos: Getting Started with Knits and a Tutorial on Style 3!)
Make sure and take advantage of the 20% sale going on right now on PDF patterns in the shop in honor of the new collection! Put in code AUDREYNEW20. The sale should last through February 2016. it includes ALL PDF patterns including Kid cottons and quilt patterns!
I’d love to hear what you are doing with knits! Join my Facebook page to tell me or my Private Sewing Group on Facebook! As always, I love getting feedback on the patterns and projects I am working on.
Finally, there is a good chance we will have handmade Style 1 in Misses S, M, L available for sale in a couple of weeks. We will have a very limited few since these are being made inhouse. Keep your eyes out for these!
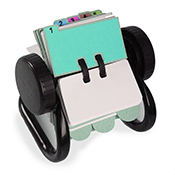
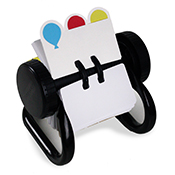
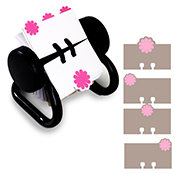
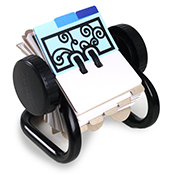
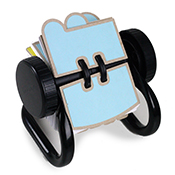
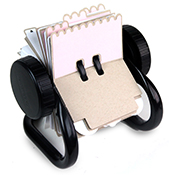
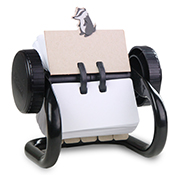
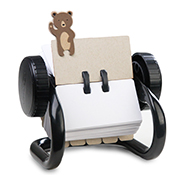
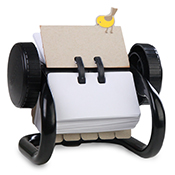
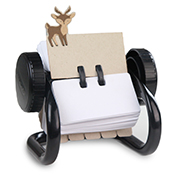
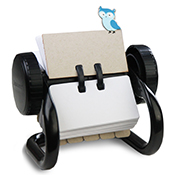
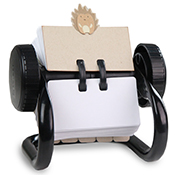
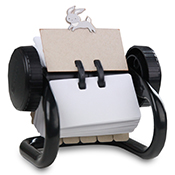
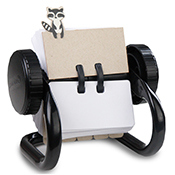
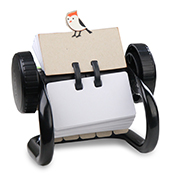
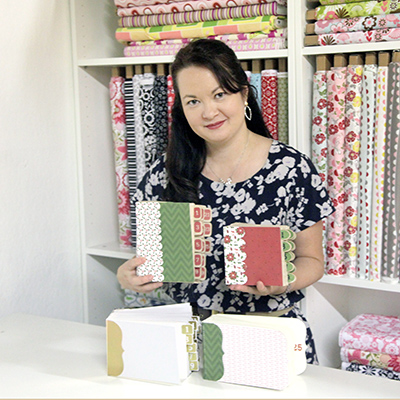
I love putting together a little “planner” at the beginning of the year. This year I focused on Mini rotating file systems. These make me so happy and can be used in so many ways. I love that these could be potential albums, event planners, birthday planners, and so much more. I personally adore the little fox tab!
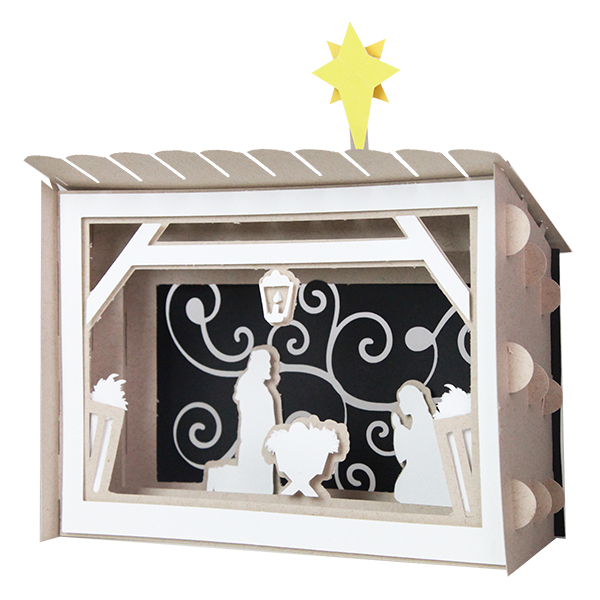
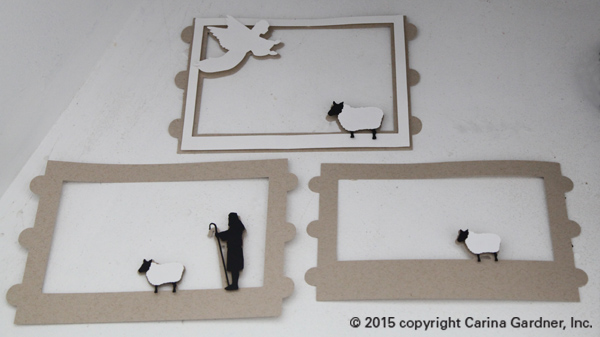
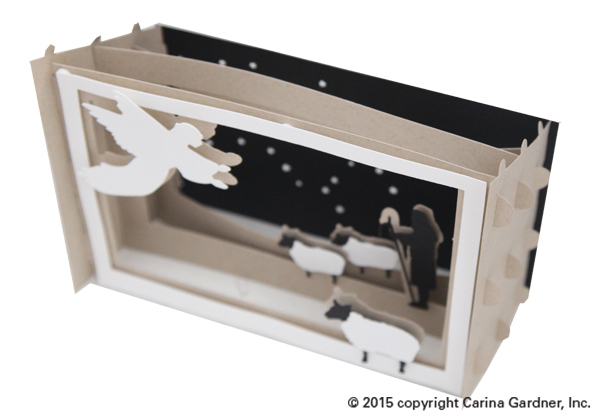
These darling Shadow Box Scenes pop together and then can be pulled apart and stored flat. For me, that makes for the perfect piece of Christmas decor! There are five scenes in all for you to enjoy the holidays!
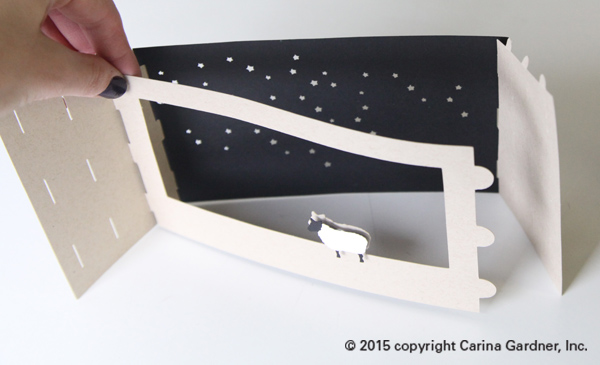
1. Cut out the svg files. The sides, roof, and frames I cut out in kraft paper, the shepherd, background, and the main part of the sheep in black, and the frame, angel, and sheep fur in white.
2. Begin with the frames. Pop dot and attach the angel, shepherd, sheep, and white frame in their appropriate places. Once you have all the figures in place, you can start putting the nativity together.
3. Now, put the background and two side pieces together by slipping the tabs on the short ends of the sides into the slits of the background.
4. The frames attach similarly. Put the tabs on the ends of the frames into the slits in the side piece. Do this for all of the frames. Remember, the frames go in a certain order for it to have the shadowbox effect. The frame with the thickest bottom goes in the back and the thinnest goes in the front.
It will look like this when all of the frames are in.
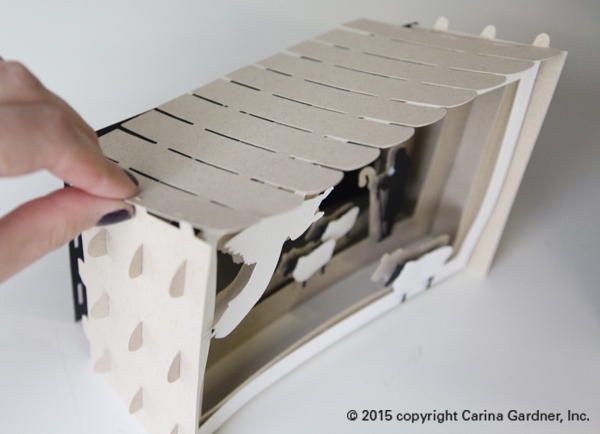
5. For the roof, start with one side and put the tabs of the side piece into the slits of the roof. Do this for the other side. Make sure the side of the roof with the rounded edges goes in the front.
You’re done with your Nativity! I hope you have a chance to make the entire collection!
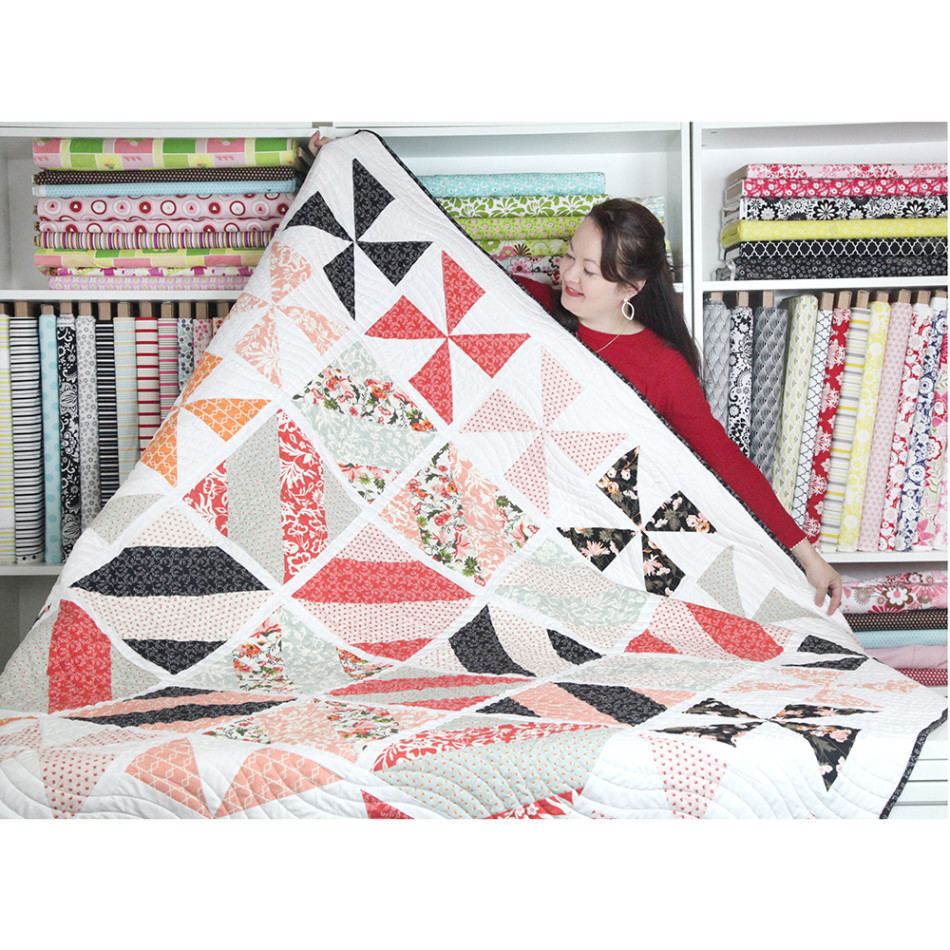
Finally finished the pattern, the video, and I’m giving away the Anything Goes Quilt PDF Pattern I made on instagram this weekend (be sure to check this out!). This quilt is so versatile! I use the Magic 8 technique to get a lot of triangles cut and sewn all at once. I named it the Anything Goes pattern because it really can make so many different kinds of quilts—flying geese, hour glass, pinwheels, chevrons, and more!
Hope you have a chance to try it out! You can purchase the pattern for it (and see some great options!) here.
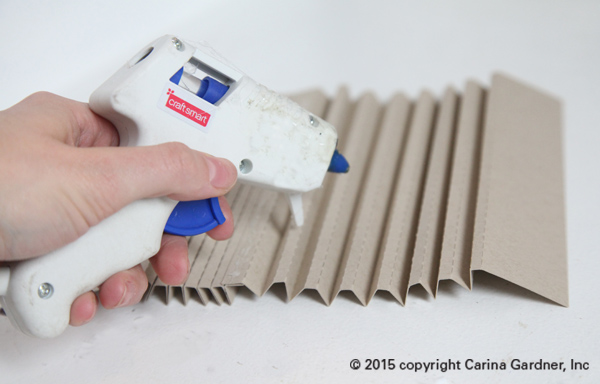
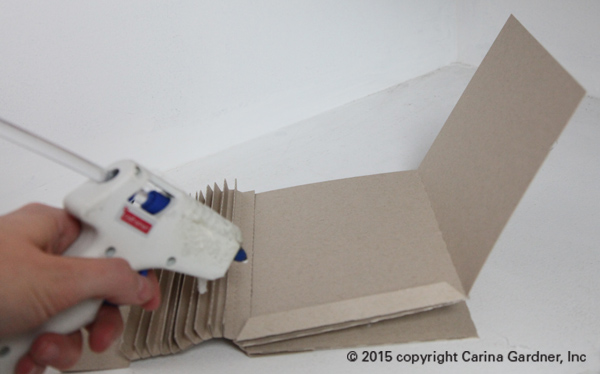
2. Begin with two pieces of the binding and fold along the dotted lines, then glue them together by overlapping the short sides.
3. Turn it over, and glue the wider folds together so the back looks flat and the front has tabs sticking out.
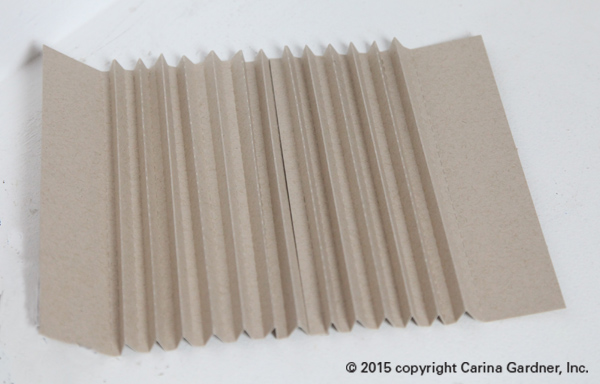
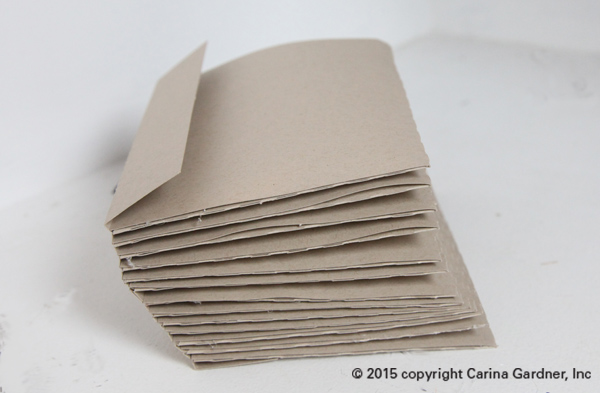
4. Take your pages and fold all of the creases inwards. (The picture below shows the binding on backwards. All those little glued together pieces will become the pages for the album).
5. Now to add the pages! Glue along the long edge of each page and attach the long edge to the back of one of the folds in the binding. This will create a double-sided/double thick page.
6. Glue the top side of the edge of the long page, as well as the bottom tab and fold the page over. This should create an envelope with an open top. Add a page to each one of the binding pieces.
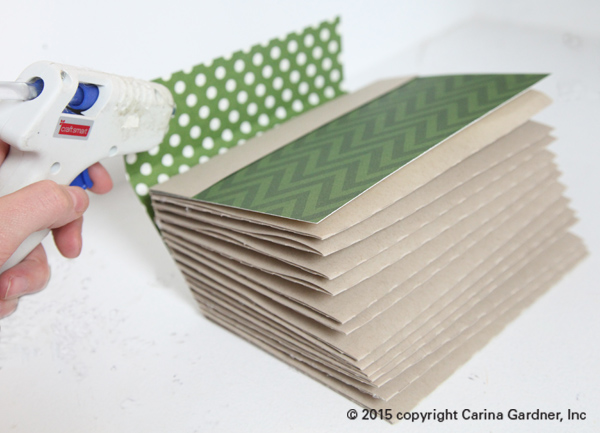
7. Add the cover by gluing the left side of the cover to the bottom side of the flap. This makes the inside look clean and the binding flap will be covered with the binding cover later.
8. Glue the binding cover by matching up the crease of the binding cover with the square of the book. Glue the front, binding, and back side separately.
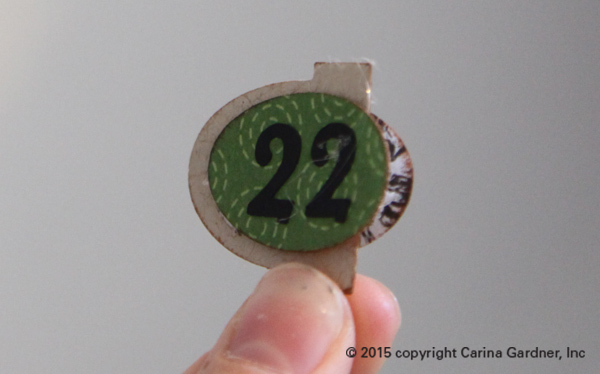
9. For the tabs, glue each number onto an oval (or whatever shape you have). Note: one of the albums (bracket) does not use this step.
10. Glue half of the ovals onto each tab, leaving space to slide the tabs into the slits and for the ovals to go on top of the page. There are 13 tabs, so each tab will have two numbers (one and two will be on one tab, three and four another etc.)
11. Slide the tabs into the appropriate slit on each page. Leave the oval out and glue the other half of the oval onto the outside of the page. Glue odd numbers to the front and even numbers on the back of each tab.
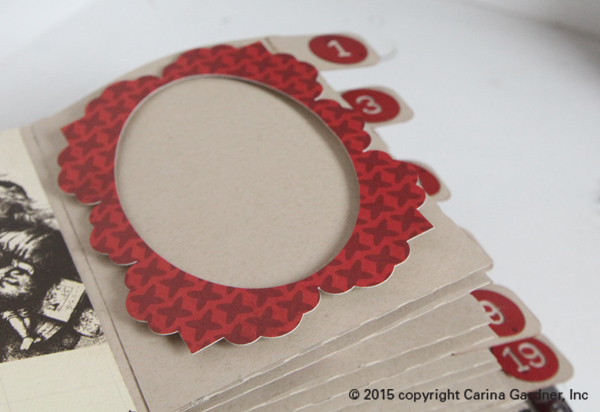
12. For the frames, take each frame and place pot dots on the back.
13. Place the frame in the center of the page and make sure the pop dots are firmly in place.
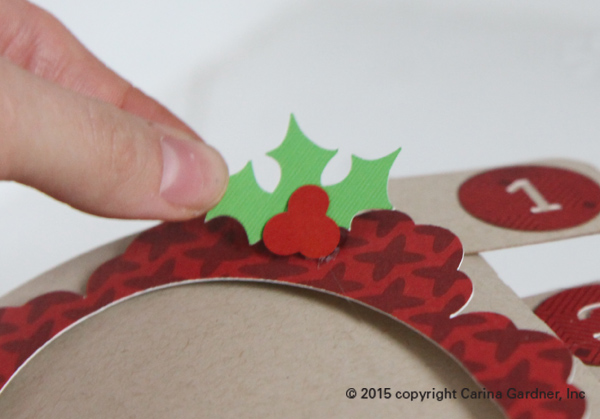
14. Glue the leaves to the berries and attach to the corner of the frame.
15. Place pictures and memories on each page to fill your 25 days of December Album!
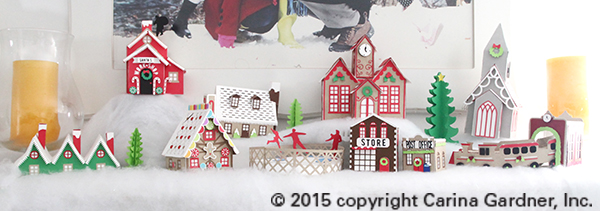
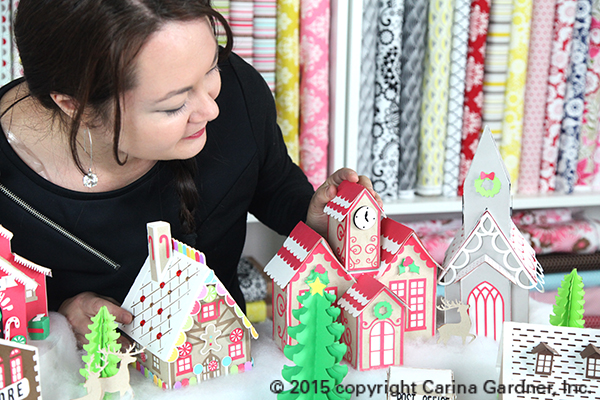
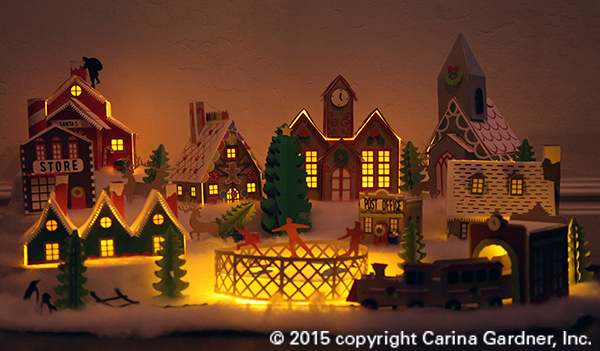
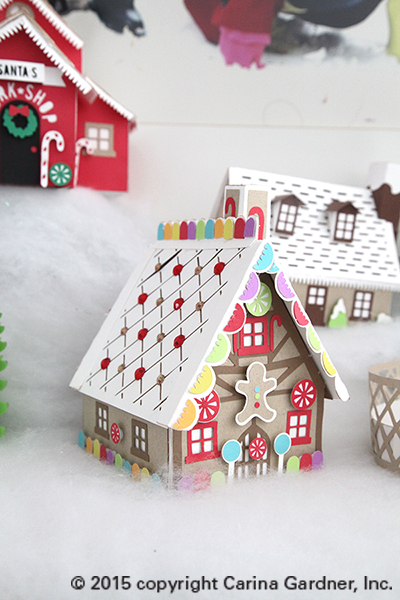
I’ve been working on this Christmas Village for weeks now. Every time one of the little houses got put together, I couldn’t help but smile! Everything about this little village makes me so happy.
There are quite a few pieces, and they all can be purchased from Silhouette and DigiPlayground. Each building is very intricate and there are a lot of parts. I have a quick video on some of the harder pieces so you can see how they go together (see above).
As for displaying this village, there are soooo many options. I have two I’d like to suggest here for you. The first is a display made completely from foam core. I have a free svg file for you to make a template of the one I made and some instructions on how to put it together below. (The photo below is the display I created with foam core. You can make this too!)
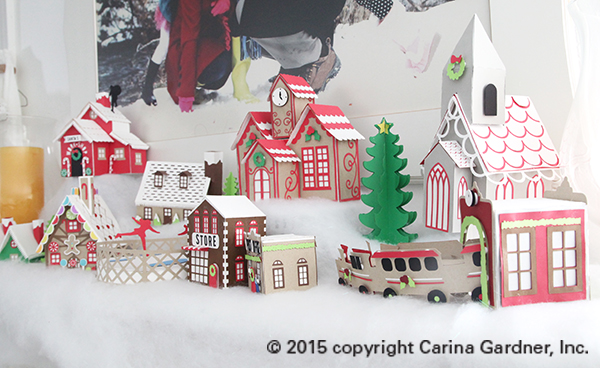
The second way I would display it is on a mantle or coffee table. I love mine on top of our white piano. The best part is at night when we put electric tealights underneath and the entire thing lights up (picture of this below!).
If you place your village on a mantel, depending on the number of pieces you build, I suggest using cake plates and cups turned upside down to give dimension and layer to your village. Cover these with ‘snow’ you can purchase from your local craft store to hide these layers. Instant snow drift!
The two photos below is of the Christmas Village on top of my piano (about the size of the mantel). I love it up there! Every piece is so unique and darling. My family is really going to enjoy it this holiday season!
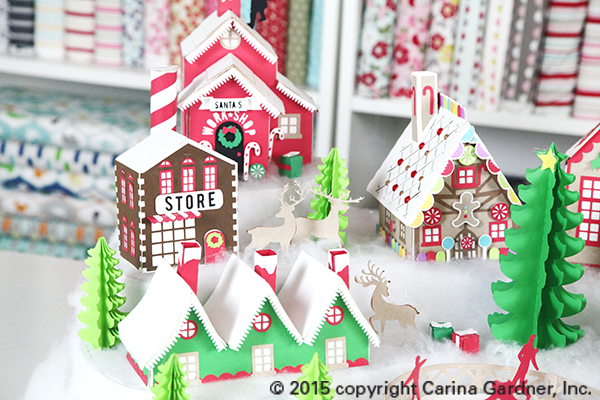
There are so many great pieces in this village. They will be release over the next two weeks (so keep an eye out for them!). The picture below is of the Santa’s Workshop, General Store, Gingerbread House, Trees, and Deer.
Picture below highlights the Clock Tower, Chapel, and Gingerbread House.
The train comes in two files—a Train Station with tracks and a curved 3D Train.
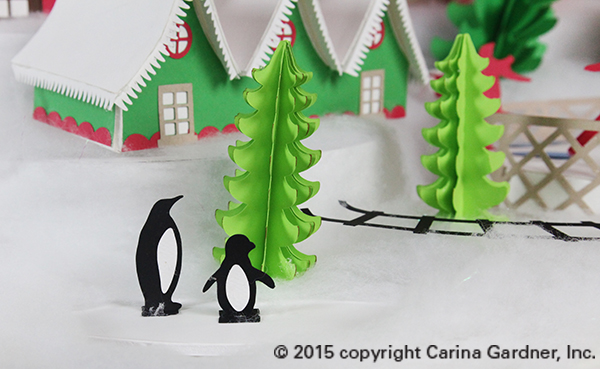
Happy little penguins anyone?
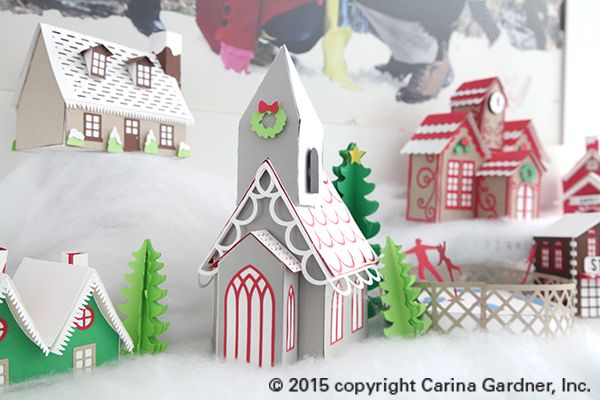
Check out the Snow Cottage, Elf Houses (with curved roof!) and the Chapel.
Turn off the lights and watch them glow! Instant Christmas Magic!
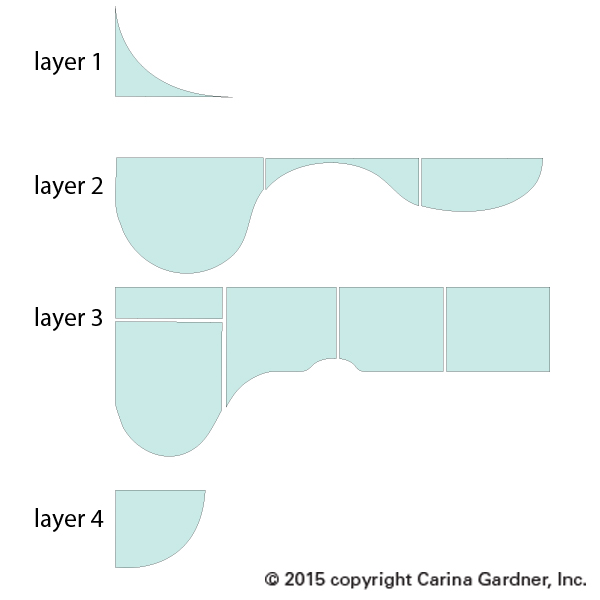
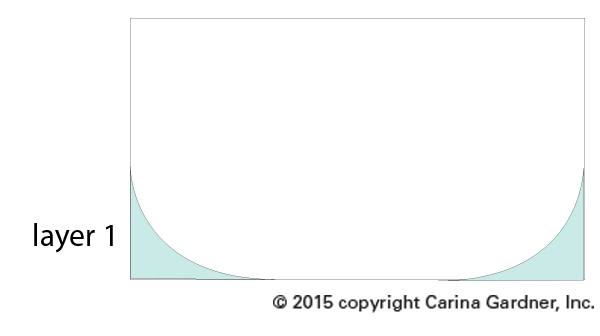
Download the zip. You will need 5-6 pieces of 20 inch x 30 inch foam core in white. You will also need a hot glue gun, a small package of ‘snow’, and x-acto knife.
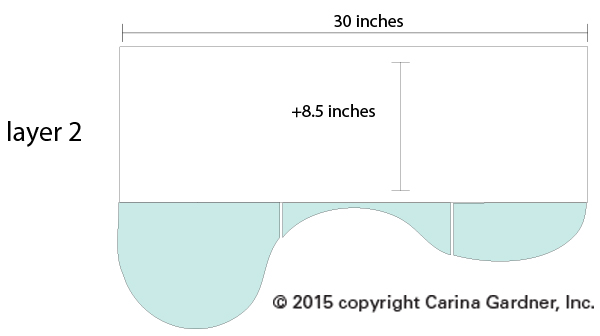
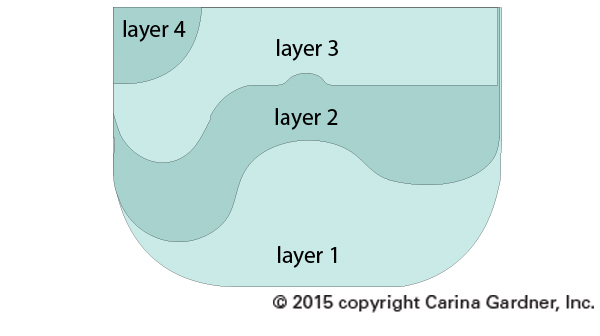
There are four layers to this display. The zip contains 4 documents that may look a bit jumbled (everything needed to fit on a 12 x 12 template for Cricut users). All you need to do is pull all the pieces apart and cut each of them out. Then layout your template like I have below:
3. After cutting out your pieces you will lay the template onto each layer. Layer 1 you will use the template to cut away two edges of the display. Layer 2 you will need to add a width of 8.5 inches to add the depth. Layers 3 and 4 you can cut out as is.
4. Use an x-acto knife to cut these out. Don’t worry about making it perfect! Your snow will cover your mistakes!
5. Once the layers are cut out, you will want to create dimension by cut out several 2 inch strips the full length of the 30 inches on the extra foam core you have. Slice lightly into one side of the strips so that you can bend them to the shapes of your layers. Start with layer 2. Start at the side front and hot glue the 2 inch strip along the curve. Don’t worry about mistakes or gaps! Your snow will cover all of this! Once you have glued the strip along the edge of layer 2 you will glue it down to layer 1. Continue with all the layers using the diagram below to help determine how to place everything.
6. Once everything is glued together, simply layer snow on the display. I glued a little bit to the board to help everything stay in place. To glue the trees, deer, and penguins to the display, I moved the snow to the side and glued these pieces directly onto the foam core. Then I moved the snow back into place.
I hope you have fun making this display and the entire Christmas Village!
 I know it’s early September but Halloween is around the corner and I know I’m gearing up for some serious decorating. I’m releasing a Tiny Halloween Village, this week on Silhouette. I think you will love it, especially if you did last year’s Halloween Village. Yes, All the pieces in the new set WORK WITH the Halloween village from last year! So mix and match!
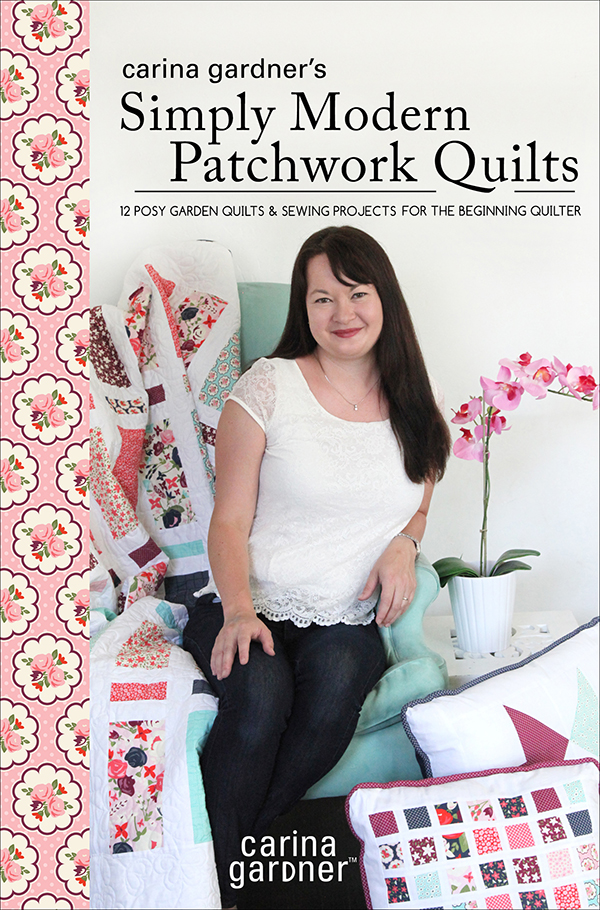


 I’ve been working on this Christmas Village for weeks now. Every time one of the little houses got put together, I couldn’t help but smile! Everything about this little village makes me so happy.
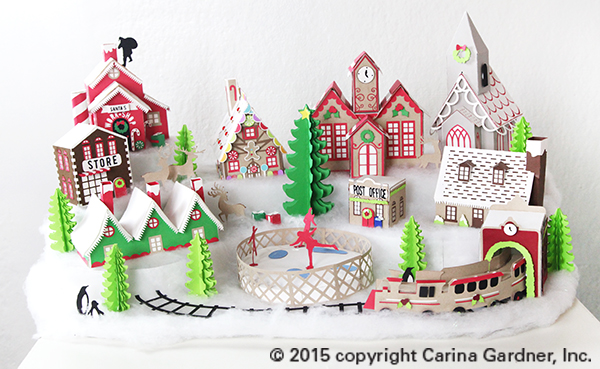
 The second way I would display it is on a mantle or coffee table. I love mine on top of our white piano. The best part is at night when we put electric tealights underneath and the entire thing lights up (picture of this below!).