48 Hours in Texas and New Mexico

IMG_6805_web

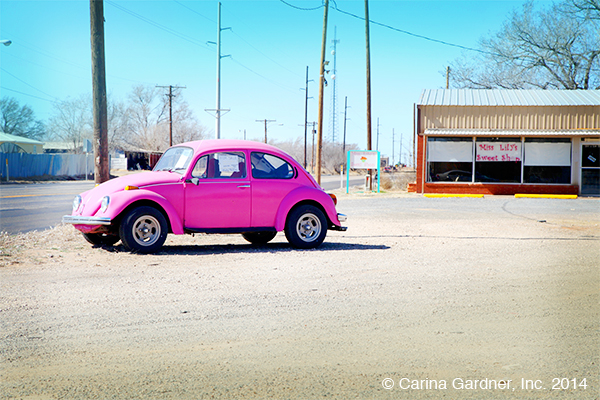
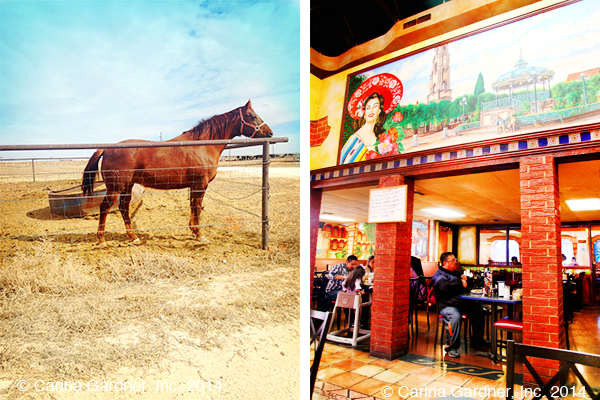
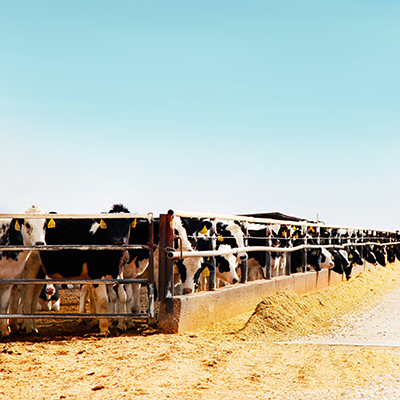
48 hours in New Mexico and West Texas isn’t a lot of time to do much, but I made time to eat a lot of Mexican food and take pictures of the livestock (haha, see below). I flew into Lubbock, TX and drove to Portales, New Mexico—a charming little town that houses Eastern New Mexico University. There I was greeted by the host of Creative Living’s Sheryl Borden, who is probably one of the nicest people I have ever met. (photo above: It was too hard to pass up taking a photo of a pink bug. Slug Bug!)

IMG_4931_web

Sheryl and I taped three segments for her PBS show Creative Living. I believe the segments should air at your local PBS station (check your local listings) sometime in the third and fourth quarter of the year (more on this when I find out air dates). I’ll also post our segments on my youtube channel when I get my hands on the videos. (photo below: Sheryl and myself on her set).IMG_6696_web

IMG_6728_web

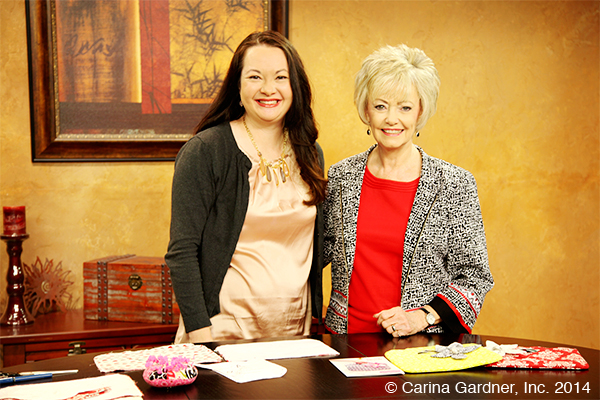
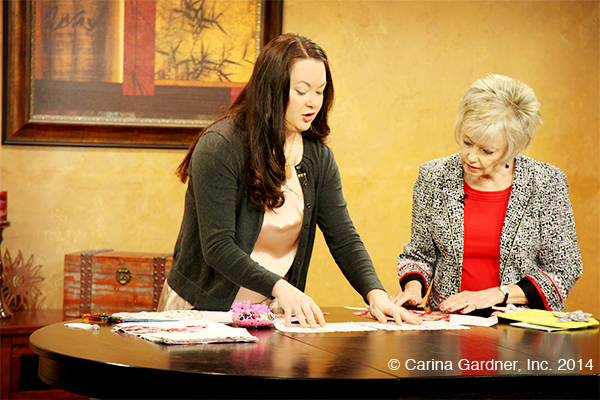
Obviously some super important explaining happening above. ^^^

IMG_6760_web

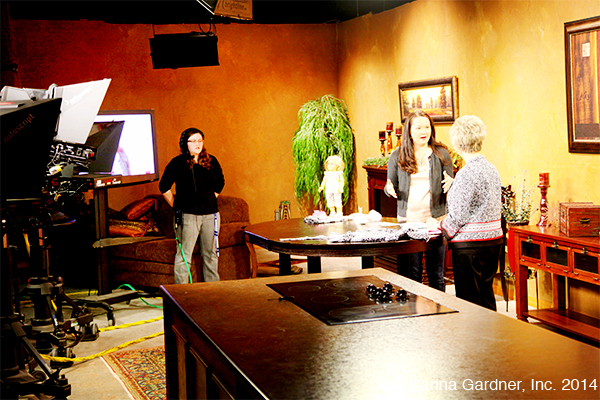
I always love to see behind the scenes of something like this and two members of Sheryl’s crew was nice enough to snap photos for me with my camera. The set has a full kitchen and living room area.IMG_6793_web

IMG_6802_web

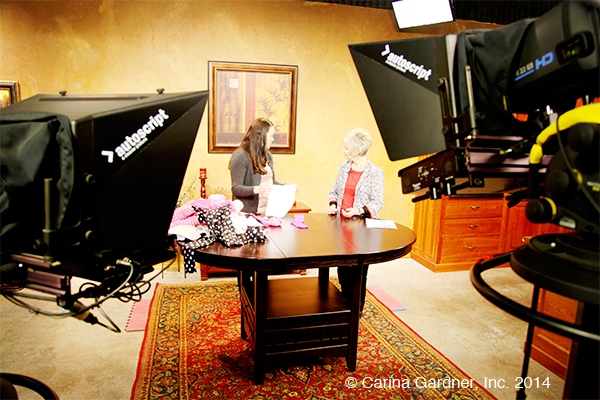
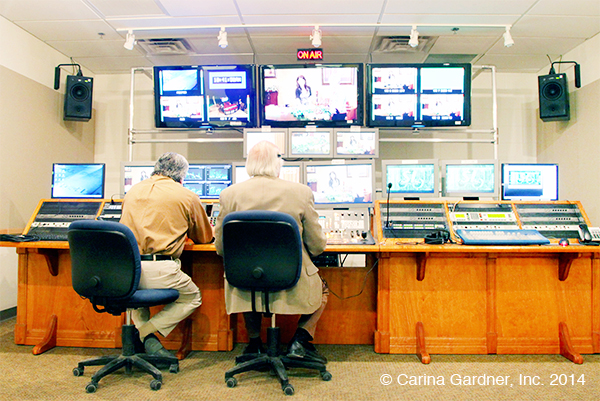
Serious control room. ^^^  IMG_6807_web

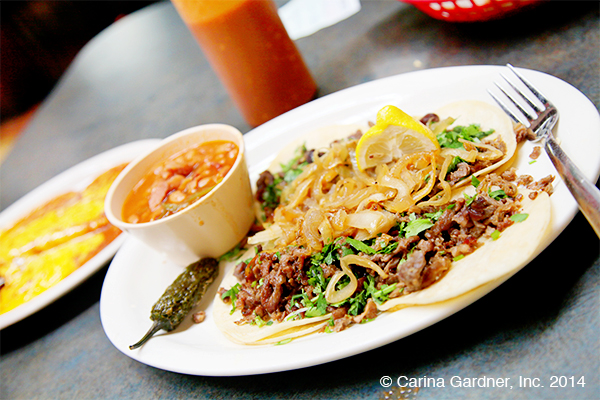
The foodie in my was pretty happy on this trip. There is something so fun about discovering places I have never eaten before. A couple of places to mention: I loved the carne asada tacos at Taqueria Jalisco. I also stopped by the Taco Village and loved their beef tacos (near the airport—a plus!).

IMG_6691_instagram

I’m on my way home now and it should be a busy weekend including the Yard Sale at The Cottage! Be sure and check it out for some amazing deals. I also get to attend the wedding of a college girlfriend and maybe even stop in at our neighborhoods big band dance. I’m looking forward to getting home!

And although it has only been 48 hours, I’m excited to go home and snuggle my Charlie-boy and girls.

Carina


Silhouette Design Store JOANN Stores

Evening Blooms Quilt Tutorial with Andy Knowlton

photo 1Today I have a special treat for you! Andy Knowlton of
A Bright Corner created this beautiful quilt using my Evening Blooms fabric collection. To top it off, she has agreed to give you all a tutorial on how she made it. There is even a pdf download at the end (scroll to the bottom to download).

So without further ado, here is Andy:

___________________________________________________________________________________________
I love the timeless look of classic black and white and these fabrics don’t disappoint! This quilt is made entirely from half square triangles (HSTs) but don’t let that deter you! I have a fast and easy way to make a ton of HSTs in no time at all.
First I’ll show you how to make your HSTs then I’ll show you how to assemble one block. I’ll add a quilt layout diagram at the end and you’ll be on your way to finishing your own Evening Blooms quilt!
First of all, here’s what you’ll need:
photo 2
1/4 yard of 7 various dark prints
1/4 yard of 5 various light prints
2 yards of white/background fabric
1/2 yard binding
3-1/2 yards backing fabric
photo 3
From each of the prints (7 dark and 5 light) cut 3 squares that measure 8″. You’ll need 36 total.
From the white/background fabric cut 8 strips that are 8″ x width of fabric.
Subcut those strips into 36 @ 8″ squares
photo 4
To create your half square triangles, pair up each print square with one white square. Match edges, keeping right sides together.
photo 5
Sew around all four outer edges using a consistent 1/4″ seam.
photo 6
Using your rotary cutter, cut diagonally through each block twice as shown in the photo.
photo 7
Being careful not to stretch it, press each HST. I prefer to press the seam allowance toward the print. Trim the little tails off of each HST.
If you are consistent with your seam allowances and careful to not stretch the HSTs you should not need to square them up. If you find your HSTs to be varying in size, then square them each up to the same size (either 5.25″ or 5″ each).
Create all of your HSTs and then move on to the block layout.
photo 8
Layout all of the HSTs you need for one block. Notice in the quilt layout diagram that not all blocks are the same. The dark and light prints are alternated for the main part of each block and the corner HSTs are different depending on where in the quilt the block will be located.
photo 9
Sew together into rows using a 1/4″ seam.
Sew rows together, matching seams.
photo 10
Your block is done!
Now use the layout diagram to make the next 8 blocks.
In the layout diagram I used just two prints – one dark and one light so you can clearly see the placement of each HST.
Evening Blooms layout diagram
You can find a printable version of this tutorial here Evening Blooms Quilt Tutorial


Silhouette Design Store JOANN Stores

Episode 8: How to Use Sewable Interfacing with your Silhouette Machine

With all the new fabric files hitting my Silhouette Shop, I thought it would be helpful for you to see how I sew with the Sewable Interfacing. I show you a couple of my tricks for sewing with the stuff and how I set up my mat. Enjoy! -Carina

Silhouette Design Store JOANN Stores

Remember Pinwheel Tutorial

Pinwheel-Table-Runner-Tutorial-Close-Up-2_webI know you are going to love this little project made with my Remember fabric! Andrea from Knitty Bitties made this lovely pinwheel table runner that I am swooning over. What’s that? You want a tutorial? Luckily for you, Andrea has one on her blog here: knittybitties.blogspot.com.

I love the way this pretty little thing is quilted together and the pinwheels are sweet. I can see making an entire quilt with these babies. But if you are like me and big projects start to wear you down, this is the perfect little project.

Speaking of projects, have you done any this summer? Or have you filled your days with library outings, pool time, and vacation?

I’ve been able to work on a few sewing projects but am now full swing into fall sewing pattern season. And winter scrapbooking designing season. But that’s another story.

Pinwheel-Table-Runner-Tutorial-2_web

Later this week, I am heading to a retreat with my BYU college roommates. It’s the first time we have had a chance to get together since, well, I’m not sure when. Follow my instagram feed if you want to sneaky-peeky into our doings. I promised to bring up scrapping and fabric supplies for some crafting fun. And while there will be some of that, I suspect there will mostly be a lot of catching up, reminiscing, baking, and then, um, eating.

Happy Sewing!

Carina


Silhouette Design Store JOANN Stores

Laminate Bag Tutorial

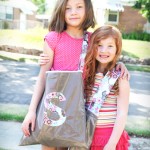
I’ve been meaning to post this tutorial for a month now. My kids took a neighborhood art class and the night before I had the hair-brained scheme that they both needed new art bags. After making them, I sketched up the steps for anyone else who is interested in experimenting with these said “hair-brained” schemes.

I’ve sketched up a similar tutorial for my girls’ ballet bag, but this time the bags are substantially larger, made of laminates, and have a single strap. I used the Dainty Blossoms™ laminates (shown in the photos).

Working with laminates was not as hard as I originally anticipated. I like to use Lila Tuller’s oil method for running laminates through my sewing machine. It works like a charm!

A few notes about the sketches for this tutorial:

* They are by no means comprehensive:). That means that I give you sizes, and you can customize as you wish.
* Yardage for the bag does NOT include the “cutout” (in my example I show an ‘S’). Either use a scrap of contrasting laminate or skip altogether (see more notes on this below).
* You may want to adjust the strap’s length for the intended use of the bag. My strap is meant to comfortably fit across the chest.
* I don’t use fusible material for the letters/cutout. I simply carefully laid the letters on the front of the bags and appliqué  stitched the letters directly to the front. It was absolutely an experiment in progress since I had never used laminates like this before. Amazingly, it worked (but was not easy!)

After a month of use, turns out these bags are pretty strong and can take a beating. I attribute it to the laminates, which helped my wipe away all the paint my kid’s left undone in the bag. Perfect art bag.

Hope you also get a chance to experiment!

—Carina


Silhouette Design Store JOANN Stores

Double Ringed Pincushion Tutorial and Free Download

If you head over to Riley Blake’s Cutting Corners today, you will find my brand-new Double Ringed Pincushion Tutorial.

All of my pincushions are made using my Dainty Blossom’s line for Riley Blake. I now have these pincushions scattered all over my studio 1. because they are useful, but also 2. because my kids like to play with the “donuts.” It works for me.

The actual pincushion is relatively fast to make. The stand is made from wood supplies found at my local craft store (spools, doll heads/spheres, and a flat circle for the base).

Head over the Riley Blake here to download the pdf instructions, pattern, and for a quick look at the instructions in the blog post. You can also download the instructions here.

Happy sewing!

Carina

______________________________________________

Silhouette Design Store JOANN Stores

Dainty Blossoms Camera Strap Tutorial—Free Download

Want to bring life to your camera strap? Here’s a quick and easy tutorial of how to make one. There are step-by-step photos and then I suggest embellishing it with something fun! This strap is made with Dainty Blossoms™ to infuse a little spring into this long drawn out winter.

What else do I like about this project? It’s a short, quick-and-easy project. I sometimes like a tiny project like this because I feel inspired and fulfilled when I finish it, but it only took me an hour.

Download the pdf here.

Hope you get in a little stitchin’ time too!

XOXO-Carina

Silhouette Design Store JOANN Stores

Dress Up Quilt—Free Quilt Pattern

As promised, the Dress Up™ Quilt Pattern in a more “bite-sized” pdf. You can also see it shown in our 6th Newsletter Issue.

I wish I had more fun things to show you, but other than a fun stop down at Riley Blake earlier this week (to grab some Paris and Company for a photoshoot & talk about a new line) and the quick recover of my kitchen table in Dainty Blossoms™ laminate (shown through instagram on my facebook page), I’ve been doing the thing I dread most…my taxes.

There’s something about having to sit over my computer crunching numbers for my tax consultant that makes me feel like Bean (boring, boring, BORING!)—that’s the second grader in me speaking.

Thankfully, we are making the transition in software this year, and I’m hoping that it limits the time I spend hunched over my computer in March.

Wait, did I say March? My how time flies when you are having fun!

Enjoy the quilt pattern!

XOXO—Carina


Silhouette Design Store JOANN Stores

Newsletter Issue No. 6—Free Quilt Pattern, Tutorials and All That Jazz

You’ve waited patiently for it and now it’s done! Our sixth issue of the newsletter has really become a digital magazine with all the stuff we try to pack into it!

This issue includes a new quilt pattern using Dress Up™, the inside scoop on Designer Workshop, tutorials from the Creative Team, a fabric tutorial on making a camera strap and so much more!

Visit the Carina Gardner Newsletter Issue No. 6 here.

Many of you have requested that we make the newsletter downloadable (which makes sense for those of you needing to print the patterns!). I made sure that this issue and all the previous issues now include the download button for your convenience. I also plan on getting smaller bite-sized downloads of the Dress Up™ Quilt, the Pinfeathers™ Quilt, and the new Dainty Blossoms™ Camera Strap Tutorials available soon.

Some of you saw my early picture of the Dress Up™ Quilt on Instagram (check my sidebar). I usually piece together all my quilts, but my mom helped me on this one. Things have been a bit busy and it’s such a blessing to have a quilting mama! She’s also planning on flying out a couple of weeks before Quilt Market to help me out with the tremendous amount of sewing we will be doing for my booth. The pattern instructions for this quilt are included in the 6th issue, and I hope you get a chance to make it! It’s simple and so sweet!

I’ll be back soon with my favorite way to cut bias strips and all those easy downloads!

Enjoy!

Carina

Silhouette Design Store JOANN Stores

Well Traveled Mini Travel Album

More fun to inspire you today! Check out Creative Team member Laurel Flechtner’s tutorial for creating a Mini Travel Album!

Enjoy! Carina

Mini Travel Album

NAME  Laurel Flechtner

FROM  Norfolk, Virginia, USA

WHAT INSPIRED YOU TO MAKE THIS PROJECT OR WHO DID YOU MAKE IT FOR?  We took a trip to NJ & NYC to see family and I always make mini-albums of each of our trips.


MATERIALS

Carina Gardner Well Traveled Paper Set 1

Carina Gardner Well Traveled Paper Set 2

Carina Gardner Well Traveled Paper Set 3

Carina Gardner Well Traveled Paper Set 4

7 Gypsies black binder ring

Cricut & Sure Cuts A Lot 2 for cutting album pages

Adobe Photoshop CS5


INSTRUCTIONS

1. Cut and adhere a front and back  paper for each page of the album.


2. Select, print and adhere photos


3. Add embellishments and journaling


Silhouette Design Store JOANN Stores

Well Traveled Scrap-o-Dex

My amazing creative team has been working on hard on creating some lovely Hybrid Projects to inspire you using the Well-Traveled Line now at JessicaSprague.com. The line will continue to be released during the month of February, so keep your eyes open! In the meantime, check out this eye candy!

XOXO-Carina

Well Traveled Scrap-o-Dex

Name  Joyce McCall

Hometown  Oklahoma City

Inspiration for the project... I am inspired by inspiration! I like having altered art and dimensional memory keepers around me so I’ll see them even when I’m not pulling out an album to look through.


Digital Supplies:

*Carina Gardner Well Traveled papers and elements

 Other Supplies:

*Claudine Hellmuth sticky back canvas

*Matte presentation paper

*Adhesive and embellishments

*Tiny alphabet stickers (Making Memories)

*Tim Holtz ornate plate with brads

INSTRUCTIONS

1.Print desired patterned papers onto sticky-back canvas.  Use software to size your pieces to 4X6

vertically/portrait orientation.  You’ll need 4 total.  Adhere to the base unit of the scrap-o-dex.


2. For the cover card print patterned paper at 4X6 horizontal/landscape orientation.  Add stamped

title and attach ornate plate to frame it.  I also added a travel path to the map with a marker, and I

added glossy accents over the compass on the patterned paper.  Cover the back of the card also!


3. Select patterned papers for the chipboard cards.  Embellish with digi elements before printing, or

with physical elements after printed, or do a little of both!  4X6 horizontally was the right size for

mine.  On the tabbed cards, add a small strip of patterned paper to the tab before adhering the main

piece.  Use a craft knife to trim out the bottom notch.  Sand outer edges if you have paper that

overhangs.  Use alphabet stickers to add titles to the tabbed cards.  (tip:cover fronts, sand edges,

carve out notches, THEN work on the back sides.)


4. Assemble your finished chipboard cards back into the scrap-o-dex!


Silhouette Design Store JOANN Stores

Hybrid Project Submissions Now Open!

We’ve had such a tremendous response to the hybrid section of the Quarterly Newsletter that I have decided to open it up to anyone who would like to submit projects they have done using my fabric, digital, or paper. This is very exciting for me since I love seeing everyone’s creativity!

Our first deadline is for Issue No. 6 Dec 2011-Jan 2012, which we expect to release mid-January. Submission Forms are due by December 15, 2011. Please download the form and look over the project guidelines. You can also check out previous hybrid projects done by the Creative Team in Issue No. 5.

Deadlines for future issues will be published on the Newsletter Page (as well as the download forms).

We’d love to publish your fabulous fabric, paper, and digital work so submit!

Hugs! Carina

Silhouette Design Store JOANN Stores

Issue No. 5 of the Newsletter—Spraguefest and Tutorials

Wheww! Here it is! Our fifth issue of the newsletter. This thing just gets bigger and bigger! This one is 39 pages long with a huge section on Spraguefest, an introduction to Susan, a quilt pattern, a coupon code for Designer Workshop, and tutorials galore!

Be sure and check out the calendar at the end…it’s a sneak peek into the “big stuff” coming up the next few months here in the studio.

Here’s you link to Newsletter Issue No. 5:

https://carinagardner.com/newsletter/carina-gardner-newsletter-issue-no-5/

Enjoy!

Carina

Silhouette Design Store JOANN Stores

Pinfeathers Rosetta Wreath- Free Download

My sister-in-law walked in as I was making this wreath and said, “Weren’t you just complaining about the number of wreaths you have?” Ummm, yep. I might have too many wreaths. But this one is just SOOO cute! (justification, justification).

So this is definately a time-consuming project but with only a couple of steps. I recommend doing it in front of a really good movie (We were watching Howl’s Moving Castle when I made this one).

The final result is so adorable that I could get a little crazy with this idea—cone shaped trees, ornaments…okay, I’m just going to stop right there.

Download the instructions by clicking on the photo!

Have fun! -Carina

Silhouette Design Store JOANN Stores

Exciting New Upcoming Events!

There are two spectacular events that I plan on attending in the coming months. The first is Spraguefest!
This is an annual event hosted by Jessica Sprague to further build (the already awesome) community. I know there are going to be a lot of awesome people at this event, and I’m pretty excited to attend! I’m teaching a class on color (it’s going to be messy!).

Spraguefest is October 7-10, 2011 and there is a registration fee of $80 for classes and materials. I know there are going to be goodie bags (yum) and some fantastic teachers! This year we are in Las Vegas and  I’m sure that whatever happens in Vegas will stay in Vegas. That means a lot of late night craziness.  Oh alright, maybe some daytime craziness as well (I might have done a little dance in the street last year).

The second event is my brand new Paper and Digital Designer Workshop! Think elegant girls-trip-meets-intense-design-school. Yep, it’s going to be that kind of weekend!

We’ll be in Salt Lake City working on your paper and digital designer skills (and possibly your shopping skills, manicure skills, nunchuck skills…).  It’s going to be a super intense experience that will help you explore your creativity! We are staying at the Little America Hotel , who will also be catering nearly the entire event. The Little America is well known for being a luxurious Four Diamond Hotel and their menus and decor are impressive! Get ready for a glammed-up girls weekend that will also define your design career!

Registration for this event is capped at 20 people and is first-come, first serve.

Check out our workshops page to learn more and register!

I hope to be able to hang out with you at one or both of these events!

Silhouette Design Store JOANN Stores