Cute Animal Nesting Boxes for Silhouette

IMG_5153_1_web 
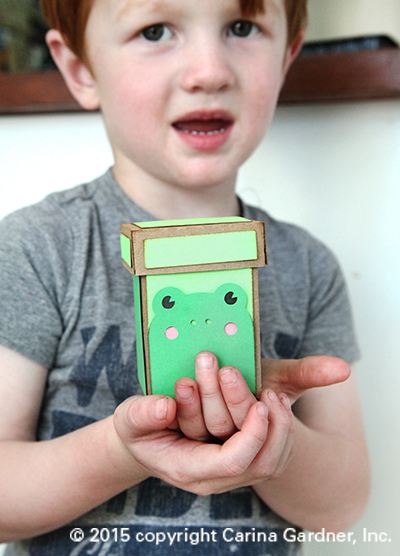
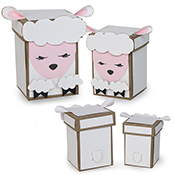
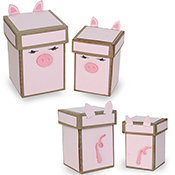
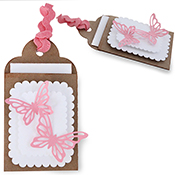
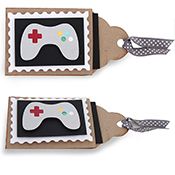
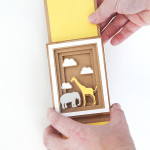
I know it’s been a lot of Silhouette posts on the blog lately so I promise to have some fabric and scrapbooking posts soon! This week’s releases for Silhouette are these darling little animal nesting boxes and layered gift card tags. Below is the tutorial for putting together these boxes. I create a lot of nesting boxes for my Silhouette Shop and generally they are all put together like the tutorial below.

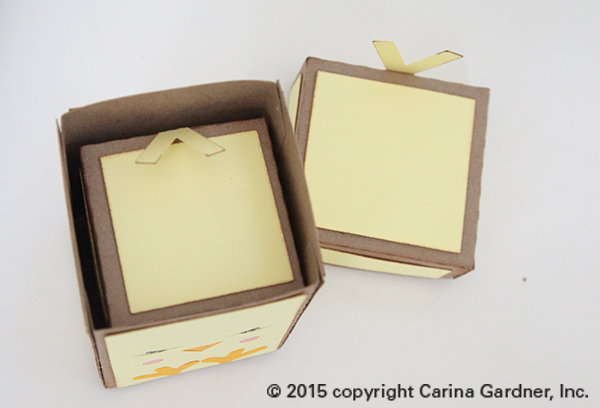
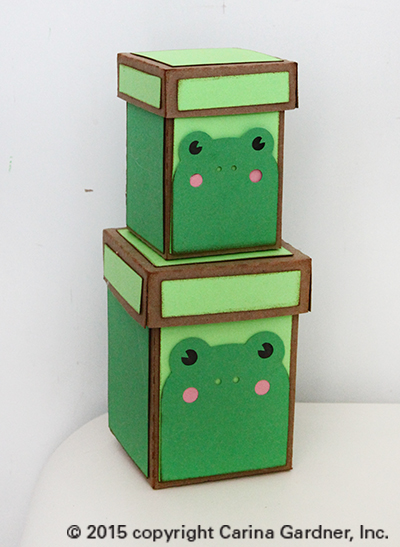
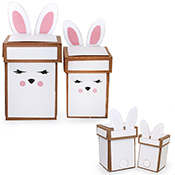
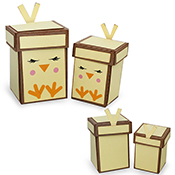
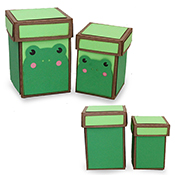
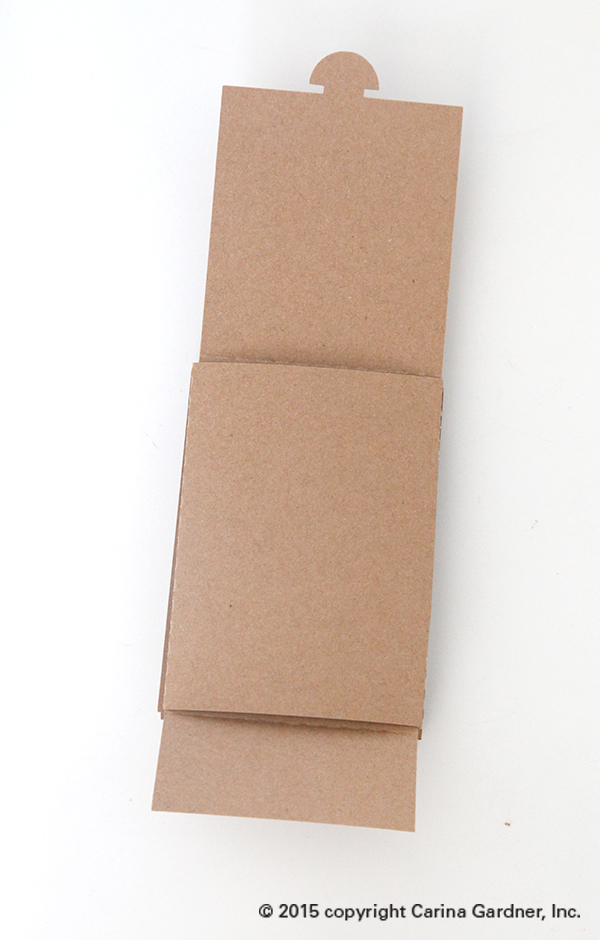
Each svg files set comes with two boxes that nest together (the smaller one fits into the bigger one).

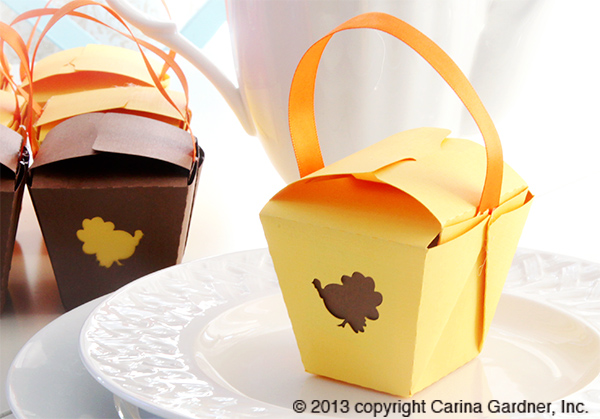
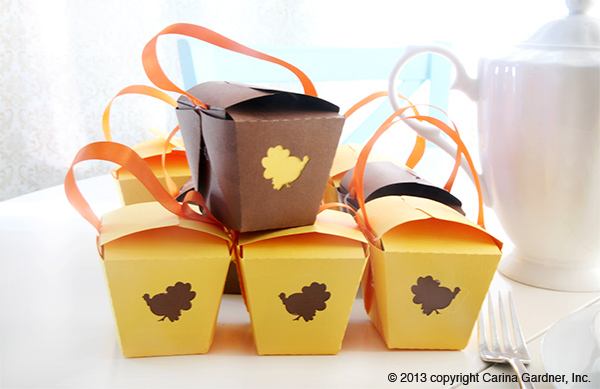
These make darling gifts, easter items, or fun spring decor (filled with candy!) for your home. When I finished making mine, my kids spent quite a bit of time just playing with them and stacking them.

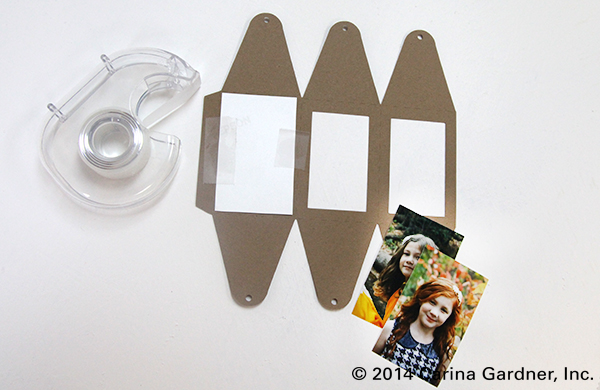
To make these boxes, all you need is kraft paper, solid scrapbooking paper, pop dots (optional), glue (I use a hot glue gun and glue stick), and your cutting machine.

1. Cut out all your pieces on your machine.IMG_5099_1_web

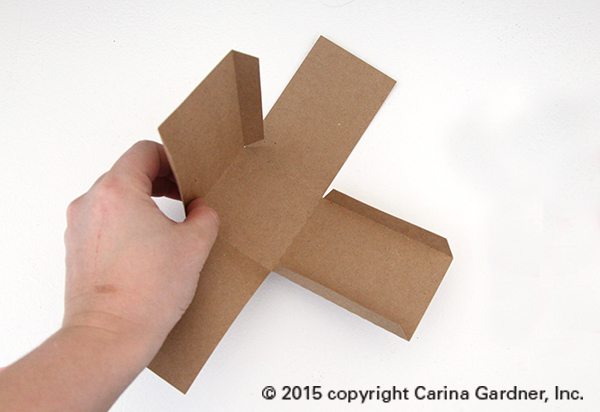
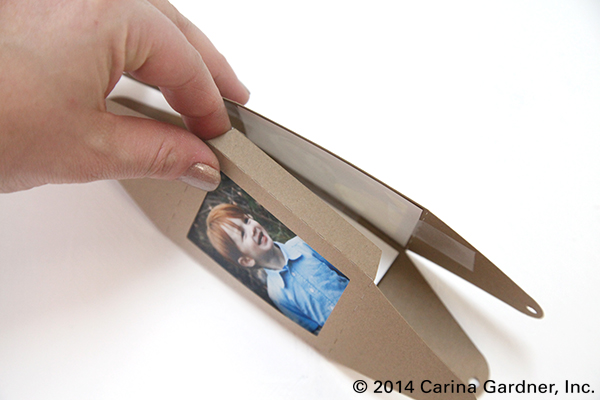
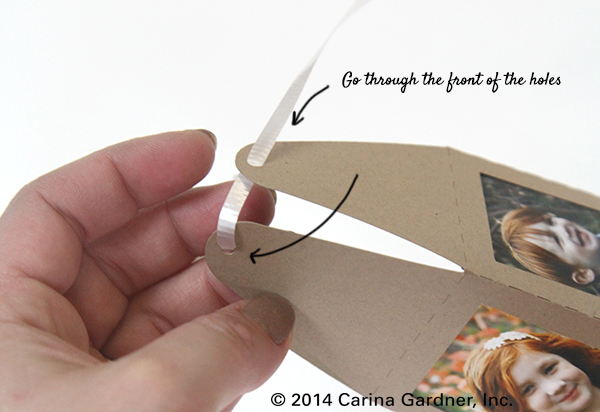
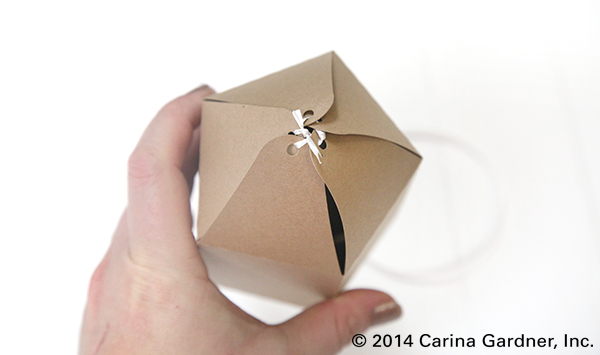
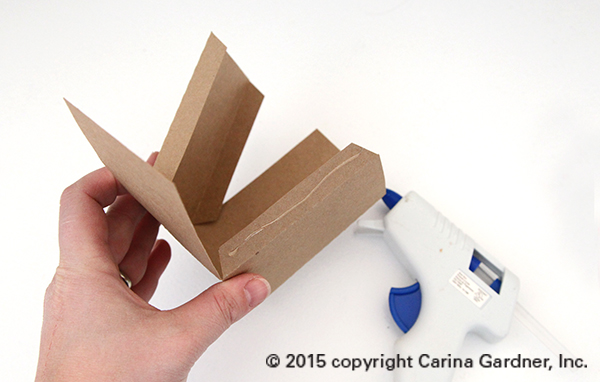
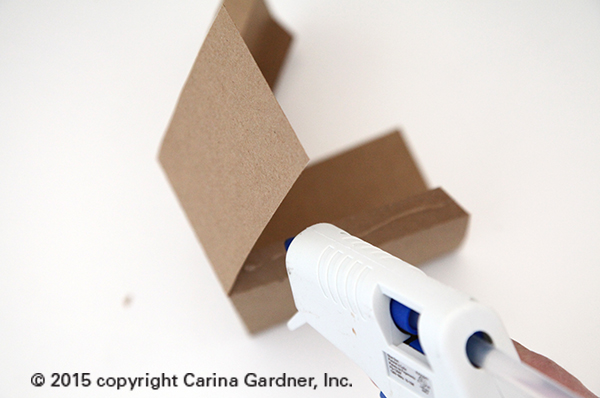
2. Fold all the score lines on the boxes and lids. Put glue on the glue flaps (I used a hot glue gun for this) to put together each box and lid.

IMG_5100_1_web

IMG_5102_1_web

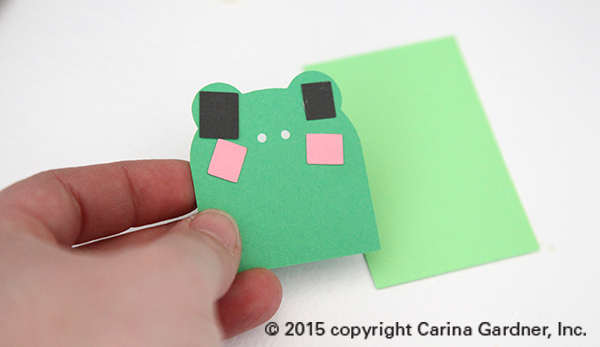
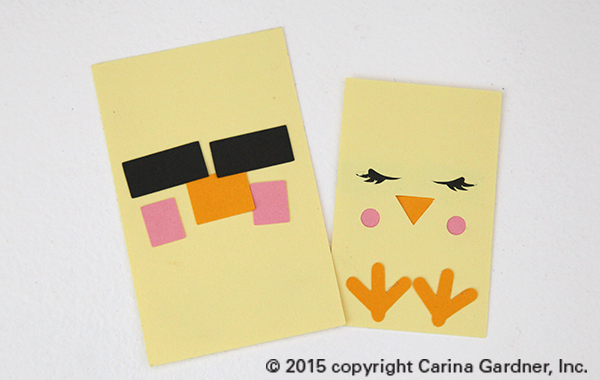
3. Assemble the faces of the animals. Place black squares behind the eyes (all in the svg file), pink behind the cheeks, white behind the whiskers. Use a glue stick for this part. For the frog or any other animal that requires a separate “background”, glue the animal to the background with hot glue. Note: The chick’s feet are placed ON TOP of the face not as the eyes and cheeks are.

IMG_5103_1_webIMG_5104_1_web

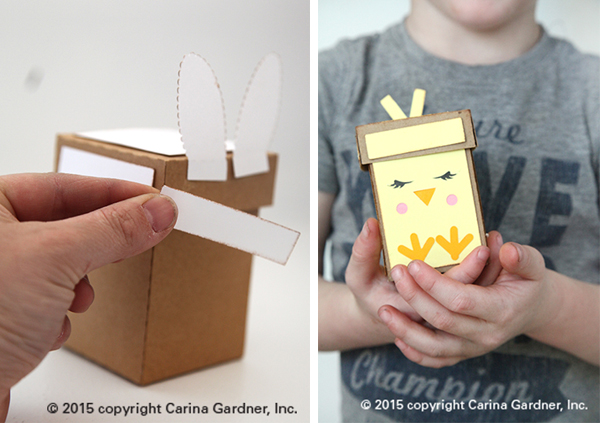
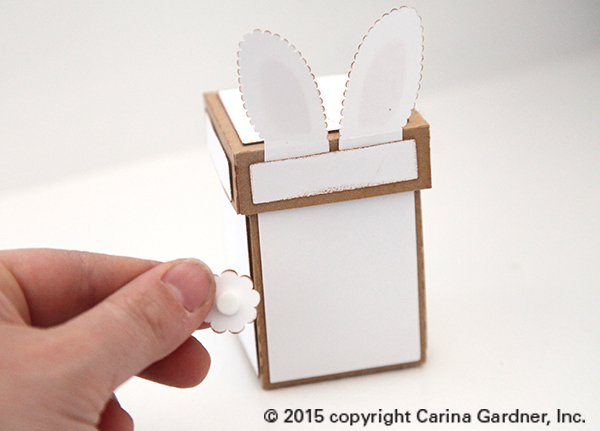
4. Glue the ears or feathers to the top of the lid. Once these are glued on, glue the small strips of paper to the lid to cover the ears and other portions of the lid. Glue the assembled face piece and other accent papers to the box.

IMG_5148_MULTI

5. Add the tail or any other accessories with pop dots or glue.

IMG_5056_1_web

And that’s it! Assembly does take some time but the end result is really darling. Charlie calls each set the ‘baby’ and ‘mommy.’ The animals ‘nest’ together so if you wanted to put a baby bunny in the mommy chick you could. The ears or feather simply fold down (there are score lines) when you place the baby in the mommy.

IMG_5125_1_web

IMG_5112_1_web

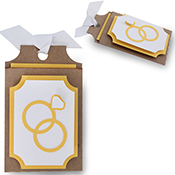
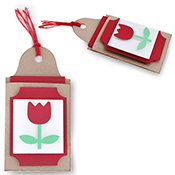
I haven’t included instructions for the layered tags here because there are basic instructions for them in the description (they are simply cut out and adhered together with pop dots or glue).

Hope you are having wonderful spring weather! Craft on!
Carina

(Links will be provided when they become available in the silhouette store on March 30).

____________________________________________________________________________________________

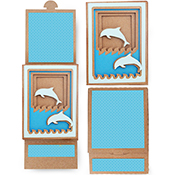
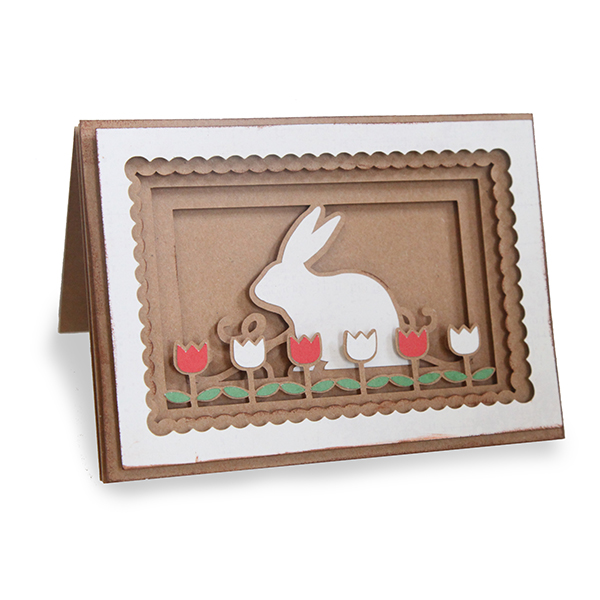
Nesting Animal Boxes

nestingbunnyboxesnestingkittyboxes nestingchickboxes nestingfrogboxesnestinglambboxes nestingpandaboxes nestingpiggyboxes

____________________________________________________________________________________________

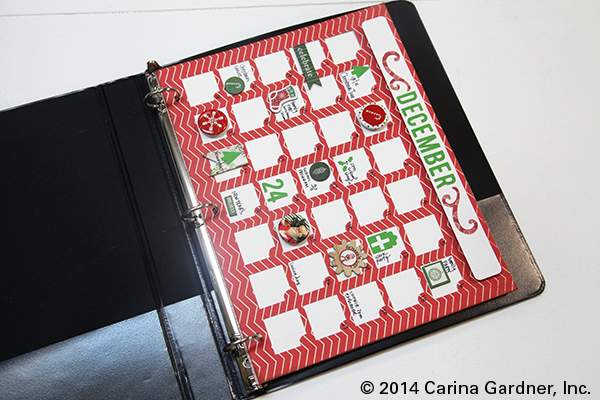
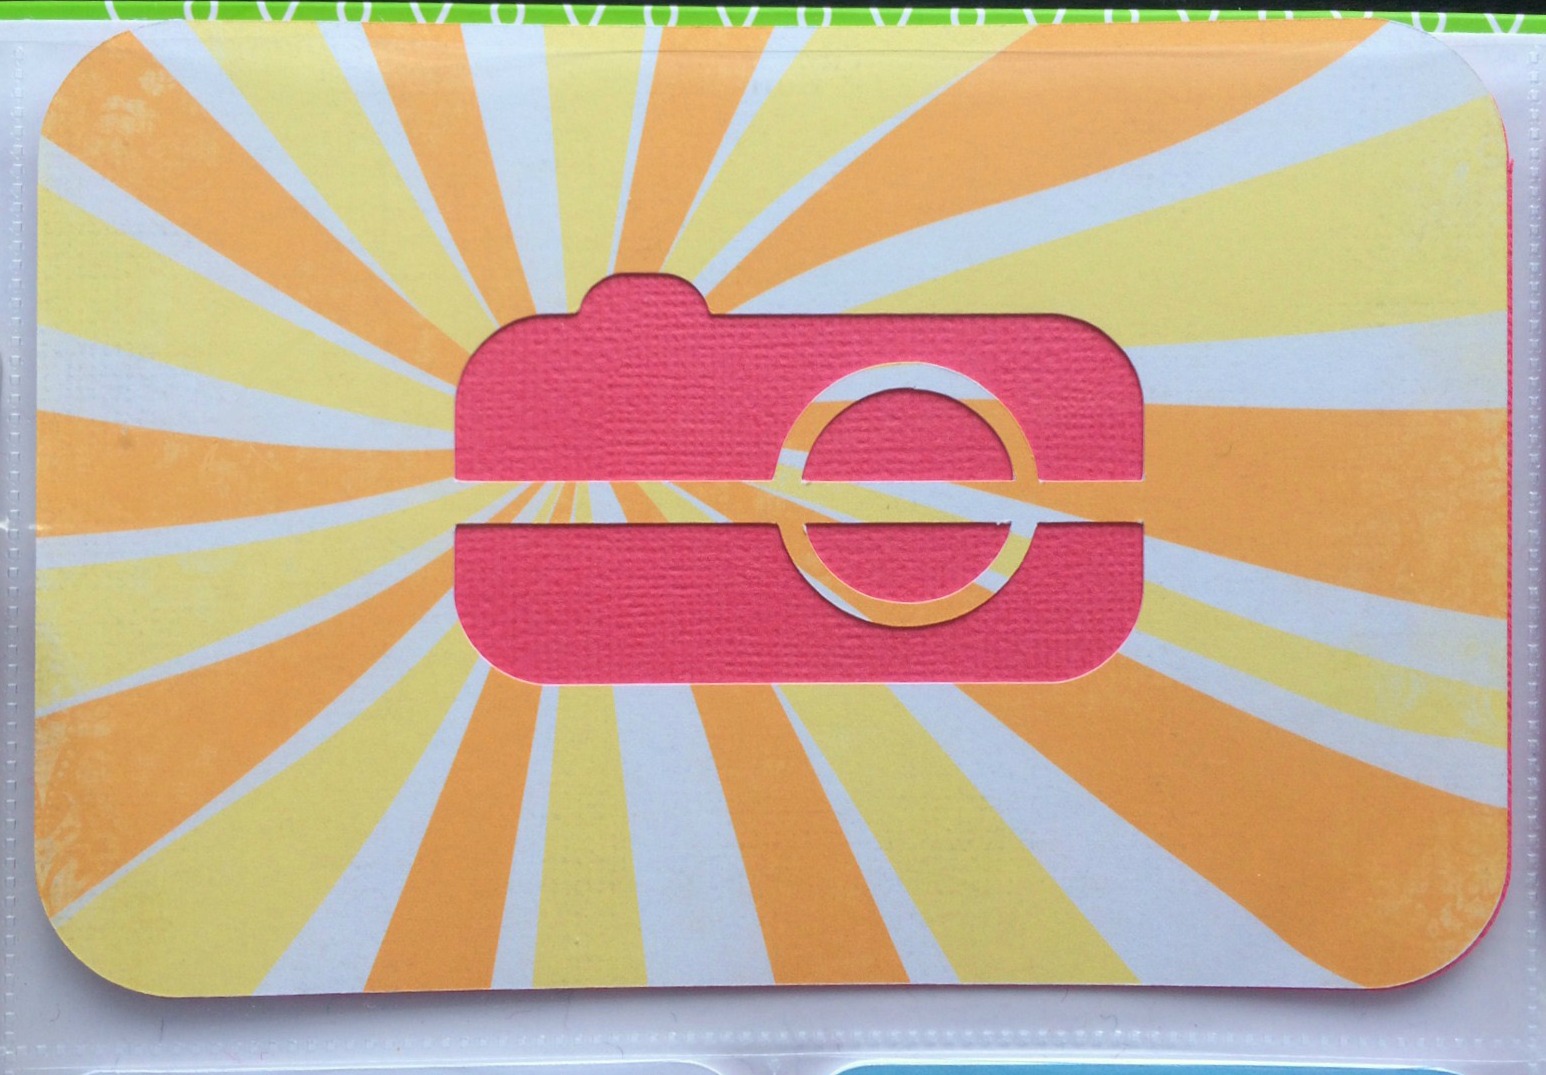
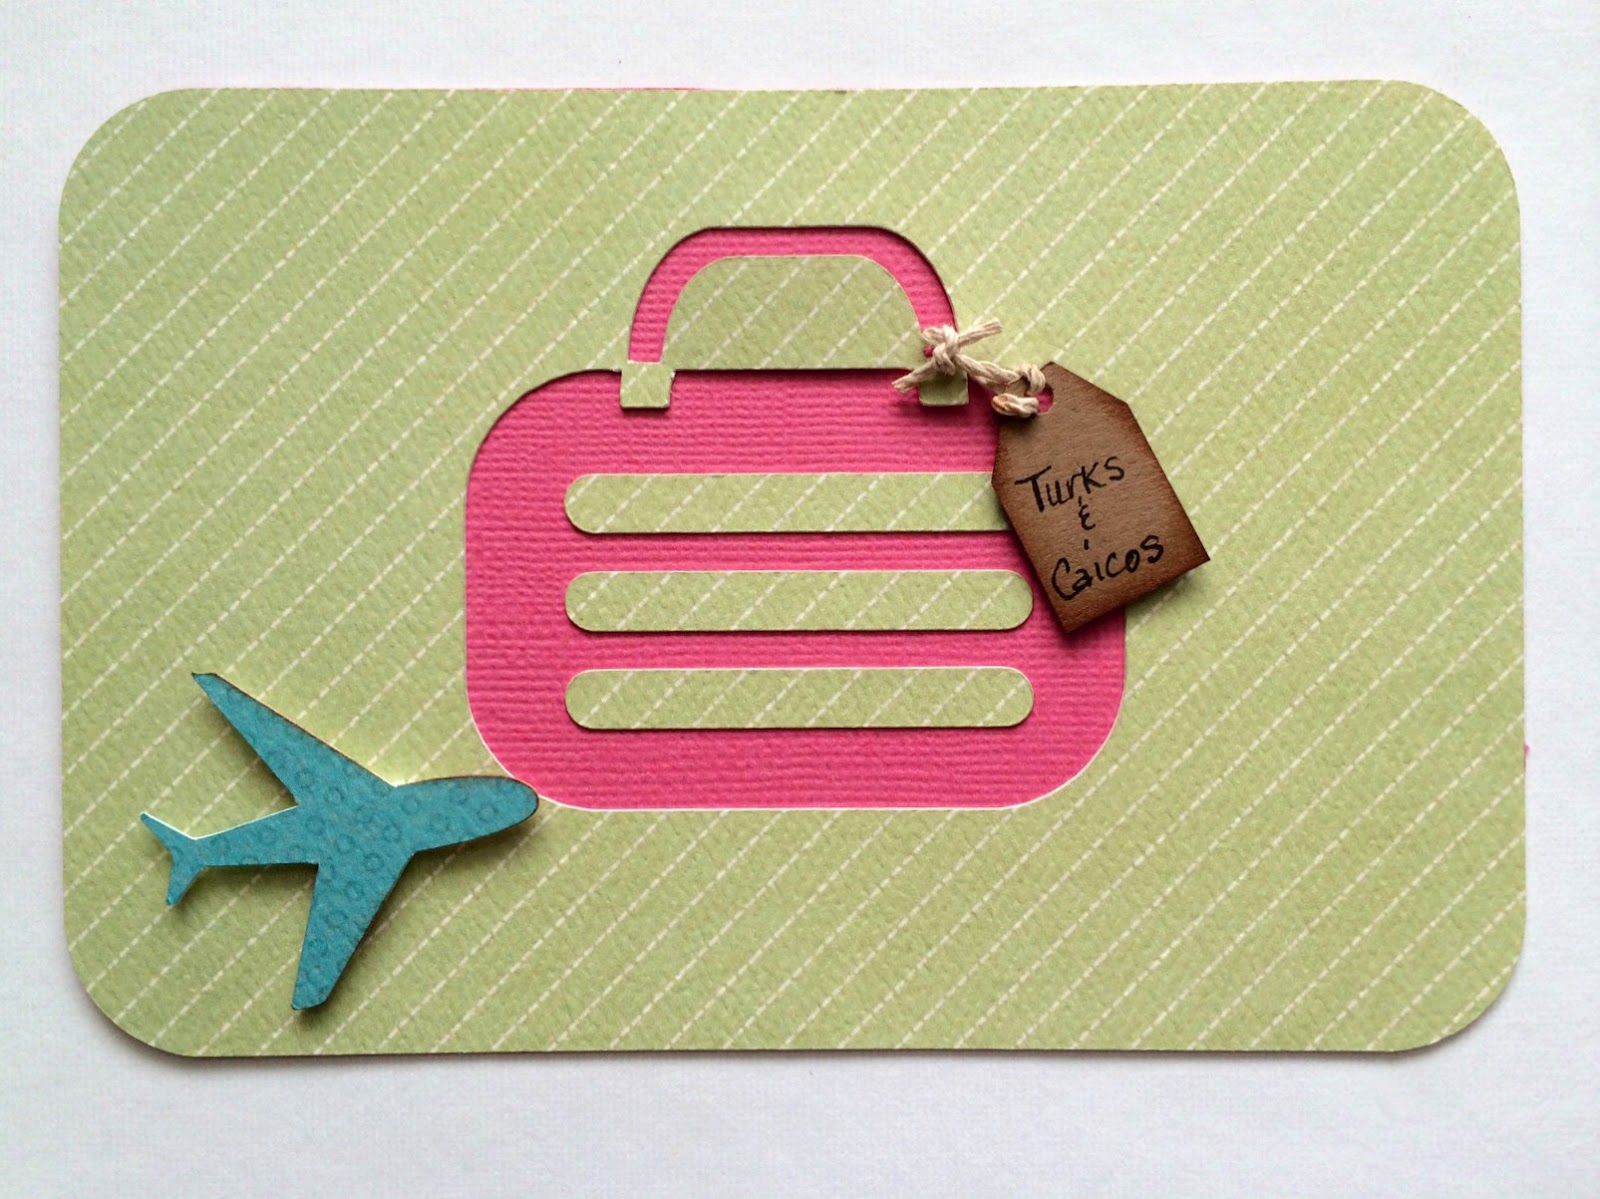
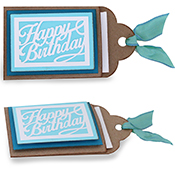
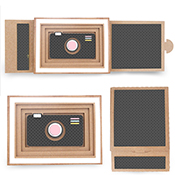
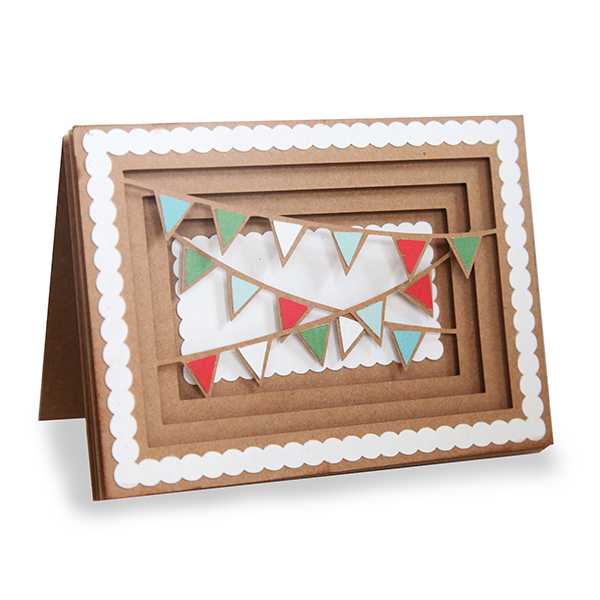
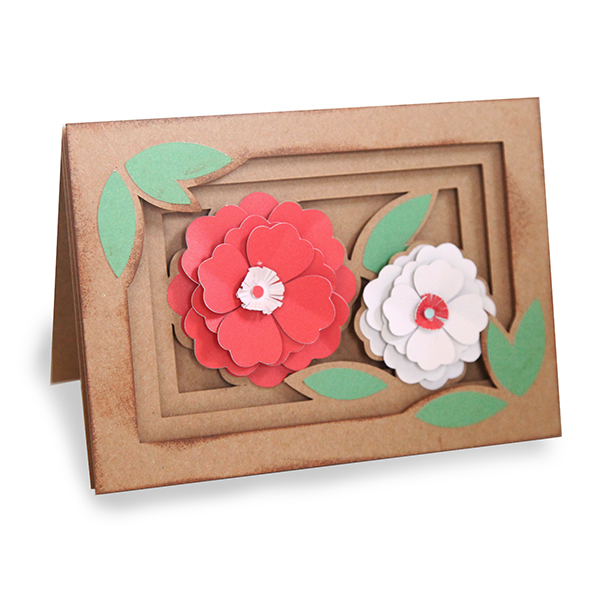
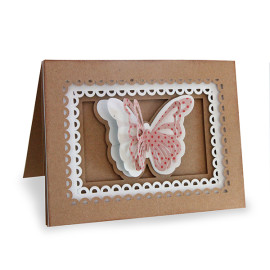
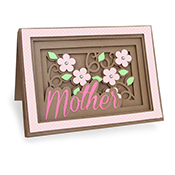
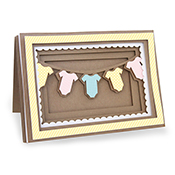
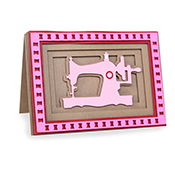
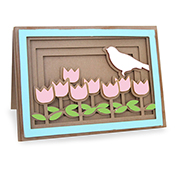
Layered Gift Card Tags

bunnygiftcardtag butterflygiftcardtag gamecontrollergiftcardtag happybirthdaygiftcardtag ringsgiftcardtag tulipgiftcardtag


Silhouette Design Store JOANN Stores

Pop Dot Shadow Box Sliding Card for Silhouette

IMG_5037_1_web
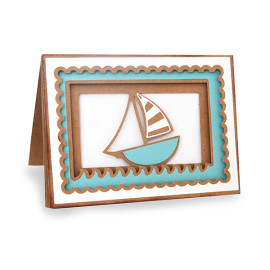
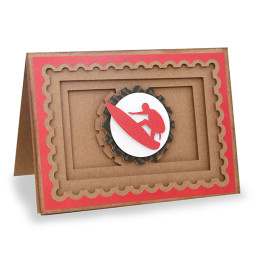
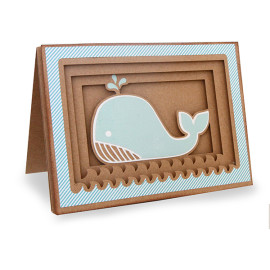
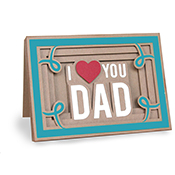
I’ve been loving the last few weeks of projects I have made for my Silhouette Store. I managed to finally finish Gilmore Girls  for the second time and catch up on Community while making this last batch of cards.

This week I’ve added more Shadow Box cards to the shop but these are (drum roll) sliding cards! (If you are looking for the folded cards tutorial, see the blogpost below).

These fabulous cards allow you to slide off the shadow box part of the card. You can write a message directly on the shadow box or a secret message on the sliding card behind the shadow box. They are easy to put together and SOOOO cute!

Here’s a little 19 second video so you can see how these little cards come together.

Here’s the tutorial:

1. Cut out all the pieces in your svg file.

2. (See below) Fold the sleeve piece that has a glue flap. Glue the flap to the opposite side of the sleeve together to create a place for the card to slip through.

IMG_5046_1_web

IMG_5014_1_web
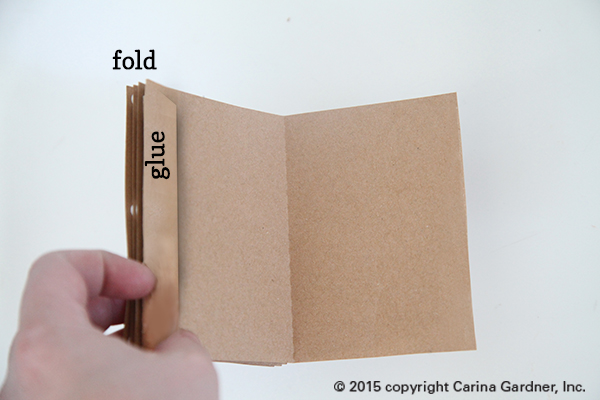
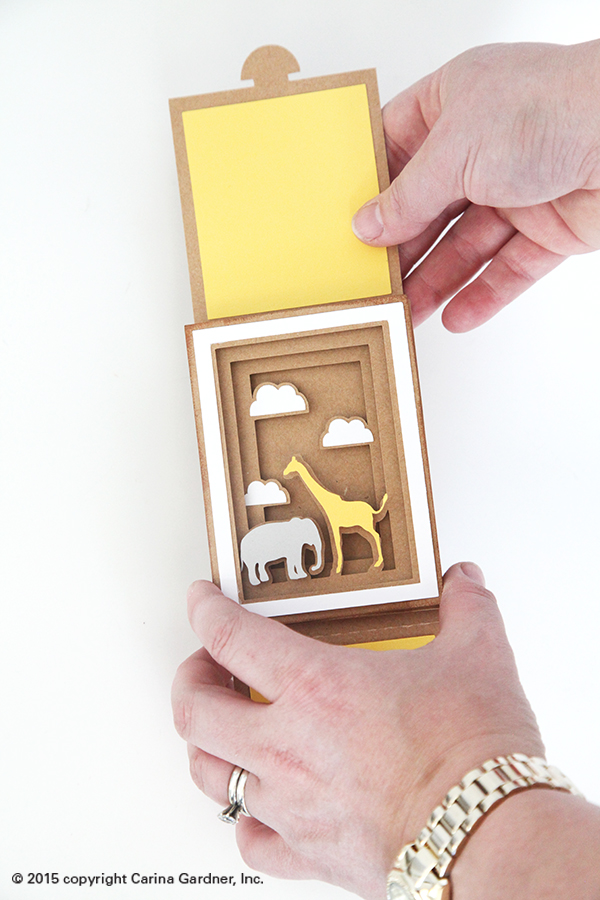
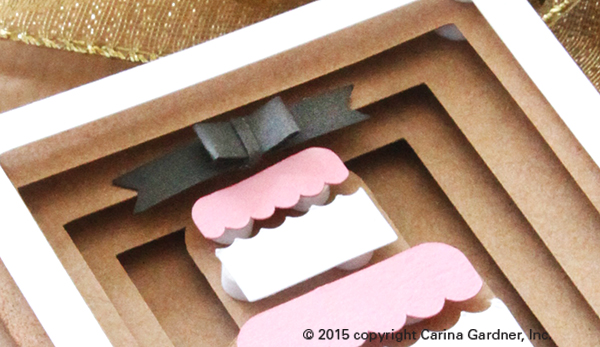
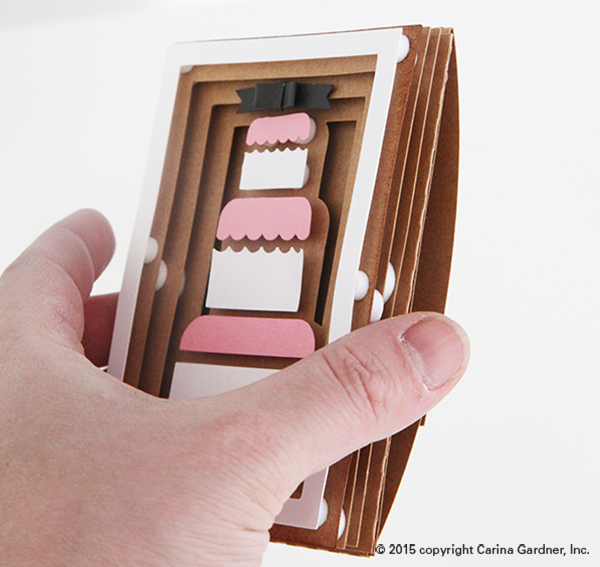
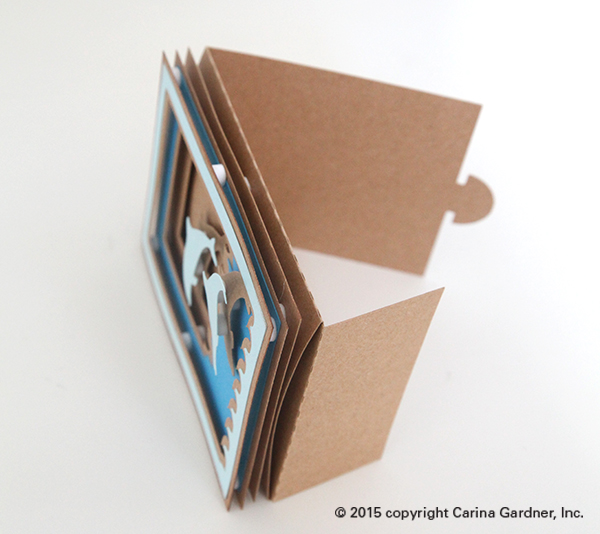
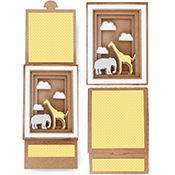
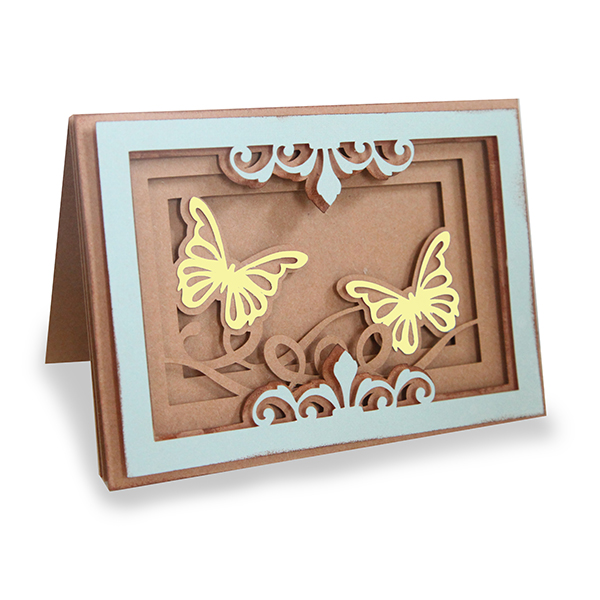
2. Once the sleeve is glued together, use it as the base of your shadow box. Glue down any “colored” objects first to the layers. For example, center and glue the clouds on top of the cloud shapes. You can use pop dots for these as well. You can see in the elephant and giraffe example above I used pop dots on the animals but glued the clouds flat.

3. Use pop dots to layer the pieces so that the card piece with the thinnest outside layer is on top and the thickest at the bottom. Place pop dots on corners and middles to keep the card stable. (See photo in previous blogpost to see how I place the pop dots.)

4. Once the shadow box is finished, slide in the “card.” (See photo to the left.)

5. Glue the accent pieces to the outside of the card. (see below.)

IMG_4995_1_web1
Helpful Tips:
+ For small or intricate cuts, I put my speed at 9 on my Silhouette Cameo instead of the typical 3. This is especially useful for the “baby” wording on the onesie card.

+ The bow on the cake card is not complicated. All you have to do is use the two score lines nearest the ends of the bow and pull them in to match to the middle score line. Use the tiny, thin piece to  wrap the center of the bow. I used hot glue to make sure everything dried quickly and held together nicely. I also placed the bow on the second tier of the shadow box.

IMG_5007_1_web

IMG_4998_1_web

+ You can use any color cardstock for these shadowbox cards. I’ve used kraft paper in all my examples but white, black, gray, and any solid color would work wonderfully for a unique take on these cards.

+ These cards are sized for a gift card. You will need to tape in the gift card or hot glue the sliding card portion to create a pocket.

IMG_5012_1_web


Hope you have fun making these and have someone special to send them to!

Happy Cutting!—Carina

(Links will be available on March 23, 2015)

cakeshadowslidingcard camerashadowslidingcard dolphinshadowslidingcard mrandmrsshadowslidingcard elephantgiraffeshadowslidingcardmustacheshadowslidingcard onebannershadowslidingcard sharkshadowslidingcard unicornshadowslidingcardweddingtoppershadowslidingcard

Silhouette Design Store JOANN Stores

Pop Dot Shadow Box Folded Card for Silhouette

bunnyshadowcard

The new shadow box cards I have in my silhouette shop are amazingly simple to put together. Instead of glue flaps, the shadow is simply created by pop dots. Pop dots can be found at your local craft store for about $2.99-$3.99. The effect you get with this little guys is fantastic!

All of the cards are meant to fit into an A2 envelope with the finished size being about 4 inches x 5.5 inches. It is a little smaller than the traditional A2 sized card (4.25 inches x 5.5 inches) but it is to compensate for the size of the shadow box and helps get it into the envelope.

All of my cards are FOLDED, which means you can place a message on the inside of the card. Of course, you can also forgo the pop dots and glue all of the layers down for a cute layered effect without the shadow.

IMG_4912_1_web

So here are the simple instructions:

1. Cut out all the pieces in your svg file.

2. Glue down any “colored” objects first. For example, center and glue the bunny to the piece with the bunny shape. You can use pop dots for these as well. In my examples, I glued them flat (without shadow).

3. Use pop dots (see image below) to layer the pieces so that the card piece with the thinnest outside layer is on top and the thickest at the bottom. Place pop dots on corners and middles to keep the card stable.

IMG_4921_1_web

And that’s it! Simple but elegant! Look for more of these designs this coming week!

babyshadowcard bannershadowcard bunnyshadowcard butterflyshadowcard springflowershadowcardbirdflourishshadowcard gardenshadowcard


rocketshadowcardkittenshadowcardmultilayeredbutterflyshadowcard birthdaycupcakeshadowcard dinosaurshadowcard dragonshadowcard graduationshadowcard mymothershadowcard_1 onsieshadowcard pregnancyshadowcard sewingmachineshadowcard tulipshadowcardtrainshadowcardsailboatshadowcardsurfershadowcardwhaleshadowcardiloveyoudadshadowcard

Silhouette Design Store JOANN Stores

Accordion Number Album Instructions for Silhouette

AccordianFolderNumberAlbumToday I released several new silhouette designs in my shop. Here are the instructions for the Accordion Number Album. I love this album because you can mix and match it so many ways and it makes an amazing gift. It is fairly simple to put together.

1. Cut out all the pieces in the file. You will want to cut out three of the folded pieces with the glue flap and one of the cover.  If you want to place a “color” (in my case white) behind the number, use scrap pieces of paper and simply place behind the bracket numbers.

2. Glue the number brackets to each of the “pages.” Glue a plain bracket to the front cover. Each page will hold two numbers (1 + 2, 3 + 4, 5 + 6). If you plan on putting a photo between numbers, cut out six of the template instead and only place one number on each page.

3. Fold at all the crease lines of the cover and pages.

carinagardner_albumaccordion3

4. Place glue on the flaps of each of the pages and attach the pages to each other so that the numbers are in order.

carinagardner_albumaccordion2

5. Finally glue the flap attached to the number “1” page to the cover.The flap will fit perfecting in the center of the cover.

carinagardner_albumaccordion1

And that’s it! Add photos or journaling for a simple and elegant album!

AccordianFolderNumberAlbum_carinagardner

Happy cutting!
Carina

Silhouette Design Store JOANN Stores

Introduction to Diecut Design Class Now Available!

class_diecutting1_webI’m so excited to let you know about the release of a new class! It’s been a few months since I had time to create a class and this one is close to my heart. The name of the class is Introduction to Diecut Design and I teach you how to create a tag, envelope, shallow square box, and pillowbox with a flower. I walk you through how to create basic svgs so that you can then use your creativity to expand upon the designs I make with you.

There are four lessons, pdf notes, and you also get the svg files to help you compare against the ones you create. If you have a diecutting machine, this is a great way to get creative with your own designs.

I suggest Illustrator Basics 1 as a prerequisite for this course since all the svgs we create are in Illustrator.

You can check out the syllabus and course description here: Introduction to Diecut Design

AND this class went on sale for the rest of the week for 20% off! It will go off sale with the rest of the classes on February 1, 2015 so be sure to stock up now!

Silhouette Design Store JOANN Stores

Open When Envelopes—Last Minute Meaningful Homemade Gifts

IMG_3661_1_webLast week I came out with a brand new series of envelopes called OPEN WHEN. It’s a wonderful meaningful gift, and I am making a set of envelopes with box for Josh for Christmas. If you want to see the instructions and everything in the series, go here: https://carinagardner.com/silhouette/carinas-open-when-series/. If you want to look at the current printables for this series, go here: http://www.carinagardnershop.com/index.php?option=com_virtuemart&page=shop.browse&category_id=56&Itemid=2

(Photo to the left is one of the printables from the Open When: You Are Bored. You just staple onto the card a piece of bubble wrap.)

This post is just to show you a few examples of what I am doing (although to be honest, I’m not done yet). I love that you can make a set of envelopes for someone and put A LOT into the envelope or just a note. Really, the most important part (in my opinion) is the hand written note. Every single one of the envelopes I’m making for Josh includes a note and a photo. I also included some of the printables, a treat, and anything else I think will be fun for him to open.

IMG_3653_1_webYou’ll notice that I have included label printables in the shop. That’s because I know that not all of you have a diecutting machine. To be honest, the labels are a lot easier (and quicker) to use if you are throwing together this project (last minute, right?). The labels can be put on any A2 sized envelope and you can just fill them. It’s the perfect last minute solution!

(Photo to the right is from the Open When: You Are Happy printable set. The svg file from for the envelope can be found here.)

The Open When projects I’ve seen usually are given in sets of 10. But I think you should be able to include as little or as many envelopes as you want. You could even coordinate them and give more envelopes out during the year (for example, Christmas 5 envelopes, Valentine’s 5 envelopes, and your anniversary 5 envelopes).

For Josh, I selected 10 envelopes and am using my basic 10 envelope box. I love the prompts in the printables I’m hoping they will help me think of things that are special to just the two of us (and by the way, each of the descriptions in the printables have suggestions for other things you can put in your envelope).

IMG_3517_1_web

Every “Open Now” gift should have an “Open Now” Envelope. Truthfully, I designed the printables (shown below) so that I could use all of the cards in any of the envelopes. It’s sort of “basic pack.” I’m planning on throwing some funny photos of the two of us from 2014 into this envelope—kind of as a way to celebrate the year. The “pie chart” card I’m going to write all of the things we did in 2014.

IMG_3667_1_web

I’m so in love with my printable set for “Open When: You Can’t Fall Asleep.” One card allows you to staple a piece of dried lavendar to it (or any other scent you want). The silly cutouts are more of a joke then something the person has to do, but I like adding the popcycle sticks in the envelope just in case they do end up cutting out the animals.

IMG_3649_1_web

The “Open When: You Want to Reminisce” is going to be the most fun to put together for Josh. I’m using all the printables as prompts but spending most of my time gathering up photos and things that we did together for the last 14 years.

IMG_3641_web

You’ll notice that I’m slowly adding printables to the shop as I make them for myself. If you decide to do this project (for Christmas, a birthday, Valentine’s, and Anniversary, or whenever!), make sure and check my Silhouette instruction page because it has updated links to all the envelopes, boxes, and printables that go to this collection to see what is new!

IMG_3521_1_web

Hope you are being creative and having a great time doing it this holiday season! Merry Christmas and Happy New Year!
Carina


Silhouette Design Store JOANN Stores

Family Ornament Silhouette Instructions

5photofamilyornament
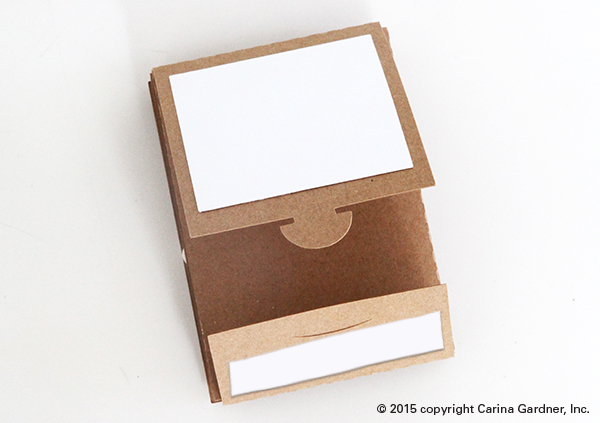
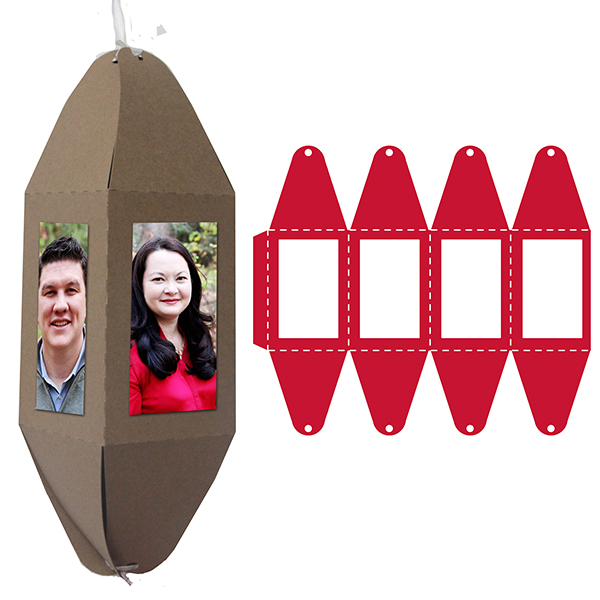
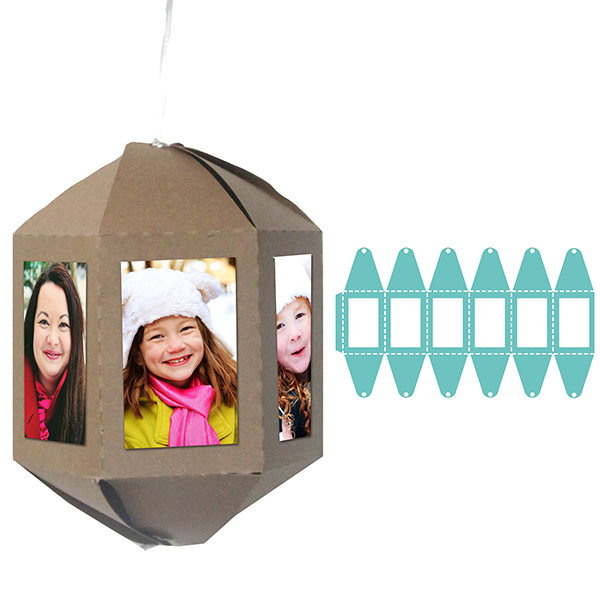
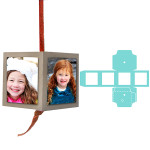
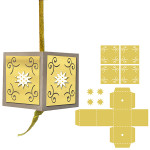
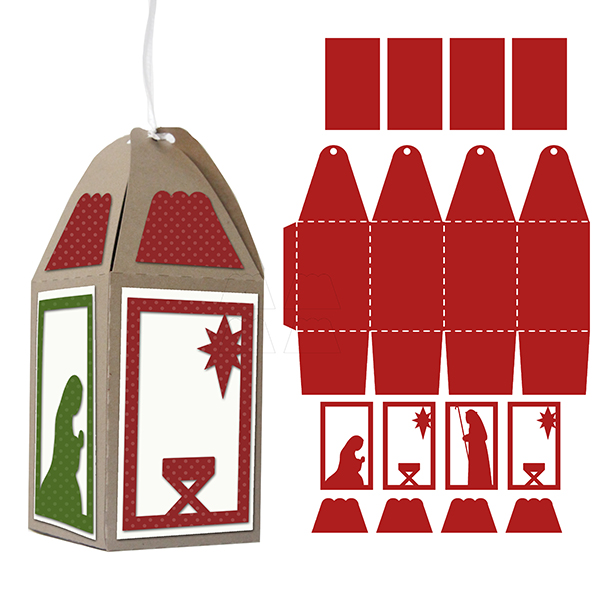
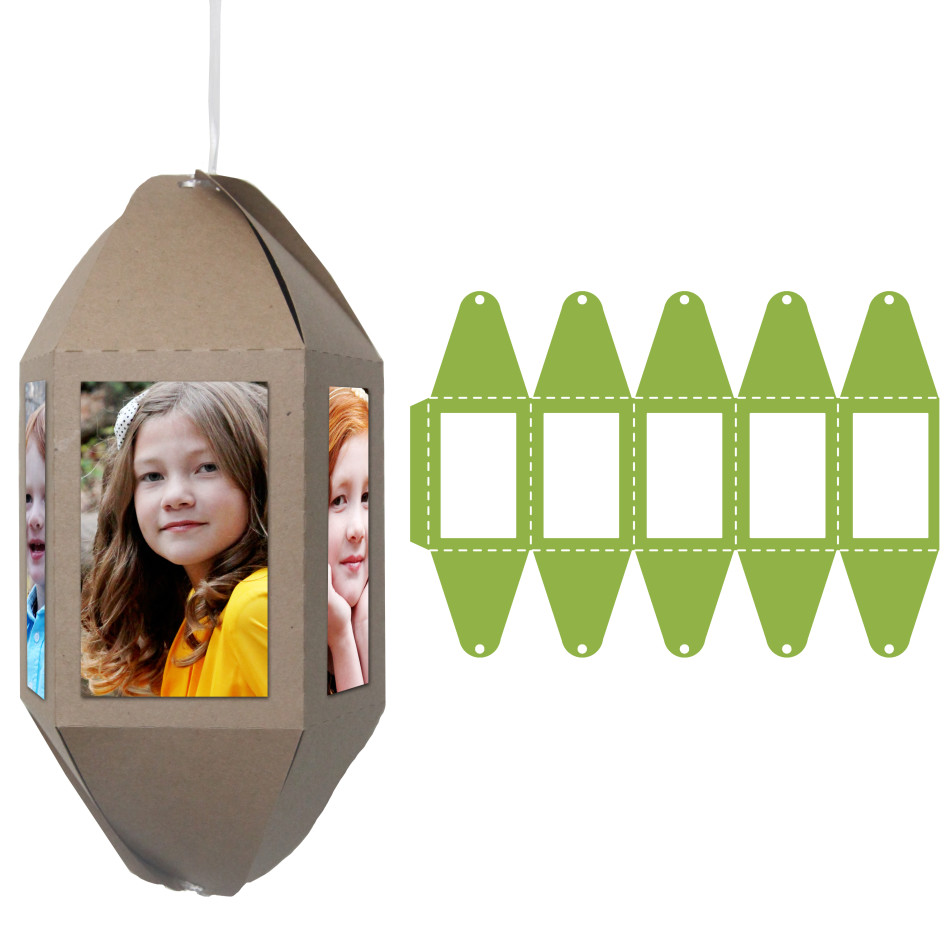
Today I have a series of 3-D cut out ornaments coming out in my Silhouette Store. I love a great homemade gift, and these are perfect for that! They are so simple to put together and I love that you can customize the ornaments (or choose one) that fits your family size (The Photo Family Ornaments come in 3 sides, 4 sides, 5 sides, and 6 sides). Here are some of the instructions and helpful hints for putting together these ornaments.

Several Sided Photo Family Ornament Instructions
(Silhouette Store links: 3 Photo Family Ornament, 4 Photo Family Ornament, 5 Photo Family Ornament, 6 Photo Family Ornament)
1. Cut out the shape and then print/cut photos that are a little bigger than the windows in the ornament. Tape photos to the wrong-side of the ornament windows.
2. Crease/fold along all the dotted lines.
IMG_3419_1_web

3. Place glue on the tab and adhere it to the opposite side of the ornament.

IMG_3422_1_web
4. Use twine or ribbon to “sew” up the bottom and top of the ornaments. I like starting by placing the ribbon through the front hole of the ornament, then “whip stitching” by coming through the back of the hole and then placing the ribbon through the FRONT of the next flap/hole. Once you have gone through every hole with your twine, pull tight and tie a knot. You can leave one string long to hang the ornament or cut both strings short.

IMG_3424_1_web1 IMG_3430_1_web

3photofamilyornament 4photofamilyornament 5photofamilyornament 6photofamilyornament

Block Ornament Instructions
(Silhouette Store links: 4 Photo Block Family Ornament, Christmas Tree Block Ornament, Star Blog Ornament)
1. Cut out the shape and then print/cut photos that are a little bigger than the windows in the ornament. If you are making the photo ornament, tape photos to the wrong-side of the ornament windows. Add embellishments in layers to the ornament. (Pop dots are also a fun accessory.)
2. Crease/fold along all the dotted lines.
3. Place glue on the tab and adhere it to the opposite side of the ornament.
4. Place a piece of ribbon through the bottom and top of the box in the hols provided. Tie a knot at the bottom to keep the ribbon in place.

IMG_3433_1_web

christmastreeblockornament 4photoblockfamilyornament starblockornament

nativity4sidedornamentNativity Ornament Instructions
(Silhouette Store link: Nativity 4 Sided Ornament)
1. Cut out the shape and then print/cut photos that are a little bigger than the windows in the ornament.
2. Crease/fold along all the dotted lines.
3. Place glue on the tab and adhere it to the opposite side of the ornament.
4. Fold up the bottom of the ornament, placing glue on each flap to adhere the bottom of the box together.
5. Use twine or ribbon to “sew” up the top of the ornaments. I like starting by placing the ribbon through the front hole of the ornament, then “whip stitching” by coming through the back of the hole and then placing the ribbon through the FRONT of the next flap/hole (see photo above). Once you have gone through every hole with your twine, pull tight and tie a knot. Leave one string long to hang the ornament.

Silhouette Design Store JOANN Stores

My Life Calendar Series—Silhouette Project

January, February, March, April, May, June, July, November, and December released November 24, 2014.
August, September, October, Cover Pages, and Photo Pages release December 1, 2014.

IMG_3349_1
I love a great calendar! The My Life Calendar set is my newest silhouette project that you can use for your own organizational purposes or even give as a homemade gift. This series is easy to put together and you can change up how it is up together and cut out. Here are a few pointers on the calendar pages…

calendar_mylife_carinagardner

1. Each My Life Calendar Page comes with a background paper and a top layer. It also comes with several pieces to cut out for the header (with month and embellishments) and at least 6 icons to place on the month. You can mix and match the page backgrounds or use only one for your entire calendar (psst, I love December’s cut out because there is a place to hand write in the days of the month).

2. You can put this calendar together and add momentos, icons, and journaling as you go (aka actually use it as a real calendar) OR you can use is as a monthly scrap canvas like I did with the April layout below.

3. The holes that come with the silhouette cutouts fit a regular binder. You can also move boxes/windows down and have the month/letter cutouts be at the bottom of the page (so that your calendar faces out instead of in like mine below). You can also choose to remove the holes altogether and have the calendar spiral bound (in which case I recommend the photo pages!)

mylifecalendar_silhouette_carinagardner

IMG_3351_1_web copy
4. Use the photo pages, extra icons, and calendar cover pages to help add to your project. I designed the photo pages to be placed behind each calendar (so they are facing the next calendar page), but they can be used however you want.

IMG_3357_1

Hope your project turns out amazing!

Carina

PS. The Silhouette shop has a sale during the month of December. Stock up now!


Silhouette Design Store JOANN Stores

Back Home Again

miniloujune20 copy After a month and a half of travel, I’m finally back home in Salt Lake. I’m glad to be back home although there hasn’t been much time for a break. Lots of things have happened over the last month. Other than finishing press checks in China, going to a wedding in Tennessee, heading to St. George to enjoy the Tuacahn, and accompanying Siri at harp camp in Logan, some of my new paper and fabric lines have been released.

Over at Carta Bella, check out my newest collections Boy Oh Boy and Spooky as well as Alisha Gordon’s Moment’s & Memories. If you are going to the Summer show, be sure and check them out!

I’m also thrilled to announce my newest fabric line is on pre-sale to quilt shops! For a sneak peek at Primrose Garden, click on this link over at Riley Blake. Scroll down to the bottom to catch a glimpse of my first 18 inch doll panel! I’m so excited for this addition to this fabric line! More pretties on this line coming soon.

At my silhouette shop, I’ve been stocking with a lot of great basics that I have been interested in using for myself. Tons of swirls, overlays, gift bags, and cards to name a few.

And of course, I’ve been working on MiniLou. I’ve been planning out our tradeshows and trying to get everything “just so” for our upcoming fall release and the introduction of our spring release. It’s been a work-in-progress and I’m so proud of what we have accomplished so far. So many more exciting things to come!

As far as getting back on track, I’ve been working on some new home decor items for Deseret Book which should be out this fall/winter. I’ve also been working hard on our end of year releases for Carta Bella. Oh, and I’m hoping to have available two new design classes in the shop later this week.

Thankfully, this summer has not been all work-work, and I’ve been able to enjoy time alone with both of my girls on their respective trips as well as getting in a couple of vacas as a family. But summer is slipping by so very fast…I’m going to squeeze in as much fun as I possibly can!

Happy Summer!
Carina

(PS. Photo is from my Little Bitties Bookmarks for MiniLou).

Silhouette Design Store JOANN Stores

Diecuts 30% off the month of June!

Carina is off on her adventure to China to do press checks on the products for her new company Mini Lou
You can follow her adventures on her Instagram (carinagardner). In the meantime I am taking over the blog while she is away so let’s have some fun!!
Today kicks off our HUGE 30% off diecut sale in the shop. The shop is fully stocked with wonderful goodies. Make sure to hit the NEW DIECUTS section where we have all of Carina’s most current releases from her Silhouette Store.
We are so excited to have Deborah from Craftin Chaos working with us now on our Design Team!  In honor of the big sale Deborah has worked up some fabulous eye candy to get you inspired for the diecut sale!
Here is Deborah to tell you more about her projects:
“My projects were super quick, that being said I am hoping it still will inspire you to create some awesome projects of your own with Carina’s diecut files. I used papers from Carta Bella’s Alphabet Junction for several cards and one I used a digital paper from Carina’s Soaring Summer Paper Set as well as some of Carina’s elements  which are available in her shop at Snap Click Supply.
This first project was super quick to do.  If you have a busy schedule…and who doesn’t, these albums are perfect for capturing the moments you spent with family and friends without devoting the time it takes to create a scrapbook album layout. I love that you can get so many configurations from the pockets giving you so many options.
I used the We R Memory Keepers pockets for mine. The cards are Carina’s My Life 4X6 Travel Card Diecuts and I am loving Carina’s  Garden Picks Set of 5 Diecuts very versatile as you will see two ways I used them.  And you know I made some custom buttons! I used the die cuts from the cards to create a print and cut for the buttons in my silhouette studio


Can you tell where I want to be from my luggage tag?


This  project is one of my favorites. I just love anything with cameras on them or camera related. Instagram is something I just started using recently and I am hooked! I wanted this to be very bold and I love these two colors together. That pop of fuchsia on the front against the bright yellow is just my favorite. I used the Instant Photo Camera Album I added the Flag Shape 17 Diecut  for the sentiment.  I cut a smaller circle for the center to add a fun sentiment to the album.


A nice feature is the slots the file cuts for you to just pop in a cute photo for perfect placement. I added more sentiments to give a little more love to it.

Thanks to Deborah for those awesome projects! We will be featuring more of her creations over the weeks to inspire you.
~Susan


Silhouette Design Store JOANN Stores

Happy Thanksgiving

IMG_5302_close_web

I hope you have a wonderful Thanksgiving! My little family will be having an intimate family Thanksgiving today and go to my in-laws tomorrow. My turkey went into a homemade brine yesterday for a 24 hour bath. Usually I like to use the William and Sonoma Turkey Brine but I never got around to picking it up so this year so I improvised. Fingers crossed my salt-allspice-brownsugar-peppercorn-sage-thyme mixture works!

In our family we don’t have any set Thanksgiving traditions unless you count getting a tree the day after Thanksgiving. This year we invited the cousins over for a glamper movie night so the grownups could play games. I also made these little turkey take out boxes for Siri and Felicity to give to their cousins.


IMG_5292_web

Hope you have a spectacular Turkey Day! Are you doing anything special or sticking to your family traditions this year?

Carina

Silhouette Design Store JOANN Stores

More of My Life, Calendars, Journaling Cards in Diecut Land

carinagardner_mylife_bracketcalendarpvsz

I’ve been working hard to get out some new diecuts  at the shop at Silhouette America!  That is between binding quilts, checking fabric strike-offs, and working on the glamper.

As always my diecuts are .99 cents and you can save 25% on all of my Halloween shapes through October 31st!

Here’s what we came out with this last week:

4X6 Christmas Journaling Card Set
4X6 Halloween Journaling Card Set
4X6 Thanksgiving Journaling Card Set
Fabulous Frame Set 2
Happy Halloween Pillowbox
My Life Tabbed Calendar
My Life Bracketed Calendar
My Life Monthly Cut Outs
My Life Folder Inserts 4
My Life Folder Inserts 5

Screen Shot 2013-10-23 at 9.24.49 AMYes, yes, I will post this week’s new items soon (if you want a sneaky peeky go here). If you sew and have a silhouette, I think you will be excited about what I have up!

Tomorrow I’m headed to Quilt Market, and I’ve been meaning to announce my new sewing patterns, but of course I haven’t gotten around to it. That and all the great stuff coming out from me at Deseret Book. Soon, very soon…

Be back in a jiff,

Carina


Silhouette Design Store JOANN Stores

Episode 8: How to Use Sewable Interfacing with your Silhouette Machine

With all the new fabric files hitting my Silhouette Shop, I thought it would be helpful for you to see how I sew with the Sewable Interfacing. I show you a couple of my tricks for sewing with the stuff and how I set up my mat. Enjoy! -Carina

Silhouette Design Store JOANN Stores

Easy Costumes on a Budget

halloweenskeletonbonespreview_smI love costumes that are homemade and quick to put together. You may remember Siri’s favorite Octopus Costume that was made from socks and a t-shirt. For Halloween this year, my kids chose costumes with stuff we already had around the house and in the dress up clothing. Felicity will be a little Chinese girl, and Siri asked to be Medusa. Other than making a snake tiara for Siri, it’s going to be an easy year for costumes at our house!

Charlie is going to wear this little skeleton bones outfit that I made using my Silhouette machine. You can get my new Skeleton Bones diecut for this in the Silhoutte Shop for 99 cents! Not a bad price for a costume if I do say so myself.

I have tips for working with this diecut on my extremely-oh-so-very official silhouette page here: https://carinagardner.com/silhouette/. Susan and I are hoping to tape a video for that page sometime next week to teach you a few awesome things about your machine!  Be on the lookout for that!

And if you are looking for more from me, this week we also released the following diecuts (for  99 cents as always!)

Halloween Skeleton Bones (above)
Cupcake Pencil Case
Monster Pencil Case
Halloween  Bat Accordion Album
Sweet Life Accordion Album
Dahlia Fabric Flower
Monster Life Set 1
Monster Life Set 2
Monster Life Set 3
Fabulous Frame Set 1

Will show you a little more on the pencil cases soon! What are your kids going to be for Halloween?

Carina

Silhouette Design Store JOANN Stores

Carina Gardner Silhoutte Diecutting Files Now at SilhouetteAmerica.com

halloweenscallopbag_webThat’s right! My big news this week is you can now find my diecutting files at silhouetteamerica.com. How cool is that?

This week was the first week we placed files on the silhouette site. You’ll see this darling halloween scalloped bag, fabric flowers, the my life album set, and more! Yesterday I put together a myriad of new projects for the shop that will come out next week! More fabric stuff and great paper shapes. And some monster surprises for Halloween.

Speaking of Halloween, I thought I would point you in the direction of some happy Halloween fun.

Last year, I did a Witch and Wizard Party. It’s fun, full of ideas and was a total blast. Photos and inspiration here: https://carinagardner.com/2012/10/17/witch-and-wizard-party-kids-halloween-party/carinagardner_witchparty_web_1_72-copy

And of course, there has been the ever popular free banner download that I hung on my piano: https://carinagardner.com/2010/09/10/how-to-make-a-halloween-banner-free-download/

If you want ideas of easy bat art and free silhouette cutouts (and a video to boot!), there are free silhouette files here: https://carinagardner.com/2012/08/15/episode-4-all-hallows-eve-decor-video/

Want to make a batty wreath? Here’s the free pattern to make it: https://carinagardner.com/2009/10/23/spiders-web-papers-batty-wreath/

Last but not least, the Halloween Advent class is on sale for $3. That’s right! Take advantage of this sale while your can! http://www.carinagardnershop.com/index.php?page=shop.product_details&flypage=flypage.tpl&product_id=162&category_id=37&option=com_virtuemart&Itemid=2

Going to get up all my Halloween decorations this week! Wish me luck!

Carina

Silhouette Design Store JOANN Stores